Hackster's F100 CV Swap, Coyote, 6 speed 3 link build thread
#1
 10-15-2015, 10:02 PM


Hackster's F100 CV Swap, Coyote, 6 speed 3 link build thread
Just discovered this forum so Ill transplant some of my build thread onto here.
Ill get you guys caught up to speed....
Well,
The first truck went pretty well in the end....few things I would do different on it so a few months ago I started scheming about a plan for a second truck.
Things I want in this truck.
Driver Quality, not as pretty and not afraid to drive it....anywhere.
Manual Transmission...I hate not having a manual. Autos are great and strong but so boring.
Lower ride height. This one will be a couple inches lower and on smaller diameter wheels, either 18's or 19's and will run 275's or bigger on all four corners.
Pretty much sums it up.
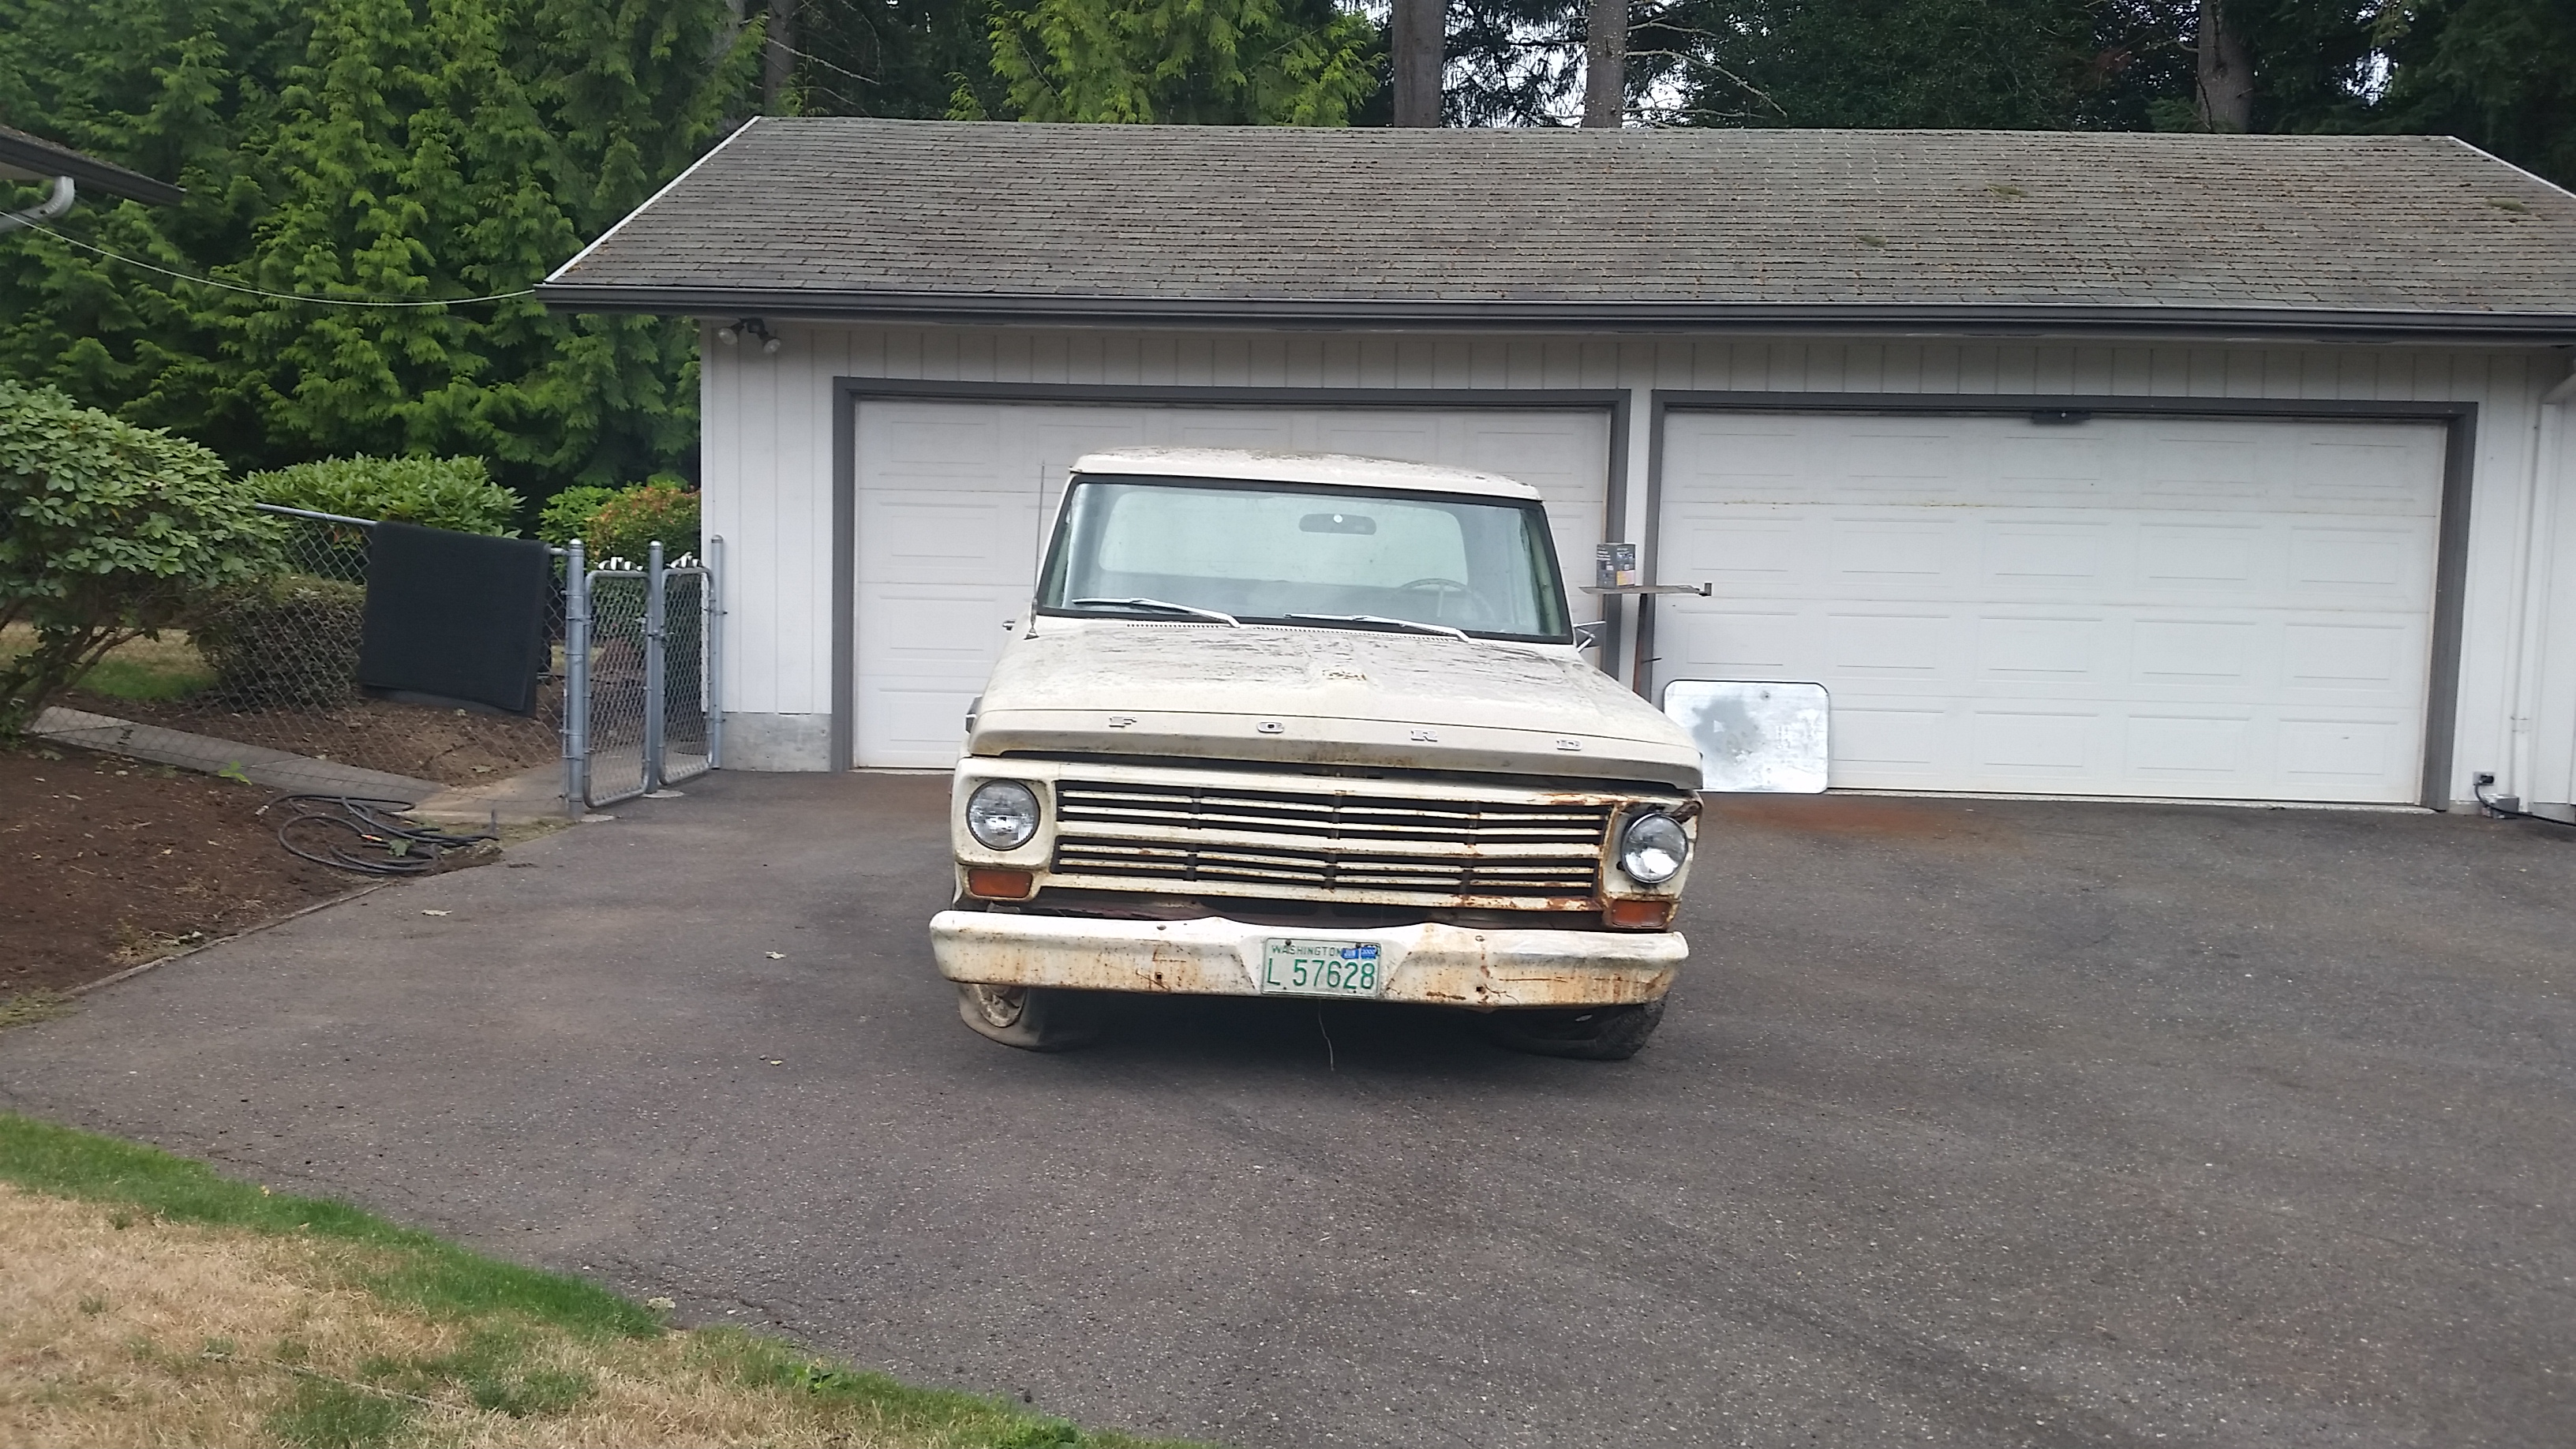
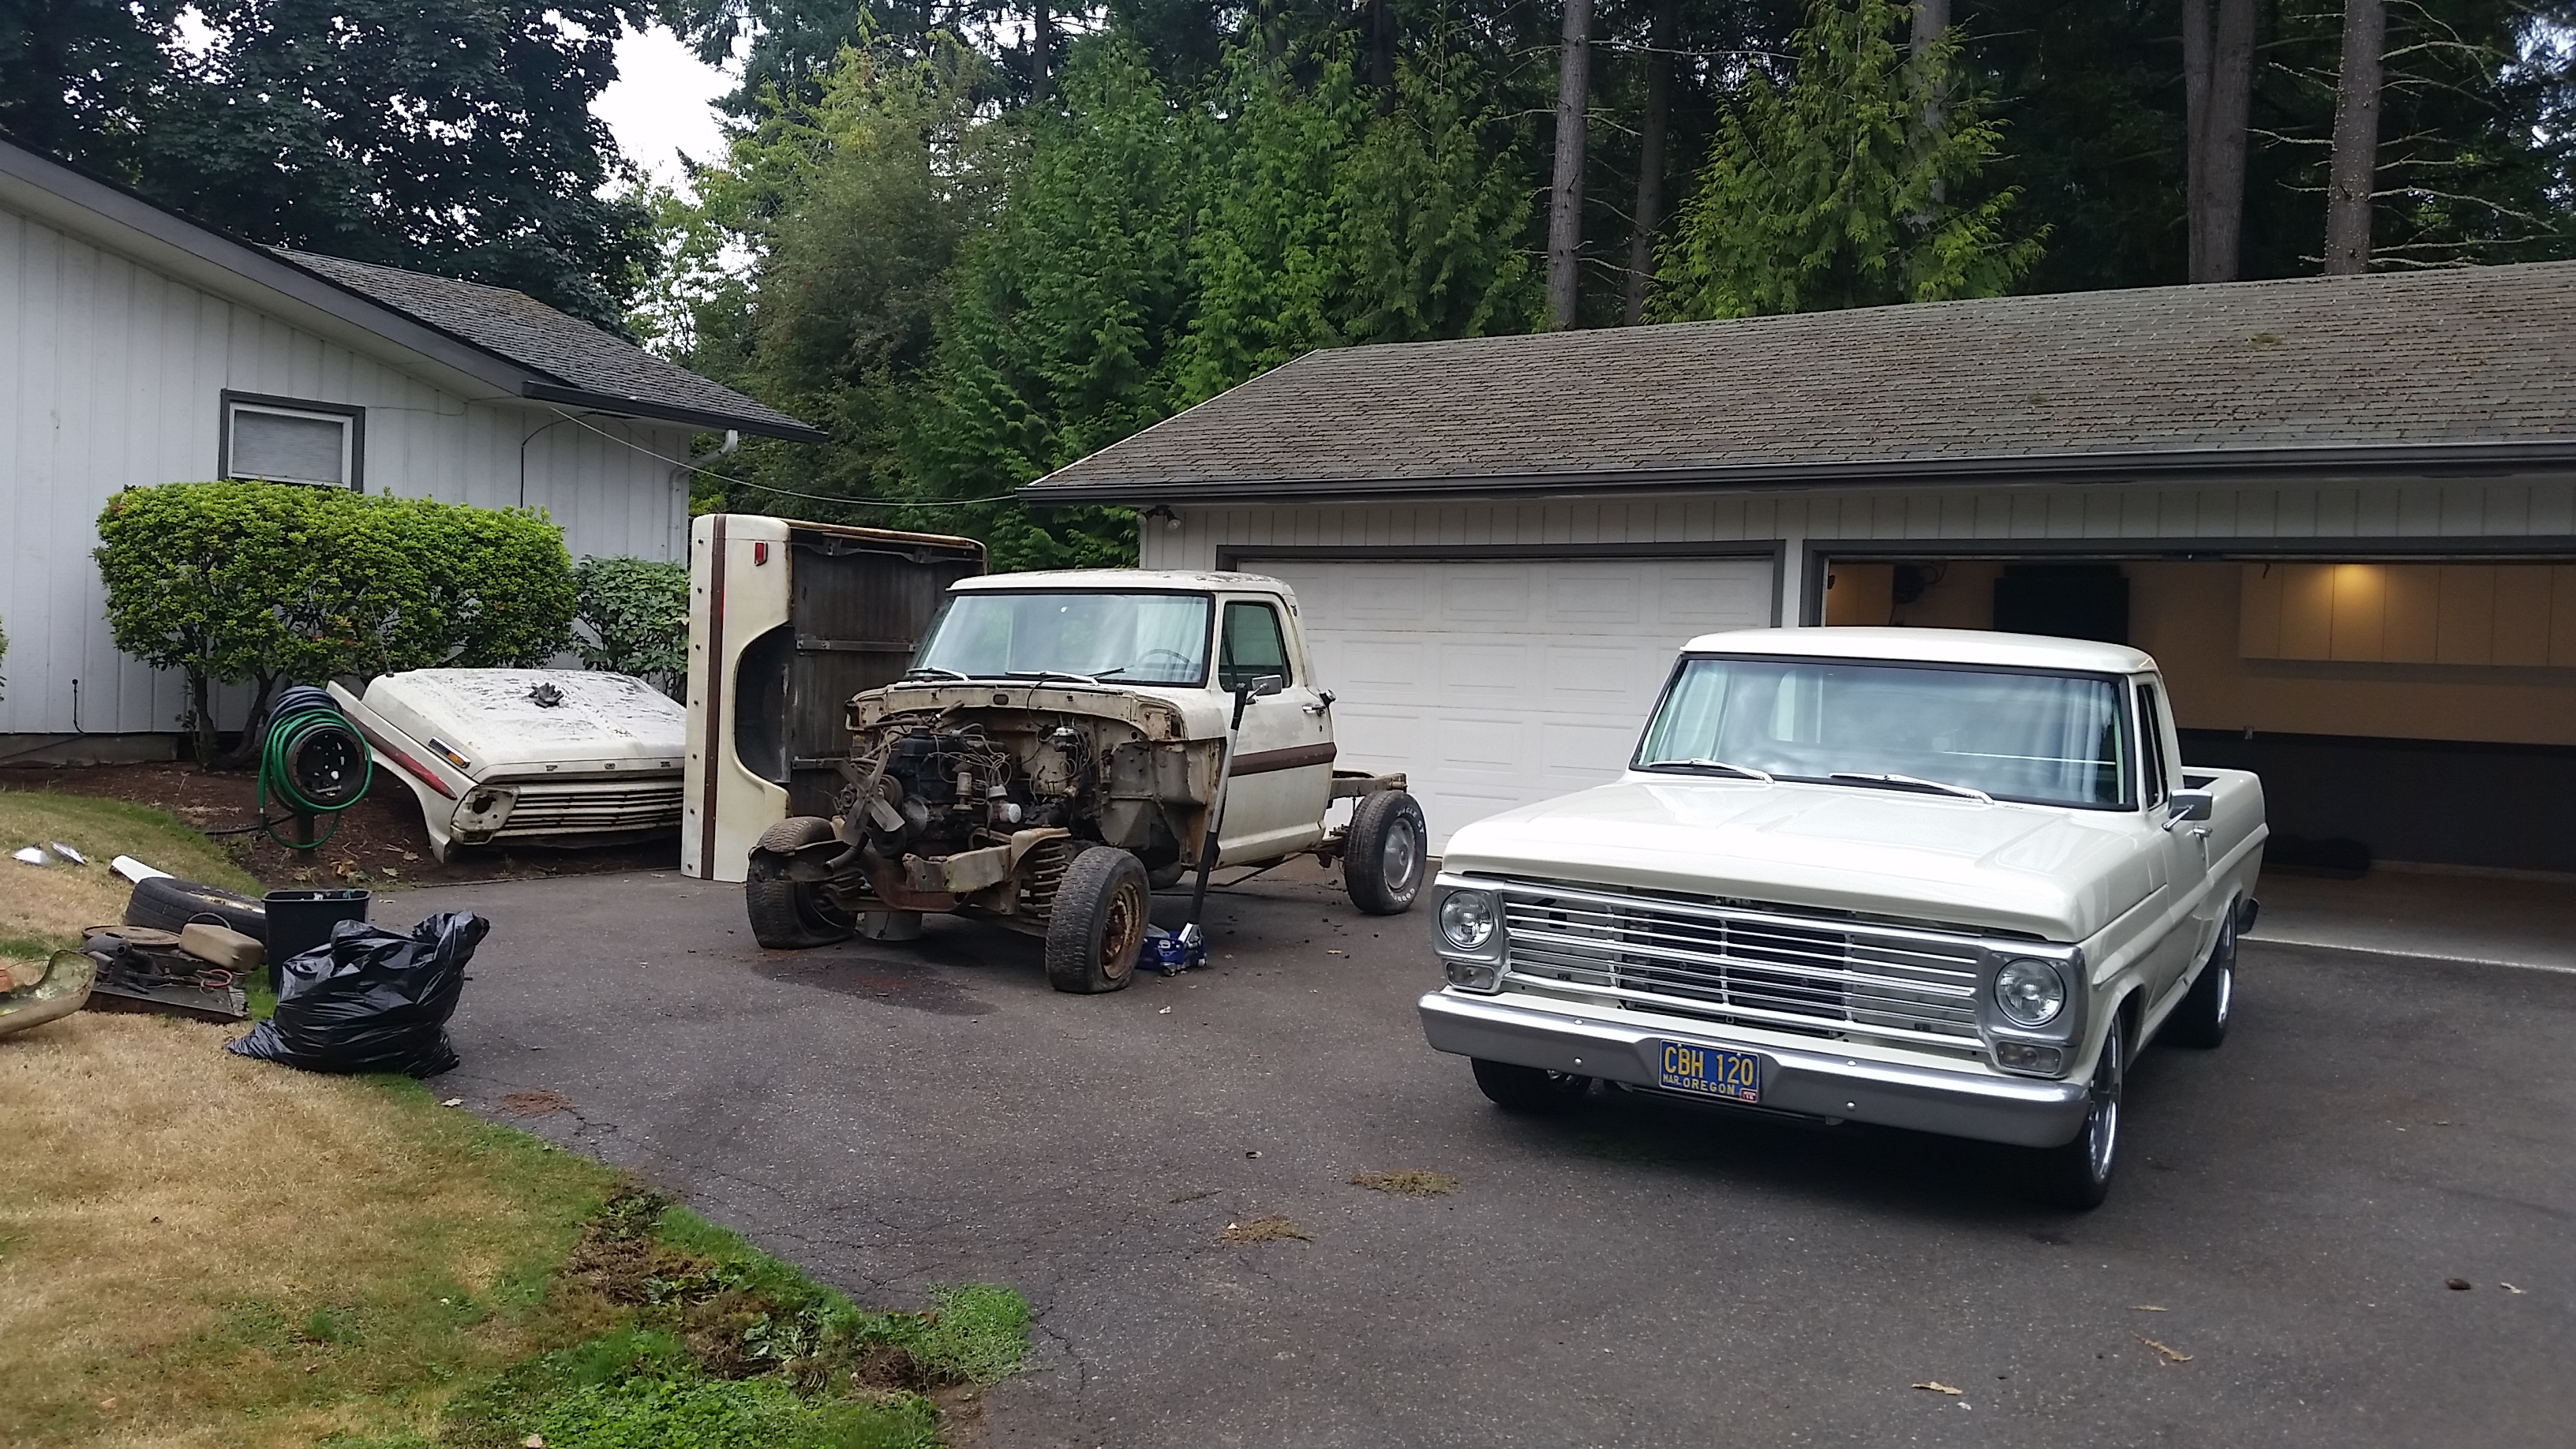
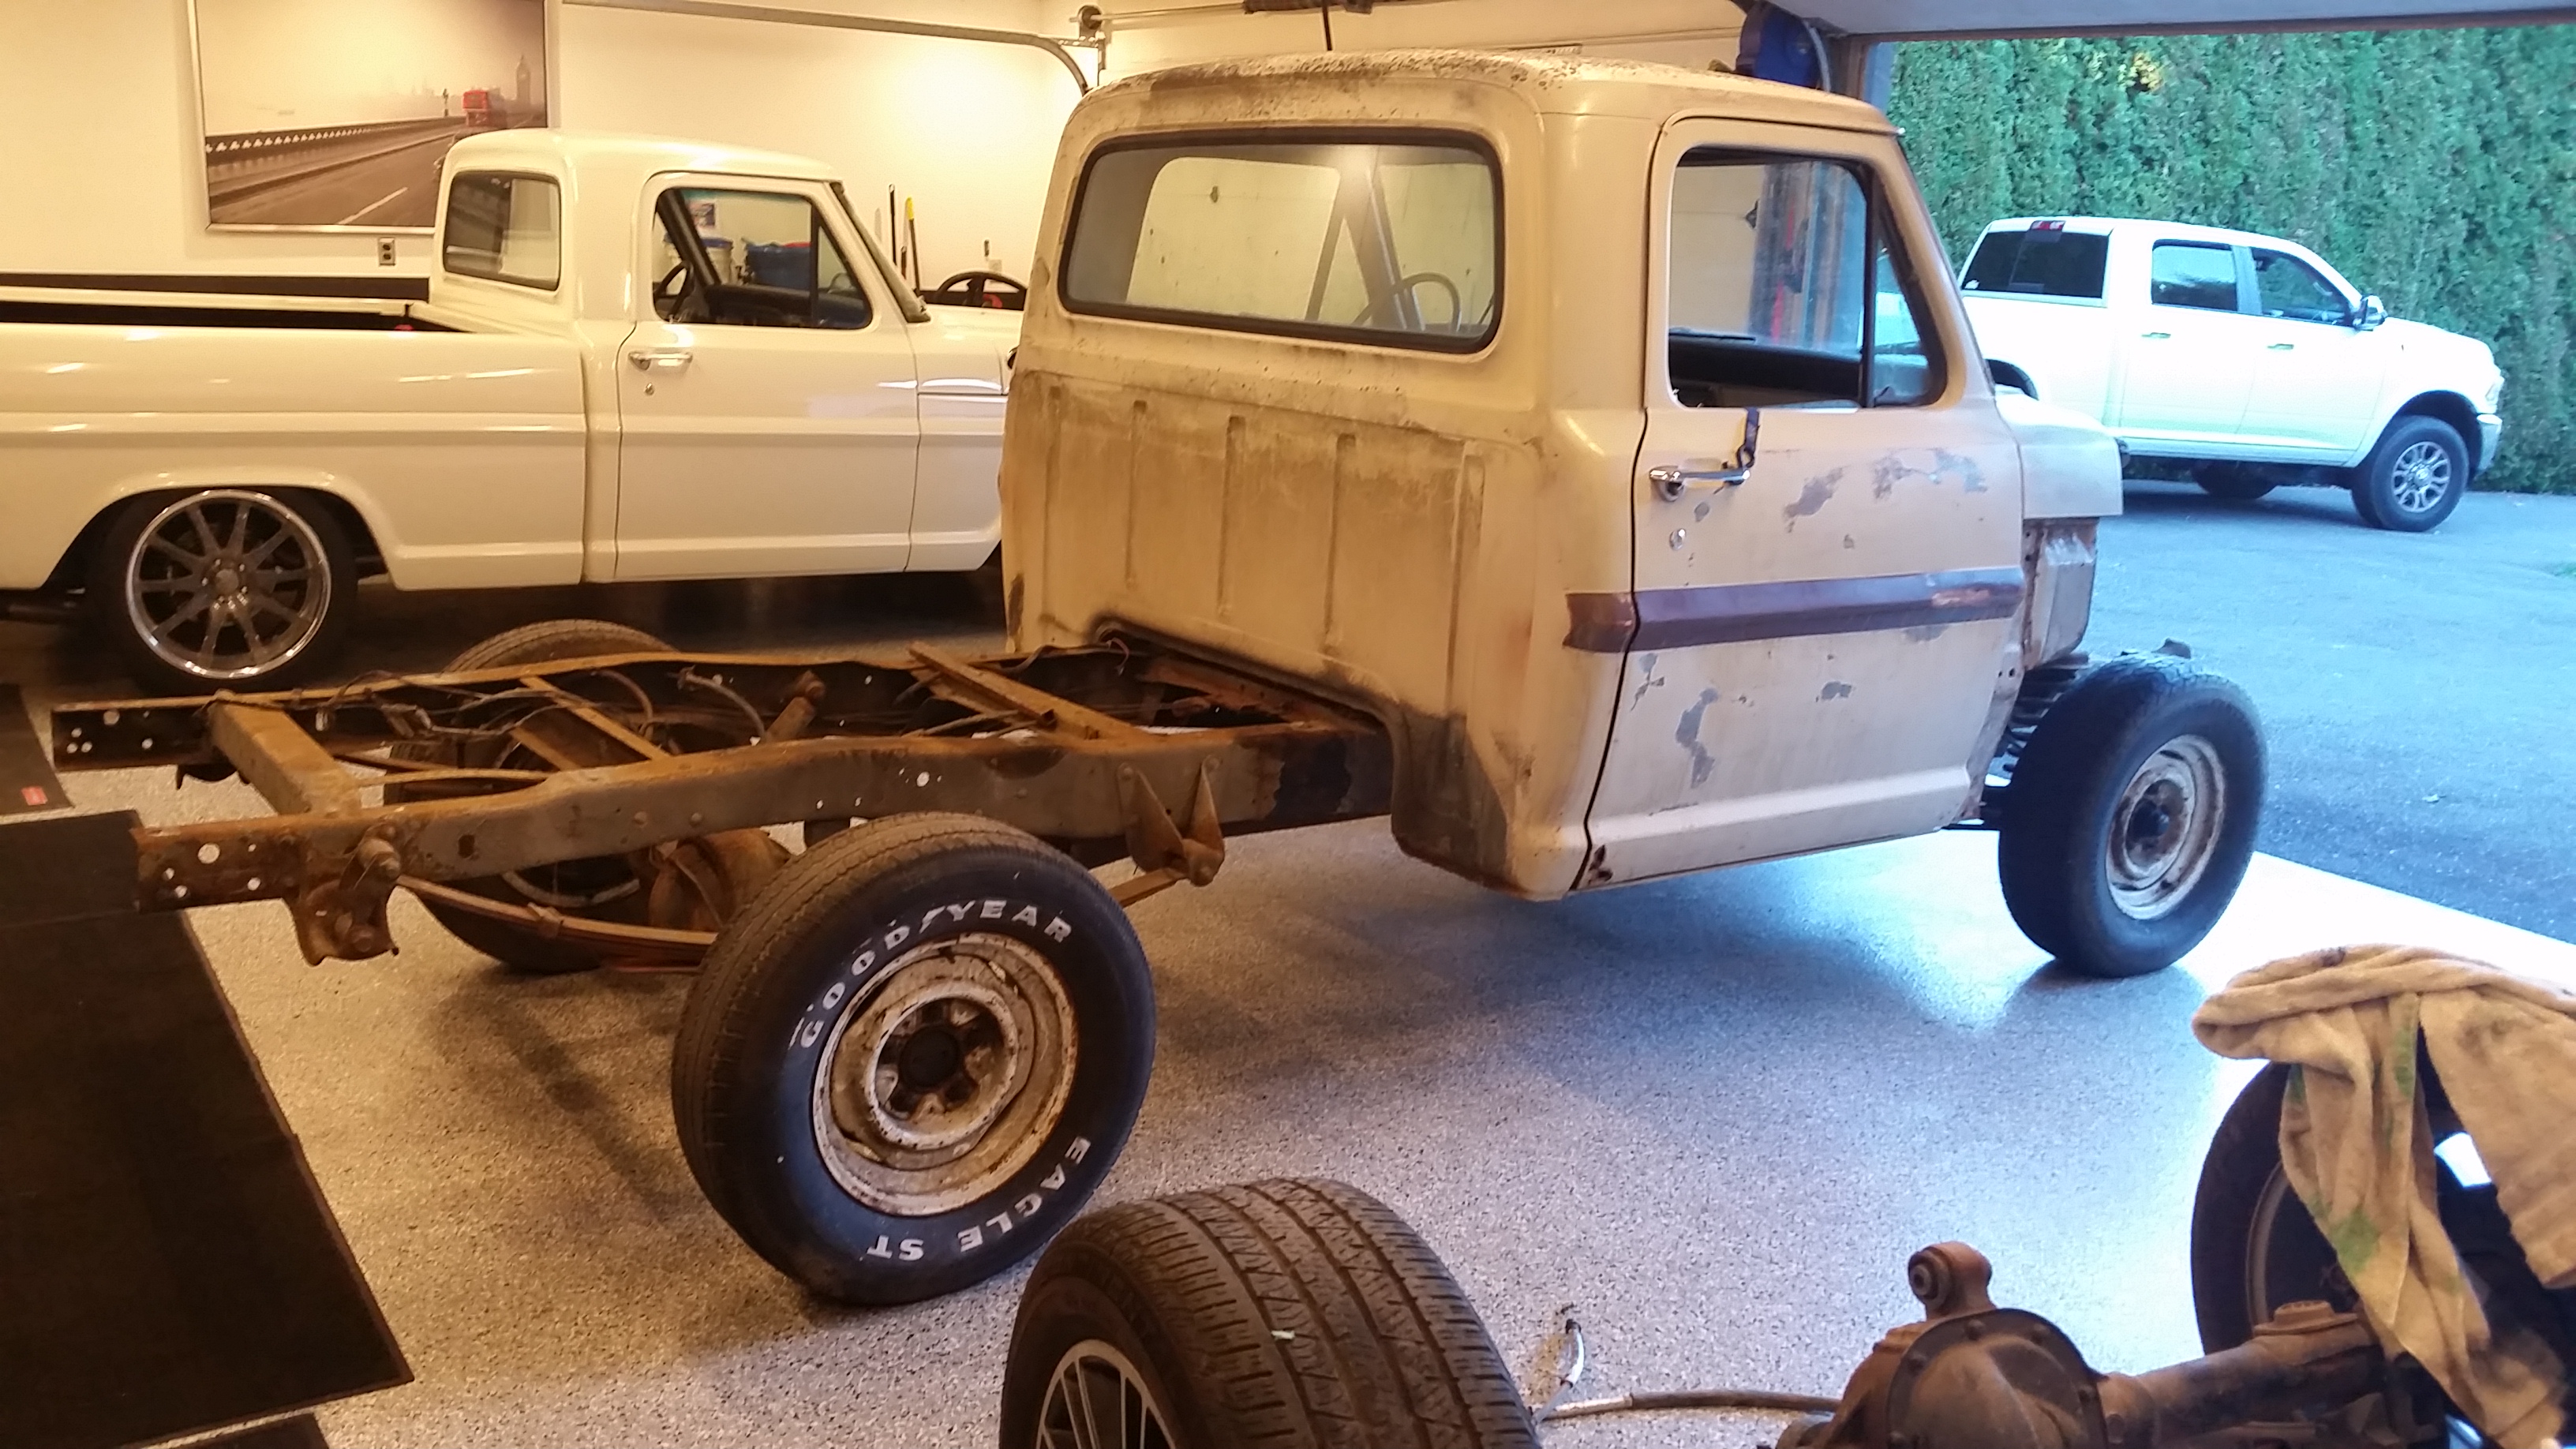
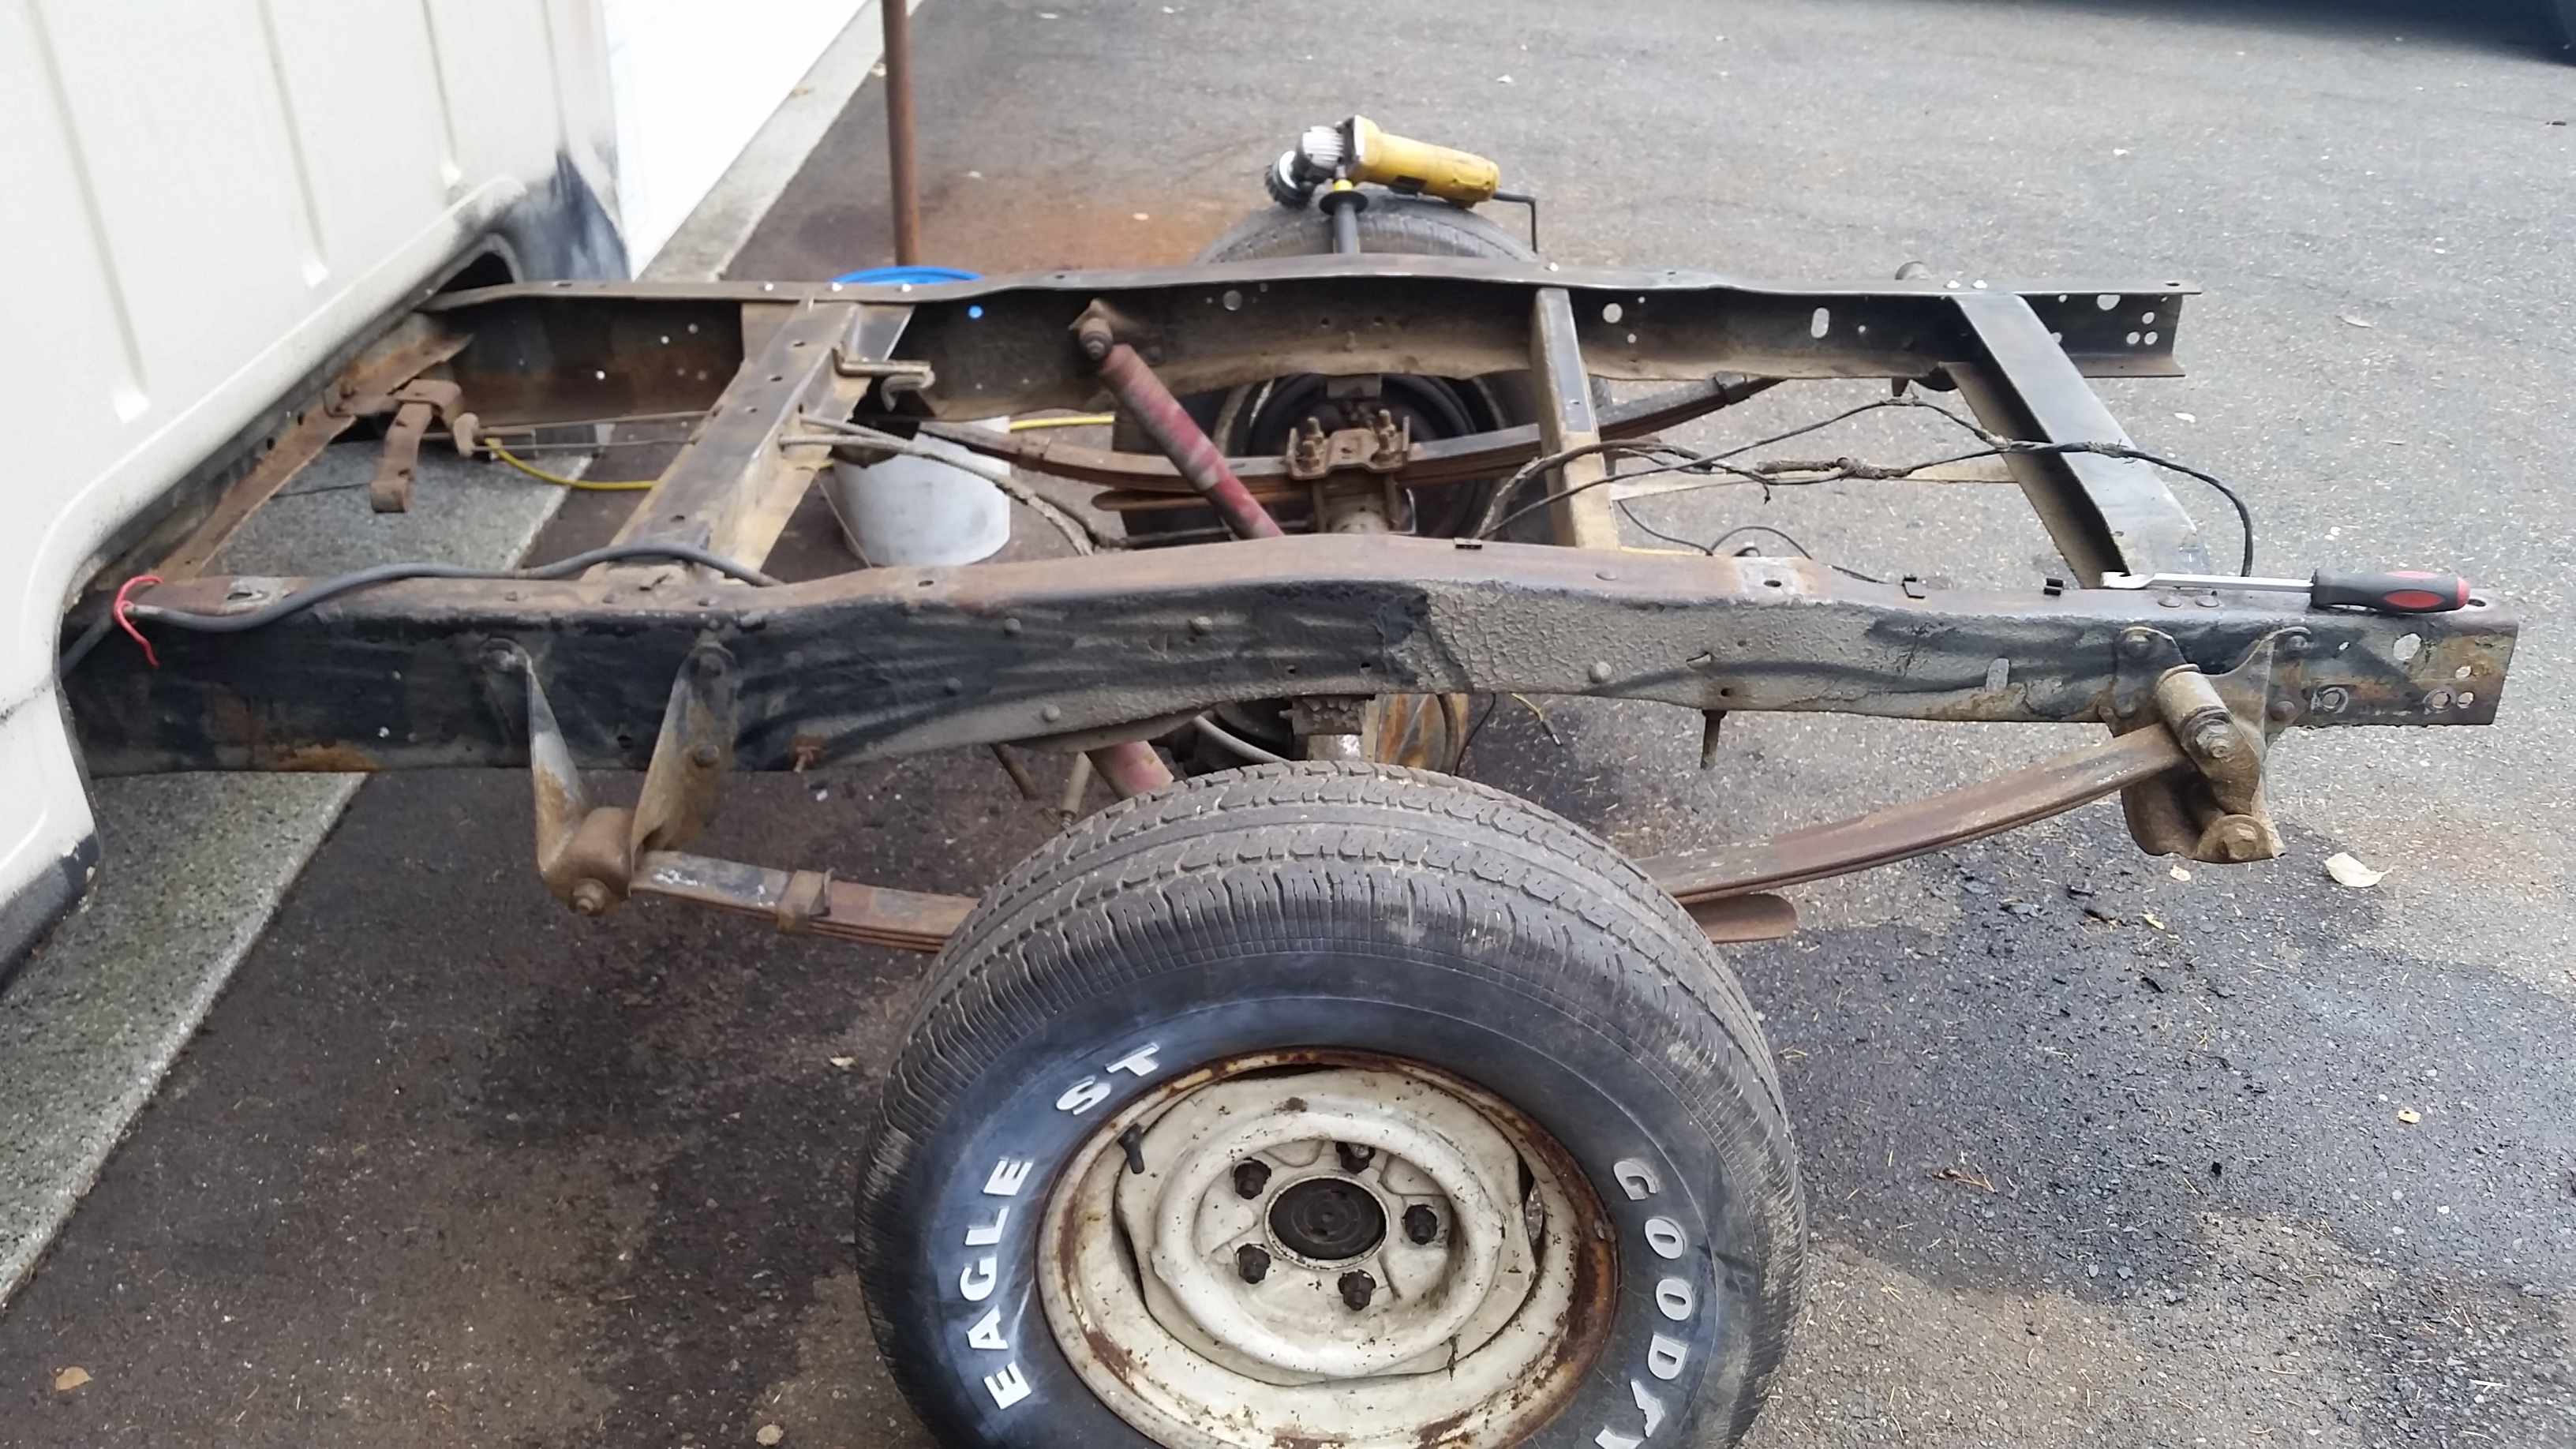
So the search was on for a 2wd short bed, mind you they are getting harder to find around here so this was harder than the first time around. Looked for a few months and my dad actually found the truck, behind his mechanics house. Picked it up for $500.00, literally drug it with all 4 tires locked up solid onto a trailer.
Here is the Gem!!! Aint she purdy.

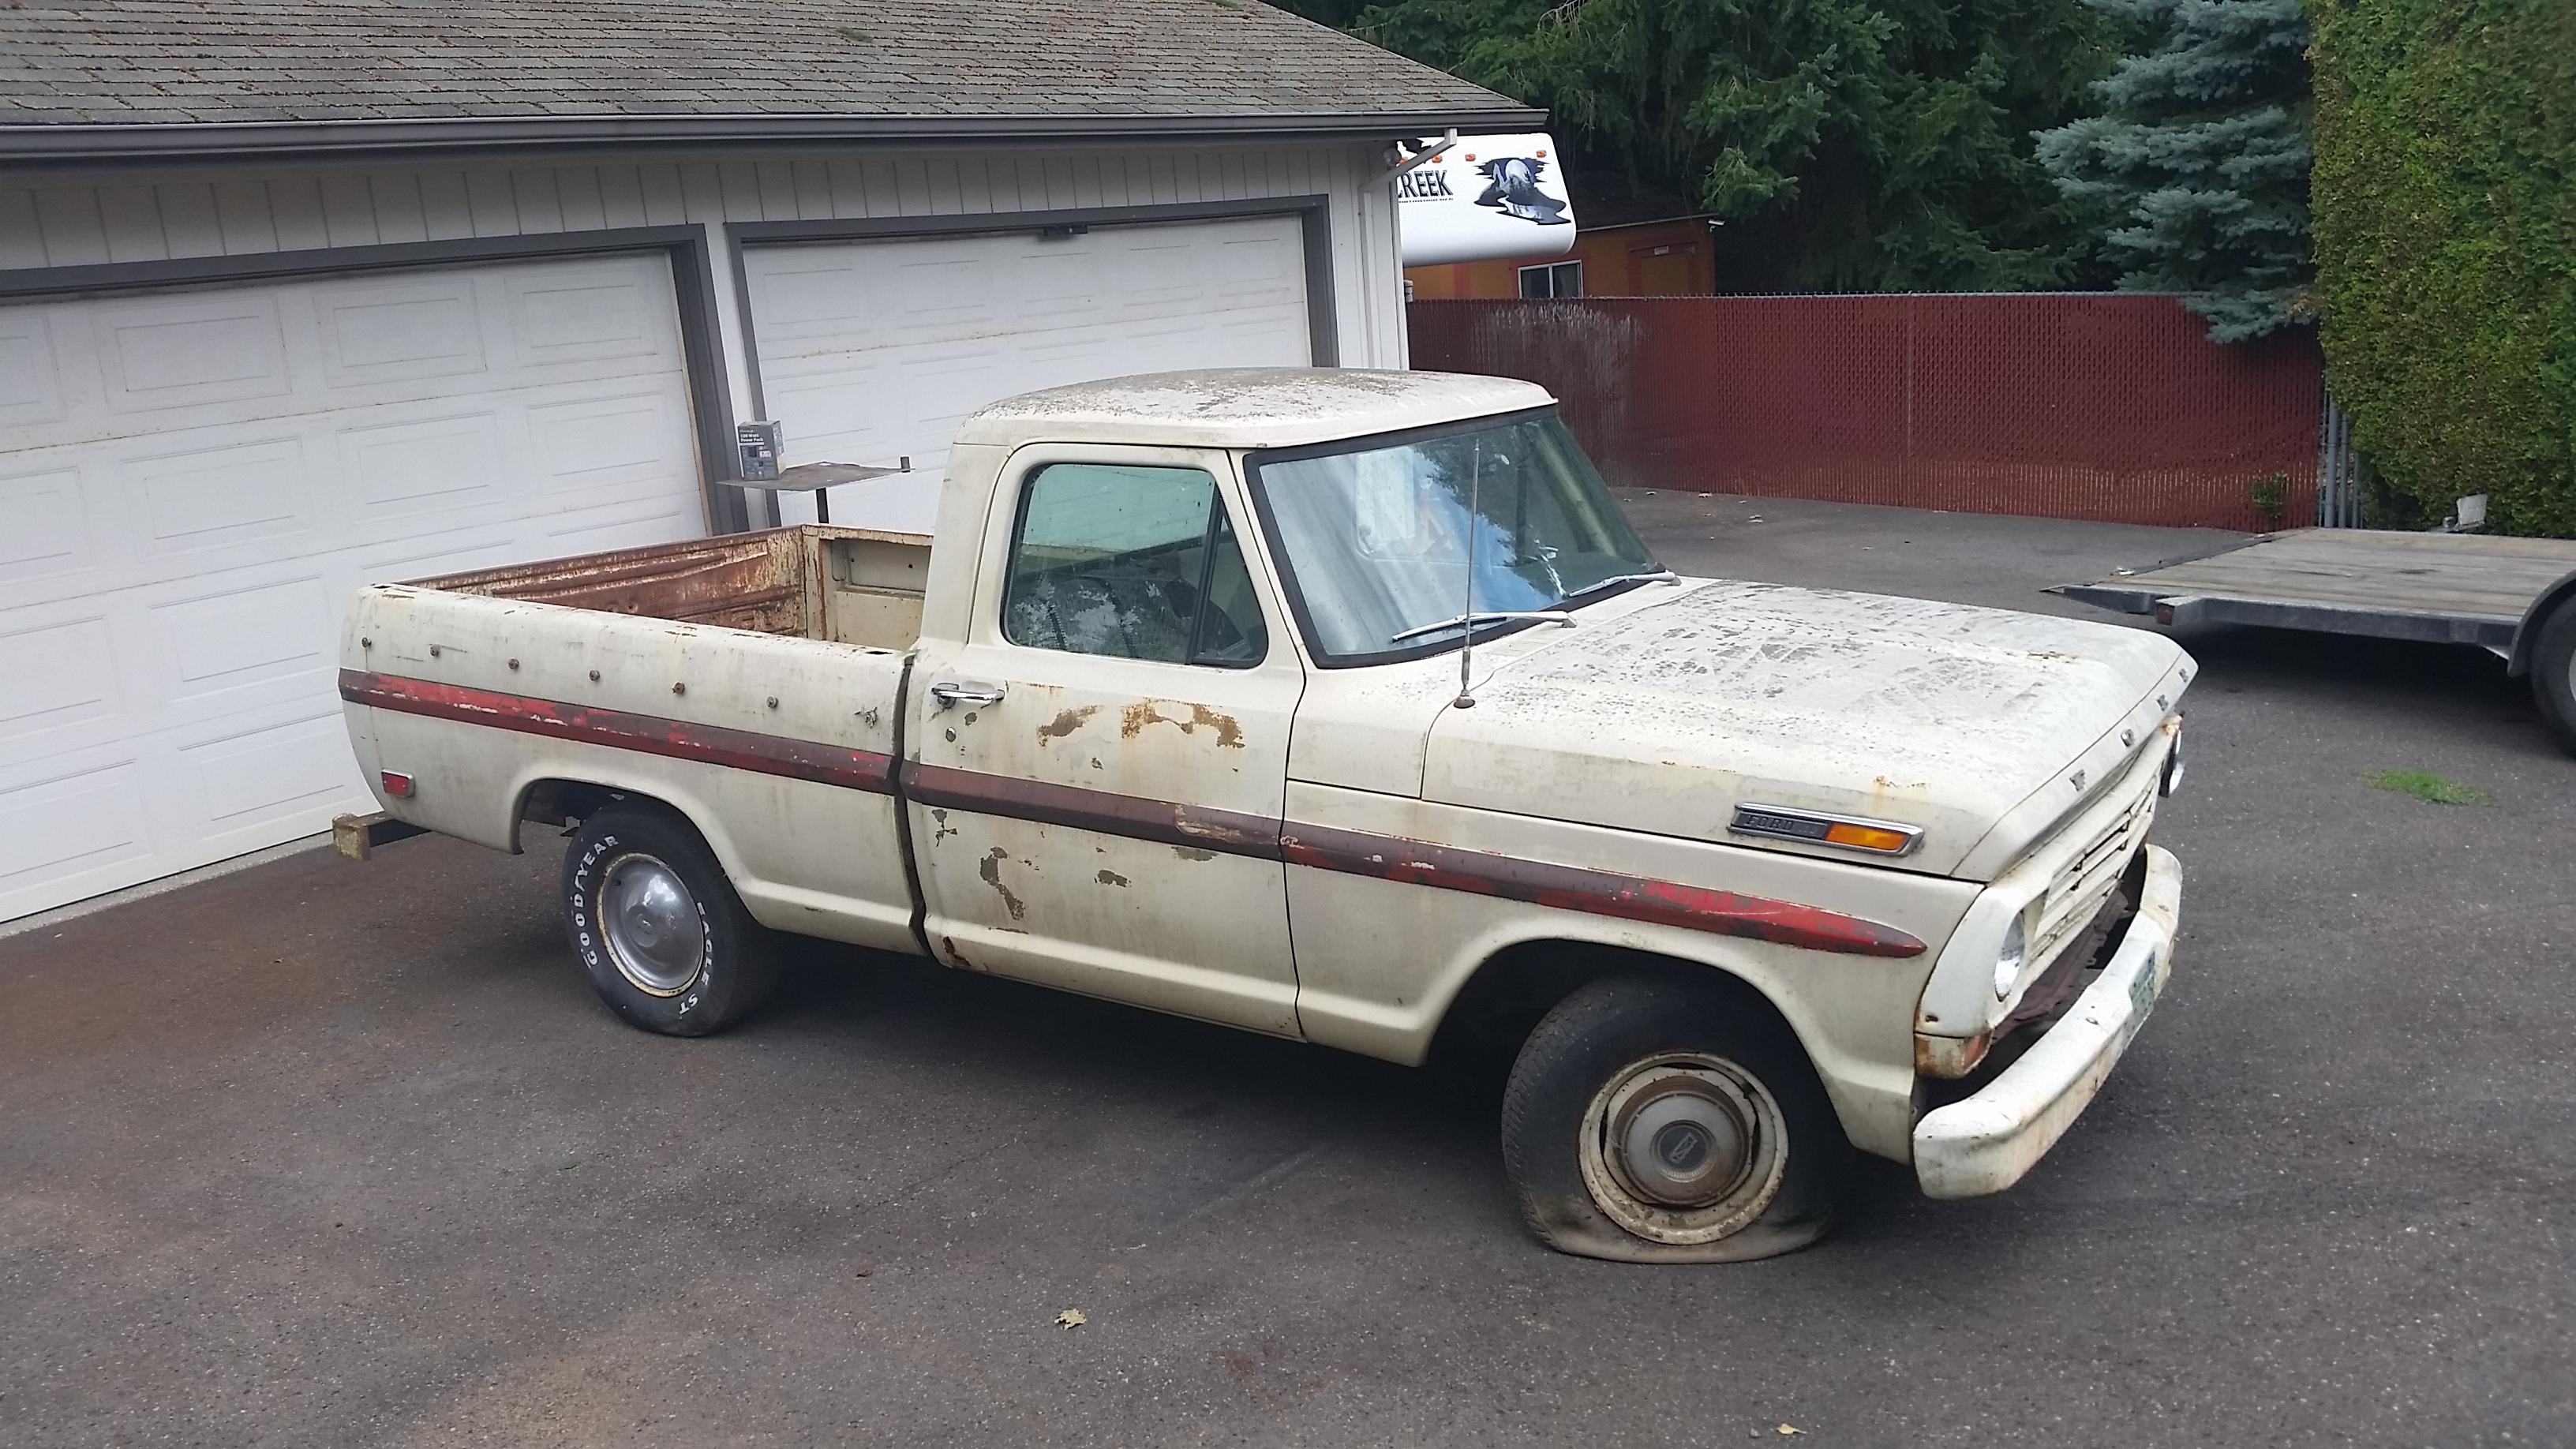
So the teardown began last Thursday or so.....when I discovered the little fender bender was a little worse than we thought. The front framehorns have a little sway in them so it slowed the teardown progress a fair bit.
This is about 3 hours into the build..
Giving the LSX truck a little on screen glory..
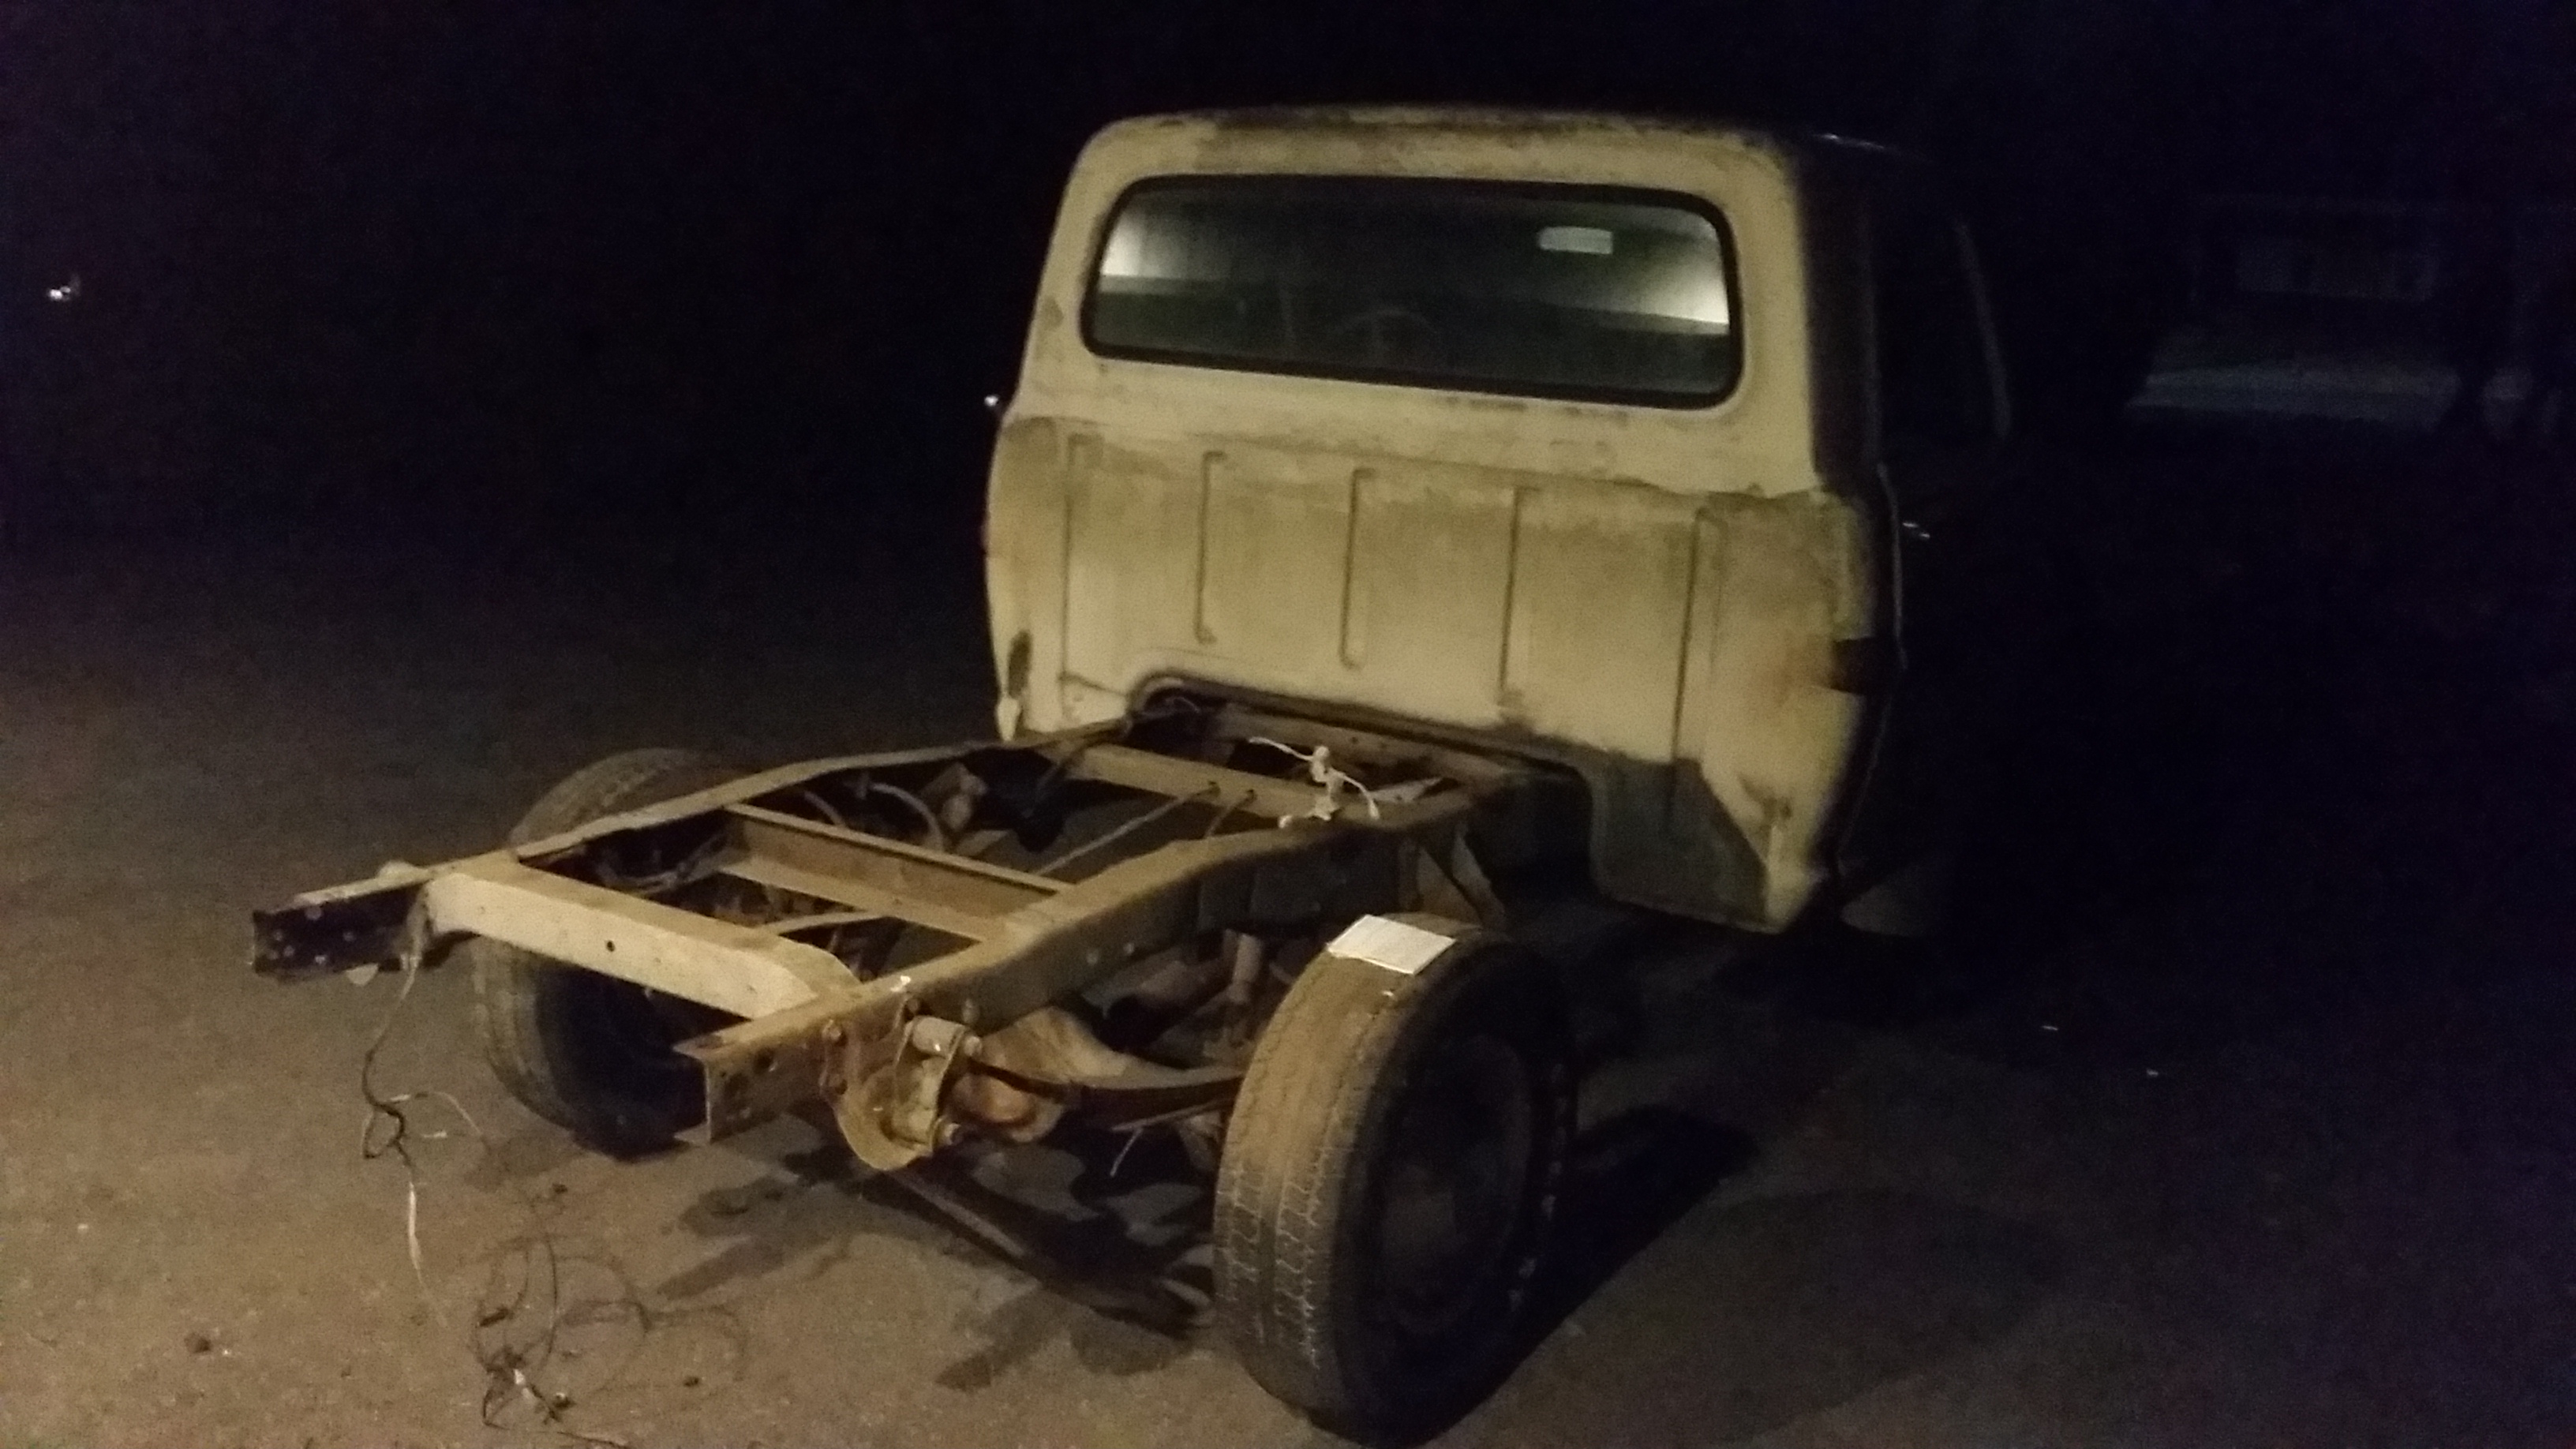
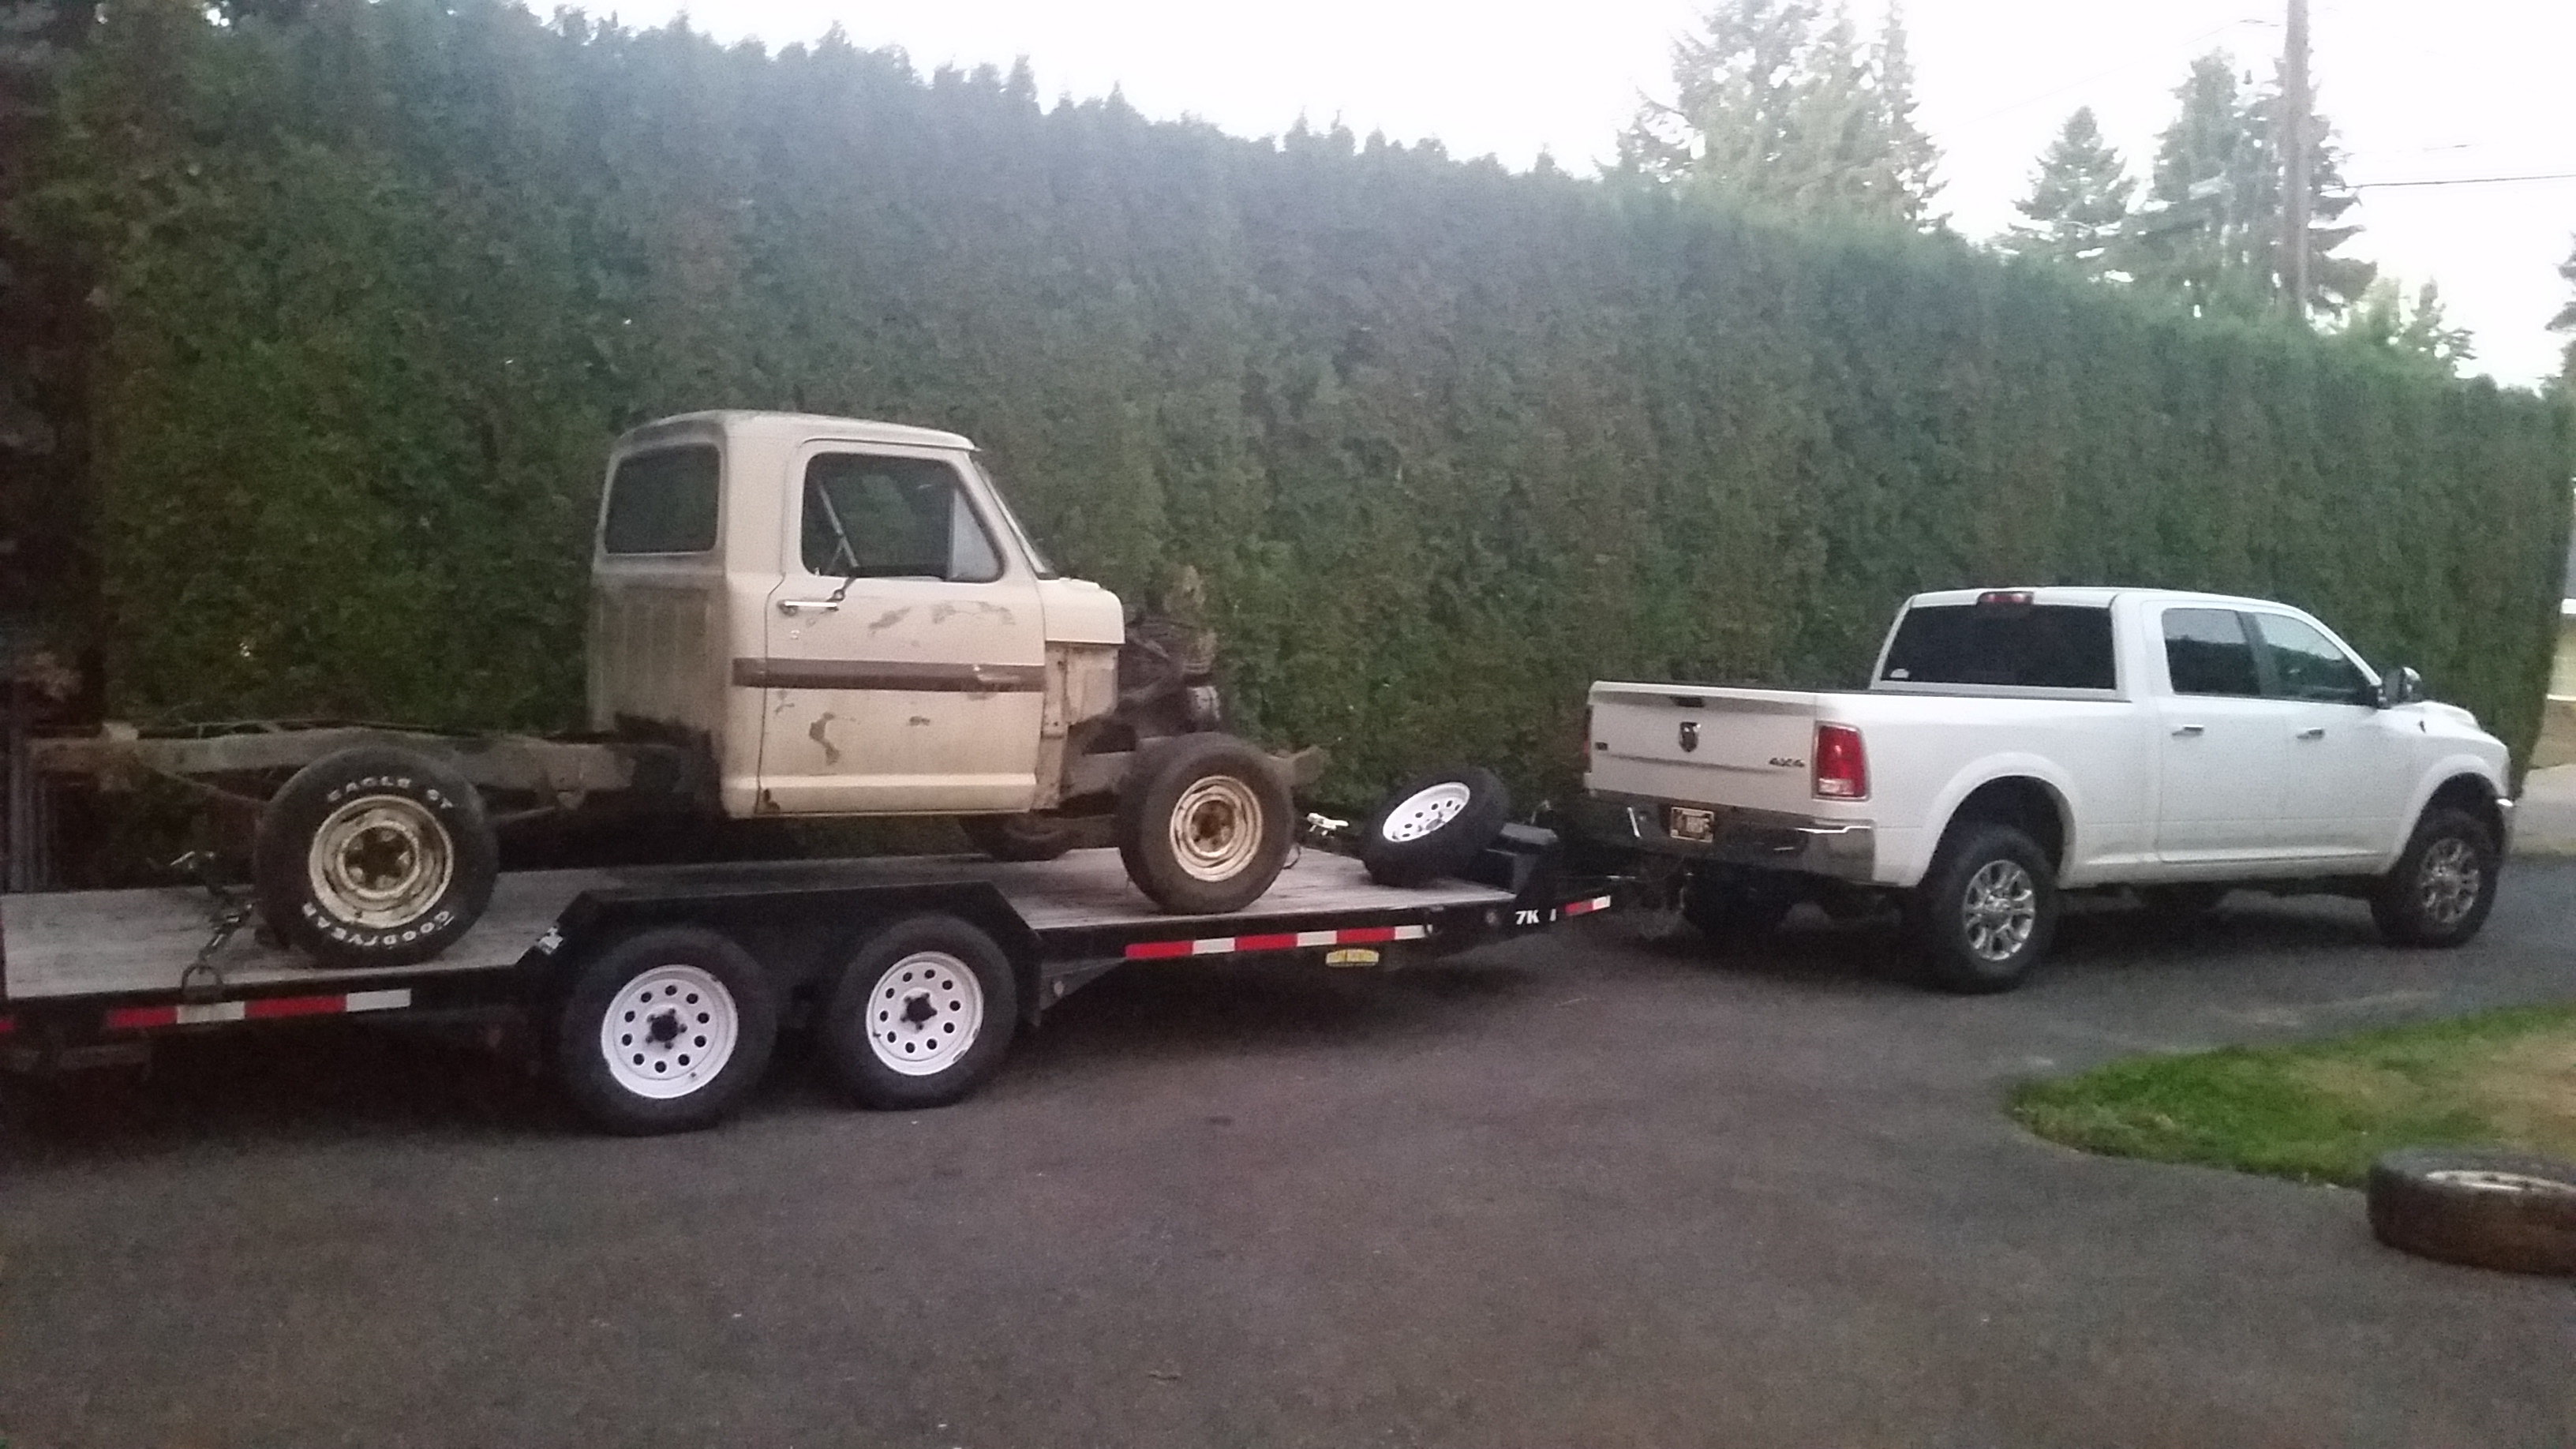
Got the old girl to actually roll put two less old tires on the front and made it mobile for the first time in who knows how long. Its on the trailer headed to the frame shop.
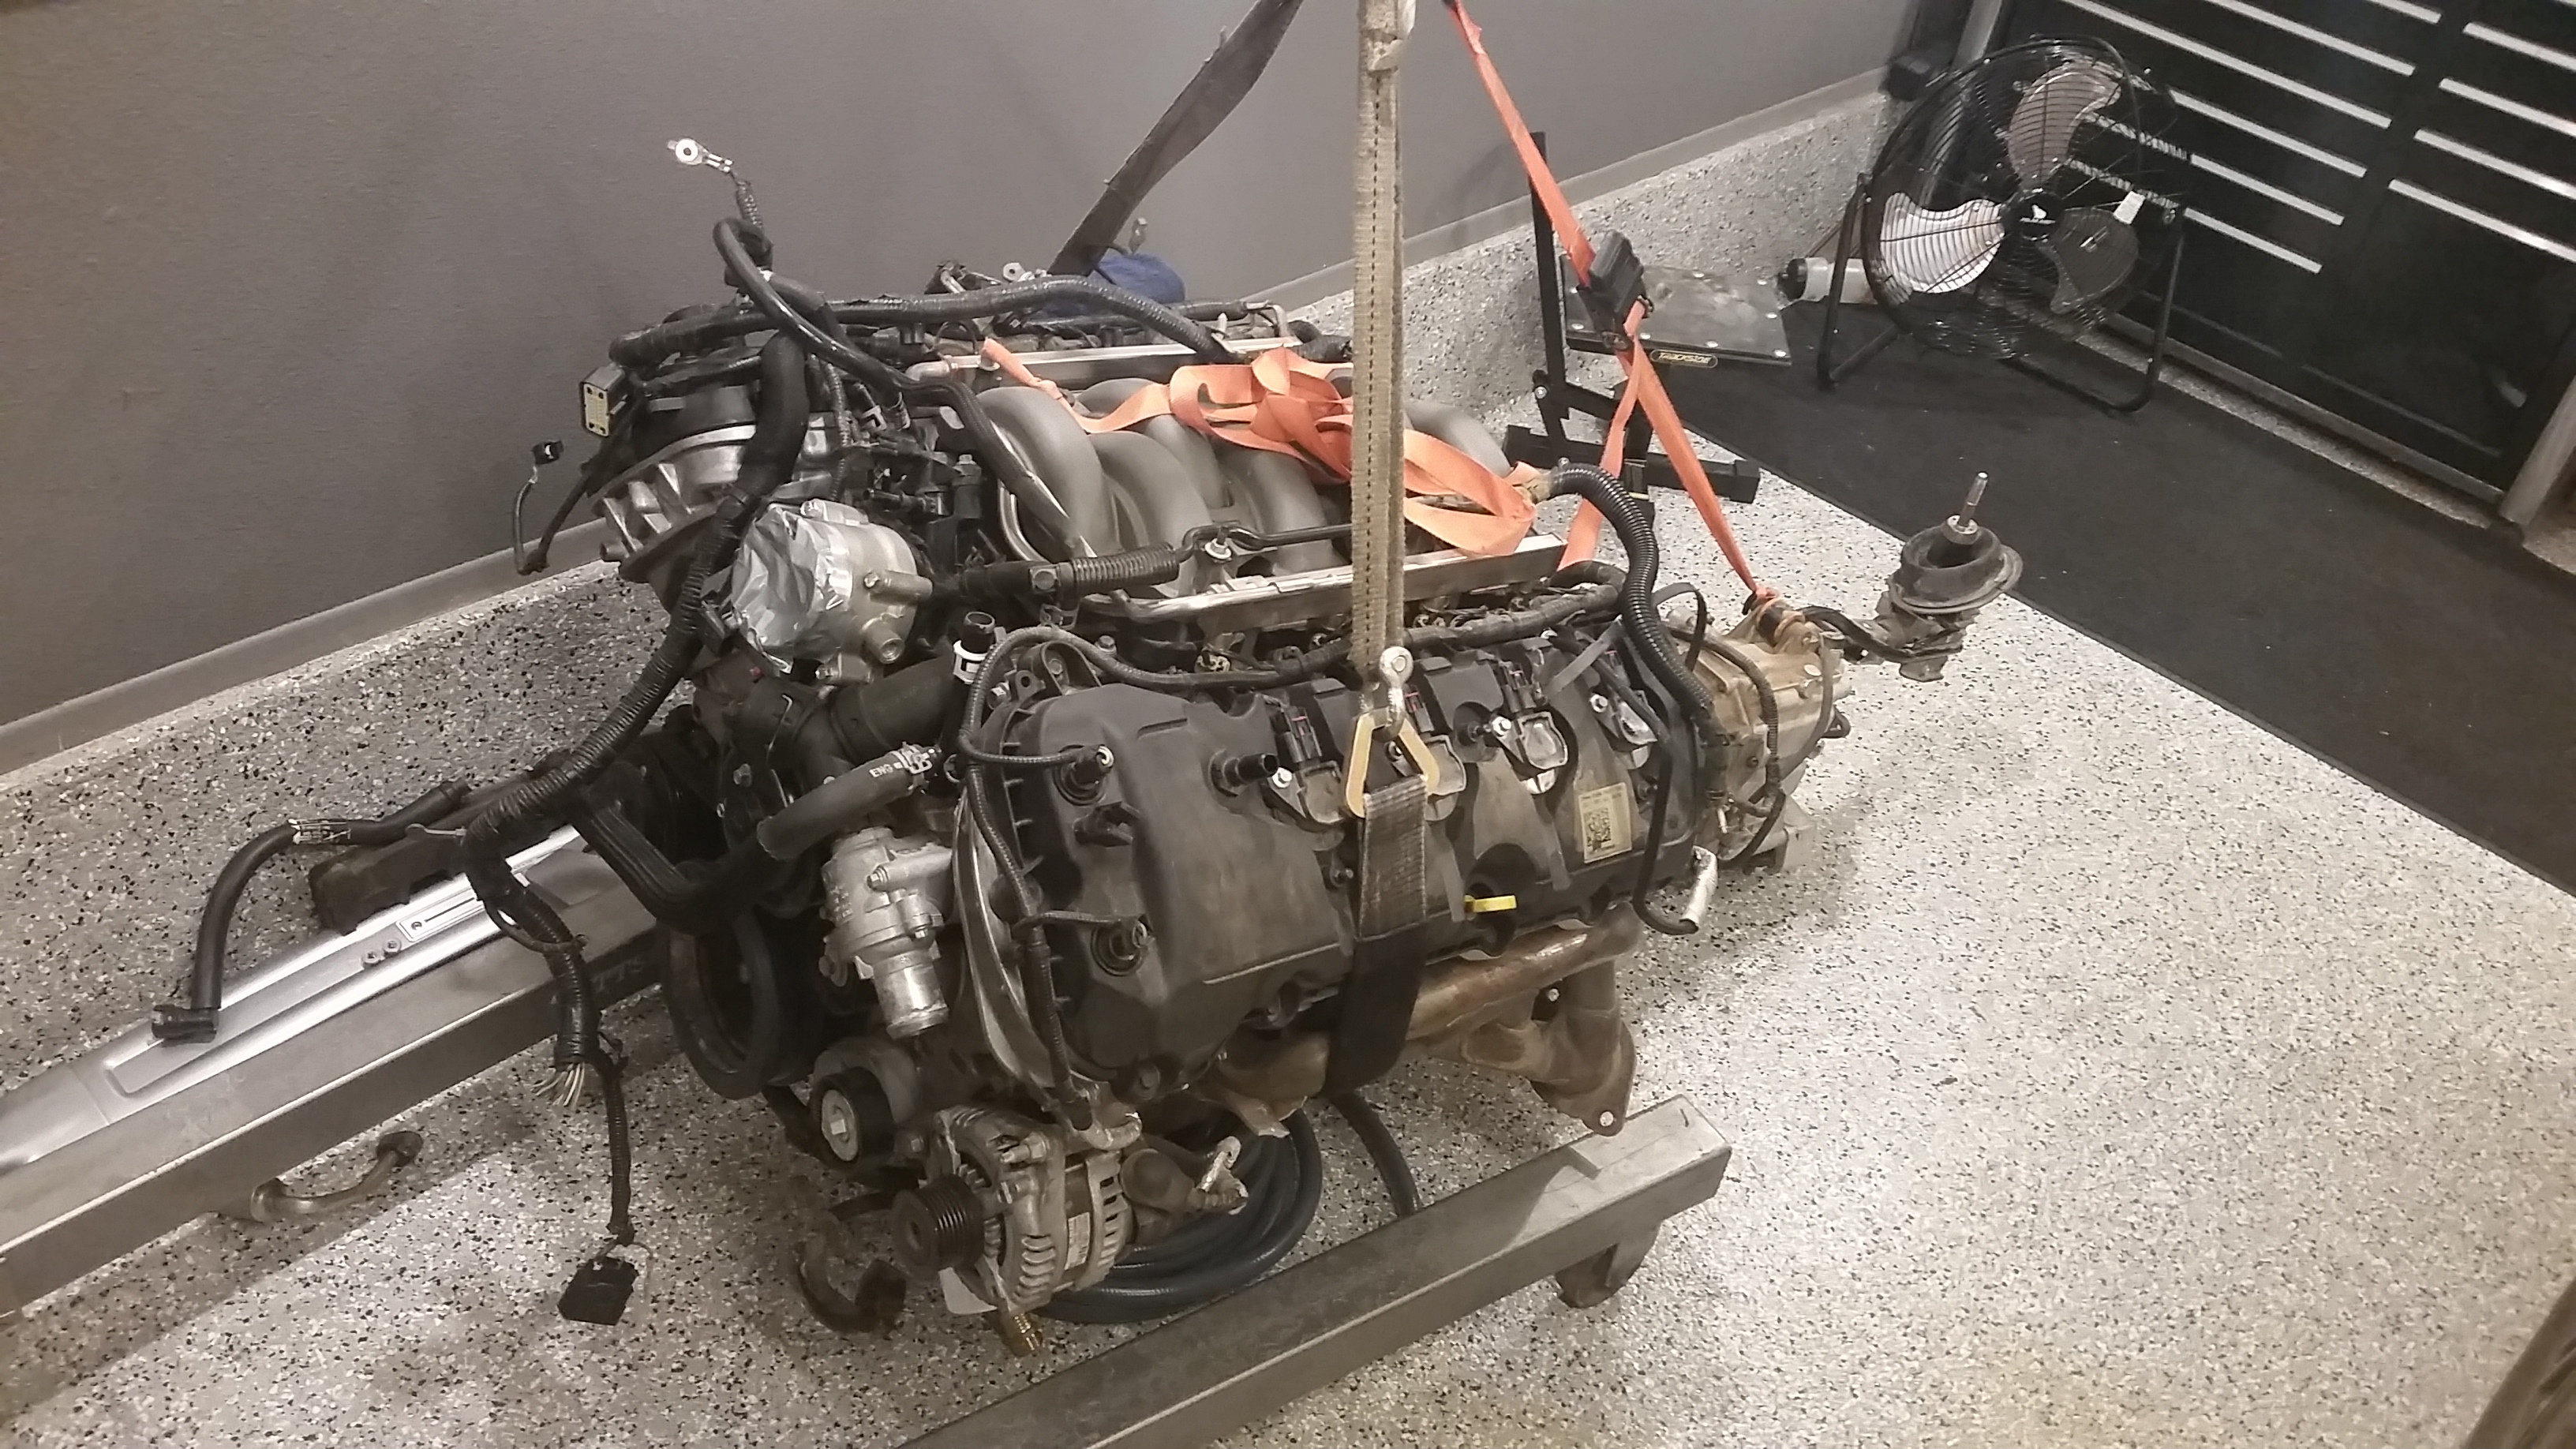
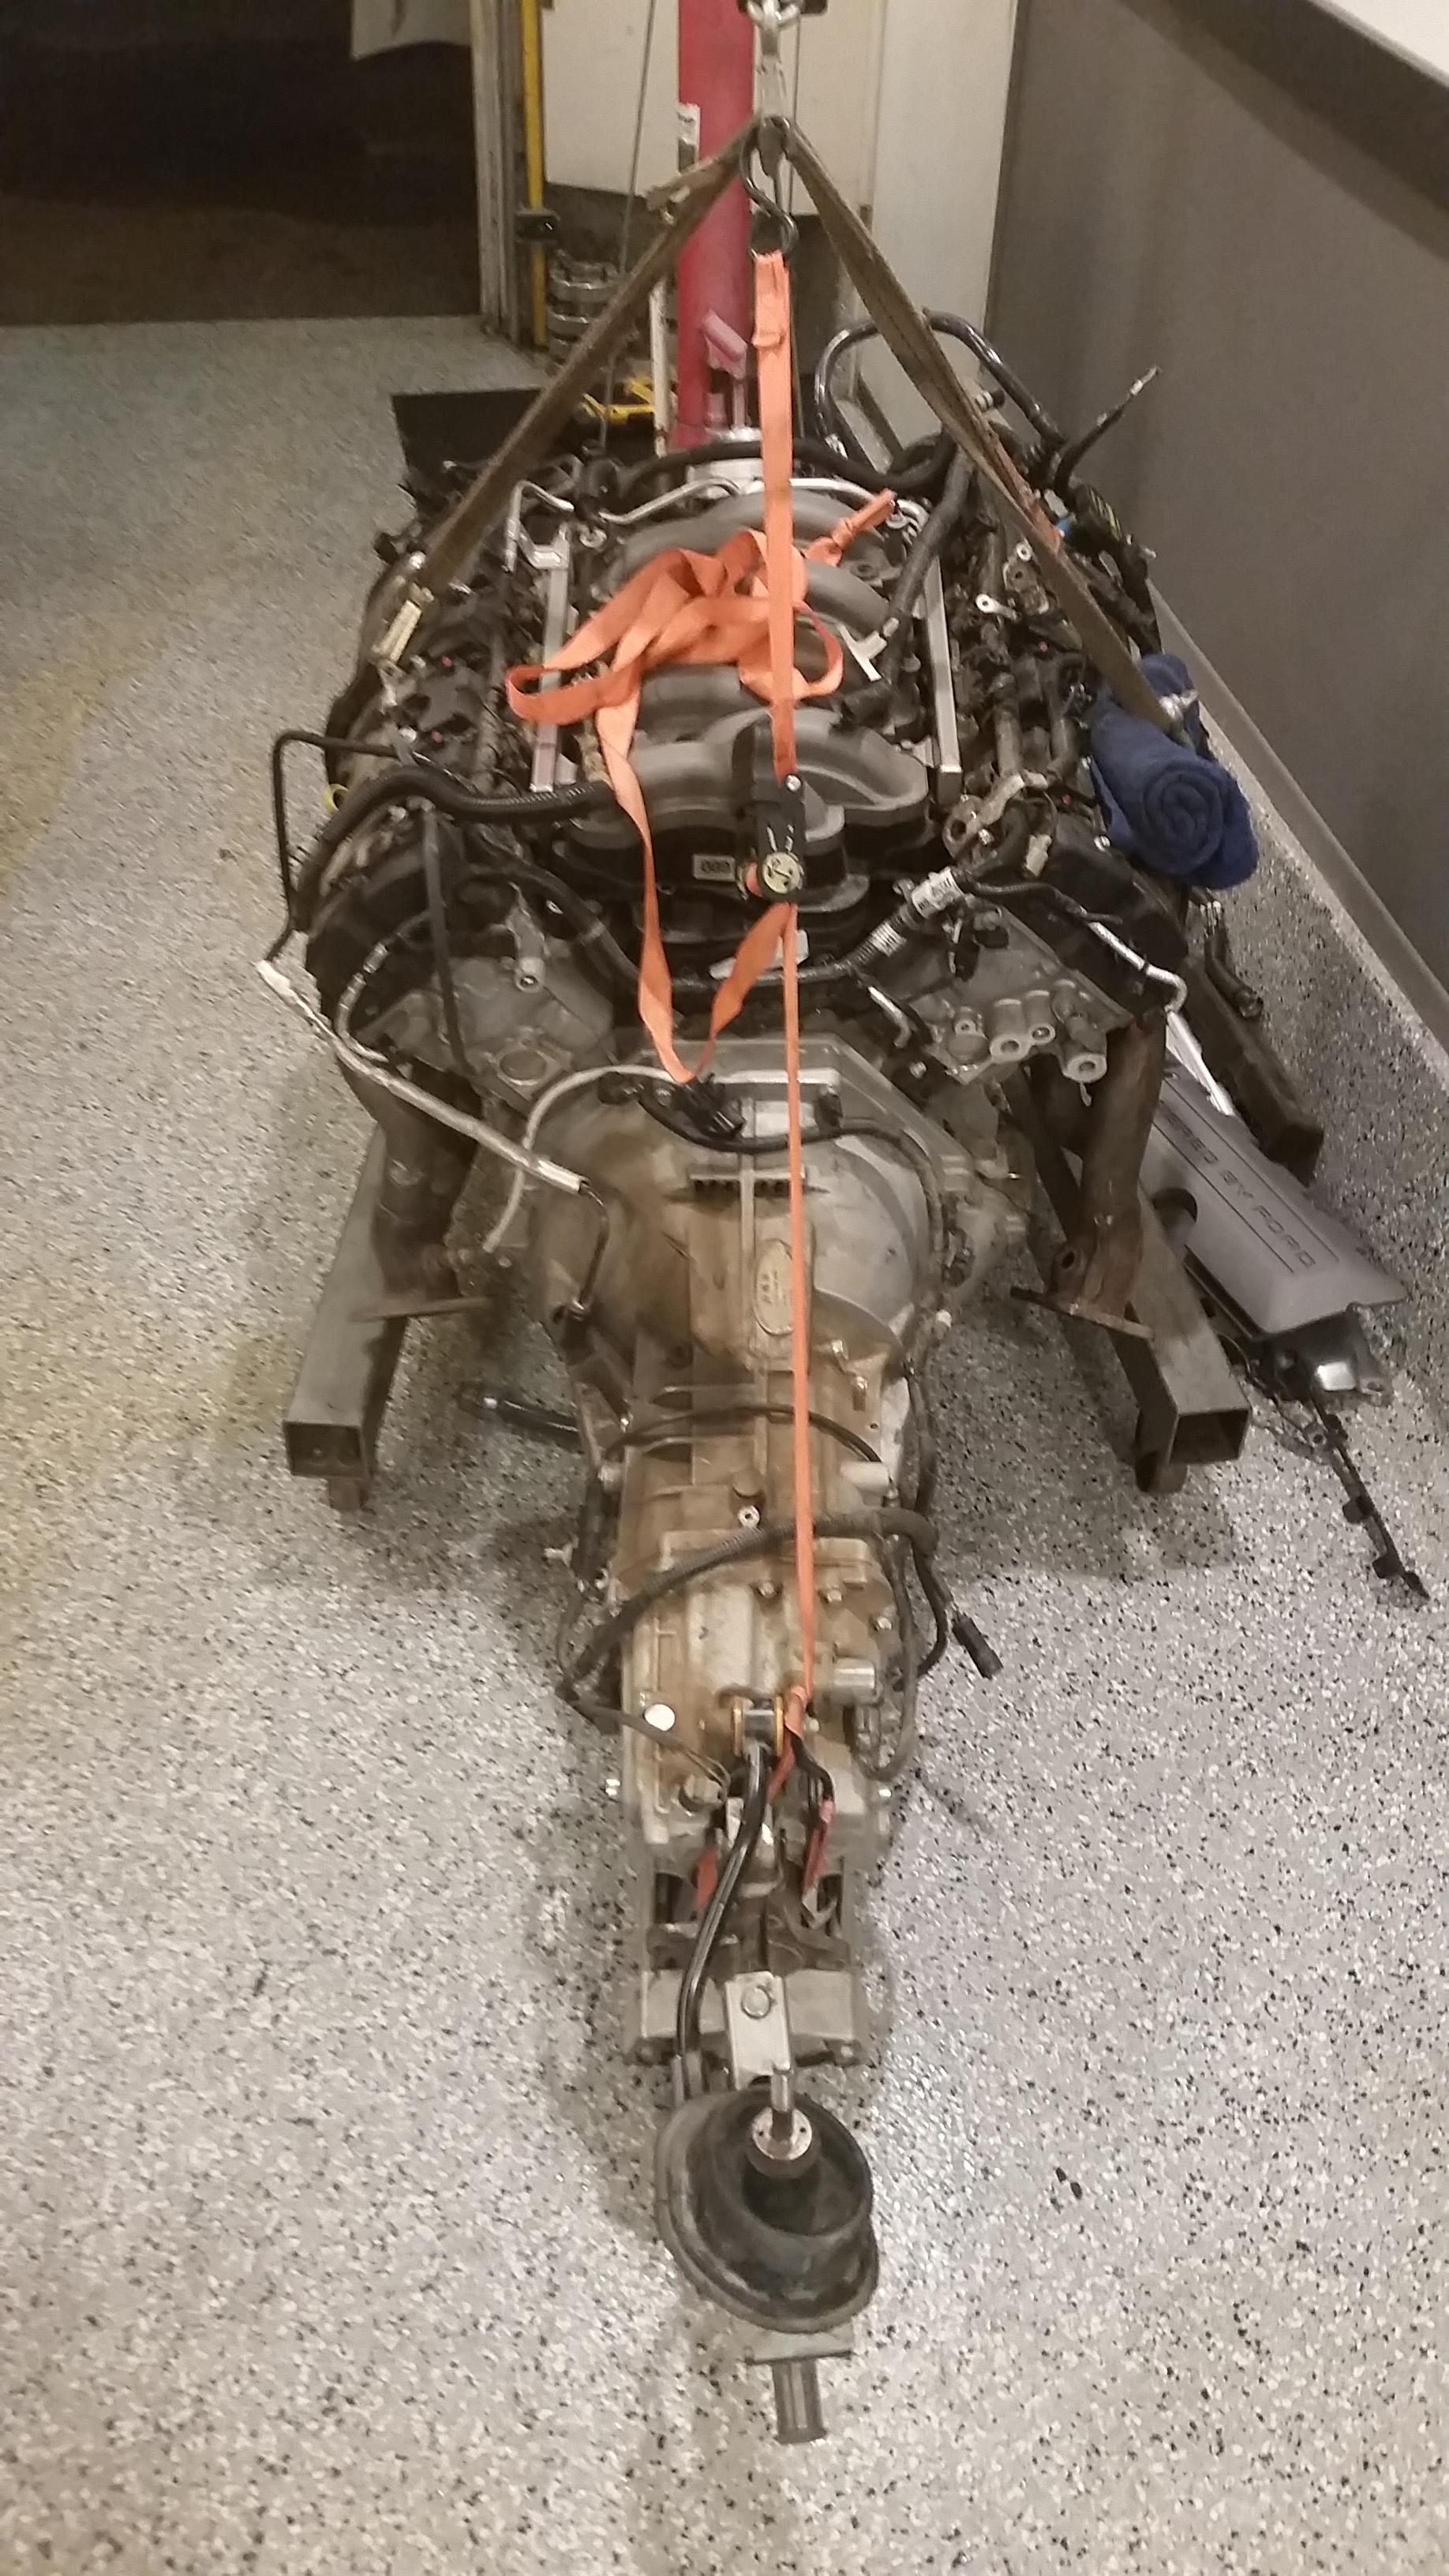
So here is where we get very different from my last build.....its going to be ford powered. I truly wanted to do another LS build, but this truck is going to be a road race truck with potential for some sticky tires and all of the reading I did on the LS3 was horrible. It needed a dry sump setup in order to survive any kind of real road course events. I thought about LSA but the costs were more than I wanted to be in up front. So I started searching for coyote stuff. I stumbled on to this car down in Grants Pass a few days ago, made a deal with the owner and picked it up for less than a crate motor...it only has 22k on it and I should be able to use the engine, transmission, rearend, pedal assembly and hopefully the brake Master Cylinder.
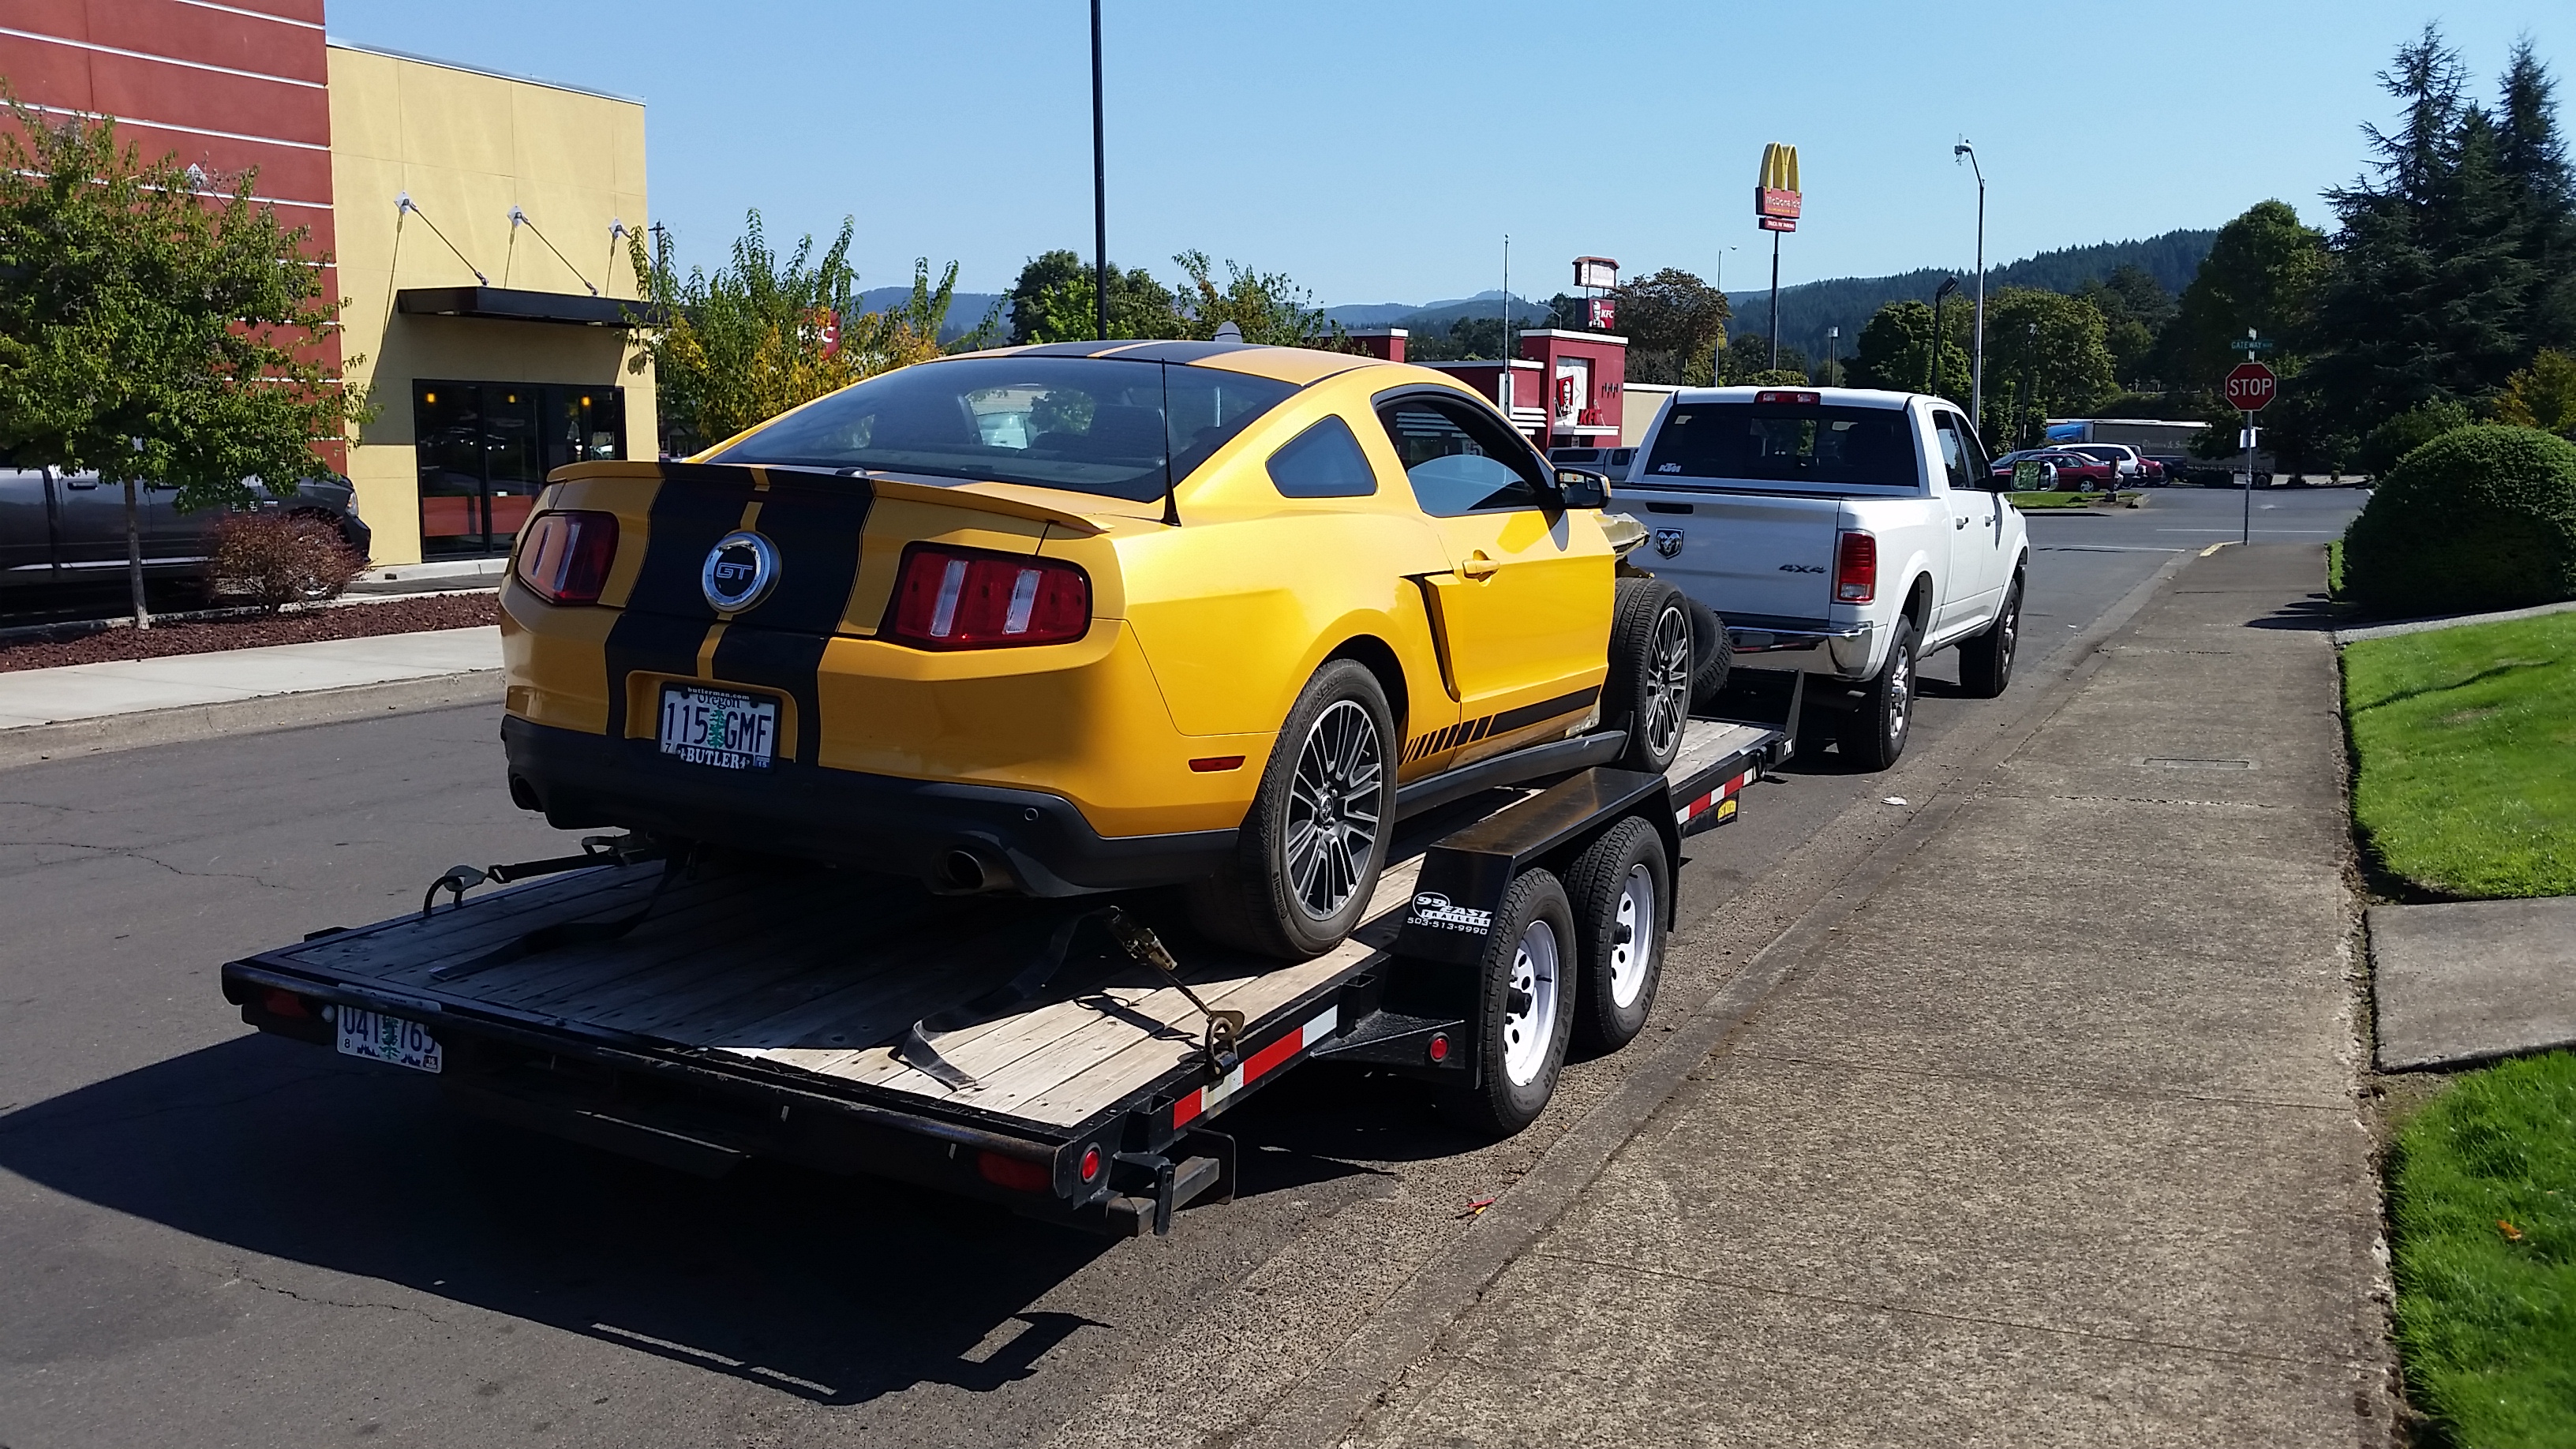
Car is almost too nice to part out......oh nevermind =)
That brings us up to today. I should be able to get the truck back from the frame shop in the next week and get started on the real project.
Having a tough time getting my hands on a crown vic front clip....recommendations?
Should be a fun build.
Sean
Ill get you guys caught up to speed....
Well,
The first truck went pretty well in the end....few things I would do different on it so a few months ago I started scheming about a plan for a second truck.
Things I want in this truck.
Driver Quality, not as pretty and not afraid to drive it....anywhere.
Manual Transmission...I hate not having a manual. Autos are great and strong but so boring.
Lower ride height. This one will be a couple inches lower and on smaller diameter wheels, either 18's or 19's and will run 275's or bigger on all four corners.
Pretty much sums it up.
So the search was on for a 2wd short bed, mind you they are getting harder to find around here so this was harder than the first time around. Looked for a few months and my dad actually found the truck, behind his mechanics house. Picked it up for $500.00, literally drug it with all 4 tires locked up solid onto a trailer.
Here is the Gem!!! Aint she purdy.


So the teardown began last Thursday or so.....when I discovered the little fender bender was a little worse than we thought. The front framehorns have a little sway in them so it slowed the teardown progress a fair bit.

This is about 3 hours into the build..

Giving the LSX truck a little on screen glory..

Got the old girl to actually roll put two less old tires on the front and made it mobile for the first time in who knows how long. Its on the trailer headed to the frame shop.

So here is where we get very different from my last build.....its going to be ford powered. I truly wanted to do another LS build, but this truck is going to be a road race truck with potential for some sticky tires and all of the reading I did on the LS3 was horrible. It needed a dry sump setup in order to survive any kind of real road course events. I thought about LSA but the costs were more than I wanted to be in up front. So I started searching for coyote stuff. I stumbled on to this car down in Grants Pass a few days ago, made a deal with the owner and picked it up for less than a crate motor...it only has 22k on it and I should be able to use the engine, transmission, rearend, pedal assembly and hopefully the brake Master Cylinder.

Car is almost too nice to part out......oh nevermind =)
That brings us up to today. I should be able to get the truck back from the frame shop in the next week and get started on the real project.
Having a tough time getting my hands on a crown vic front clip....recommendations?
Should be a fun build.
Sean
#2
10-16-2015, 08:04 AM
Logistics Pro
#3
10-16-2015, 08:46 AM
A few reasons really, cost, ease of the swap and I think the factory does a better job of building somethings than the aftermarket. These frontends are really well built and the end result is a truck that drives like a brand new car.
Although I only had a few hours to spend on the truck tonight, I had a hand and we got some work done. Did find a few things that I did not see upon my first inspection..needs an oil pan, it took a little hit when it went off roading. Also the driveline has a bend in it, but should be able to use the yokes and stuff to build a new driveline with so no real big deal.
She is a big girl....
Also scored on a frontend...2009 crown vic with all the hardware. My dad picked it up and I should see it sometime tomorrow. Stoked about that.
Although I only had a few hours to spend on the truck tonight, I had a hand and we got some work done. Did find a few things that I did not see upon my first inspection..needs an oil pan, it took a little hit when it went off roading. Also the driveline has a bend in it, but should be able to use the yokes and stuff to build a new driveline with so no real big deal.


She is a big girl....


Also scored on a frontend...2009 crown vic with all the hardware. My dad picked it up and I should see it sometime tomorrow. Stoked about that.
#4
10-16-2015, 08:48 AM
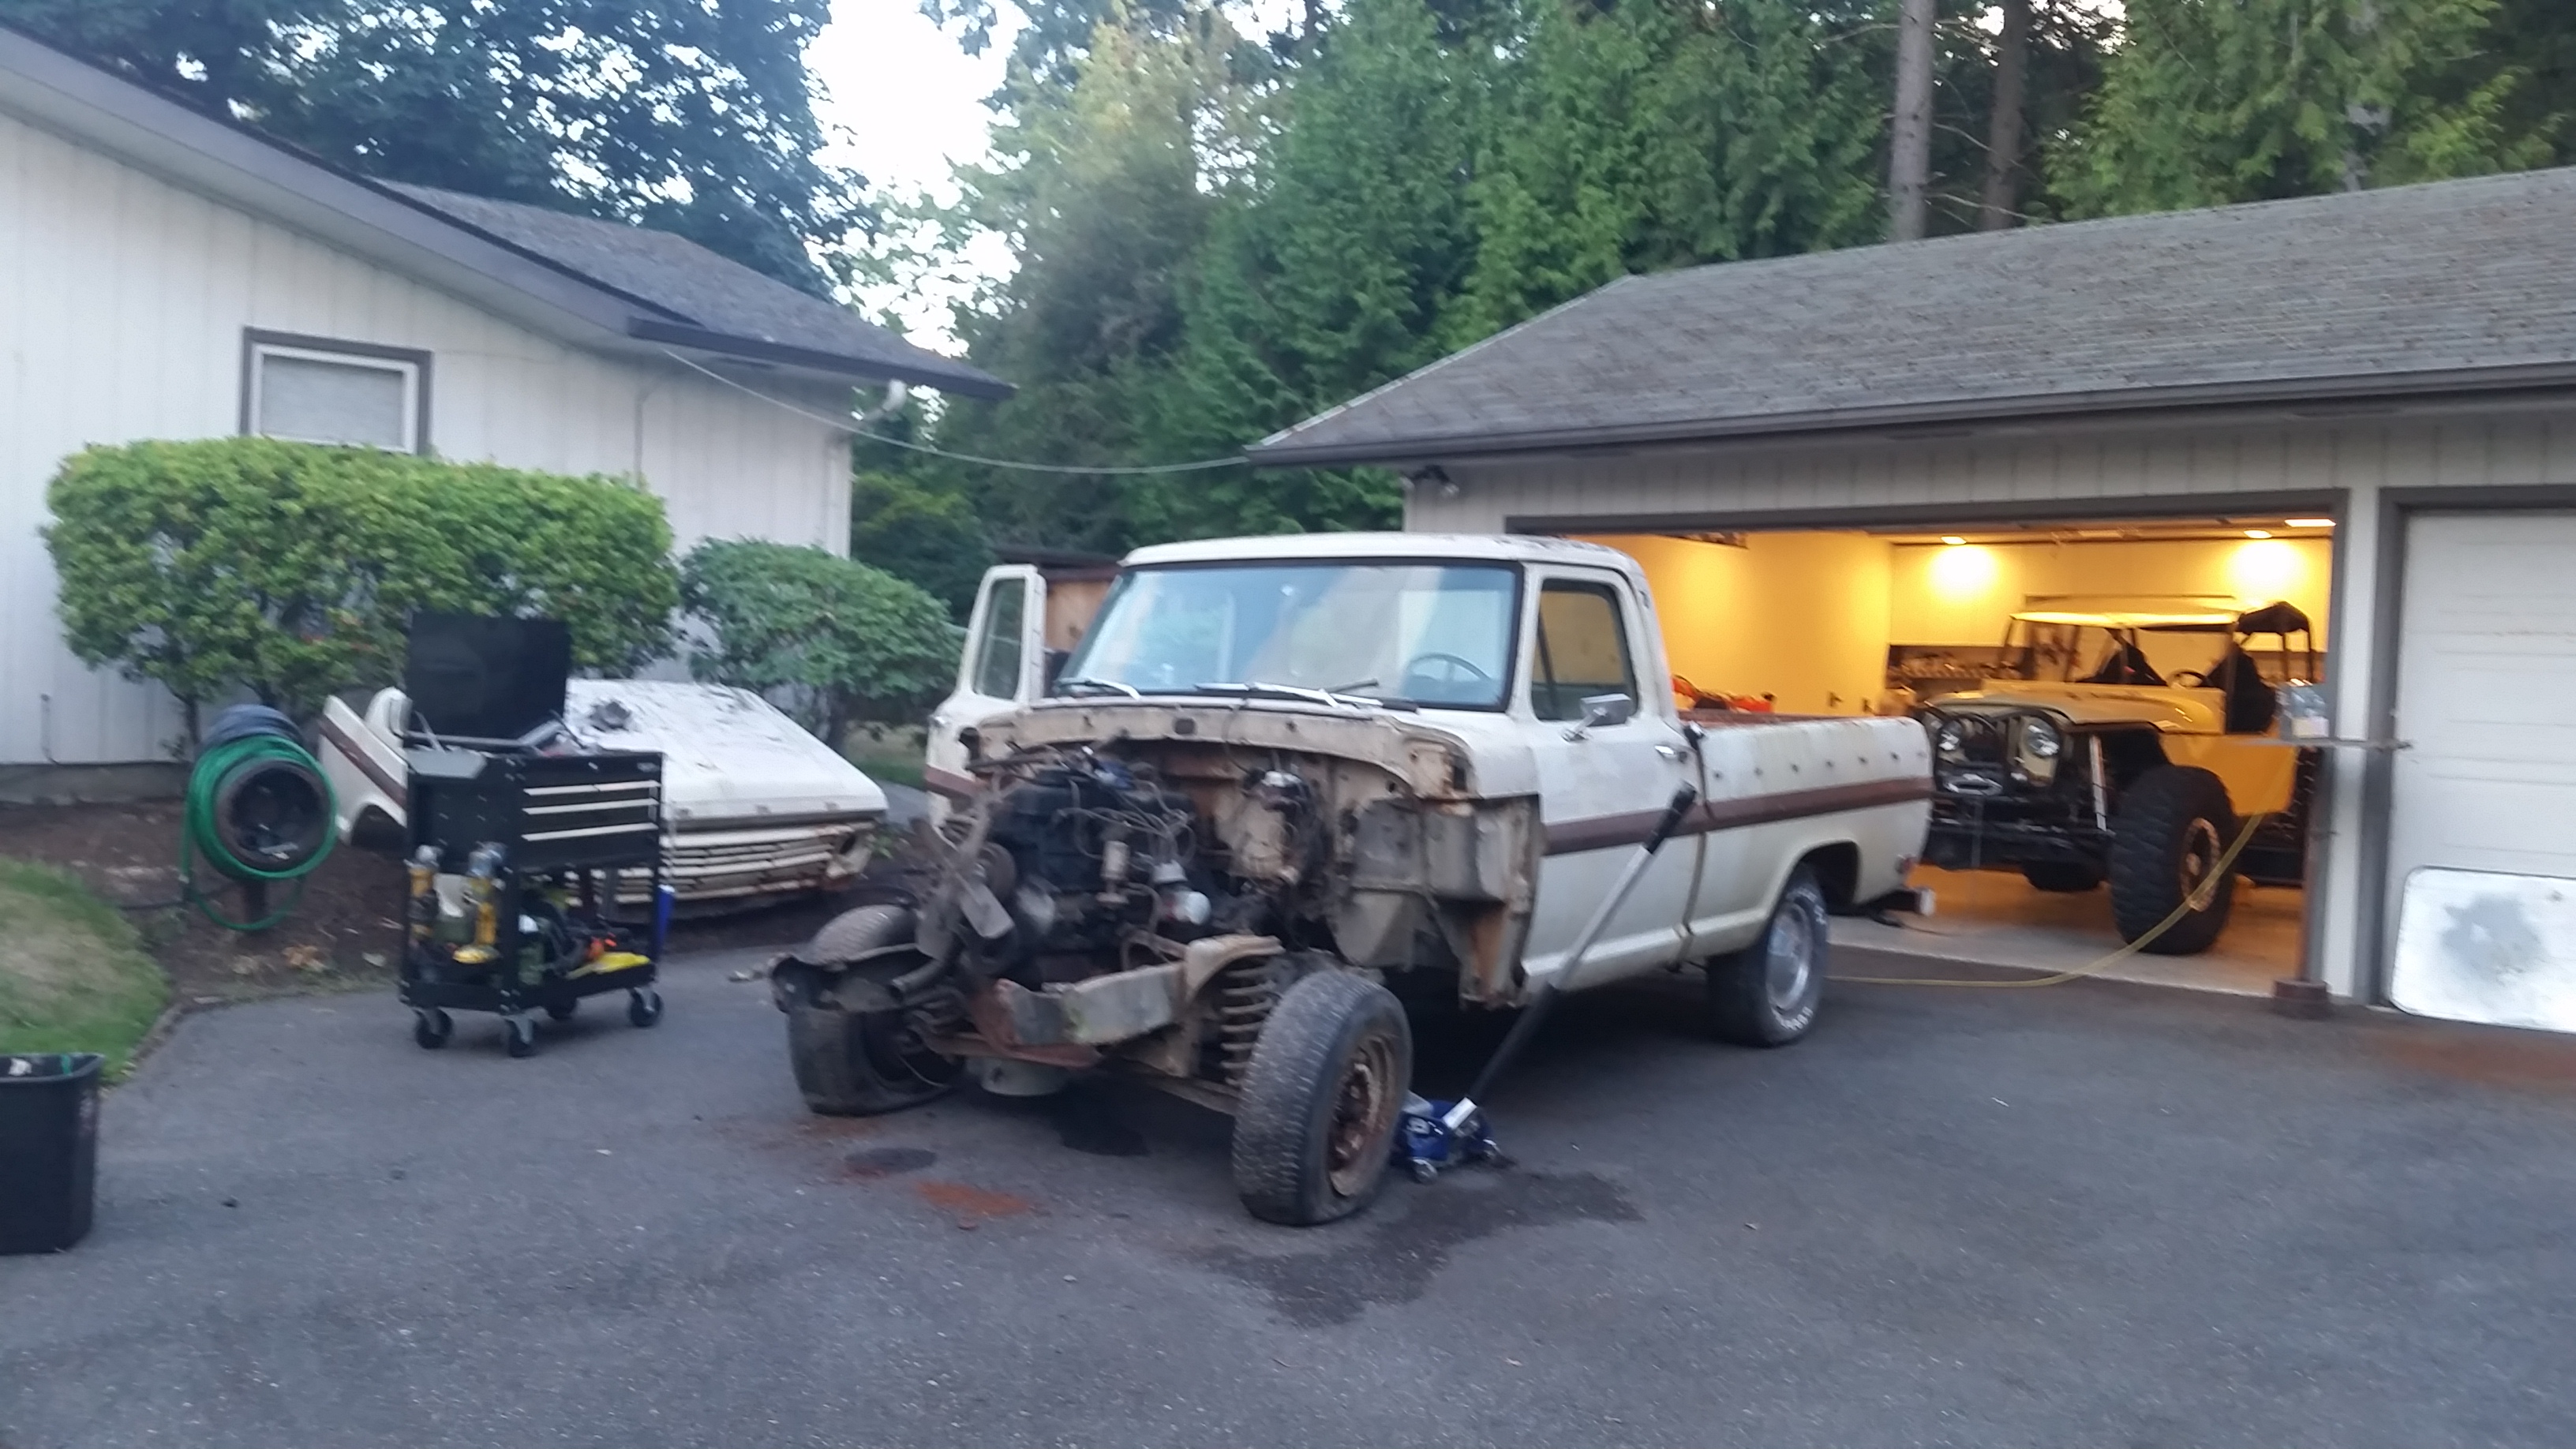
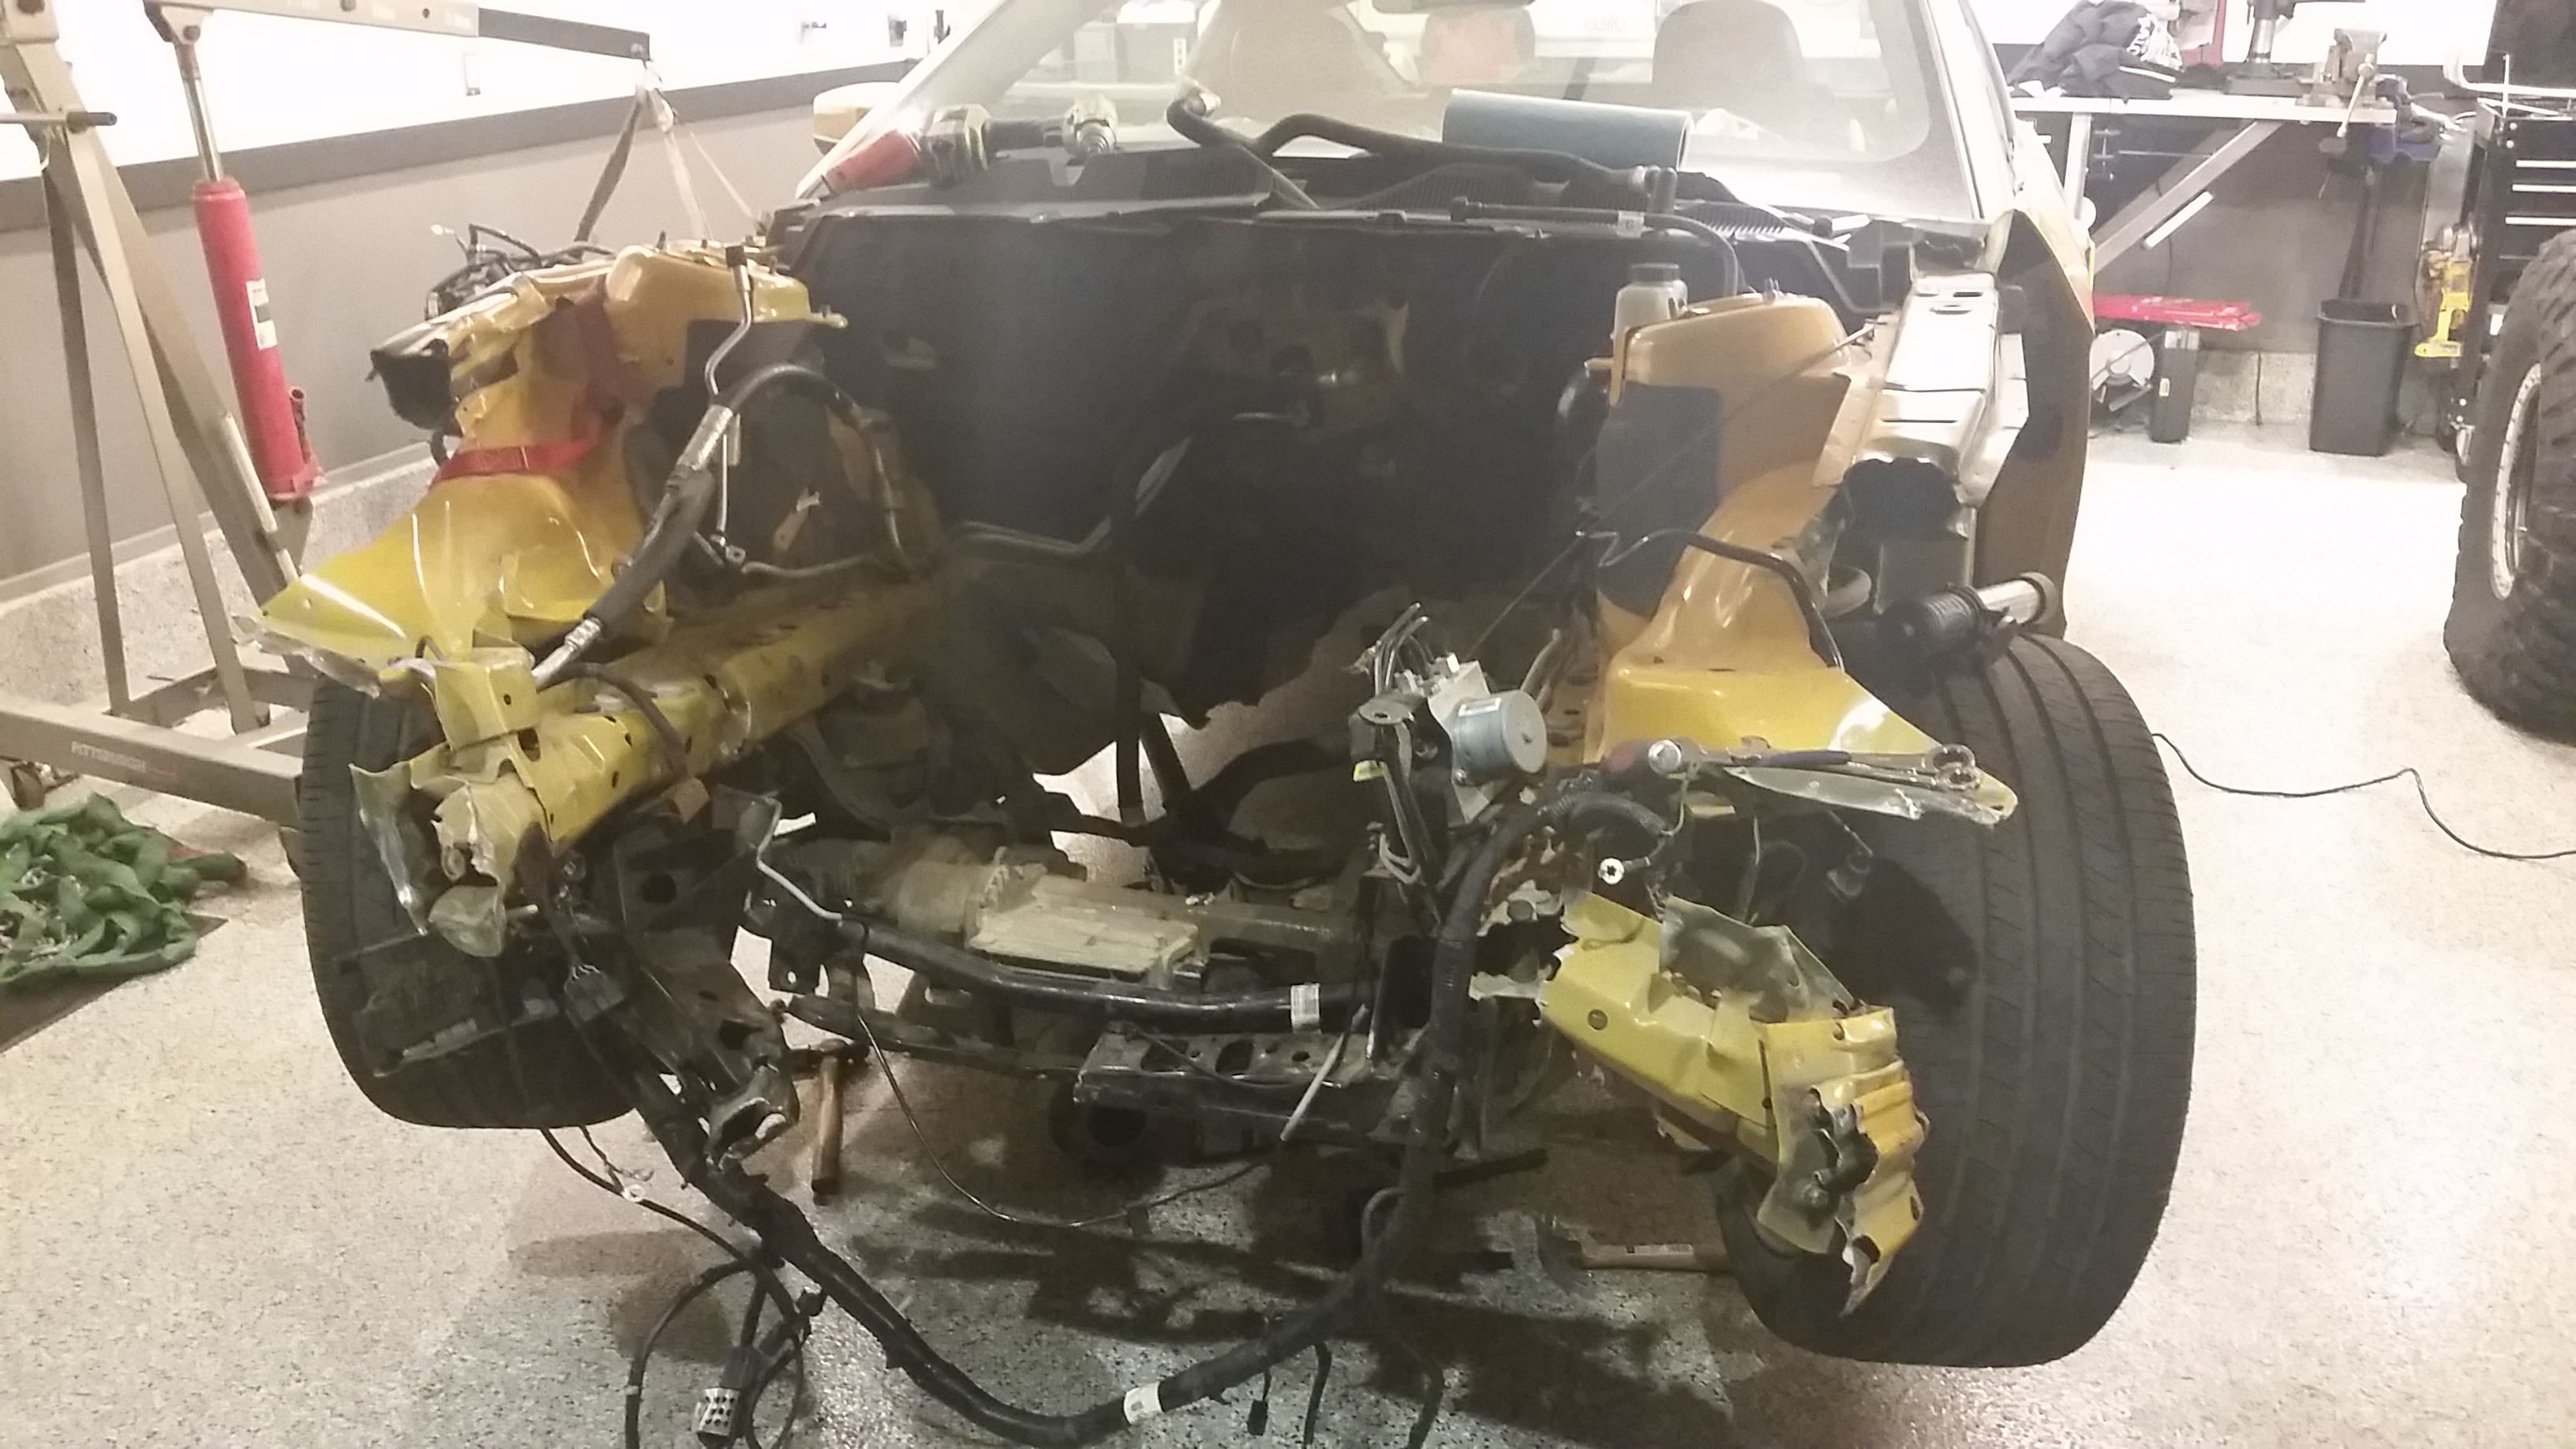
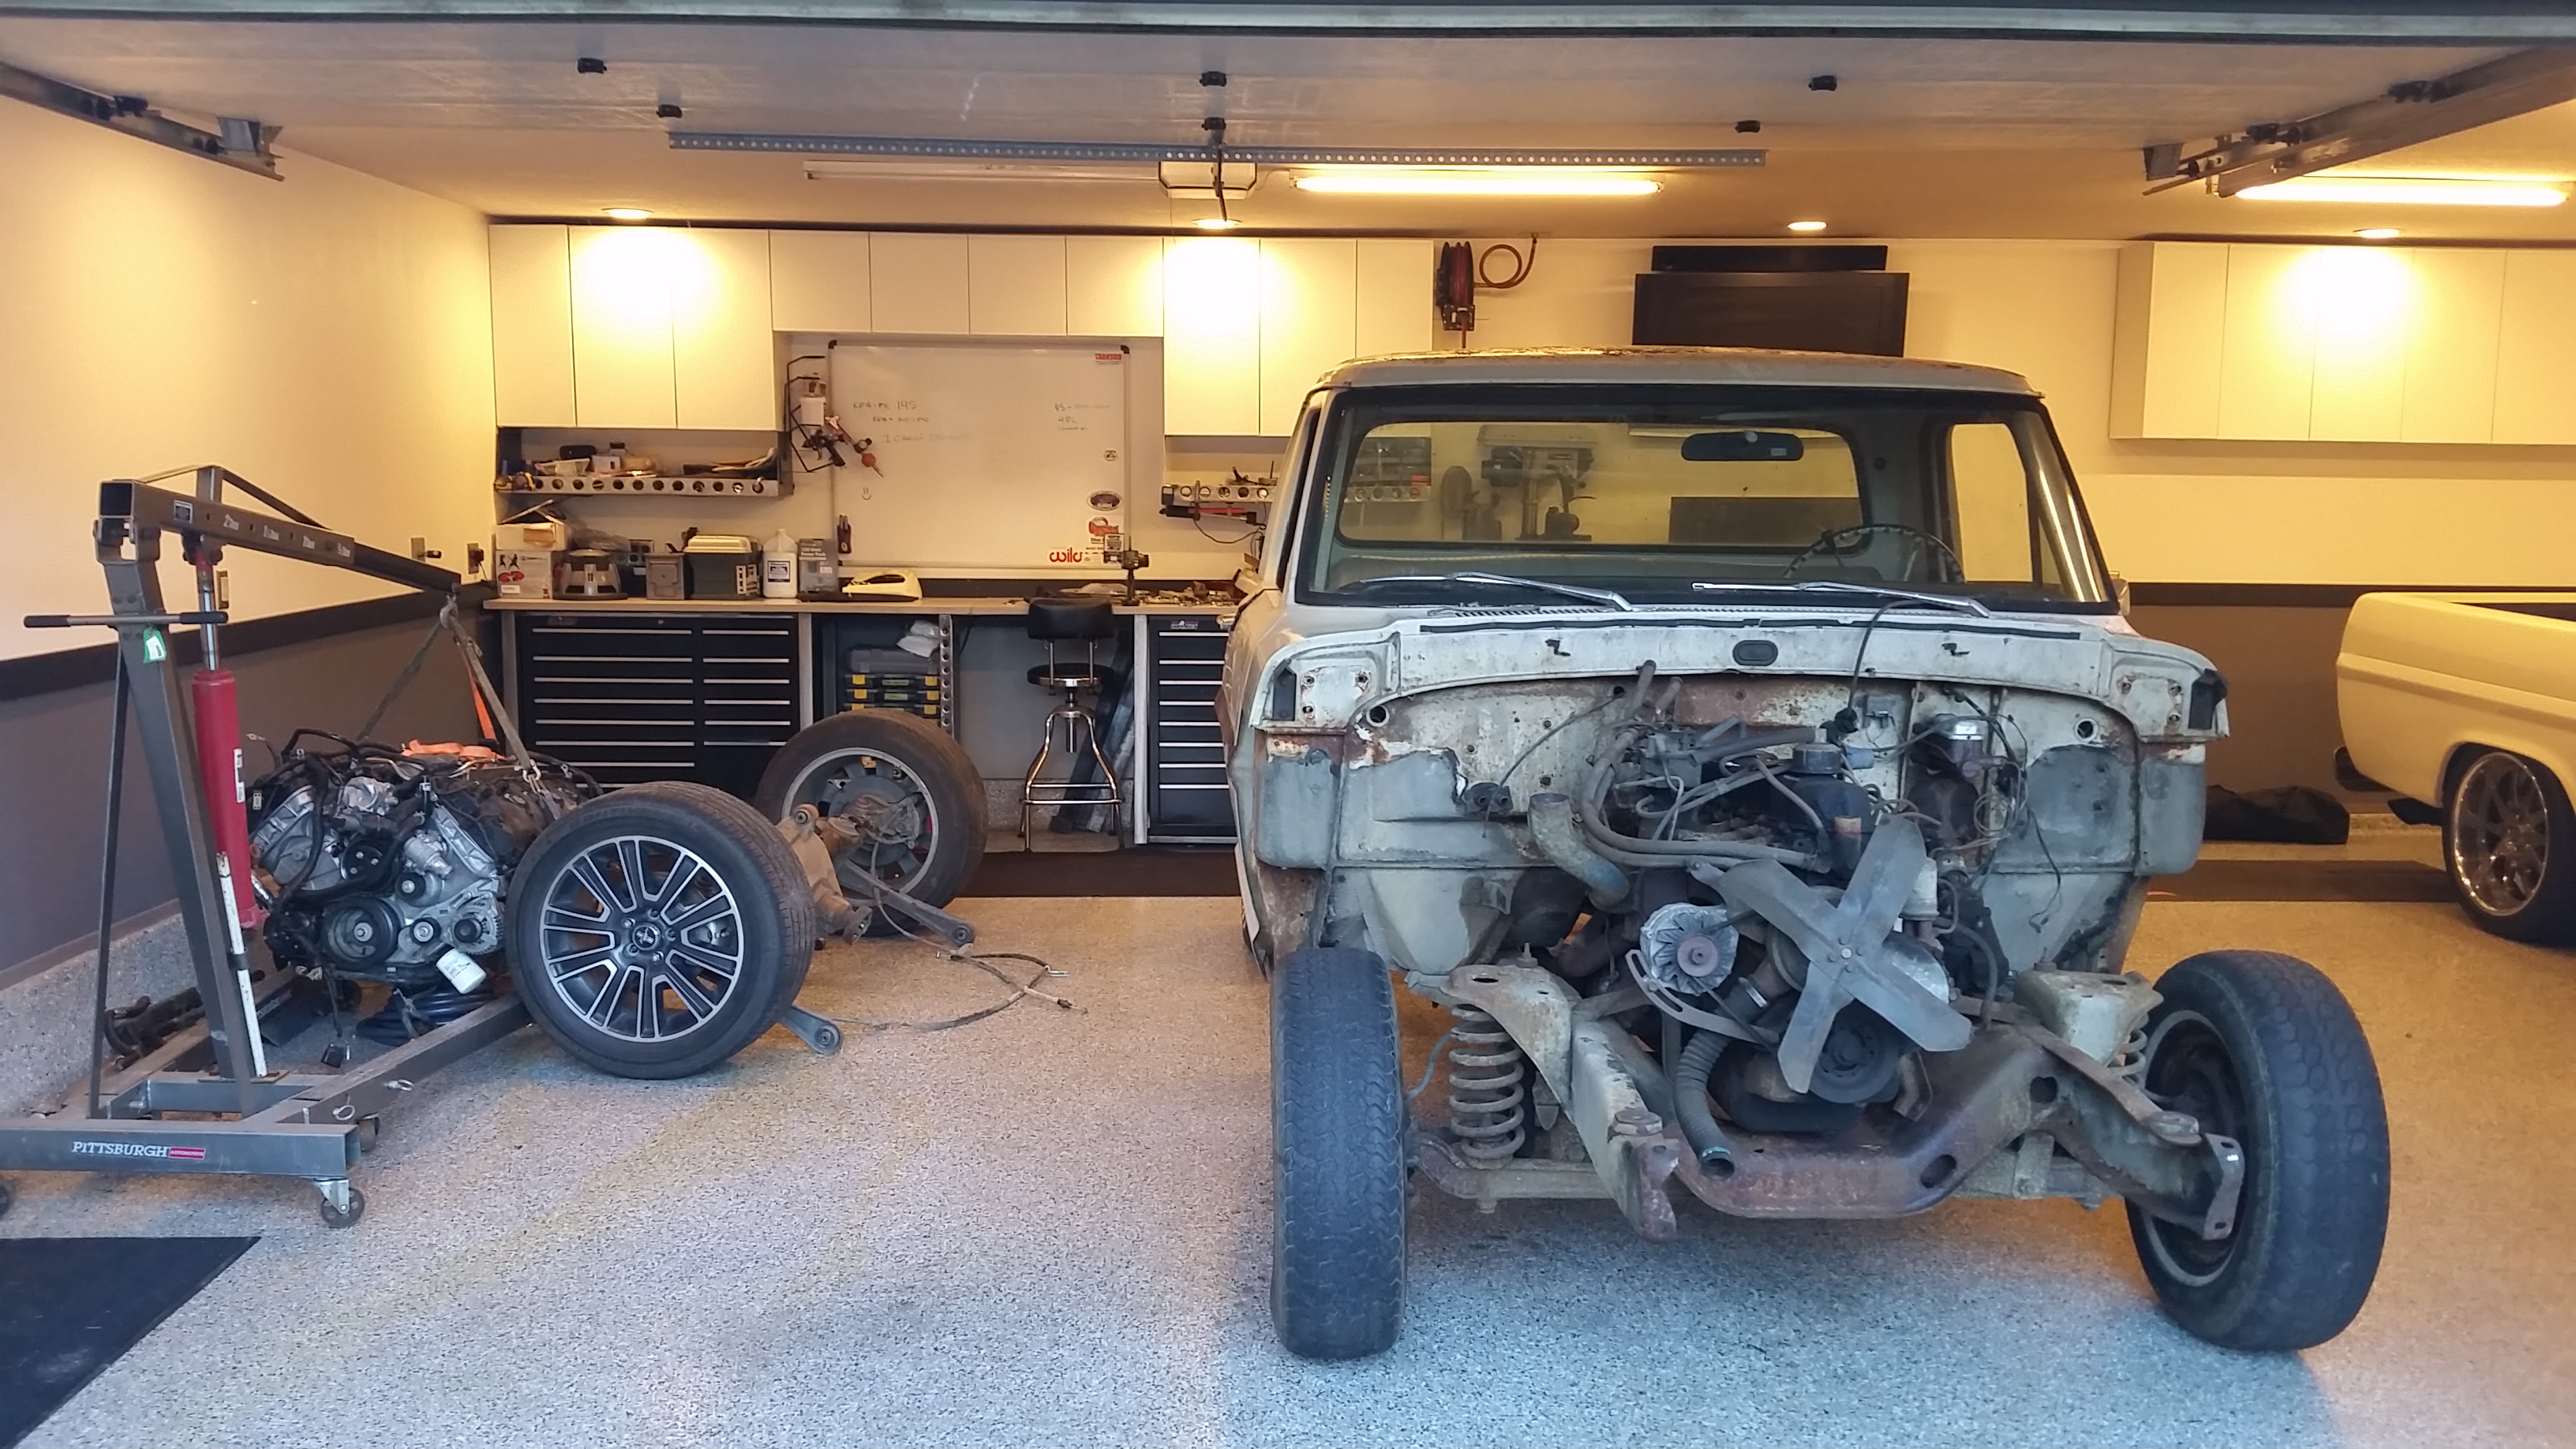
So the wife is still over in Europe and my spare time has been much less than normal as I am taking care of the dog and doing chores a bit more. I did manage to get out in the garage for a couple of hours today and a little bit this week. Managed to get the entire pedal assembly, clutch master cylinder, booster and master cylinder out of the car. Gas pedal removed as well as some cool steering column parts that I think Ill be able to use.
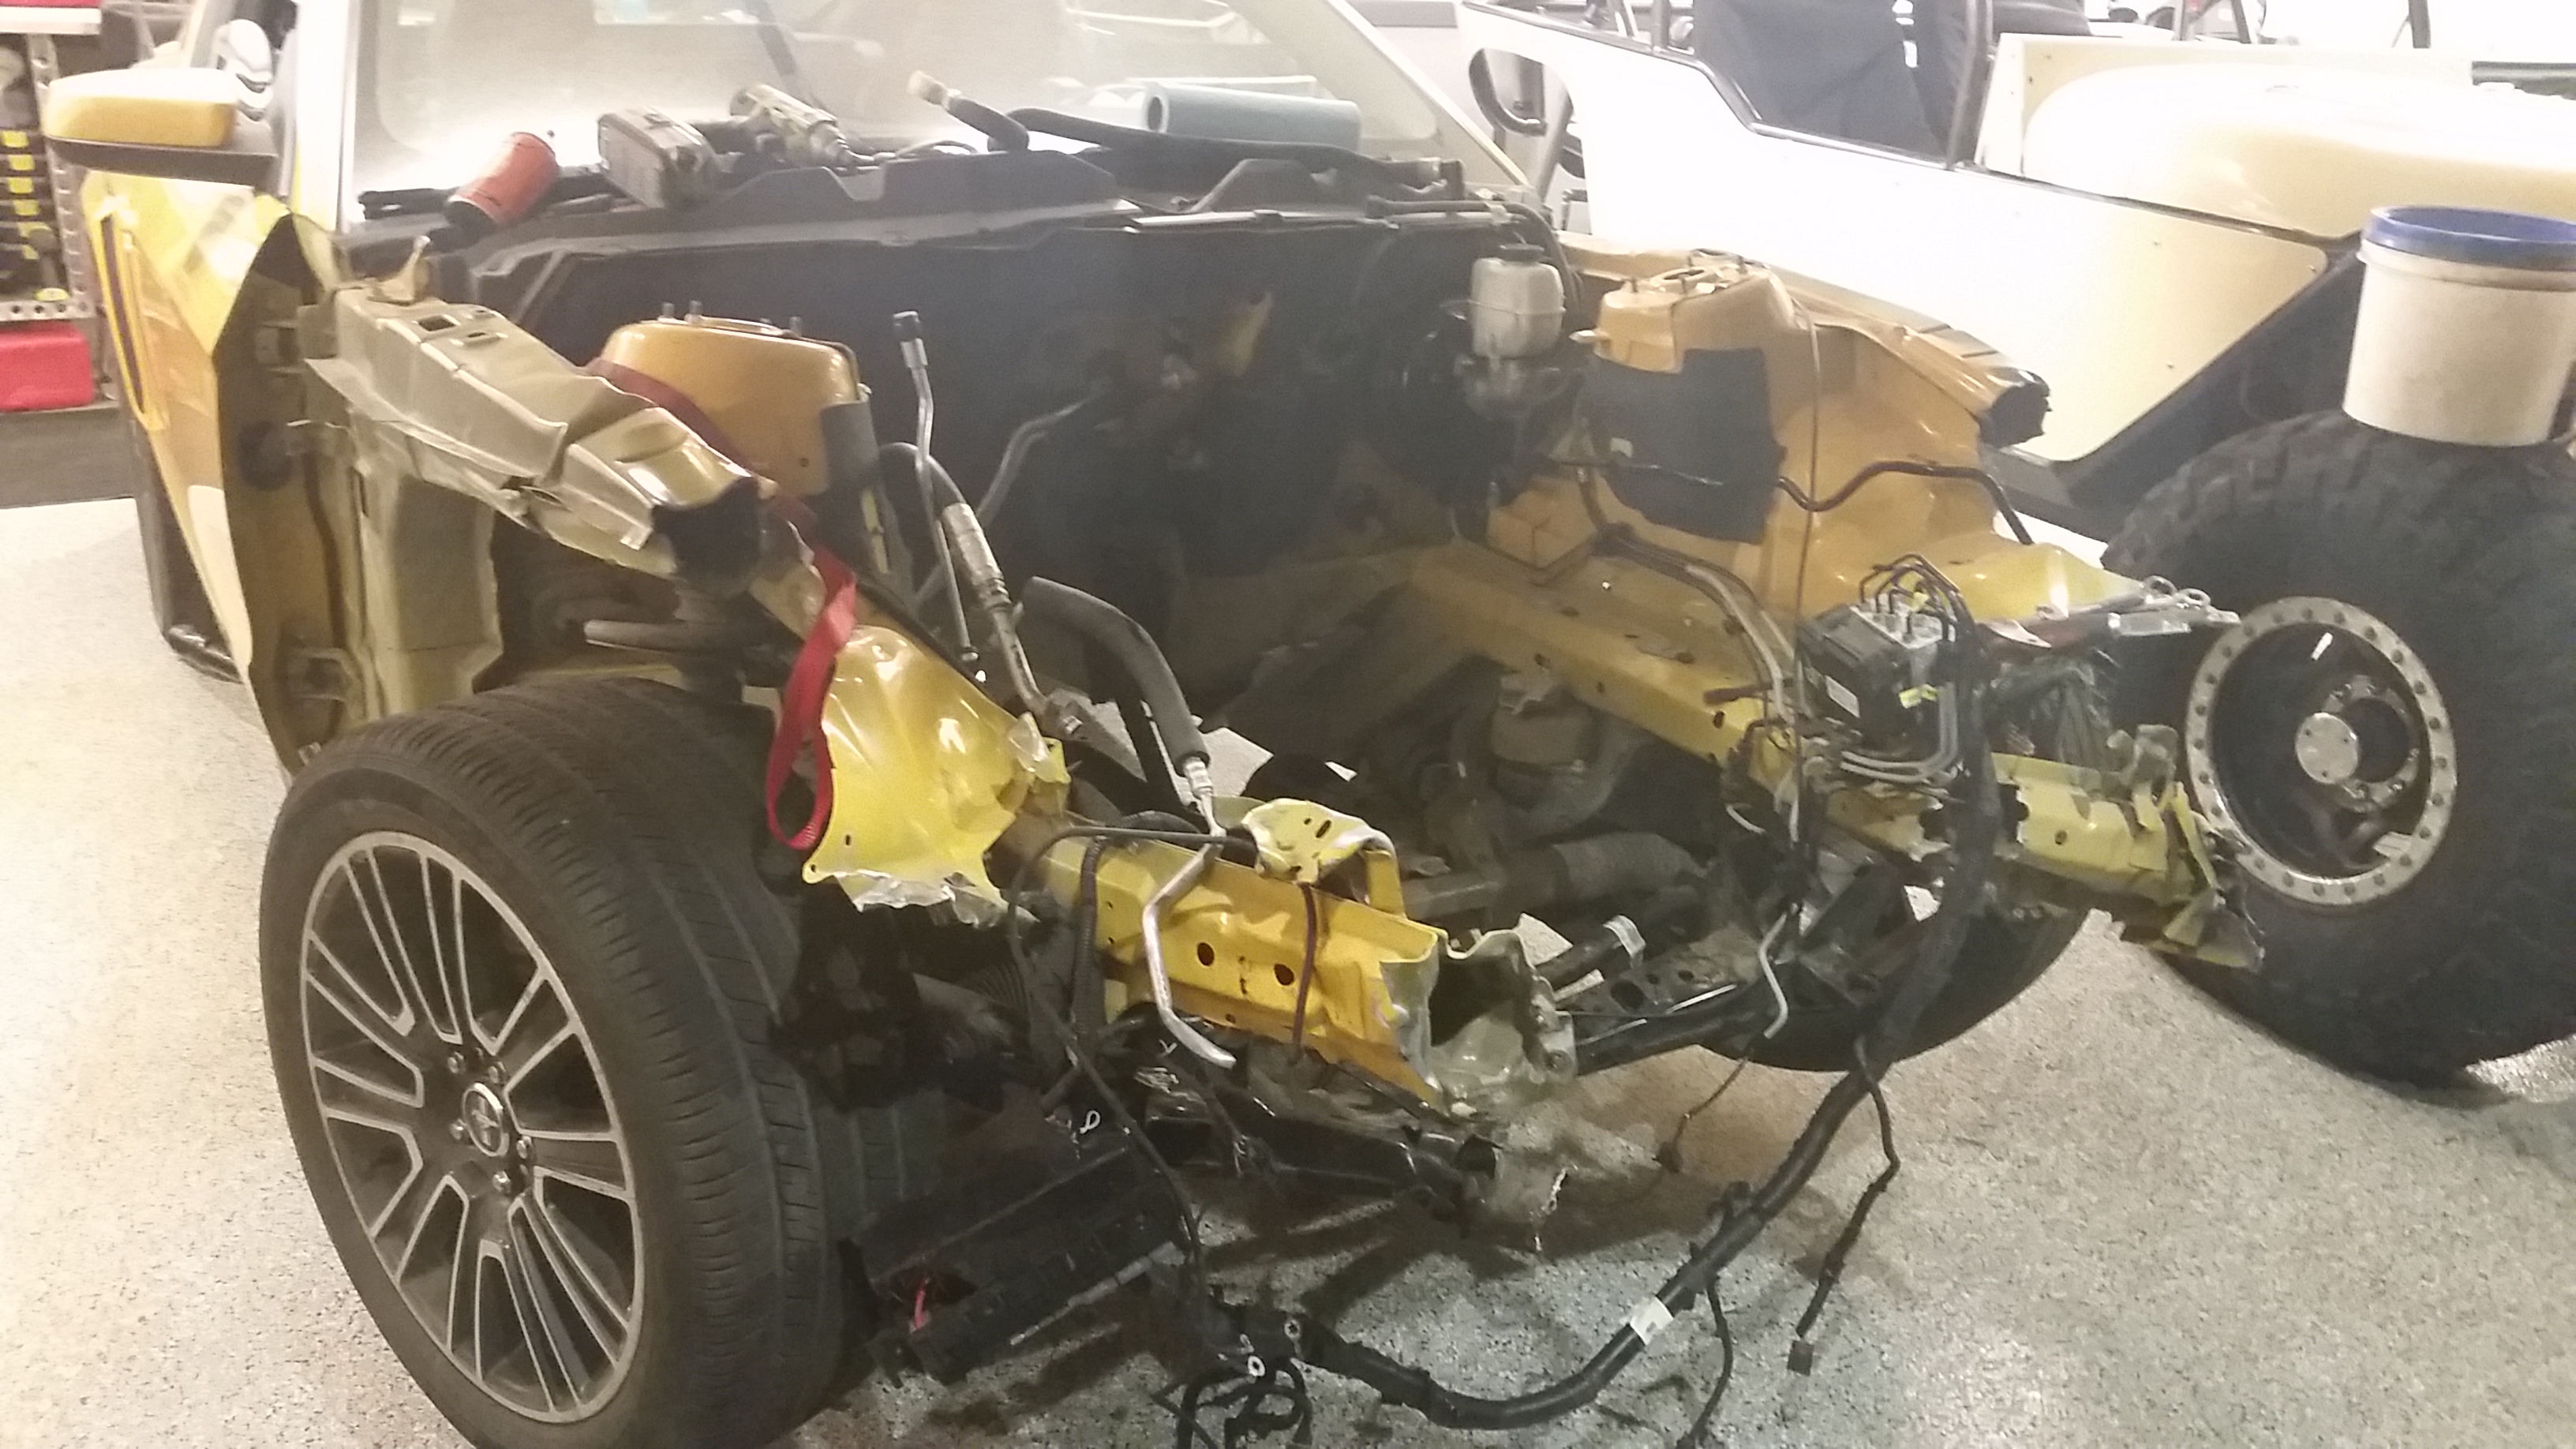
Got the car outside today up on jackstands and pulled the rest of the exhaust, driveline and rearend out of it.....It was a little more work than I anticipated especially by myself.
I have a few little parts and pieces left to grab like the emergency brake handle assembly and boot and a few hoses and stuff but other than that its pretty stripped down....now to figure out what to do with the rest of the damn thing.
Sure my neighbors love me...
I swear there is something missing here =)
Rearend out and ready to go serve a much better life.
I am torn with the rear suspension. I seriously considered using the stock mustang rear suspension and building mounts on the truck but I am not super keen on the single upper link that is super super short. Everything else actually looks pretty descent, maybe Ill build a new upper link setup and keep the lowers.
Should be making some serious progress in the next few weeks. Work owes me some serious time off.
Sean
Got the car outside today up on jackstands and pulled the rest of the exhaust, driveline and rearend out of it.....It was a little more work than I anticipated especially by myself.
I have a few little parts and pieces left to grab like the emergency brake handle assembly and boot and a few hoses and stuff but other than that its pretty stripped down....now to figure out what to do with the rest of the damn thing.
Sure my neighbors love me...

I swear there is something missing here =)

Rearend out and ready to go serve a much better life.

I am torn with the rear suspension. I seriously considered using the stock mustang rear suspension and building mounts on the truck but I am not super keen on the single upper link that is super super short. Everything else actually looks pretty descent, maybe Ill build a new upper link setup and keep the lowers.
Should be making some serious progress in the next few weeks. Work owes me some serious time off.
Sean
#5
10-16-2015, 08:48 AM
Well not a lot of progress. It is amazing how much time it takes to clean up after myself....
Moved the buggy from the shop up to the house garage and tucked it away for winter.
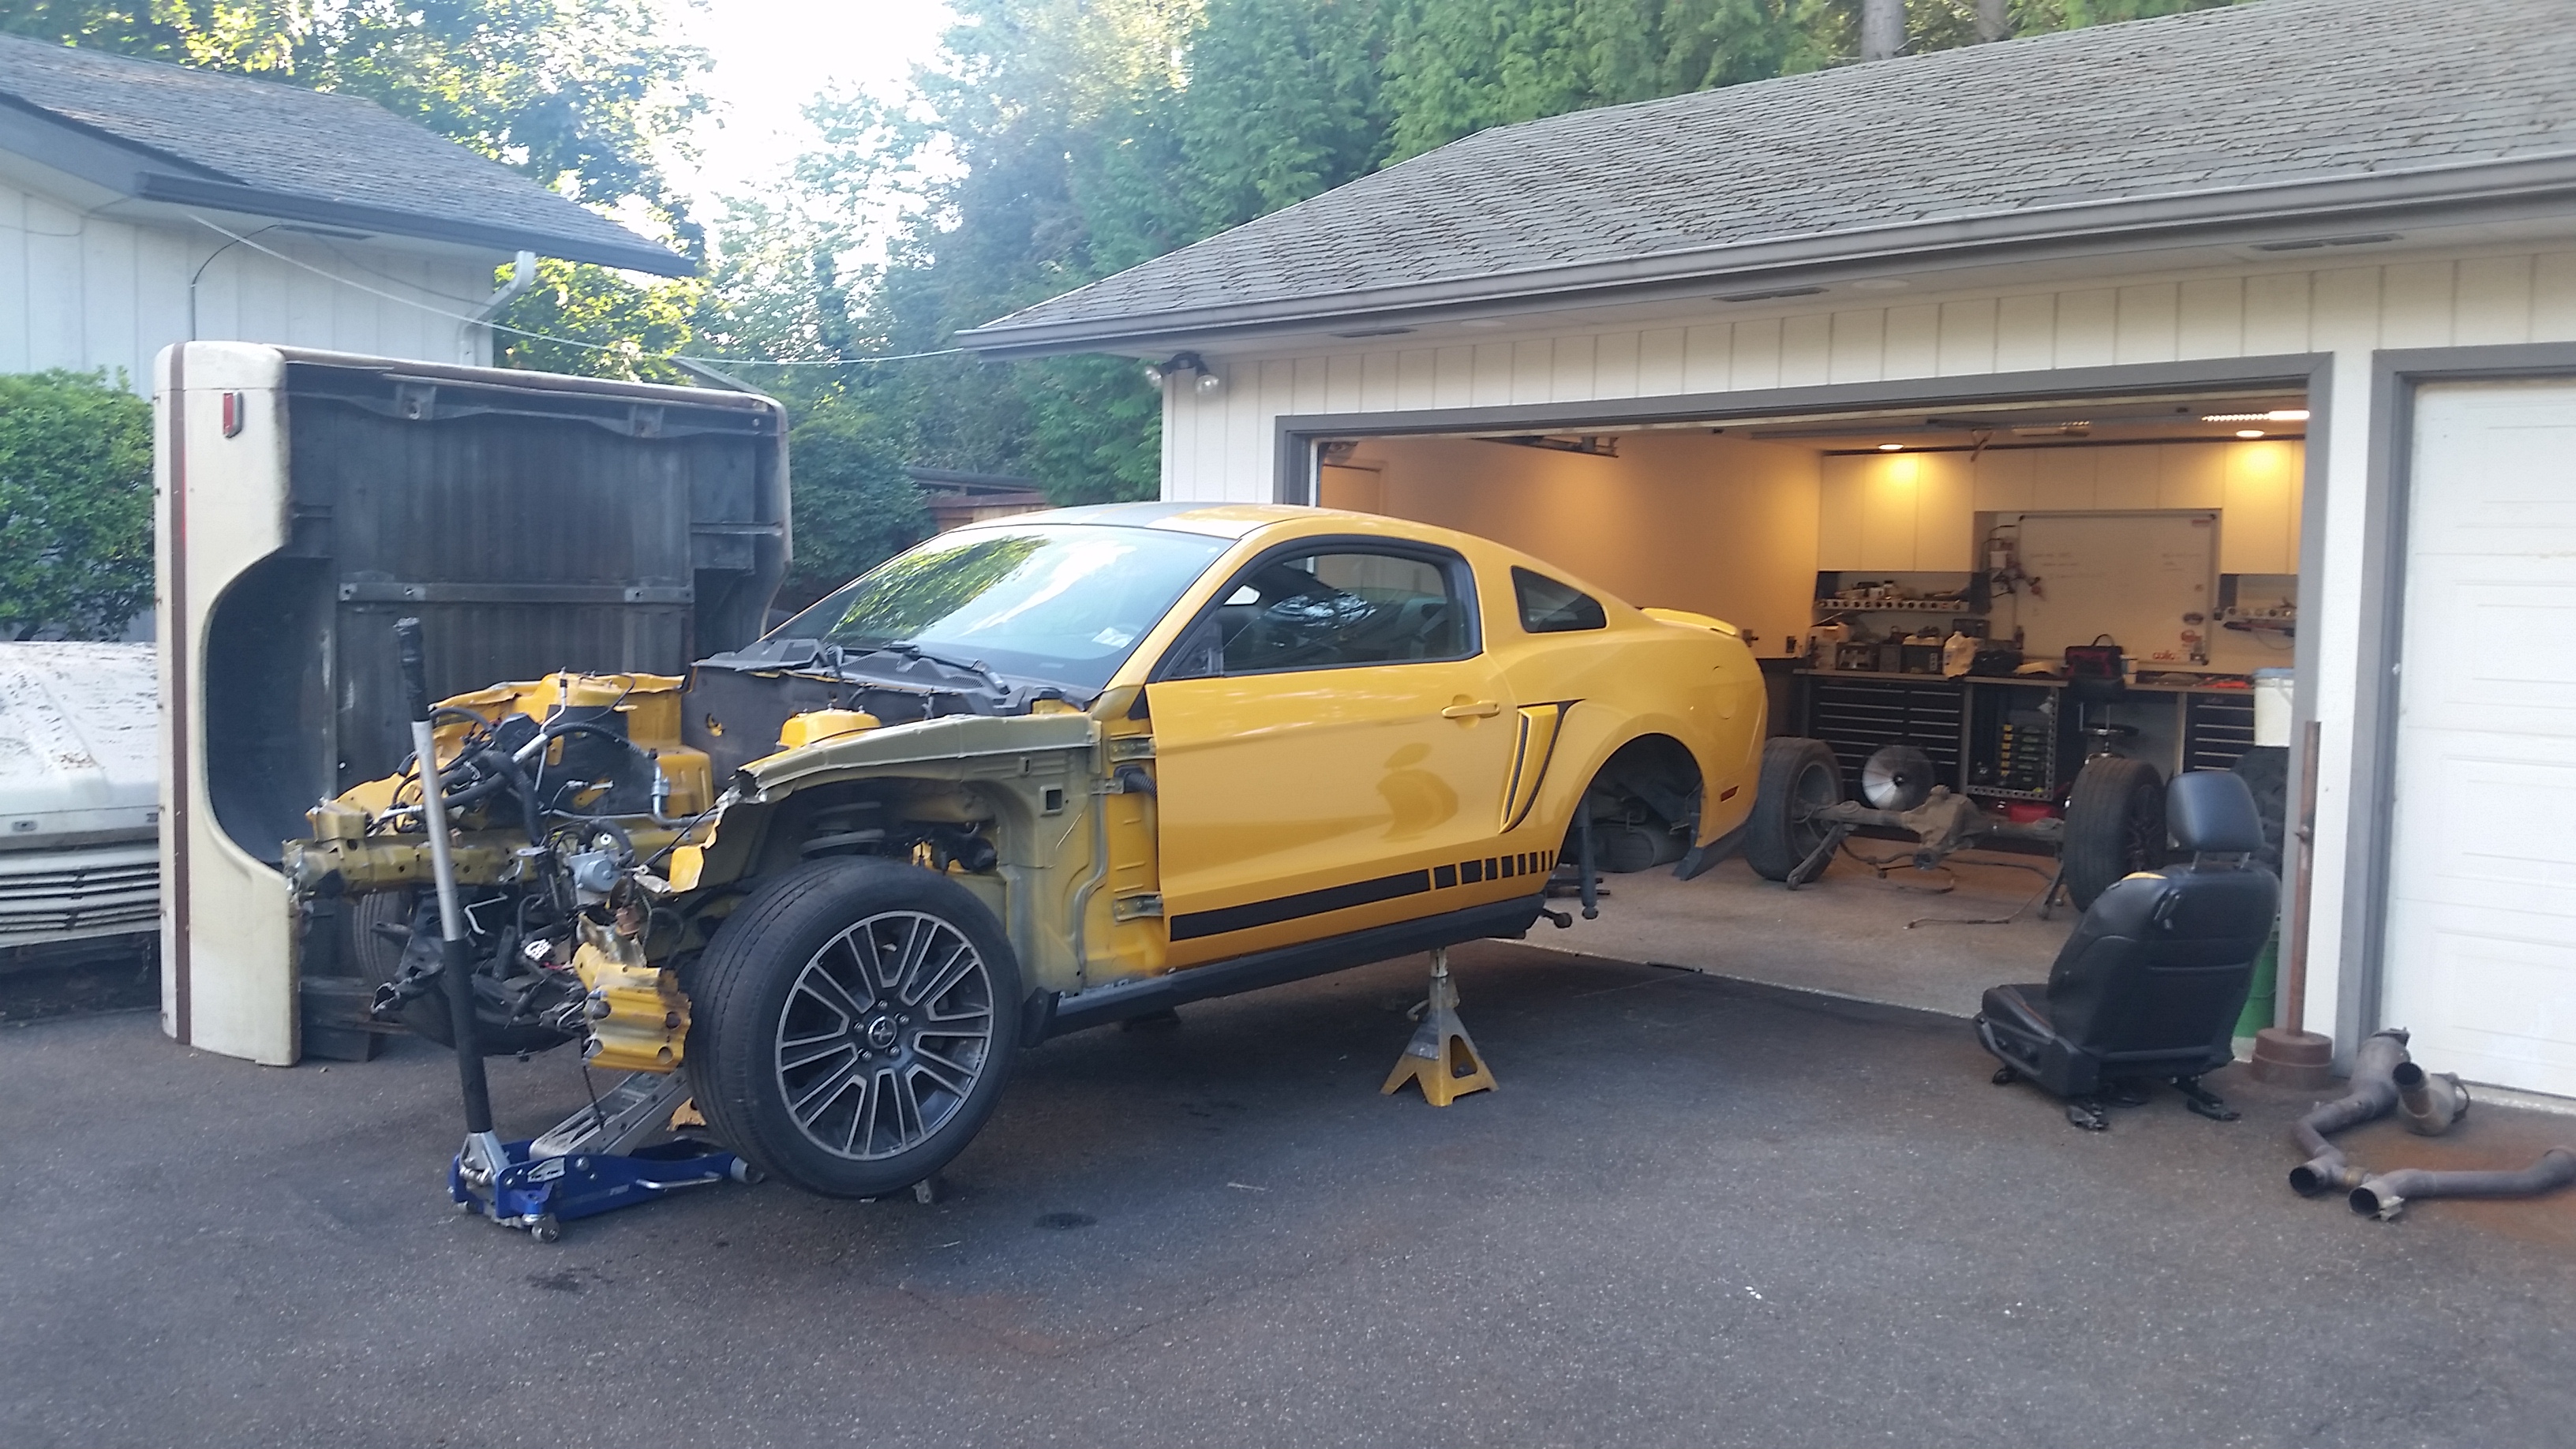
Strapped down the Mustang onto the trailer and got the trailer moved to the other side of the house tucked away until it sells. Cut up the failed attempt at a car dolly and loaded it up with all my spare wood and **** for a trip to the dump, put all the stuff from the stang in storage and cleaned up the garage finally.
I finally got the truck actually in the garage for the first time tonight. My plan is to roll it out tomorrow, pressure wash it and pull the motor and tranny out.
Anyways, sat in it and made vroom vroom noises for a few minutes tonight.
Should have some more progress soon, I have lots of parts to get to work on.
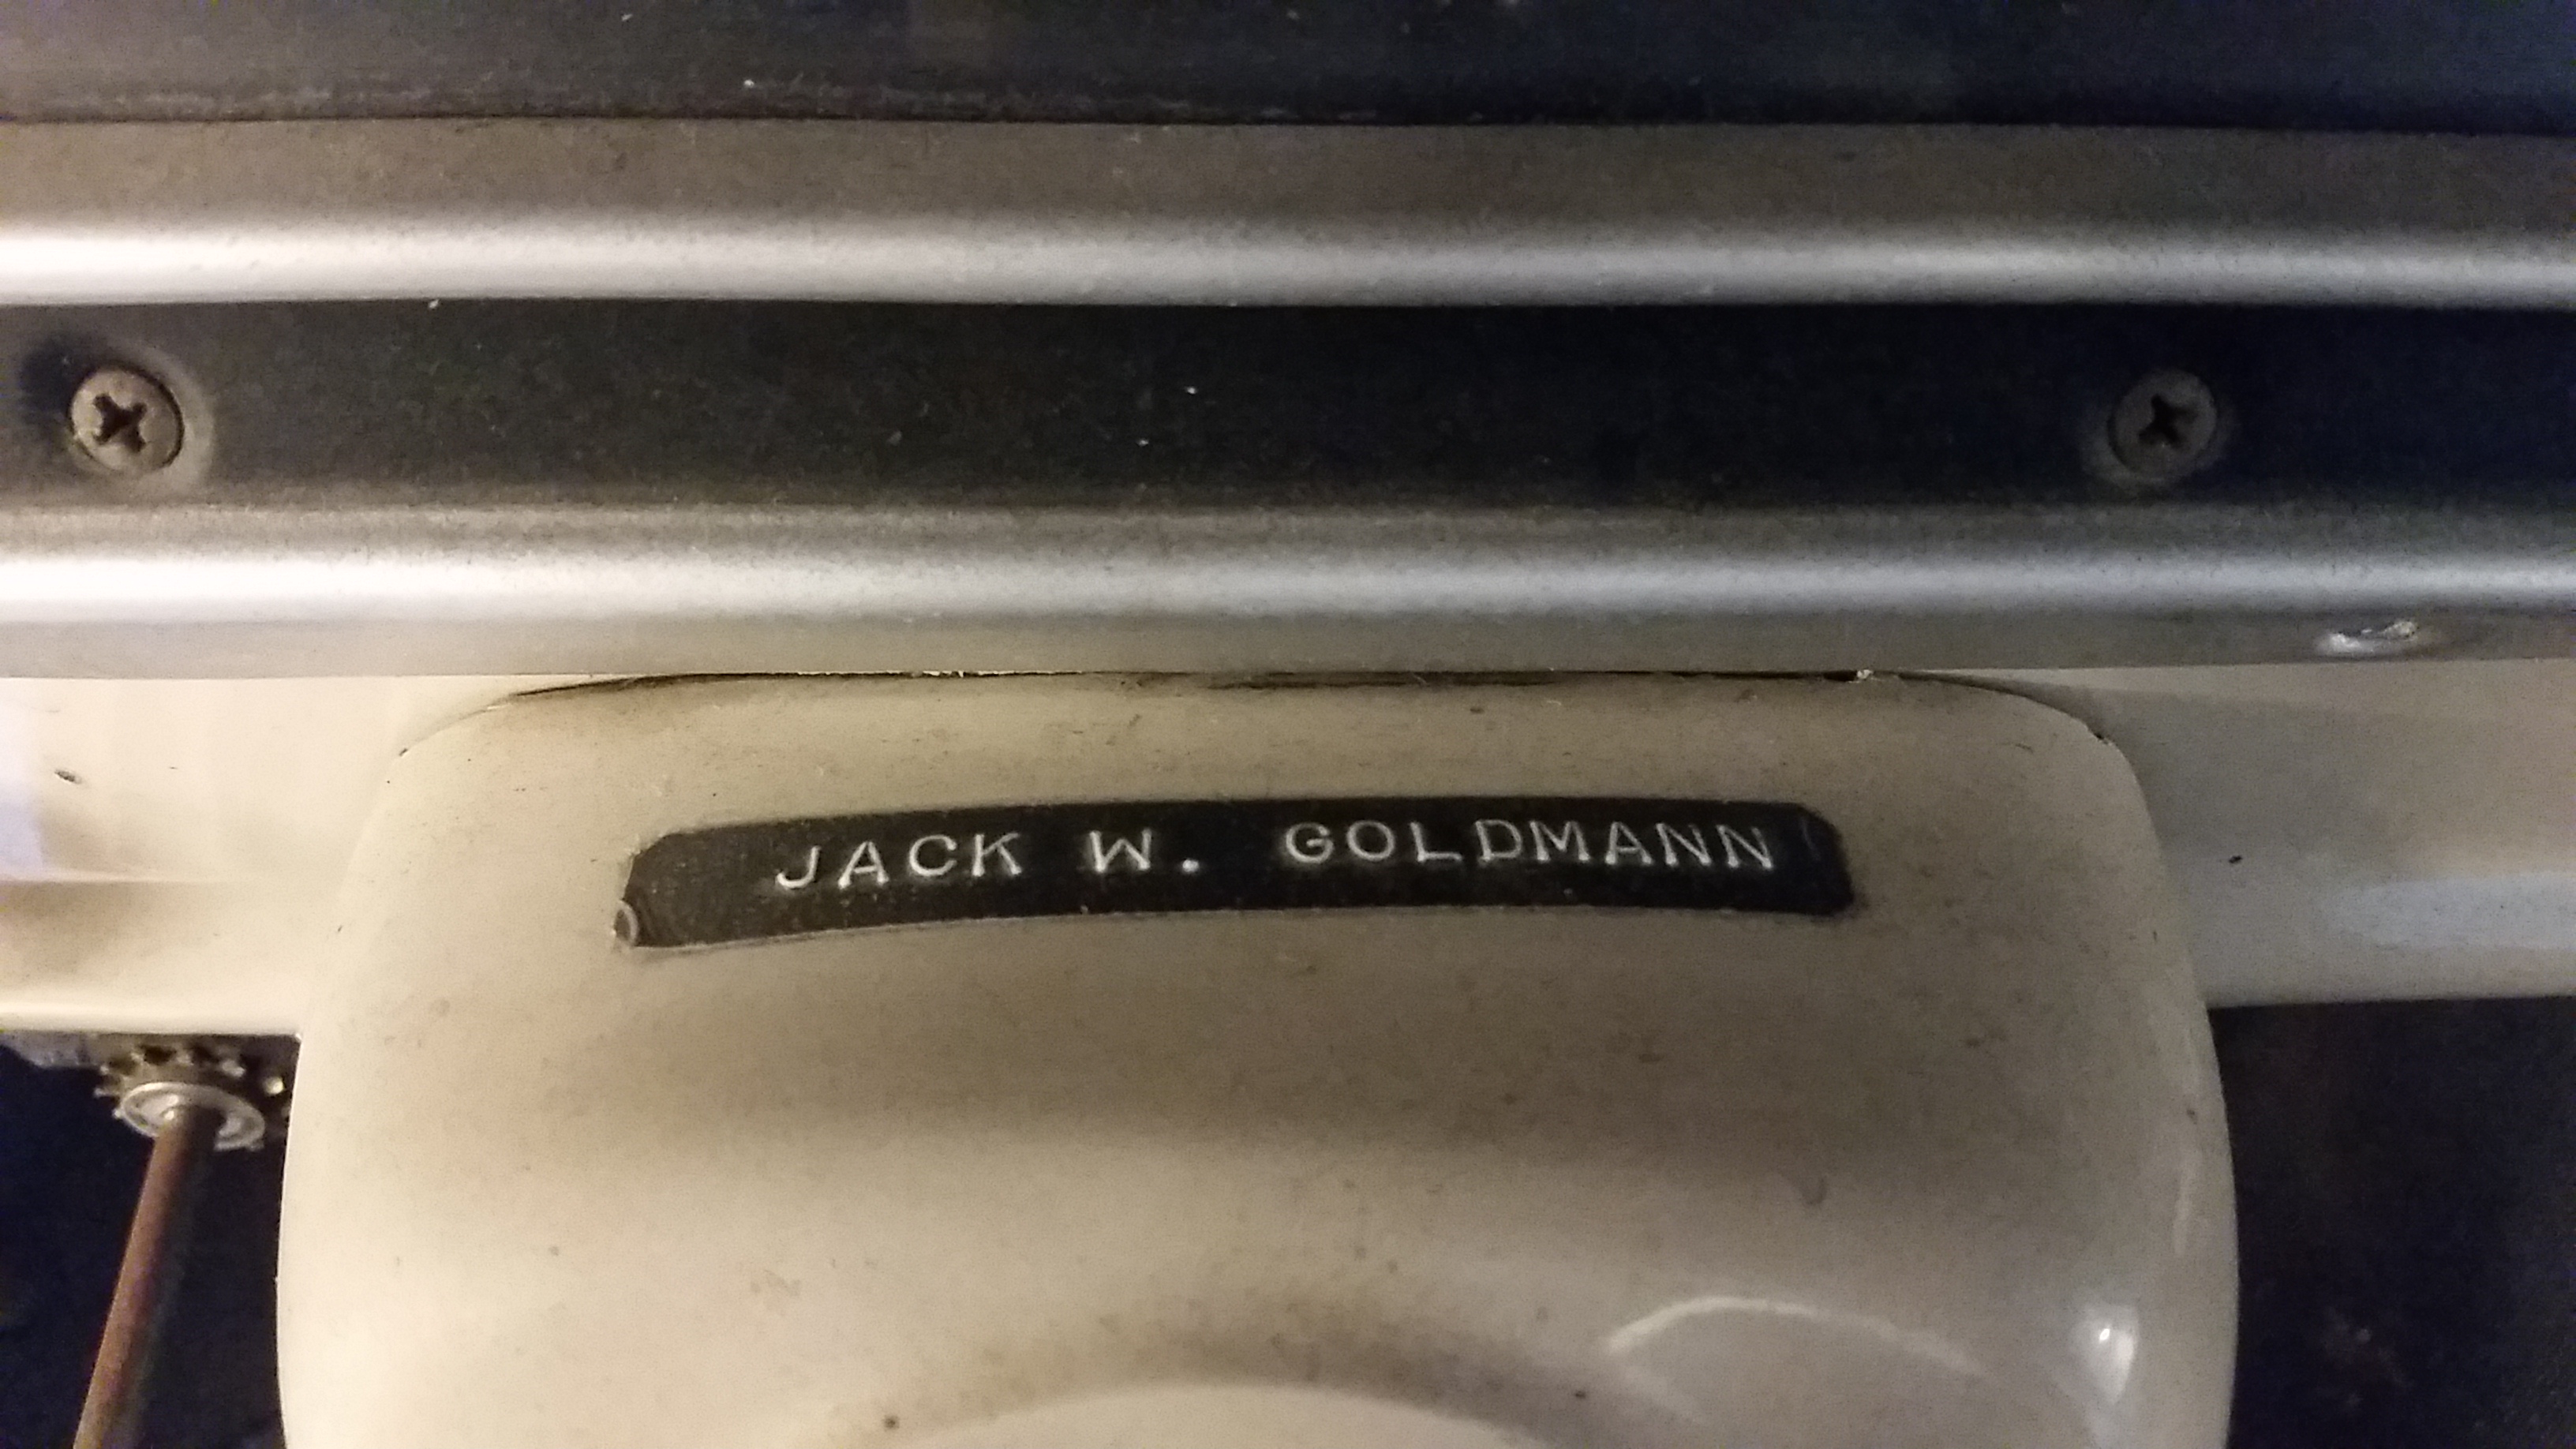
Kind of cool digging through the history of the truck and finding stuff like this, I am not planning on taking this sticker off.
Moved the buggy from the shop up to the house garage and tucked it away for winter.
Strapped down the Mustang onto the trailer and got the trailer moved to the other side of the house tucked away until it sells. Cut up the failed attempt at a car dolly and loaded it up with all my spare wood and **** for a trip to the dump, put all the stuff from the stang in storage and cleaned up the garage finally.
I finally got the truck actually in the garage for the first time tonight. My plan is to roll it out tomorrow, pressure wash it and pull the motor and tranny out.
Anyways, sat in it and made vroom vroom noises for a few minutes tonight.
Should have some more progress soon, I have lots of parts to get to work on.


Kind of cool digging through the history of the truck and finding stuff like this, I am not planning on taking this sticker off.

#6
10-16-2015, 08:49 AM
Pretty solid day in the shop.
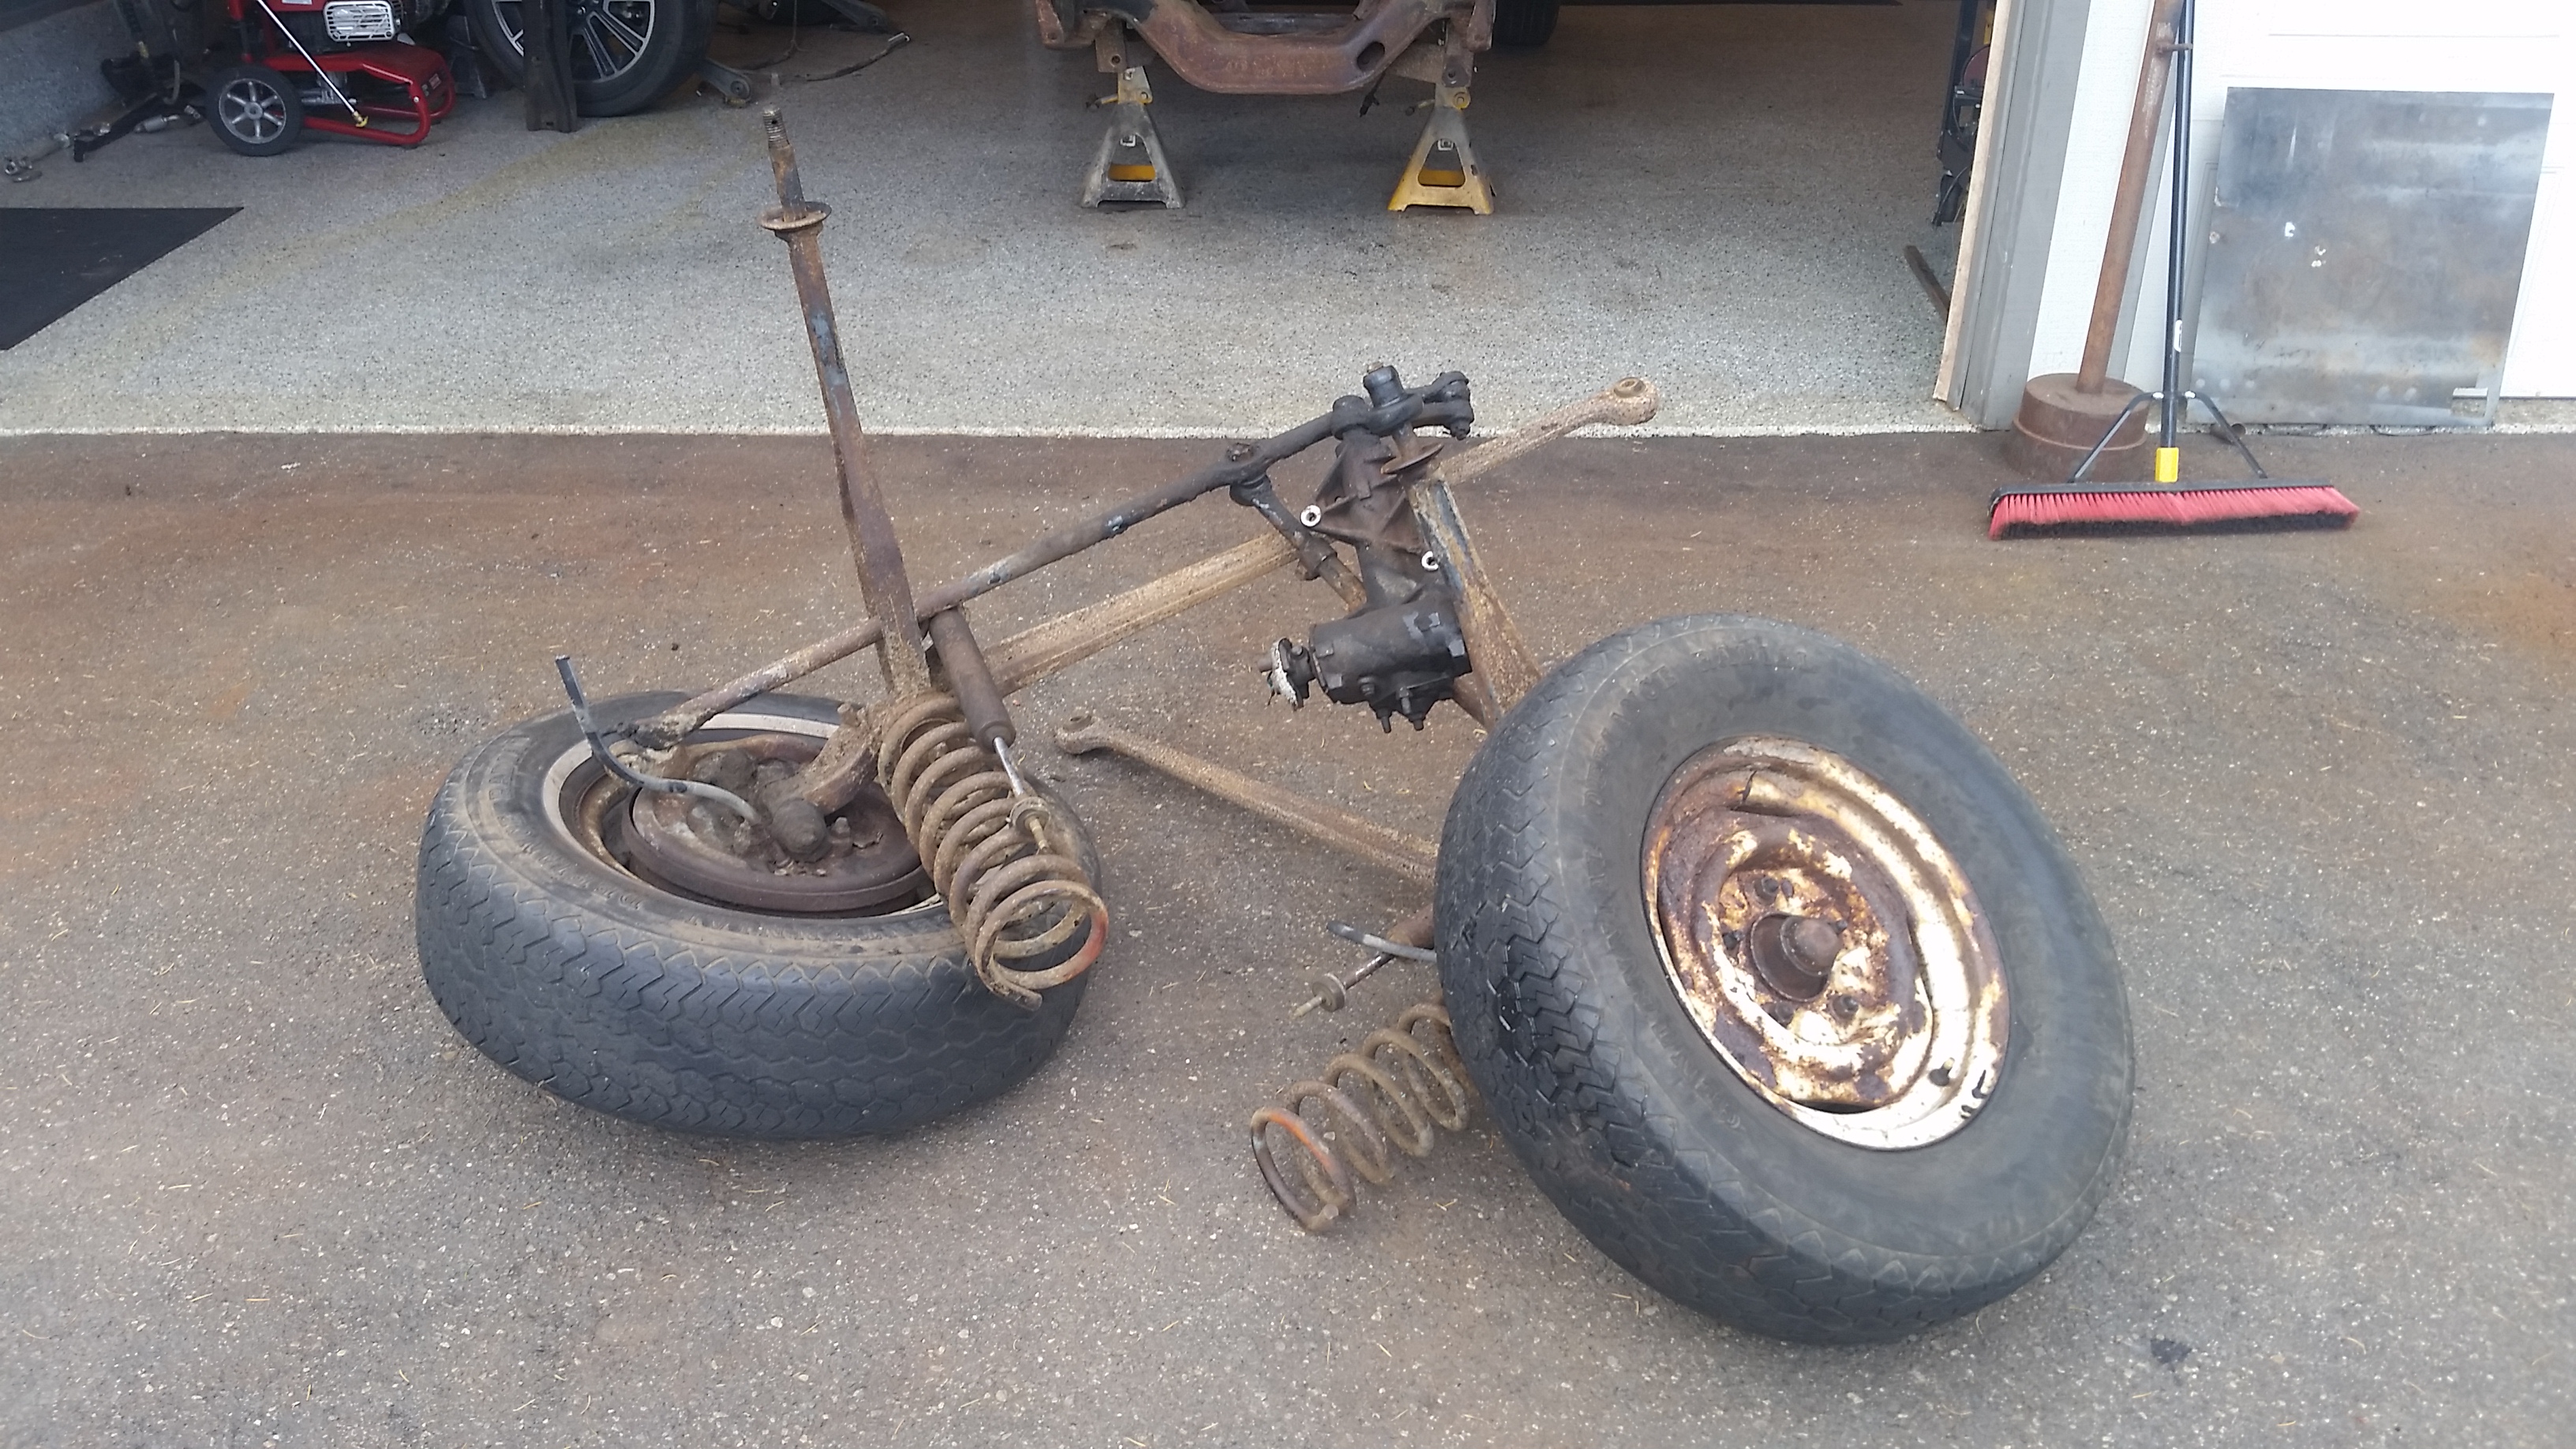
Rolled I'n the truck and got to work pulling the front suspension off.

Then got to work on the worst part of this swap, all of the cutting and grinding. Plasma cutter makes it better but it is still a ****ty job. I think I have it pretty dialed after the 2nd truck.
Brace welded in and mostly cut out
Scrap pile at the end of the day
All the internal supports cut and ground out, framerails all cleaned up of the nasty undercoating wire wheeled and ready for the crown vic.
Next couple weeks should be good stuff.
Sean
Rolled I'n the truck and got to work pulling the front suspension off.


Then got to work on the worst part of this swap, all of the cutting and grinding. Plasma cutter makes it better but it is still a ****ty job. I think I have it pretty dialed after the 2nd truck.
Brace welded in and mostly cut out


Scrap pile at the end of the day

All the internal supports cut and ground out, framerails all cleaned up of the nasty undercoating wire wheeled and ready for the crown vic.


Next couple weeks should be good stuff.
Sean
#7
10-16-2015, 08:50 AM
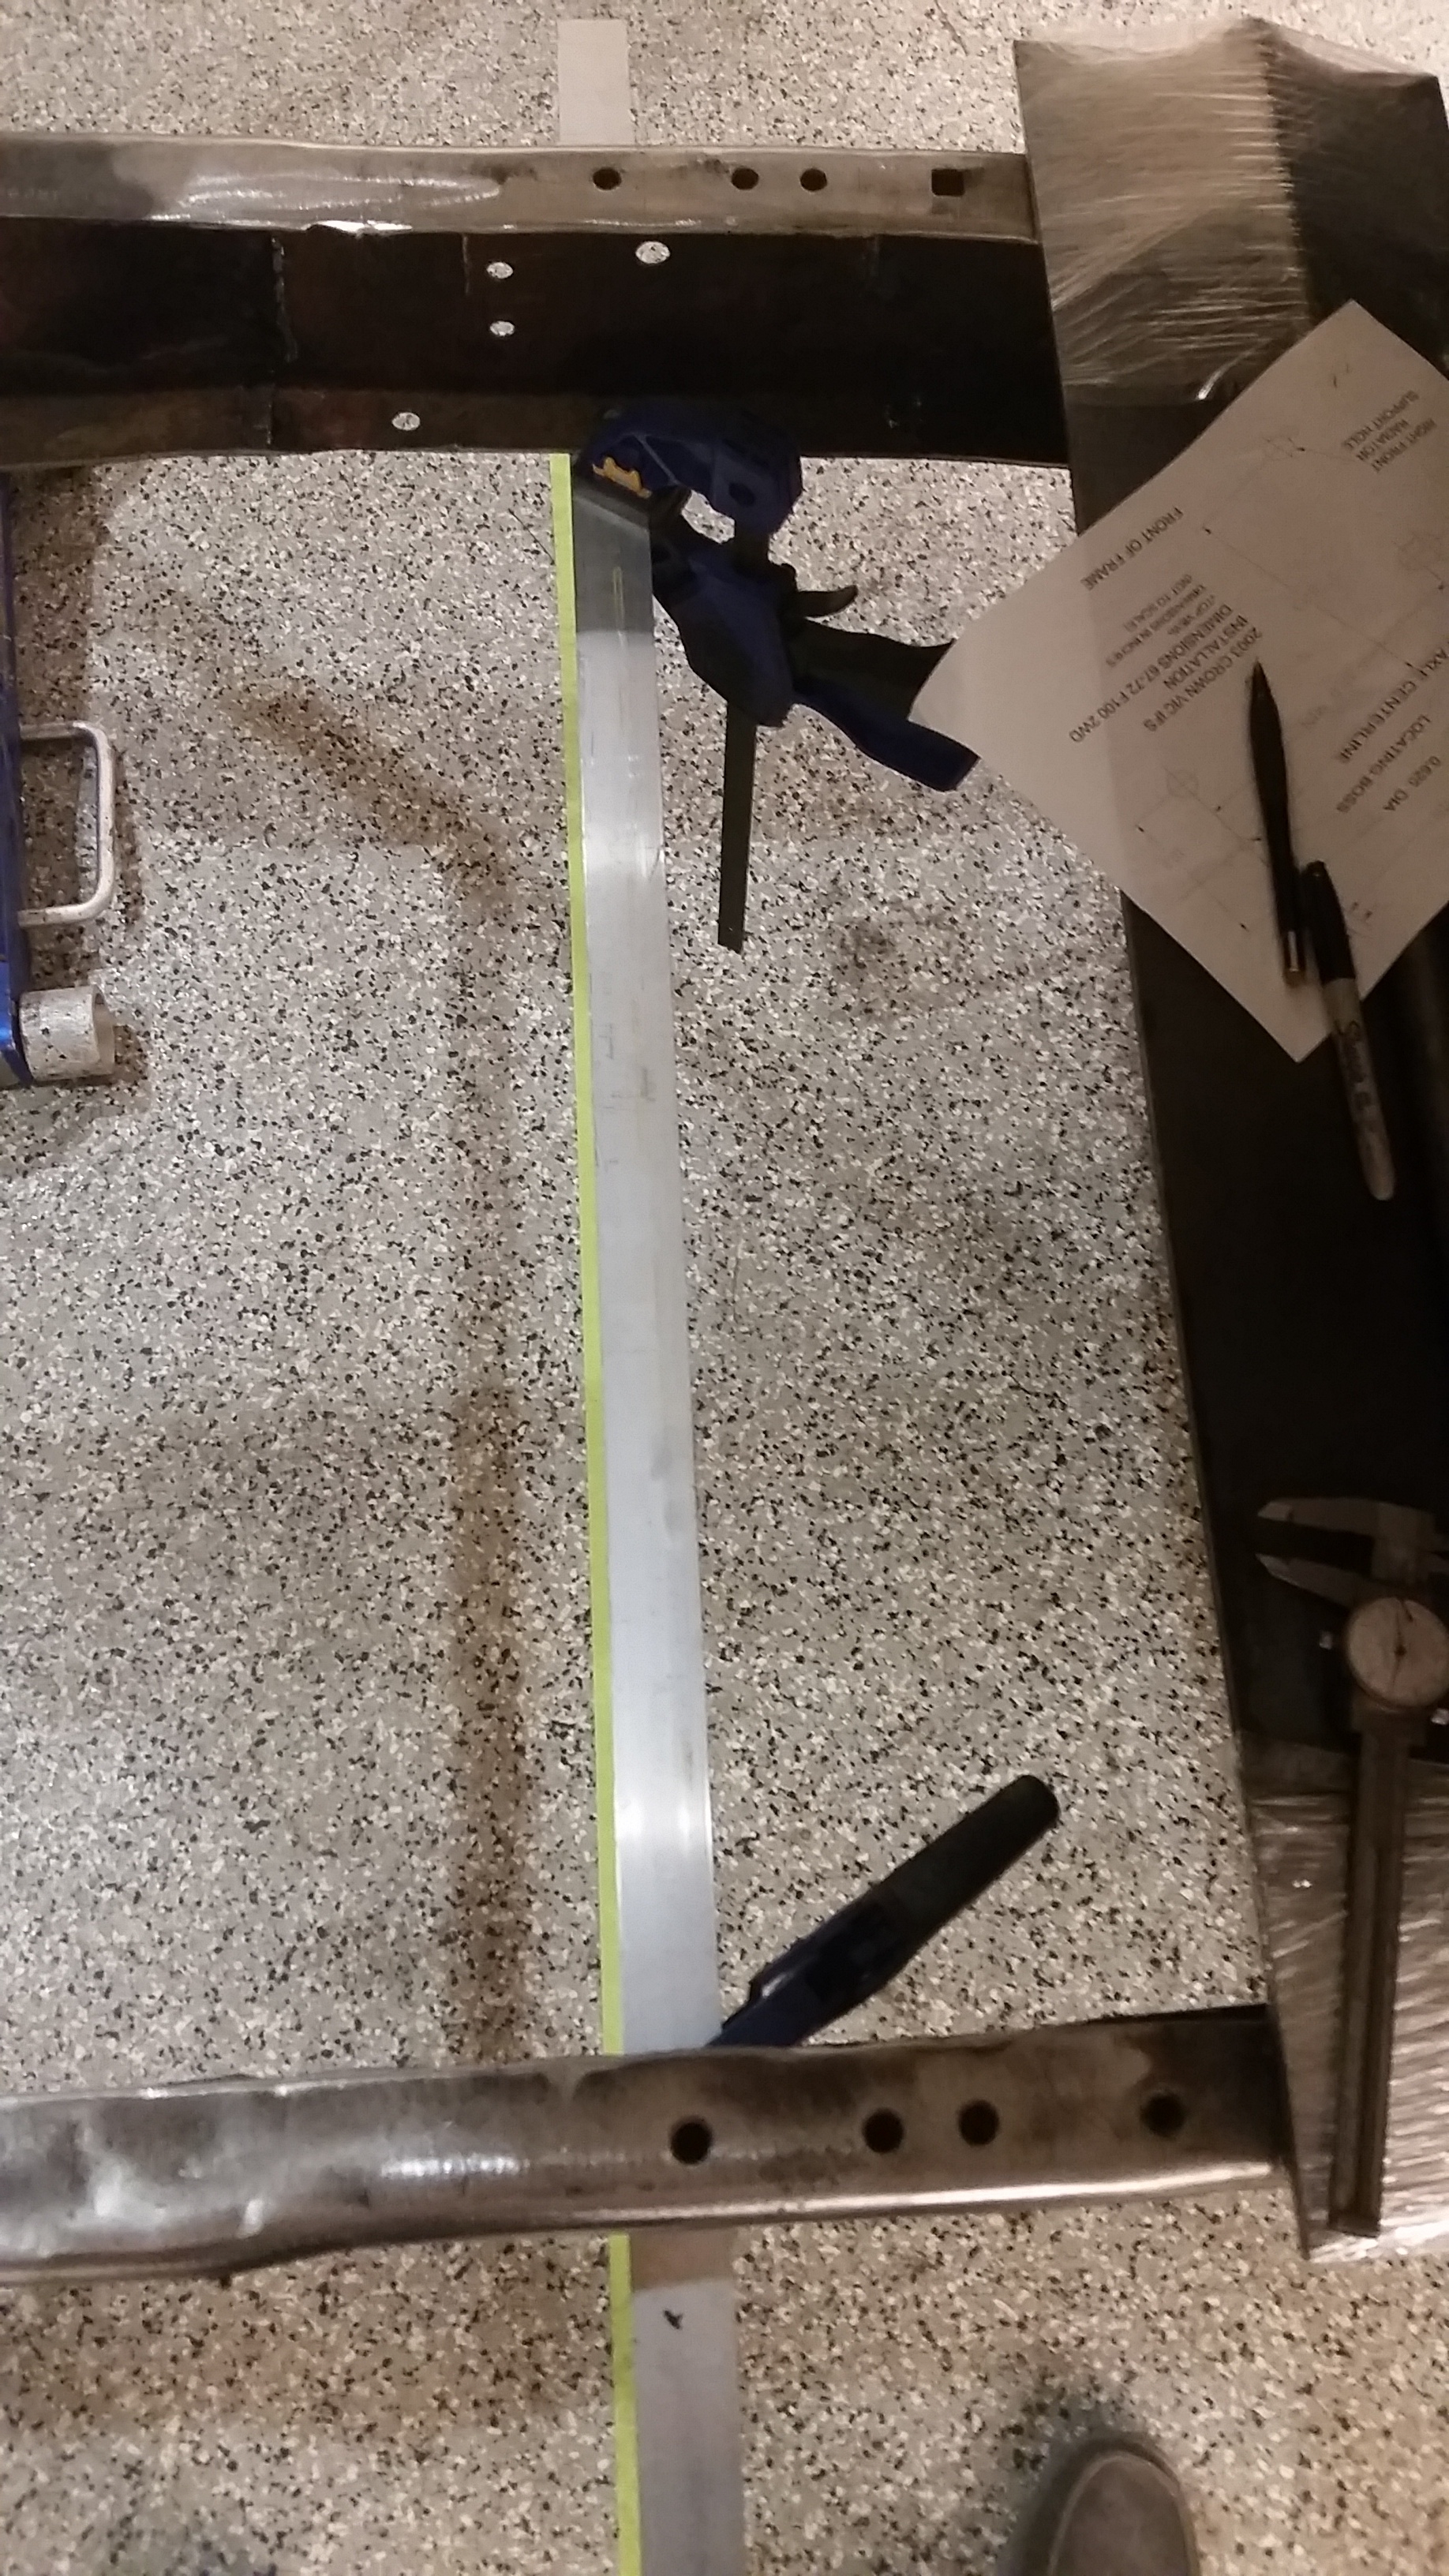
After not being happy with the location on the other truck since I got the fenders on.....I am being beyond OCD about this one.
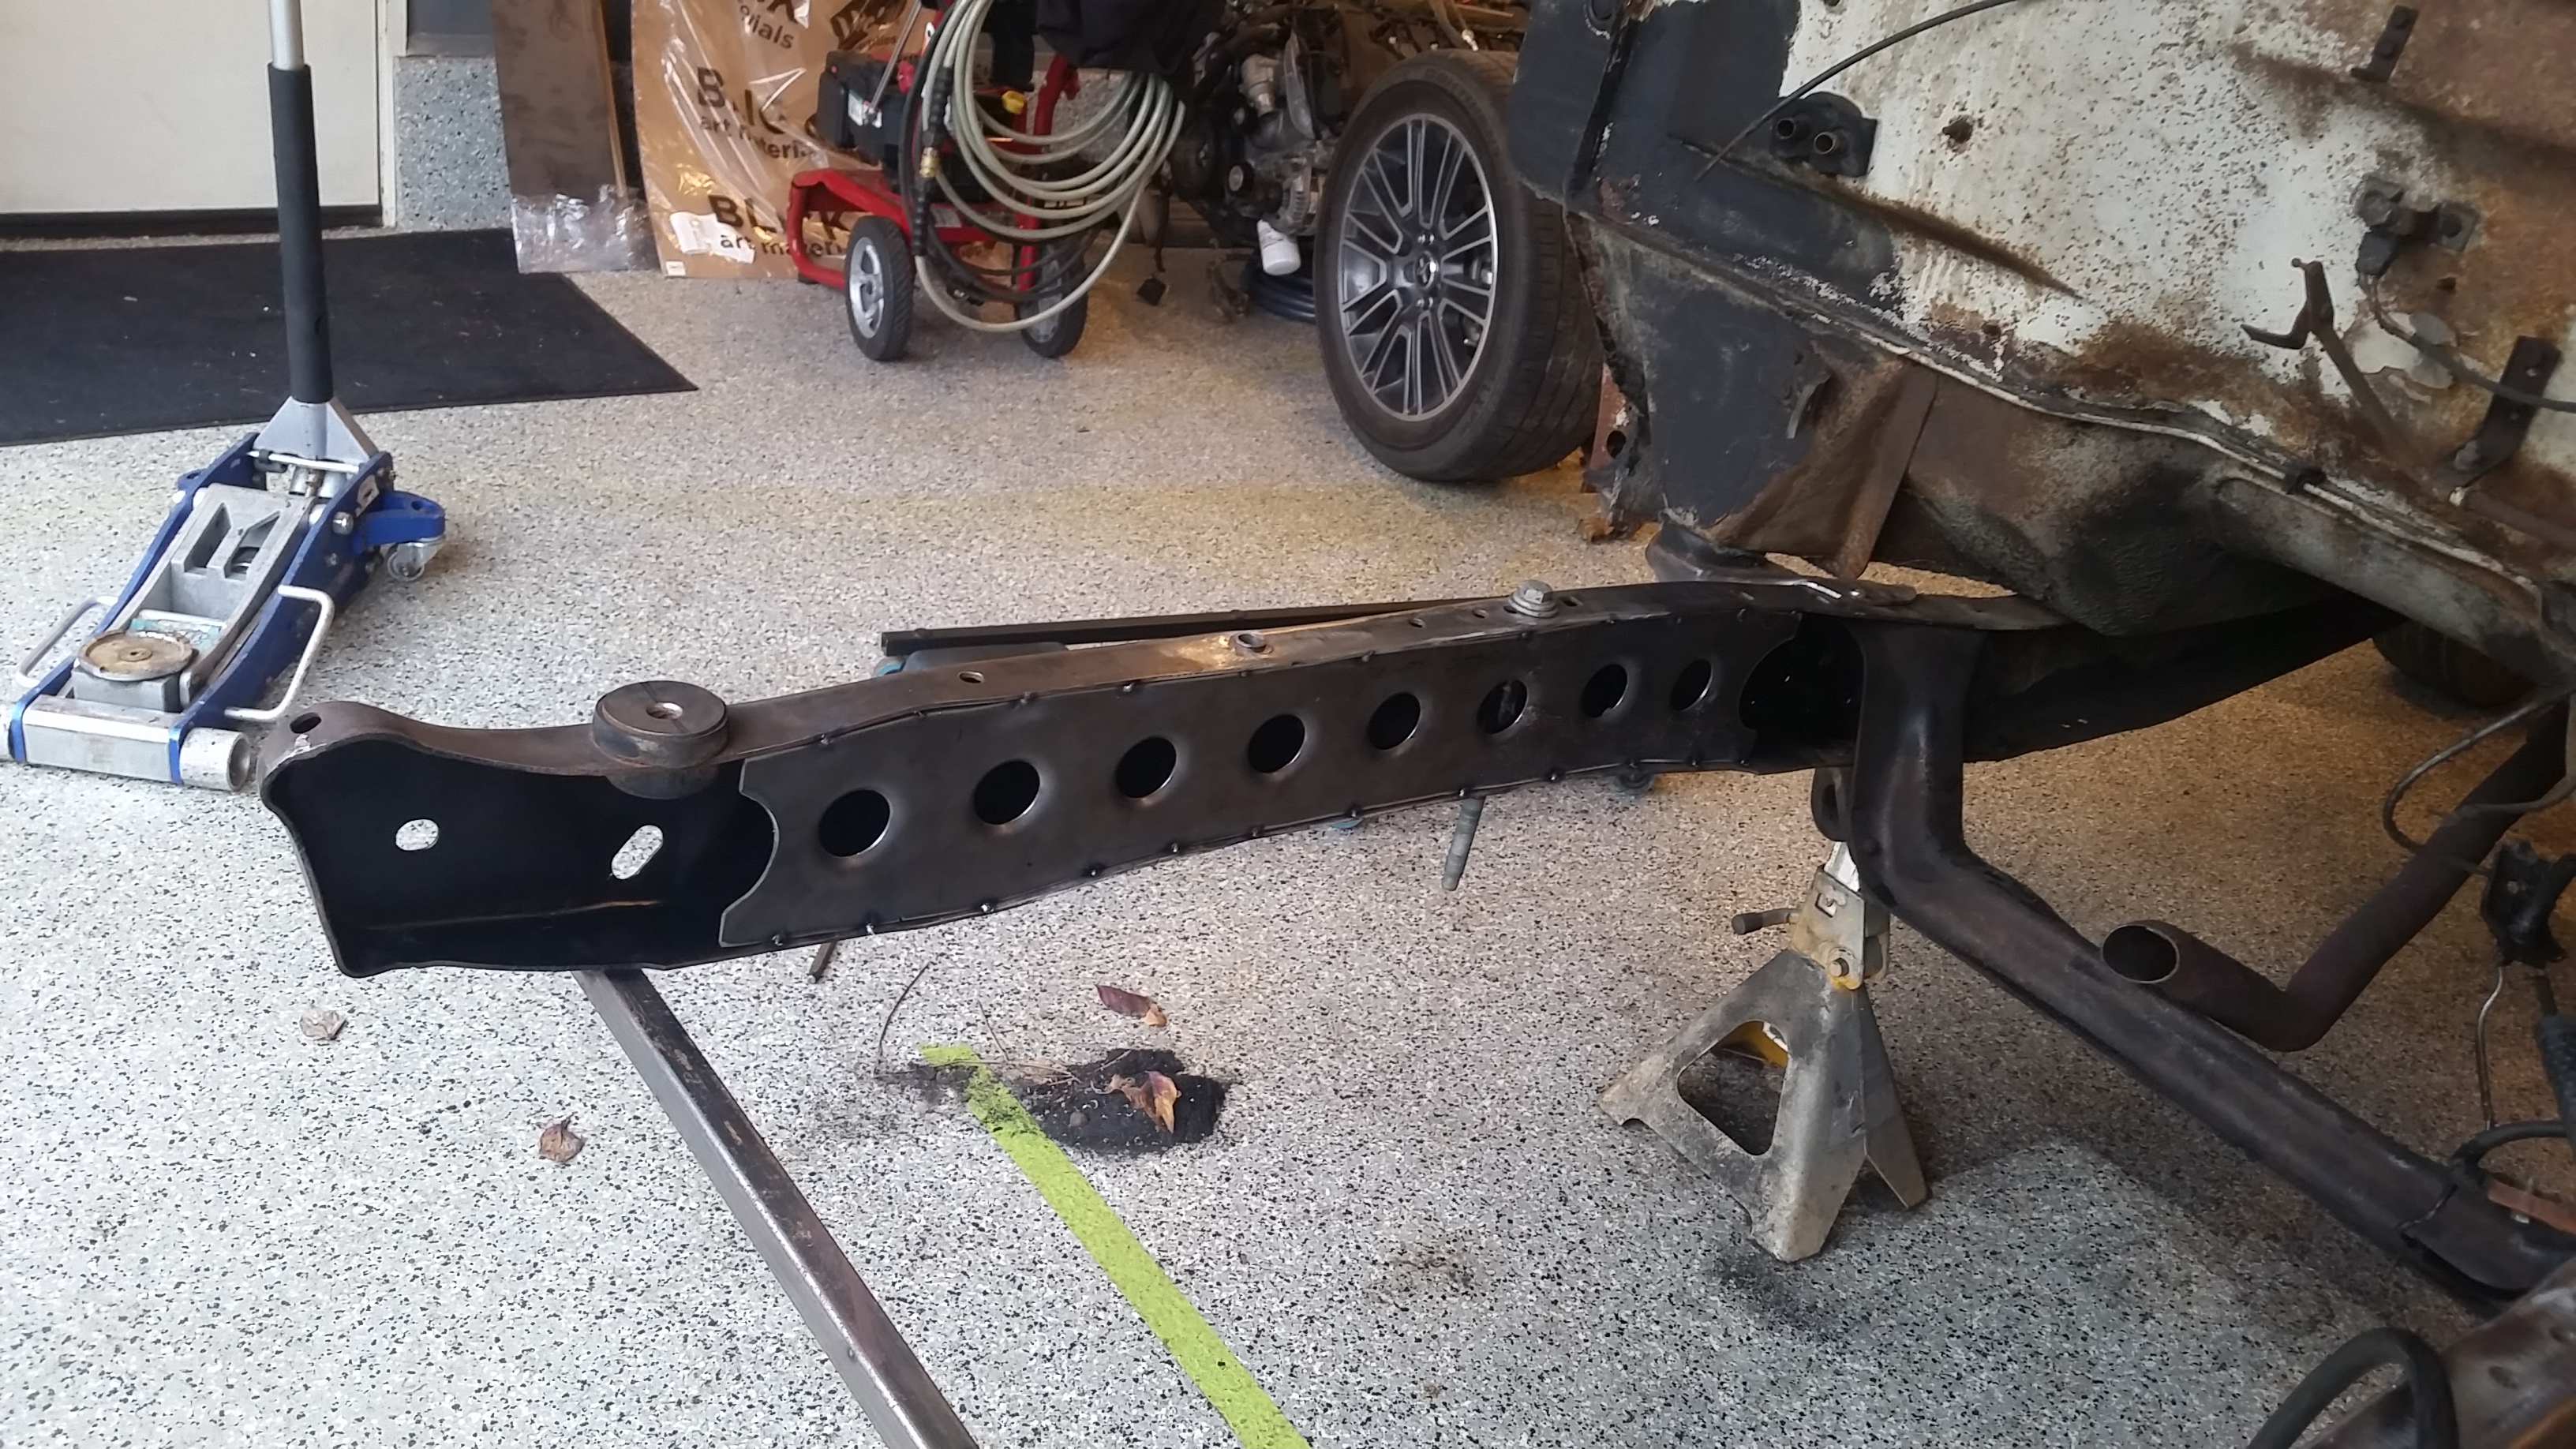
First method is to establish the wheelbase centerline right and left on the floor. This was done with a square off of the rear axle on both sides. I then got the wheelbase off the door plate and measured forward off of those tape lines to 115" and had the wife help me run a parallel tape line to the rearend for the centerline of the front axle....it looks like this.
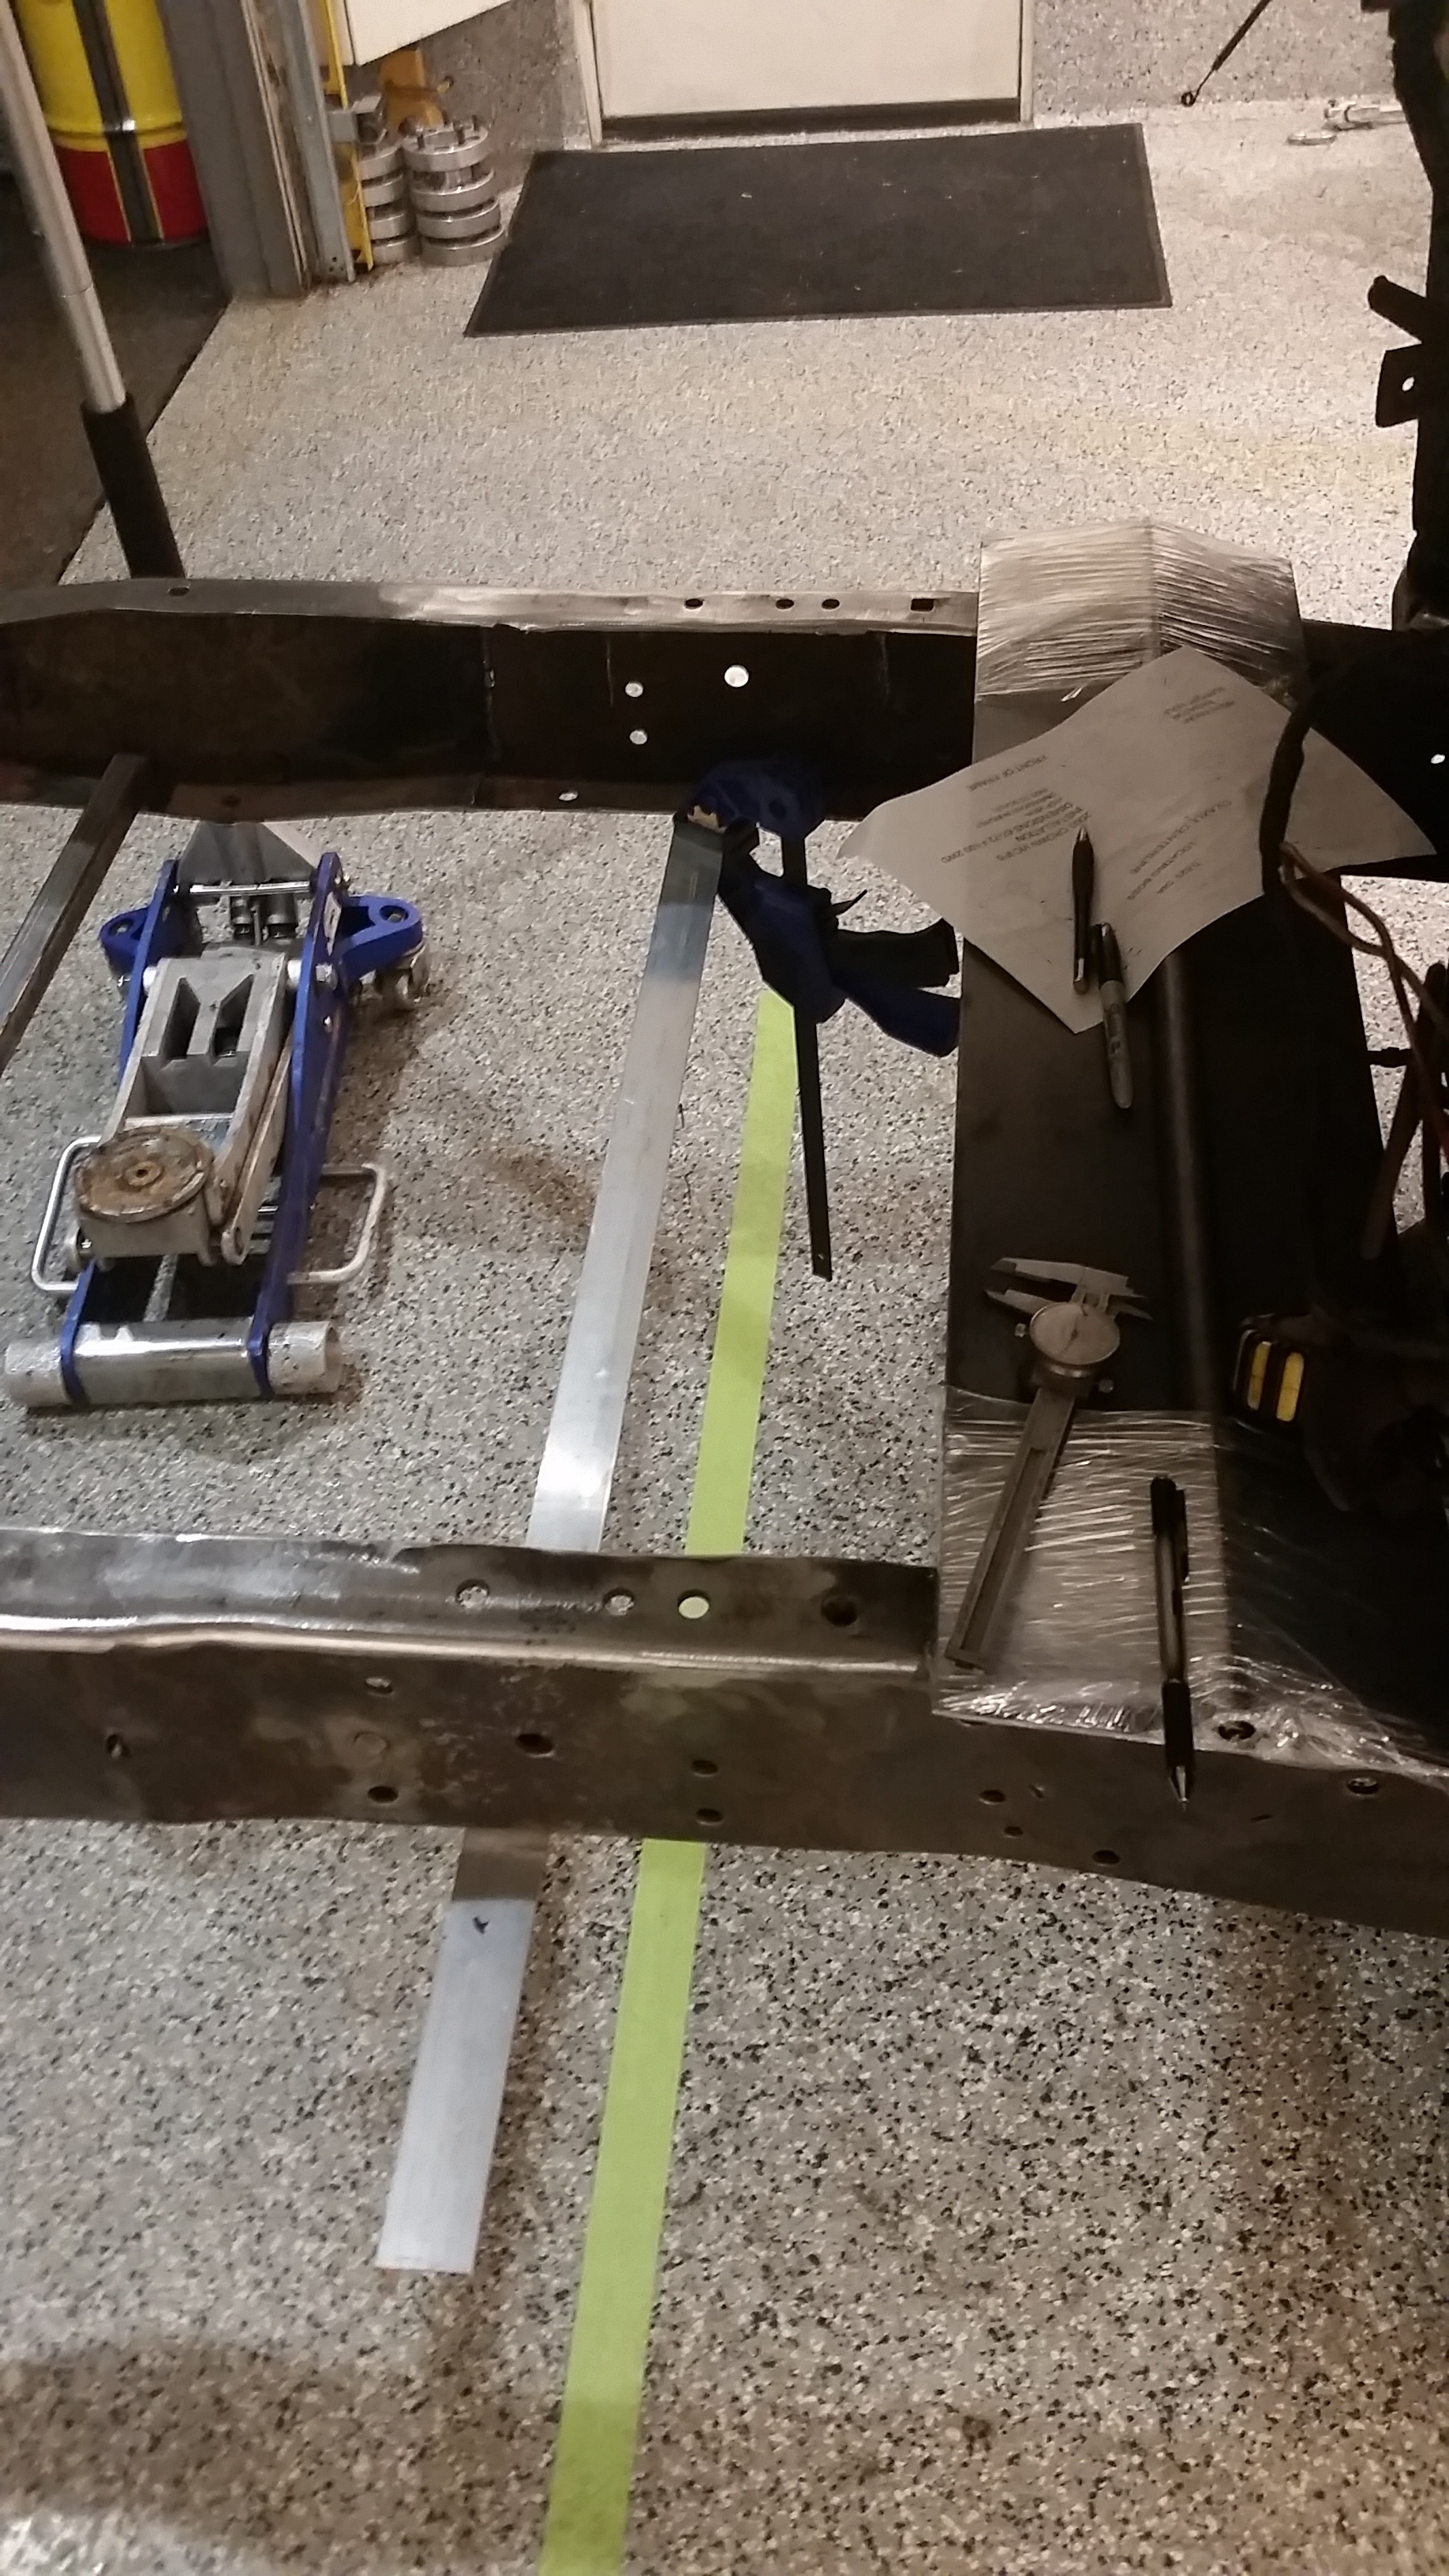
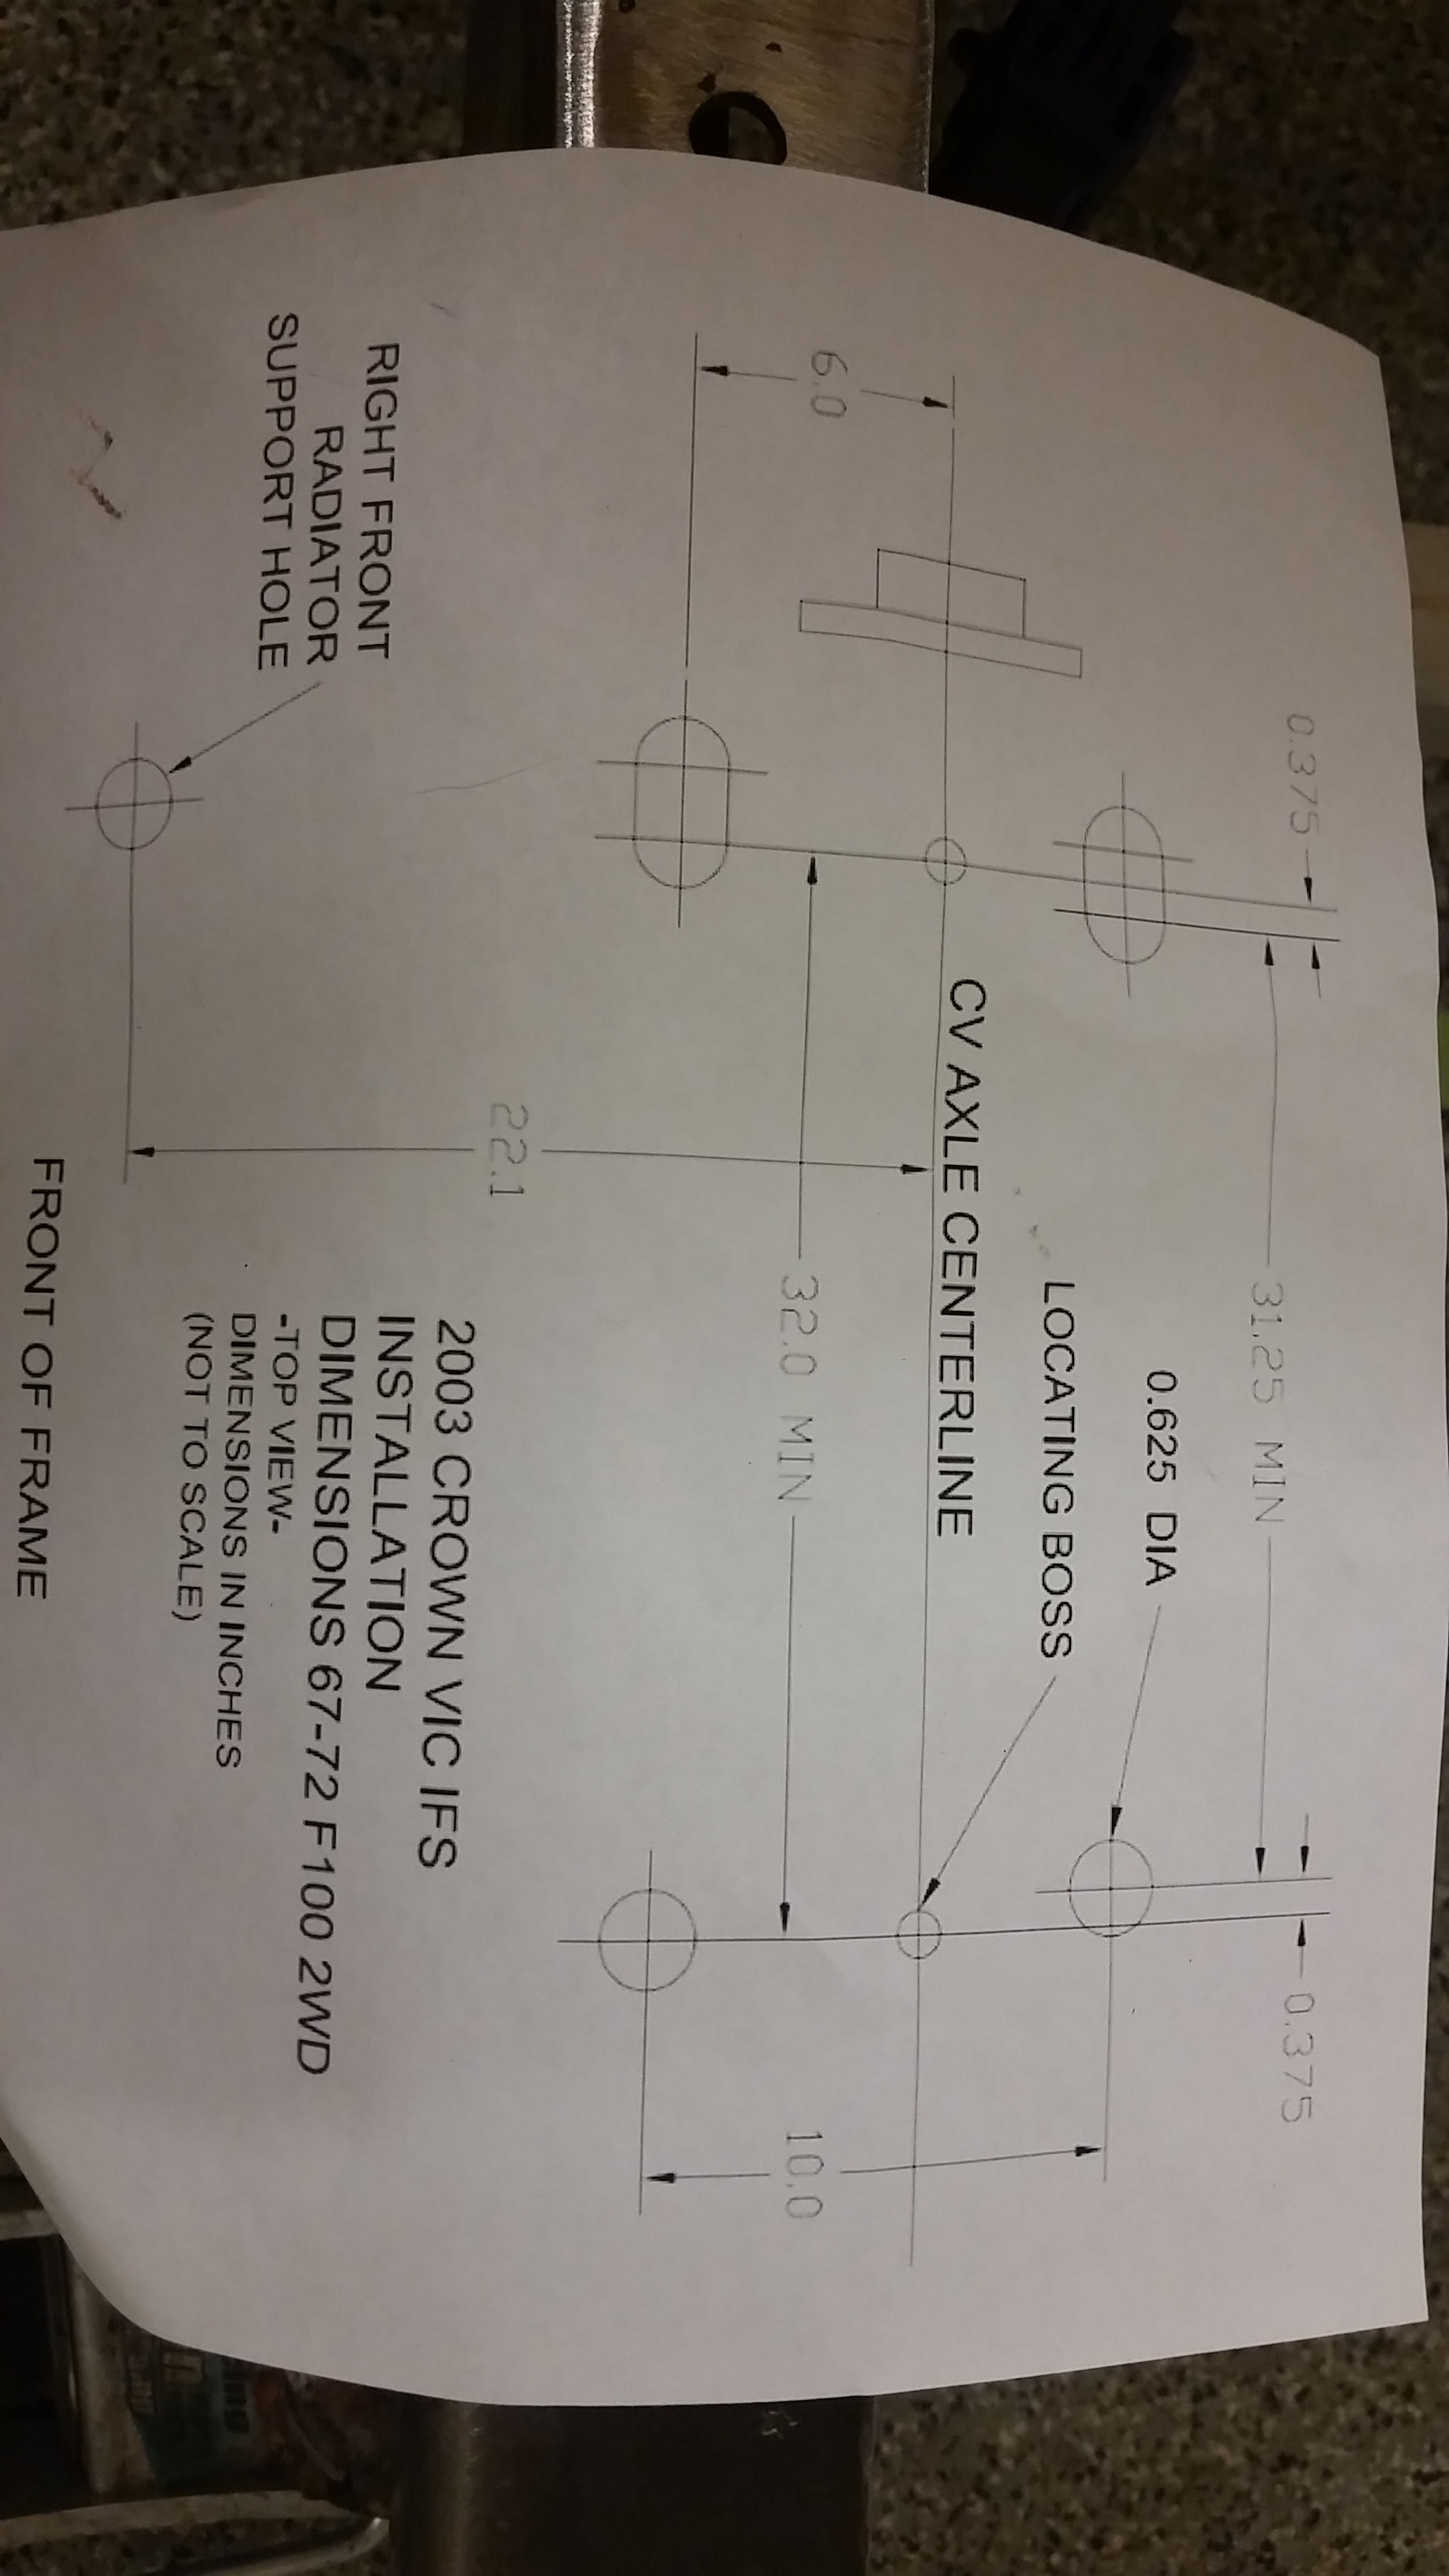
I also used this handy printout from this fine forum to do some measuring on the frontend. I measured back 22.1" using a square again off of the enter of the radiator mounting holes like indicated on the diagram and that puts me roughly .525" back from the back of the front rivet hole. The span between those two holes is 1.178 so it is less than half, biassed to the front.
I then got that marked out after measuring and remeasuring about 5 more times and put on my piece of angle aluminum on there to scope it out. Everything lines up with my measurements.
First method is to establish the wheelbase centerline right and left on the floor. This was done with a square off of the rear axle on both sides. I then got the wheelbase off the door plate and measured forward off of those tape lines to 115" and had the wife help me run a parallel tape line to the rearend for the centerline of the front axle....it looks like this.

I also used this handy printout from this fine forum to do some measuring on the frontend. I measured back 22.1" using a square again off of the enter of the radiator mounting holes like indicated on the diagram and that puts me roughly .525" back from the back of the front rivet hole. The span between those two holes is 1.178 so it is less than half, biassed to the front.

I then got that marked out after measuring and remeasuring about 5 more times and put on my piece of angle aluminum on there to scope it out. Everything lines up with my measurements.

Trending Topics
#8
10-16-2015, 08:51 AM
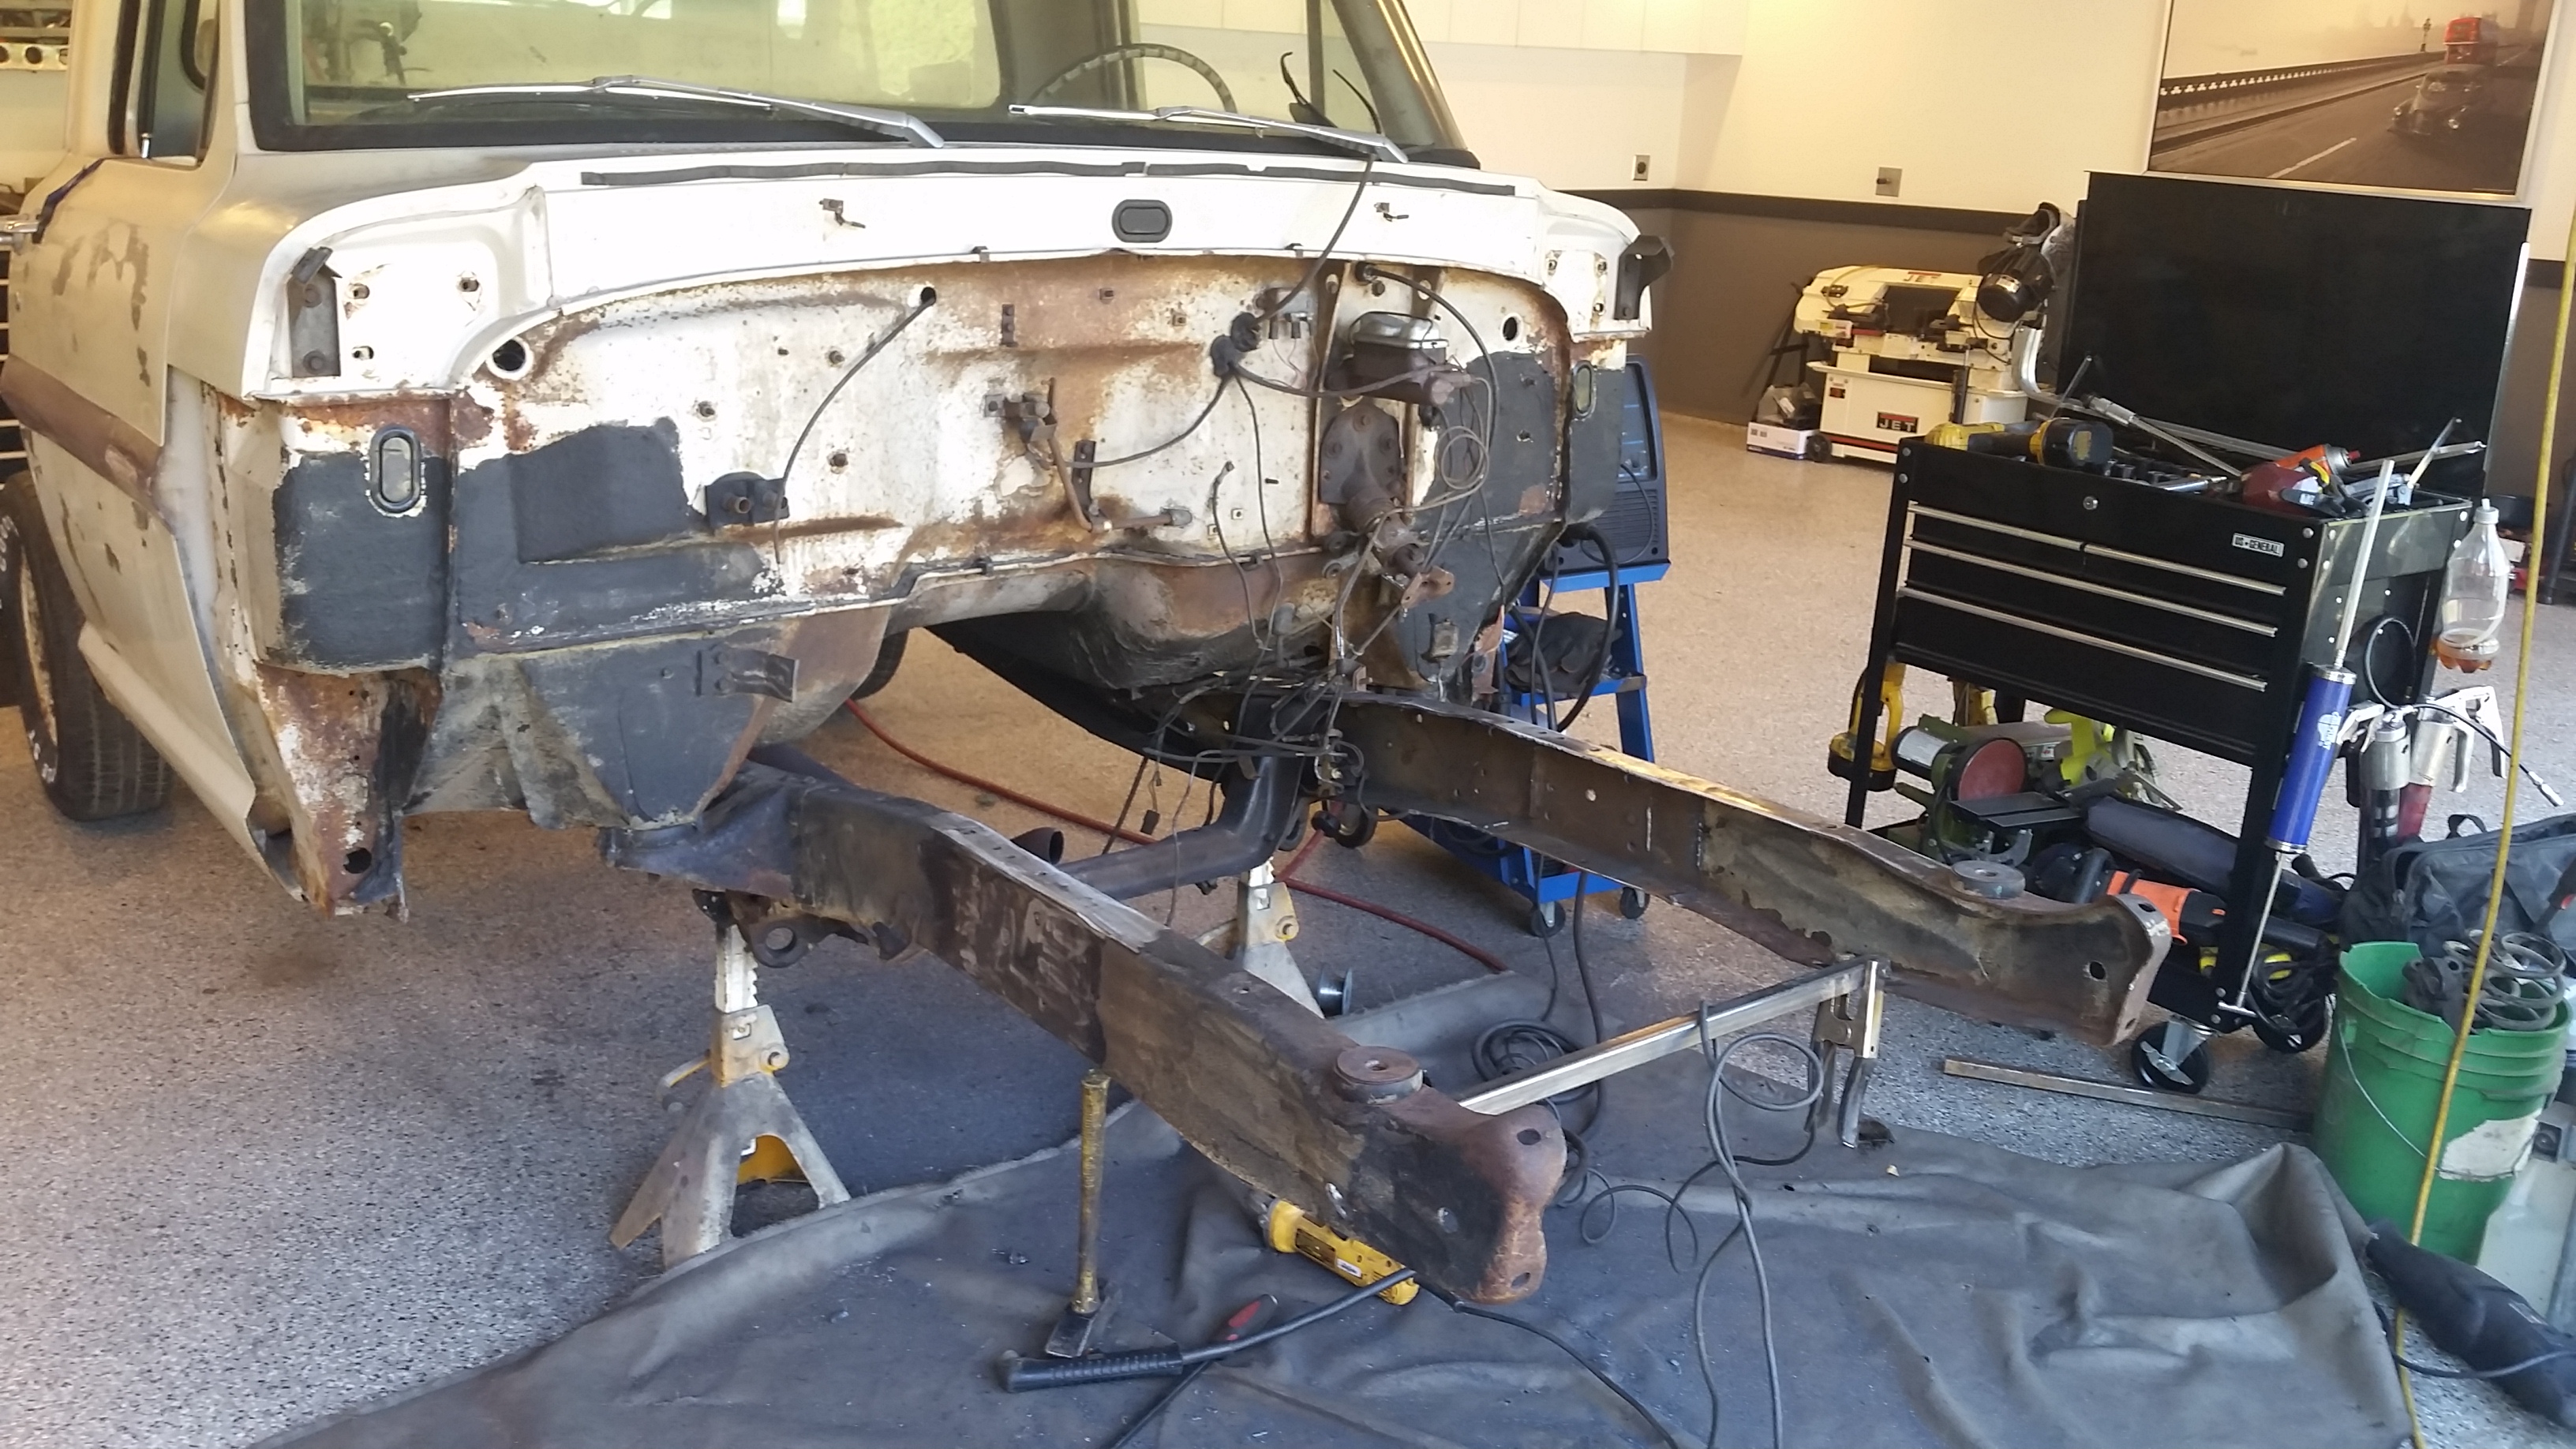
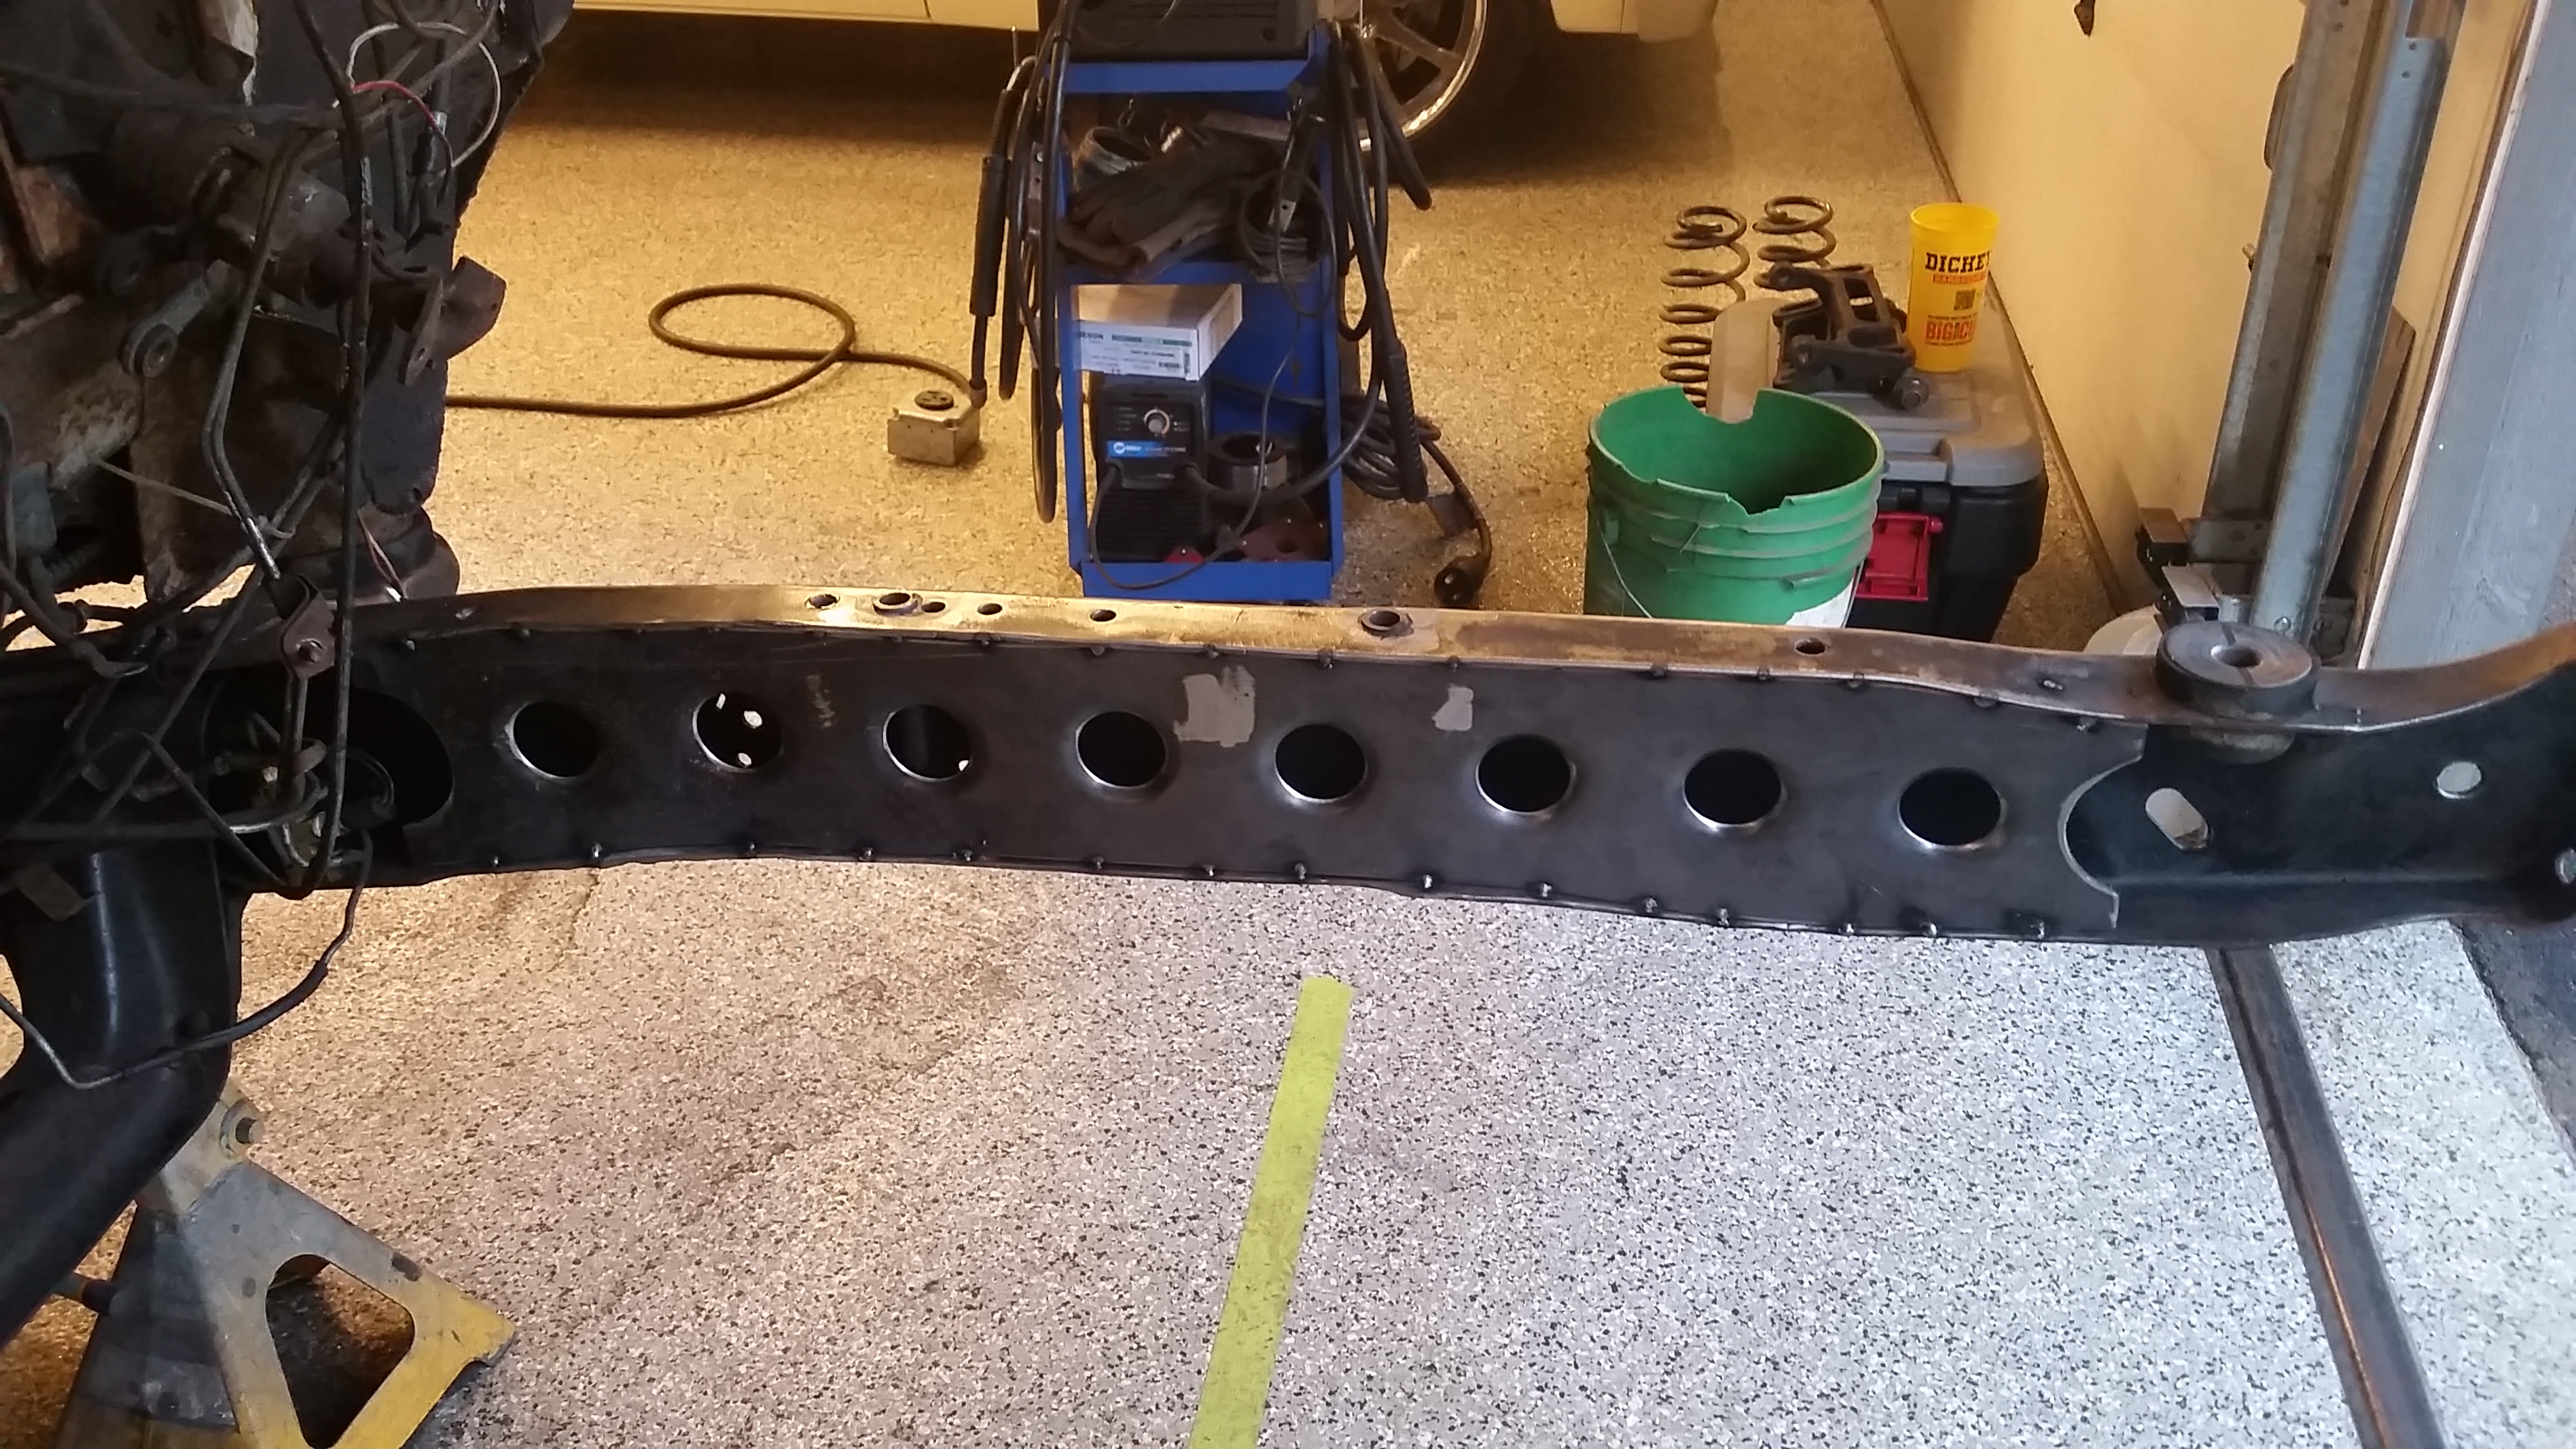
Picked up a cold this week so not a lot going on. Pressure washed the frontend last night in prep for getting it under the truck, degreased it and washed again, it looks good, I would not say great though.
Ordered all my rear suspension for the truck and hope it all works. BMR adjustable lower control arms, BMR adjustable upper link and BMR adjustable track bar. All for a 2012 mustang so the plan is to keep the three link with the panhard bar and do coilovers in the rear. My initial measurements show me that it might work. Also ordered the Naake double adjustable coilovers for the front.
Finally stopped being a wuus and drilled the holes in my frame for the locate pins on the frontend.
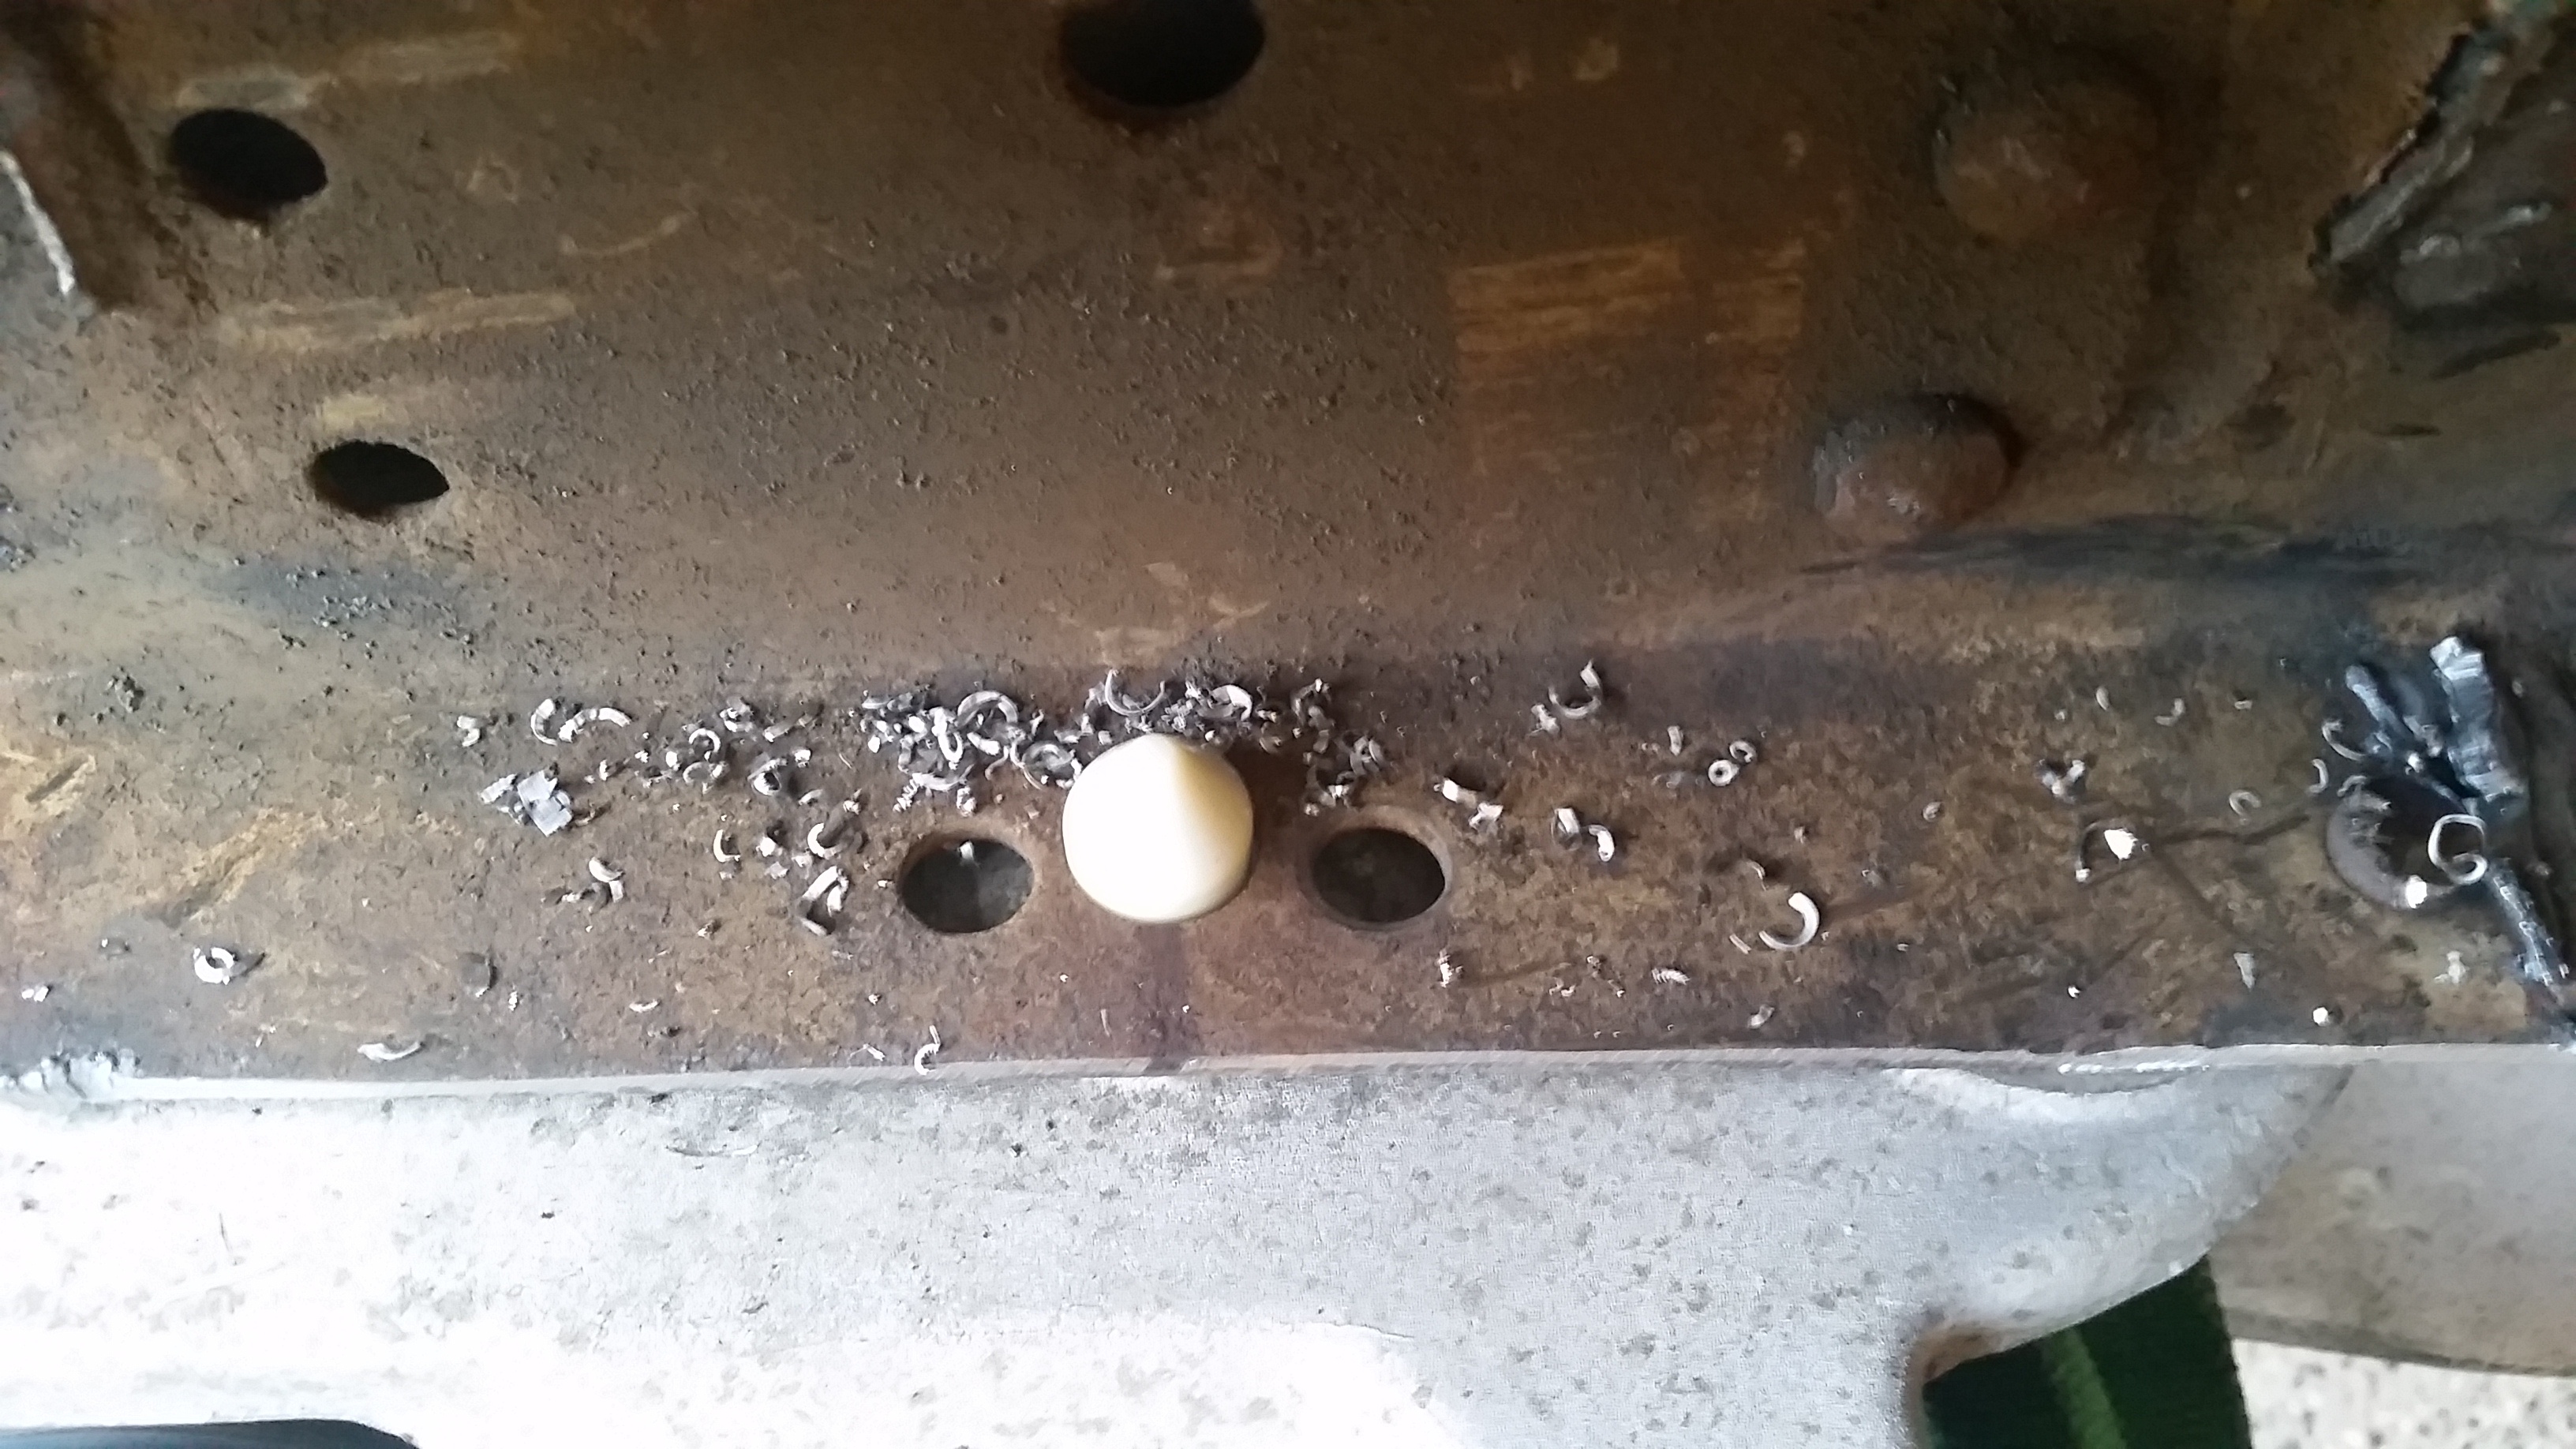
It went right on, pins lined right up on the holes I drilled. Marked out the four mounting holes and got to drilling. Cut my sleeves and prepped it all. Ready to weld it all out tomorrow night or saturday.

#9
10-16-2015, 08:52 AM
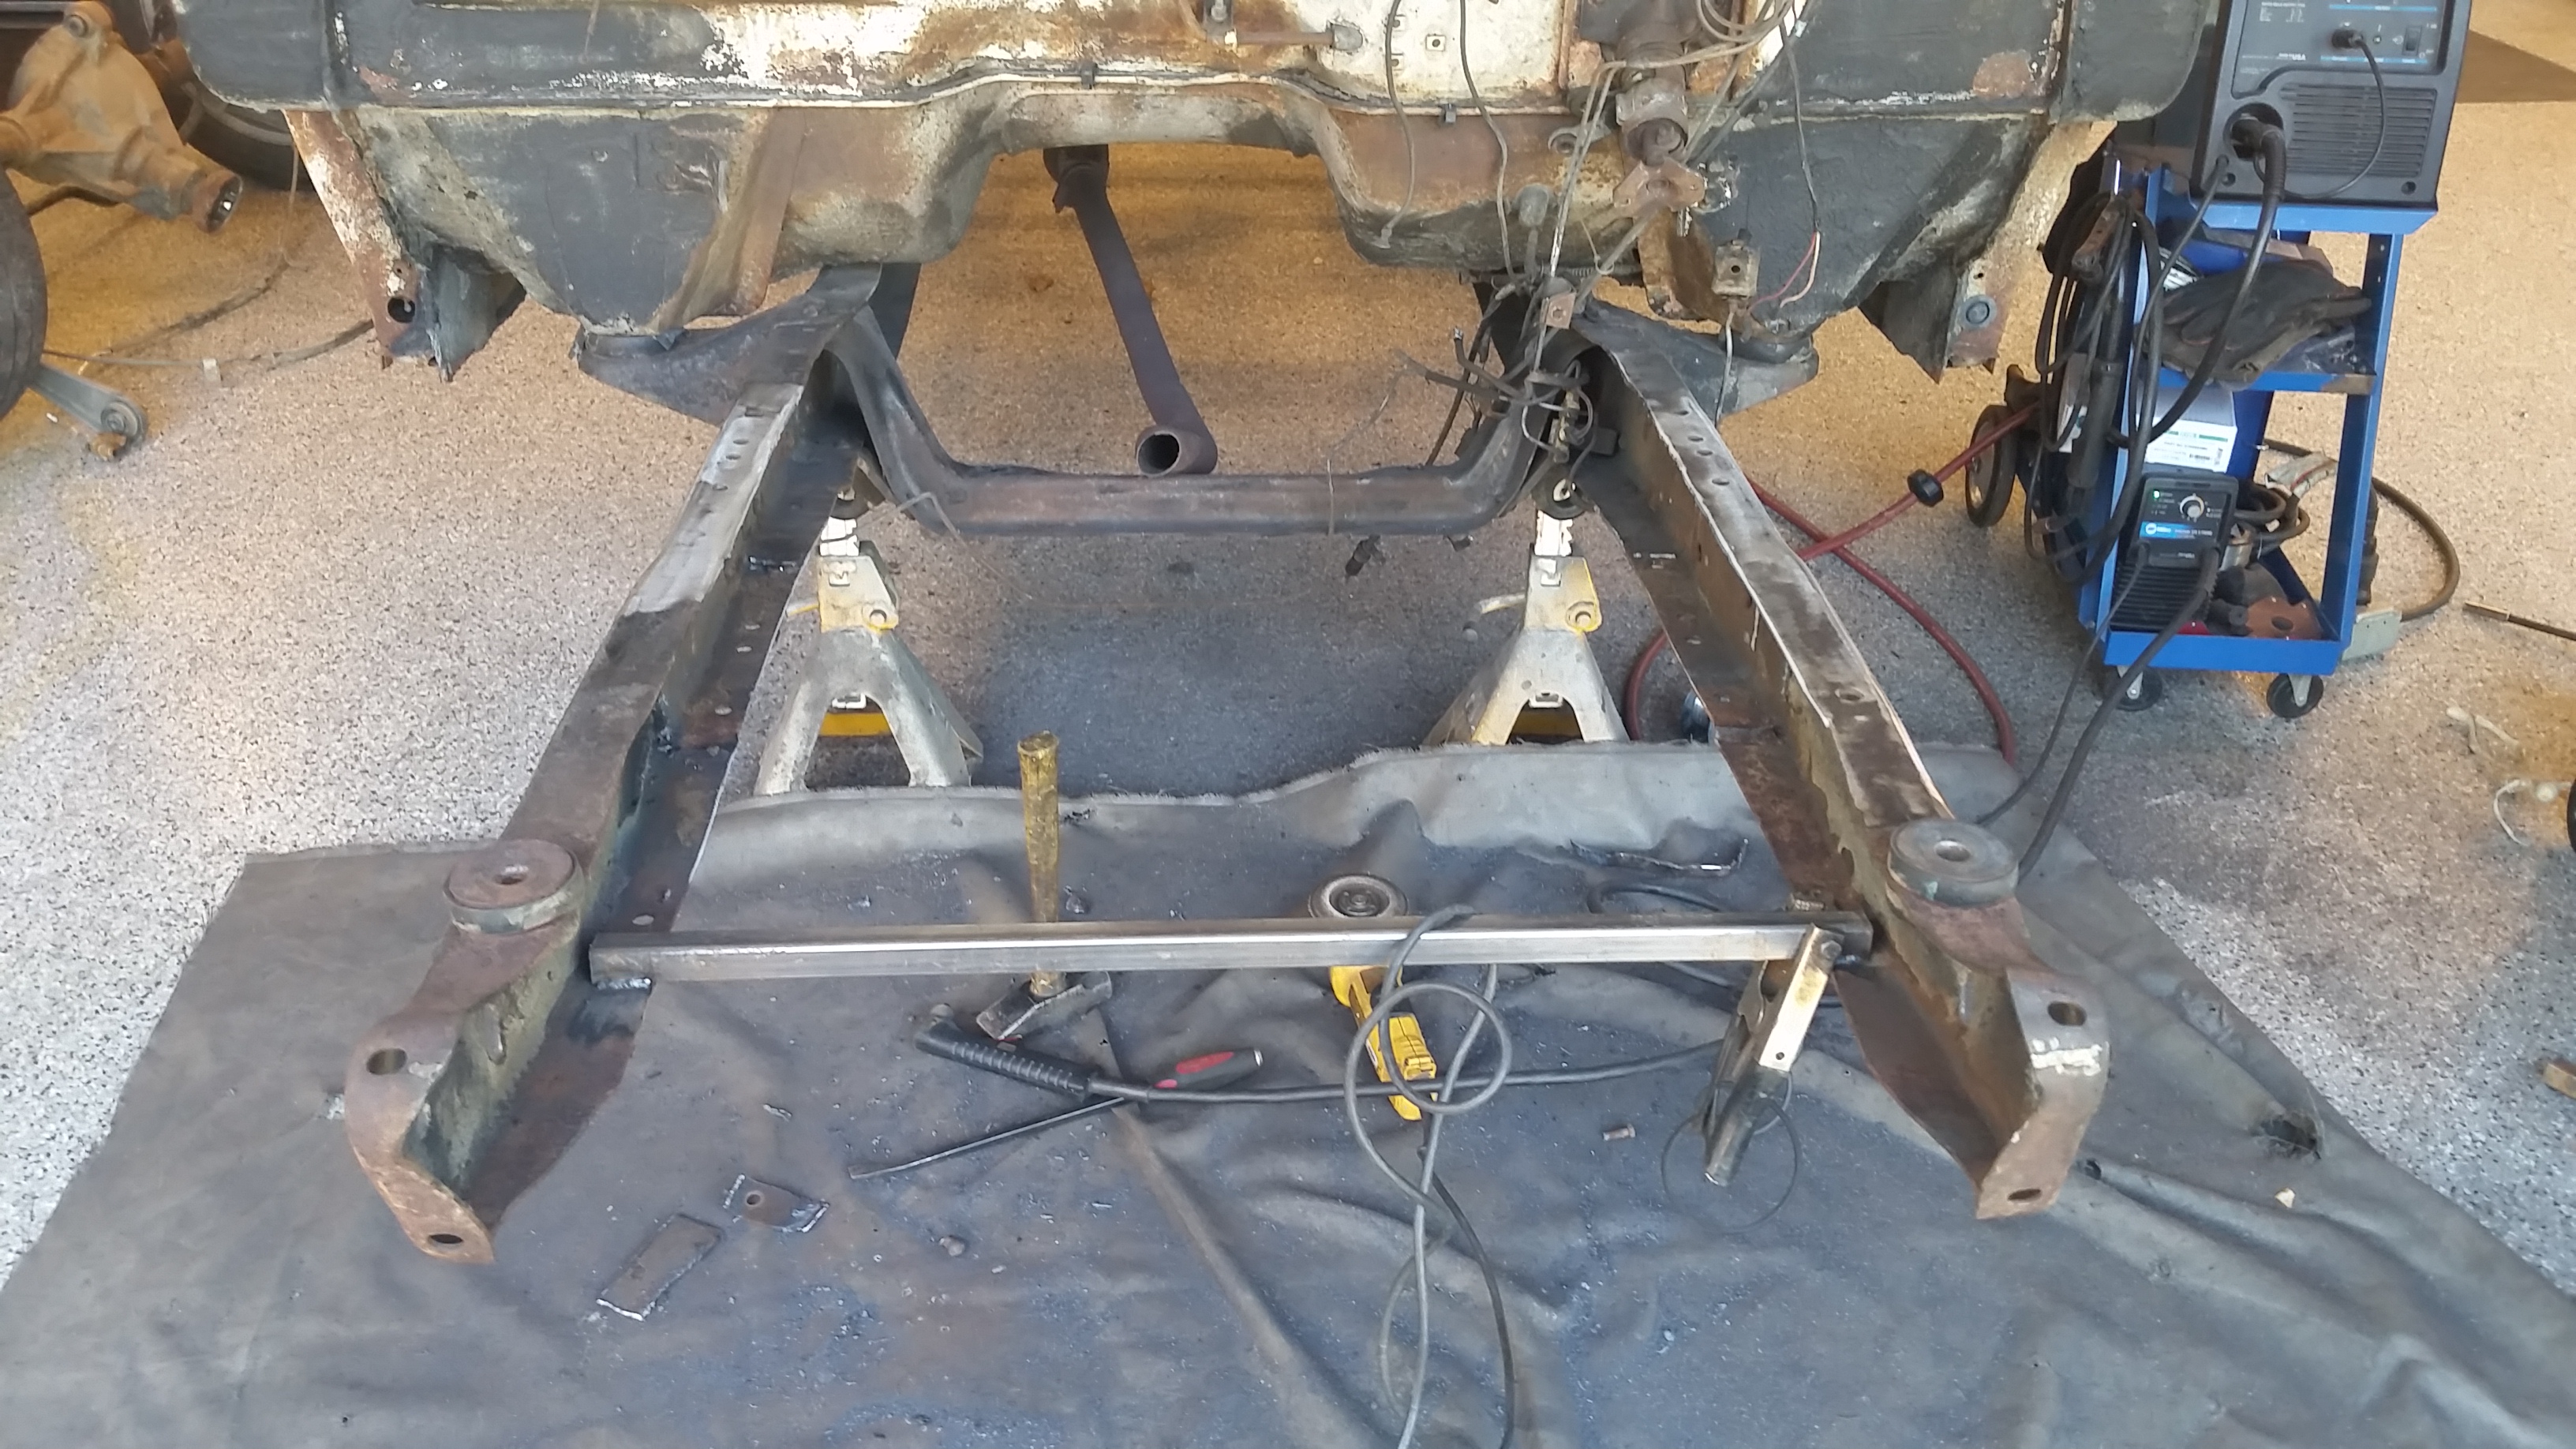
Even with a messed up back I managed to get a fair bit of tedious work done today. Got the frame tubes welded in, mocked up the front sway bar, drilled the holes and welded the nuts in from the backside.
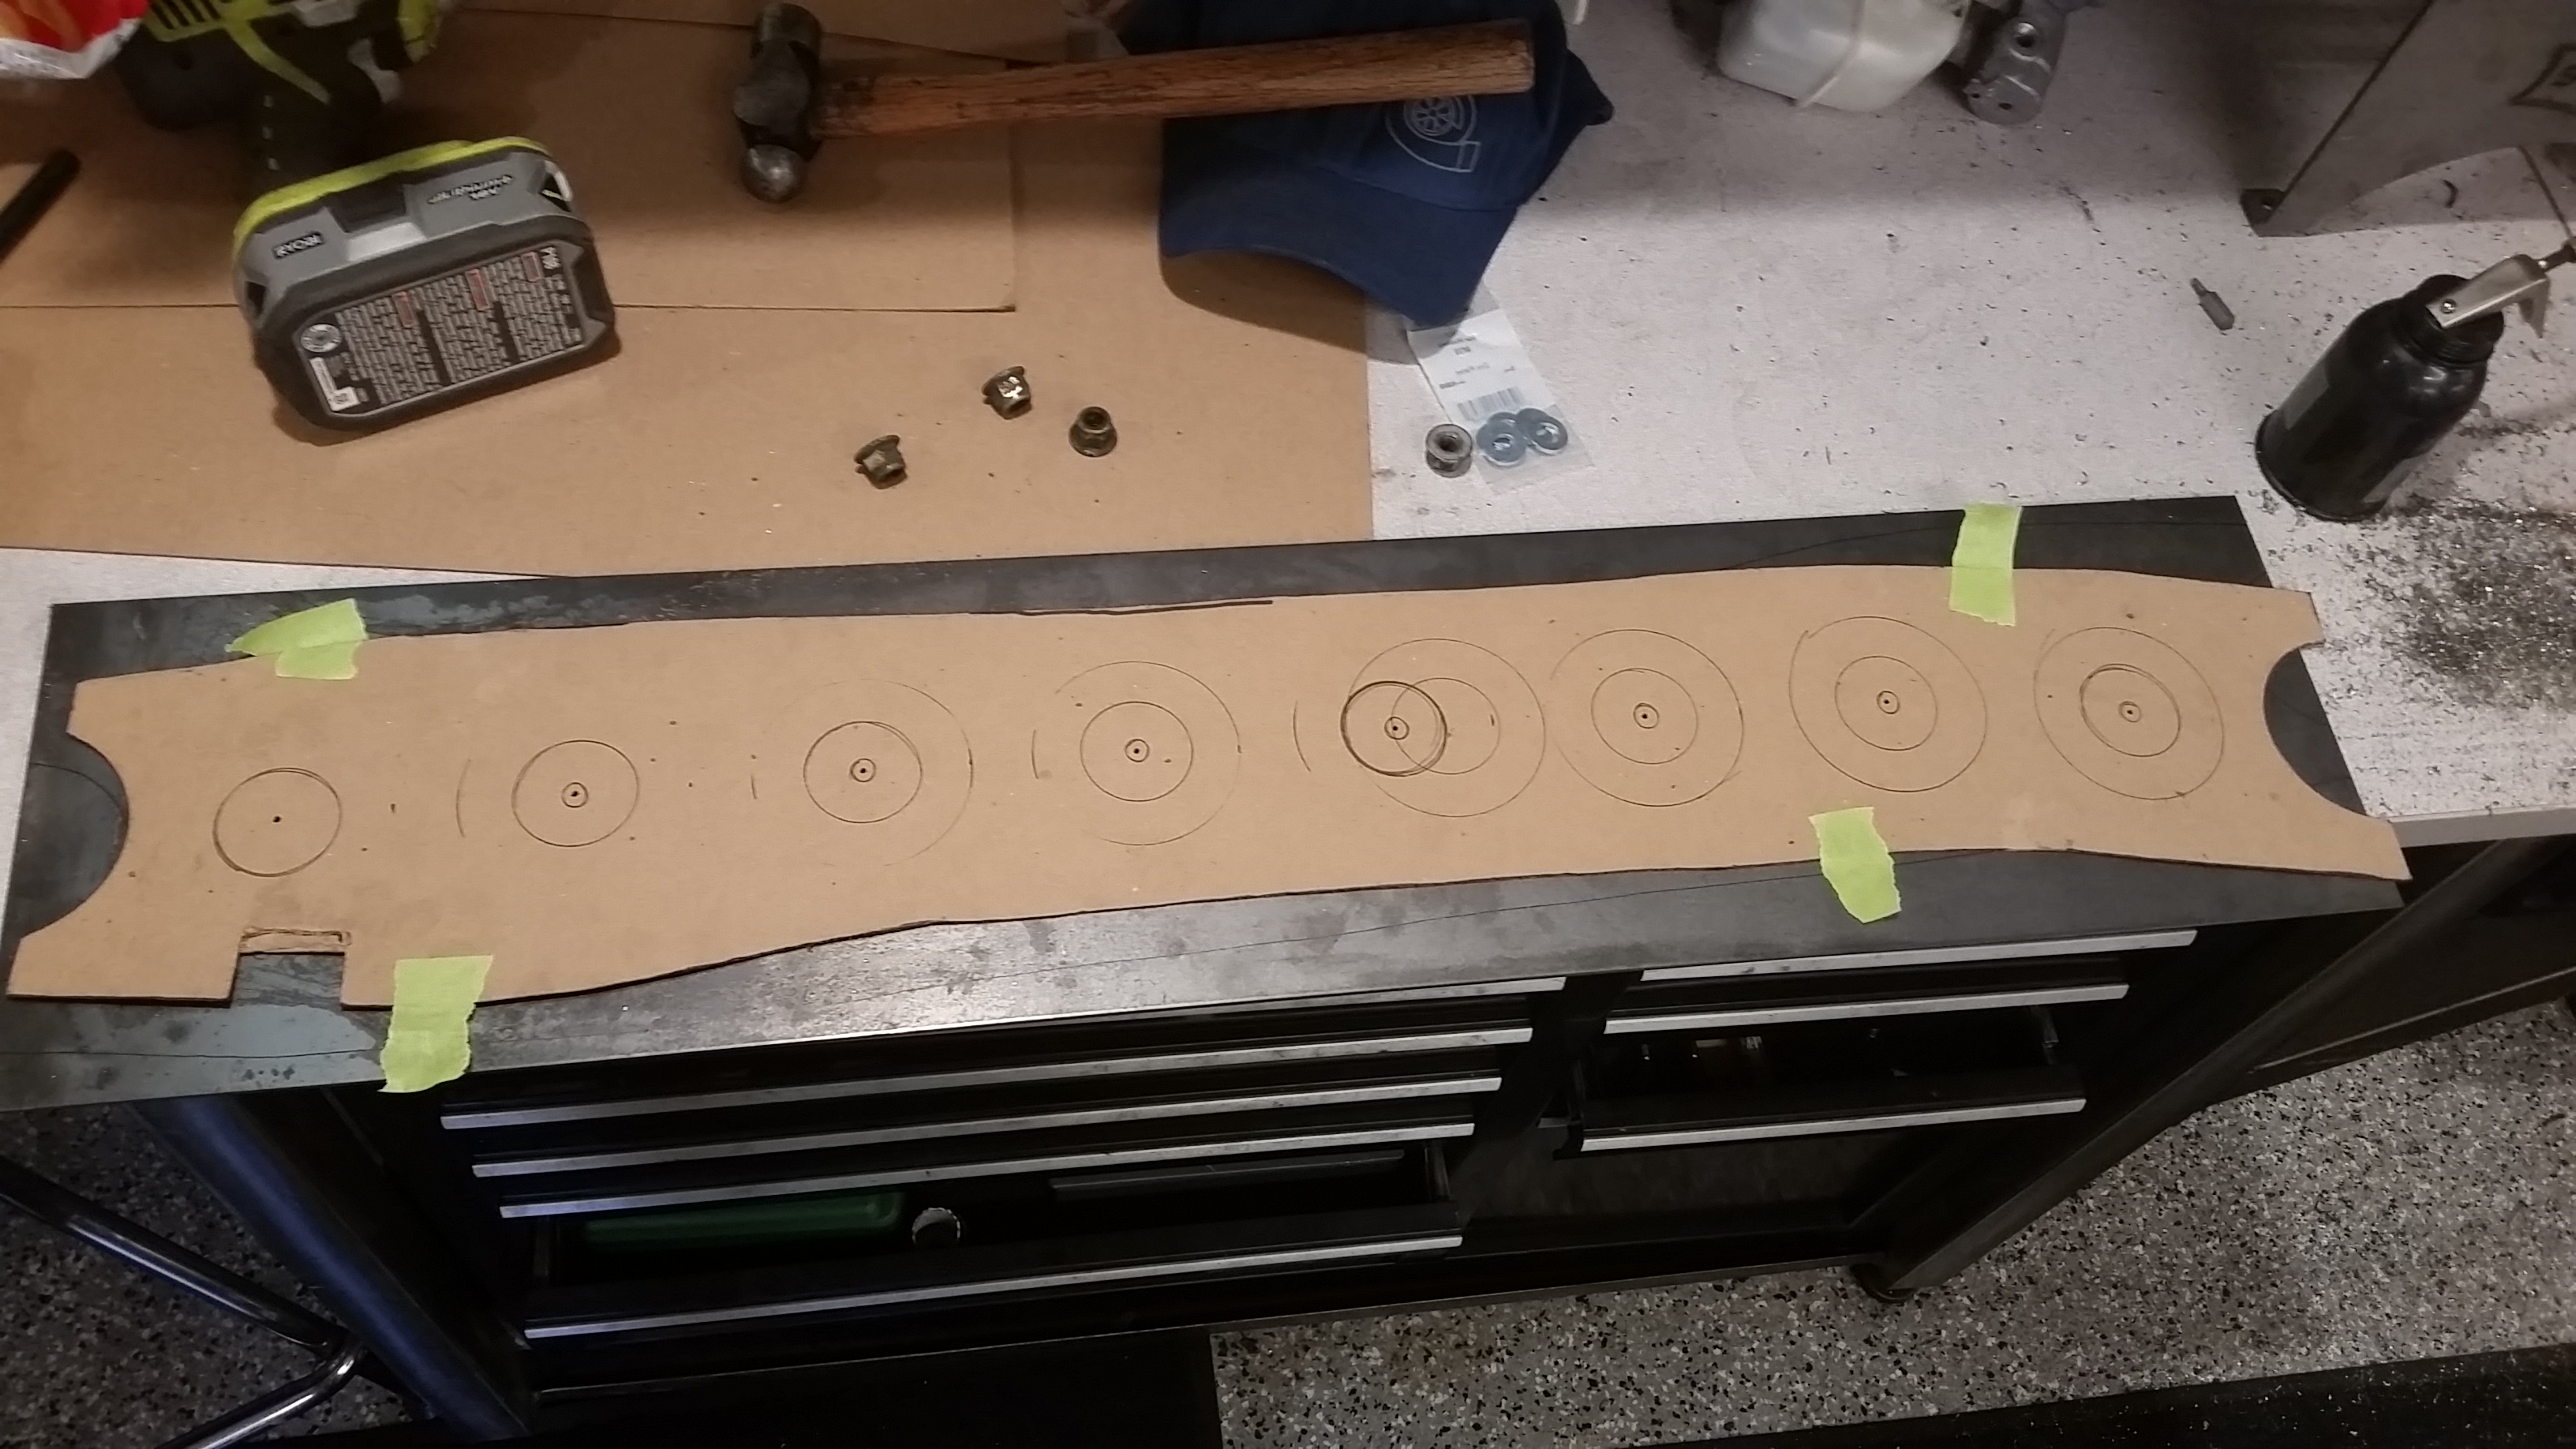
Then got to work on the frame boxing plates.
Built a template first from Chipboard and laid out my pattern.
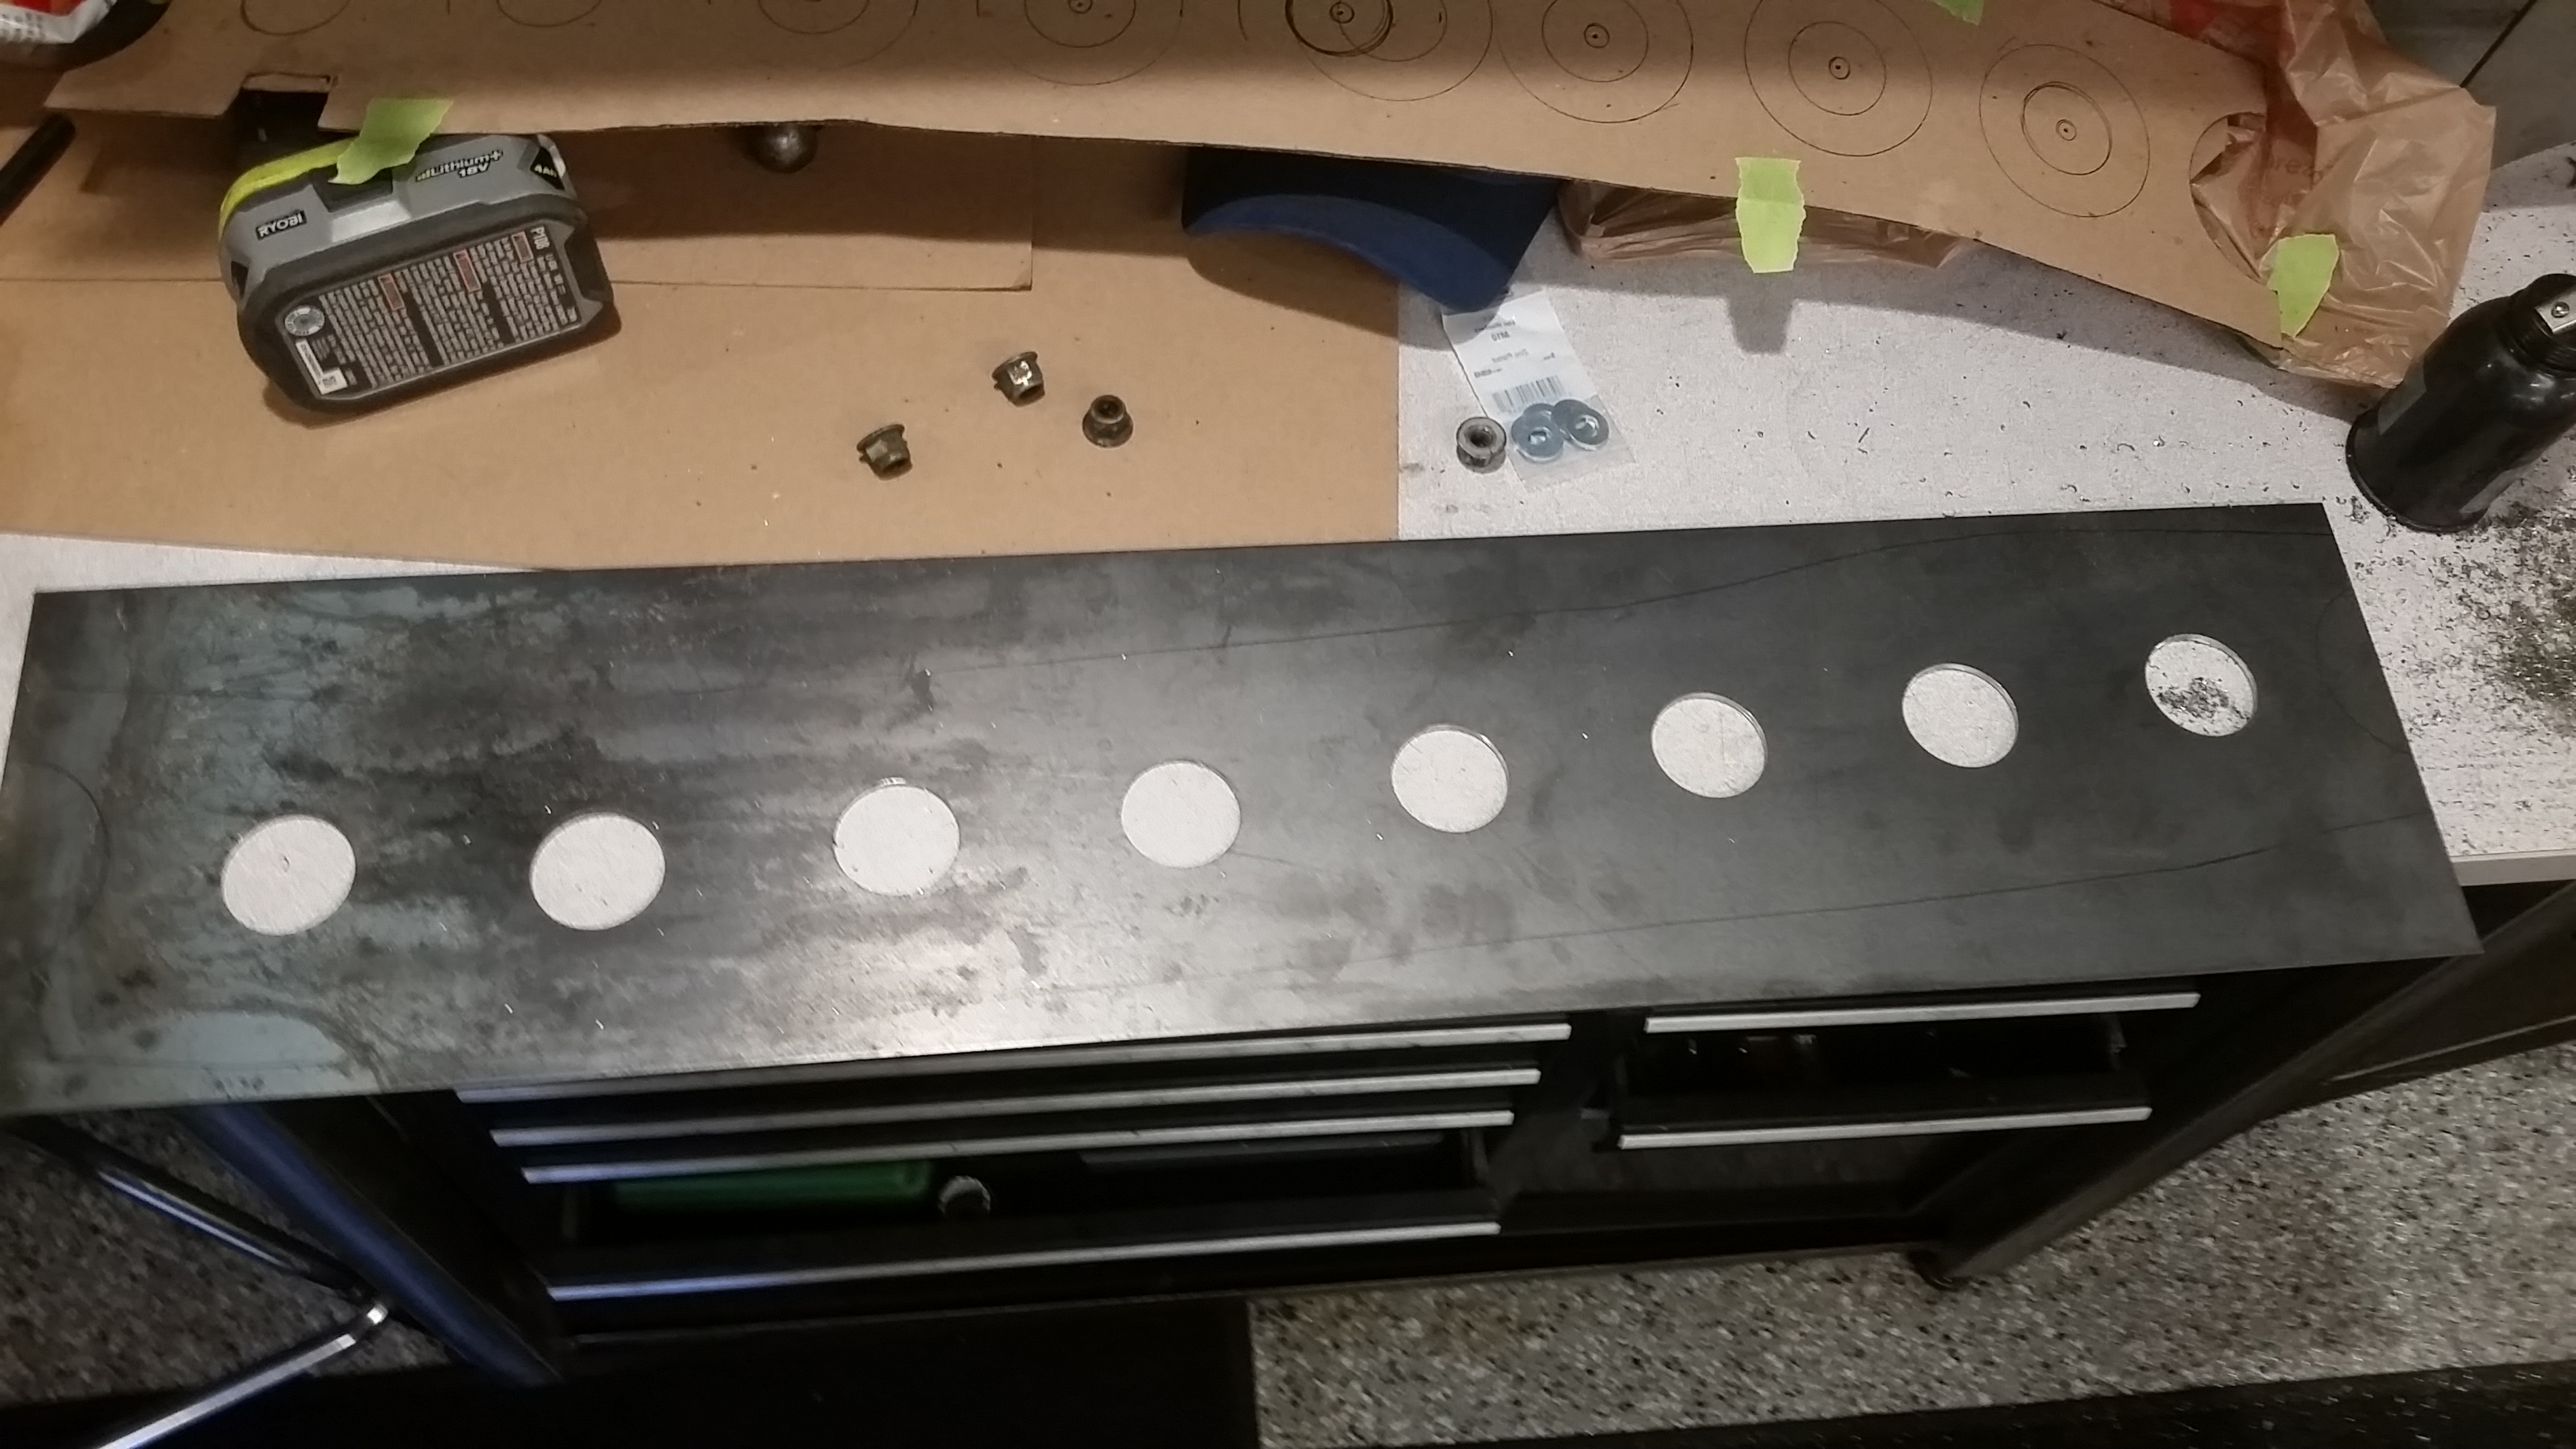
Transfer the pattern to the plate and start drilling lots of 1.5" holes.
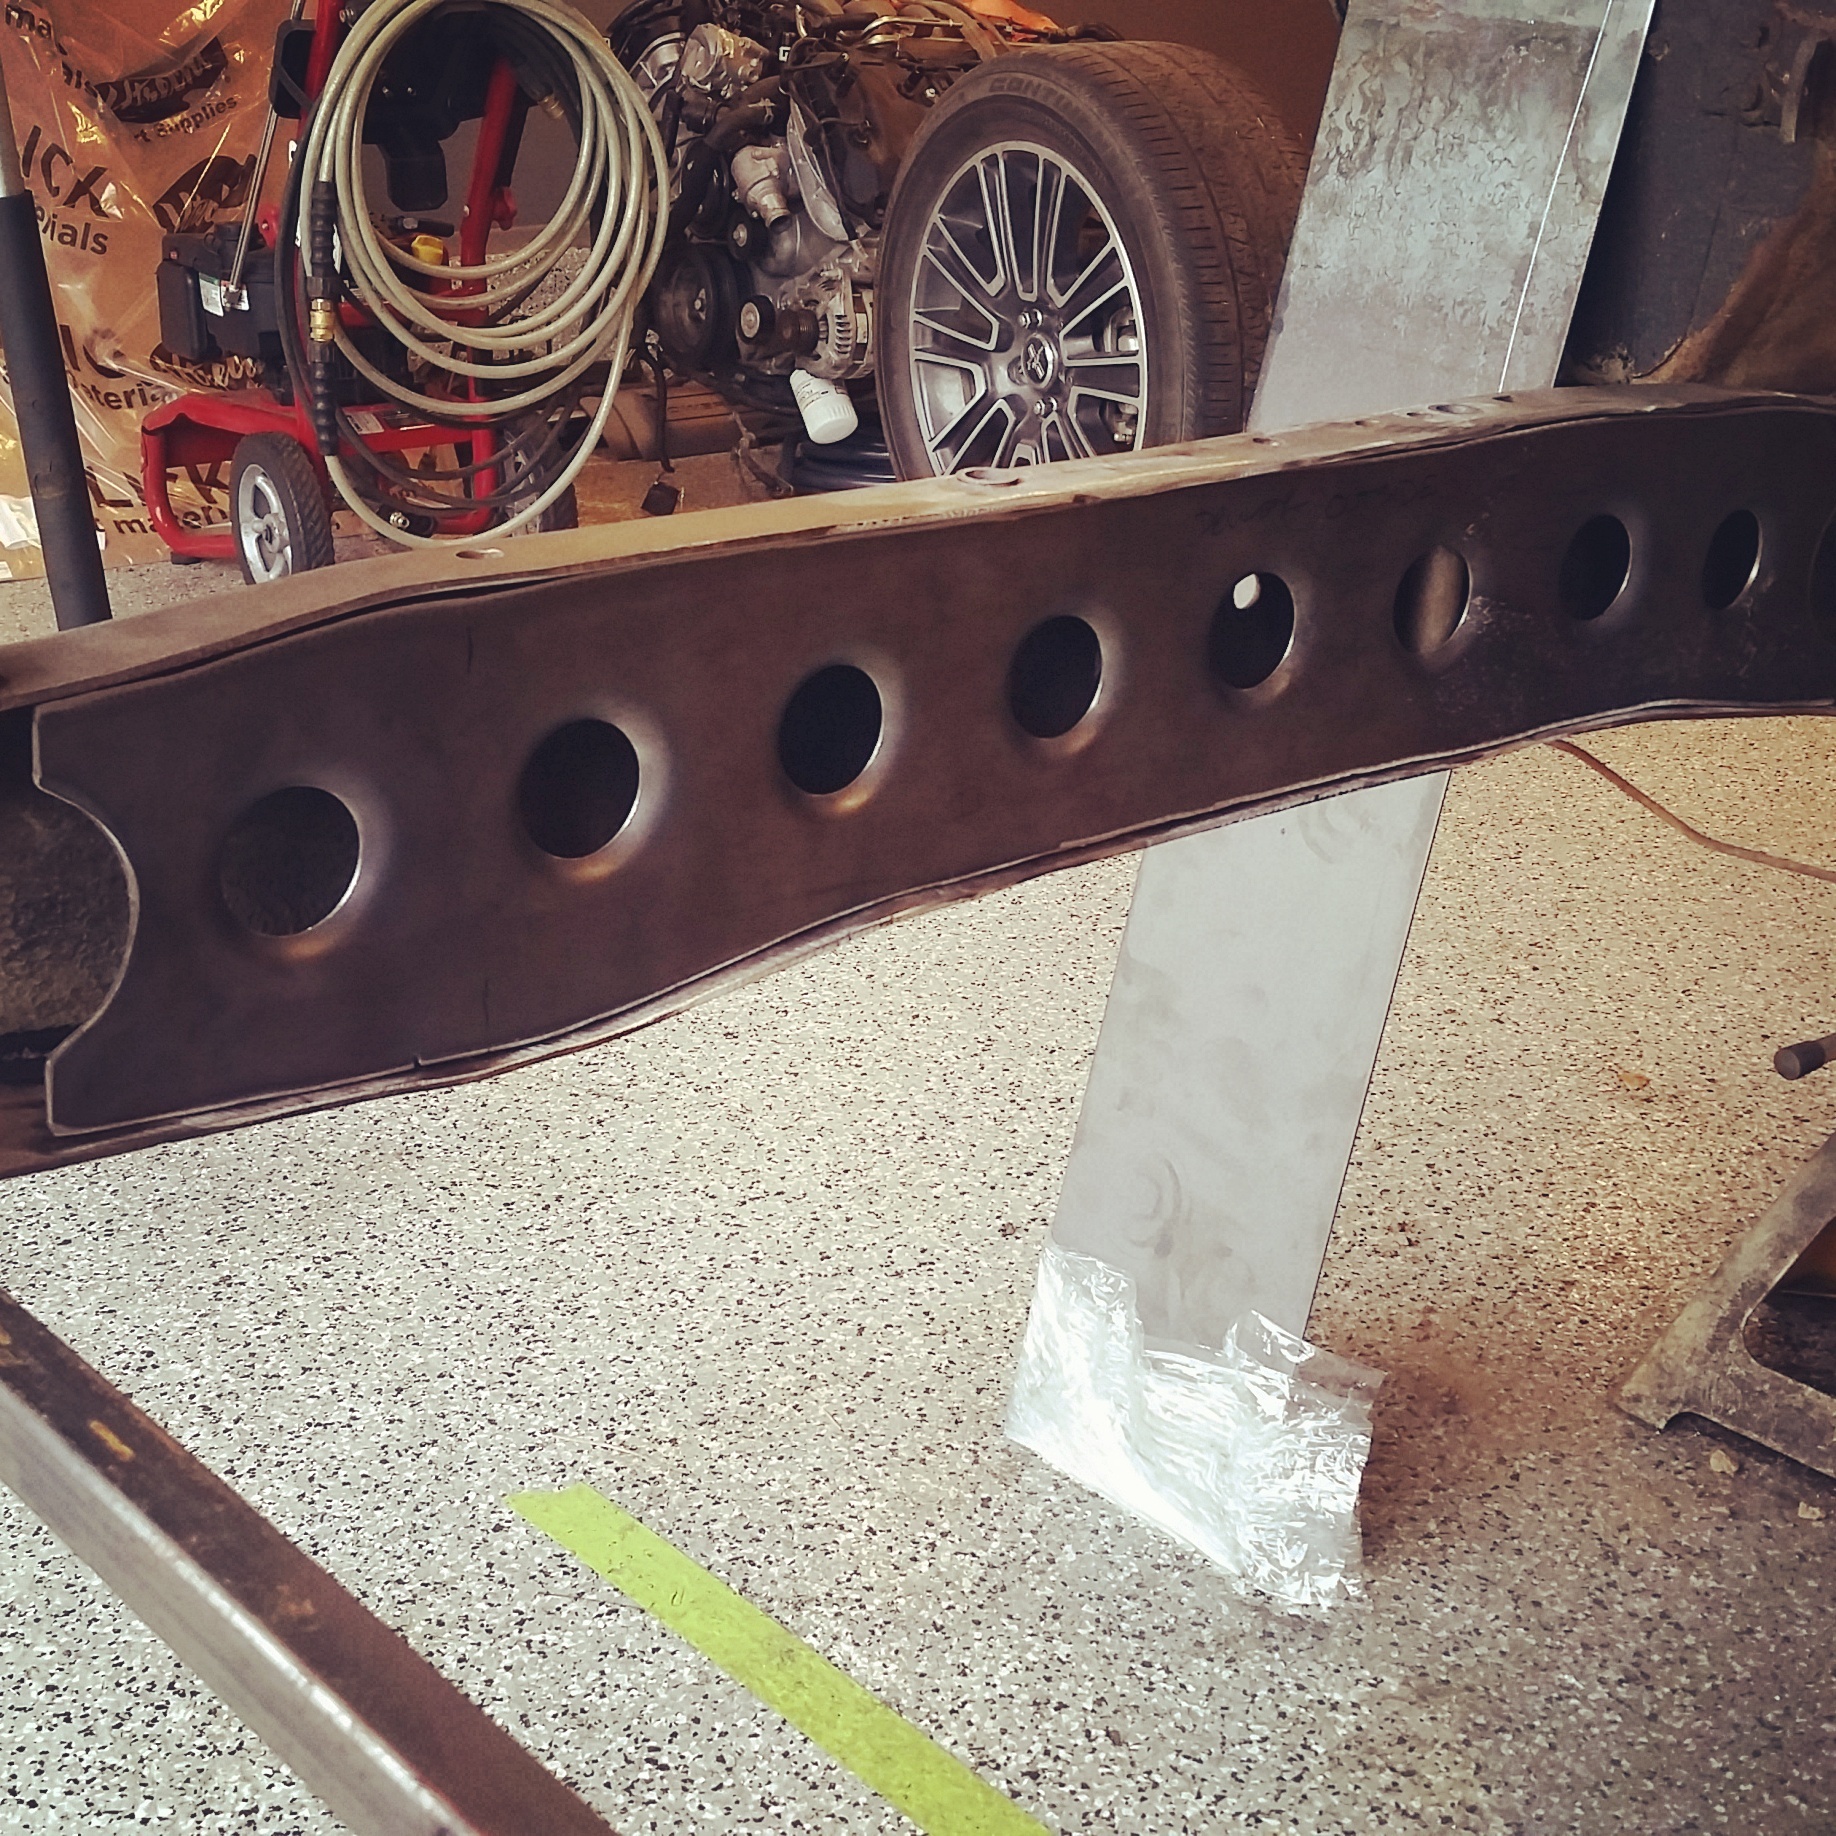
A trip to the press with some dimple dies and a test fit into framerail and do the final fitup on the passenger side
Tack in place...
Repeat on drivers side
Clean up the shop and call it a day.
Hope to get the frontend all welded out tomorrow and start on making the mounting plates for the lower control arms and get the frontend all bolted in place.
Have 7 days straight to work on the truck.
Sean
Then got to work on the frame boxing plates.
Built a template first from Chipboard and laid out my pattern.

Transfer the pattern to the plate and start drilling lots of 1.5" holes.

A trip to the press with some dimple dies and a test fit into framerail and do the final fitup on the passenger side

Tack in place...

Repeat on drivers side

Clean up the shop and call it a day.
Hope to get the frontend all welded out tomorrow and start on making the mounting plates for the lower control arms and get the frontend all bolted in place.
Have 7 days straight to work on the truck.
Sean
#10
10-16-2015, 08:53 AM
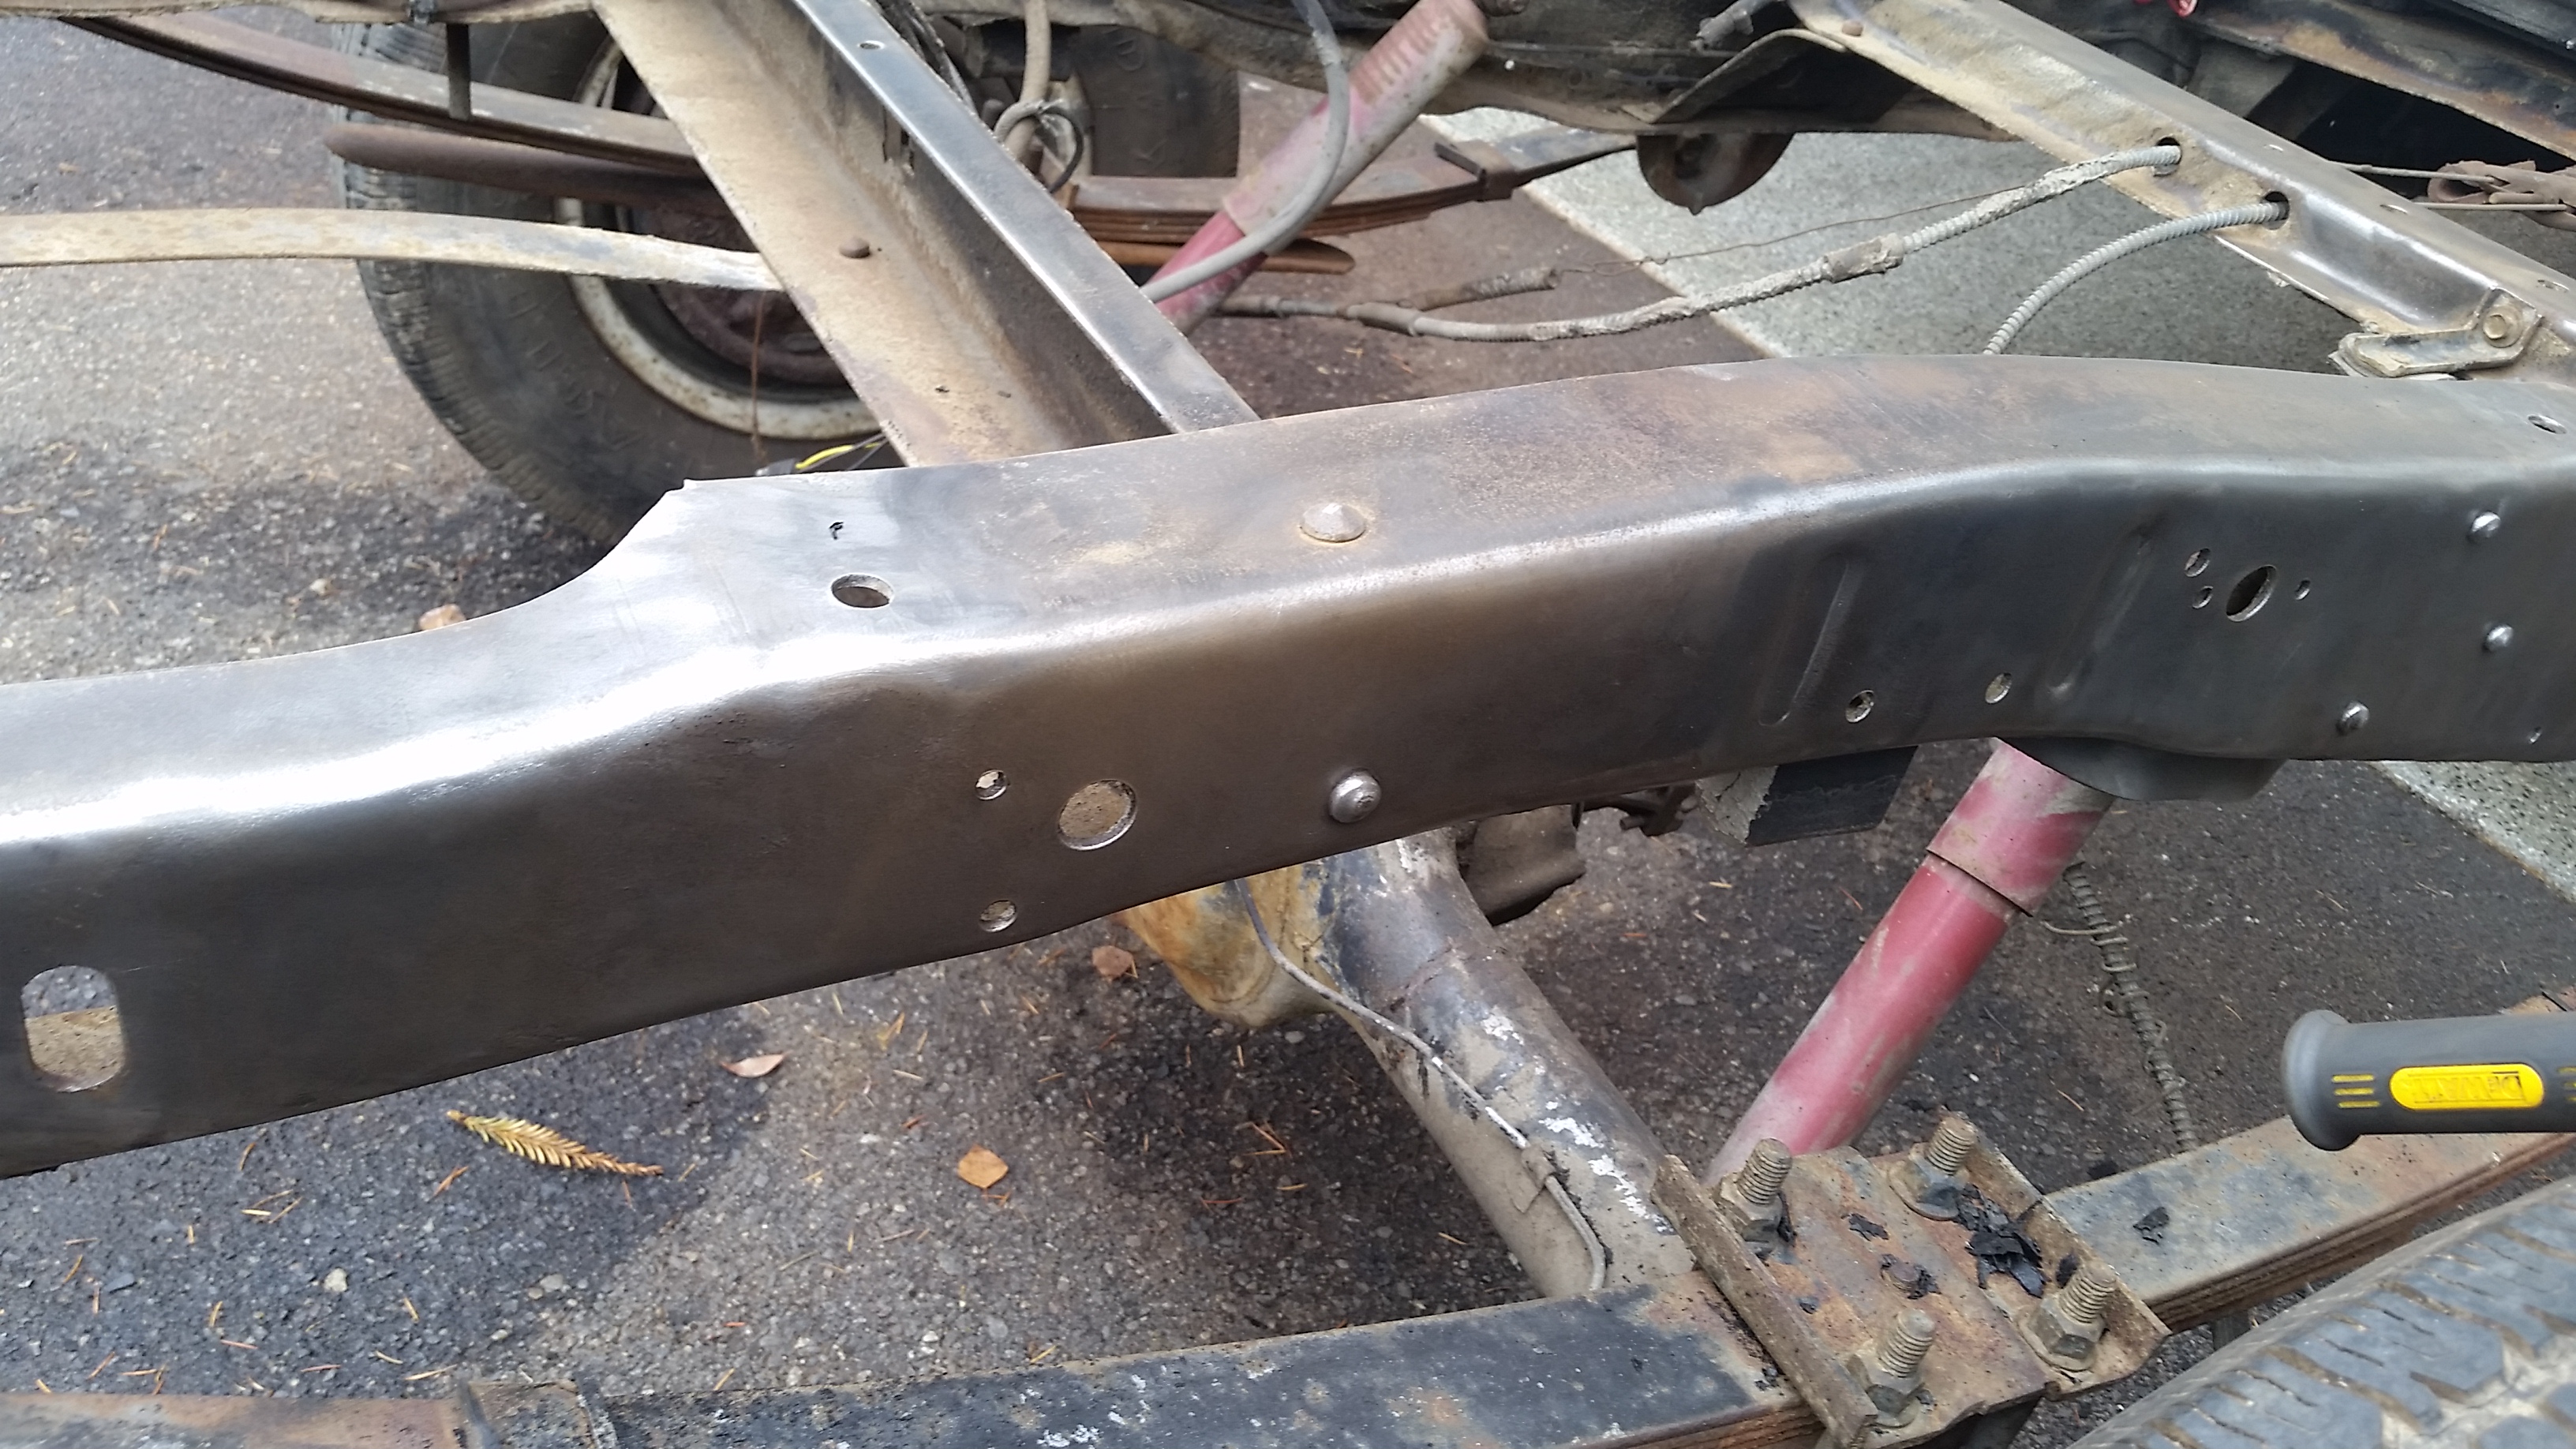
Got out in the shop this morning and got the welder fired up. Alternated top bottom right then left to keep the heat down and even. Not perfect but welding on some old ****ty metal on the truck frame turned out ok.
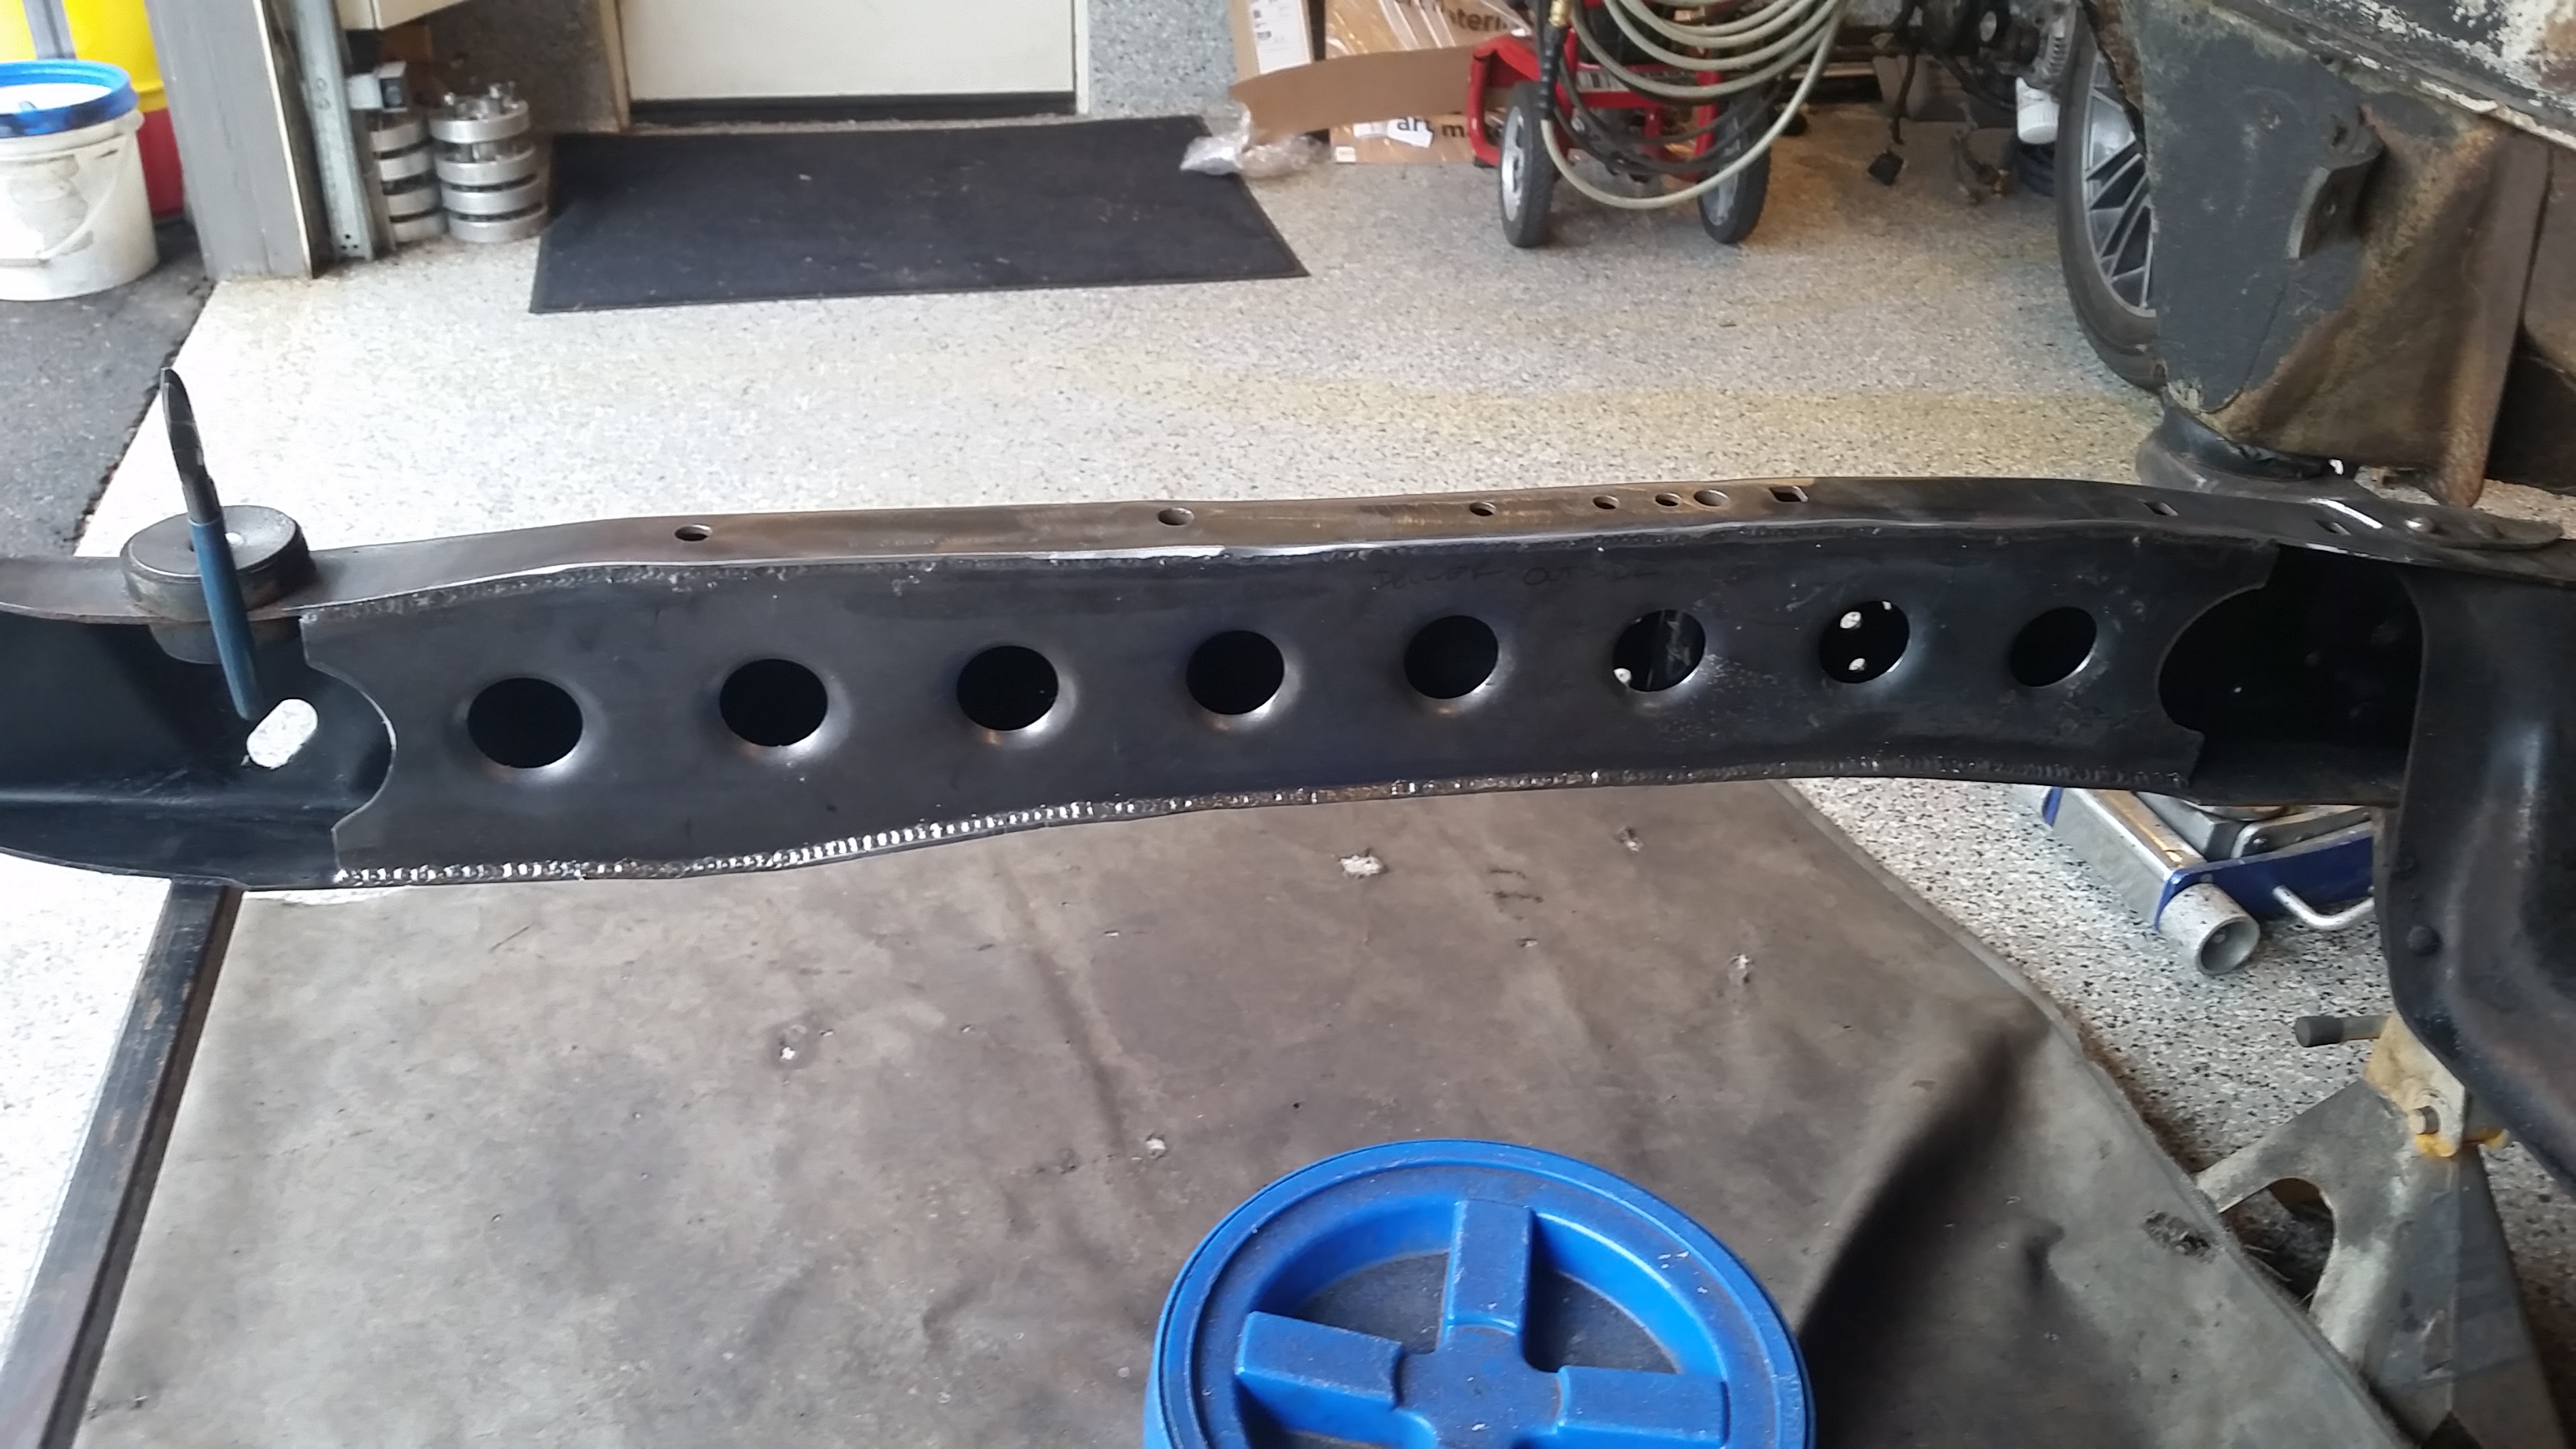
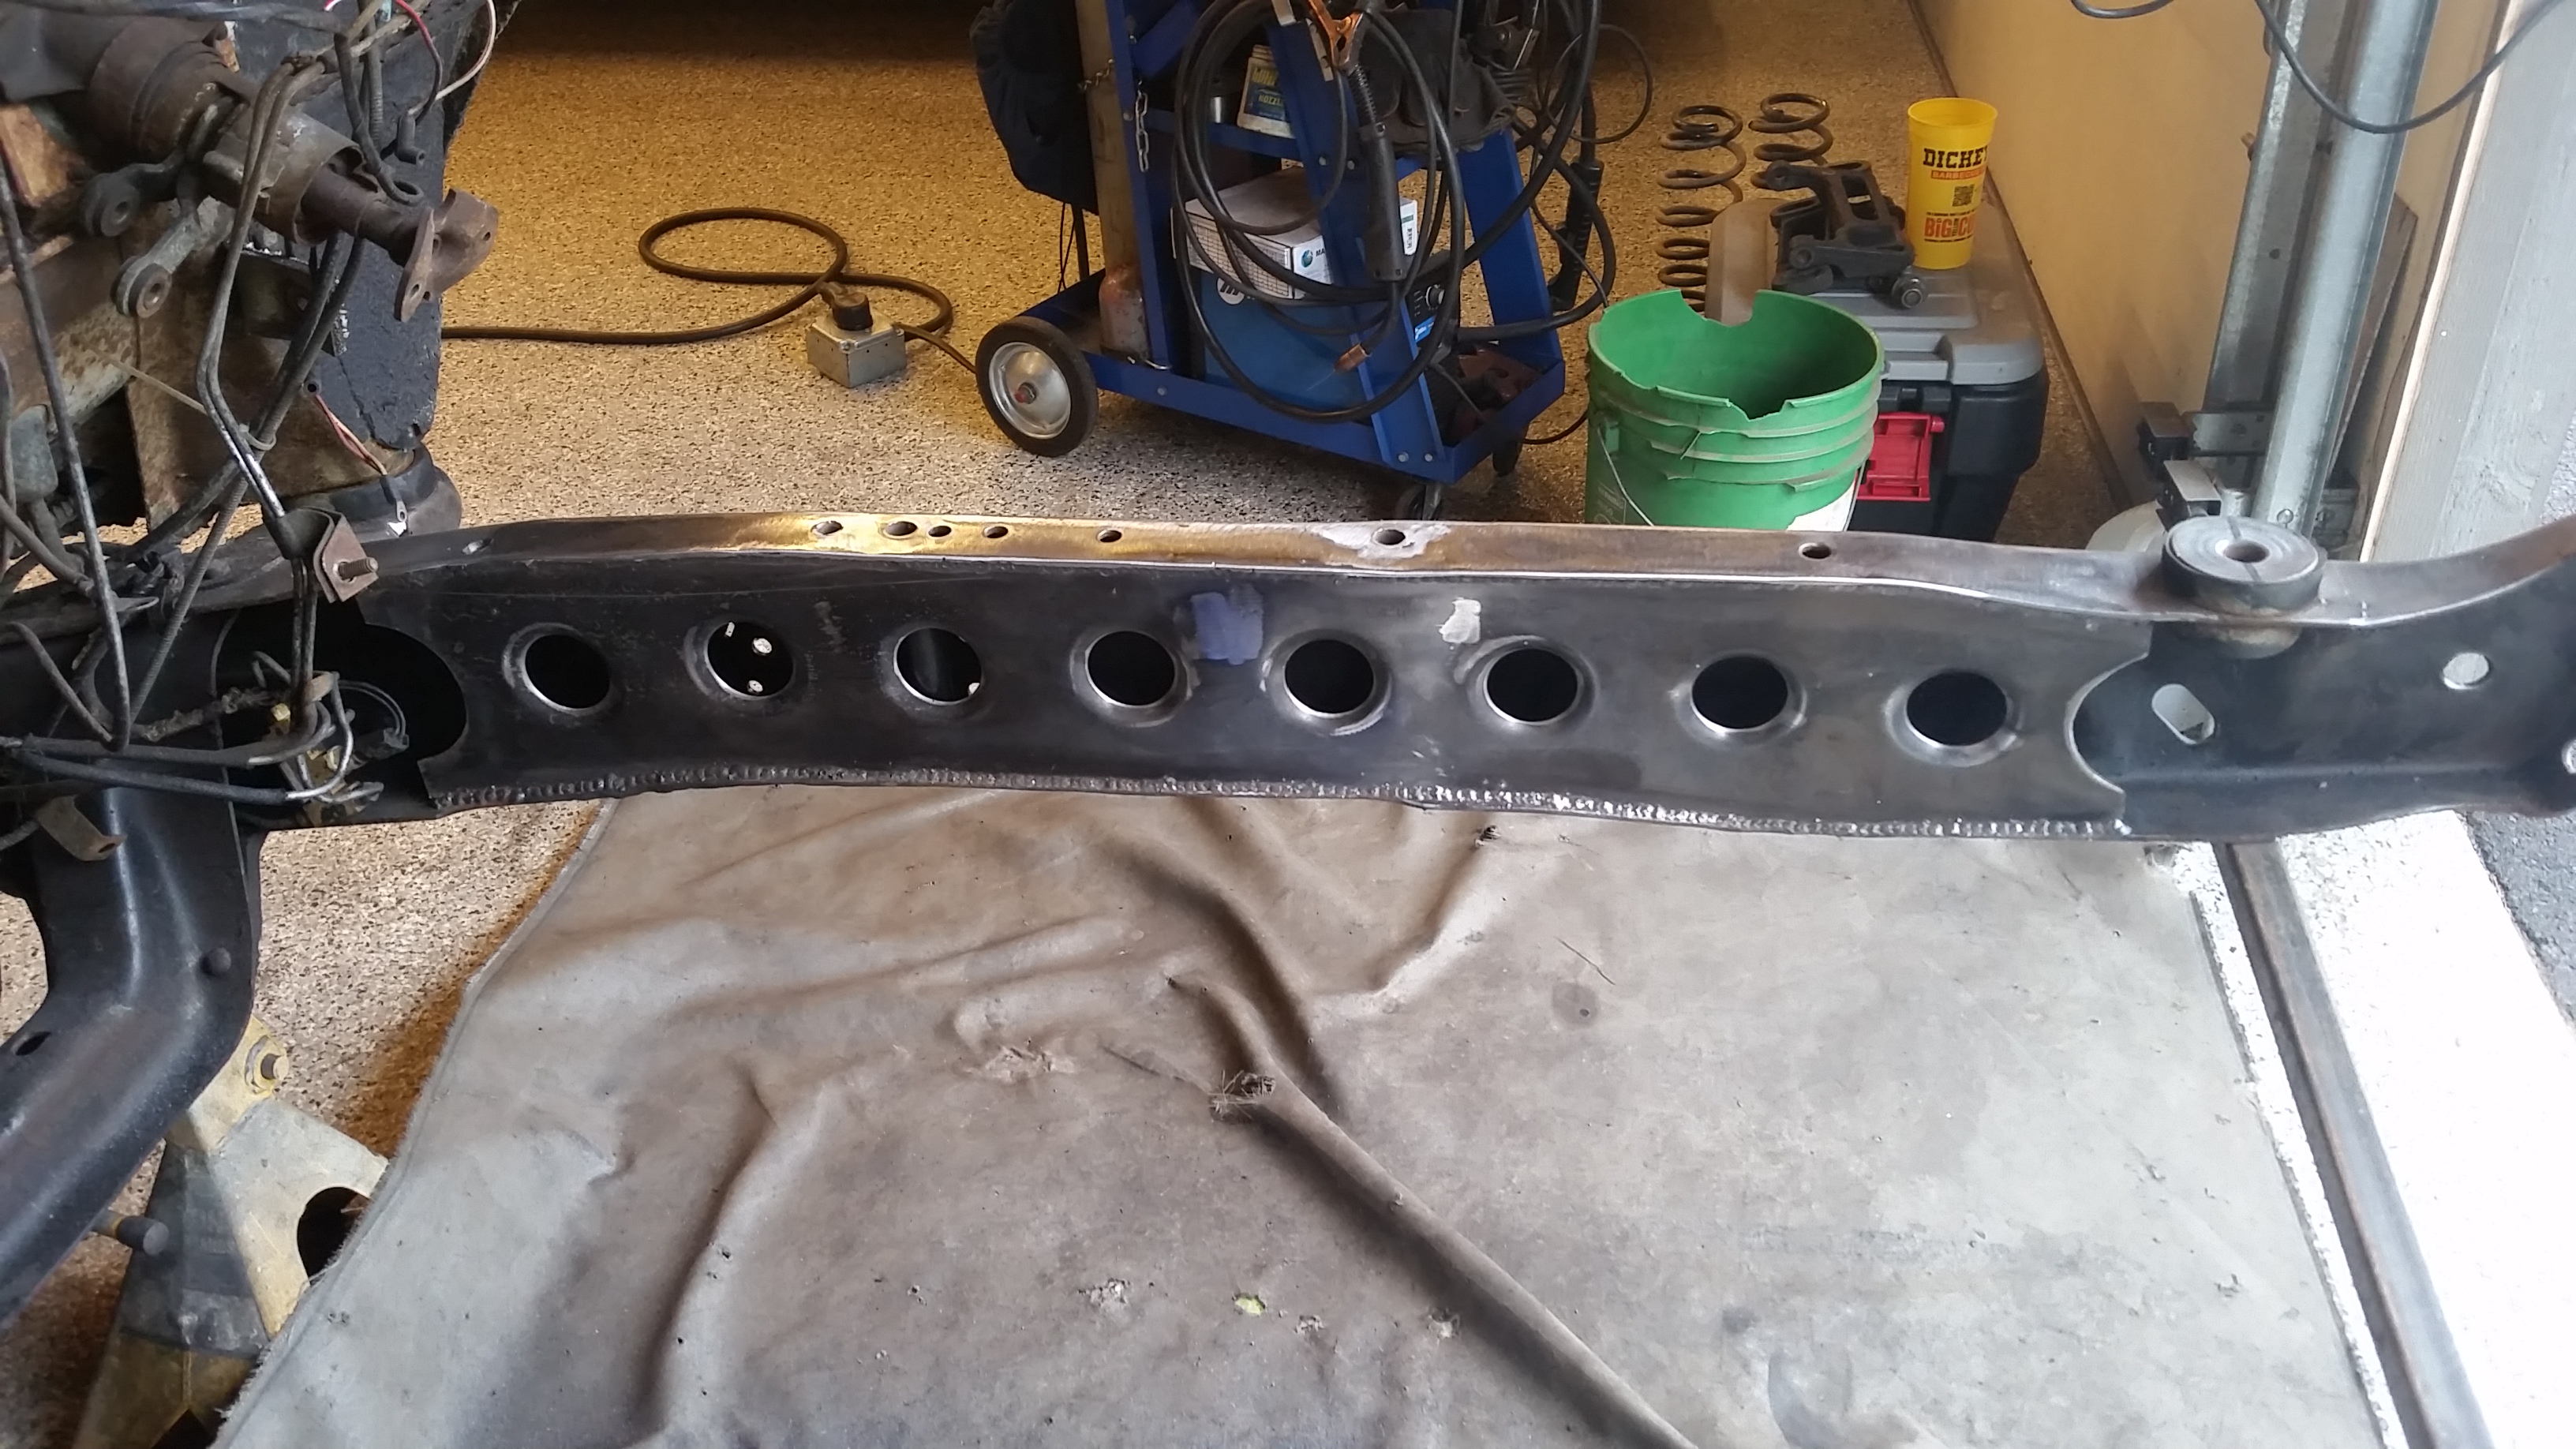
Got some paint on the front of the frame. Trying something different on this one with some Rustoleum 2x satin black. Have used in on some other projects and its been great. Not high end, this build is not supposed to be fancy, its supposed to be a driver.
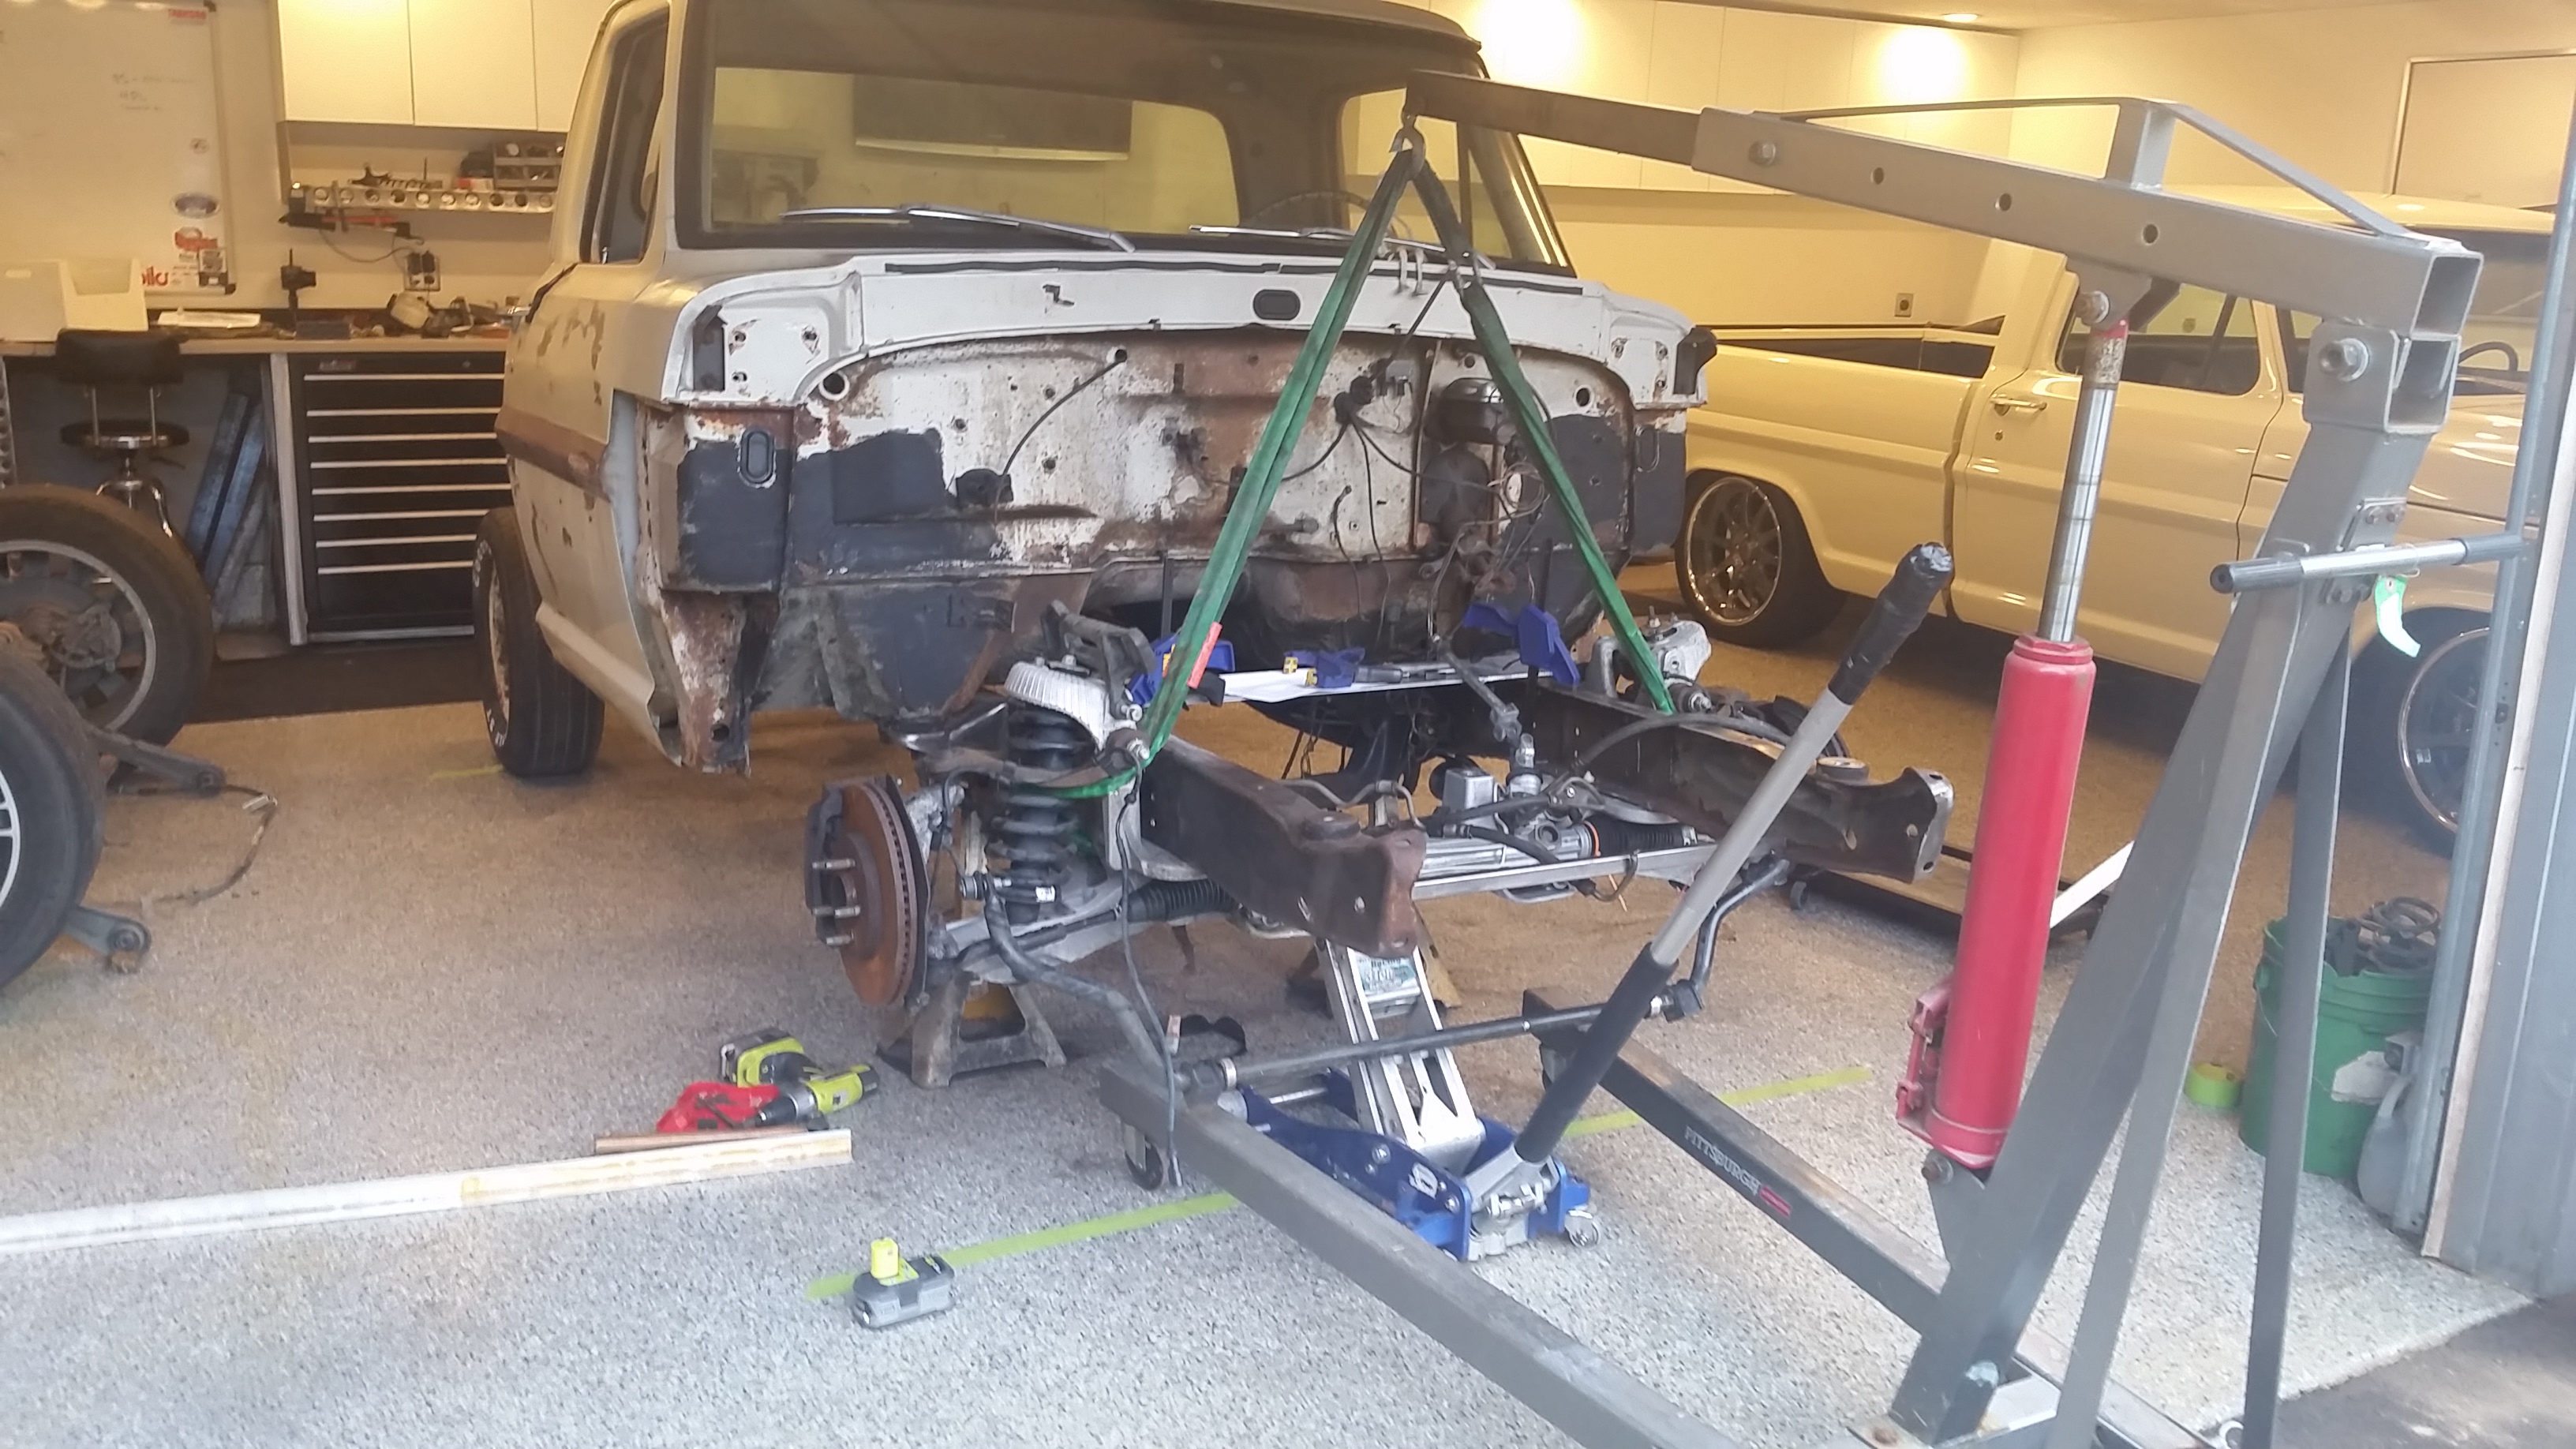
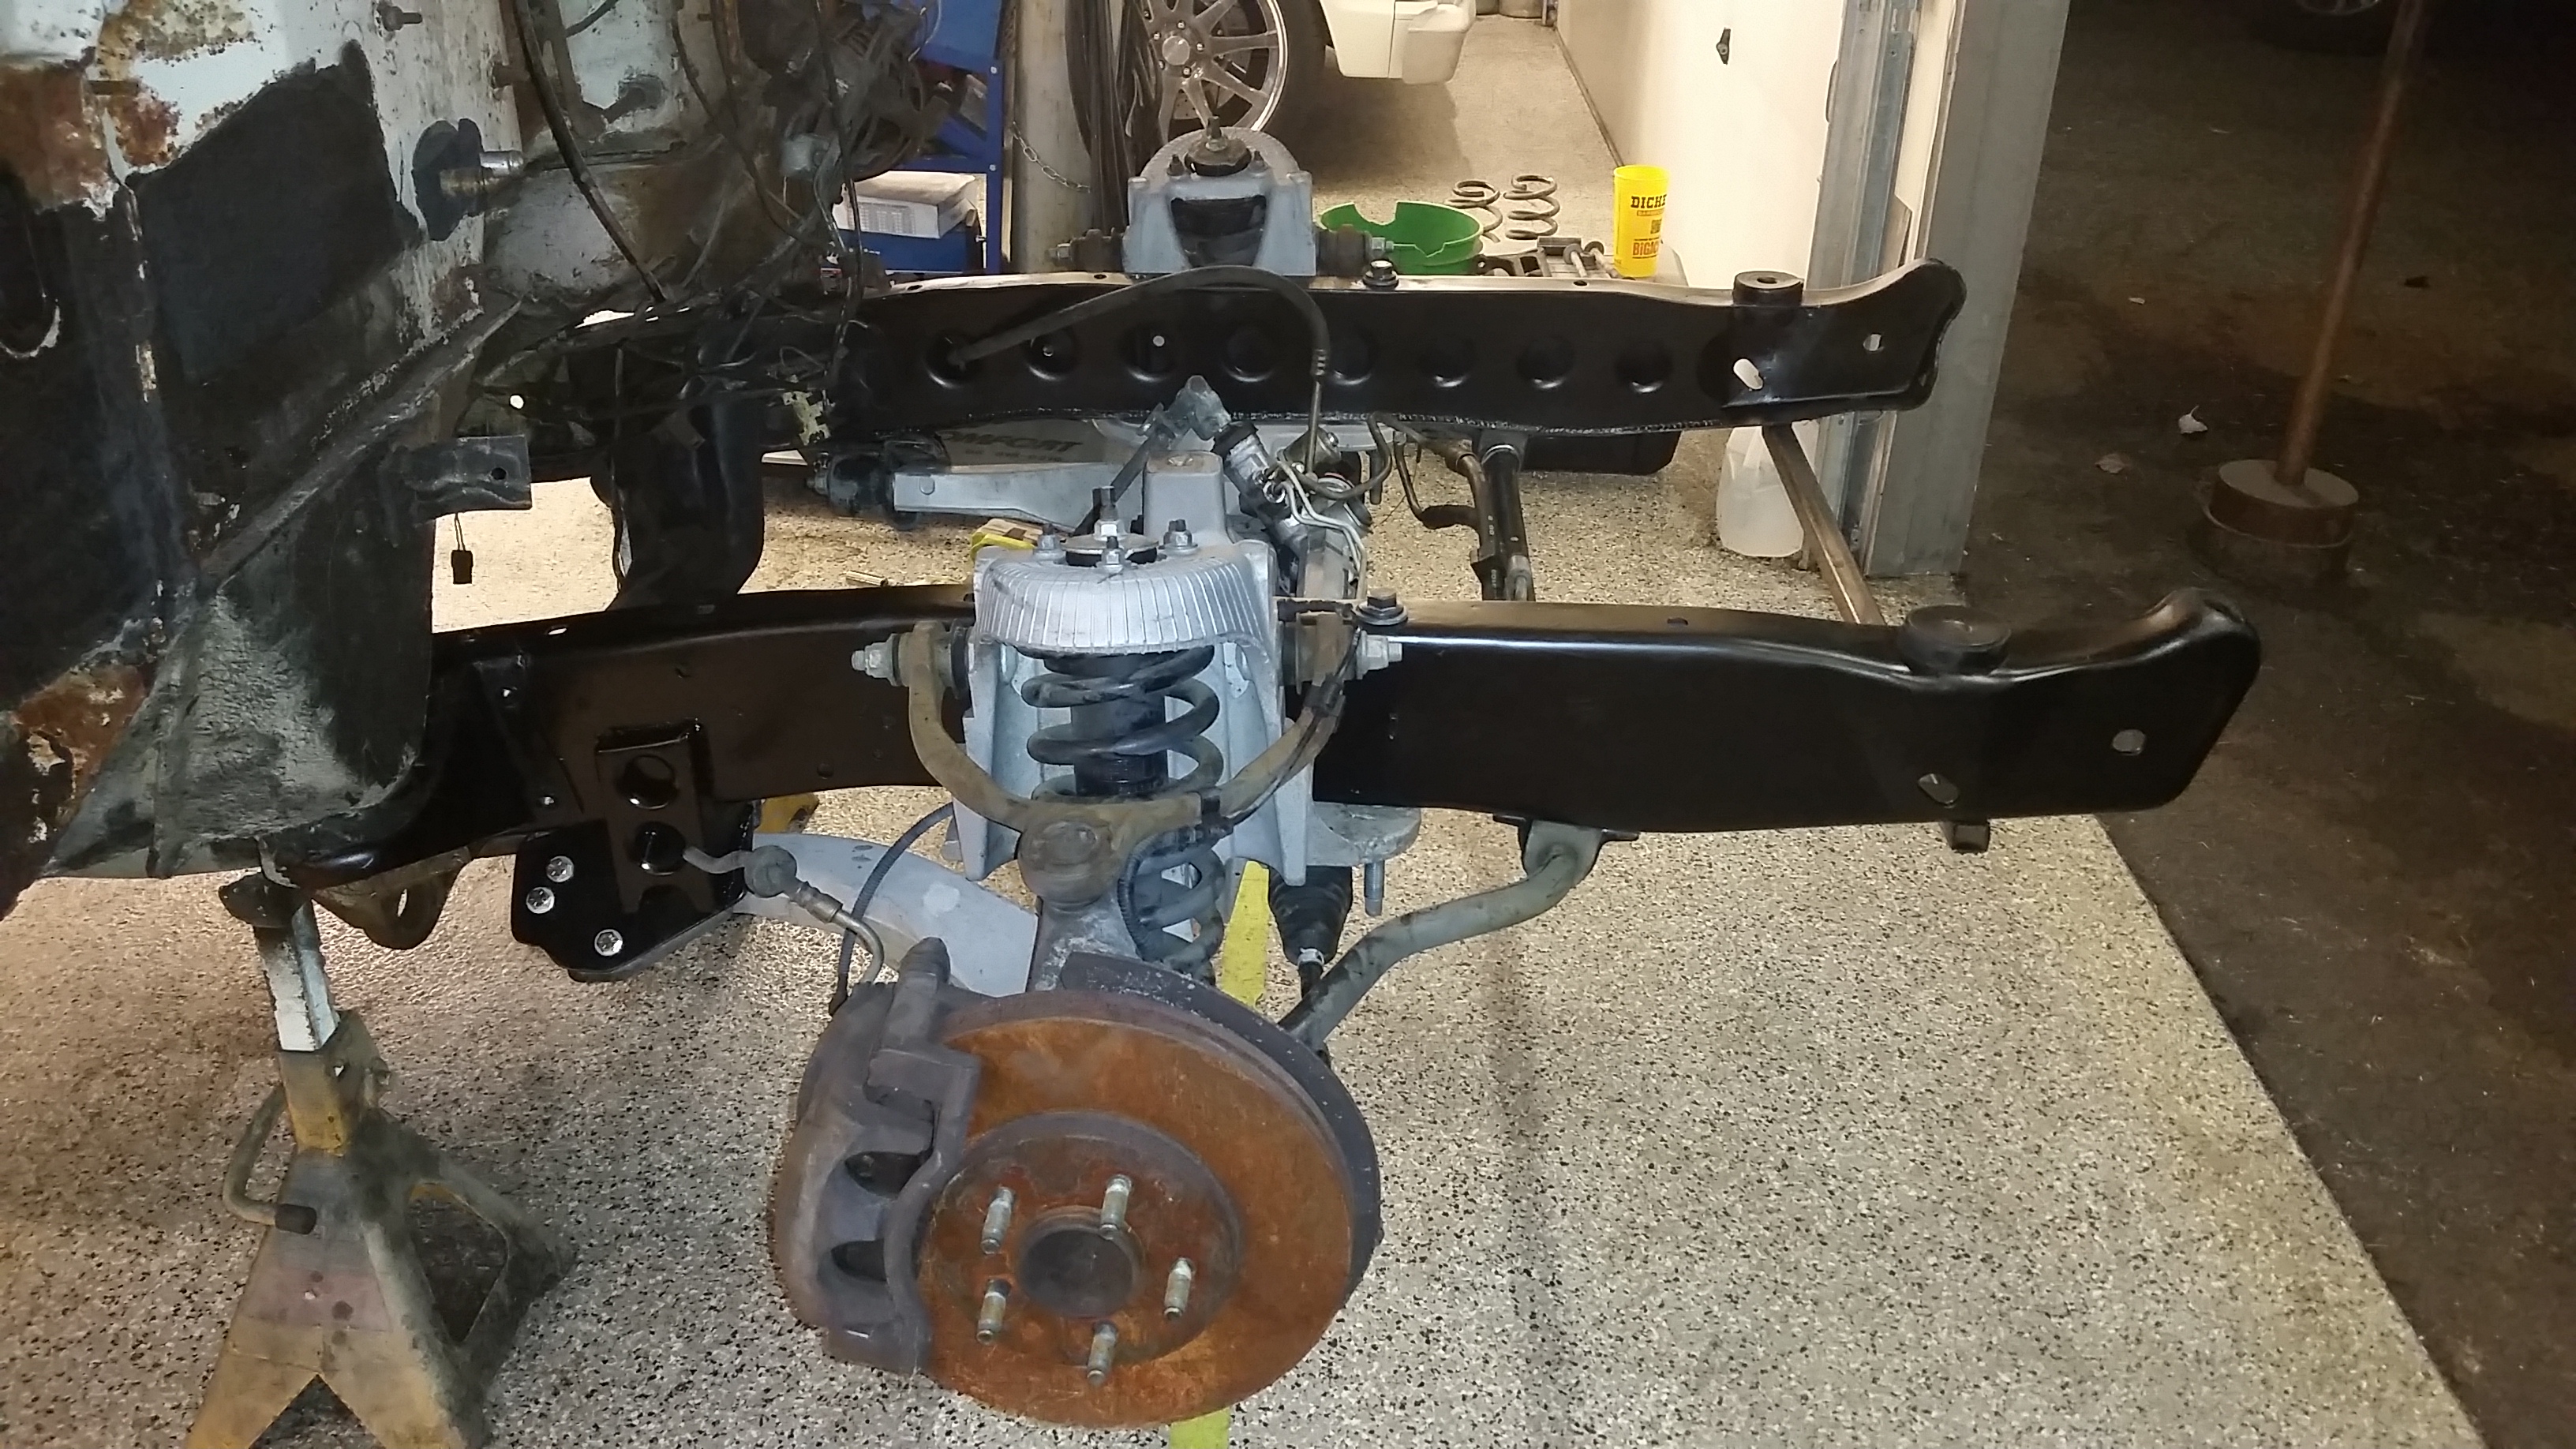
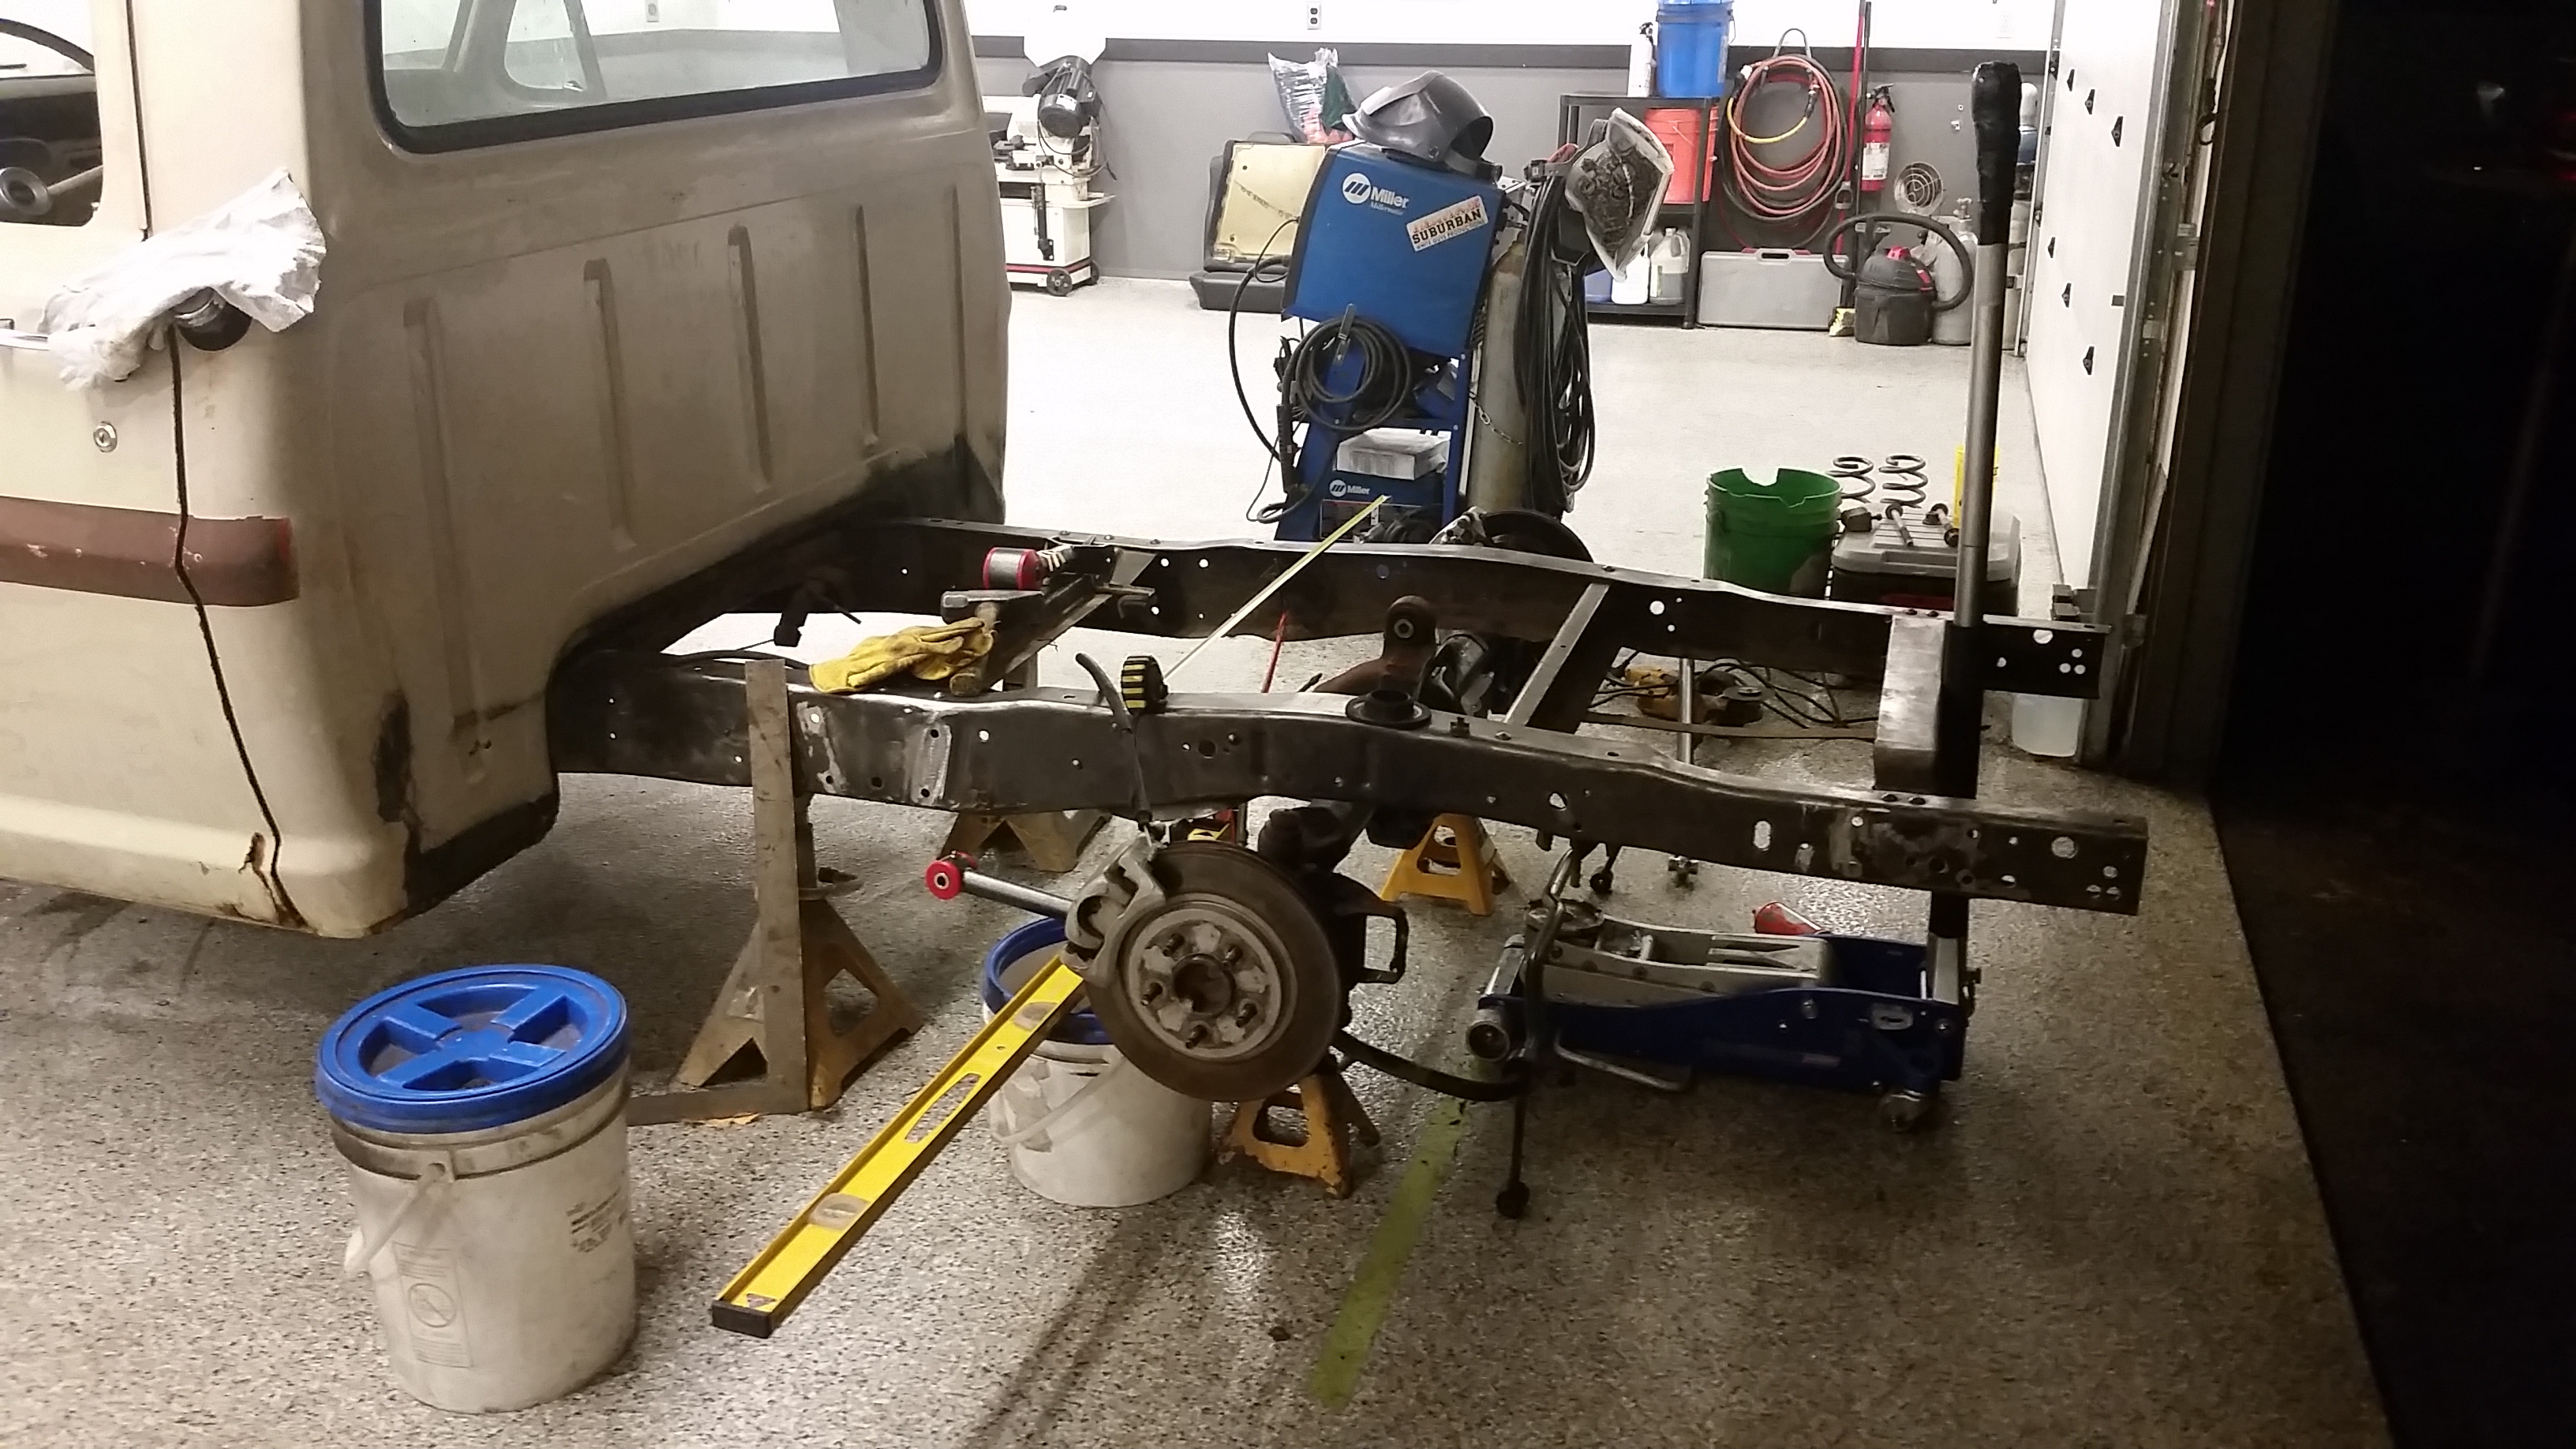
Got the frontend under it again......and started on the mounting plates for the trailing arm. Going to keep them rotated on a 45 this time. I think its a little better packaging and I can get better alignment with them mounted correctly....the things you learn by building something a second time.
Since its a race car, its going to have to keep up with the speed holes and dimple dies =)
Little bit of paint on the old girl.
Hope to get the frontend cleaned up and bolted on maybe for good later this evening, but needed a break from the shop for a bit.


Got some paint on the front of the frame. Trying something different on this one with some Rustoleum 2x satin black. Have used in on some other projects and its been great. Not high end, this build is not supposed to be fancy, its supposed to be a driver.


Got the frontend under it again......and started on the mounting plates for the trailing arm. Going to keep them rotated on a 45 this time. I think its a little better packaging and I can get better alignment with them mounted correctly....the things you learn by building something a second time.
Since its a race car, its going to have to keep up with the speed holes and dimple dies =)

Little bit of paint on the old girl.

Hope to get the frontend cleaned up and bolted on maybe for good later this evening, but needed a break from the shop for a bit.
#11
10-16-2015, 08:53 AM
It's not really that impressive but I am pretty stoked with how the frontend has come out so far.
Stock sway bar is bolted on for now, not sure I am going to keep it or run the Addco sway bar.
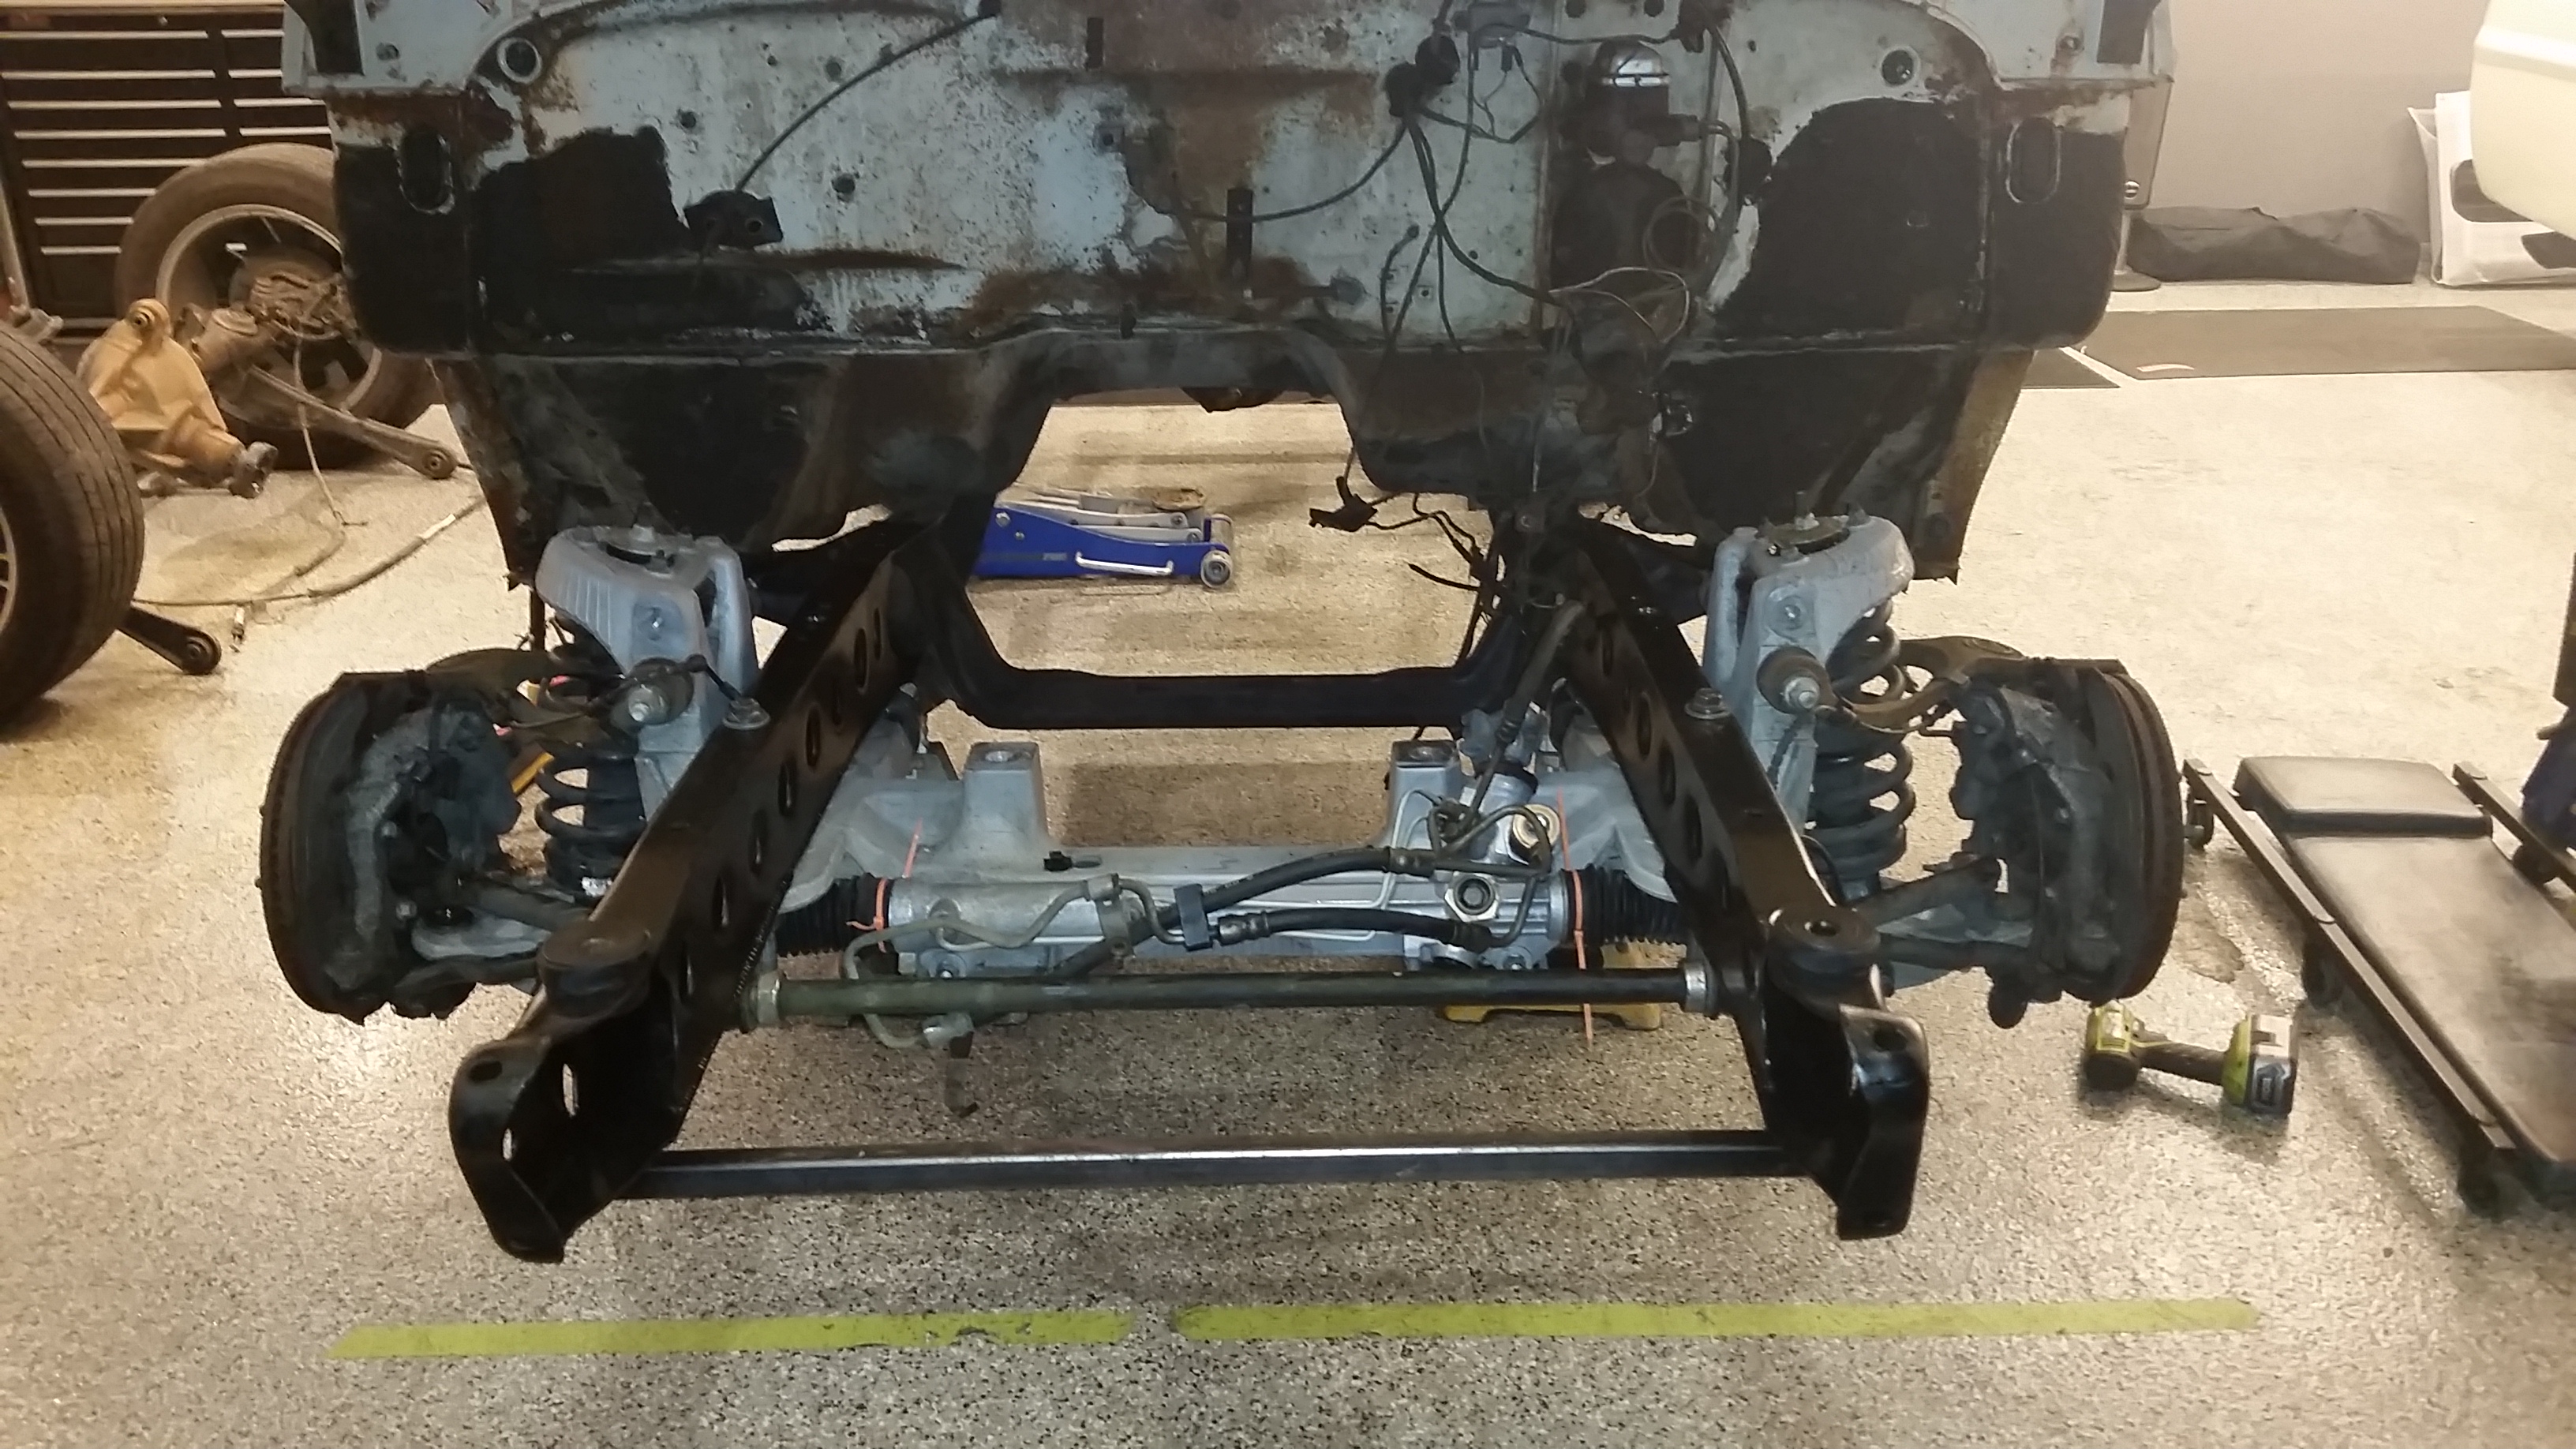
Gotta work for a few hours in the morning and then back on the truck. I hope to get it flipped around and get to work on the rear of the truck.
Sean
Stock sway bar is bolted on for now, not sure I am going to keep it or run the Addco sway bar.


Gotta work for a few hours in the morning and then back on the truck. I hope to get it flipped around and get to work on the rear of the truck.
Sean
#12
10-16-2015, 08:54 AM
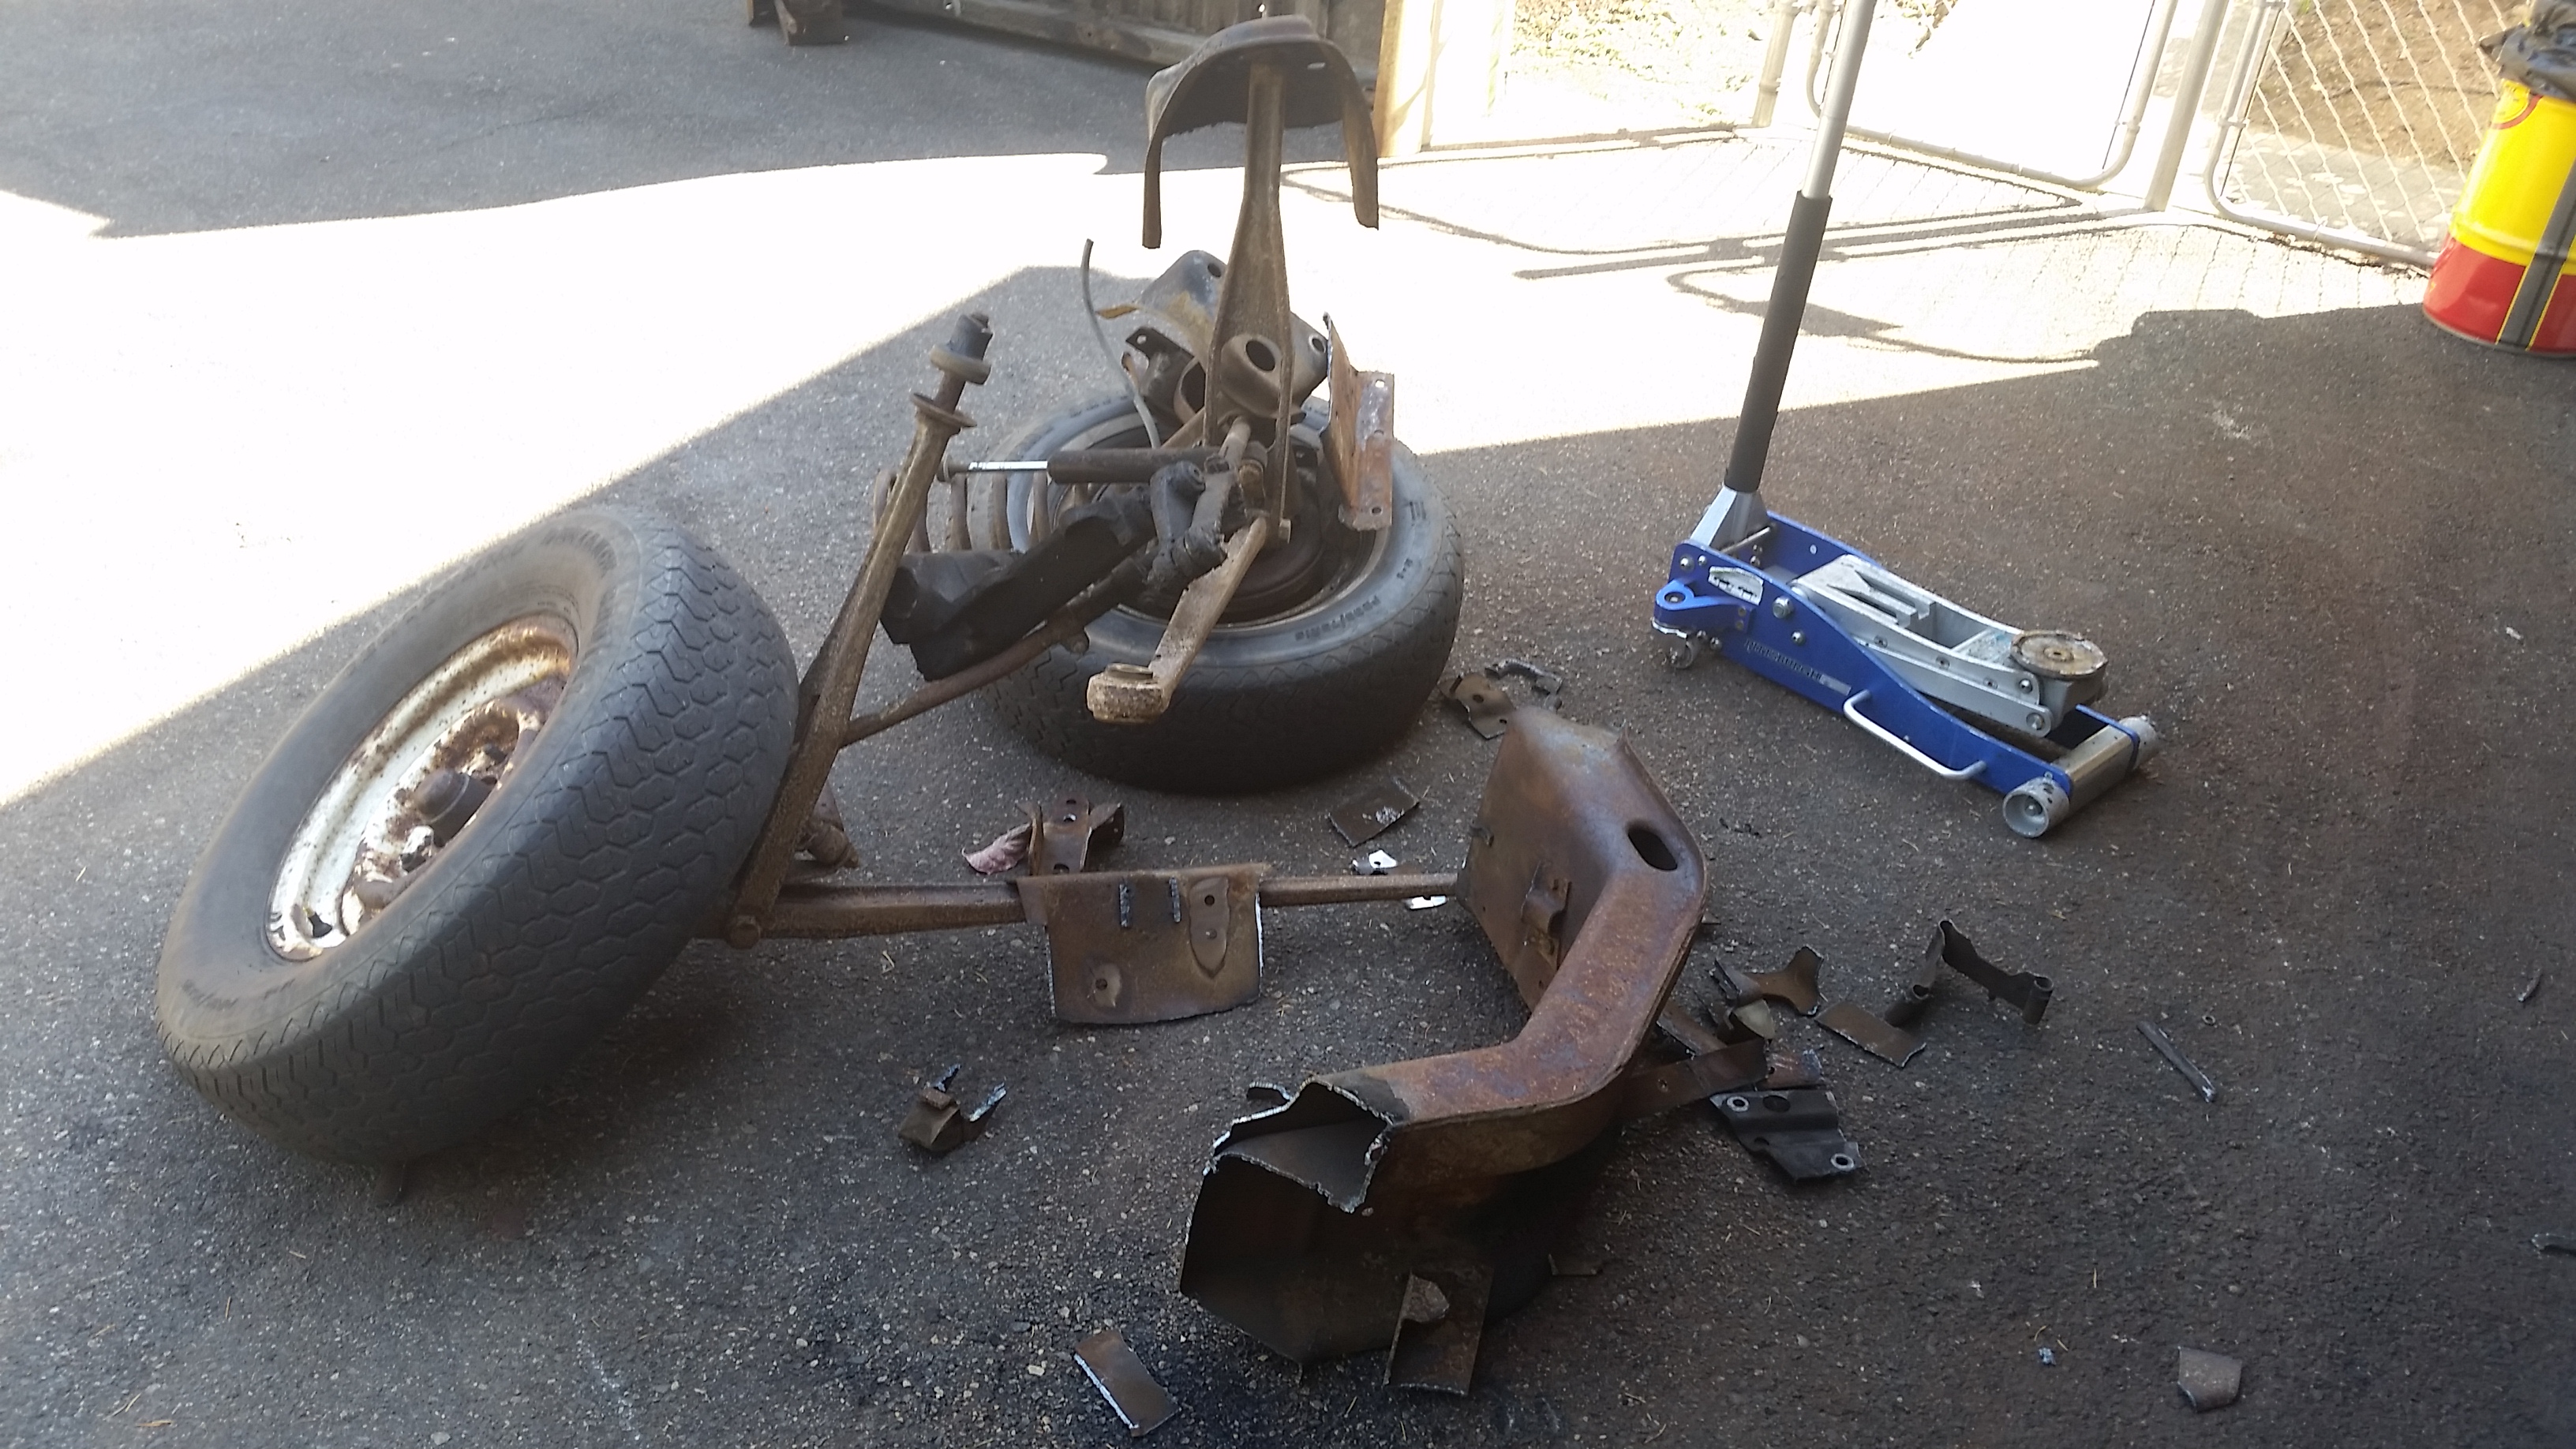
Worked till about 10:30 and then got on the truck. Put some wheels on and dropped that bitch on the ground to get turned around. Got the old frontend loaded up with a little help from Andrew and we pushed the truck out and flipped it around so I can get to work on the rear of the truck.
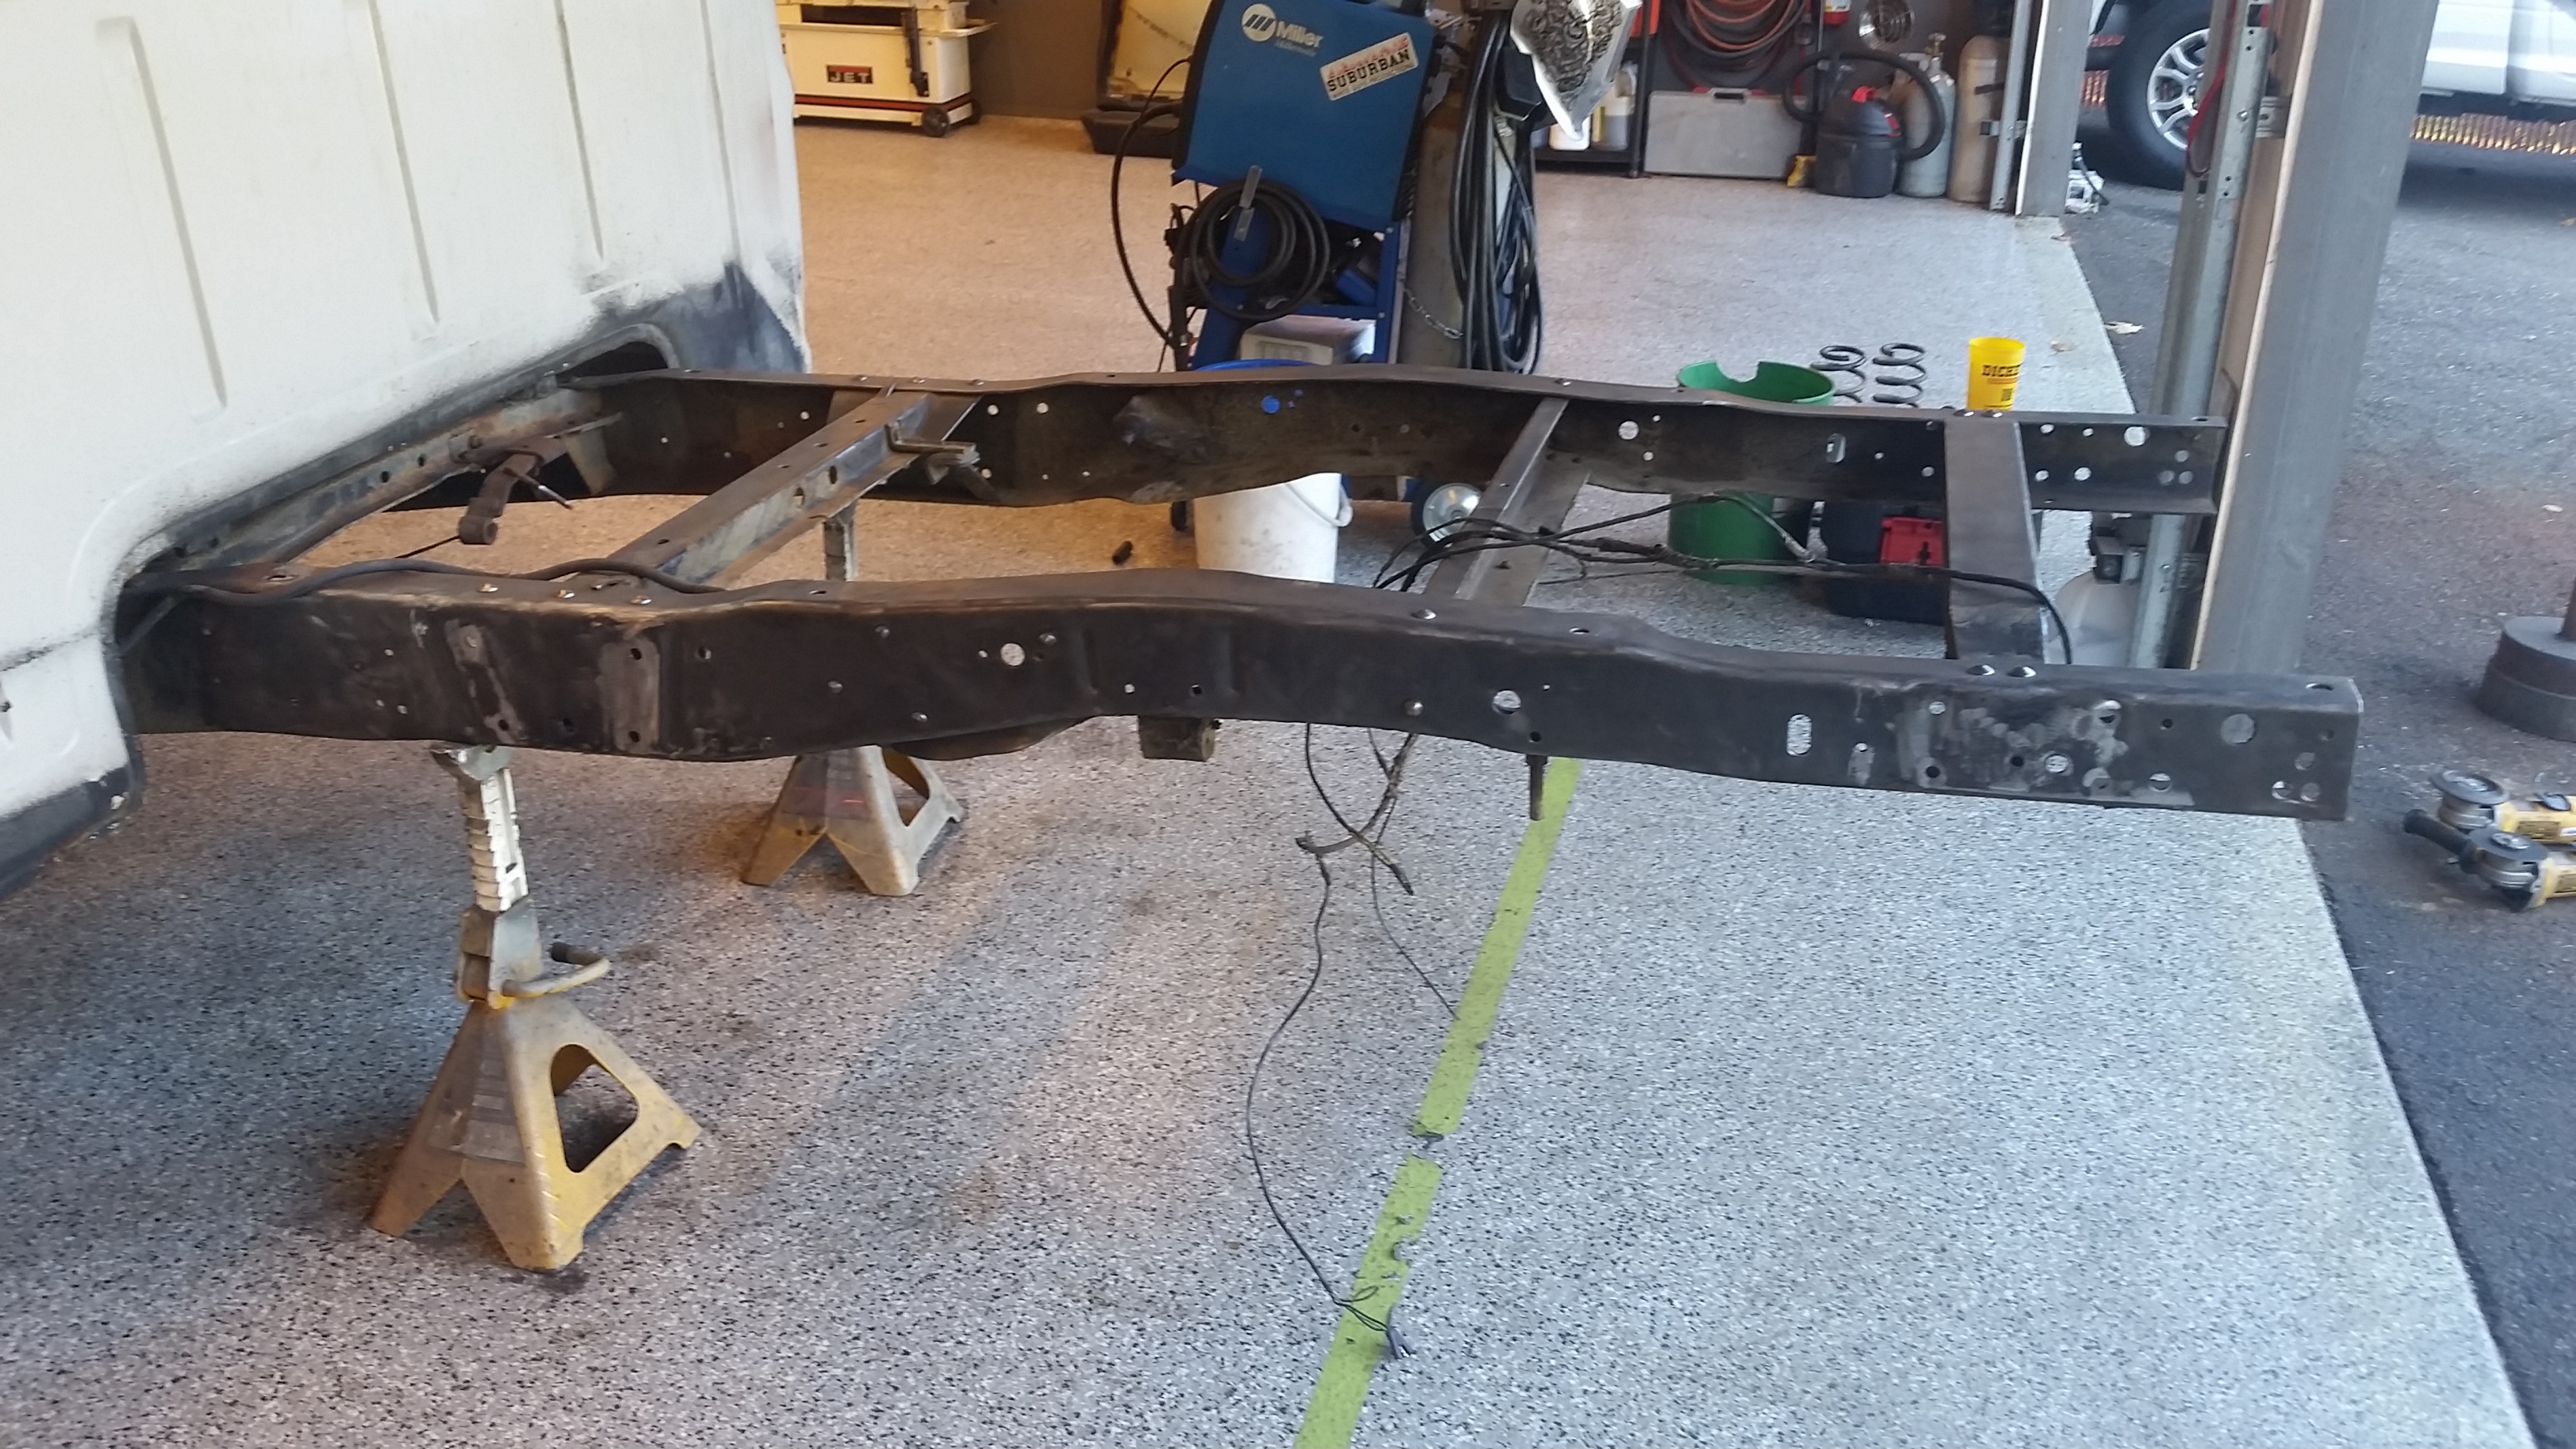
First up was cleaning off more of that god awful undercoating off. The good news is that I have a frame in like new condition under all of that crap
Here is what it looked like before.
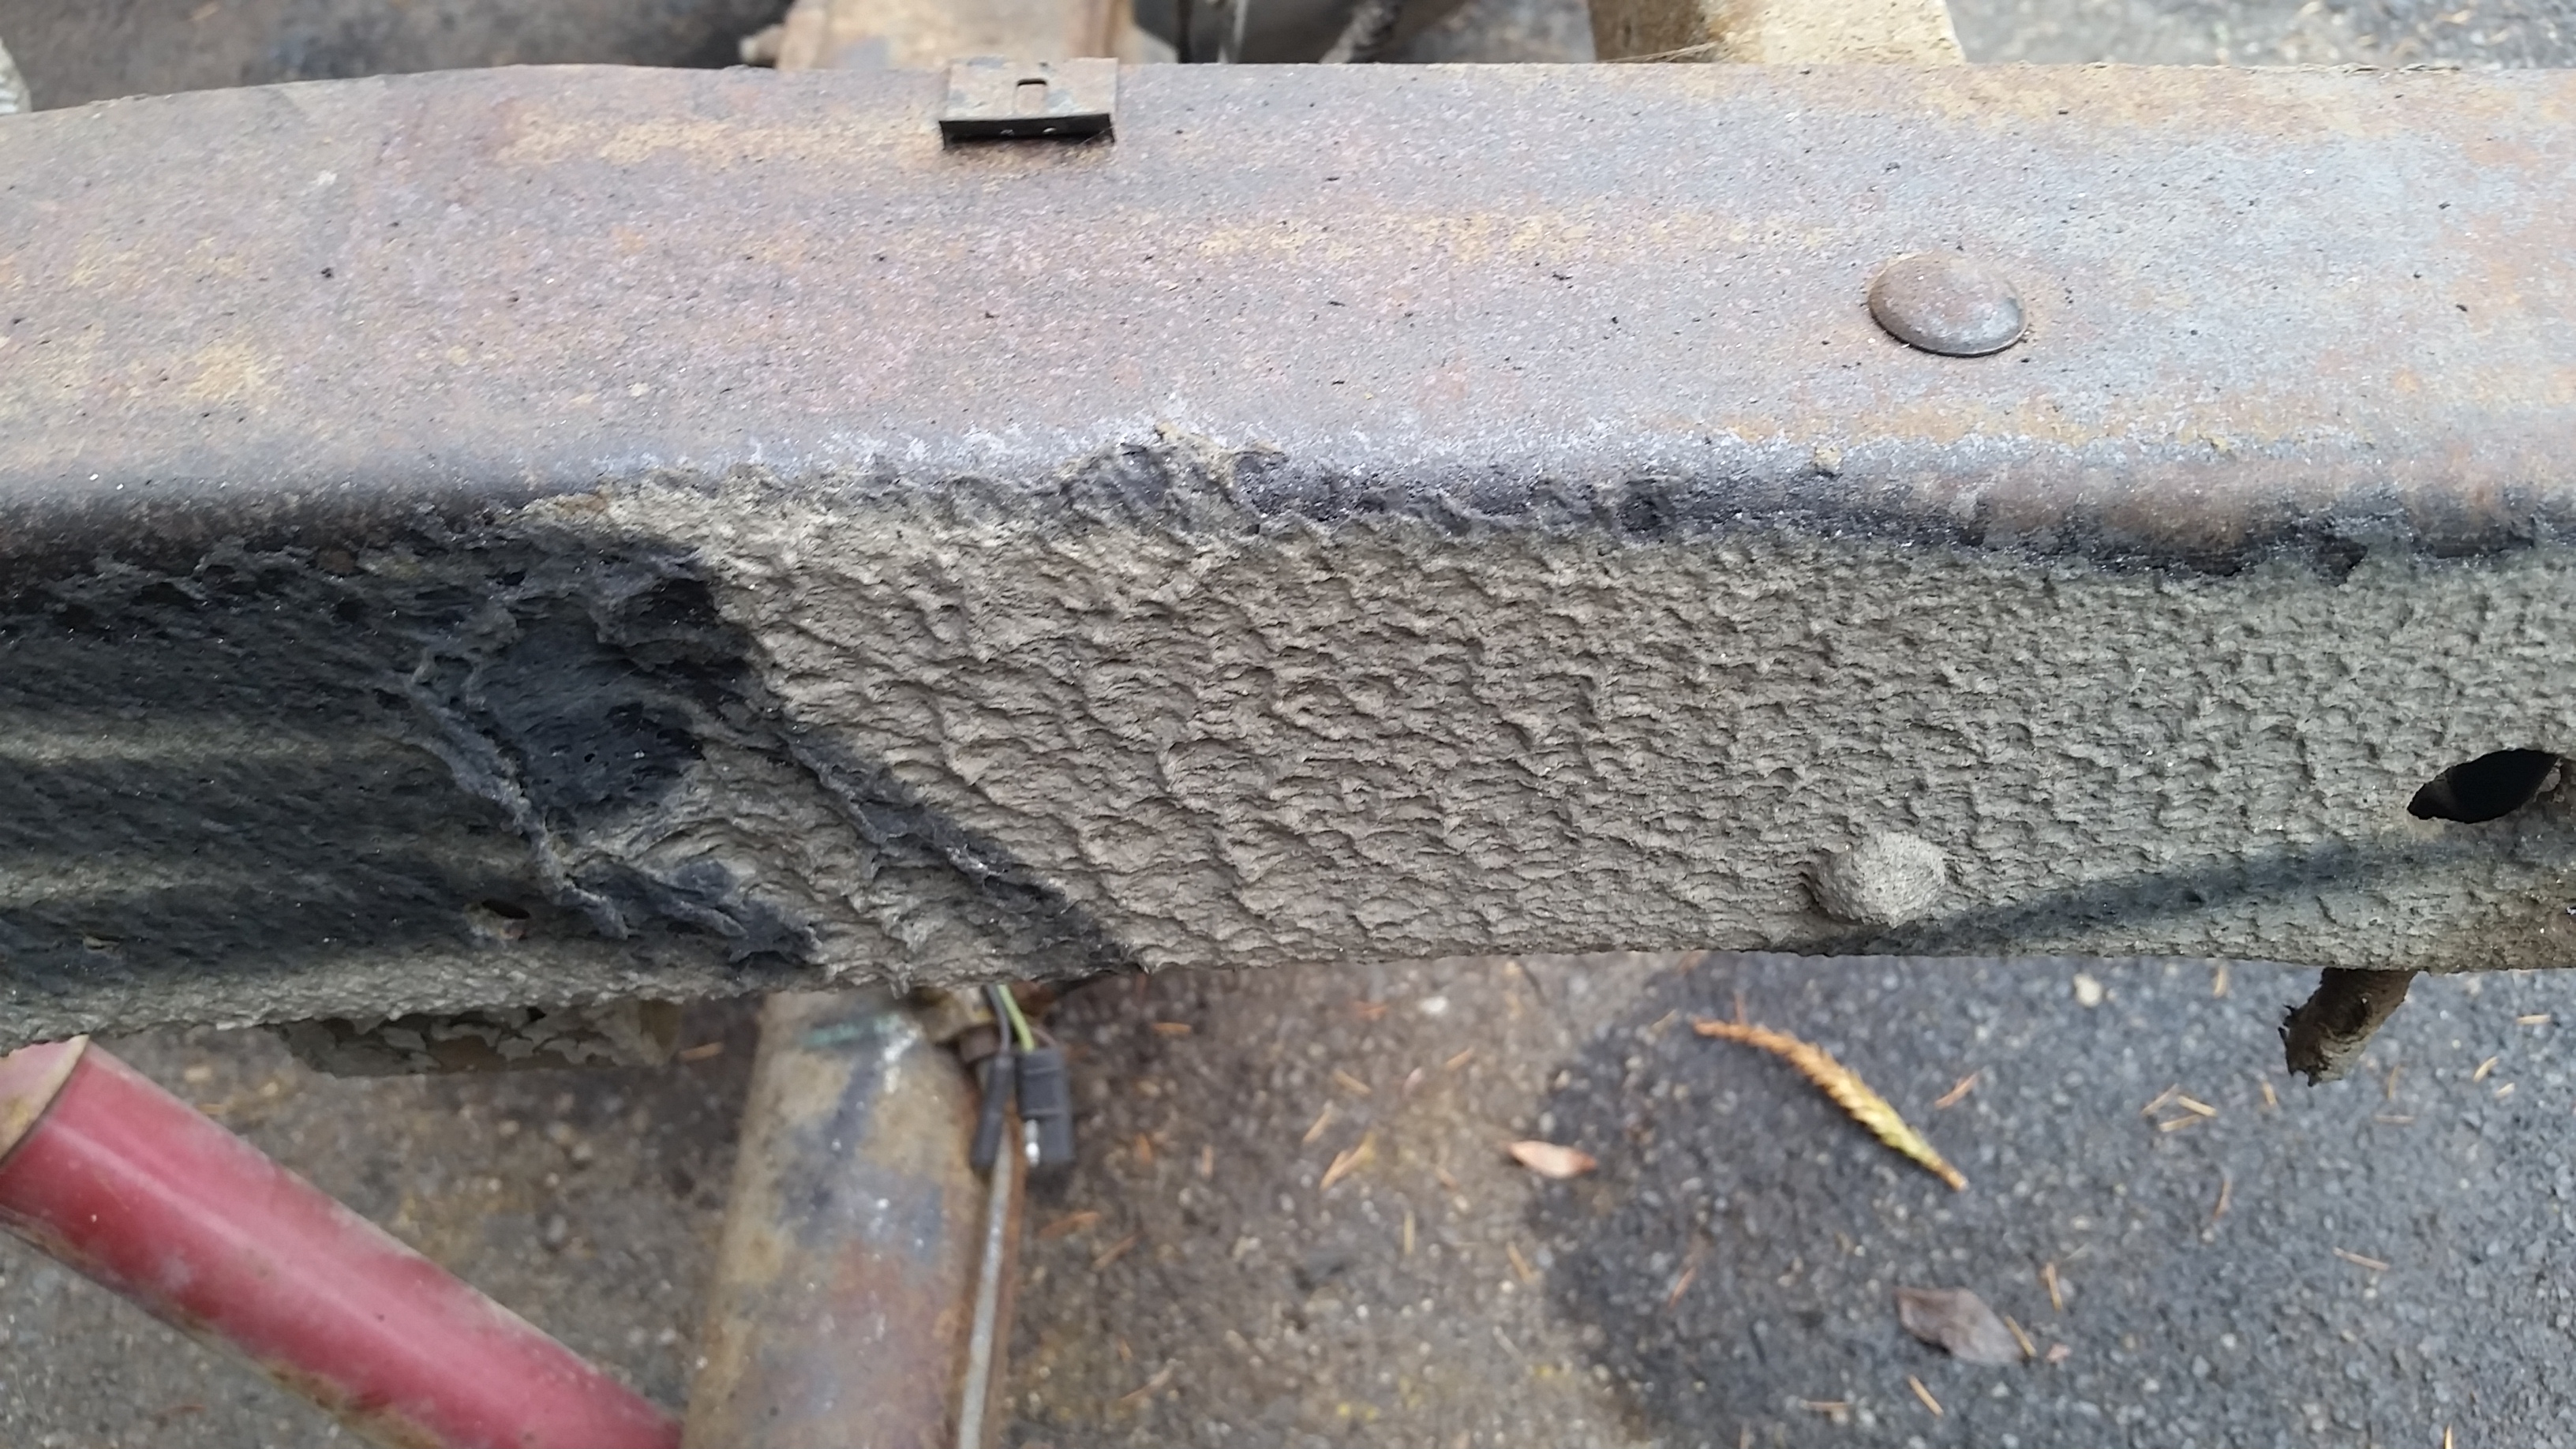
Hours with my friends....I mean a chisel, torch and a wire wheel on my trusty 4" grinder later....
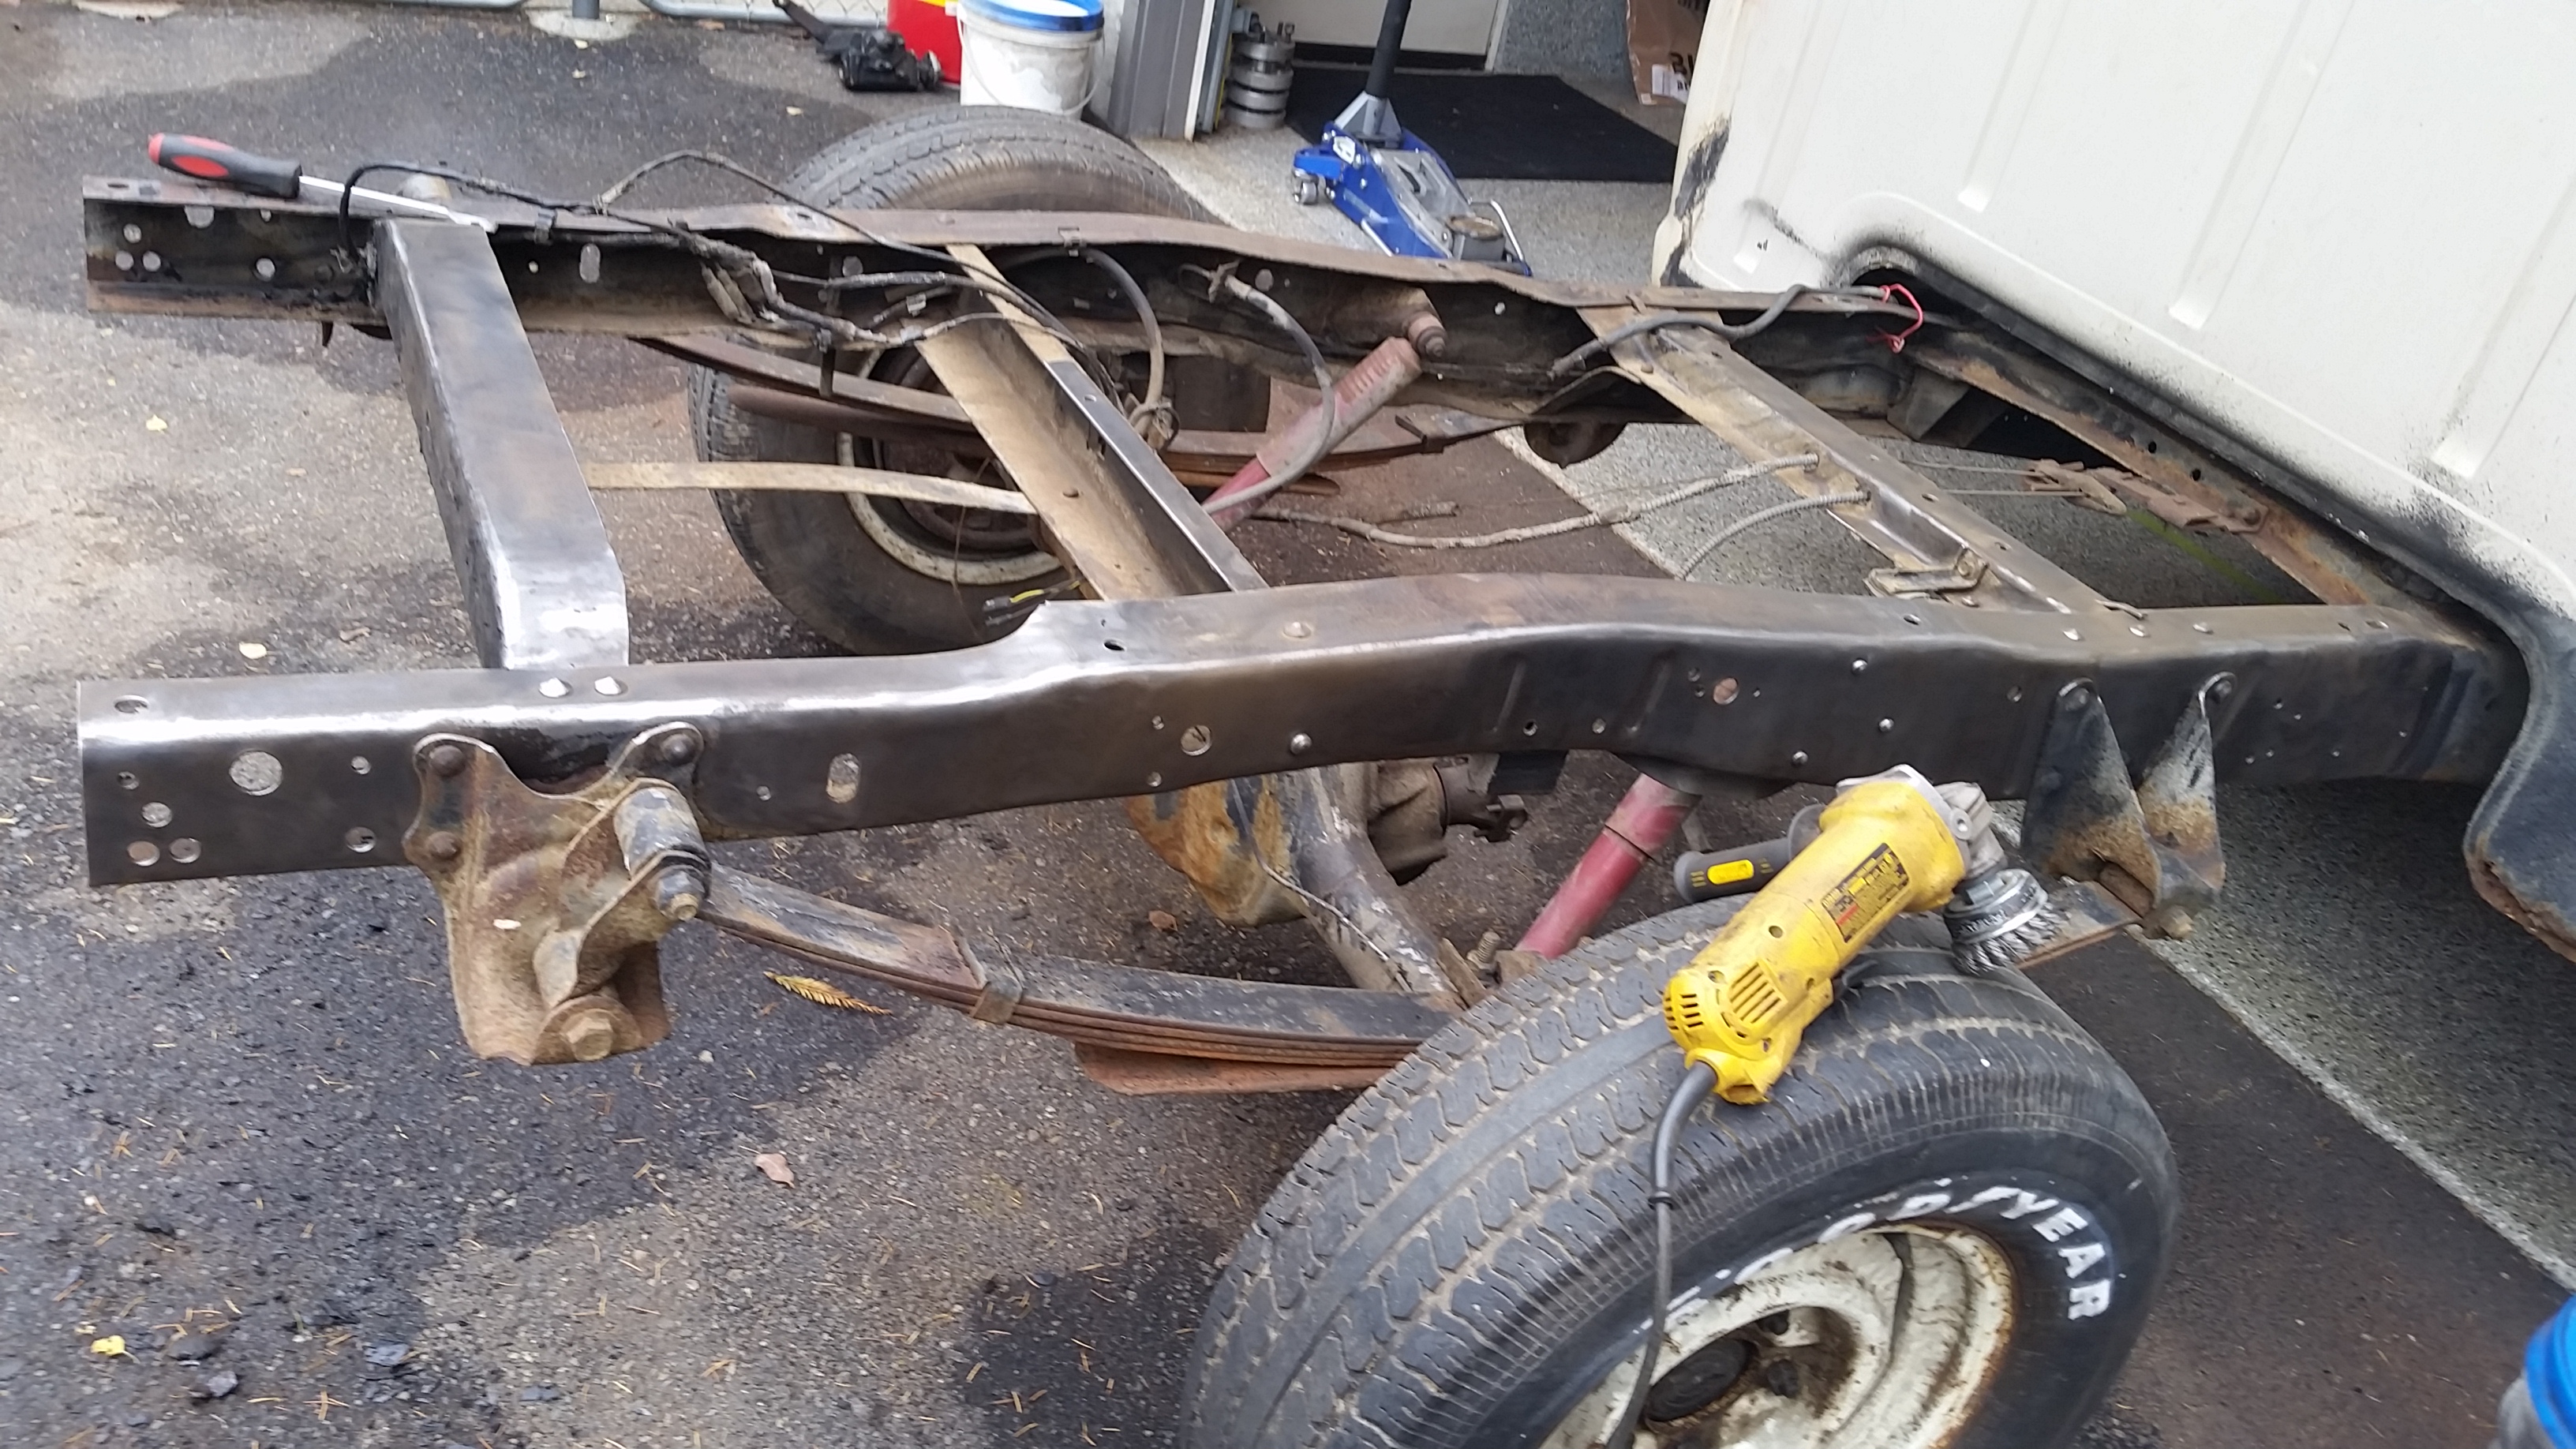
So much better.
Got it back in the shop and got to work tearing out the rearend. Everything came unbolted with no issue except the u bolts. I had to cut those out. No big deal. One of the leaf springs is about an inch lower than the other, other than that it all is in pretty good shape, suprisingly.
Got out the cutoff wheel and the grinder again for 16 more fun rivets....Did I mention I am getting tired of cutting these off? I think I have 14 lef to cut off at this point.
But its a nice clean frame to work off of at this point.
The front ones were a bitch.
I ran out of flap discs, need to make a run to the store and get some more of those, then get the rearend under the truck and see where things land.
Sean
First up was cleaning off more of that god awful undercoating off. The good news is that I have a frame in like new condition under all of that crap
Here is what it looked like before.


Hours with my friends....I mean a chisel, torch and a wire wheel on my trusty 4" grinder later....

So much better.

Got it back in the shop and got to work tearing out the rearend. Everything came unbolted with no issue except the u bolts. I had to cut those out. No big deal. One of the leaf springs is about an inch lower than the other, other than that it all is in pretty good shape, suprisingly.

Got out the cutoff wheel and the grinder again for 16 more fun rivets....Did I mention I am getting tired of cutting these off? I think I have 14 lef to cut off at this point.
But its a nice clean frame to work off of at this point.
The front ones were a bitch.


I ran out of flap discs, need to make a run to the store and get some more of those, then get the rearend under the truck and see where things land.
Sean
#13
10-16-2015, 08:55 AM
End of day update..
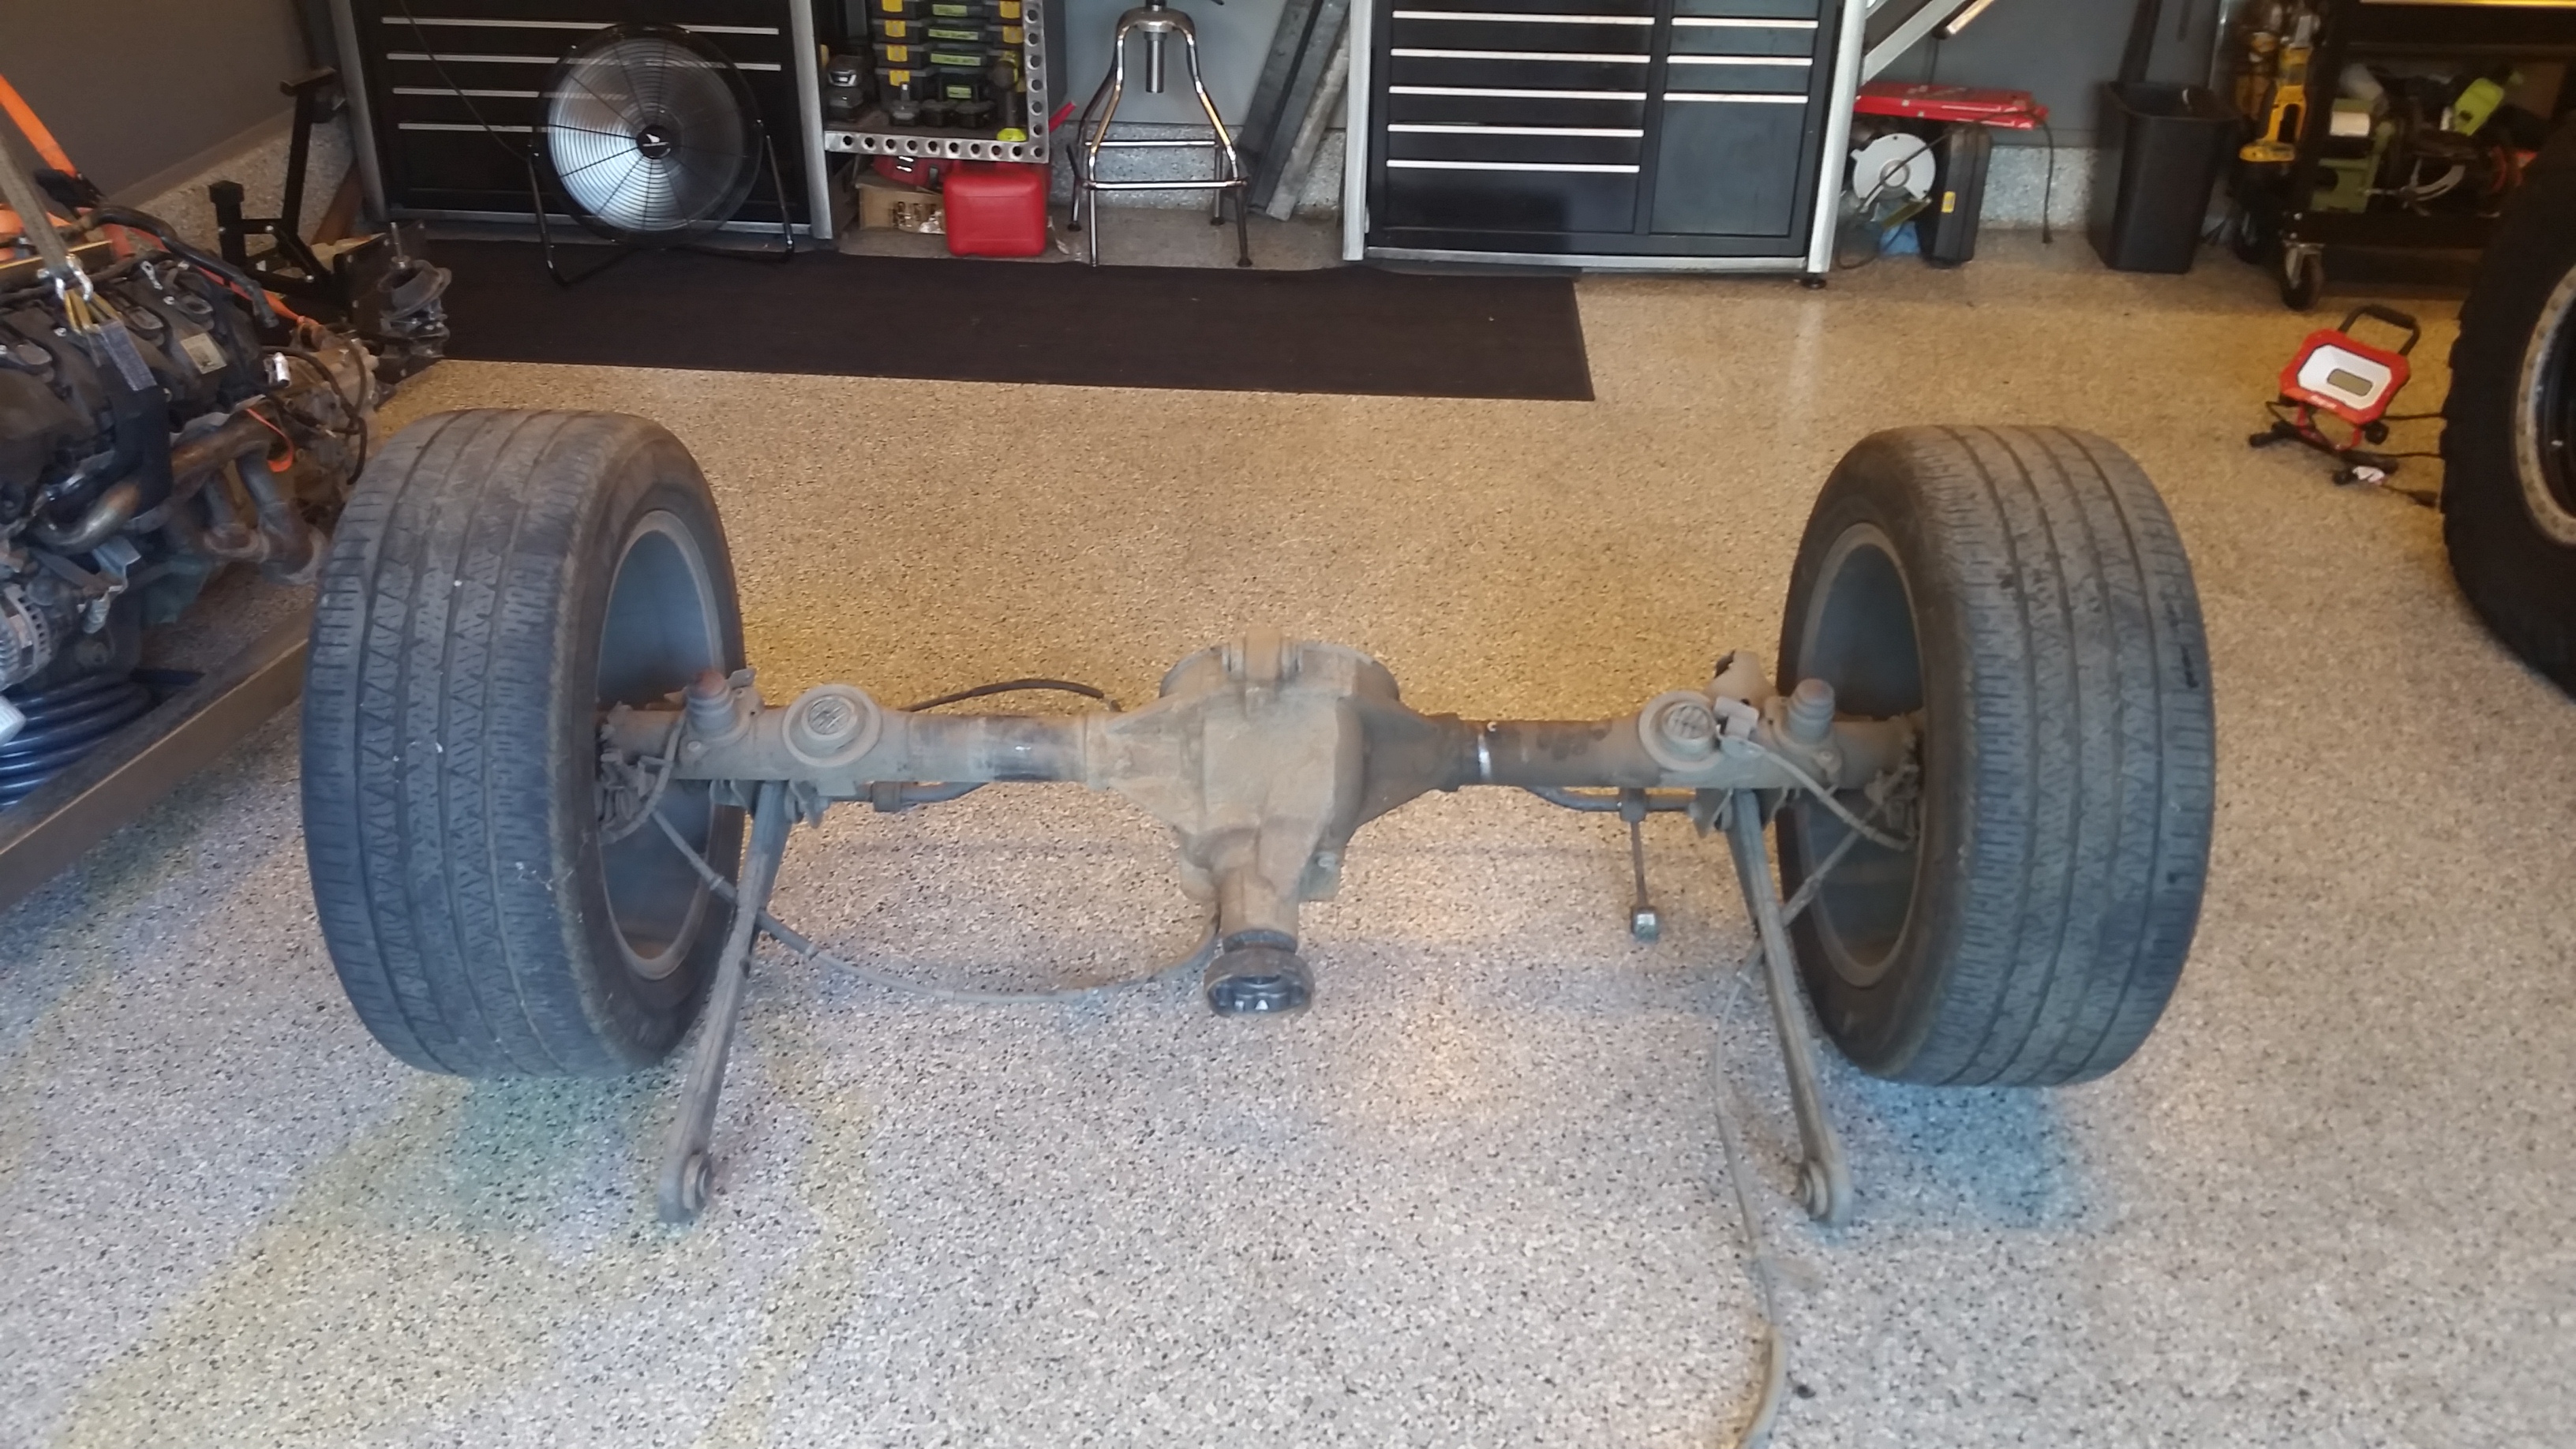
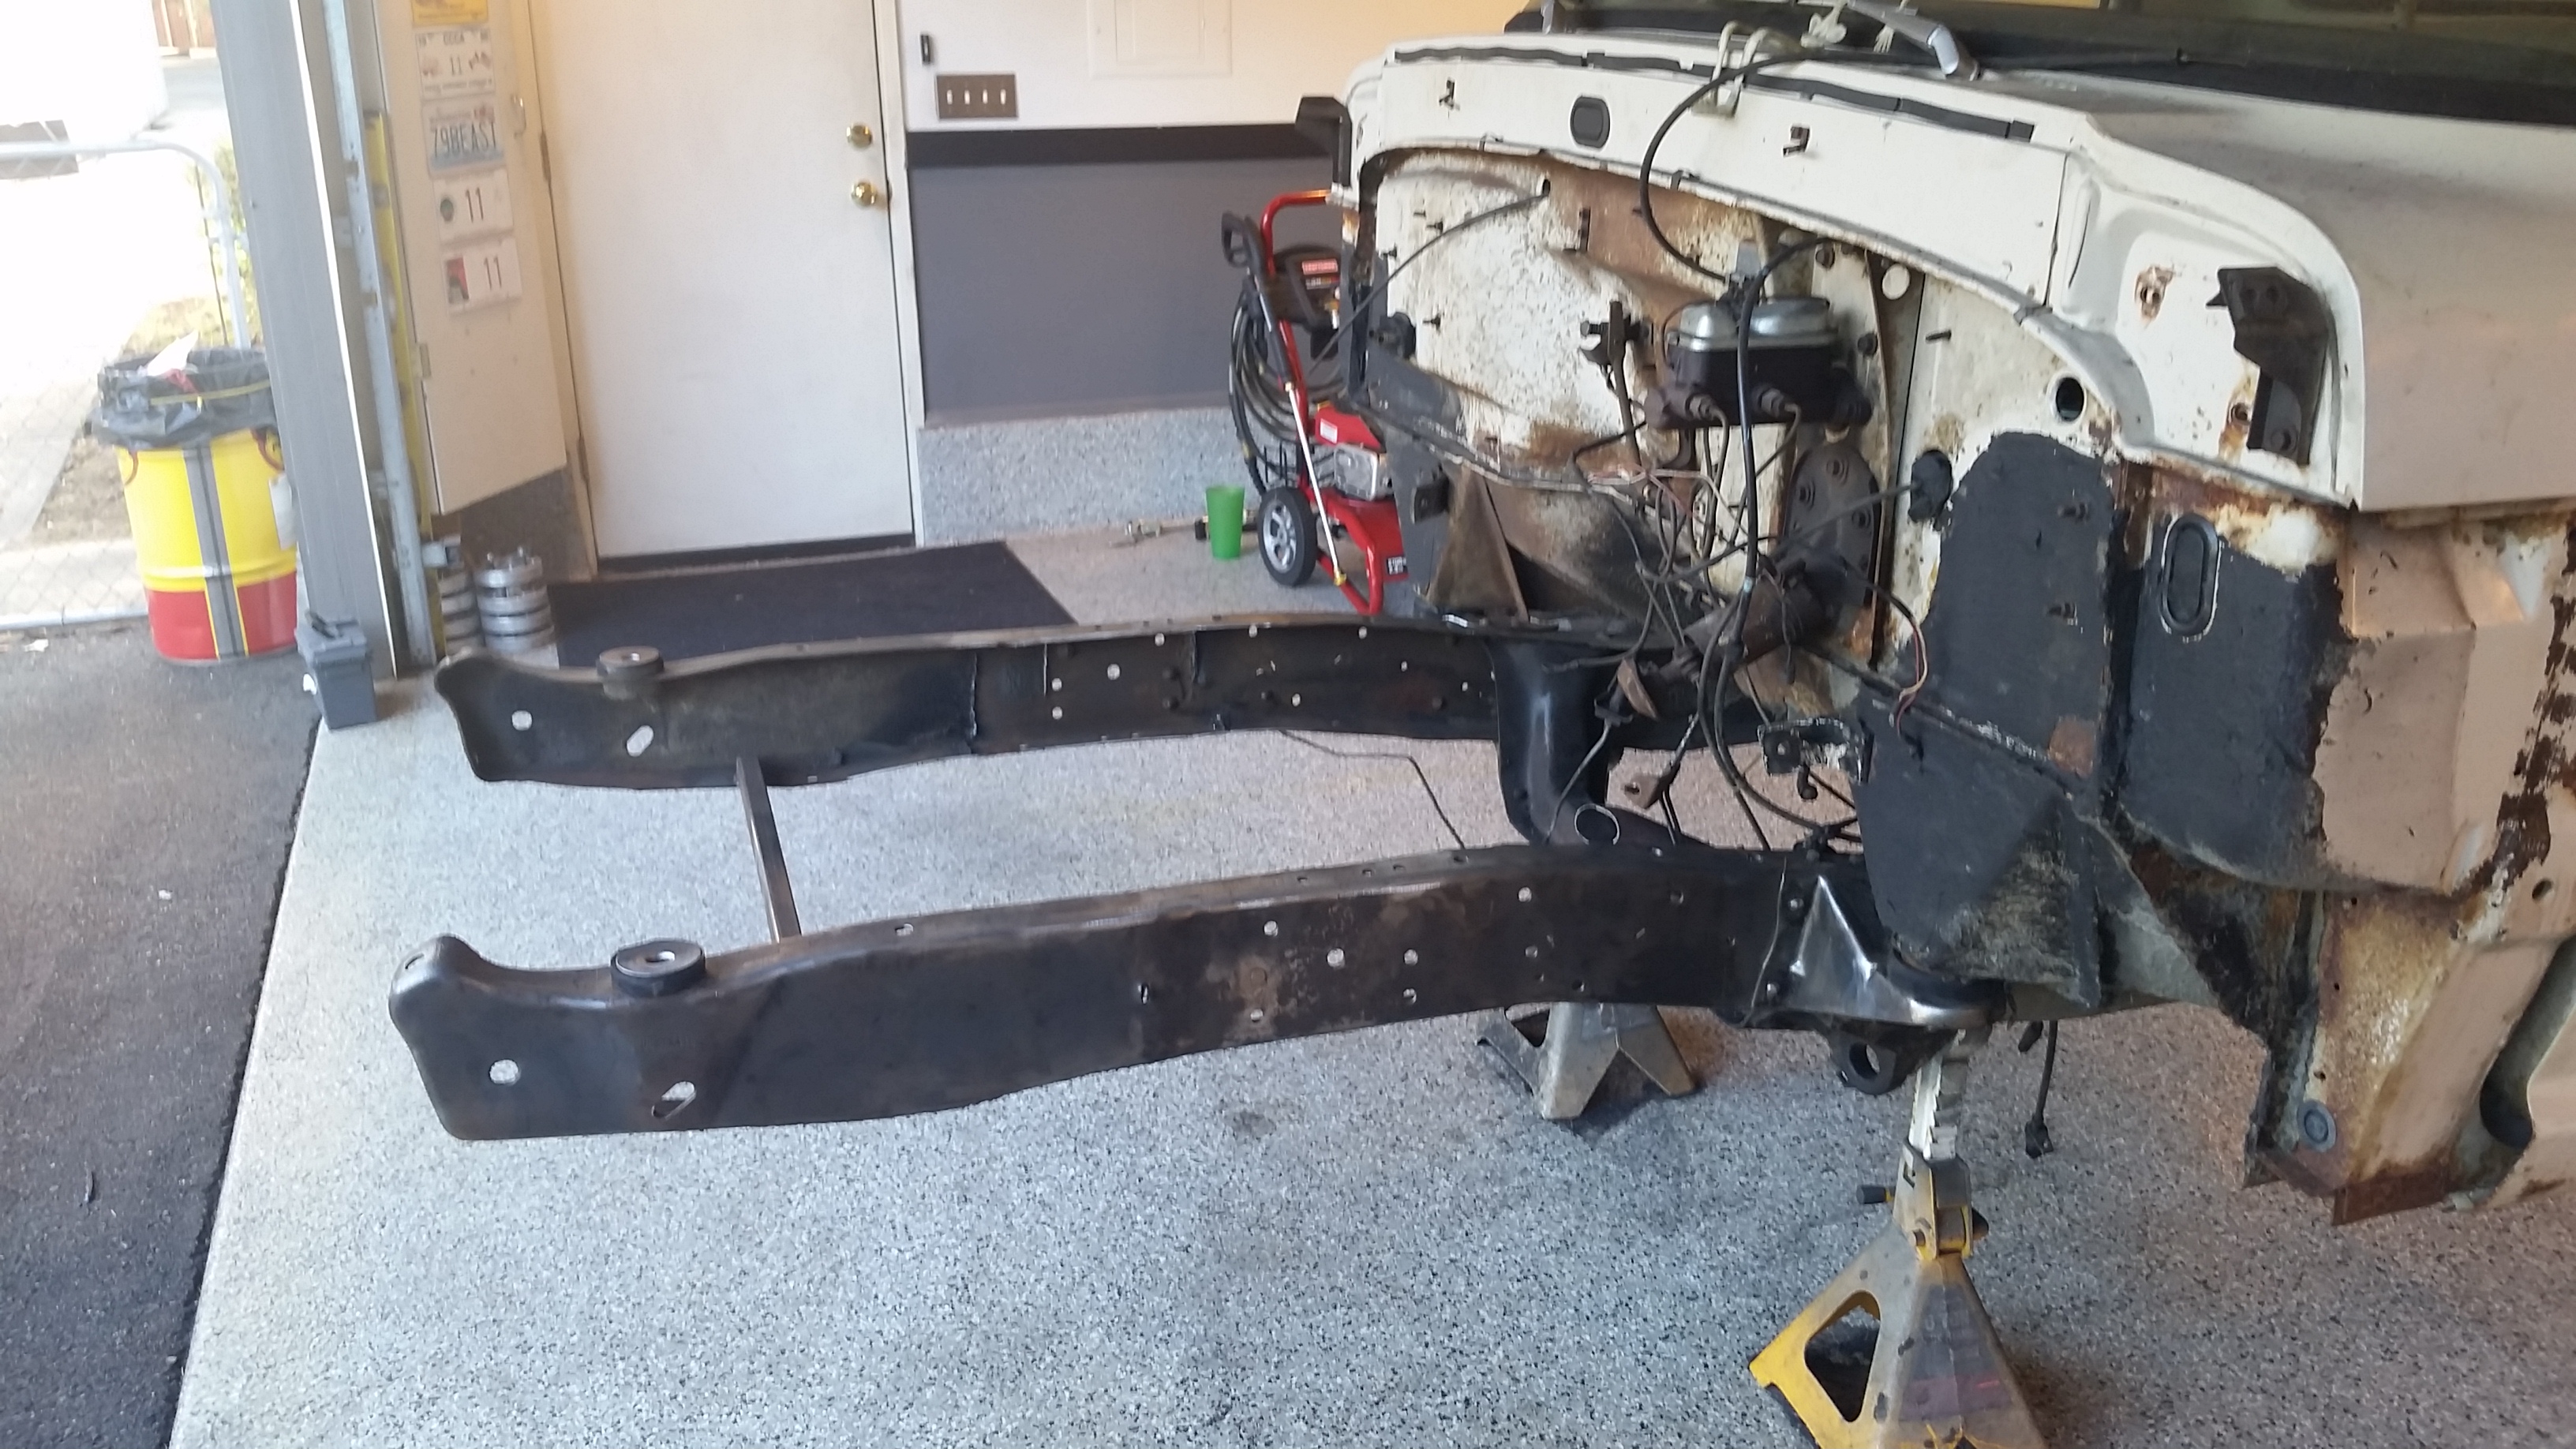
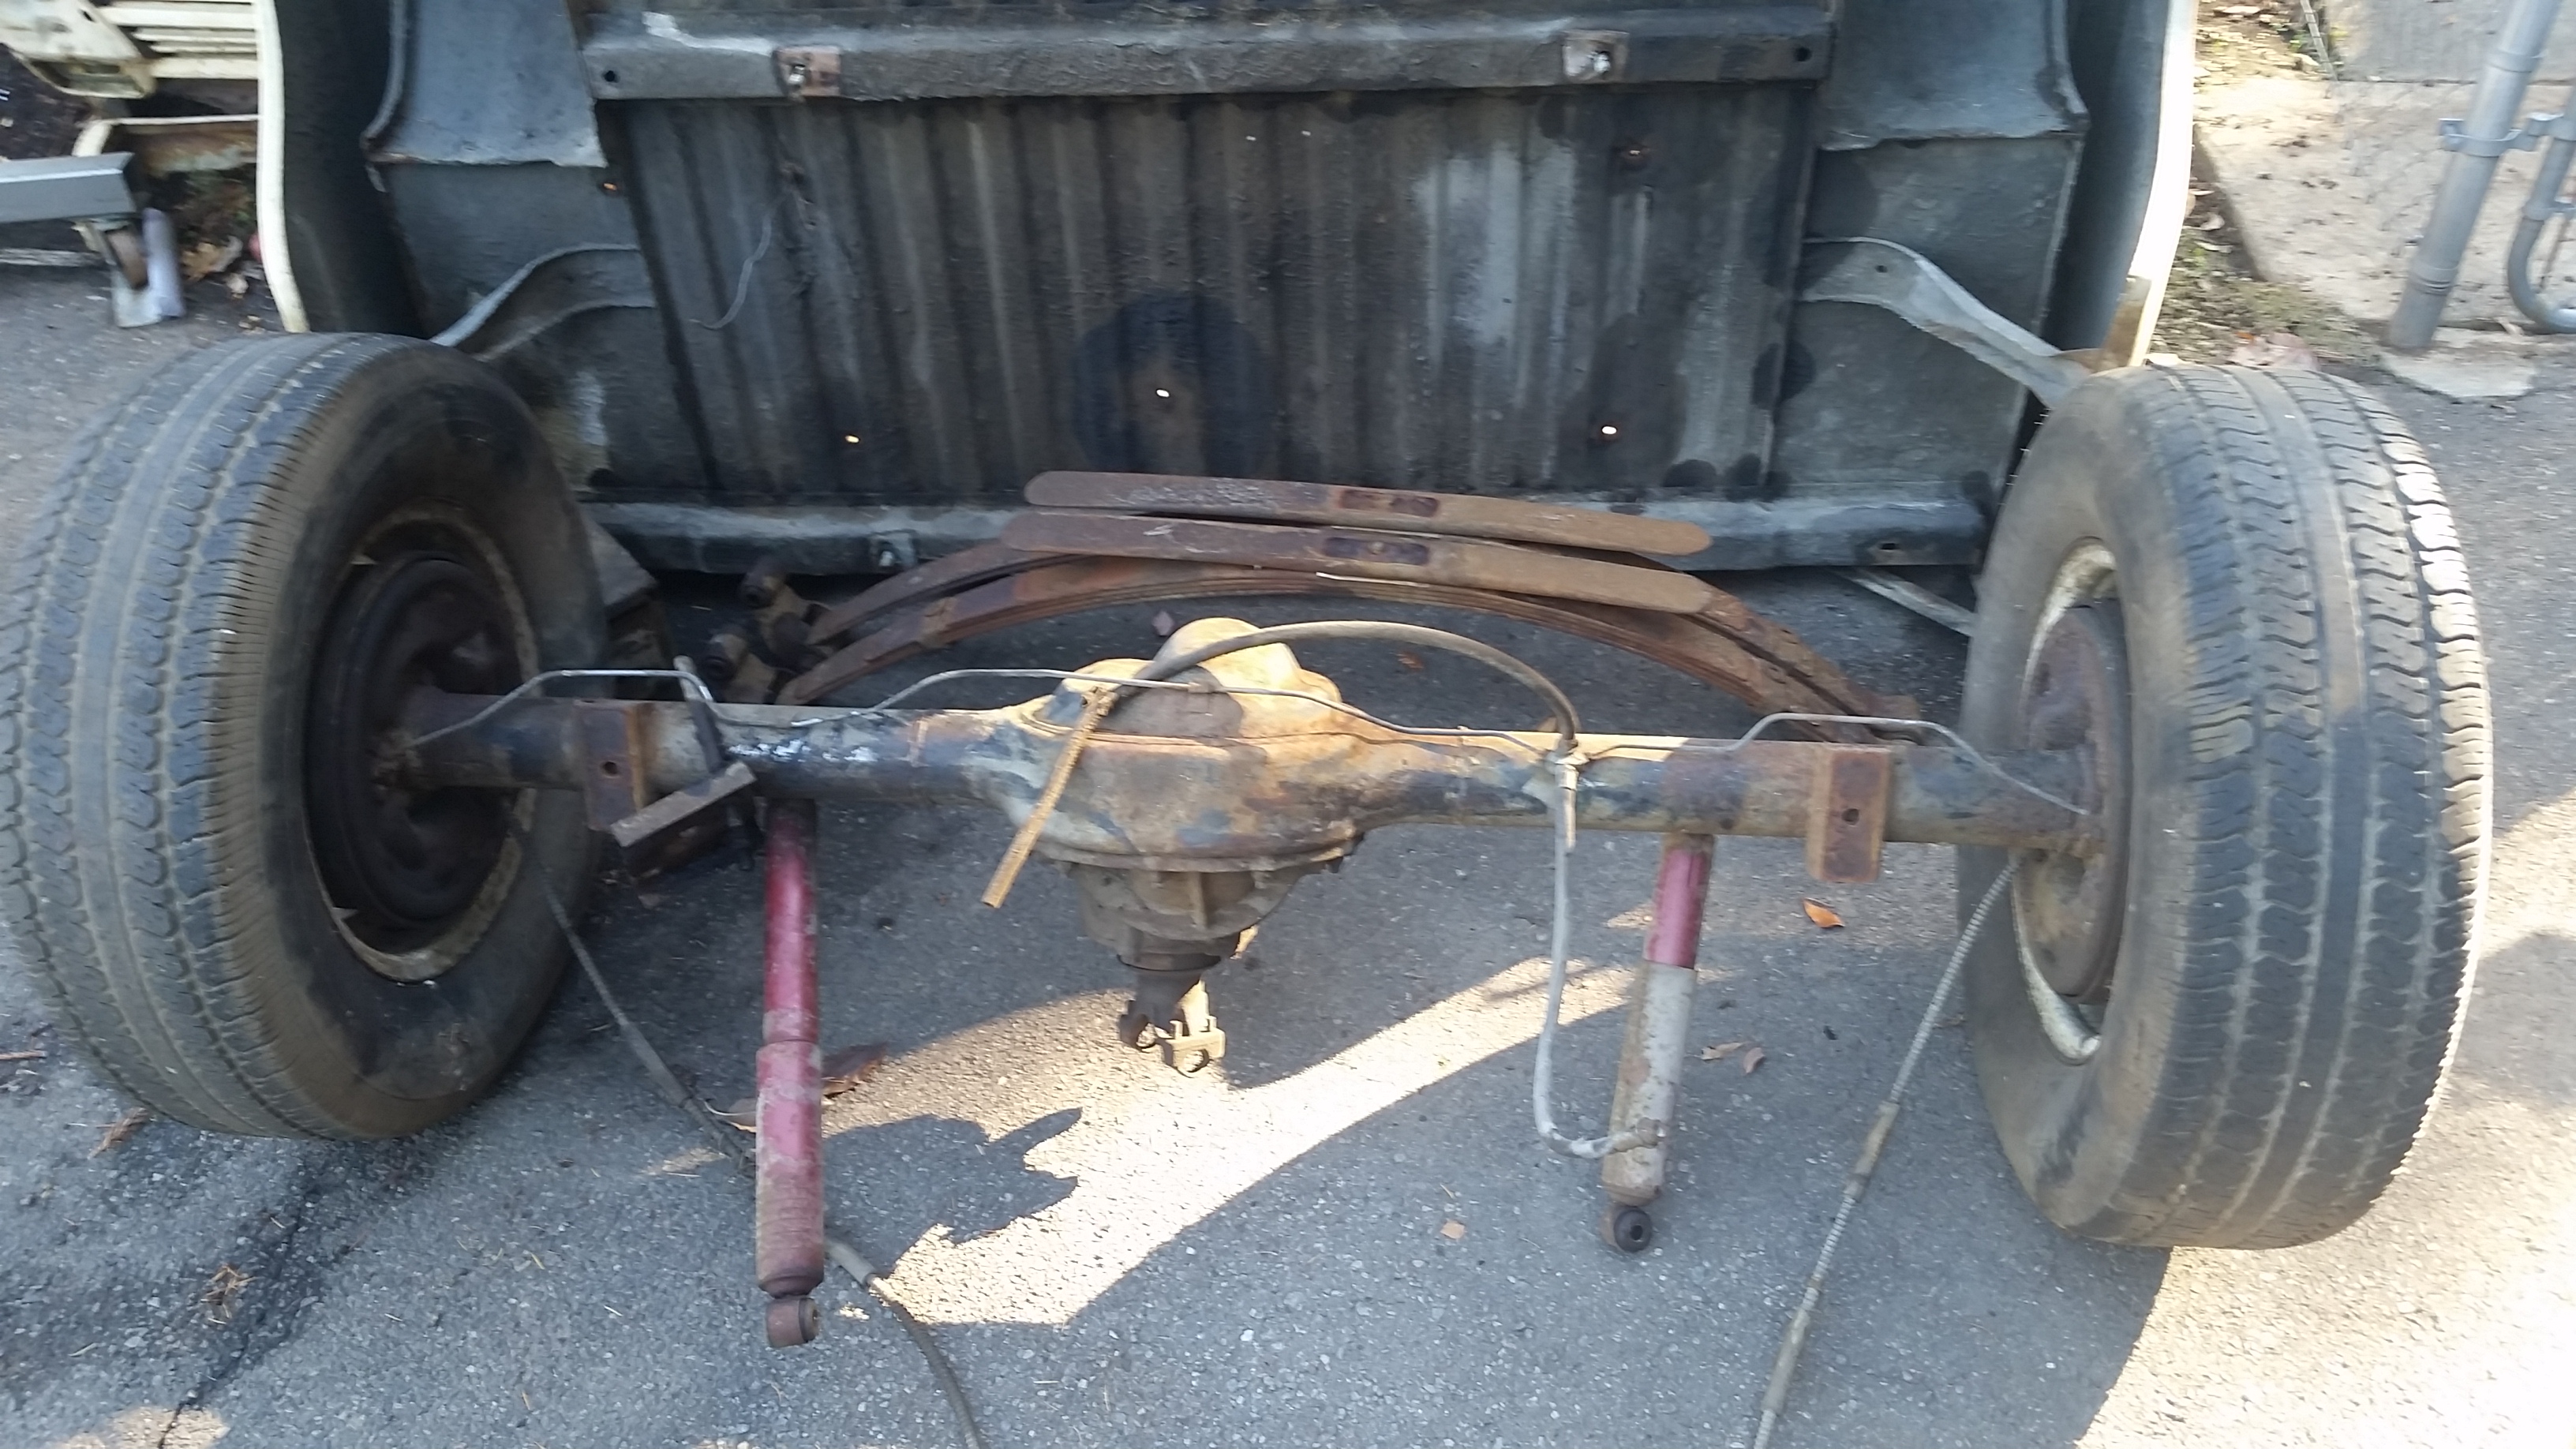
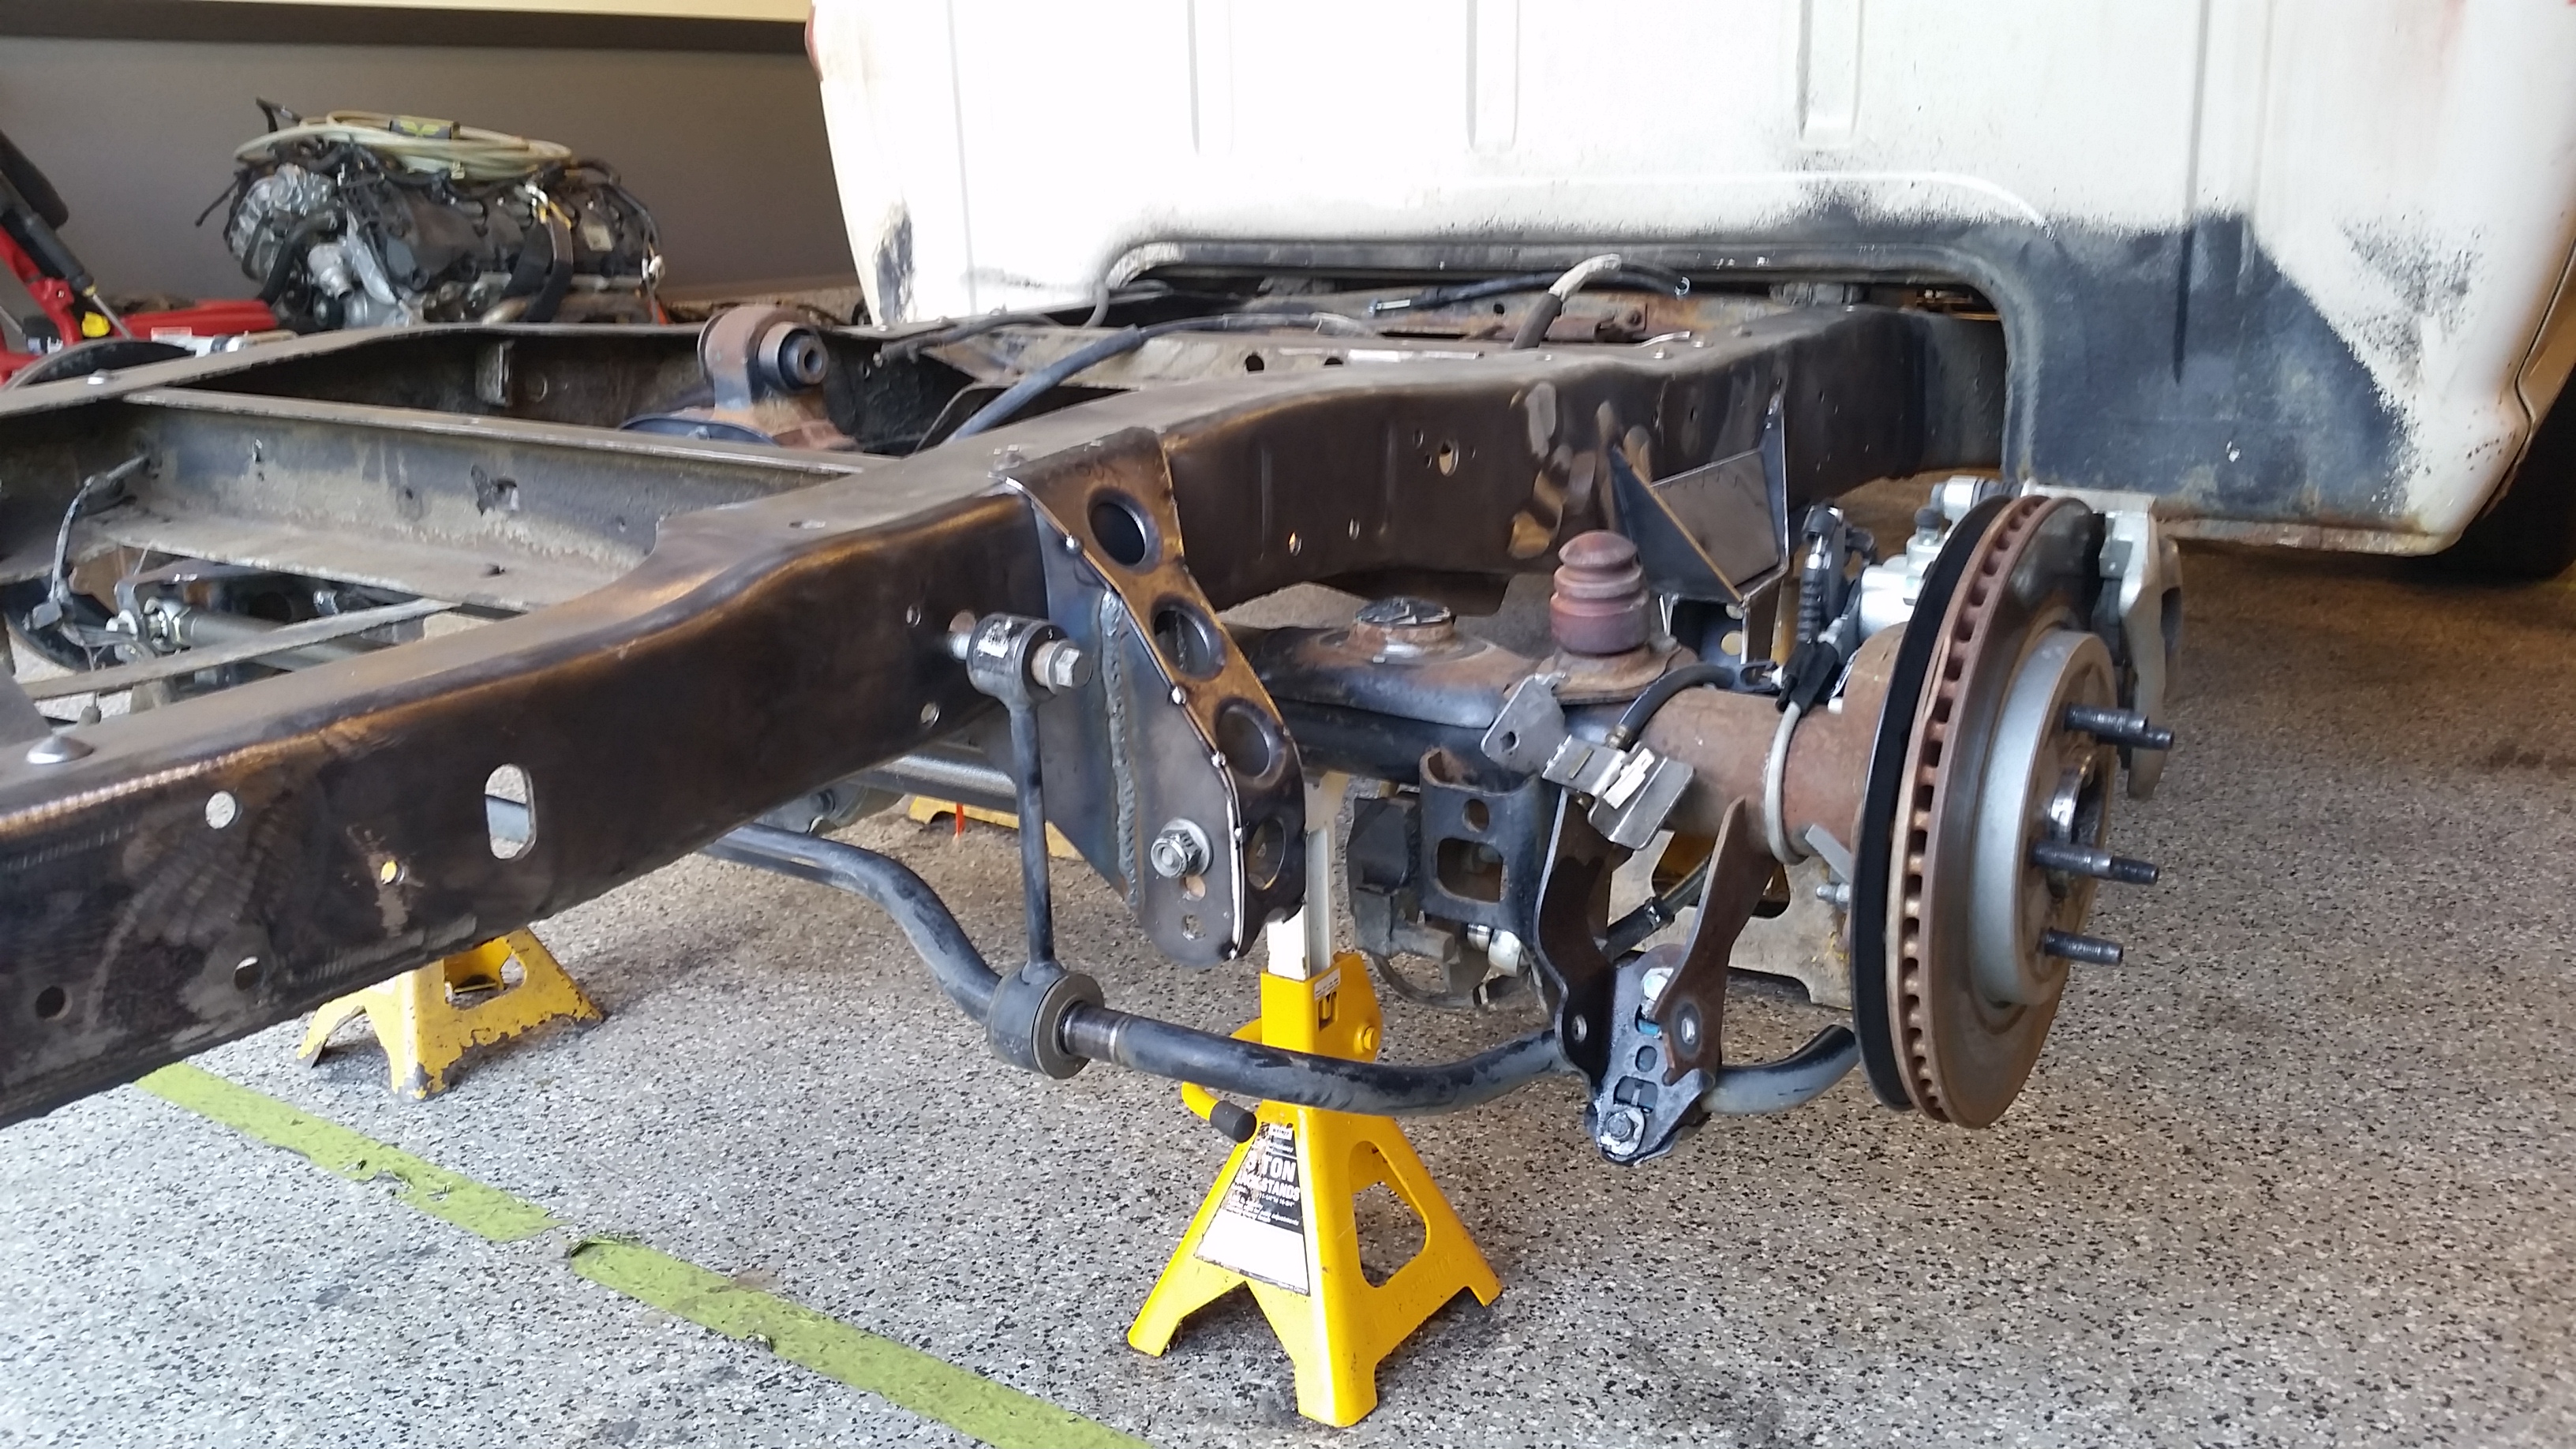
Got the 8.8 out of the shop and got it pressure washed and cleaned up. New stuff is so nice and clean and not old and rusty =)
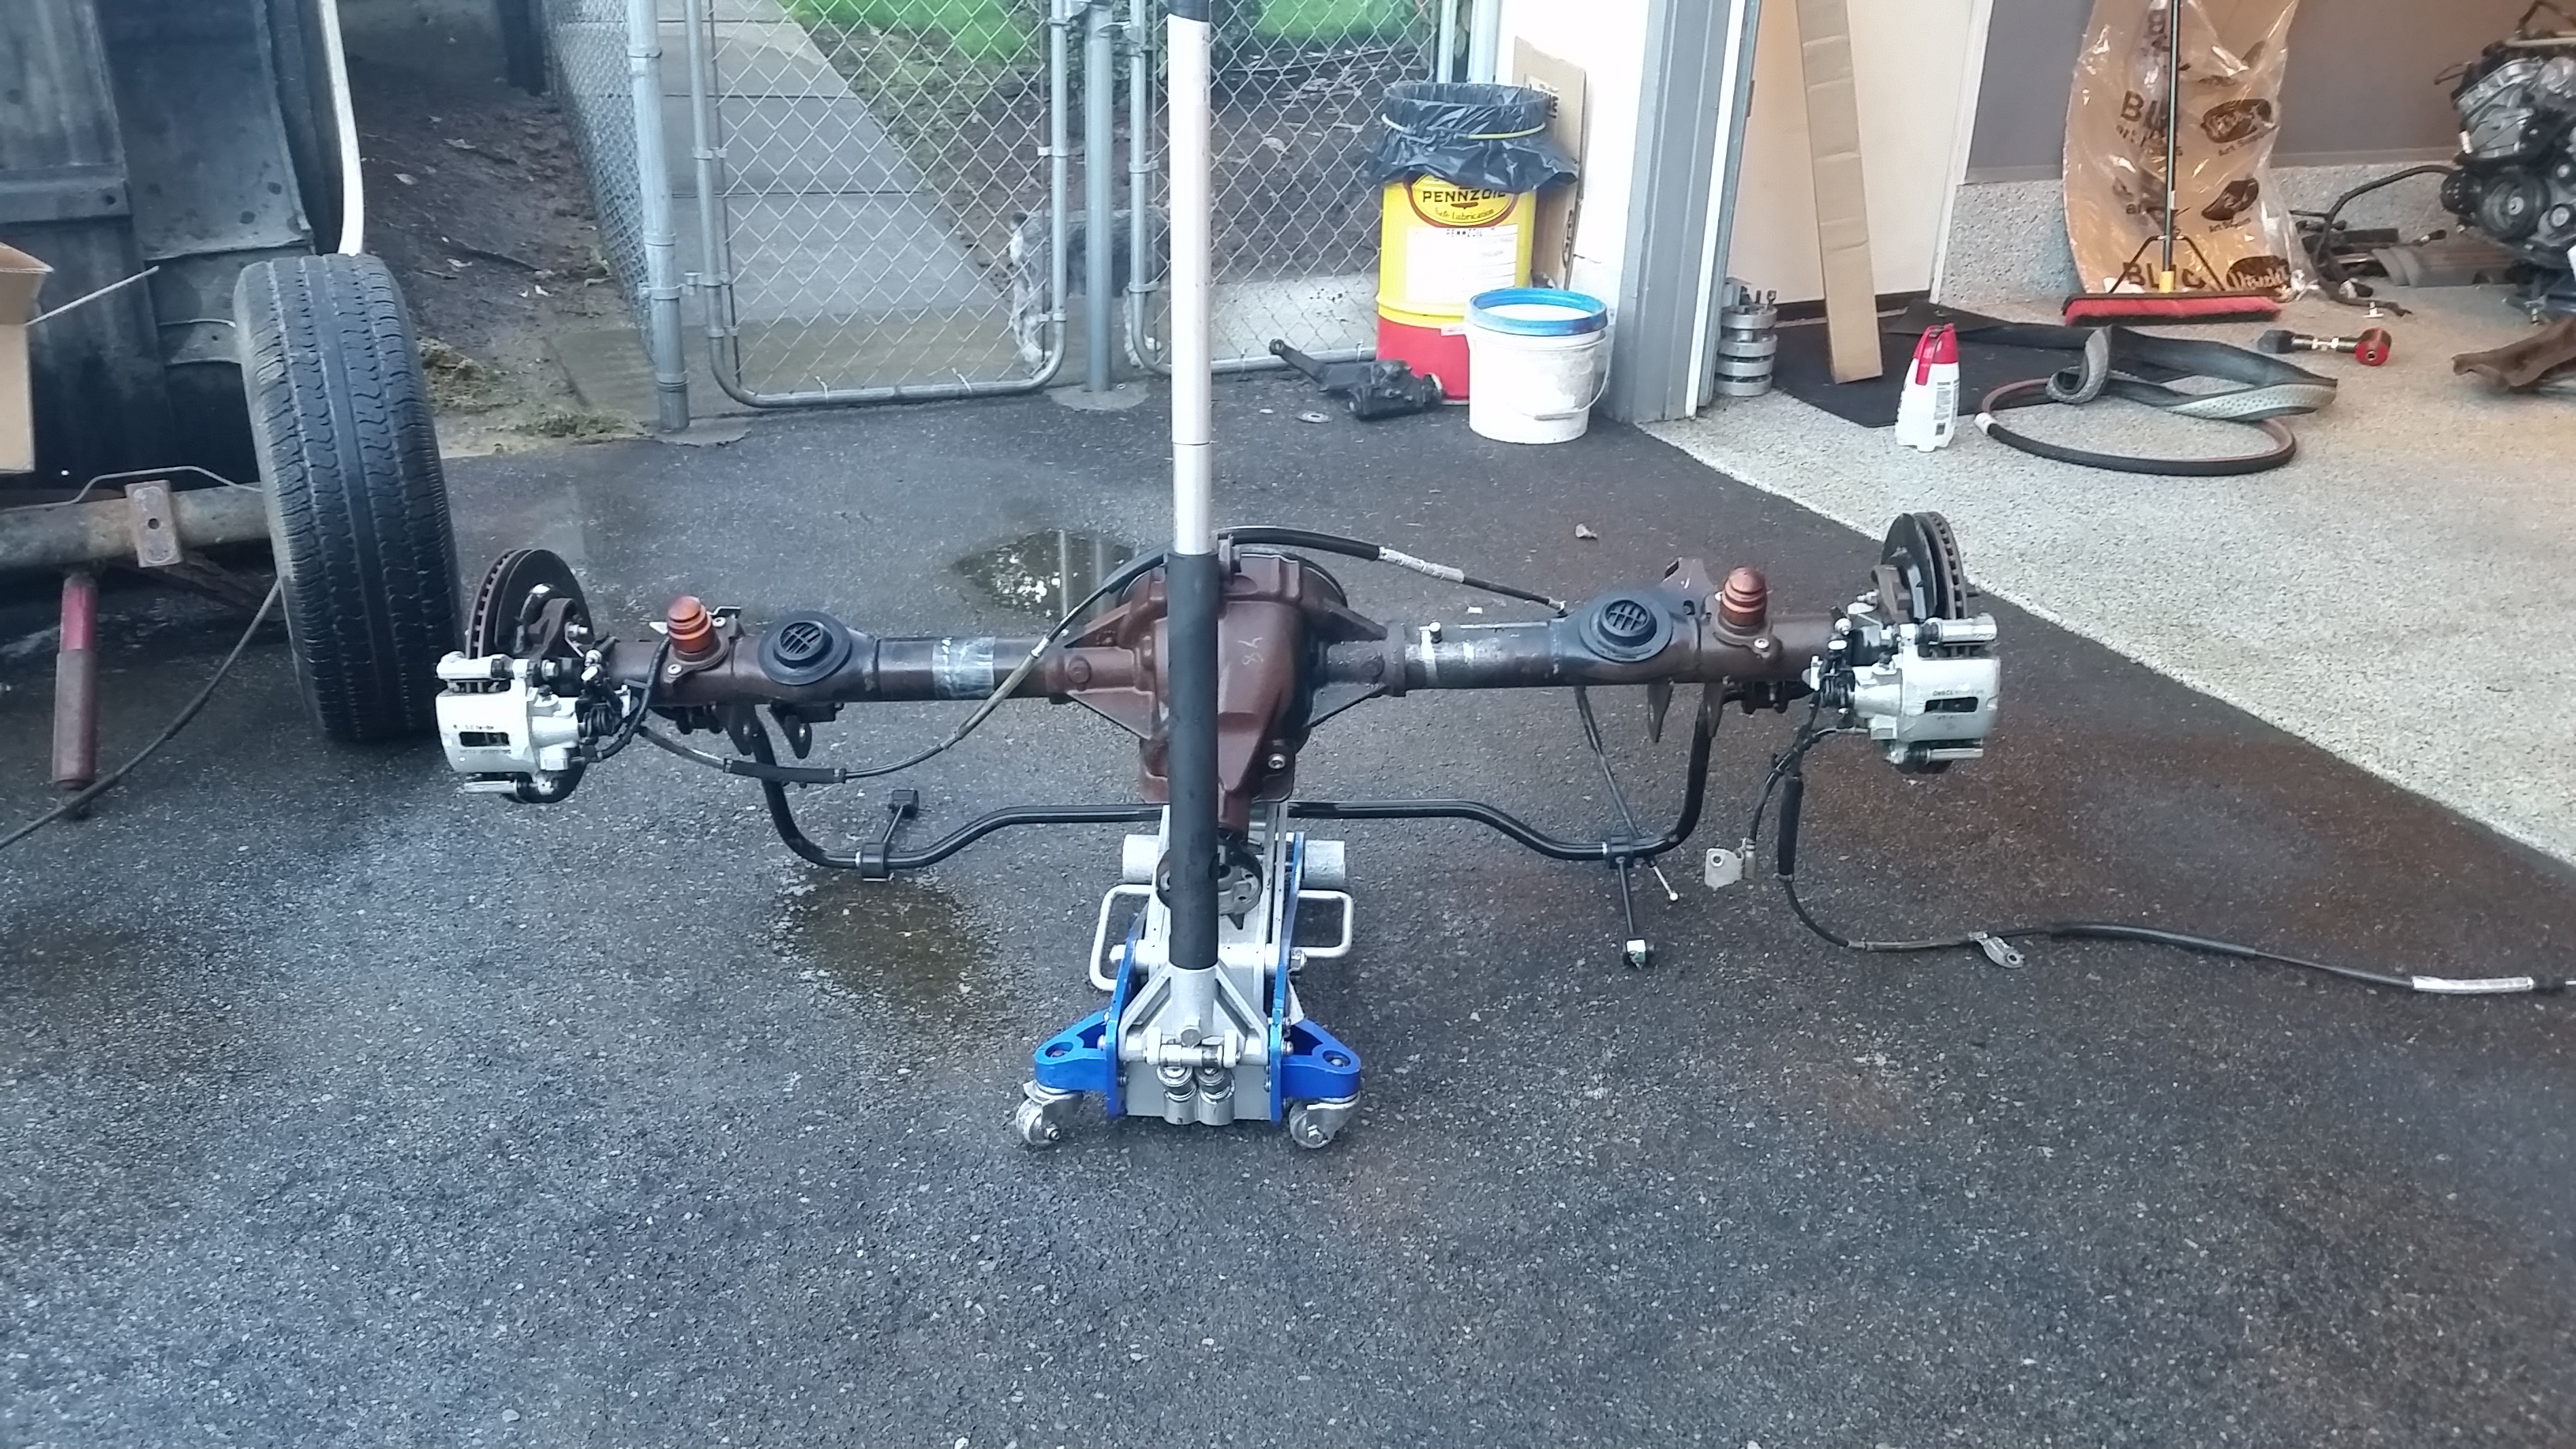
Got it under the truck and got it located where it needed to go, then got the frame to a more reasonable working height.
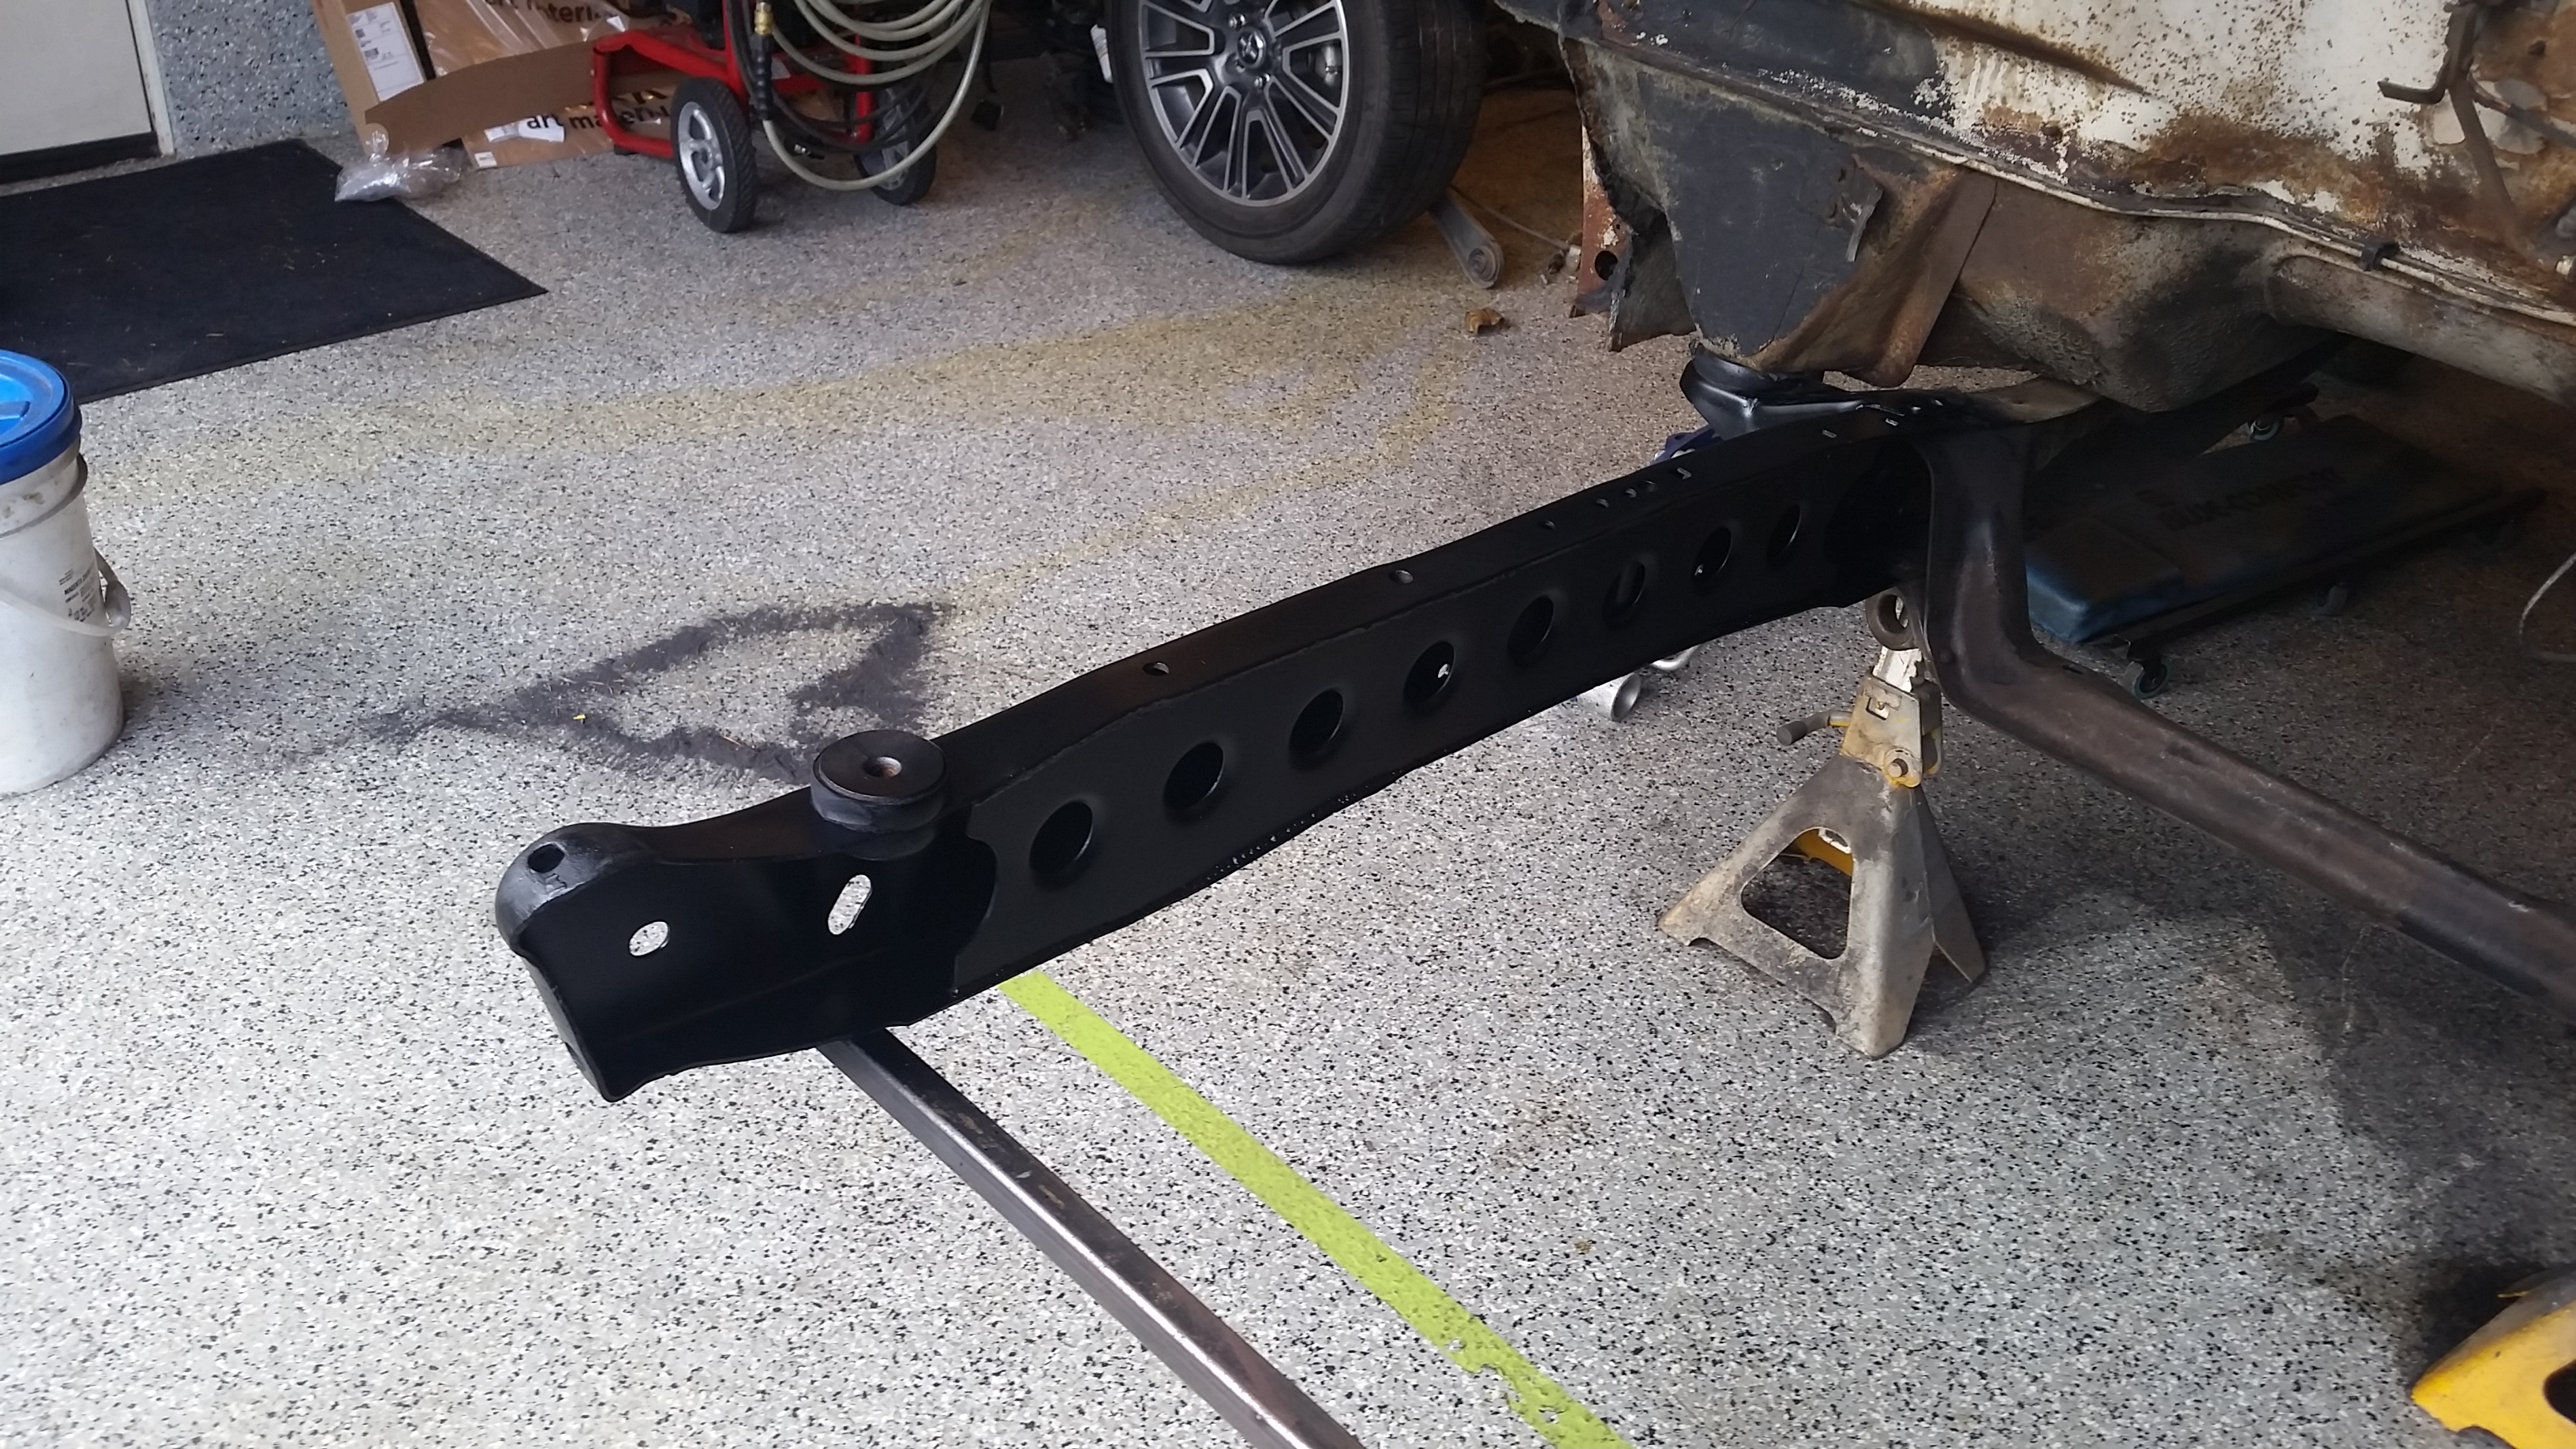
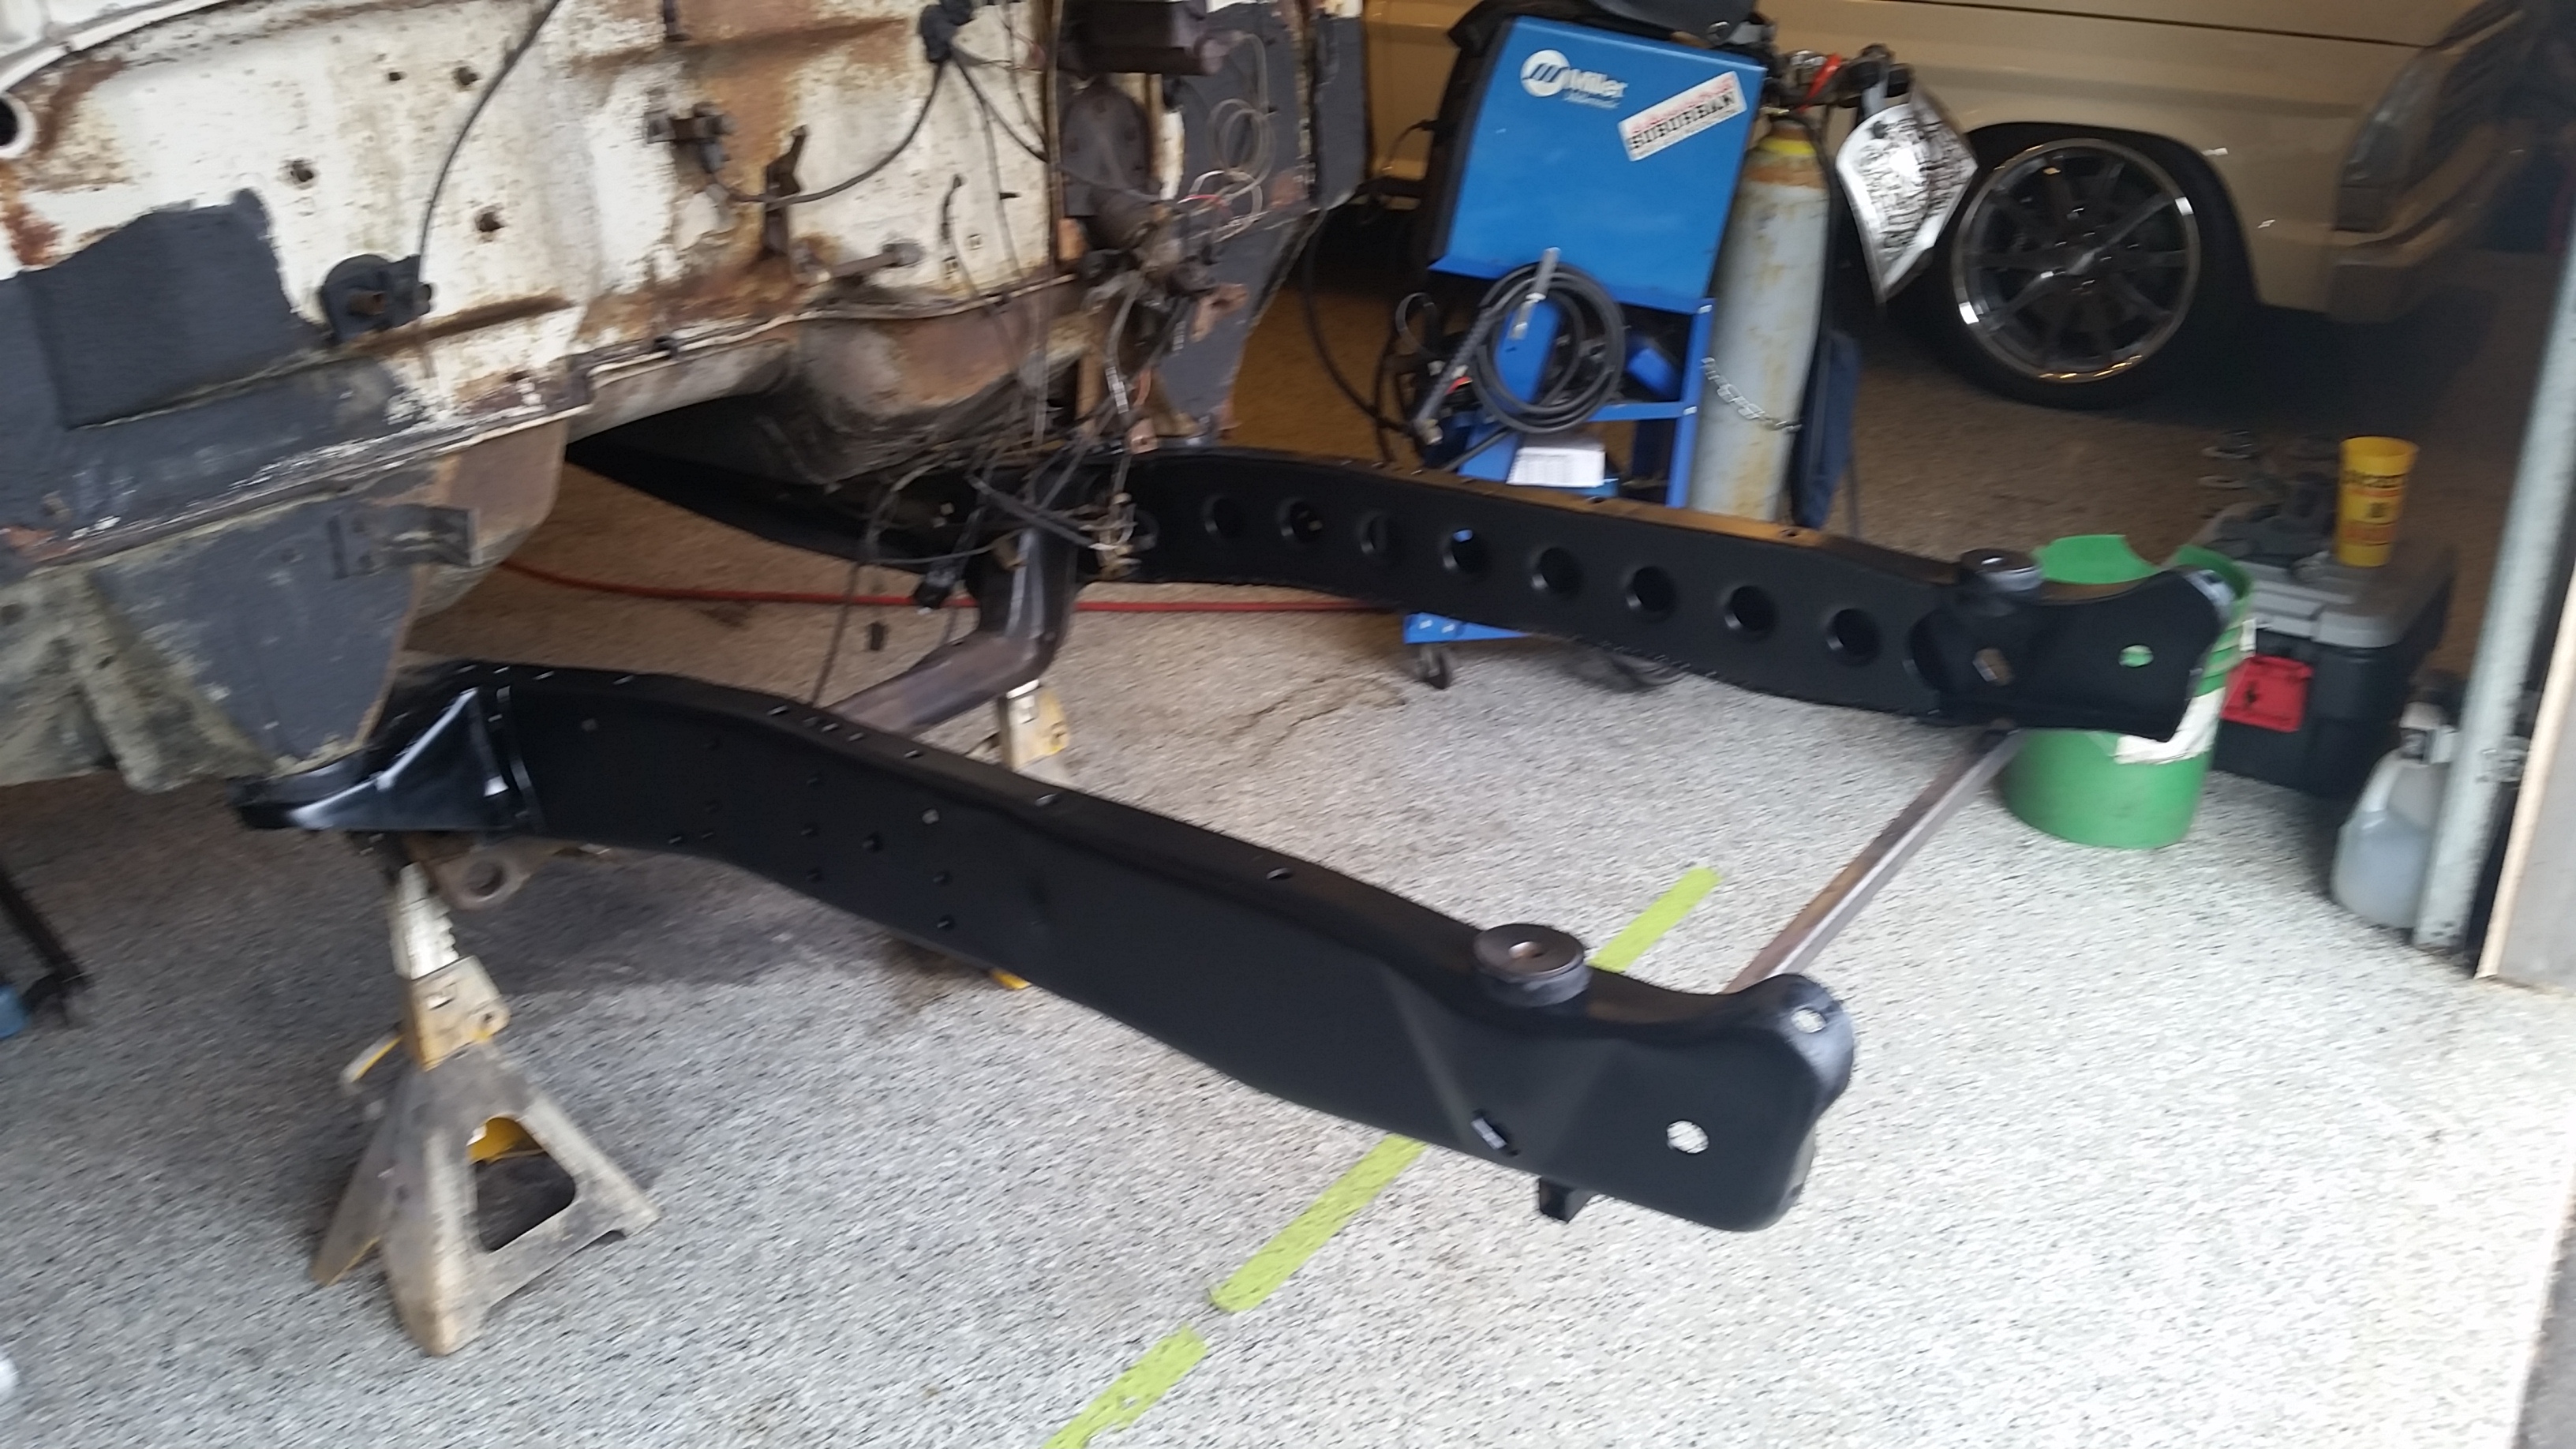
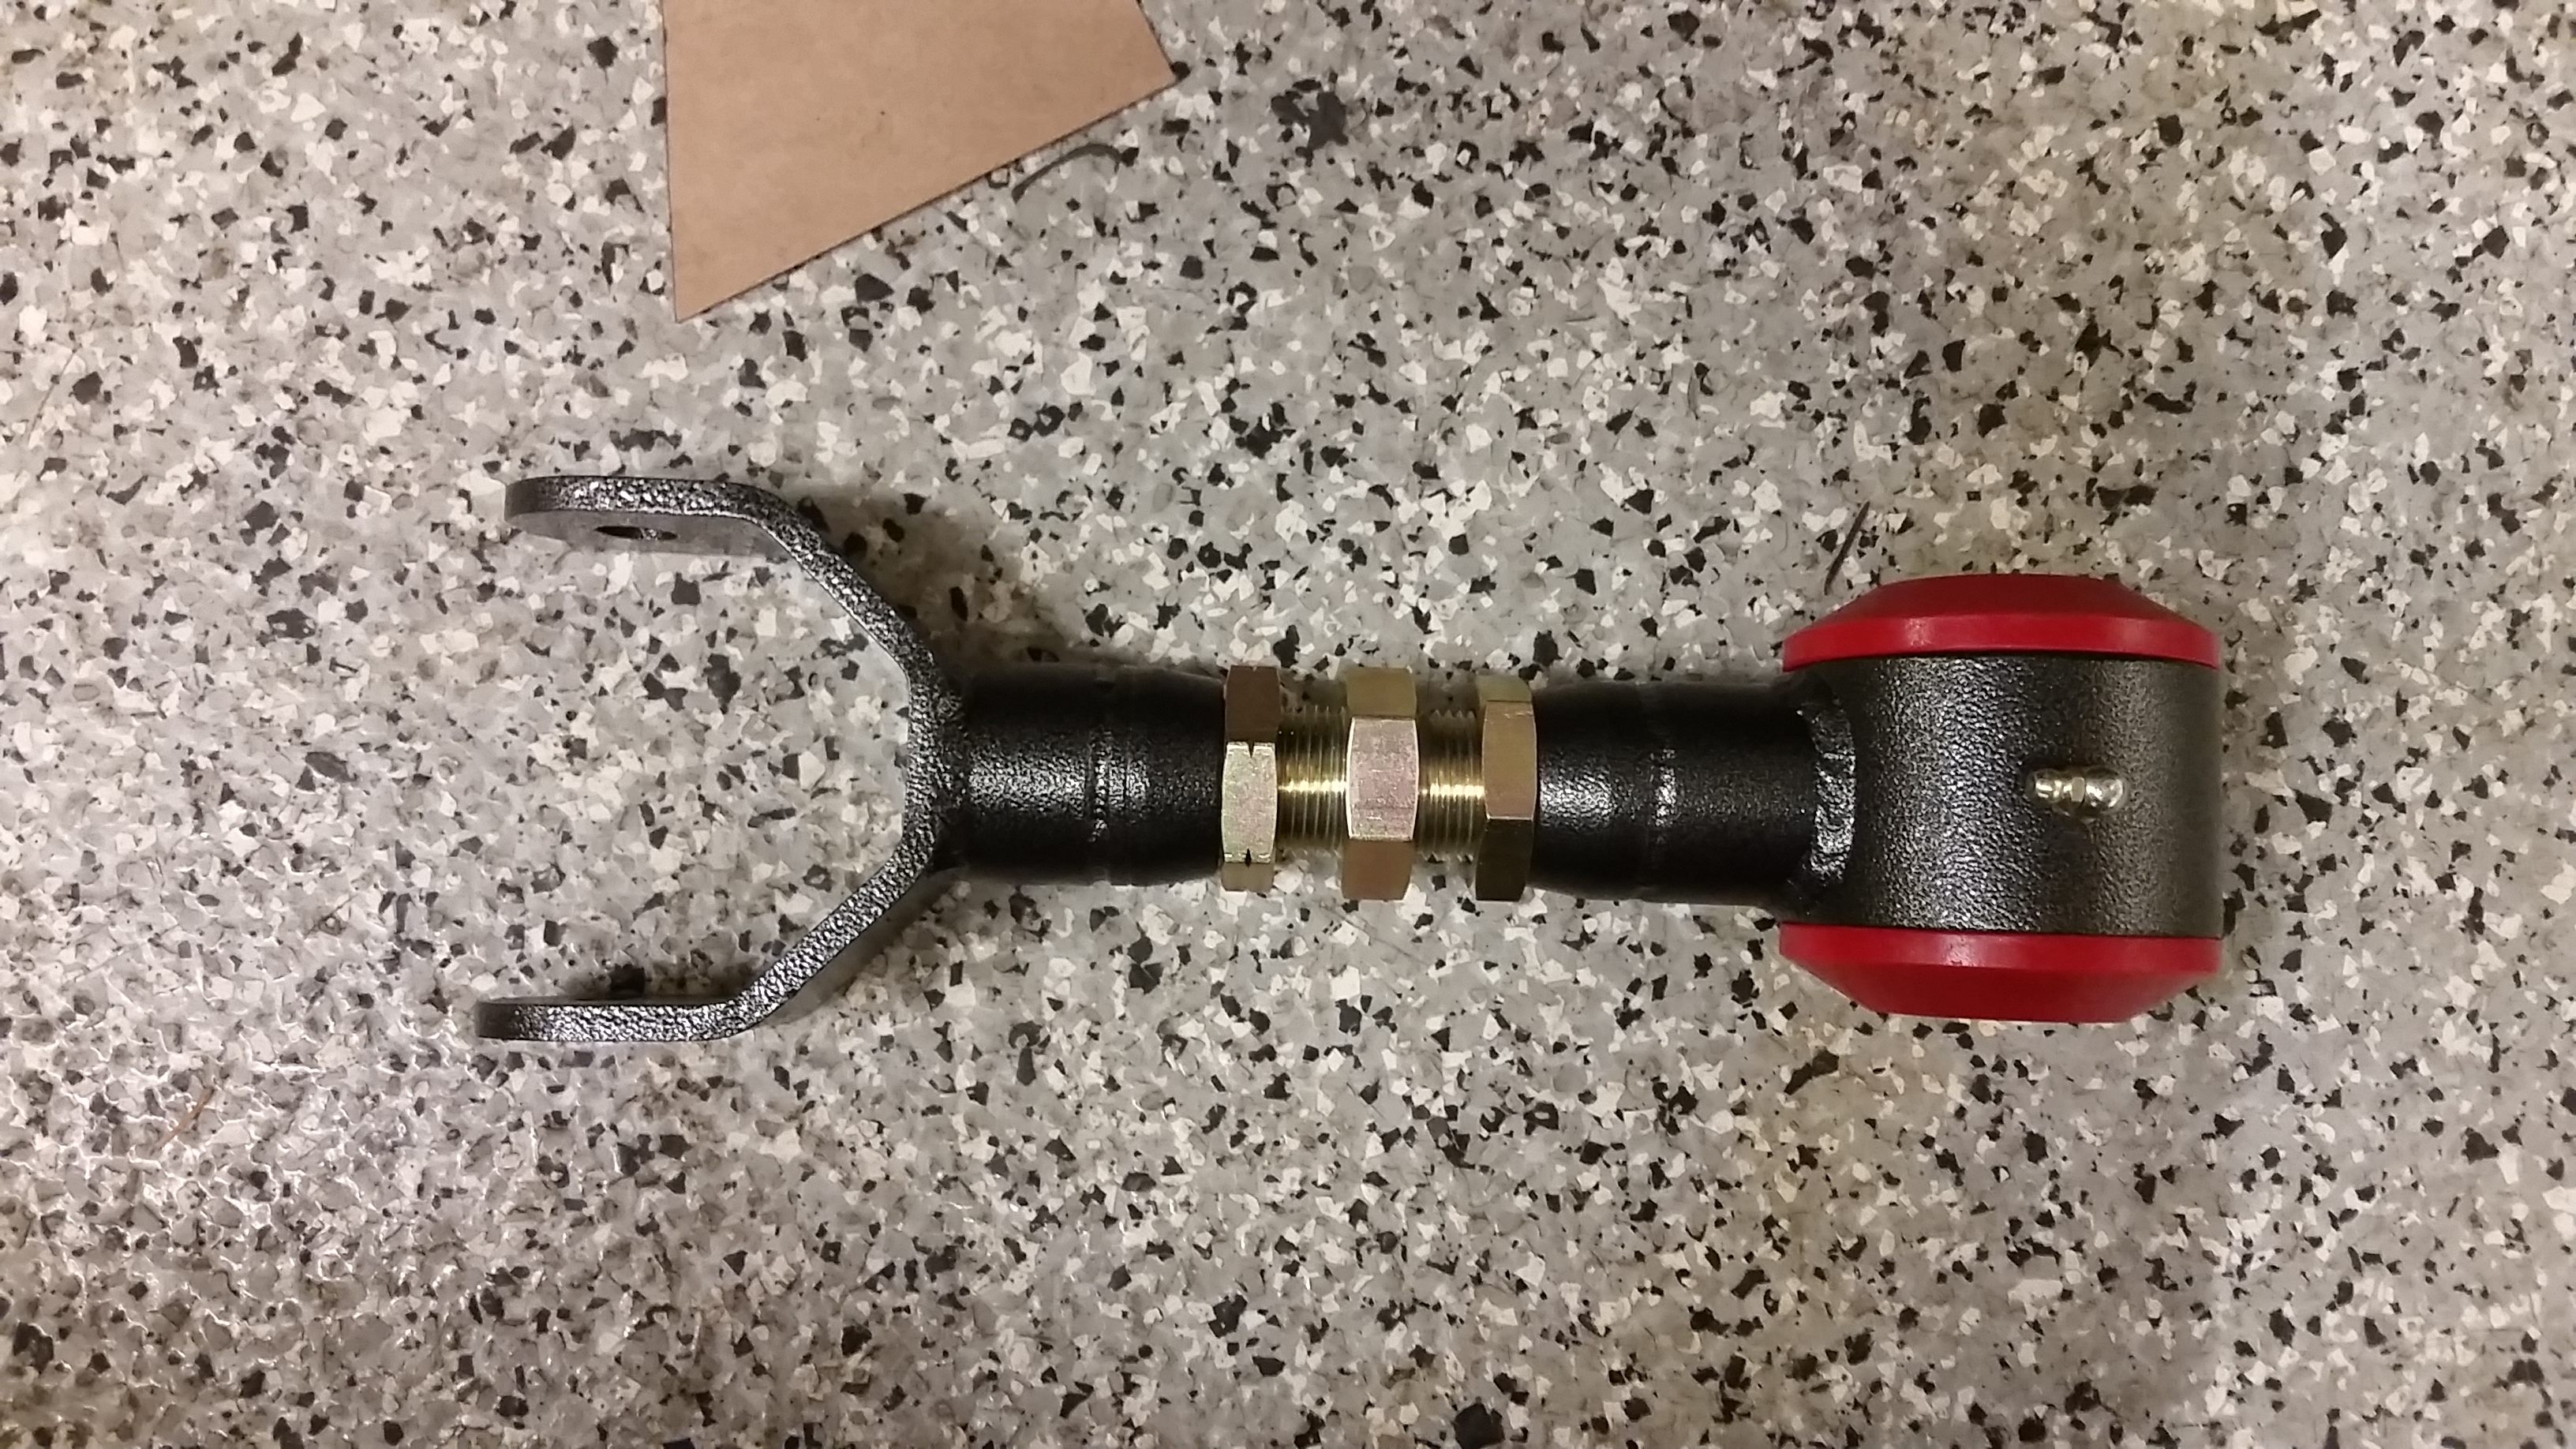
BMR Upper link....might get extended a bit.
BMR lower link, using these as is.
Working on lower link mounts now
Trying to get it dialed in where I want it and wondering if I should do multiple mounting locations to adjust roll center and stuff.

Should make a little progress tomorrow but gotta work for a bit. Picking up more metal in the morning.
Sean
Got the 8.8 out of the shop and got it pressure washed and cleaned up. New stuff is so nice and clean and not old and rusty =)

Got it under the truck and got it located where it needed to go, then got the frame to a more reasonable working height.

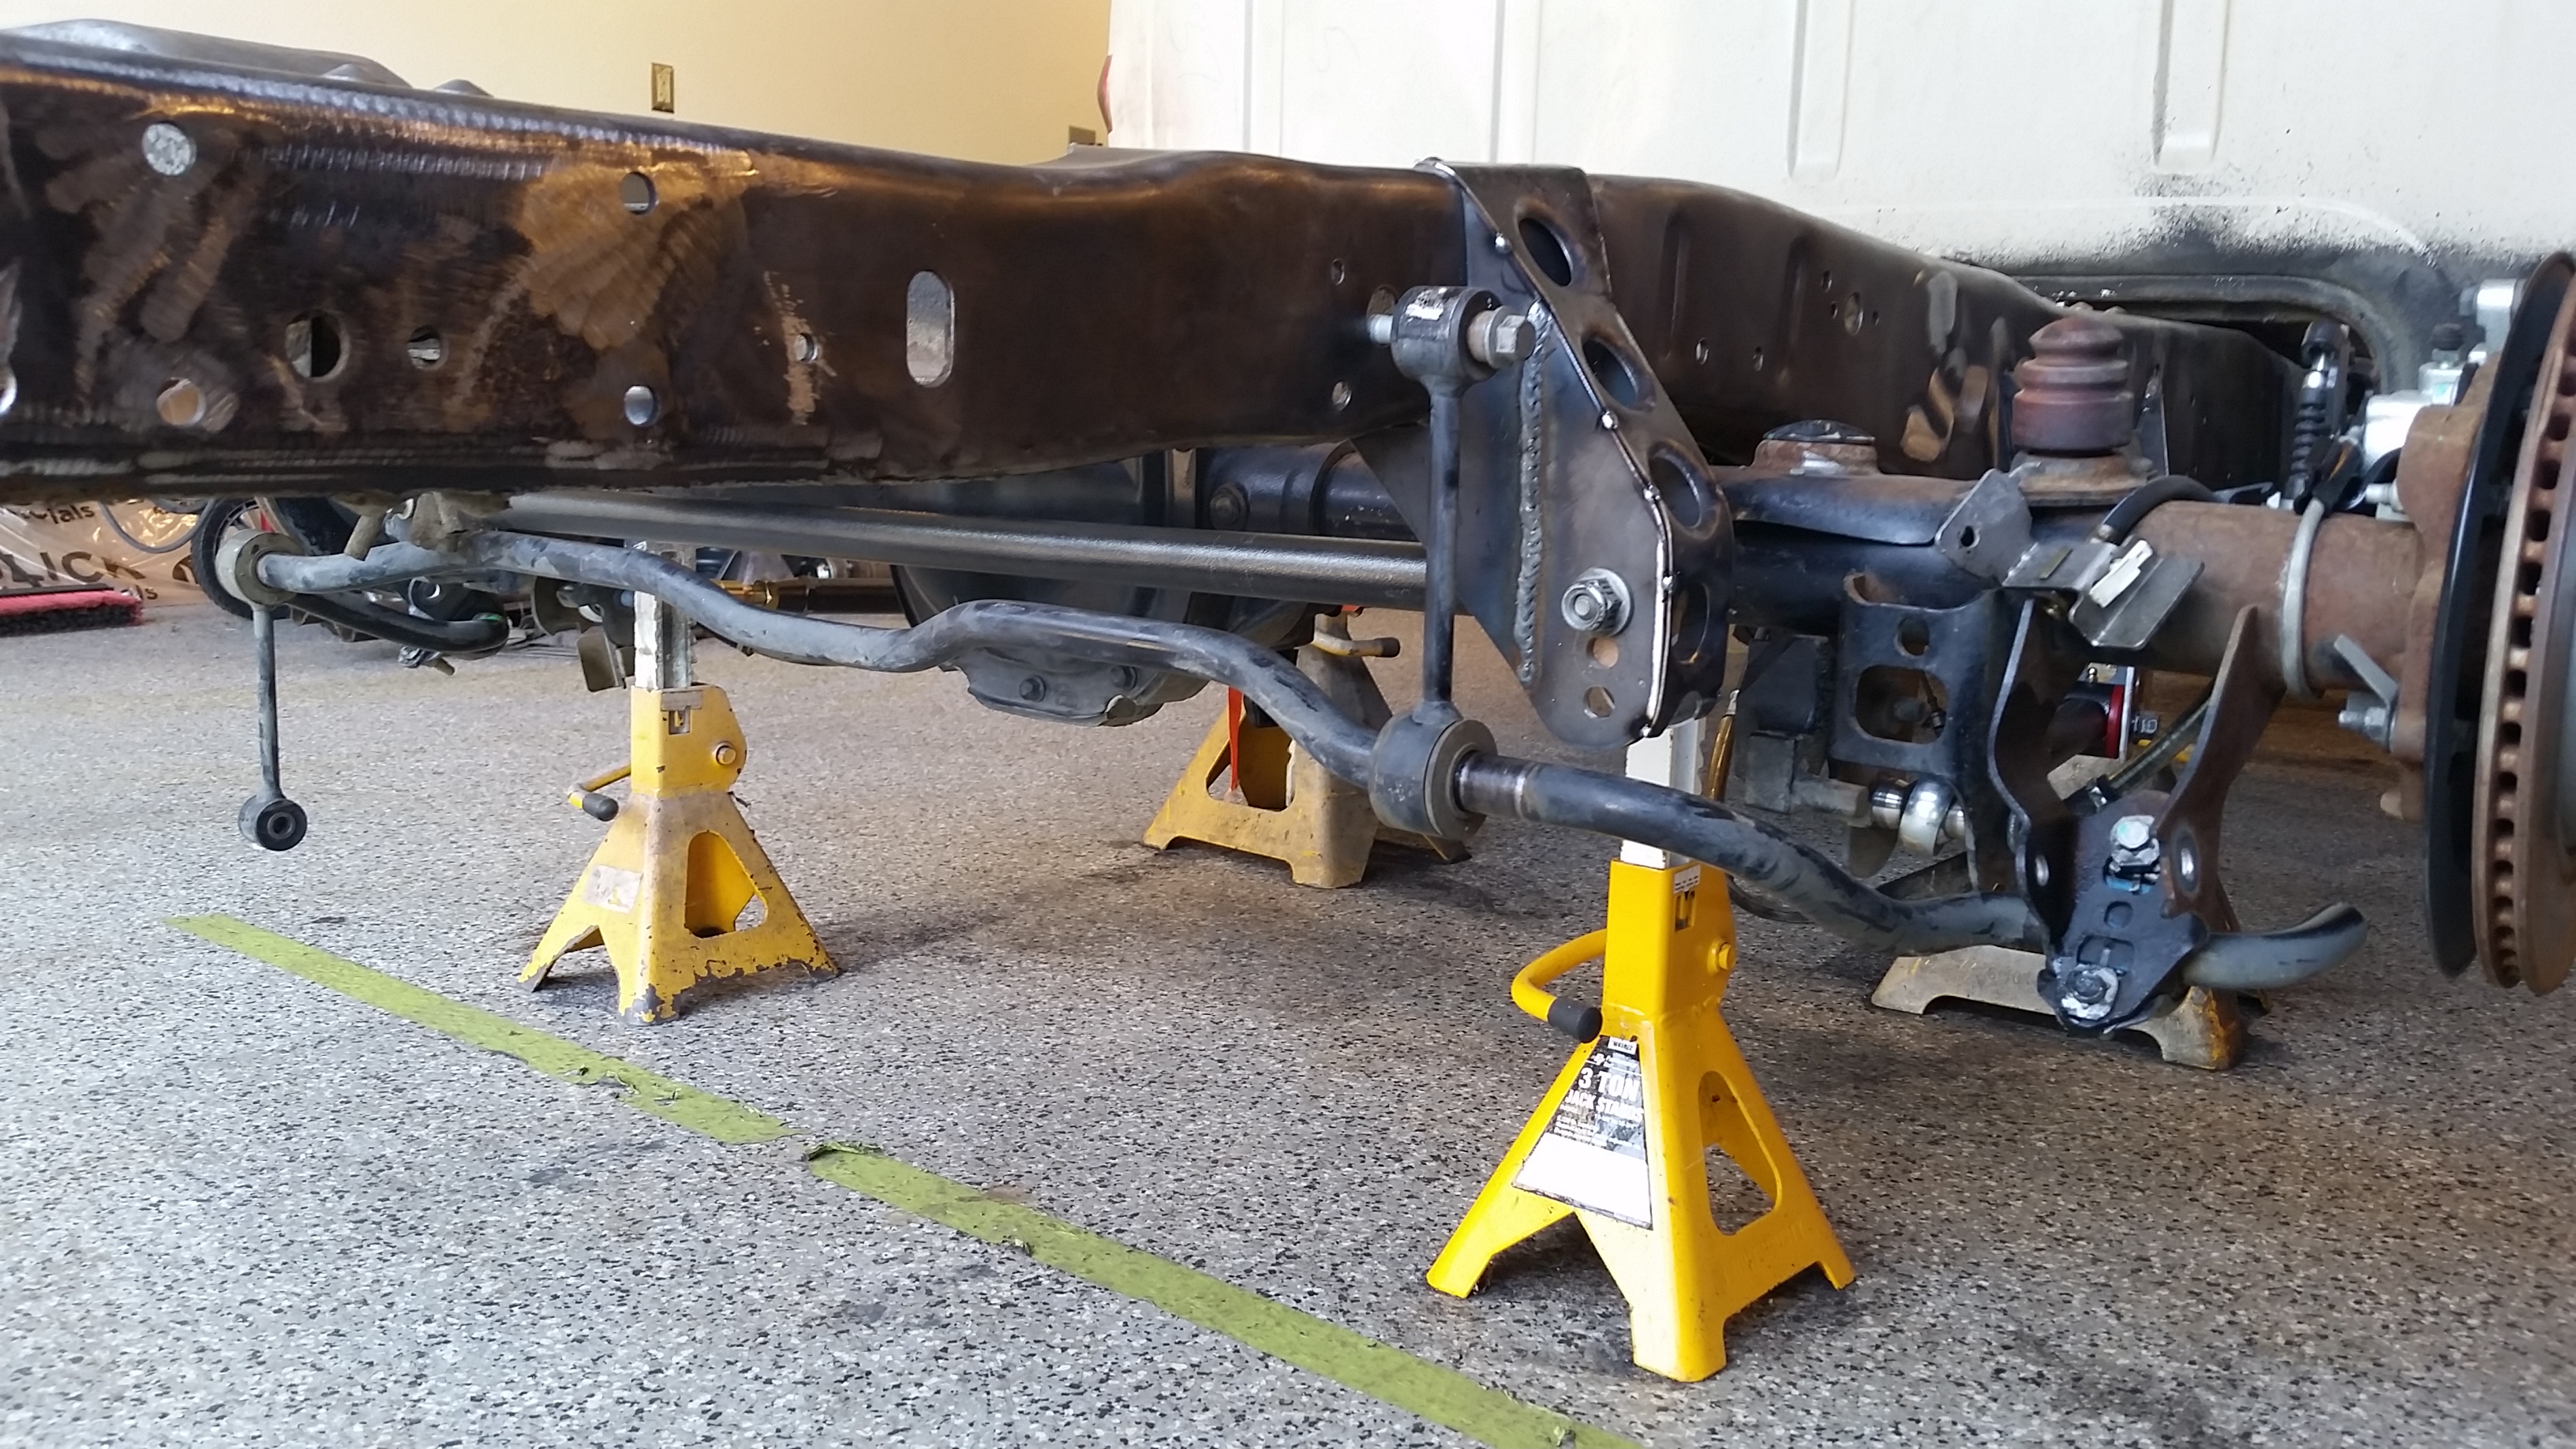
BMR Upper link....might get extended a bit.

BMR lower link, using these as is.

Working on lower link mounts now
Trying to get it dialed in where I want it and wondering if I should do multiple mounting locations to adjust roll center and stuff.

Should make a little progress tomorrow but gotta work for a bit. Picking up more metal in the morning.
Sean
#14
10-16-2015, 08:56 AM
Yesterday was frustrating to say the least. Ended up having to work till 12:30 on and off the phone and again from 6 to about 8 so not a lot of time to work on the truck.
Little more fab work here in the garage.
By the way, thinking about starting a small "company" for all of my side work. So if you see ninteen78 referenced from here on out that is me
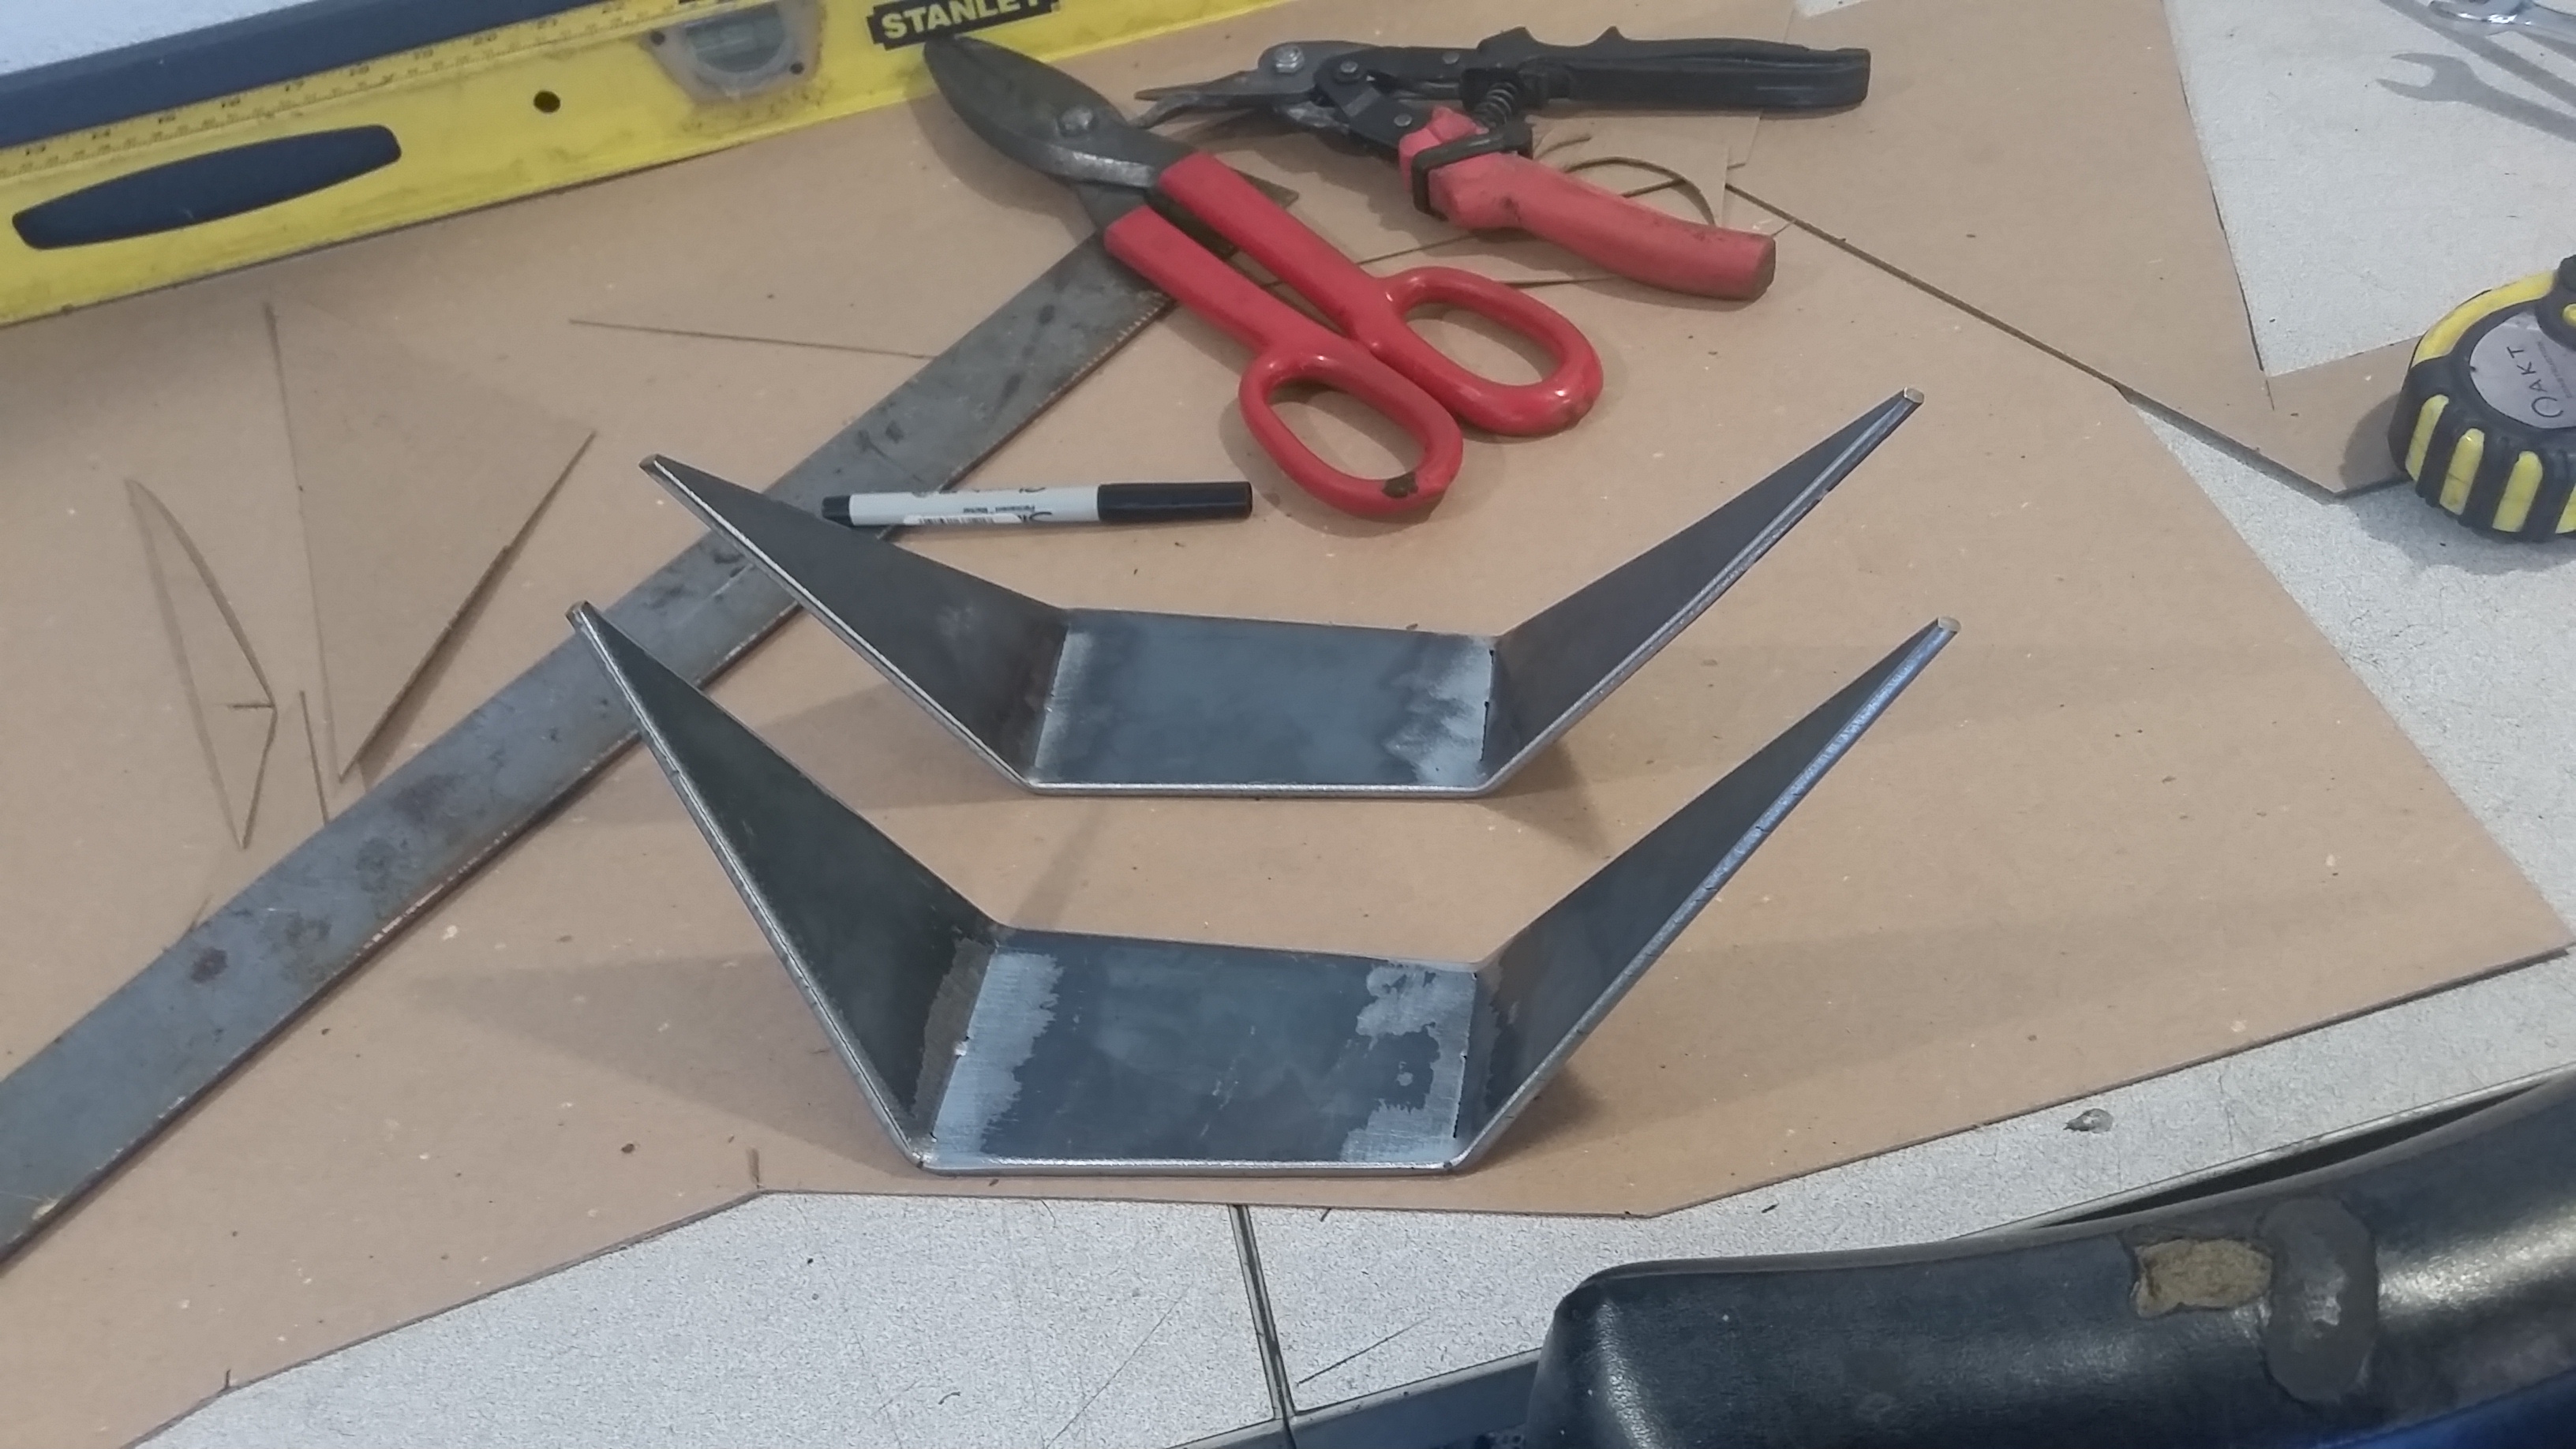
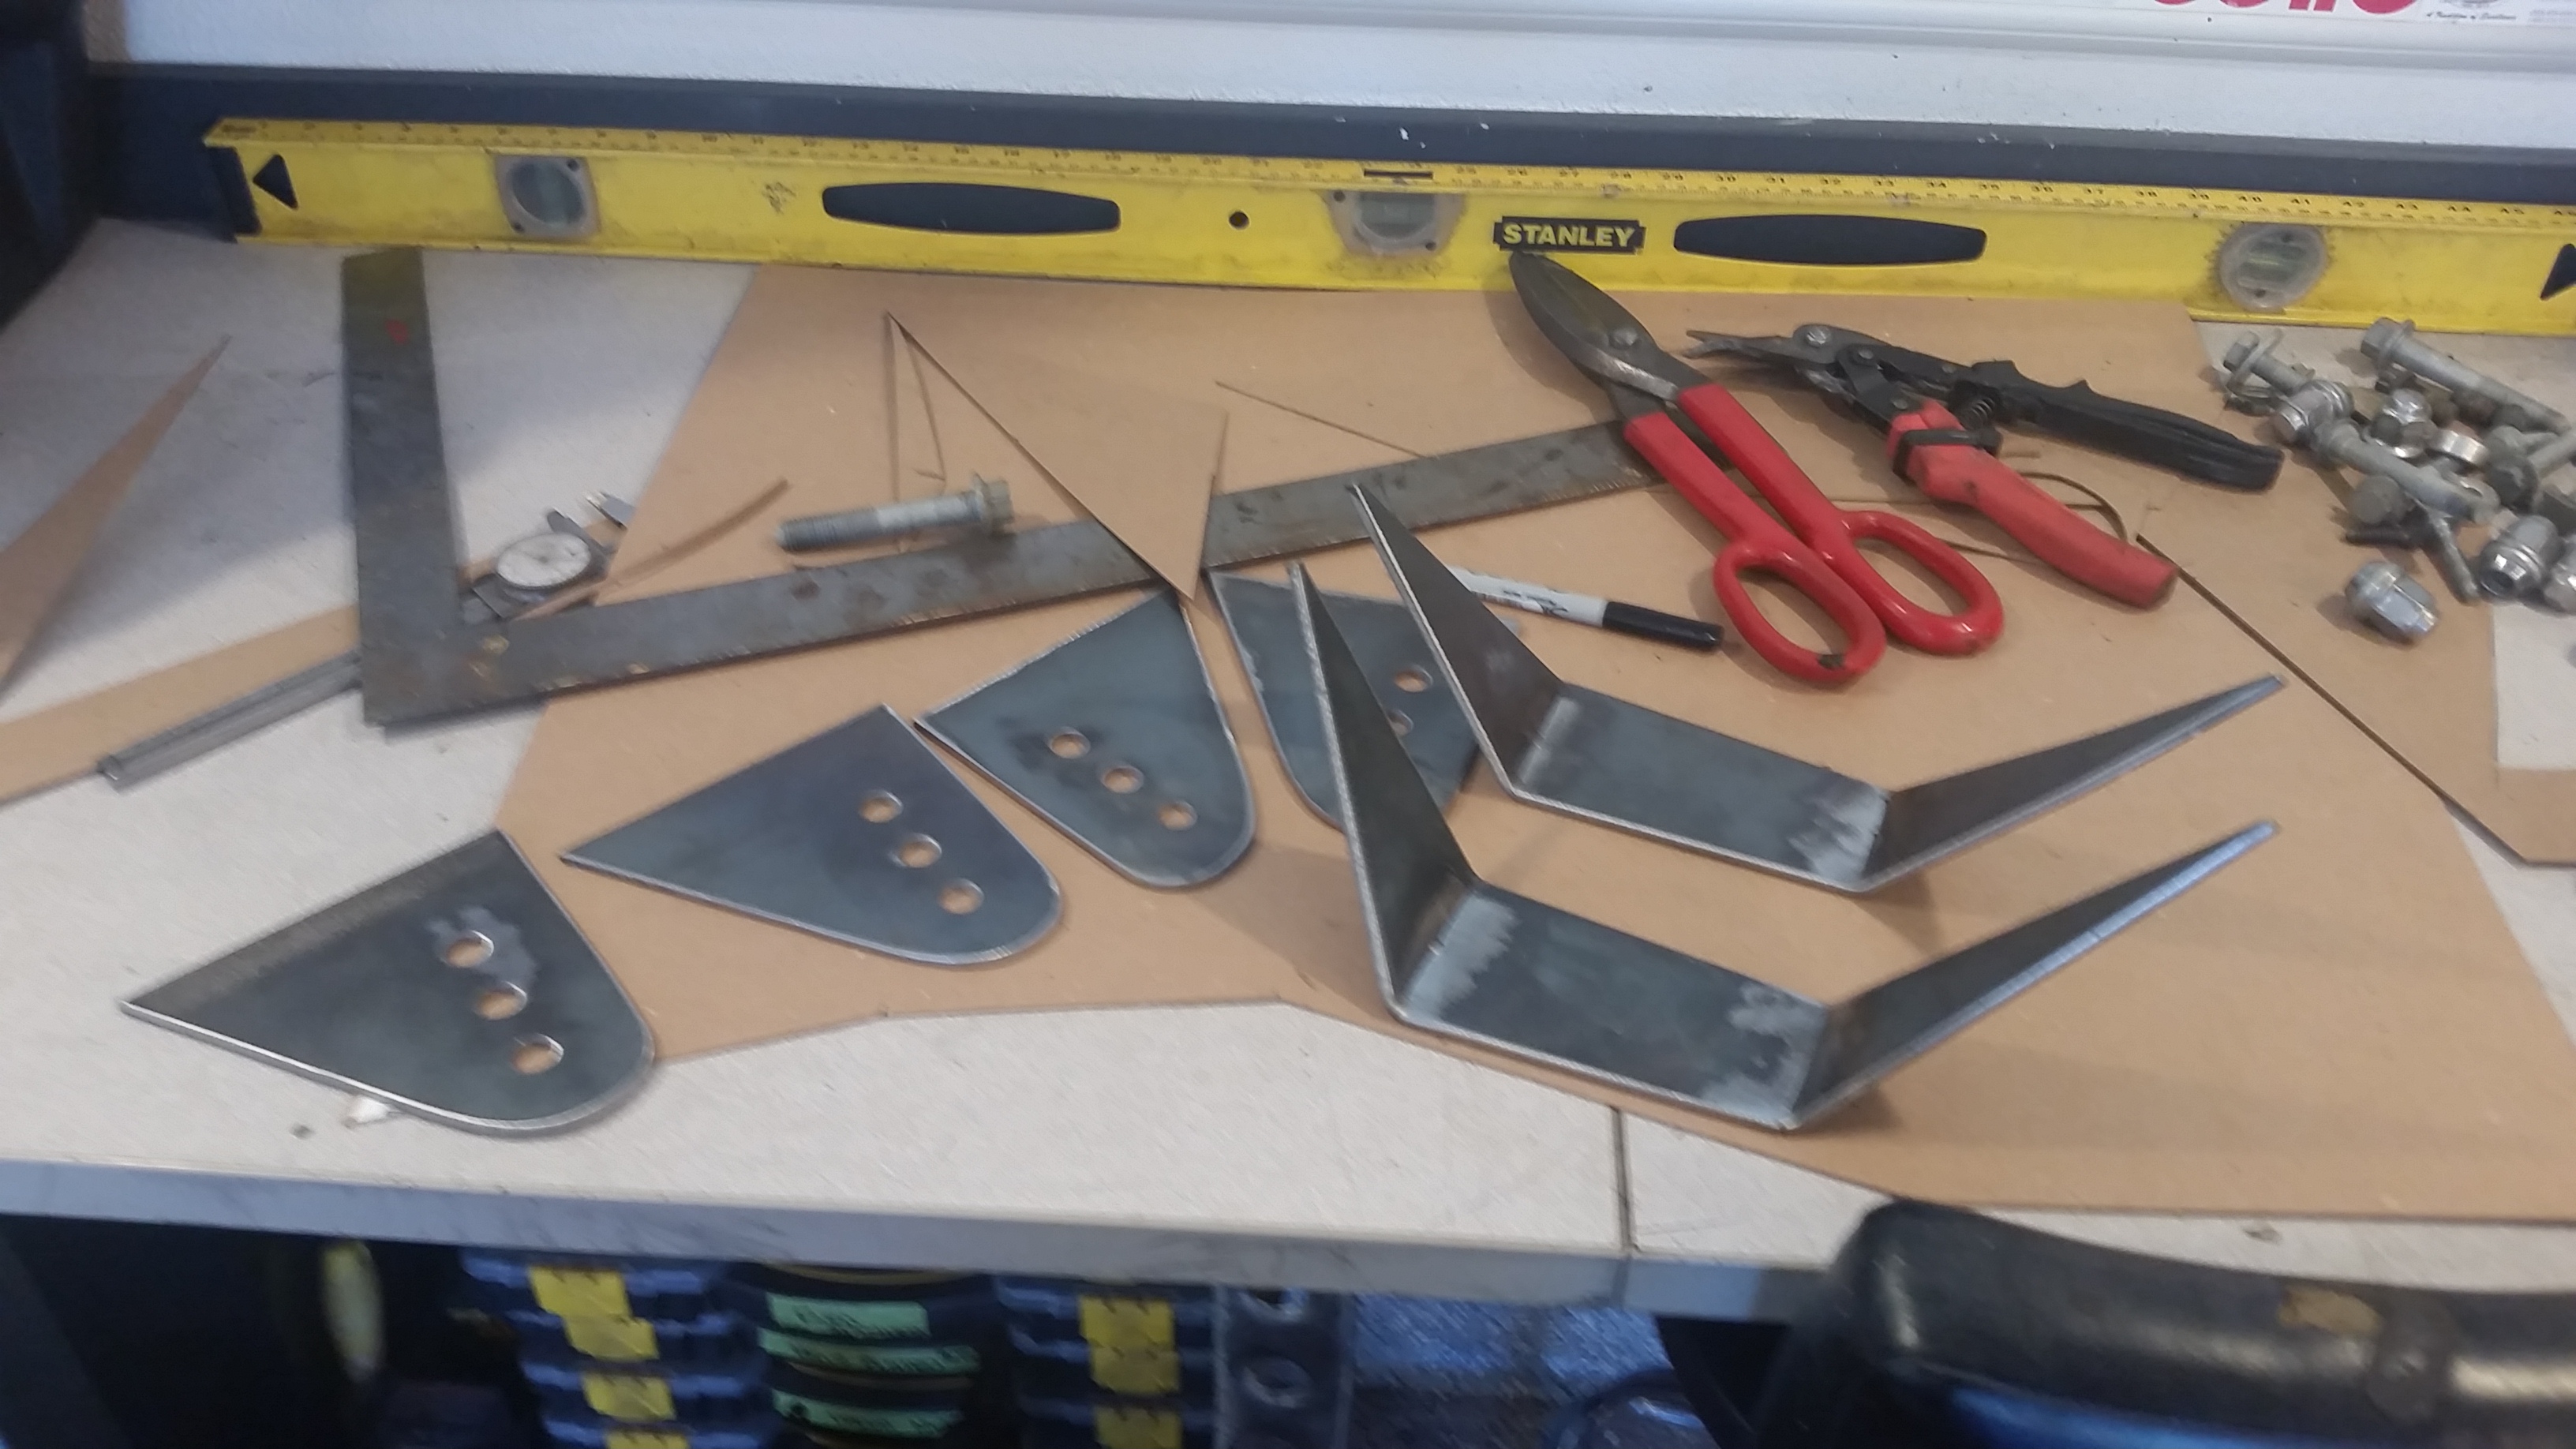
I don't have any fancy tools here in the shop, so some things that I need to get done require some....okay lots of extra effort. Say building 4 identical brackets with holes located in exactly the same location.
Build template and layout holes. Transfer to metal, gut out 4 with the plasma, grind so they are close and mate together with some tack welds. Then grind to match and drill through all 4 at the same time. This was pretty time consuming.
More templates, more pieces.
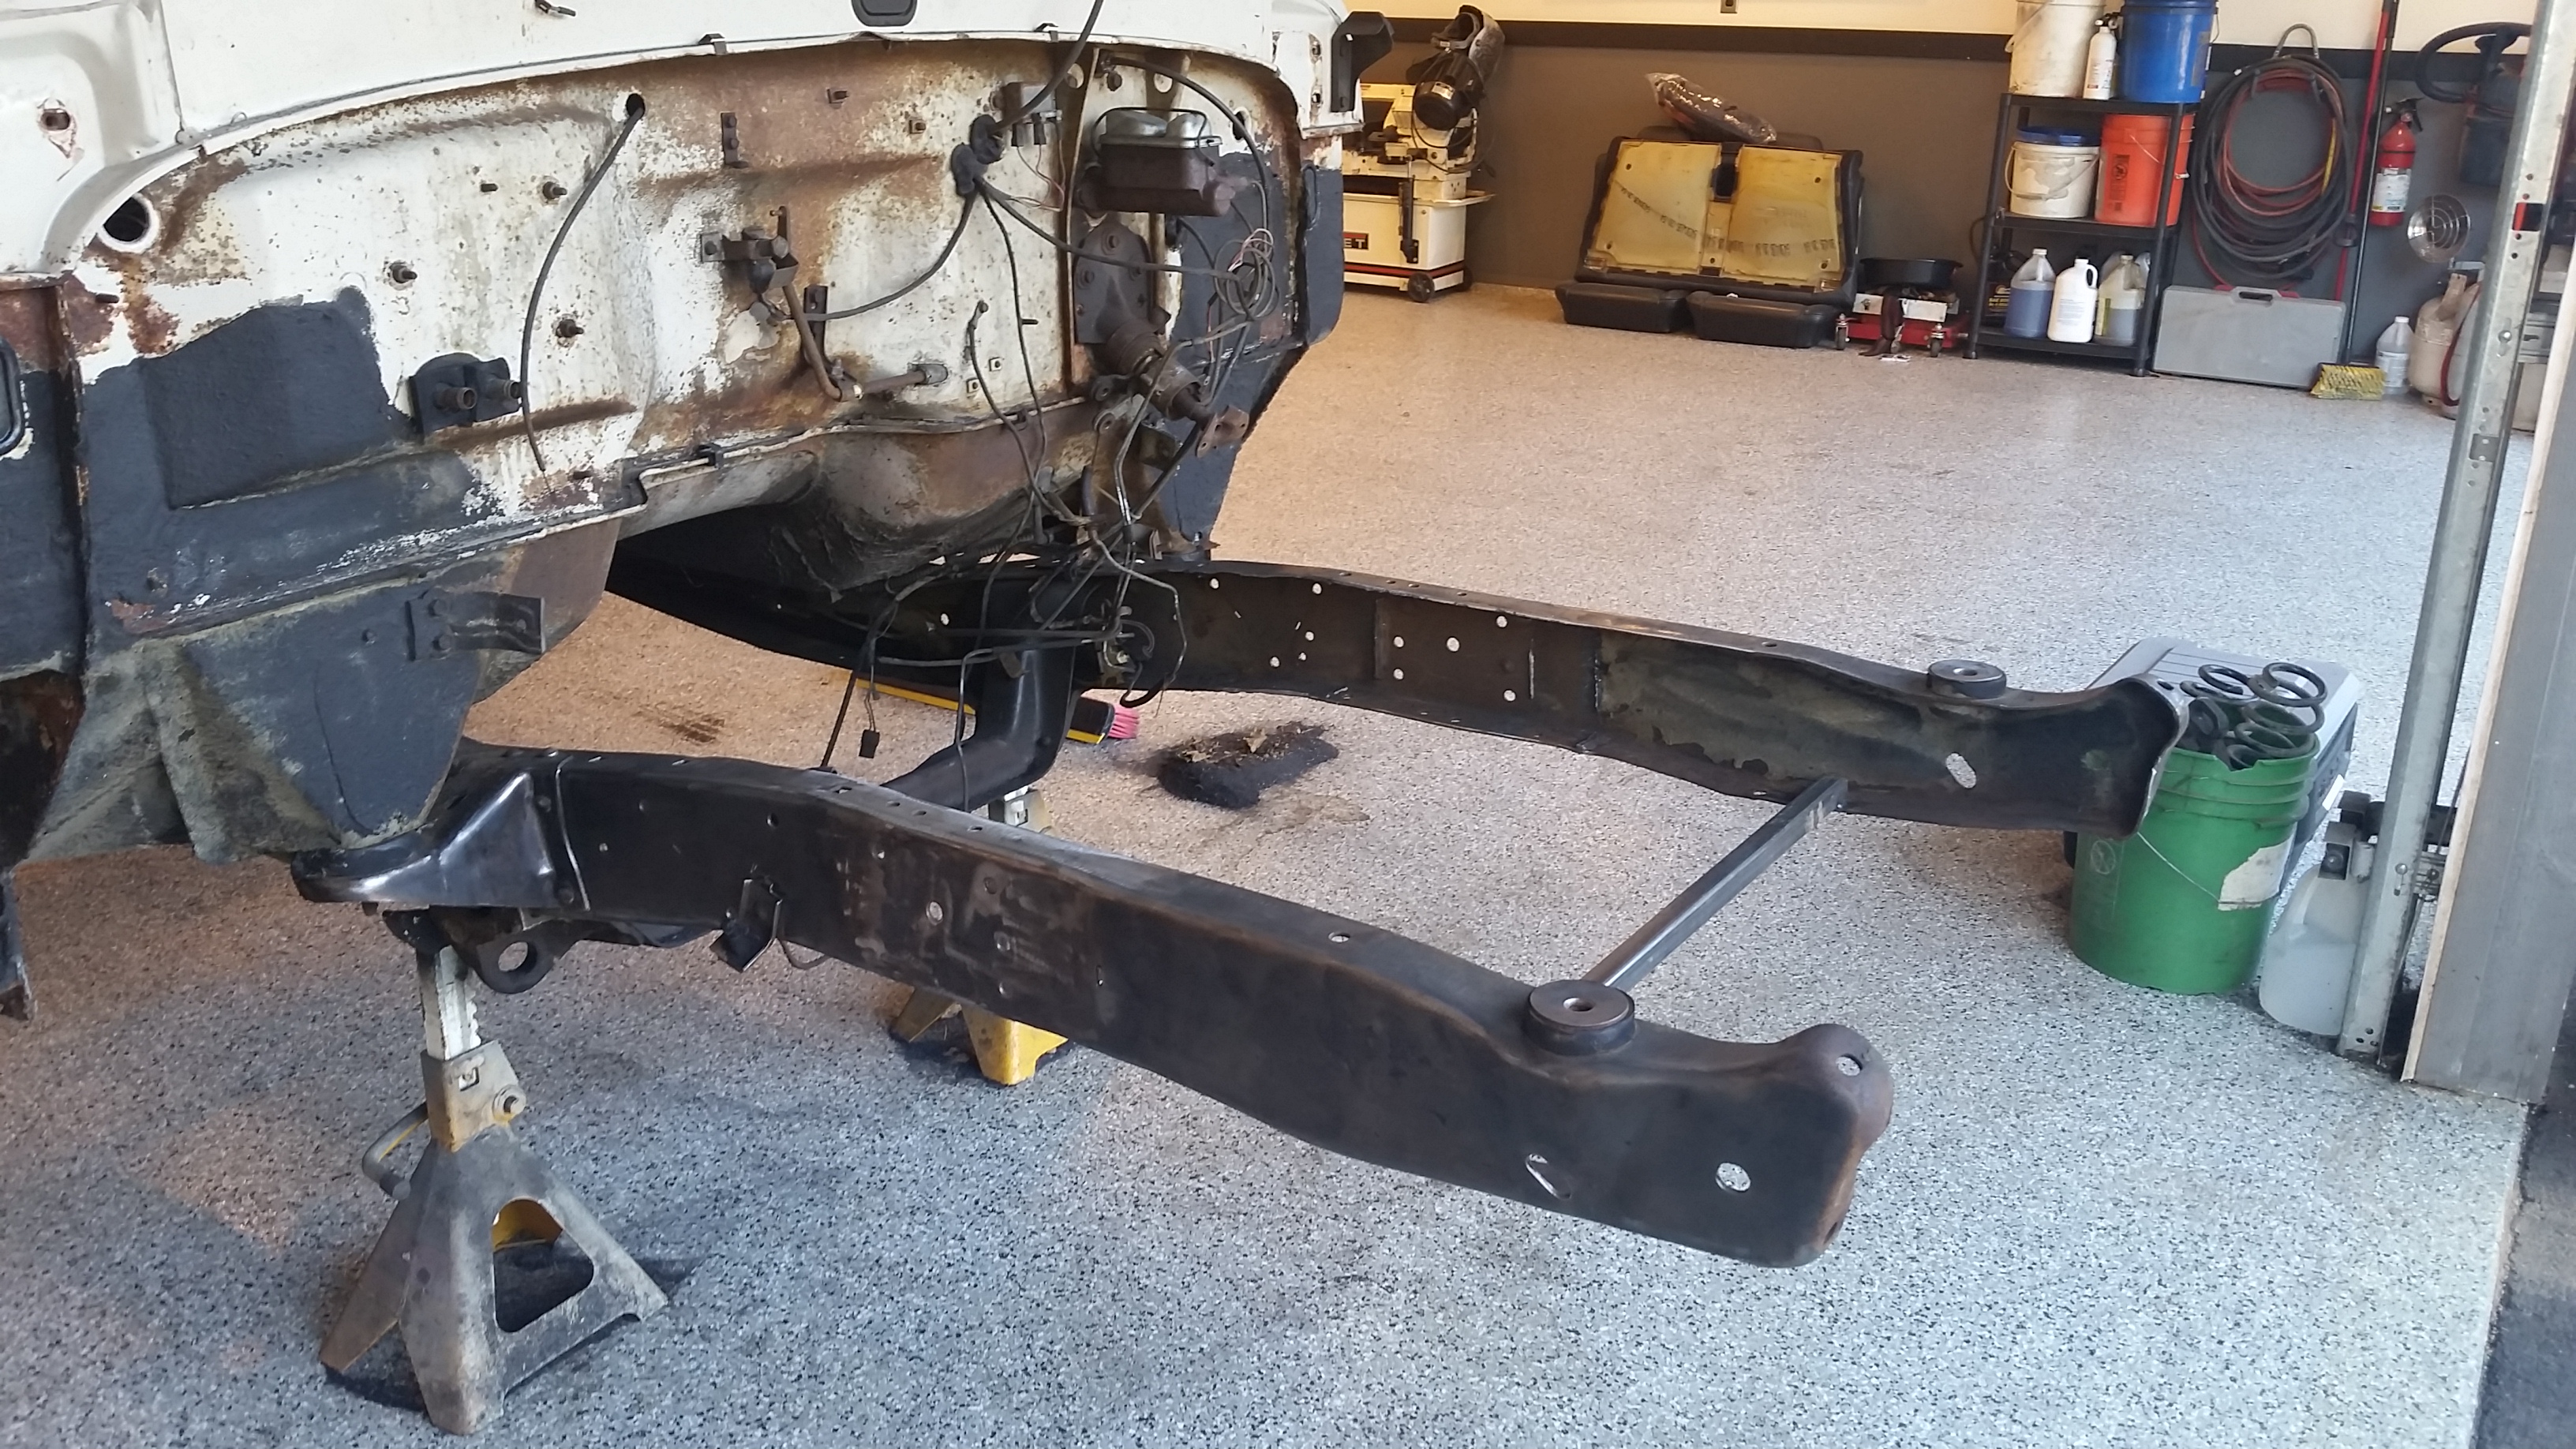
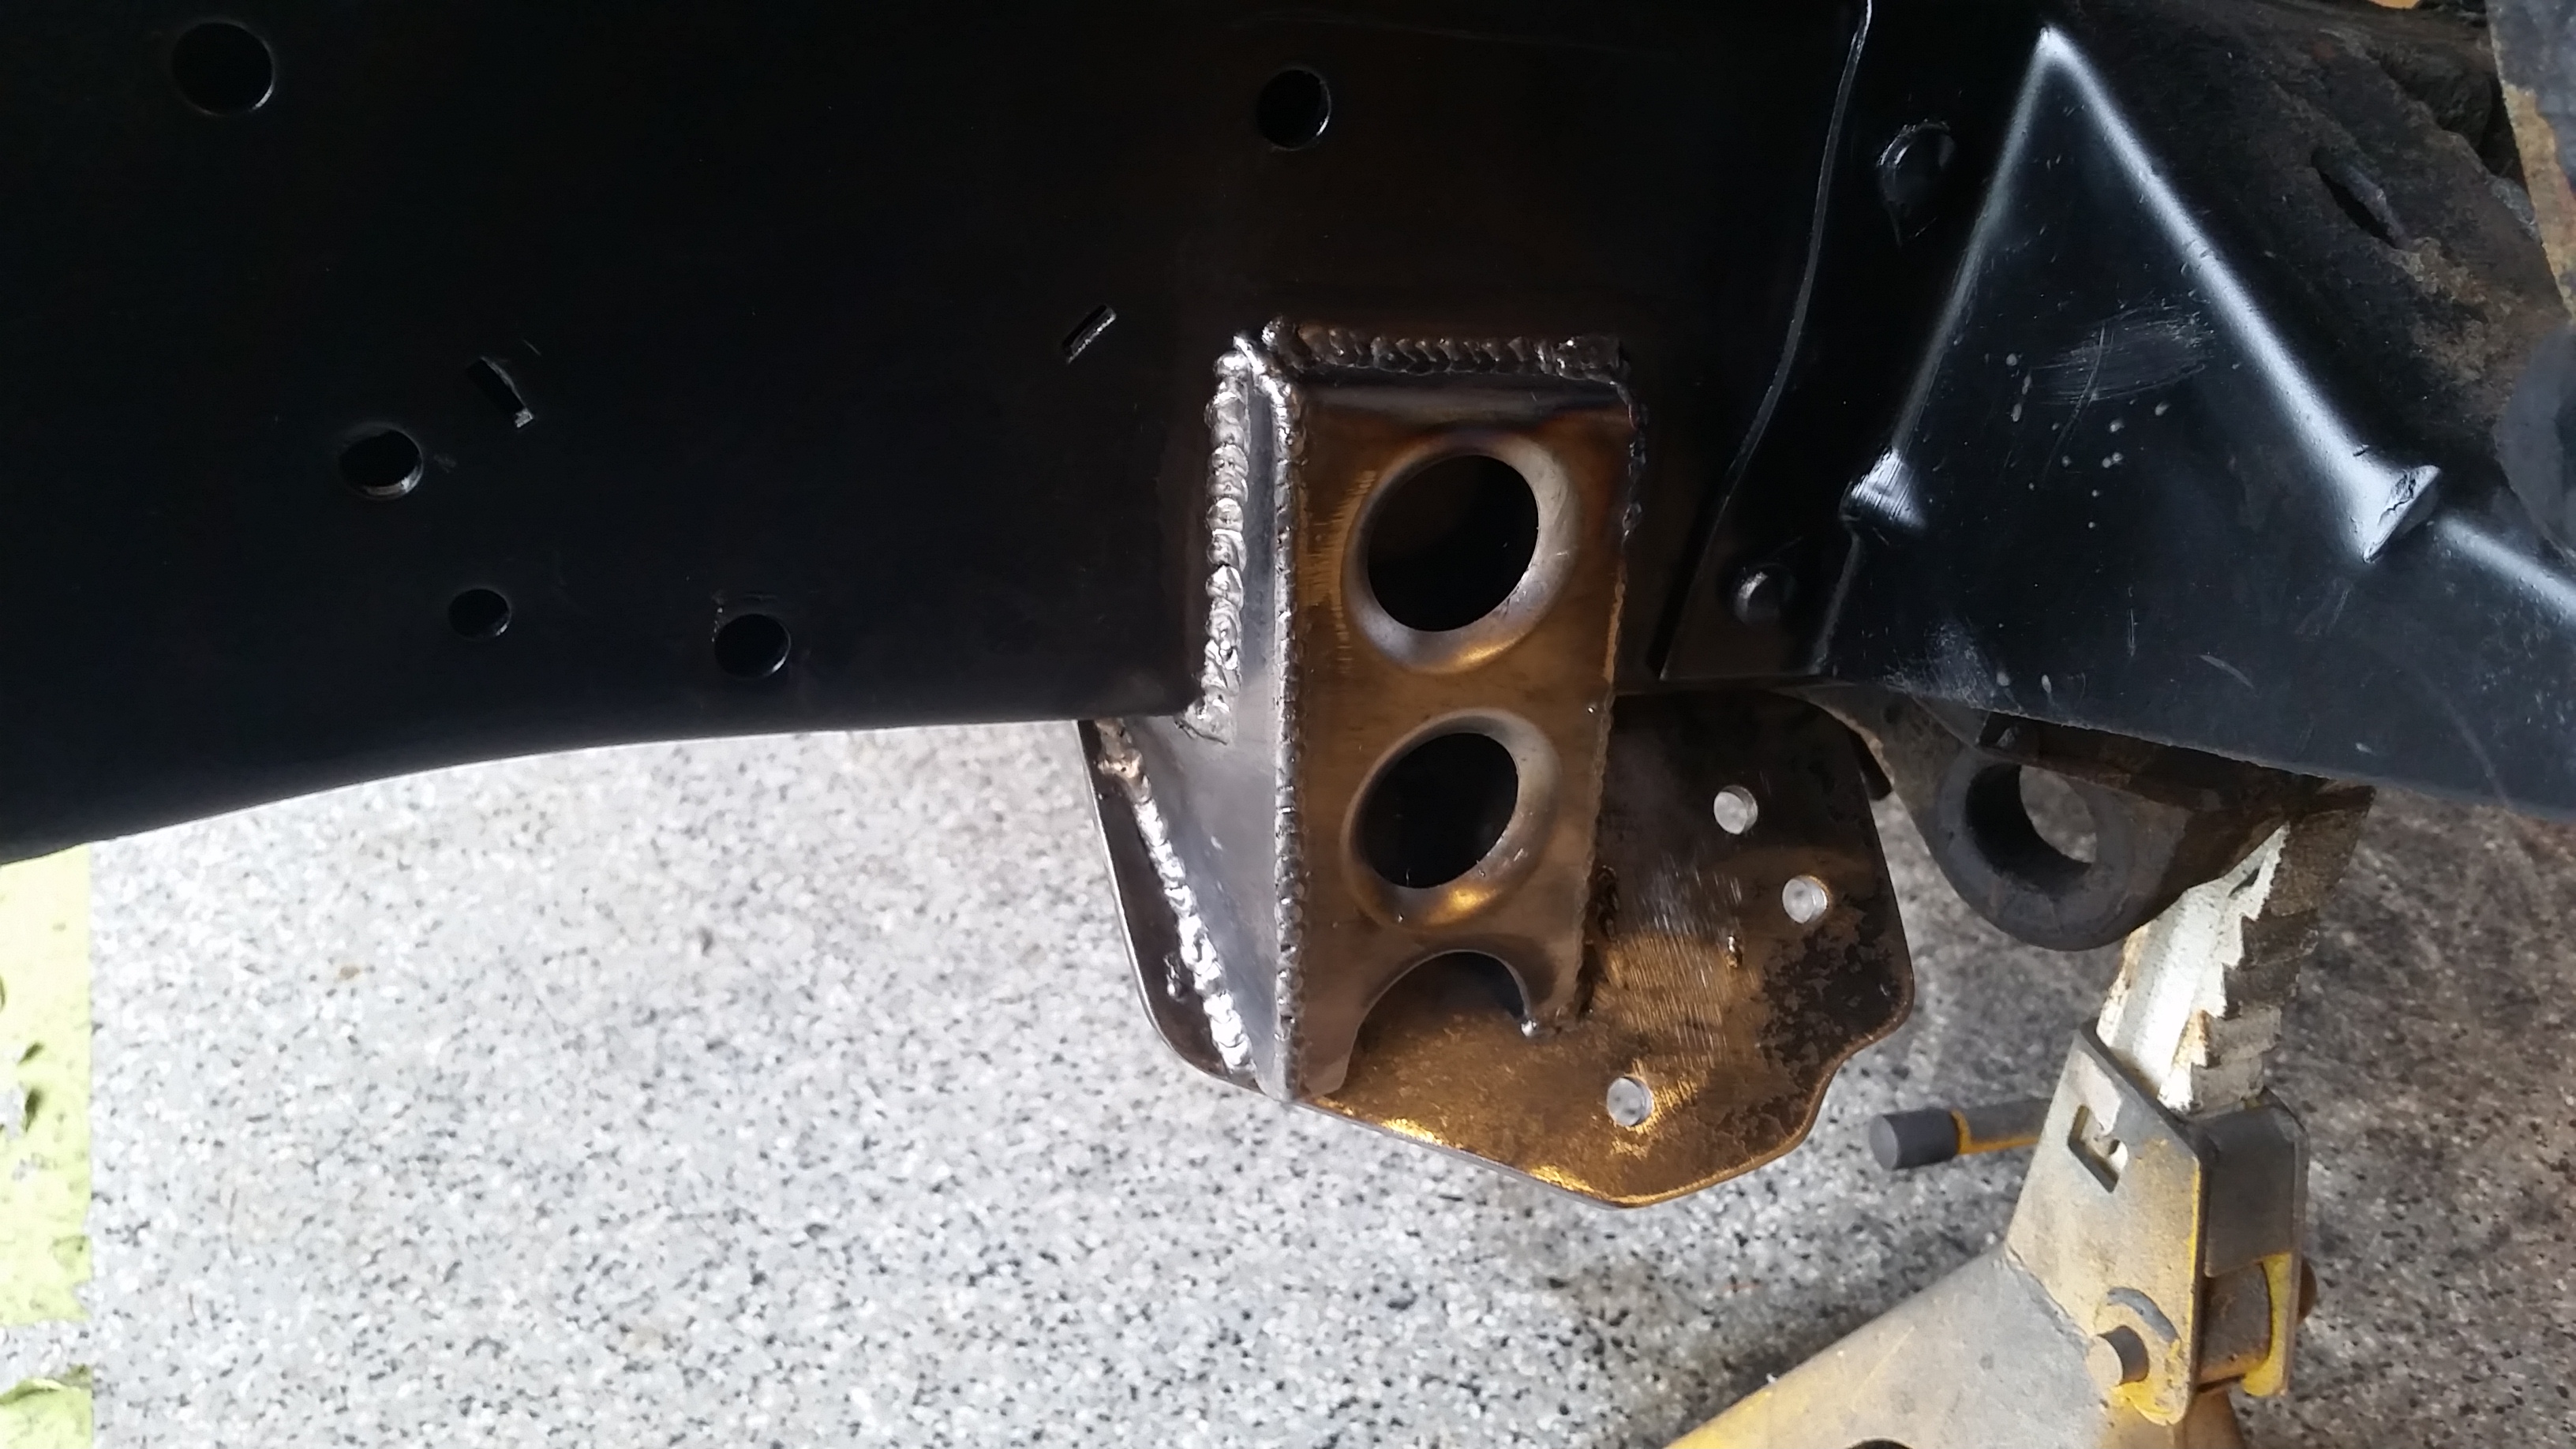
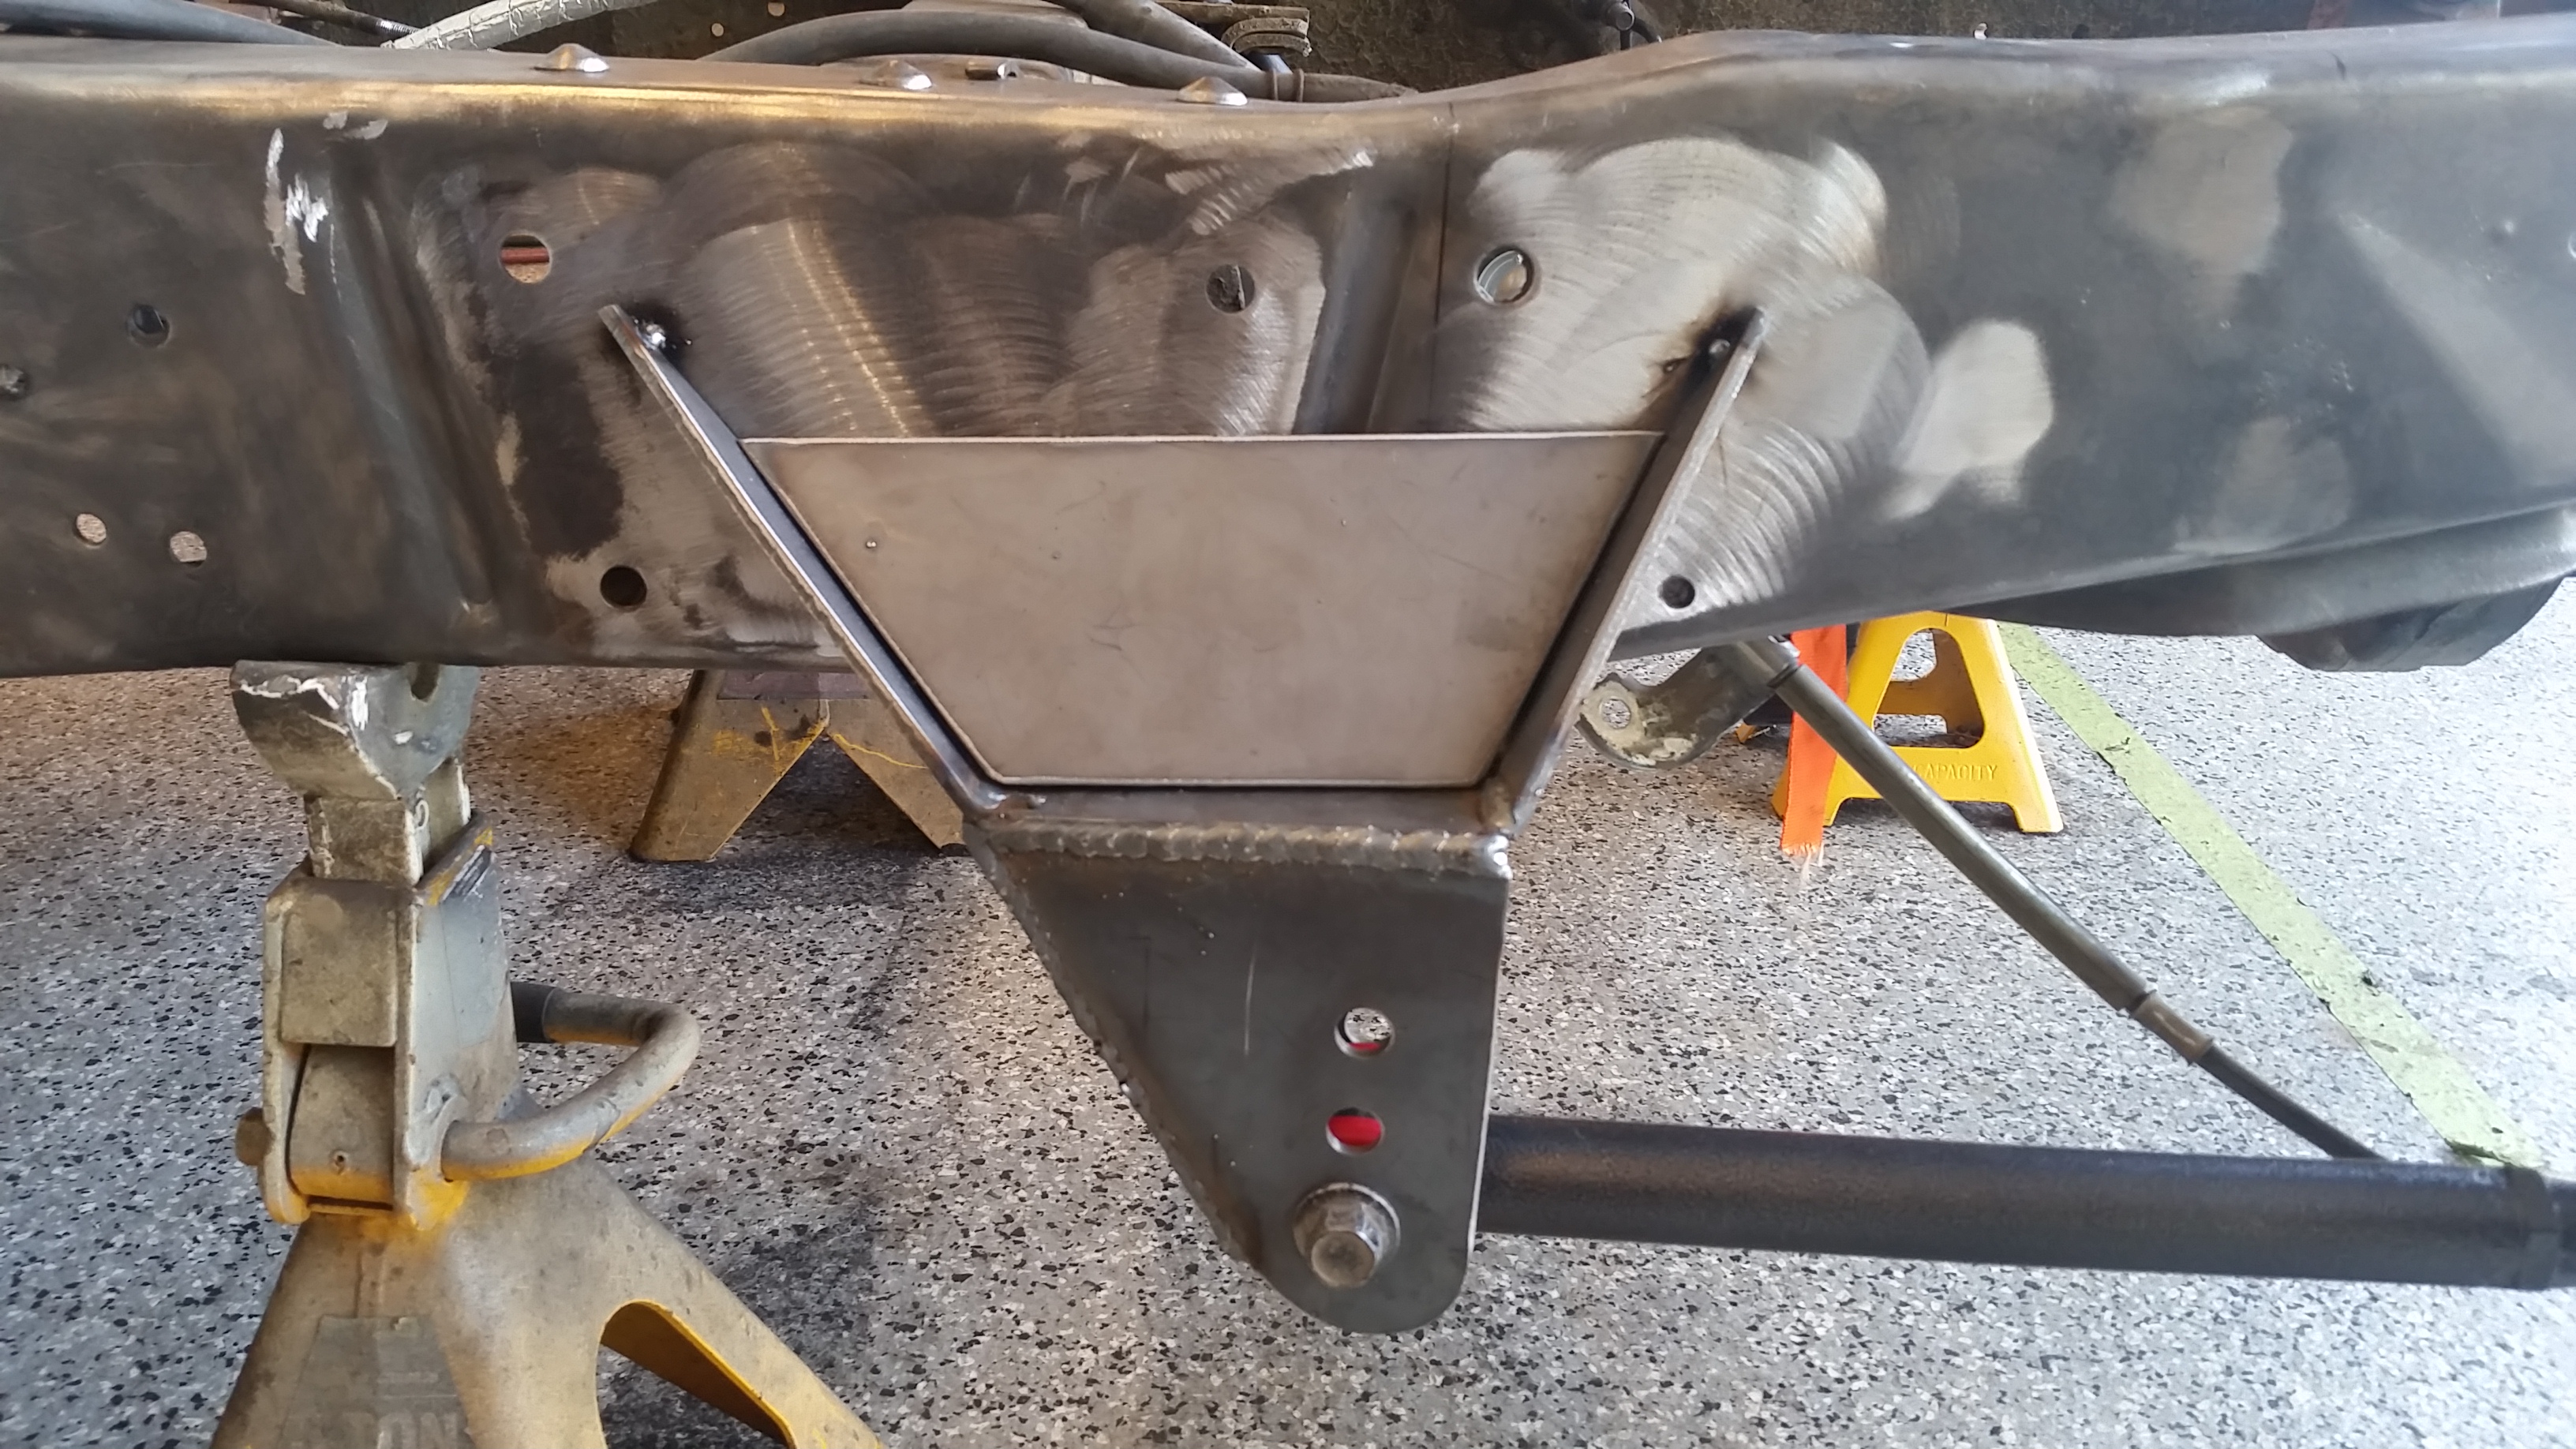
Front panel for lower link pocket welded on. This also has a support that goes behind the bracket and under the frame for more support and to tied it all in together.
Here it is just tacked up on the side of the truck. I did my final measurements now and the axle needed to come forward a little bit more. So I need to cut the tacks off and slide it forward this morning. I have some pretty good adjustment on the lowers.
I should be able to get some heavy tacks on the lower links this morning and get to wok on the panhard bar and upper link mount.....That upper link is going to be interesting.
Sean
Little more fab work here in the garage.
By the way, thinking about starting a small "company" for all of my side work. So if you see ninteen78 referenced from here on out that is me
I don't have any fancy tools here in the shop, so some things that I need to get done require some....okay lots of extra effort. Say building 4 identical brackets with holes located in exactly the same location.
Build template and layout holes. Transfer to metal, gut out 4 with the plasma, grind so they are close and mate together with some tack welds. Then grind to match and drill through all 4 at the same time. This was pretty time consuming.

More templates, more pieces.


Front panel for lower link pocket welded on. This also has a support that goes behind the bracket and under the frame for more support and to tied it all in together.
Here it is just tacked up on the side of the truck. I did my final measurements now and the axle needed to come forward a little bit more. So I need to cut the tacks off and slide it forward this morning. I have some pretty good adjustment on the lowers.

I should be able to get some heavy tacks on the lower links this morning and get to wok on the panhard bar and upper link mount.....That upper link is going to be interesting.
Sean
#15
10-16-2015, 08:57 AM
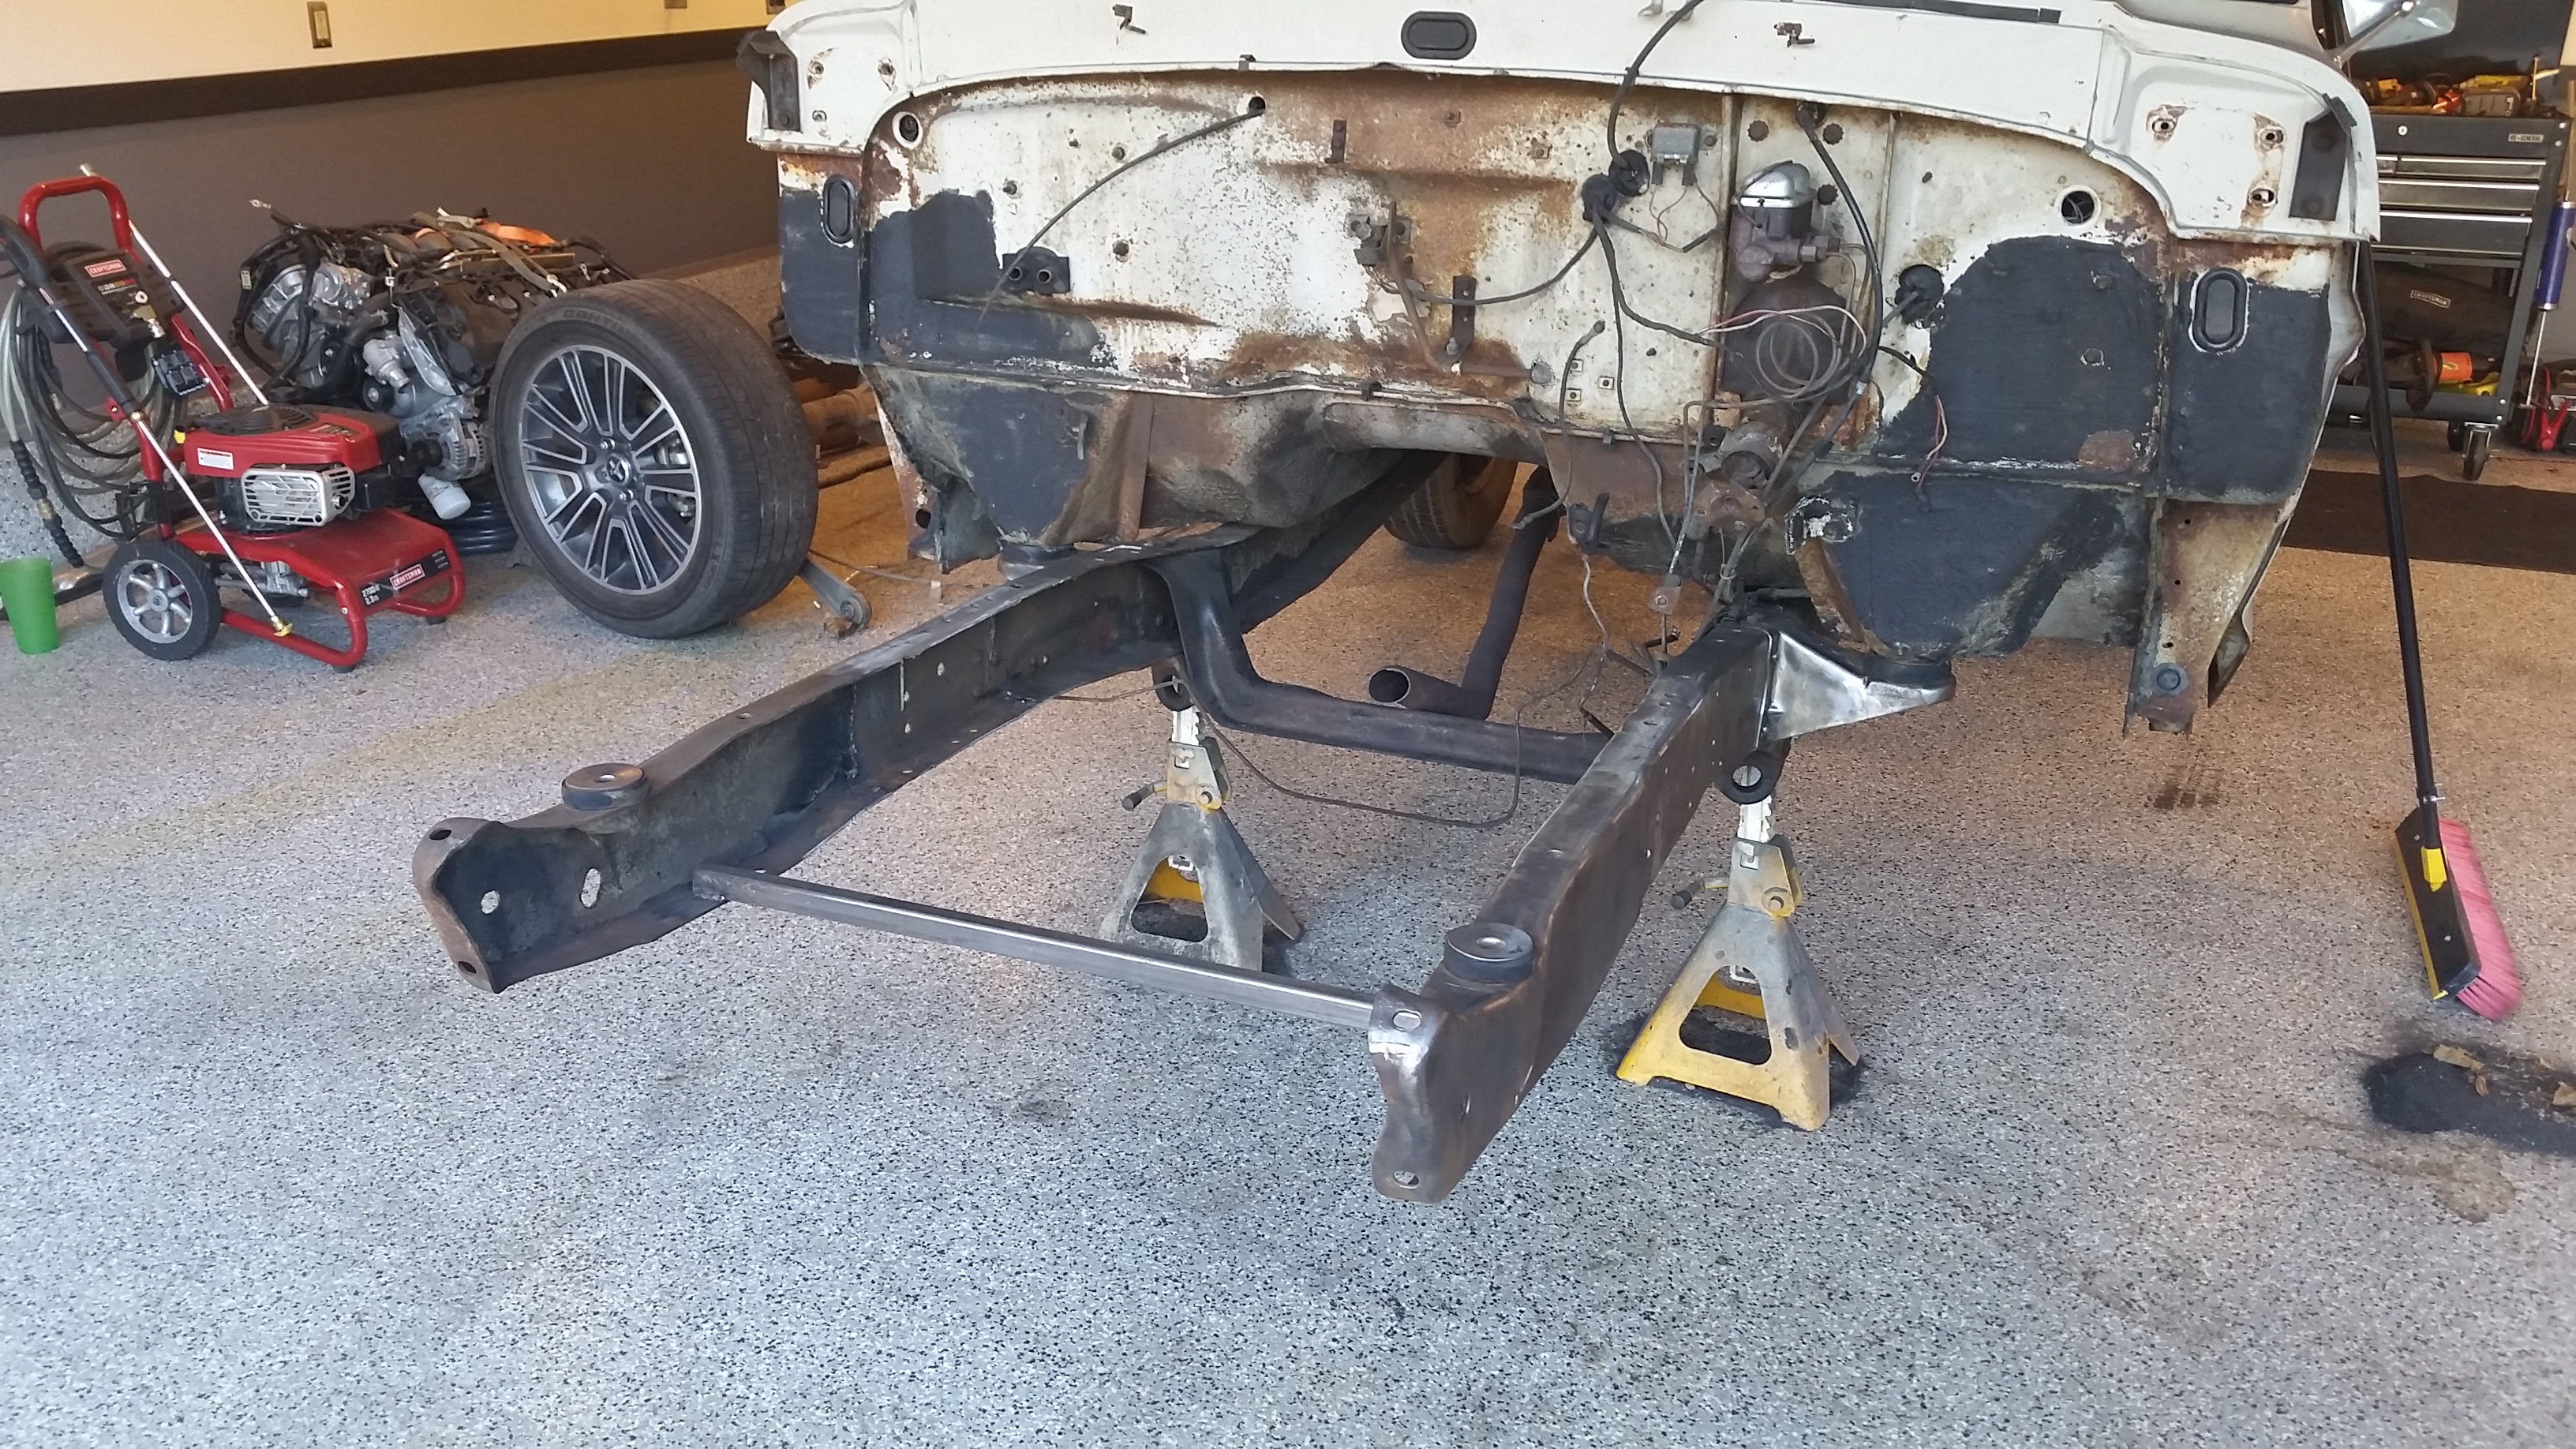
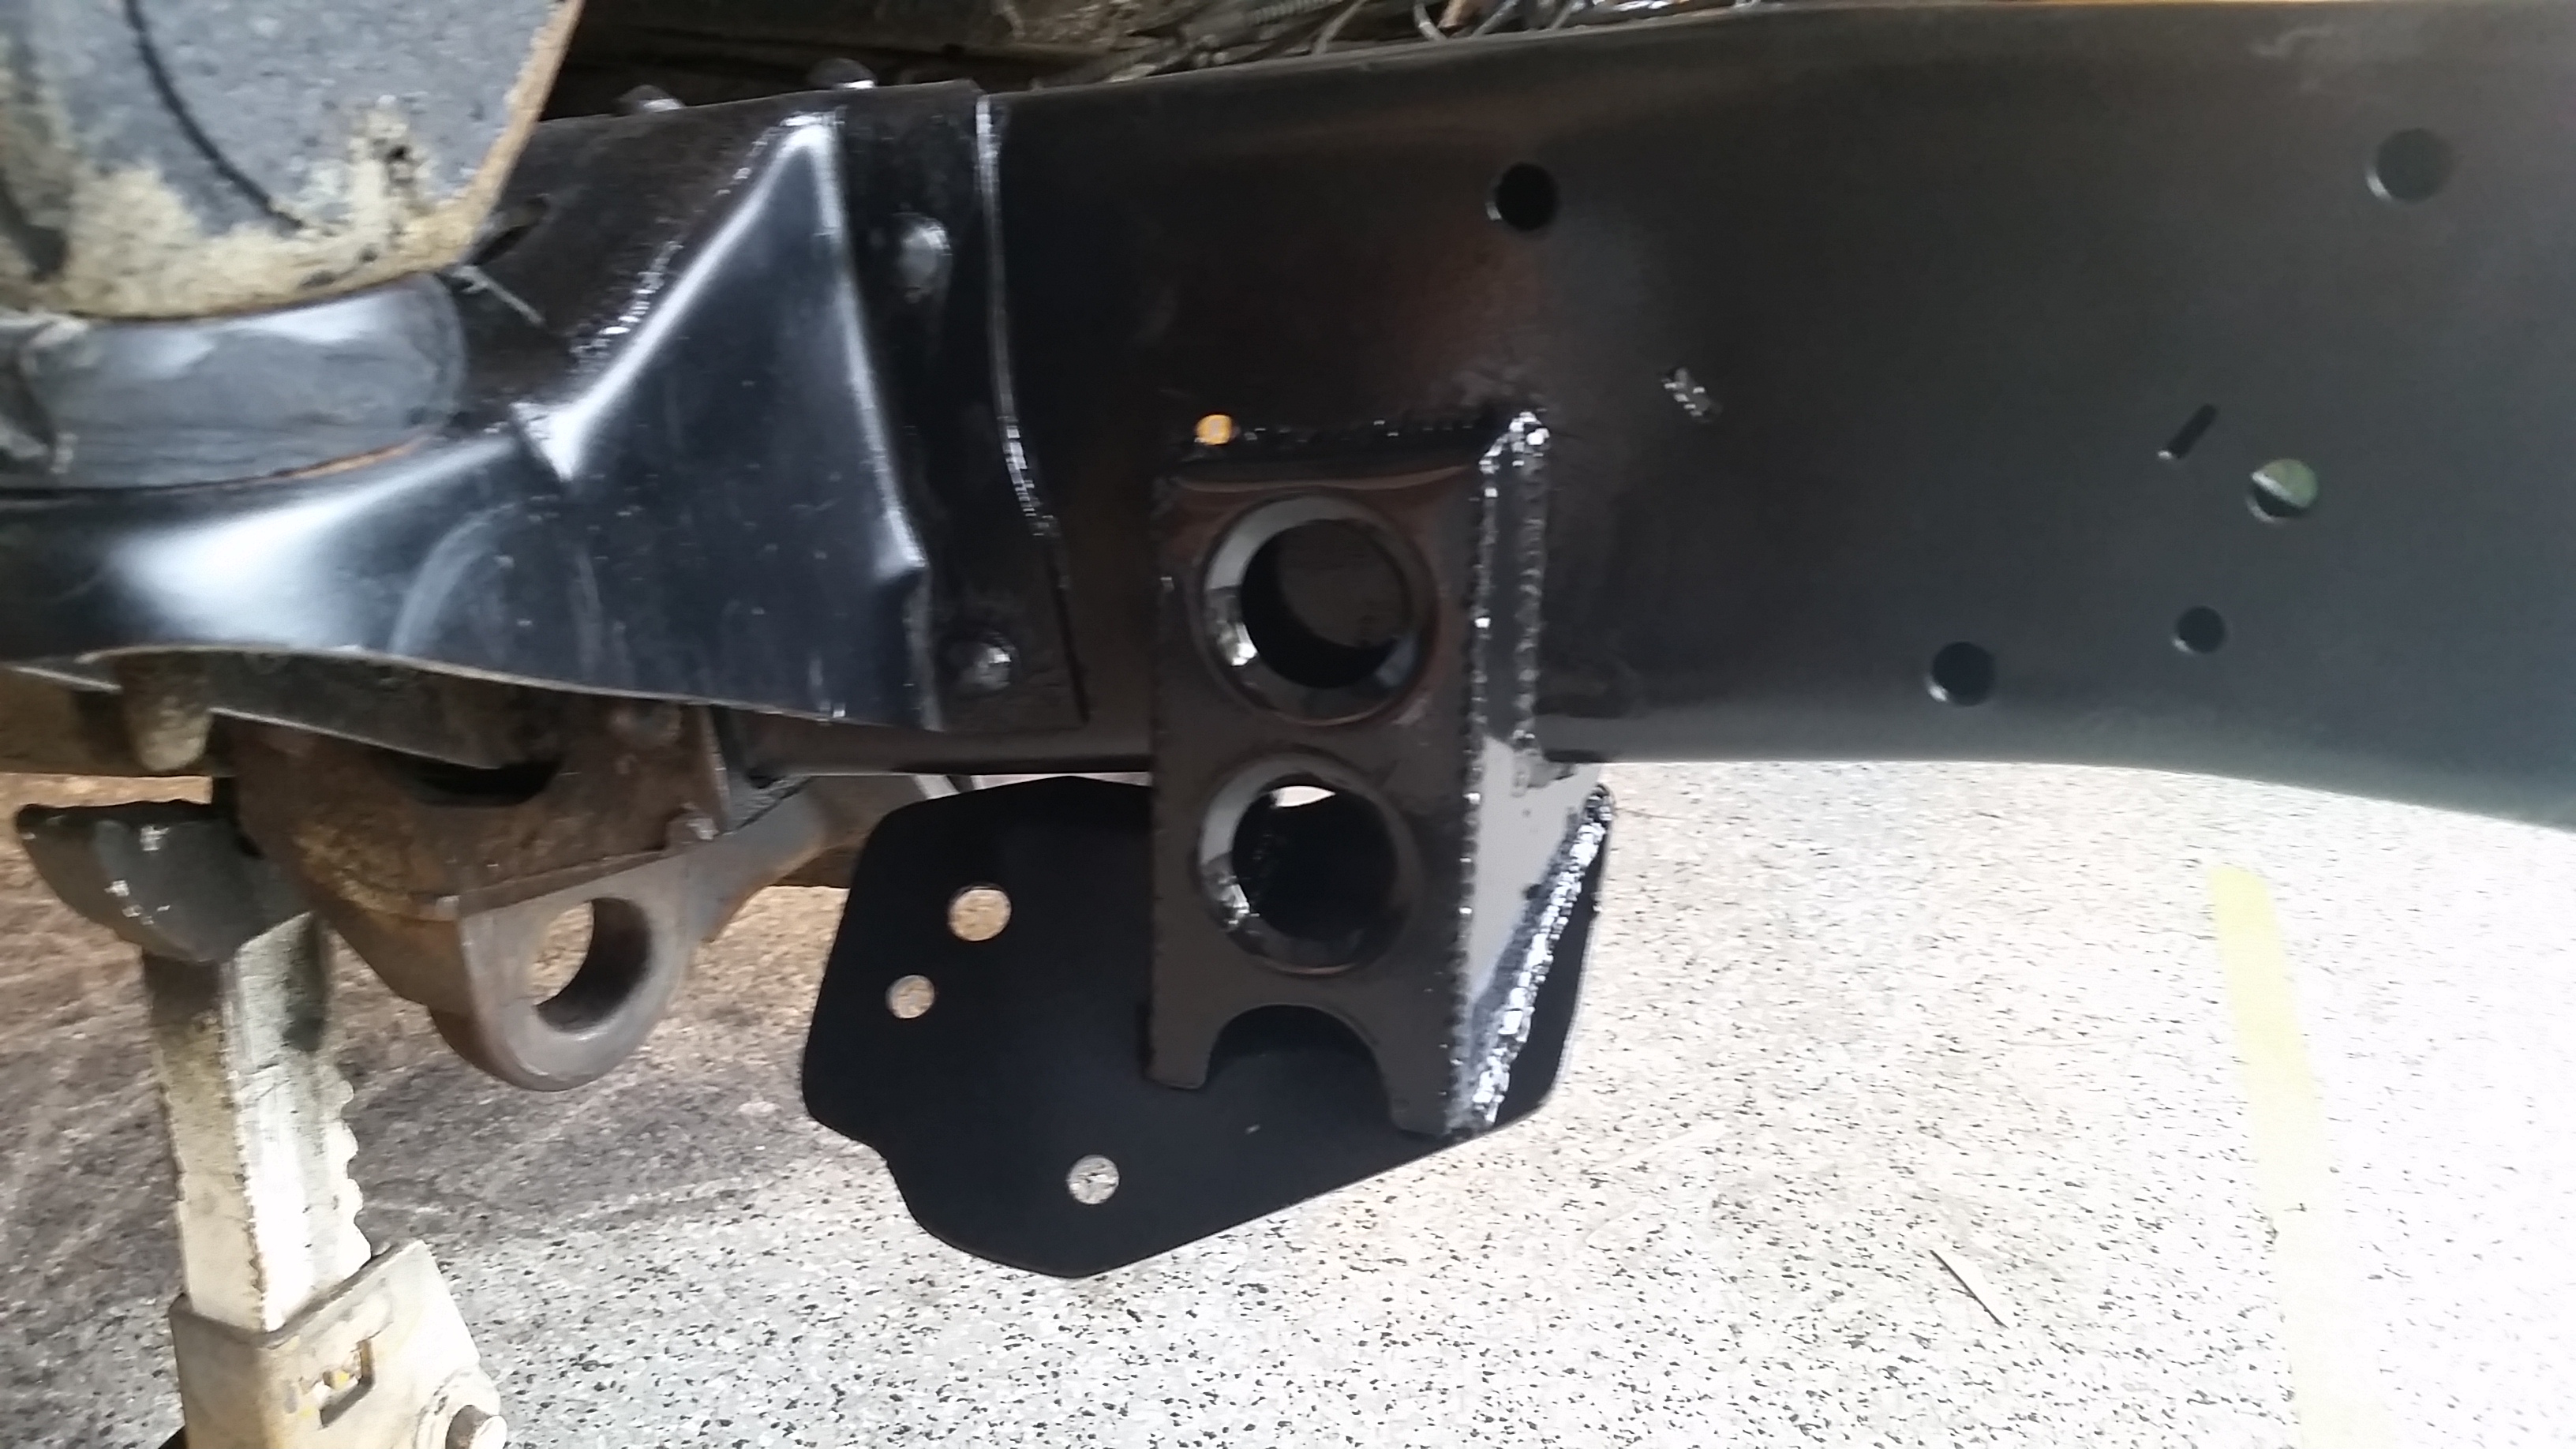
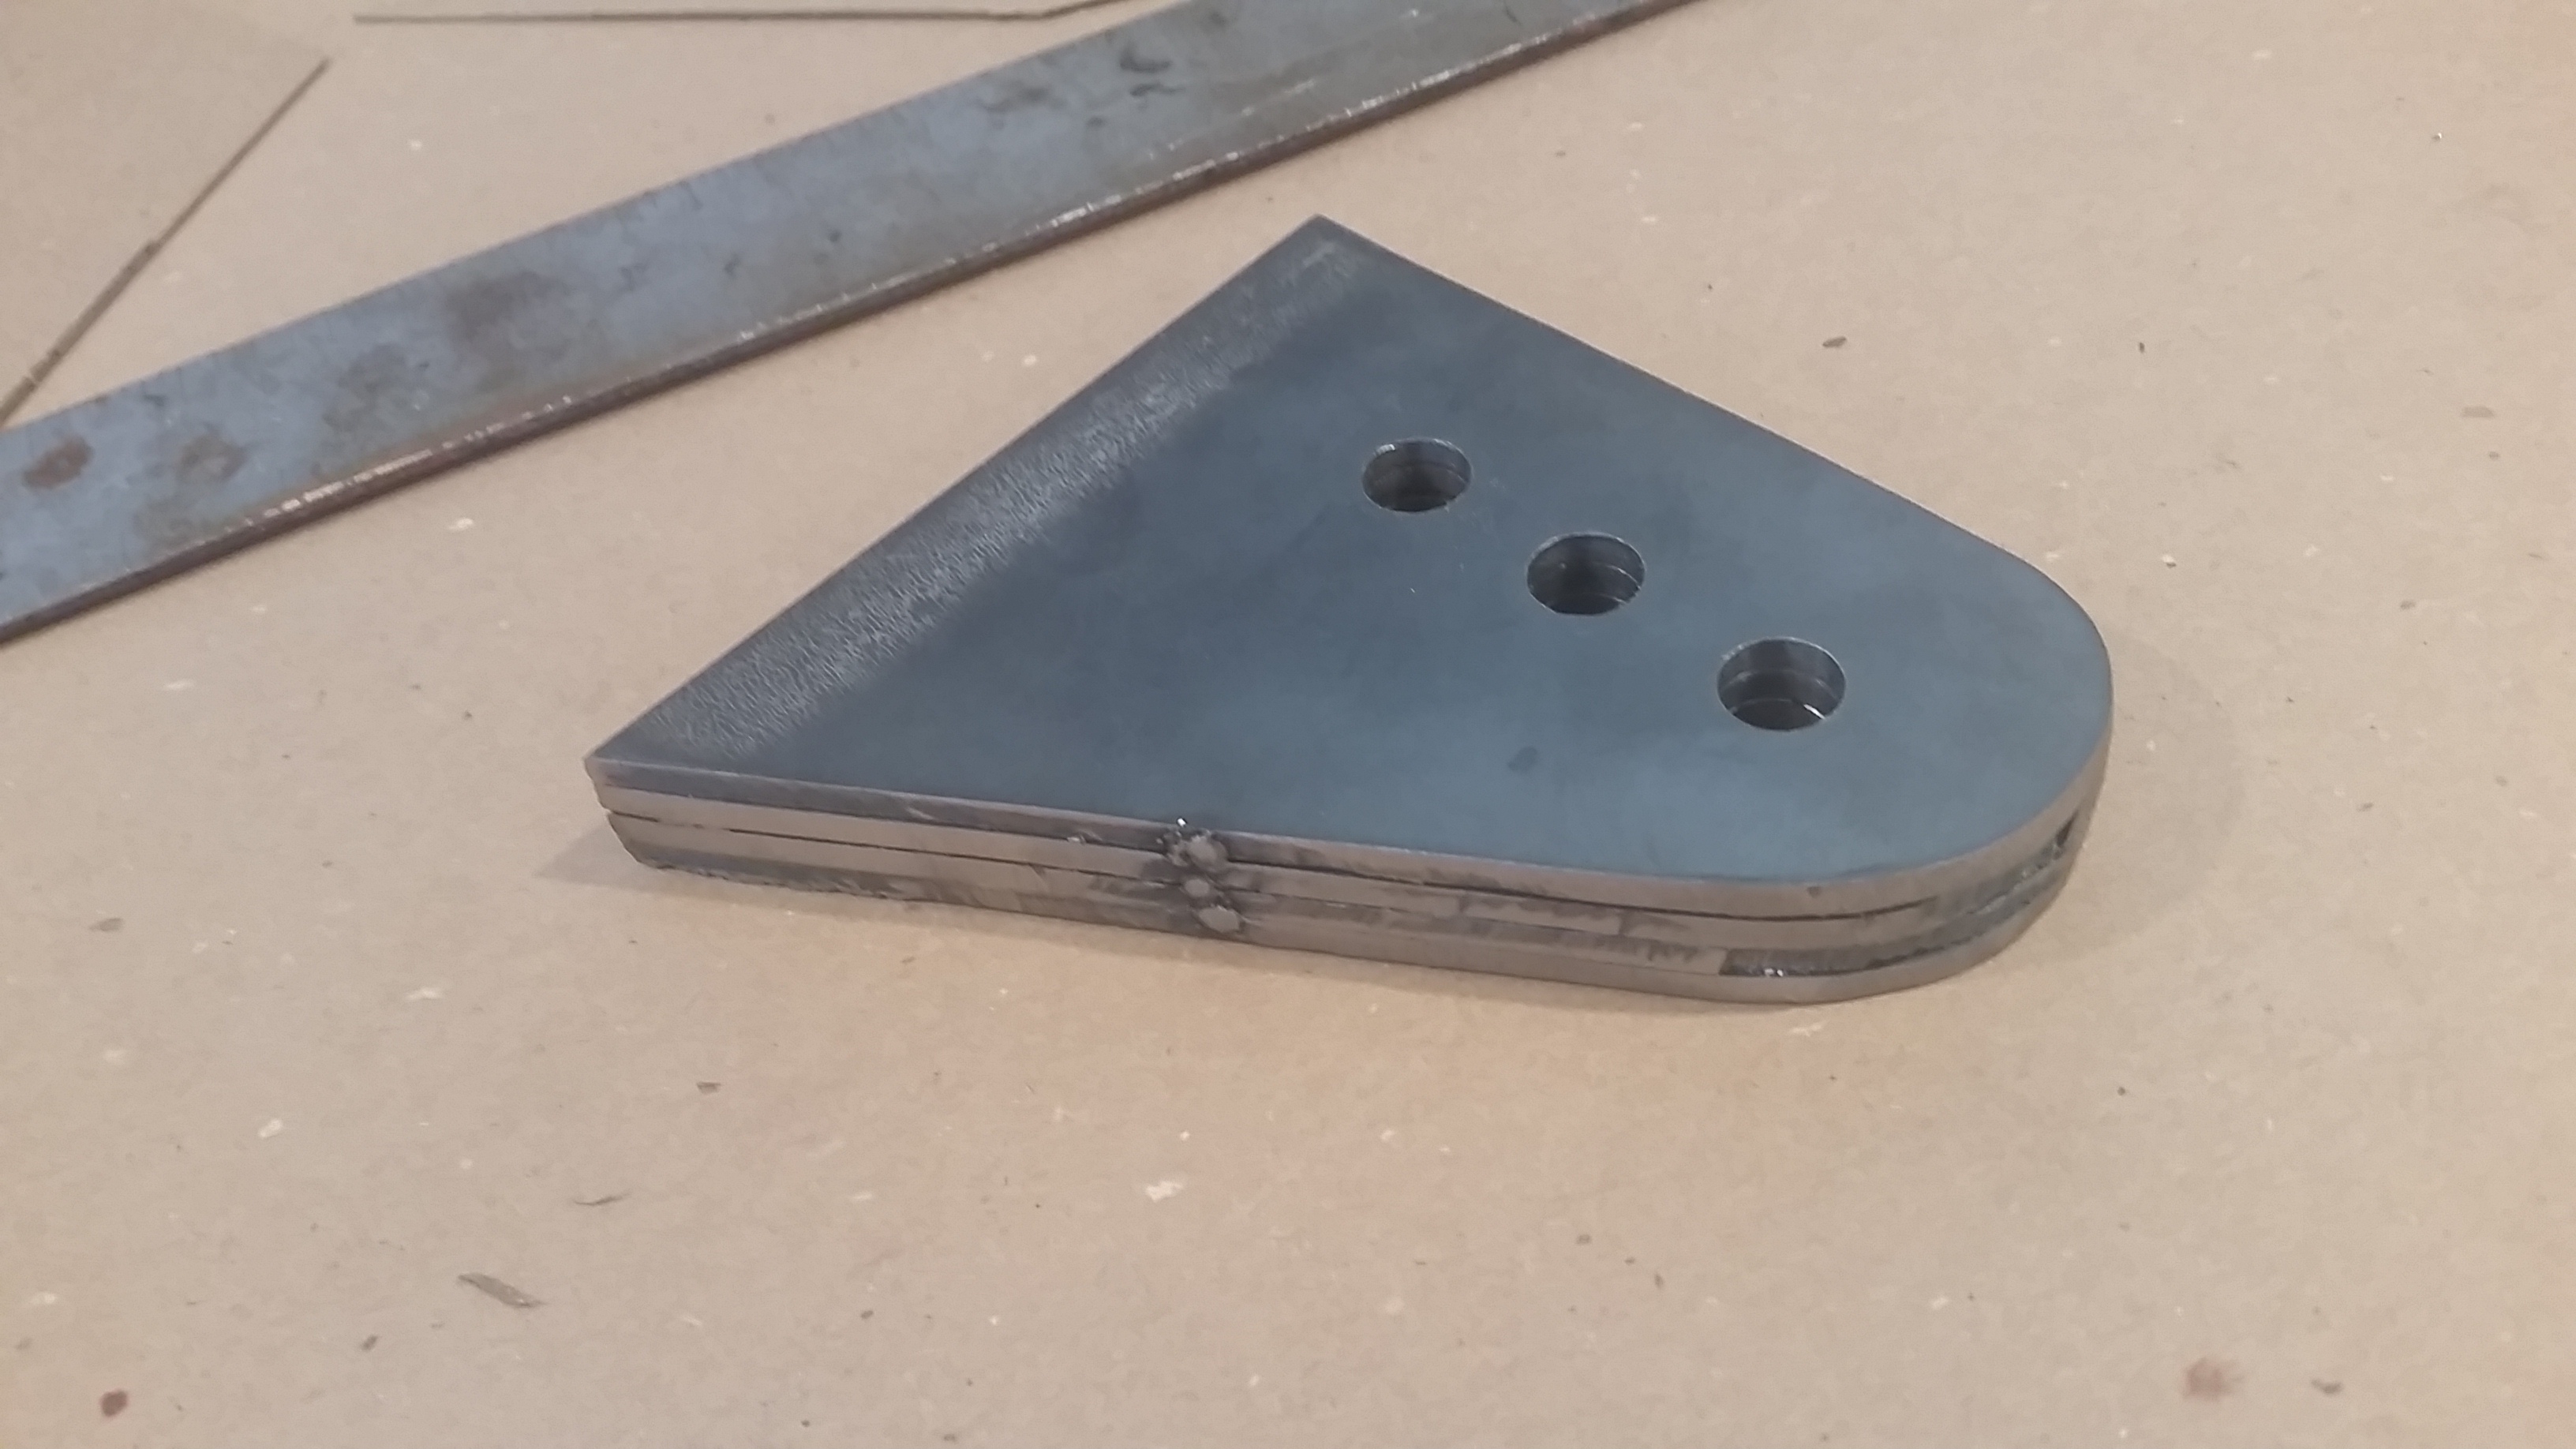
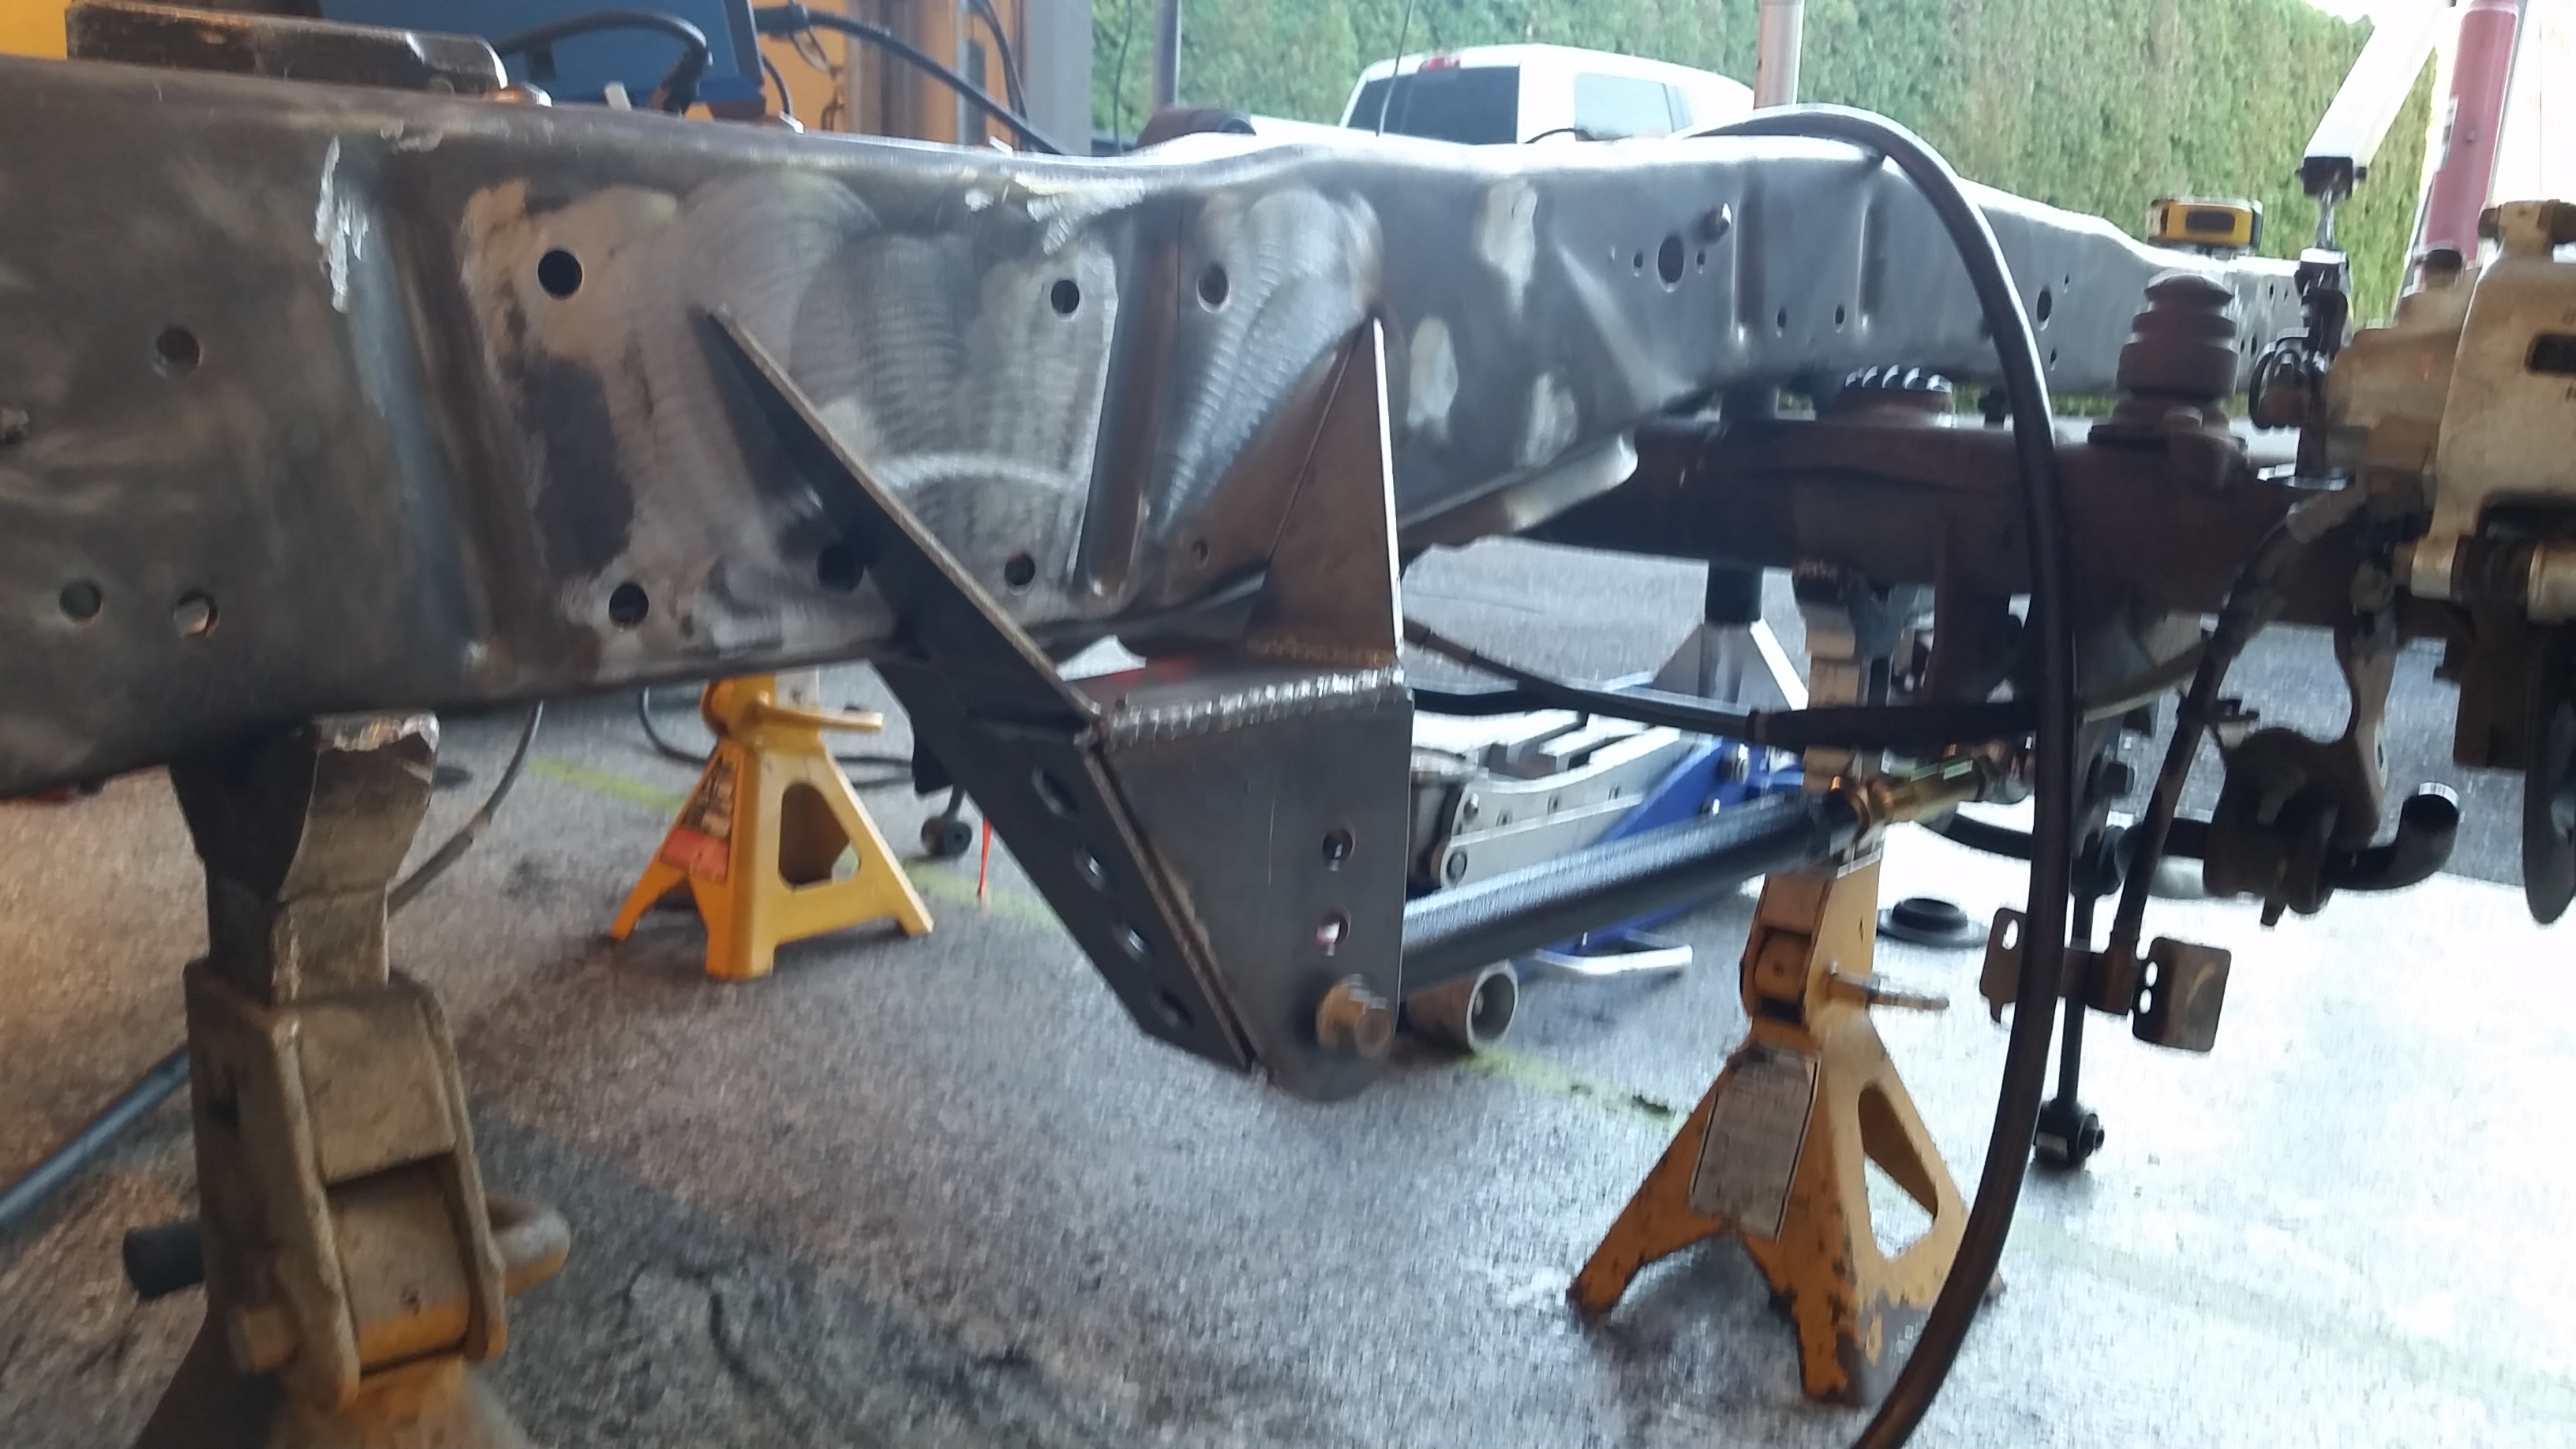
Got the front lowers in the right spot and tacked them in place, then got the gusset cut out and in place....it wont get welded till the main hanger is in place.
Got to work on the rest of the rear. Panhard next.
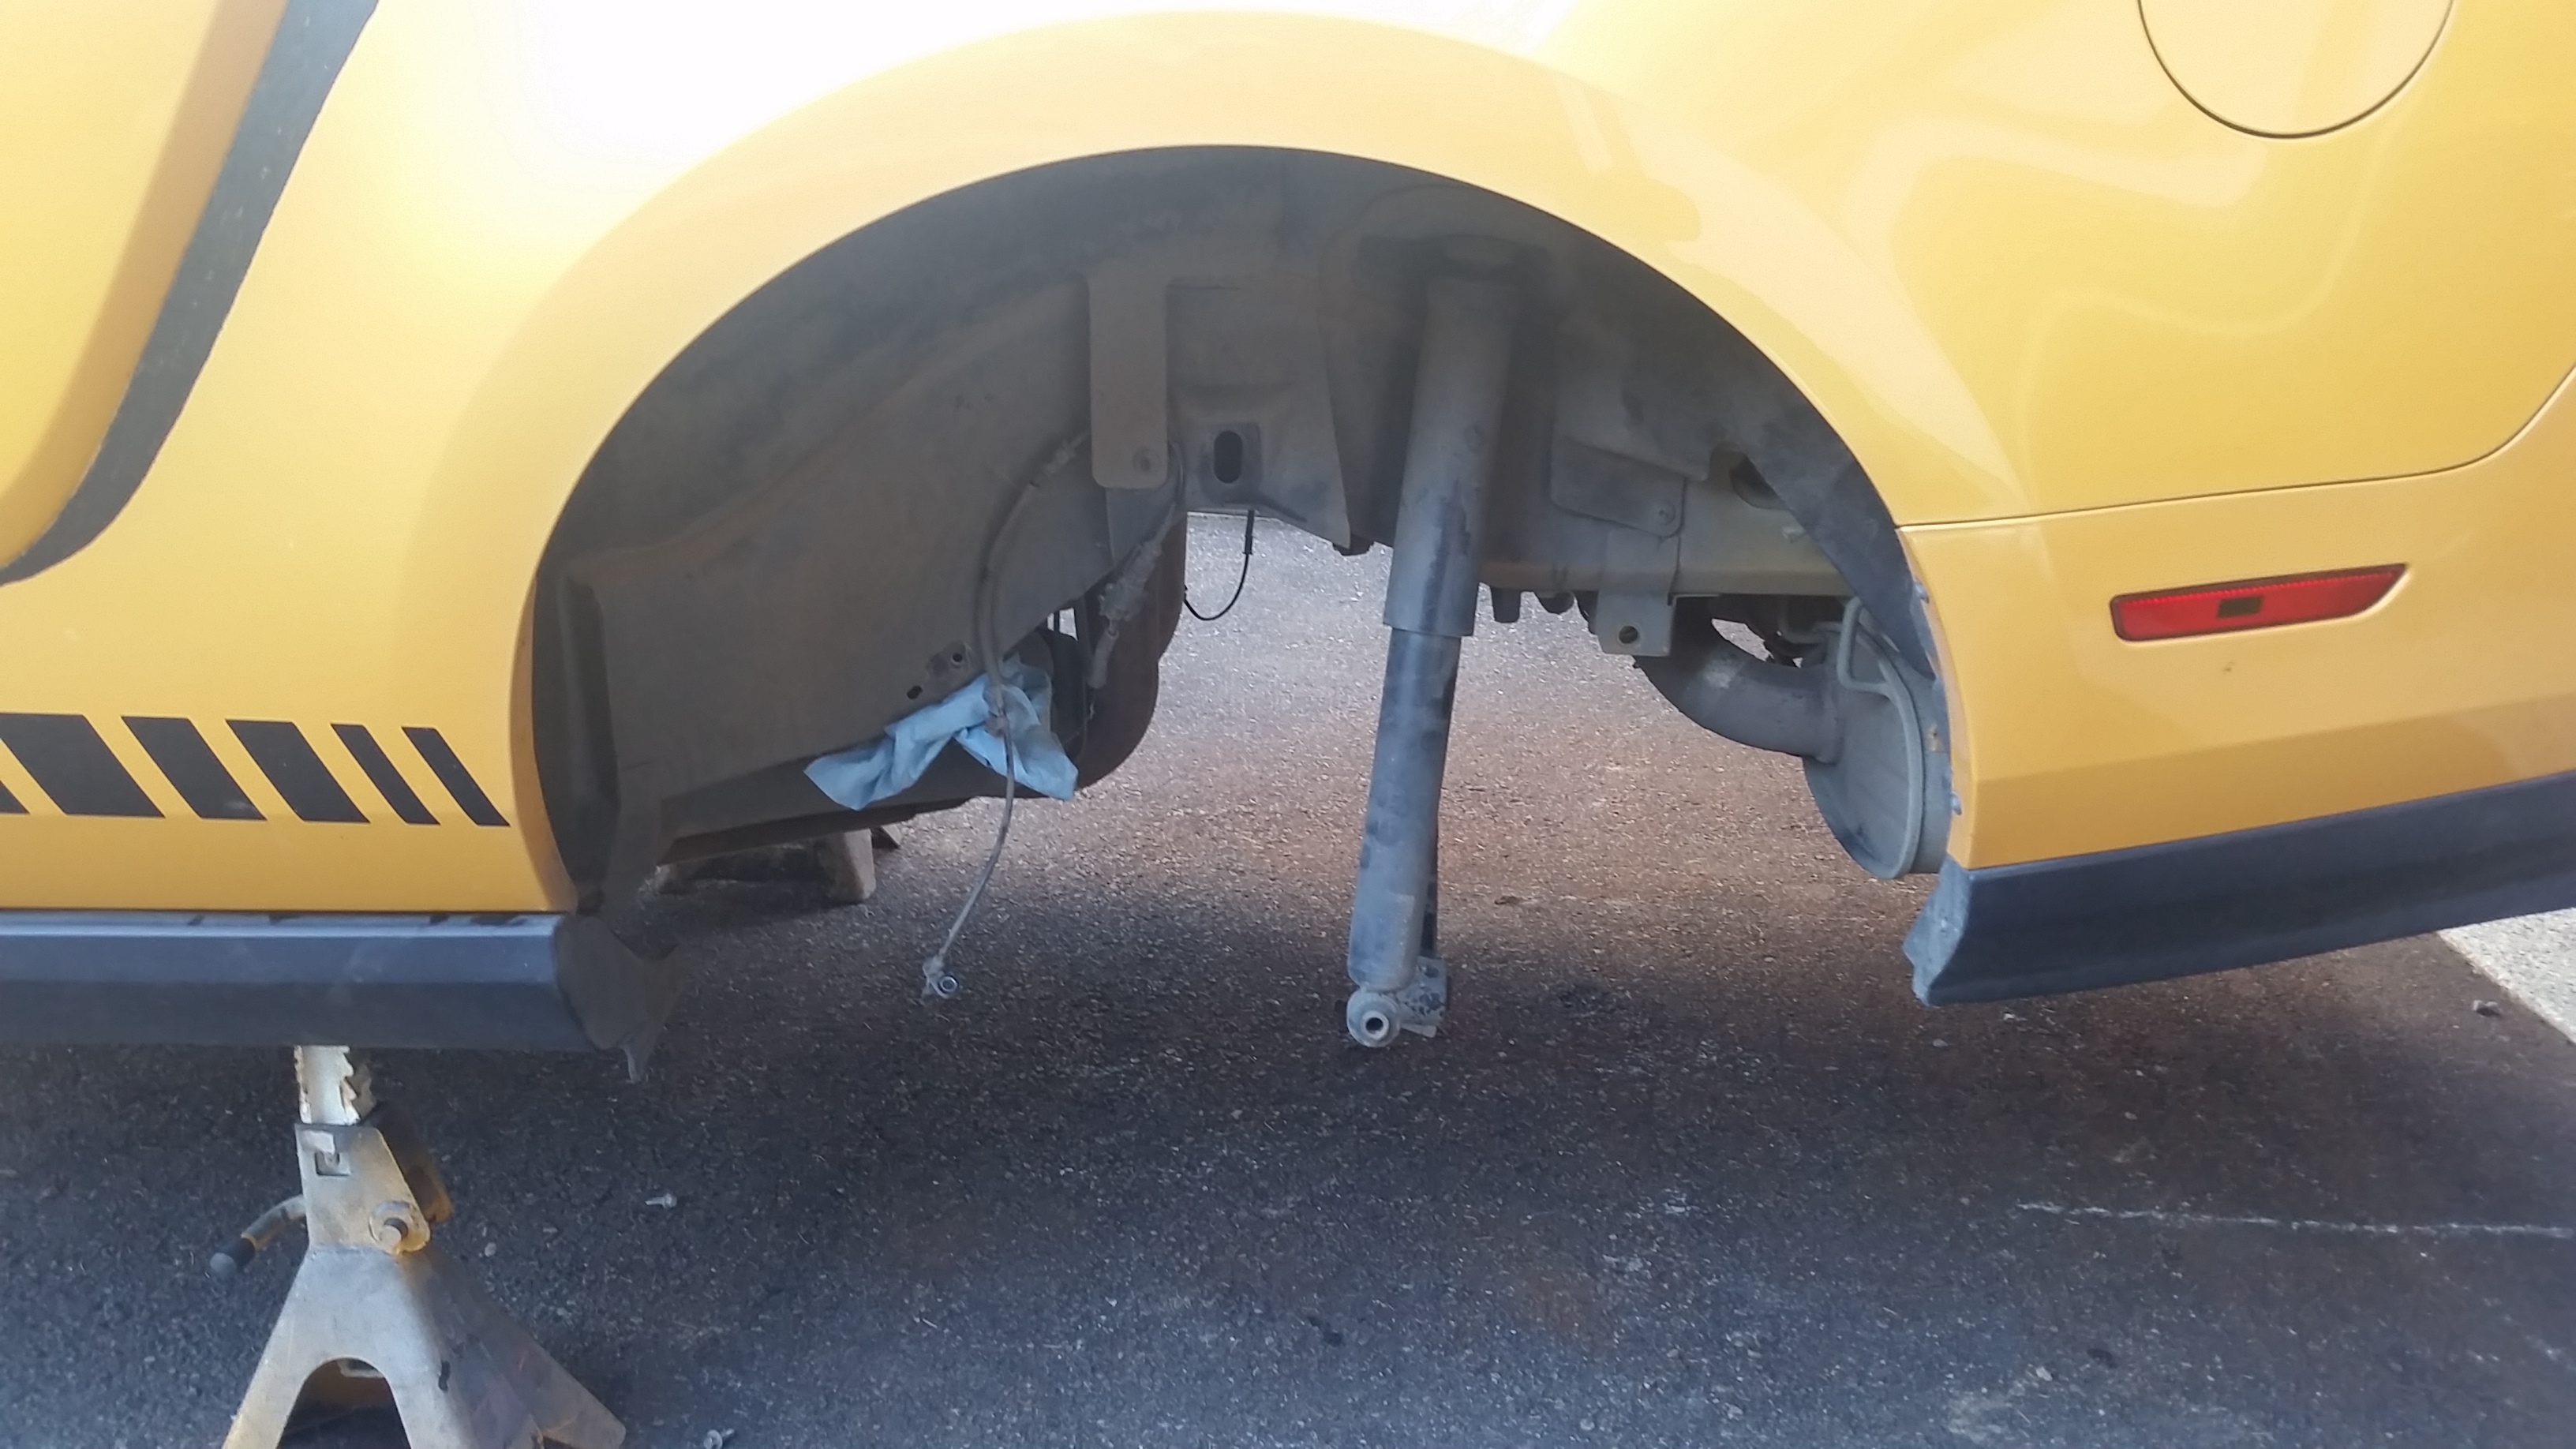
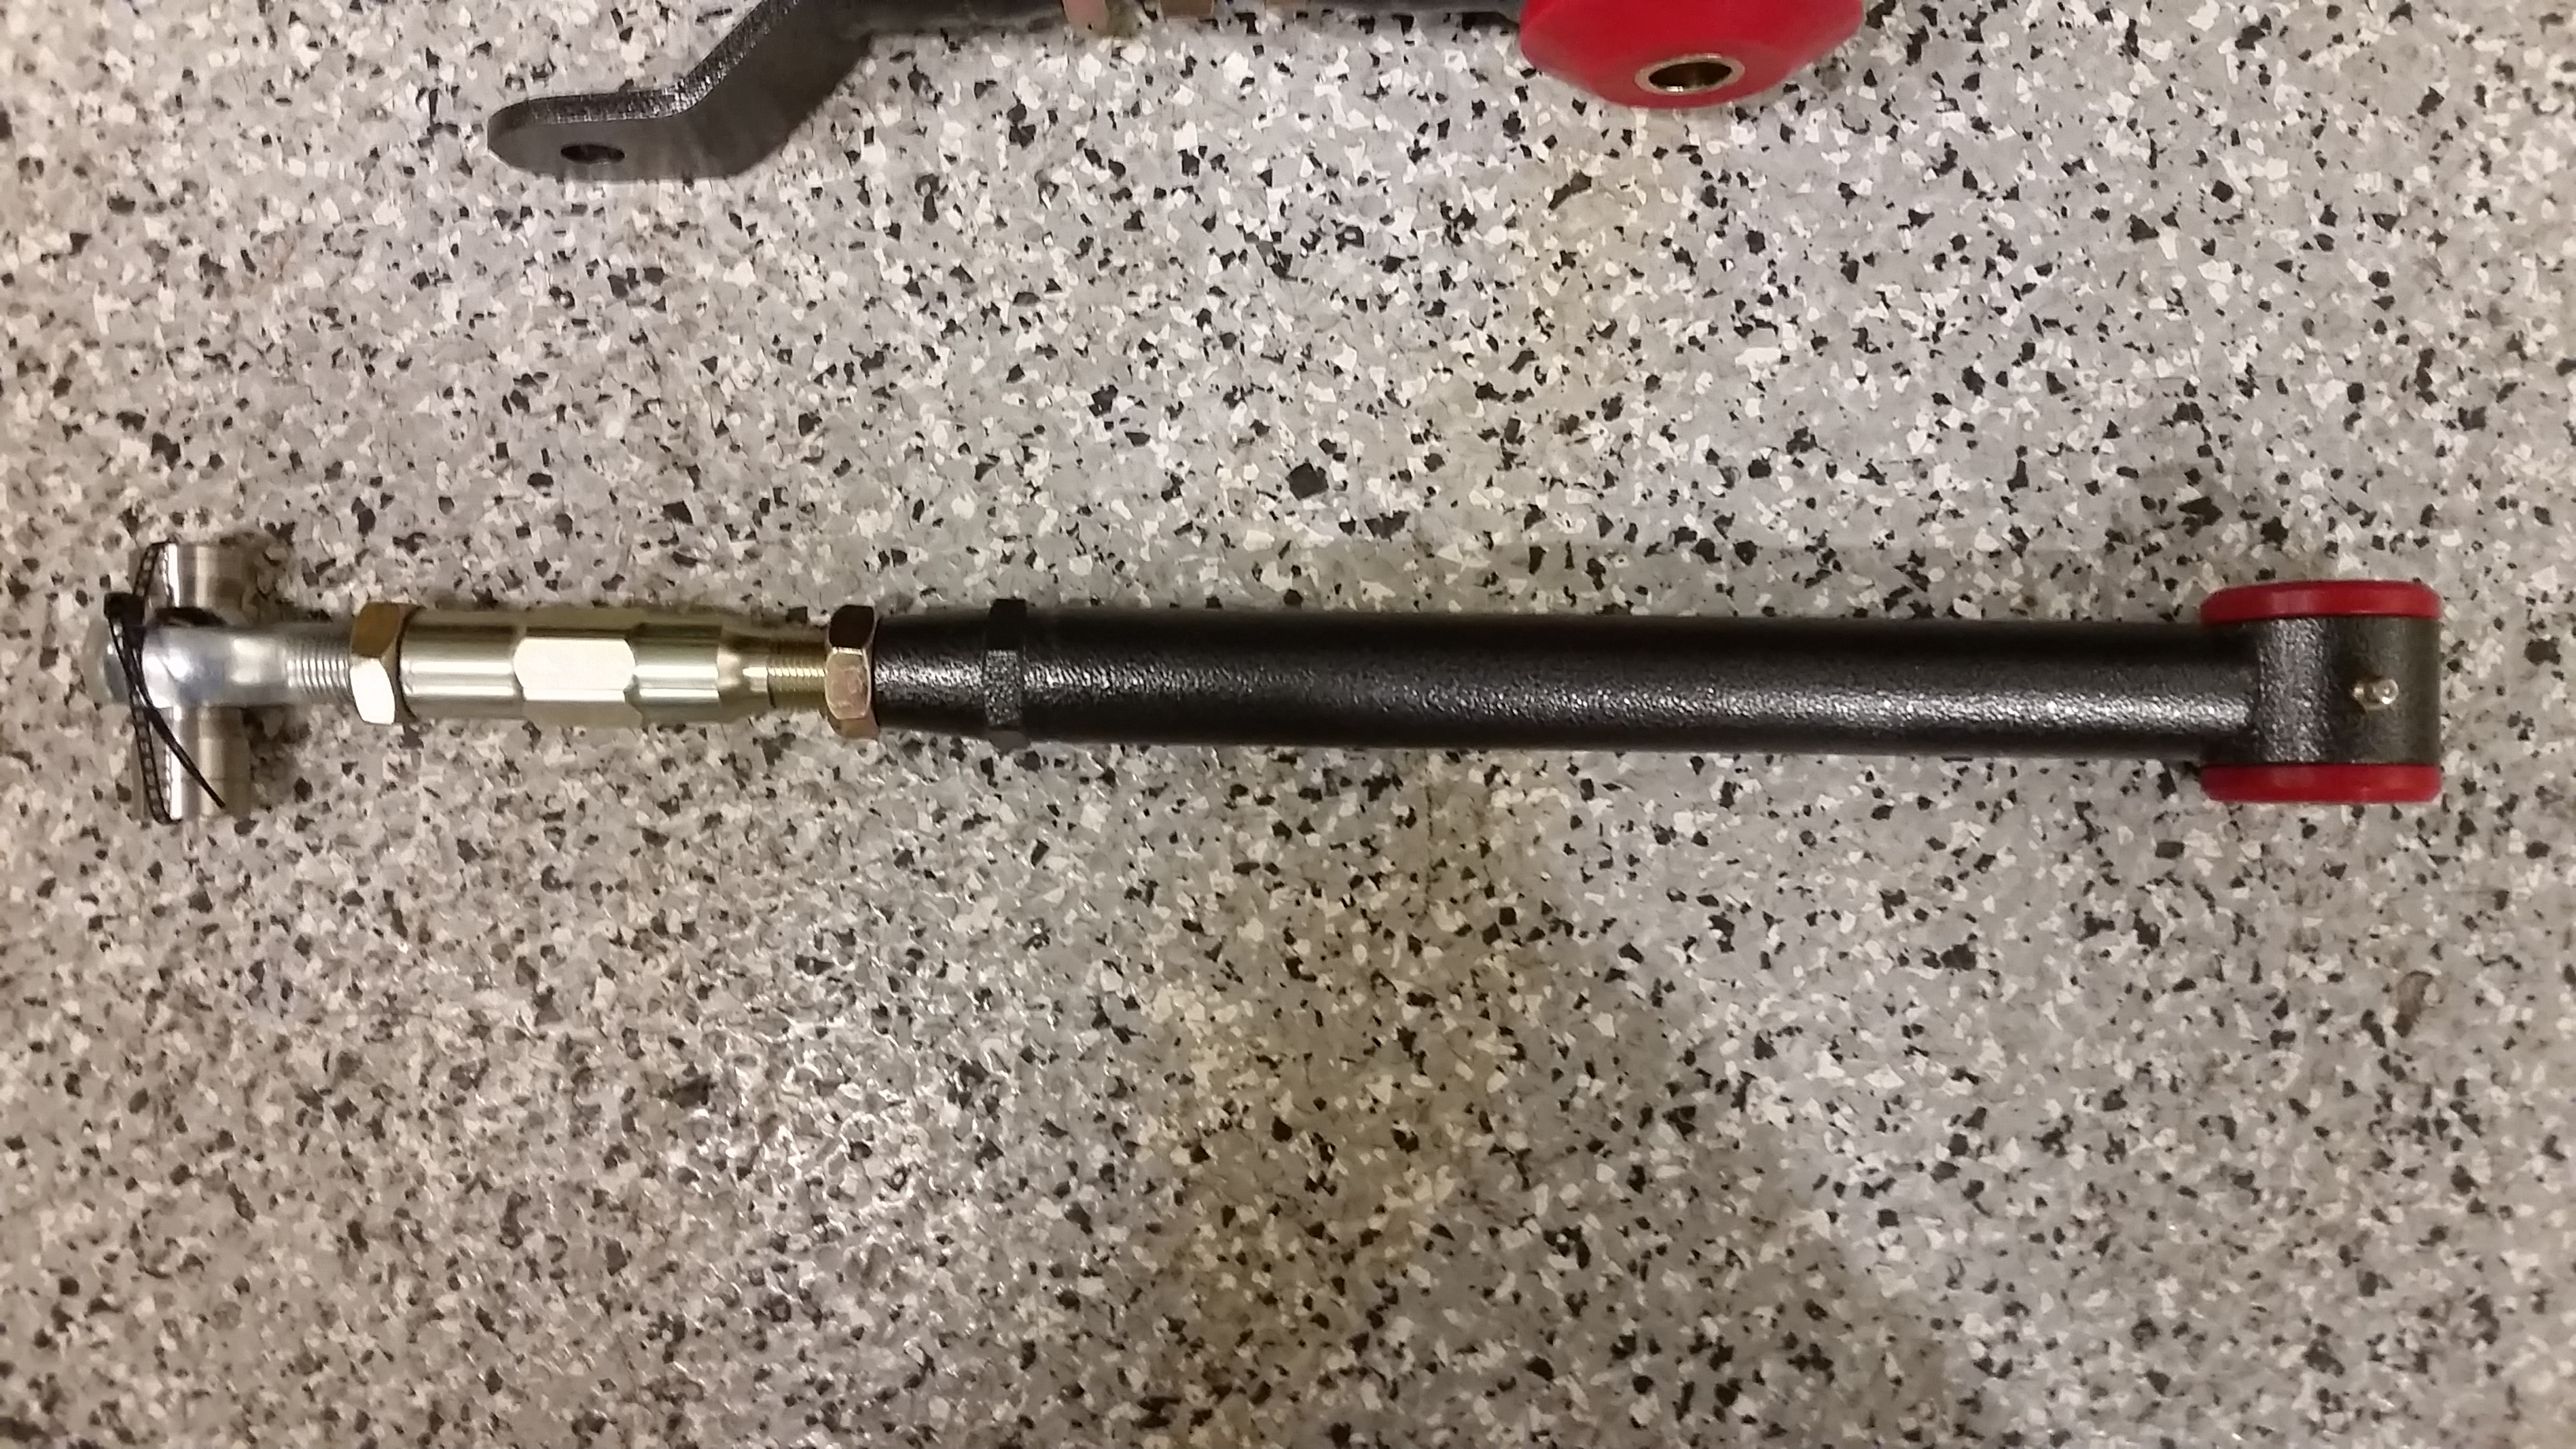
I mentioned that it laid in there about perfect by my measurements and I was right. Aside from the pesky bends in this mount, this one was pretty easy. Dimple died the reinforcement and got it tack welded in. You can also see that the sway bar is hanging in there as well, it is about 2" narrower than the wheeltubs so it will mount in that location, clear the panhard, the rearend and the rear mounted 1970 fuel tank just fine.
No regrets so far going this route.
I have a plan in place for the emergency brake as well....with the factory mustang cables =)
Sean

Got to work on the rest of the rear. Panhard next.
I mentioned that it laid in there about perfect by my measurements and I was right. Aside from the pesky bends in this mount, this one was pretty easy. Dimple died the reinforcement and got it tack welded in. You can also see that the sway bar is hanging in there as well, it is about 2" narrower than the wheeltubs so it will mount in that location, clear the panhard, the rearend and the rear mounted 1970 fuel tank just fine.


No regrets so far going this route.
I have a plan in place for the emergency brake as well....with the factory mustang cables =)
Sean