
Grinch is getting a new engine pan gasket, OBA, 38R. Step by step engine/trans removal W/ pics
#1
 06-12-2015, 06:21 AM

Grinch is getting a new engine pan gasket, OBA, 38R. Step by step engine/trans removal W/ pics
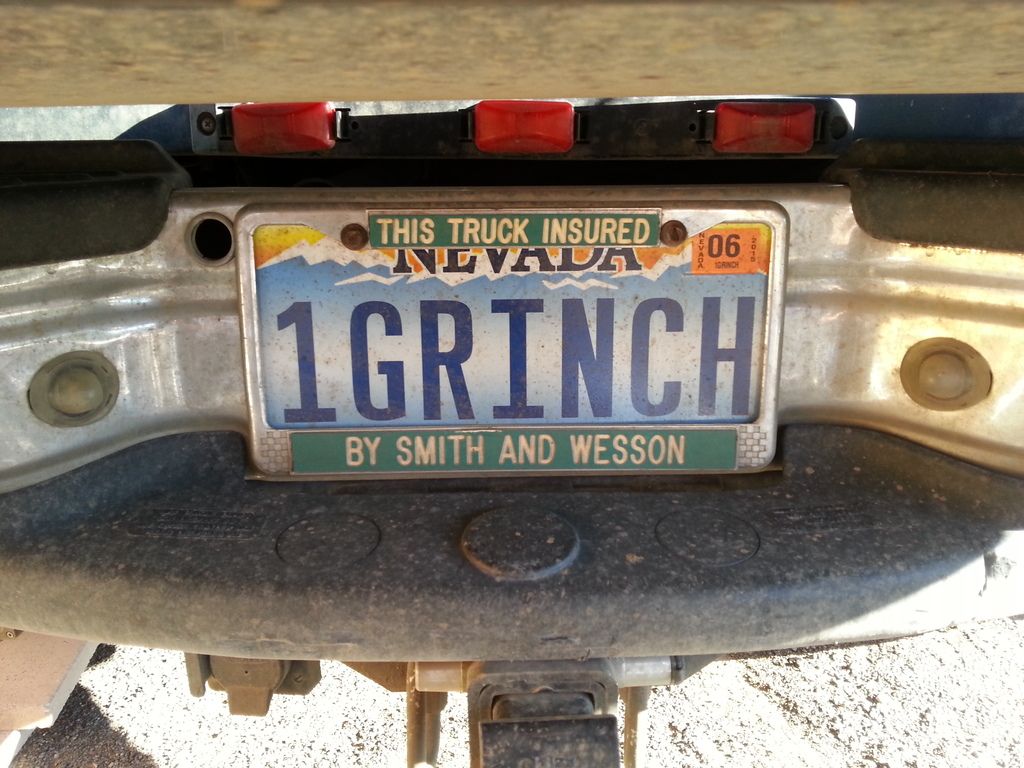
The Grinch that stole my wallet! 
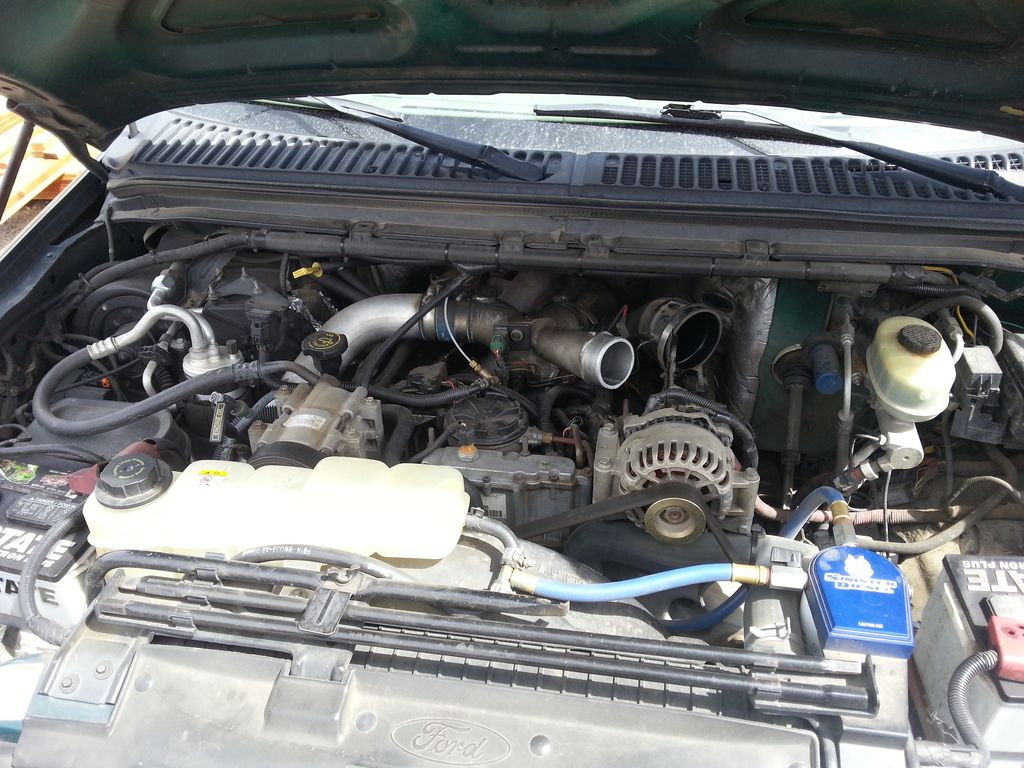
What's happening, For years the Grinch had a leaking oil pan gasket and losing a gallon of oil every 800 miles and was leaving embarrassing stains every where we went.
The plan,
Oil Pan Gasket
GTP38R
Billet Plenums
International Bellowed Up Pipes
AFe Intake Manifold
FRX
Boots and Clamps
Upgrade Gauges
Injector O-rings
CVD Fittings
Banjo Bolts
99.5 Turbo Pedestal
On Board Air (belt driven)
Drive Shaft U-joints
Probably will do,
Melling LPOP
Cylinder Oil Plugs
Welded Piston Jets
New AFe 6637 Air Filter
Up for other ideas
The trucks name "Grinch" is a done deal
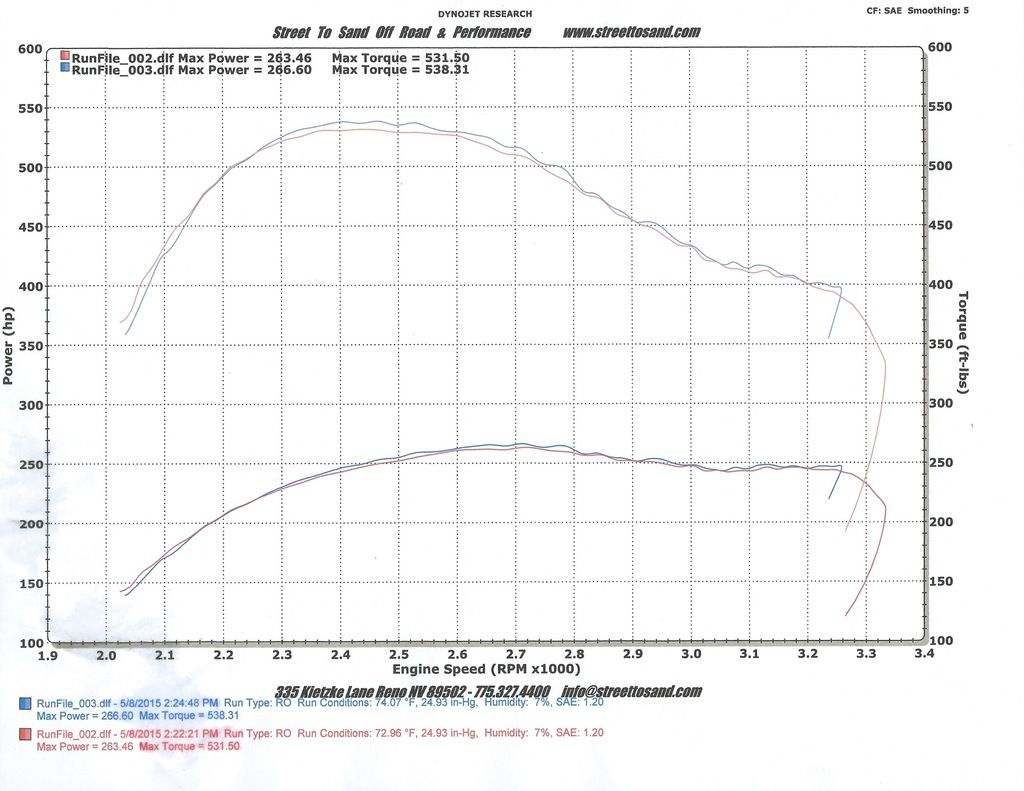
Took the truck to a Dyno and did 3 pulls before repair and mods. As she sits pretty close to stock other than what you see in my sig.
HP-266
Torque-538
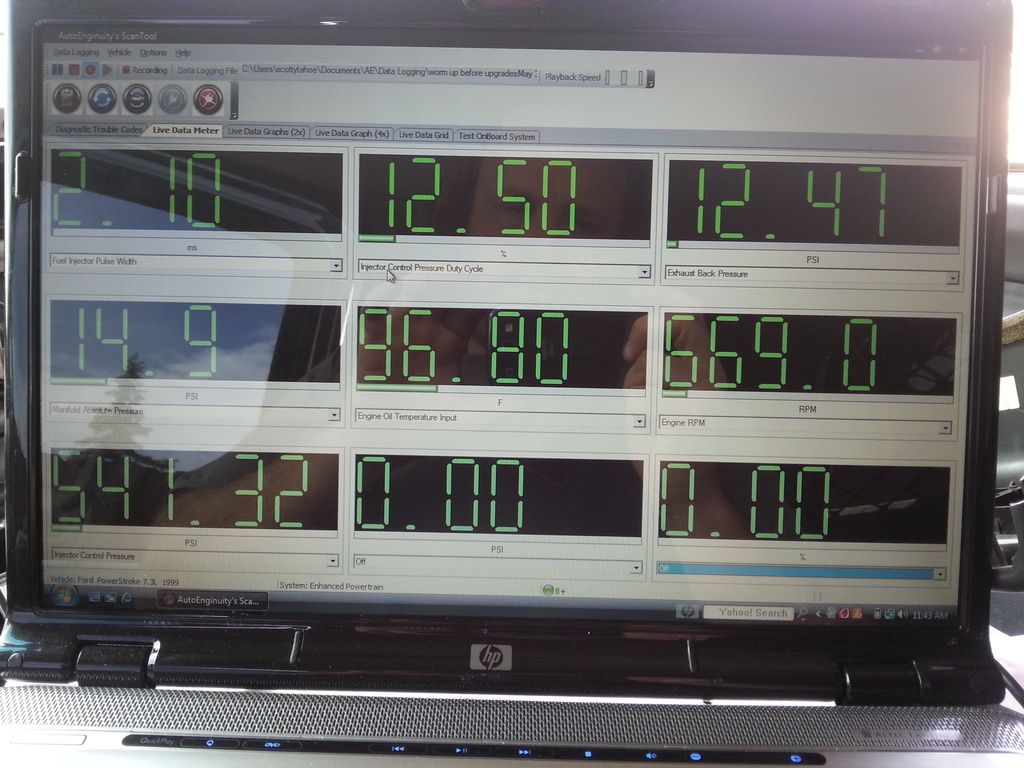
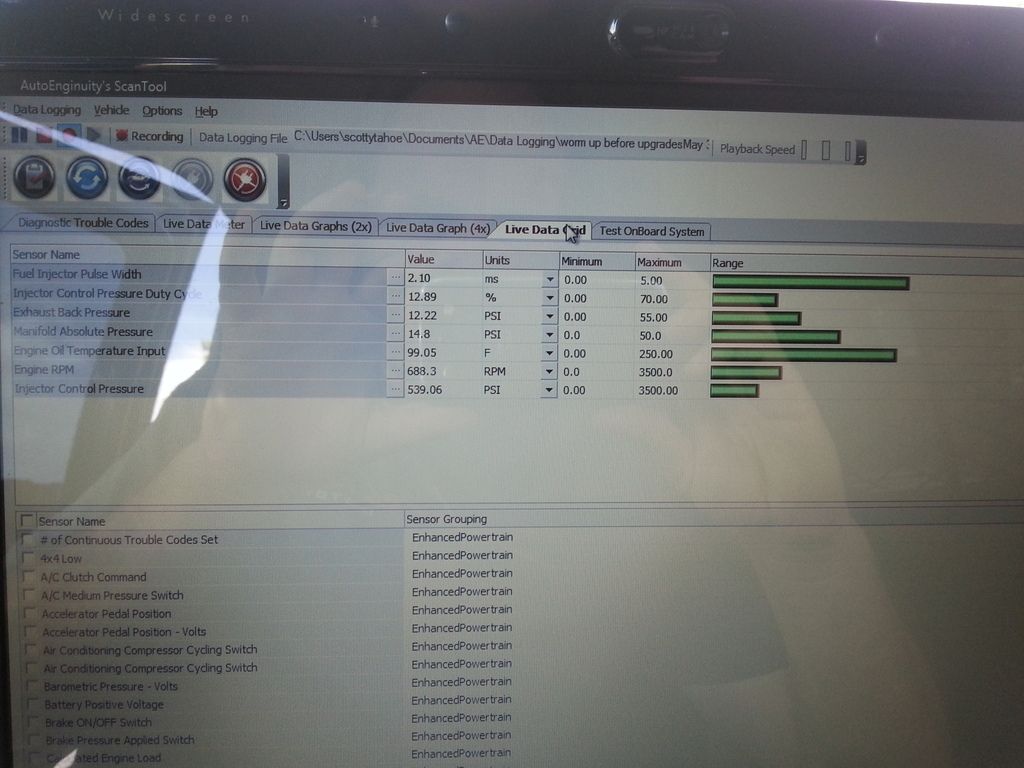
Some snap shot from AE.
In order from top left going right.
Fuel Injector Pulse Width
Injector Control Pressure Duty Cycle
EBP
MAP
Engine Oil Temp
RPM
ICP
What's happening, For years the Grinch had a leaking oil pan gasket and losing a gallon of oil every 800 miles and was leaving embarrassing stains every where we went.
The plan,
Oil Pan Gasket
GTP38R
Billet Plenums
International Bellowed Up Pipes
AFe Intake Manifold
FRX
Boots and Clamps
Upgrade Gauges
Injector O-rings
CVD Fittings
Banjo Bolts
99.5 Turbo Pedestal
On Board Air (belt driven)
Drive Shaft U-joints
Probably will do,
Melling LPOP
Cylinder Oil Plugs
Welded Piston Jets
New AFe 6637 Air Filter
Up for other ideas
The trucks name "Grinch" is a done deal

Took the truck to a Dyno and did 3 pulls before repair and mods. As she sits pretty close to stock other than what you see in my sig.
HP-266
Torque-538

Some snap shot from AE.
In order from top left going right.
Fuel Injector Pulse Width
Injector Control Pressure Duty Cycle
EBP
MAP
Engine Oil Temp
RPM
ICP


#2
06-12-2015, 06:46 AM
Compression Test
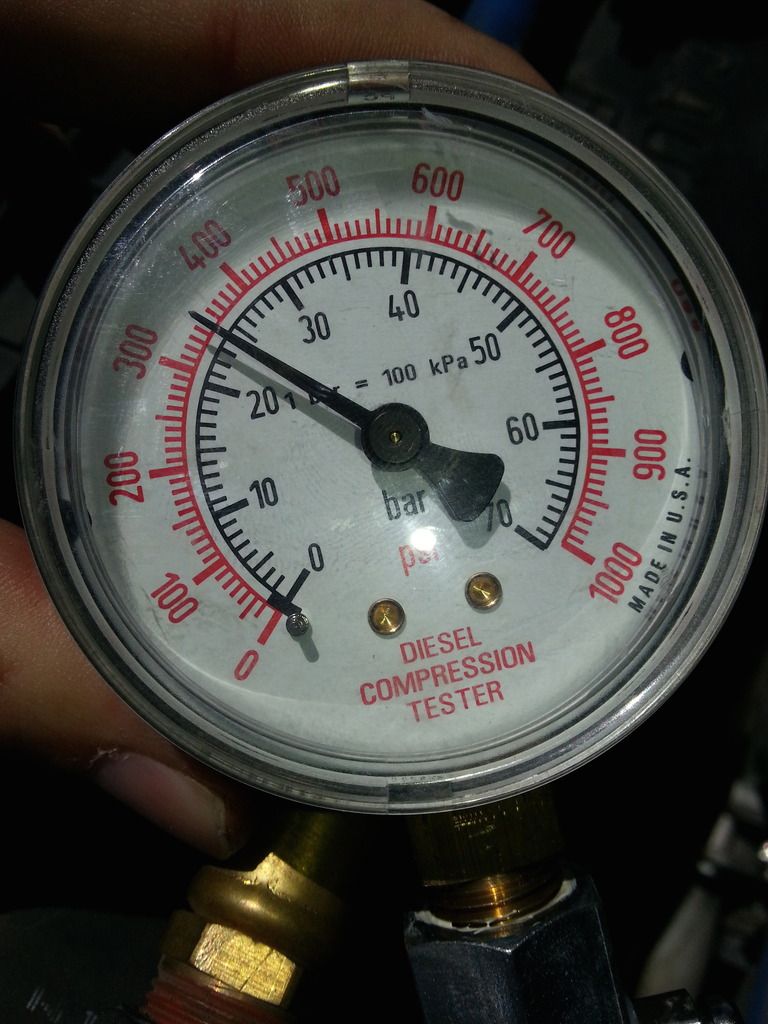
Did a compression test to make sure all this was worth it for this pig.
Here are the numbers at 6K feet elevation.
Cylinder 1- 380
3- 360
5- 360
7- 350
Cylinder 2- 350
4- 360
6- 350
8- 360
Remove air intake filter/pipe. Remove intercooler pipes. Unbolt valve covers. (didn't do a how to) plenty of write up on this part.
Probably not necessary but blow out oil around glow plug with air or soak up with rag. Remove wire to top of glow plug, I used needle nose pliers. A 10mm deep socket to remove glow plugs.
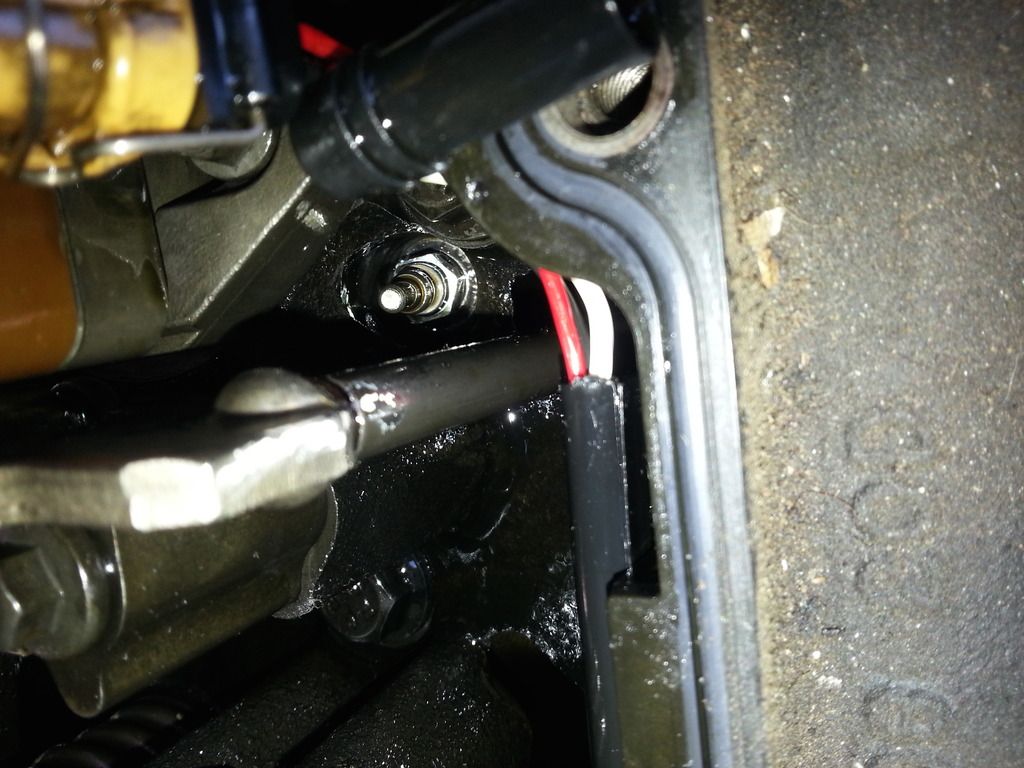
Screw in (hand tight only) compression tester.
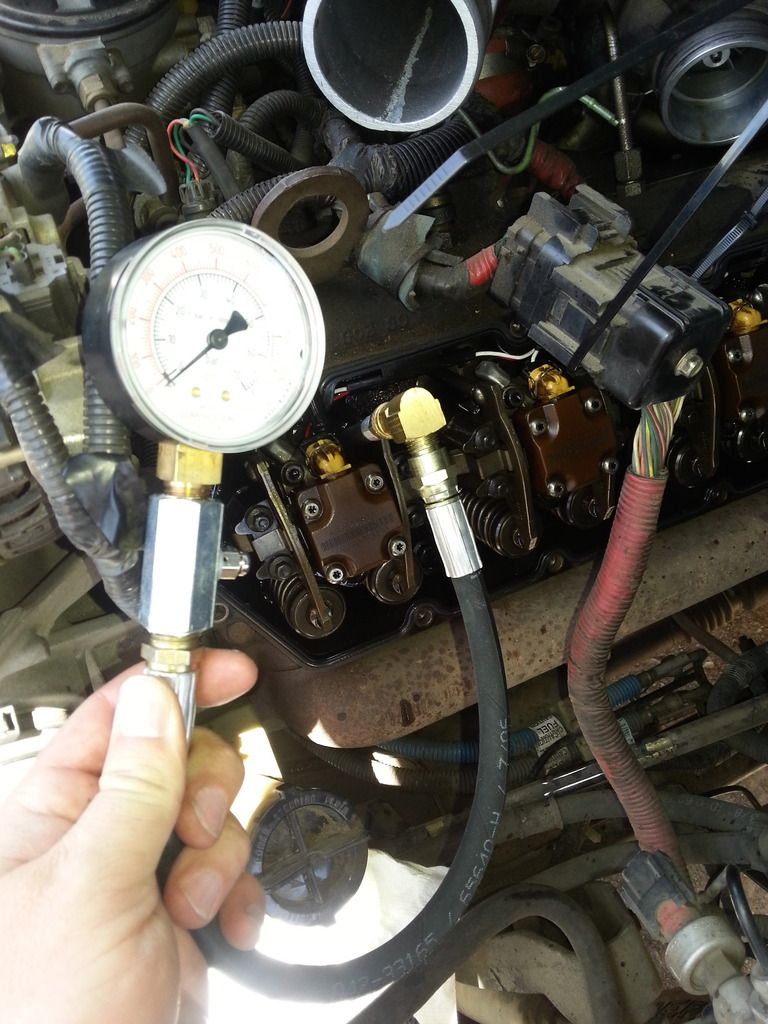
Did crank test on all cylinders.
I tried to do a running test, but my compression tester was not having it. It broke
That is not the glow plug screwed in. Thankfully it was only hand tight!
Here are the numbers at 6K feet elevation.
Cylinder 1- 380
3- 360
5- 360
7- 350
Cylinder 2- 350
4- 360
6- 350
8- 360
Remove air intake filter/pipe. Remove intercooler pipes. Unbolt valve covers. (didn't do a how to) plenty of write up on this part.

Probably not necessary but blow out oil around glow plug with air or soak up with rag. Remove wire to top of glow plug, I used needle nose pliers. A 10mm deep socket to remove glow plugs.

Screw in (hand tight only) compression tester.

Did crank test on all cylinders.

I tried to do a running test, but my compression tester was not having it. It broke
That is not the glow plug screwed in. Thankfully it was only hand tight!


#3
06-12-2015, 06:54 AM
#4
06-12-2015, 07:14 AM

#5
06-12-2015, 01:18 PM
Posting Guru
Join Date: May 2013
Location: Oklahoma
Posts: 1,199
Likes: 0
Received 0 Likes
on
0 Posts
#6
06-12-2015, 04:39 PM

#7
06-12-2015, 06:59 PM
Trending Topics

#9
06-12-2015, 10:08 PM
Fleet Mechanic
#10
06-13-2015, 01:06 AM
Edit: Sanden A/C compressor.

#11
06-13-2015, 02:27 AM
Removing the transfer case.
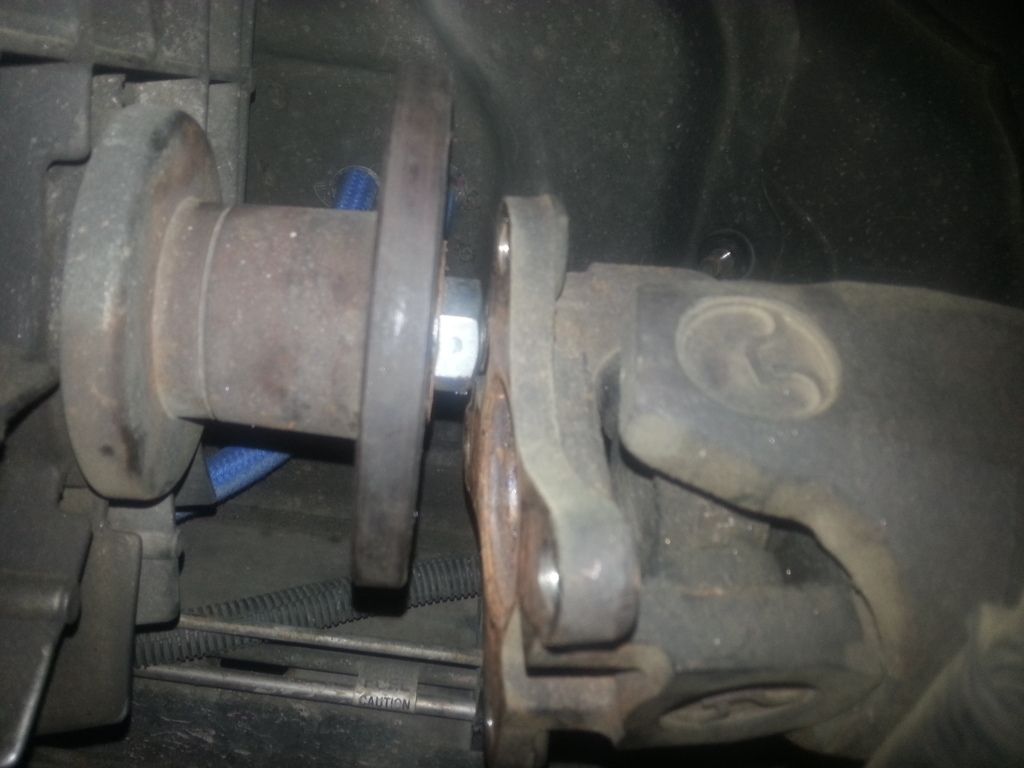
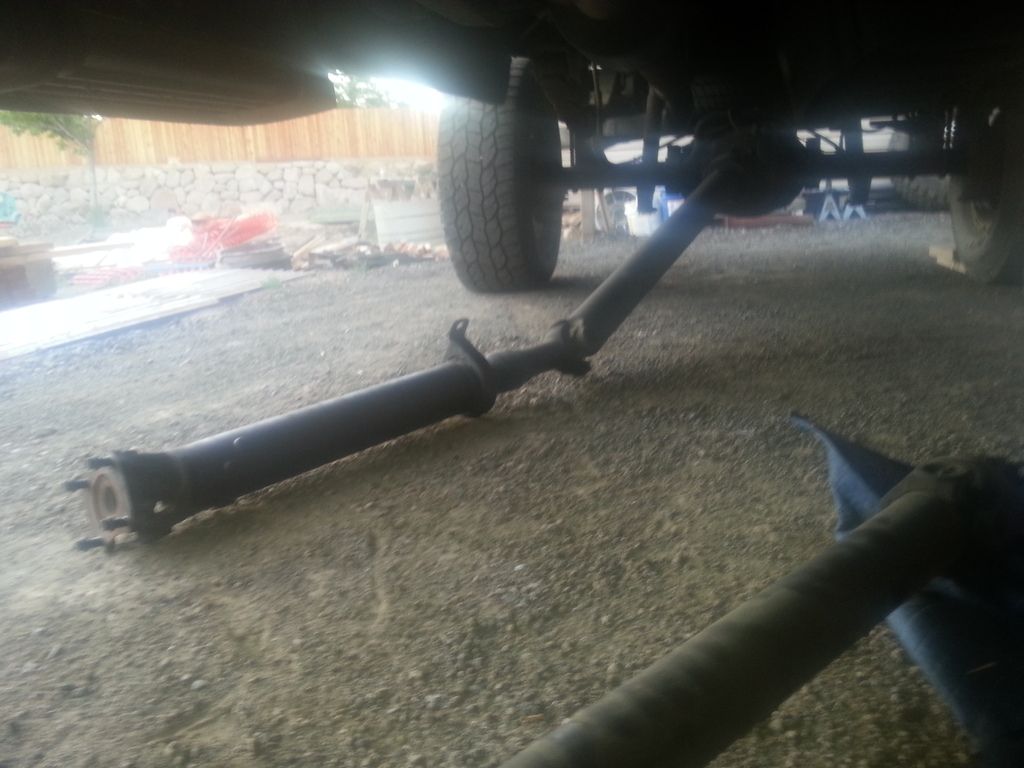
I started with removing the front and rear driveshaft. Unbolted the 4 bolts from the driveshaft to the transfer case output shaft then used a pry bar to separate it.
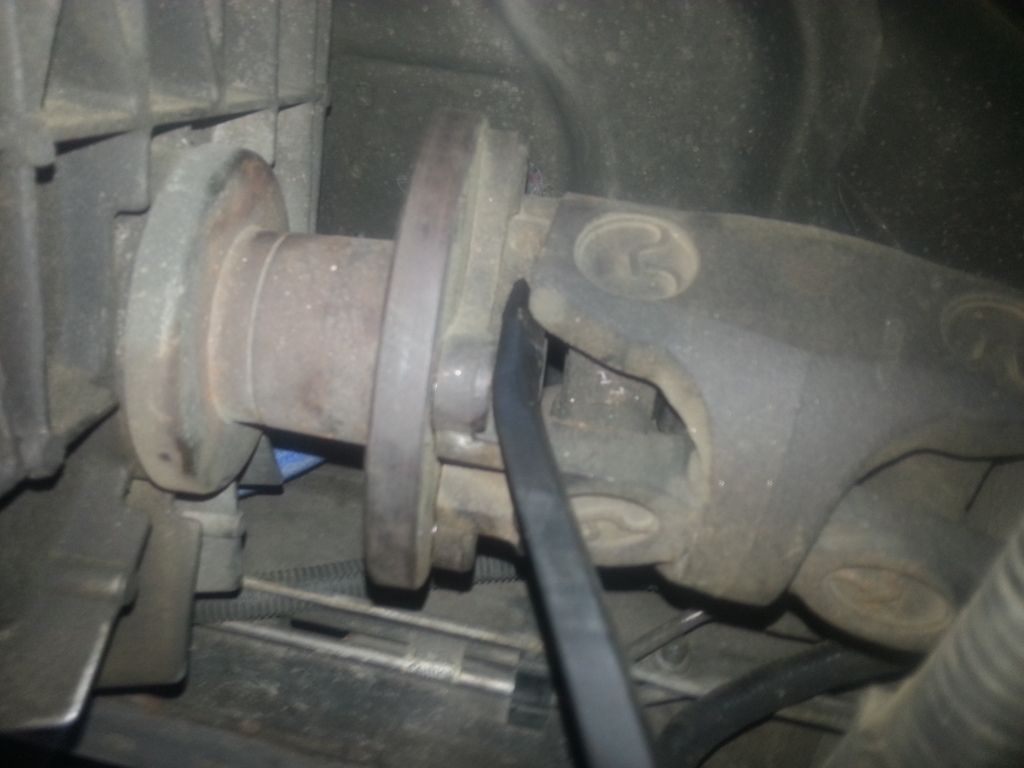
Then I unbolted the 2 bolts holding the center support bracket. Then I placed the drive shaft on the ground and out of the way. I screwed the 4 bolts back onto to the drive shaft and the 2 bolts back up on the center support bracket so I wouldn't loose them.
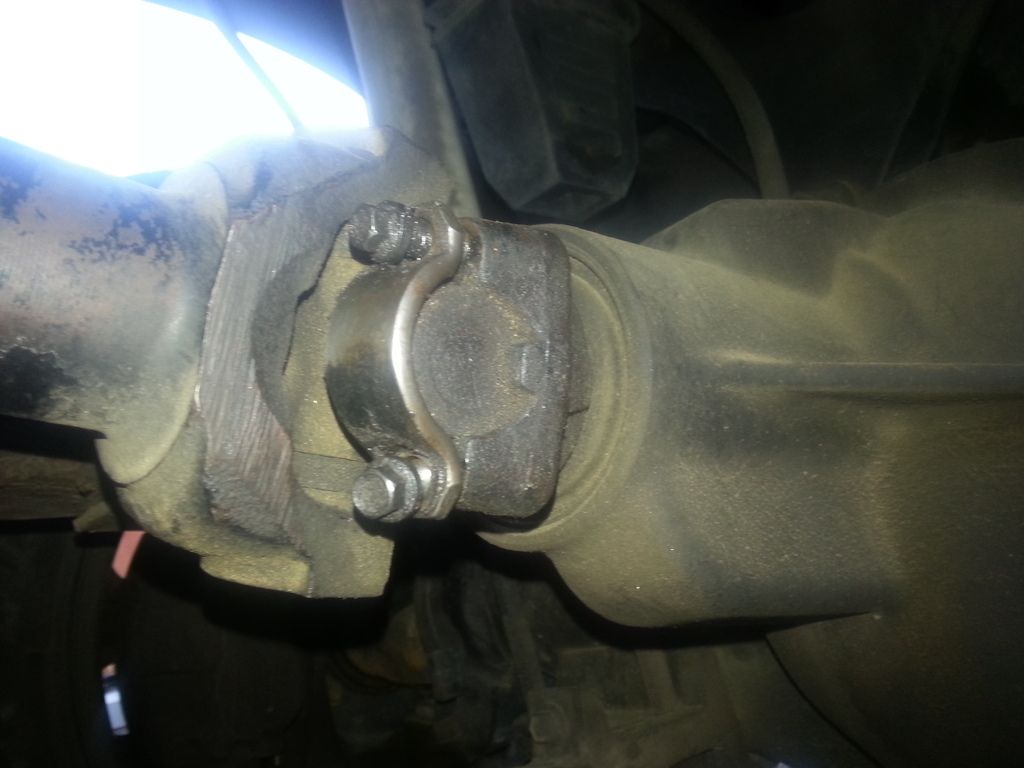
Front drive shaft. Unbolted the U-joint bracket.
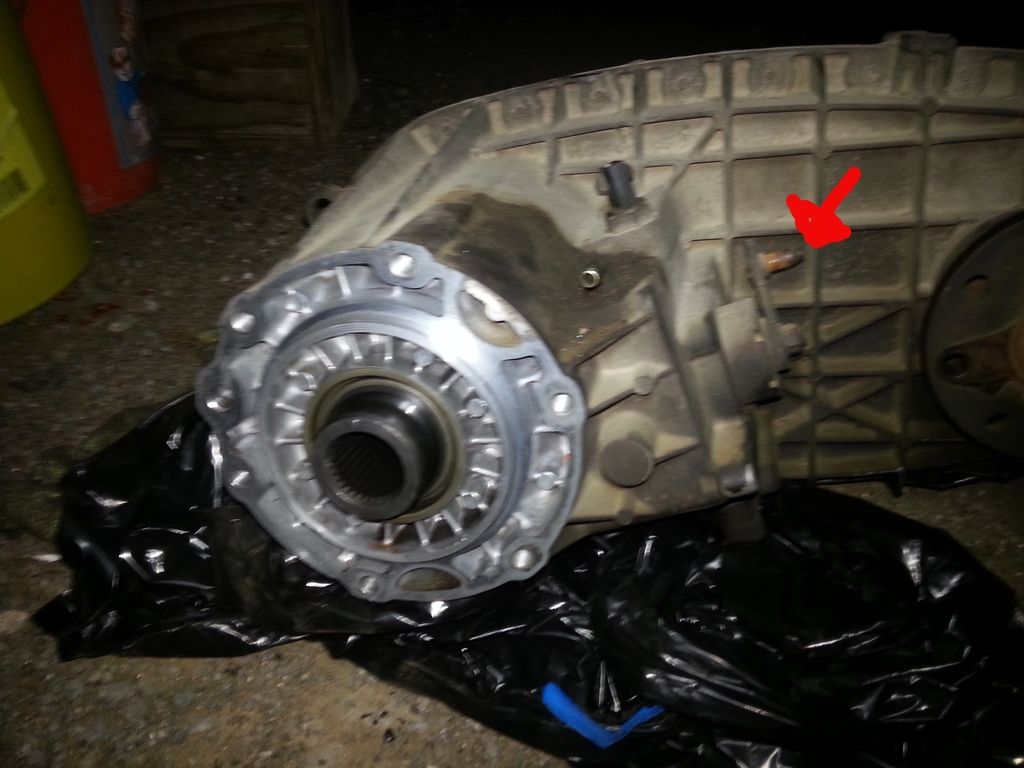
Next, drain oil out of transfer case. I carefully removed the electrical plug from the transfer case and then removed the manual 4X4 linkage off the transfer case. Sorry I didn't get a pic with linkage attached to transfer case side.
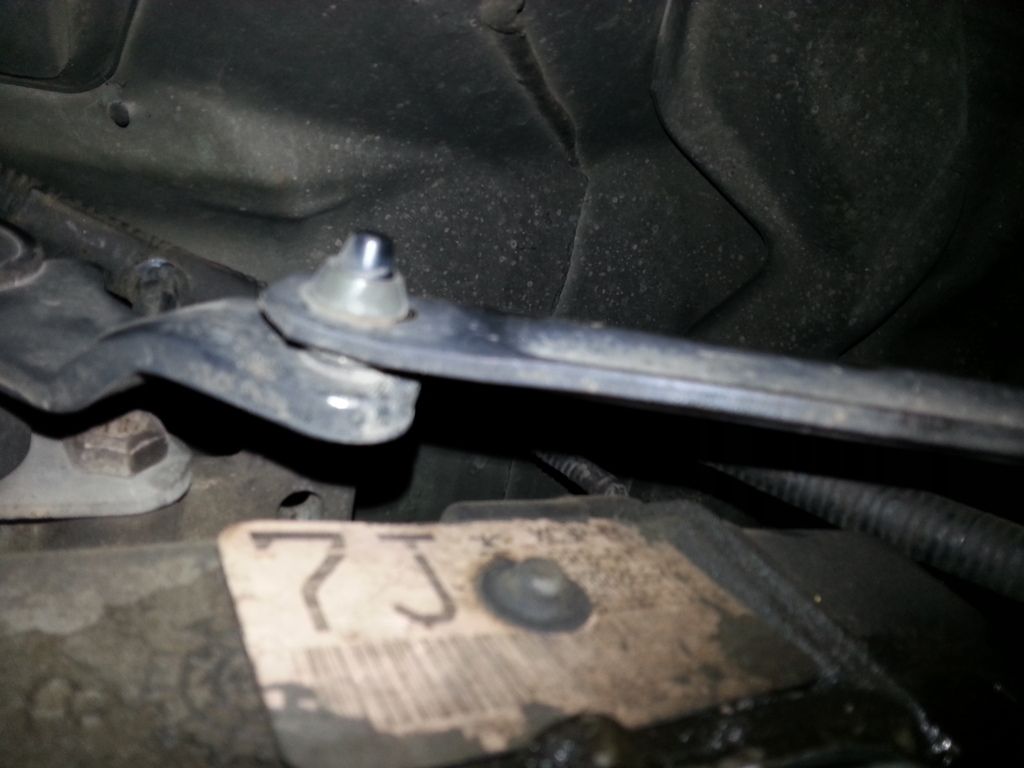
This pic shows the 4X4 linkage attached on the transmission side, but is identical on the trans case. I sprayed some liquid wrench on the rubber piece that is attached to the linkage and used a pry bar to separate with little force.
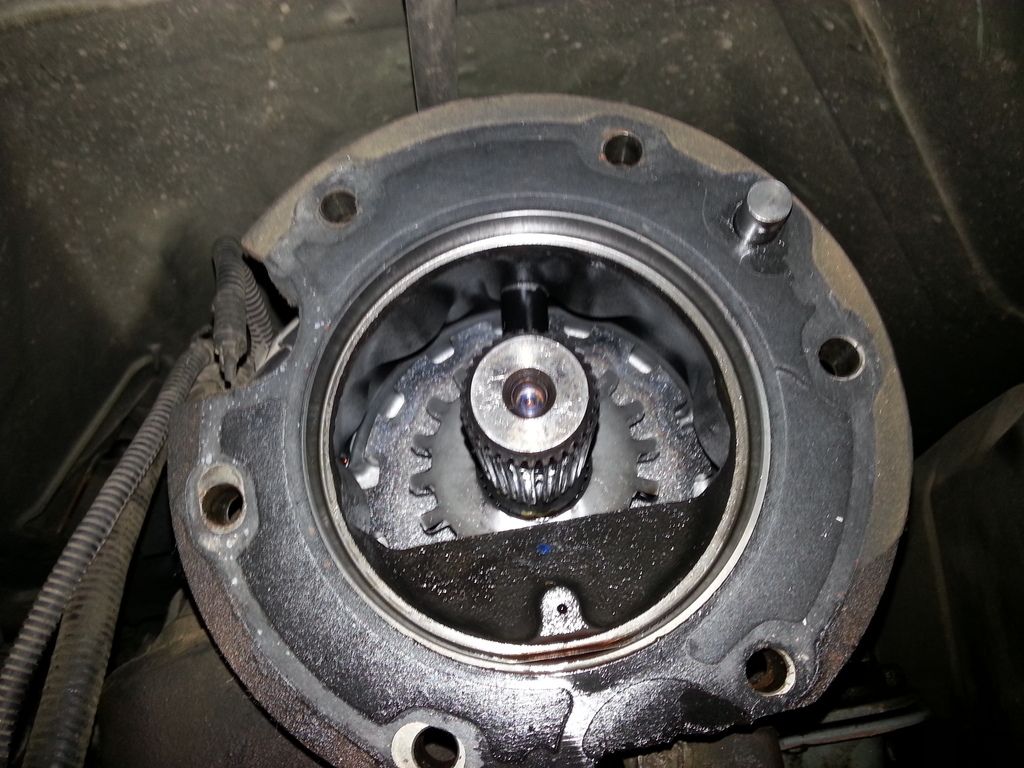
Transfer case side along with the electrical sensor that needs to be disconnected.

I guess I didn't get a shot of the transfer case mated to the transmission, but I think you get the idea.
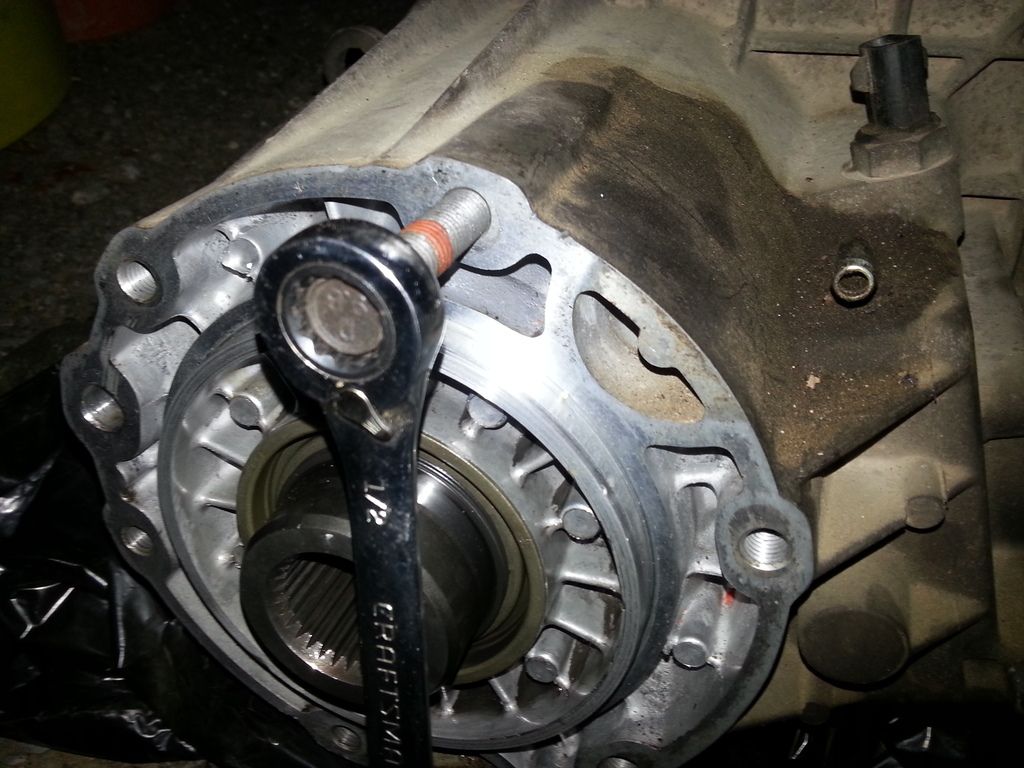
I unbolted the 6 1/2" bolts from the transfer case. Here you can see how the bolts are lined up.
The wrench would be on the transmission side.


Then I unbolted the 2 bolts holding the center support bracket. Then I placed the drive shaft on the ground and out of the way. I screwed the 4 bolts back onto to the drive shaft and the 2 bolts back up on the center support bracket so I wouldn't loose them.

Front drive shaft. Unbolted the U-joint bracket.

Next, drain oil out of transfer case. I carefully removed the electrical plug from the transfer case and then removed the manual 4X4 linkage off the transfer case. Sorry I didn't get a pic with linkage attached to transfer case side.
This pic shows the 4X4 linkage attached on the transmission side, but is identical on the trans case. I sprayed some liquid wrench on the rubber piece that is attached to the linkage and used a pry bar to separate with little force.

Transfer case side along with the electrical sensor that needs to be disconnected.

I guess I didn't get a shot of the transfer case mated to the transmission, but I think you get the idea.
I unbolted the 6 1/2" bolts from the transfer case. Here you can see how the bolts are lined up.

The wrench would be on the transmission side.

#13
06-13-2015, 12:01 PM


#14
06-23-2015, 05:39 AM
Removing the transmision.
Ok, so after a funeral, wedding, and my birthday lets get this back on track. 
Went to go drain the oil out of the trans and my wrench just spun. Something, somewhere, somehow got stripped. Now I get to remove all the bolts with all the oil still in the pan.
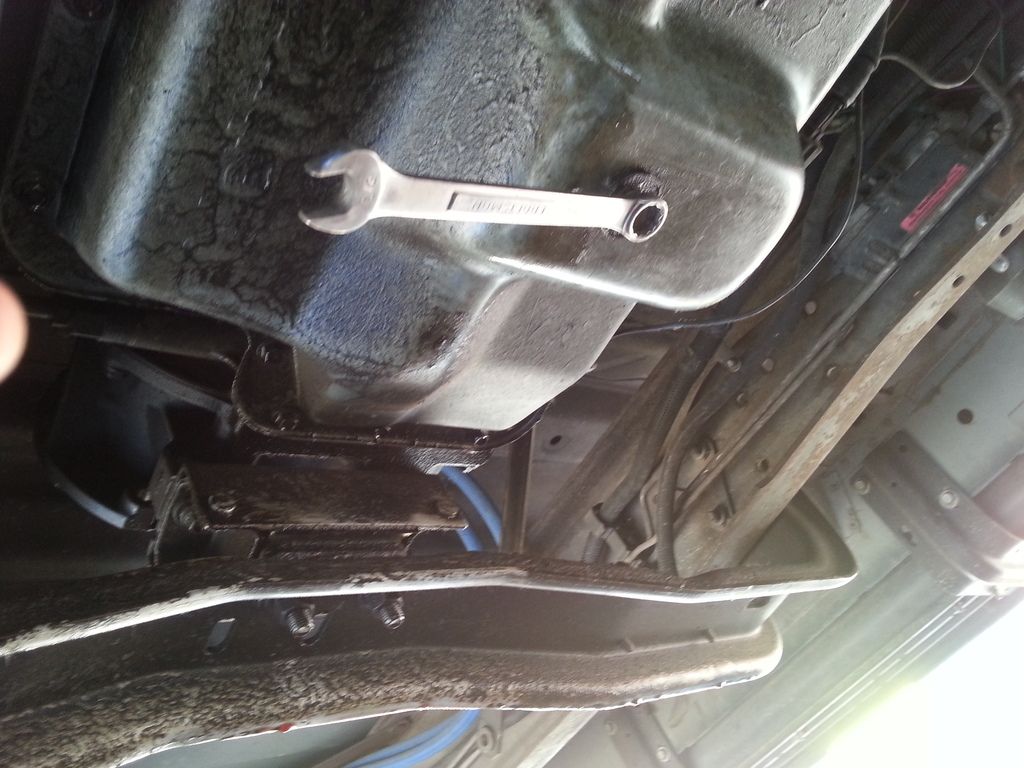
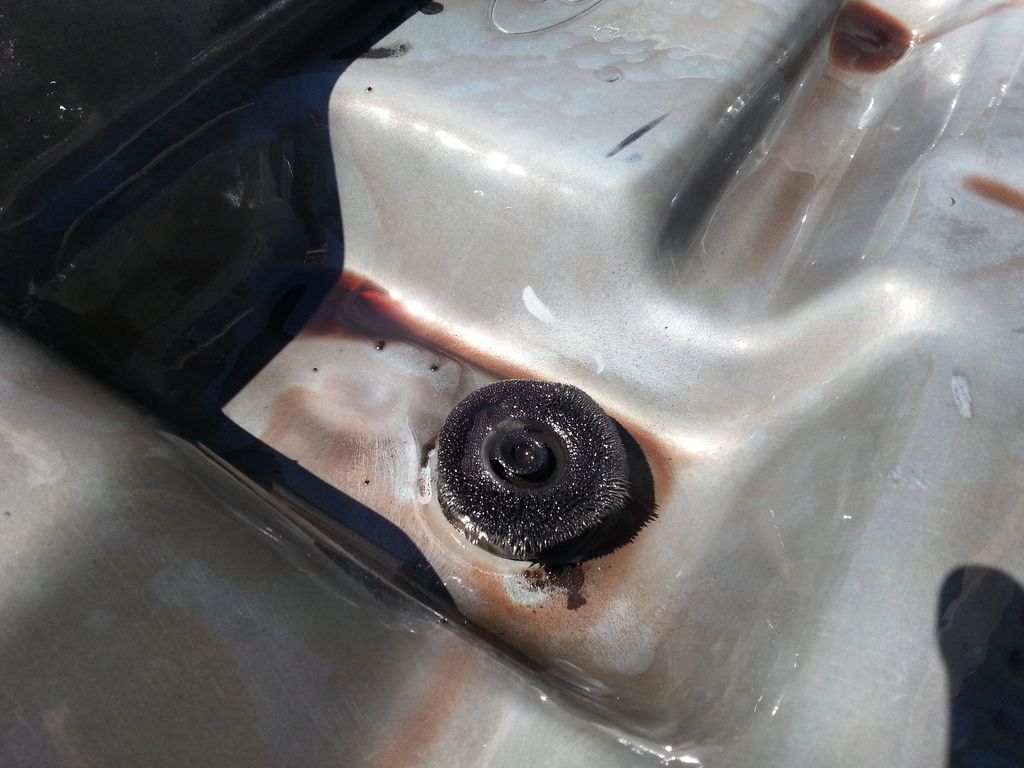
Not to sure what to do about the pan, might be looking into getting a new deep dish pizza pan or something. Here is the pan removed and filter out. I will get a the size of the socket for the pan bolts when the sun come up.
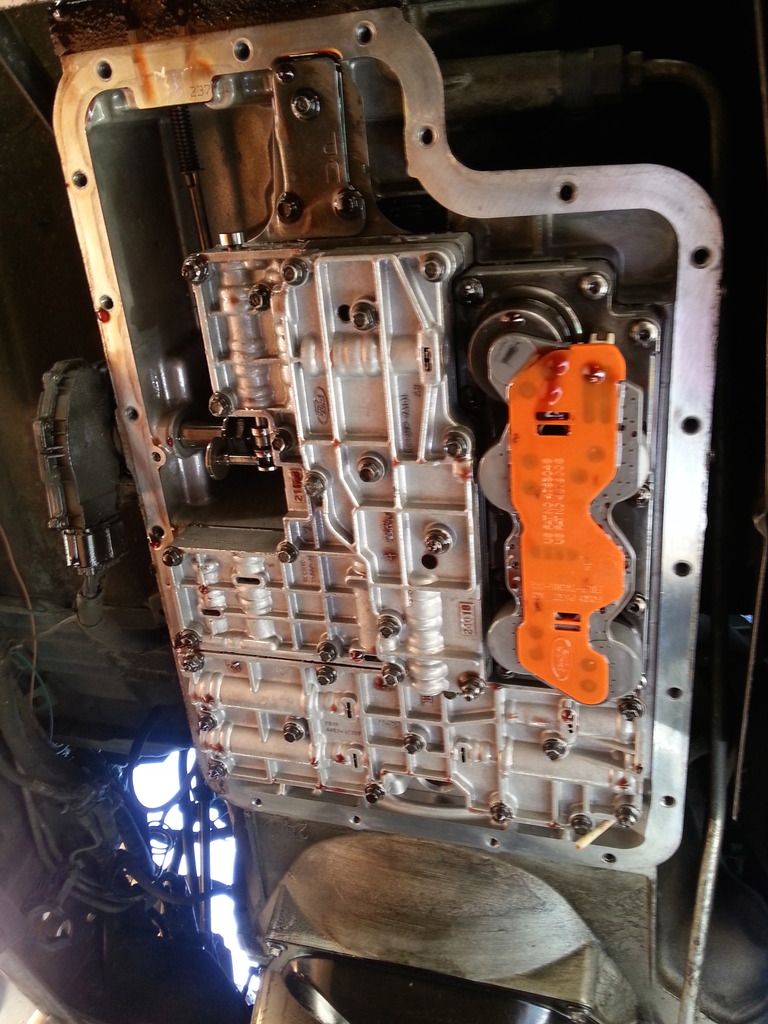
A look at the magnet with some shaving clinging to it but no chunks so that's good. With the oil drained I went ahead and reinstalled the pan and bolts.
I went ahead and removed the starter. There are 2 bolts on the bottom and one at the top. I used a 17mm socket on the lower 2 and 17mm wrench on the top. There are 2 wires that need to be removed. The large power wire is a 15mm socket and the small power wire is a 8mm socket.
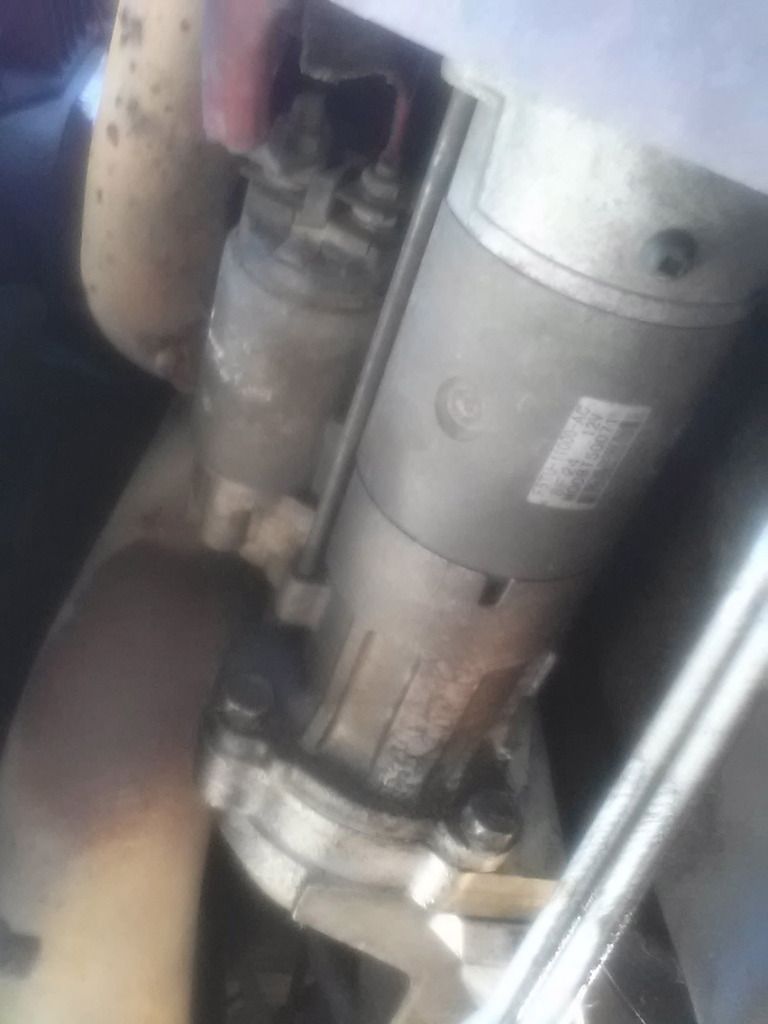
This picture pretty much sucks, I will get a better one. It shows the top of the starter with a deep socket on one of the electrical lugs.

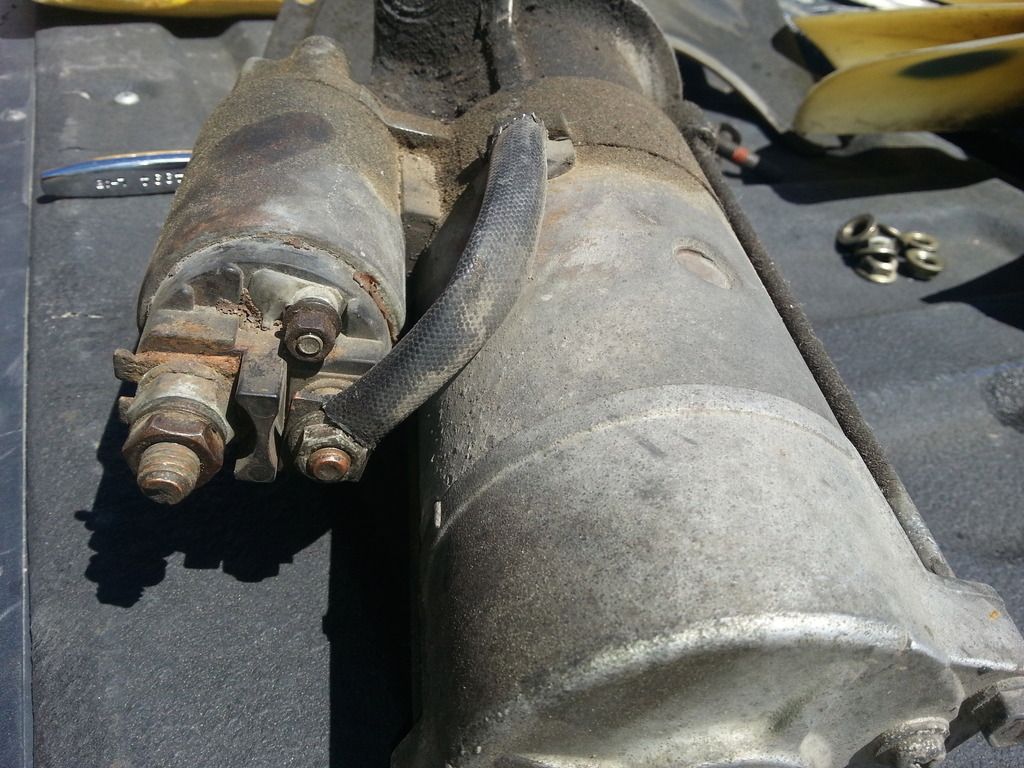
Here is a better pic of the starter. Large nut is a 15mm and the smaller nut is an 8mm.
Went to go drain the oil out of the trans and my wrench just spun. Something, somewhere, somehow got stripped.
Now I get to remove all the bolts with all the oil still in the pan.
Not to sure what to do about the pan, might be looking into getting a new deep dish pizza pan or something. Here is the pan removed and filter out. I will get a the size of the socket for the pan bolts when the sun come up.

A look at the magnet with some shaving clinging to it but no chunks so that's good. With the oil drained I went ahead and reinstalled the pan and bolts.

I went ahead and removed the starter. There are 2 bolts on the bottom and one at the top. I used a 17mm socket on the lower 2 and 17mm wrench on the top. There are 2 wires that need to be removed. The large power wire is a 15mm socket and the small power wire is a 8mm socket.

This picture pretty much sucks, I will get a better one. It shows the top of the starter with a deep socket on one of the electrical lugs.

Here is a better pic of the starter. Large nut is a 15mm and the smaller nut is an 8mm.

#15
06-23-2015, 06:50 AM
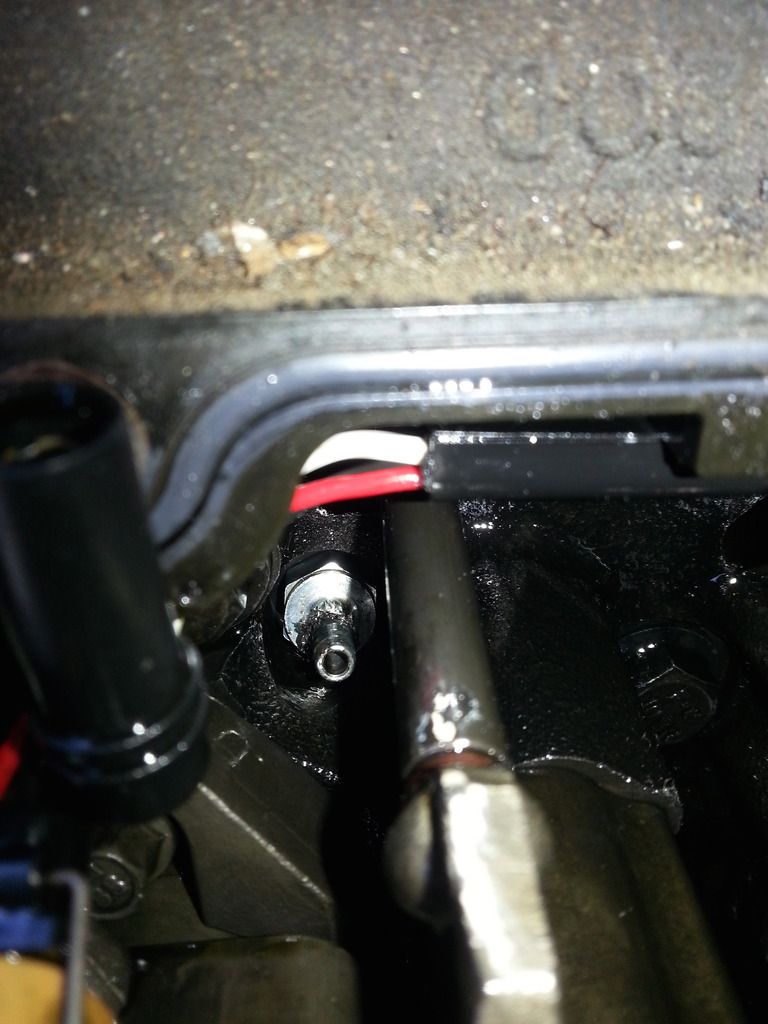
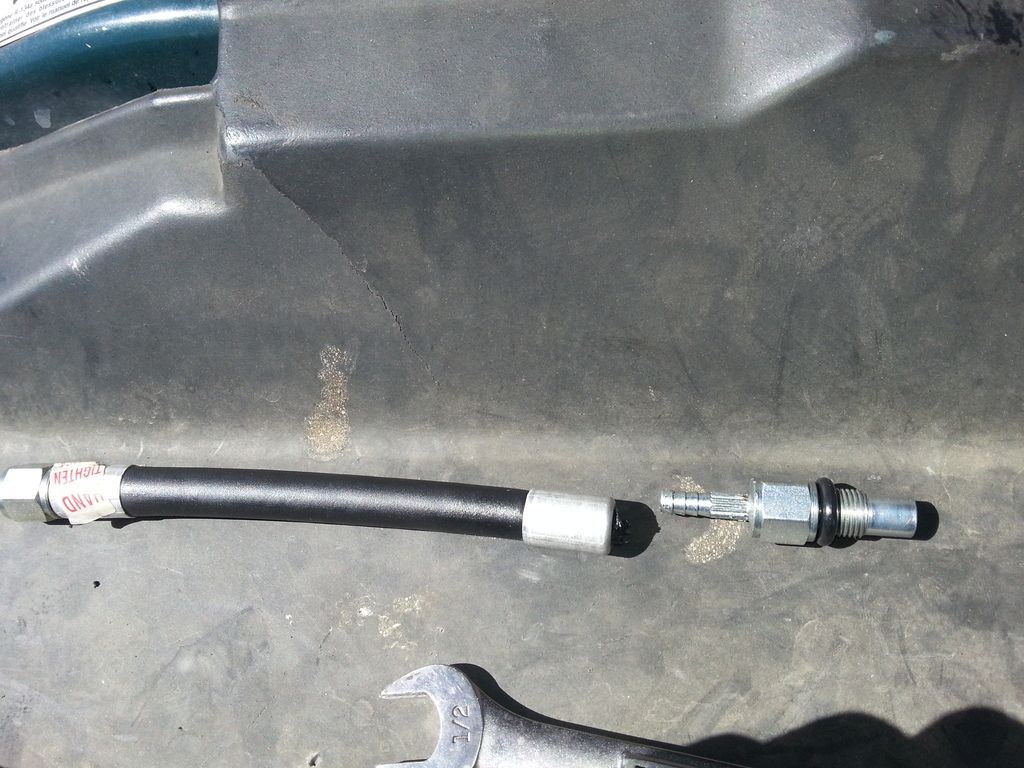
Removed the 2 oil cooler lines. I couldn't hold the camera and 2 wrenches. You will need 1 wrench to hold the bolt (not sure what it's called) on the trans side and another wrench to loosen the fitting.
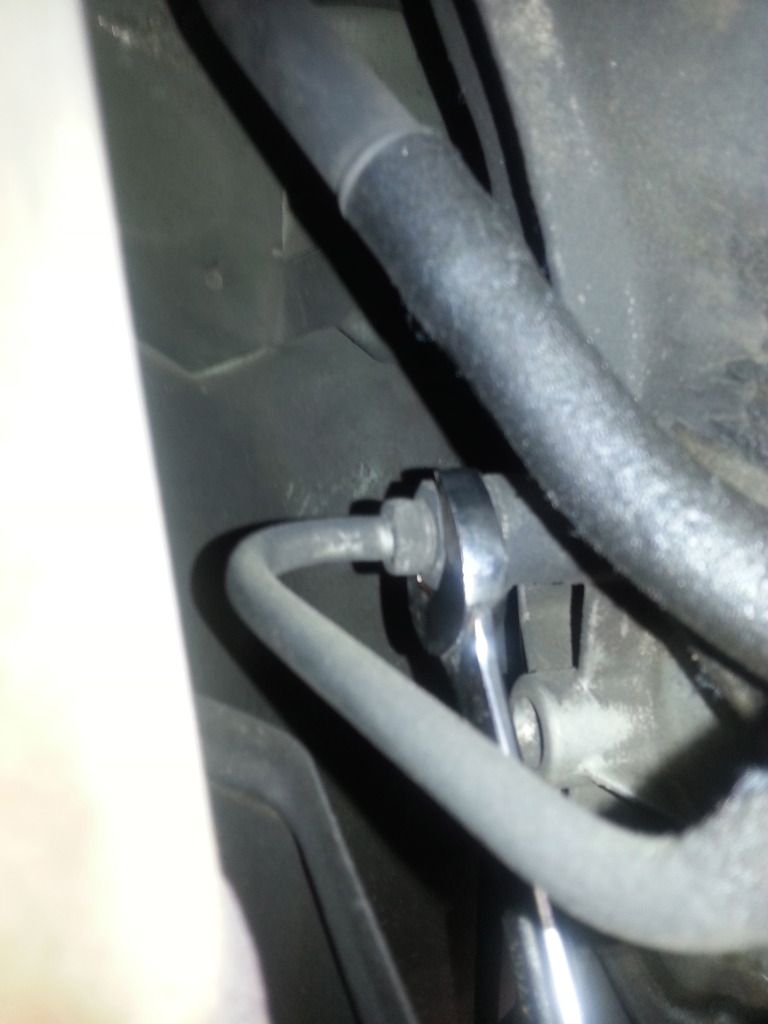
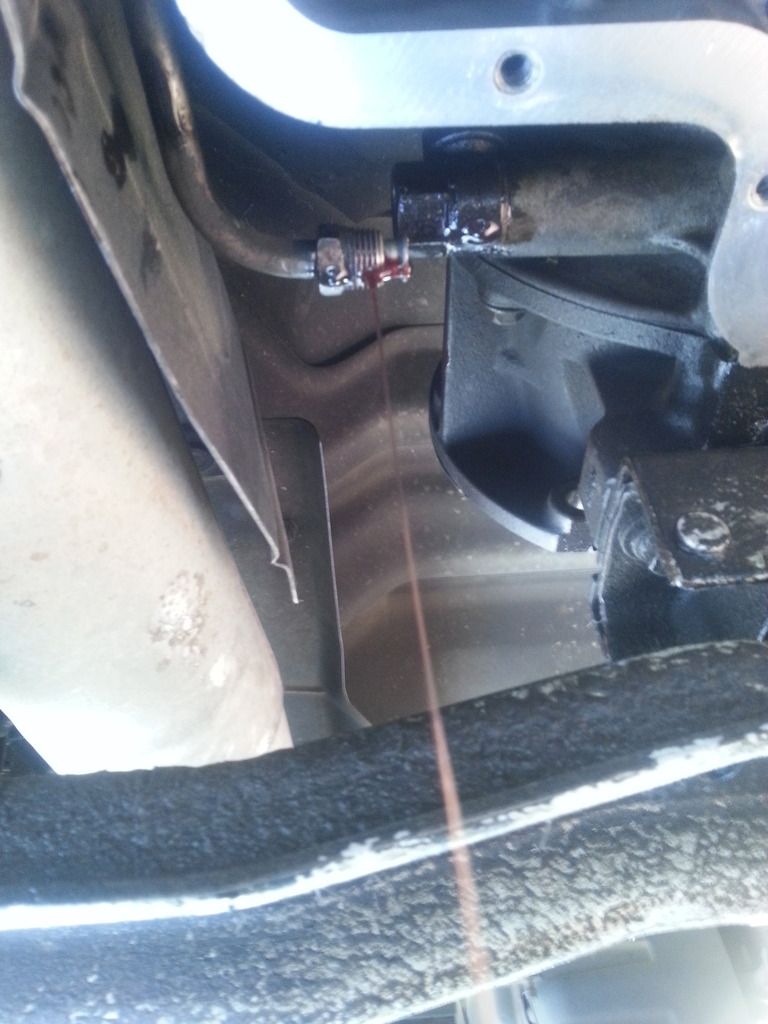
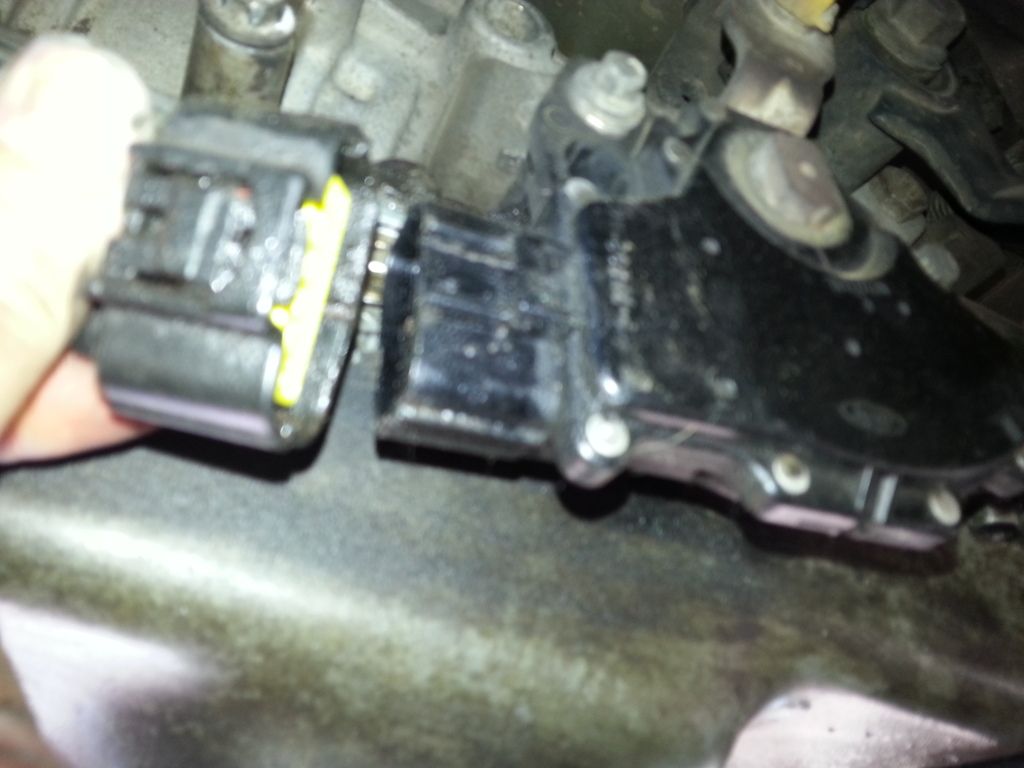
With front and rear lines removed I went onto carefully removing the 4 electrical connectors.
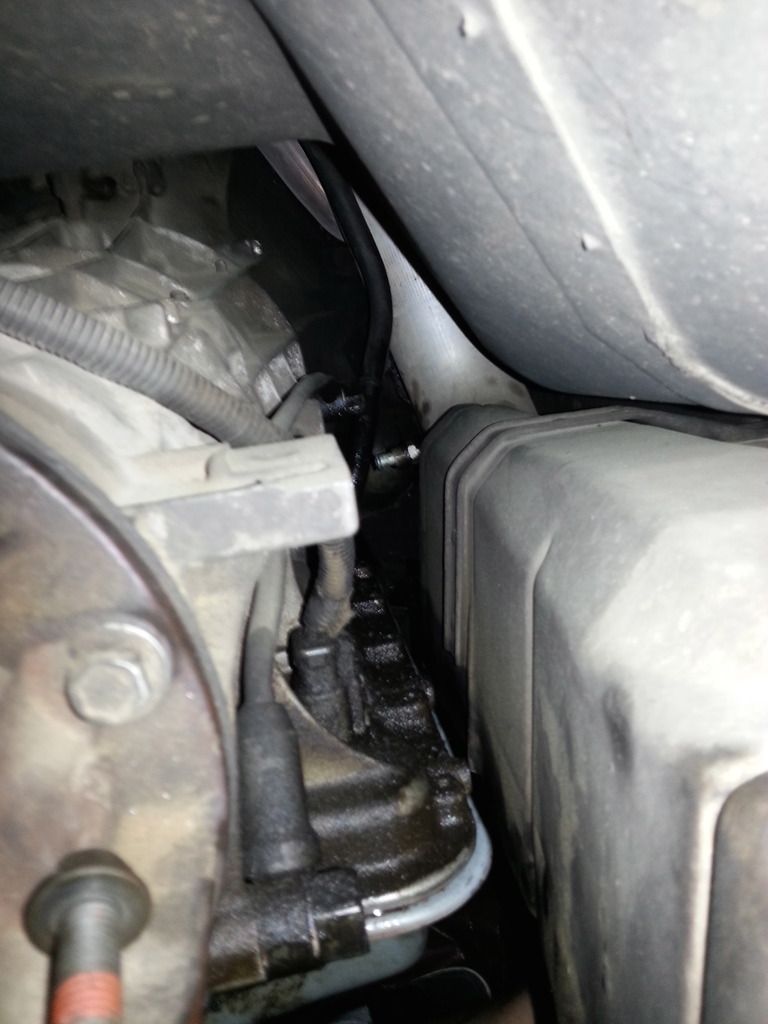
1 on top near the front driver side of the trans. 1 on top near the rear of the trans. 1 on the rear passenger side, and the gear selector part of the reverse lights.
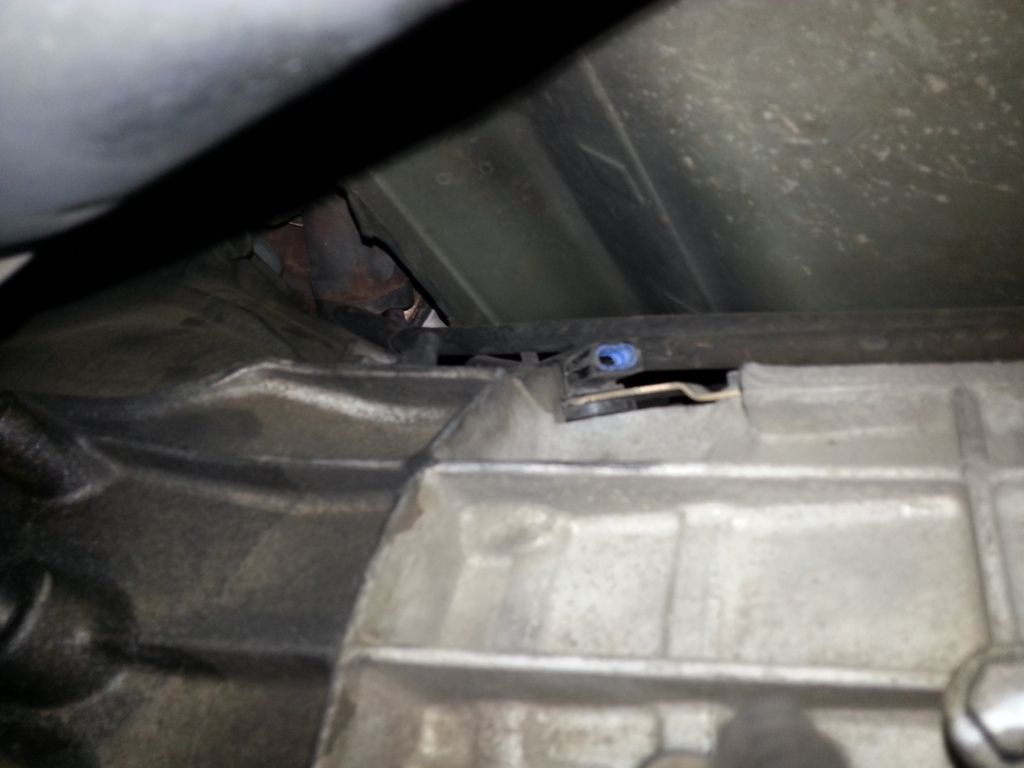
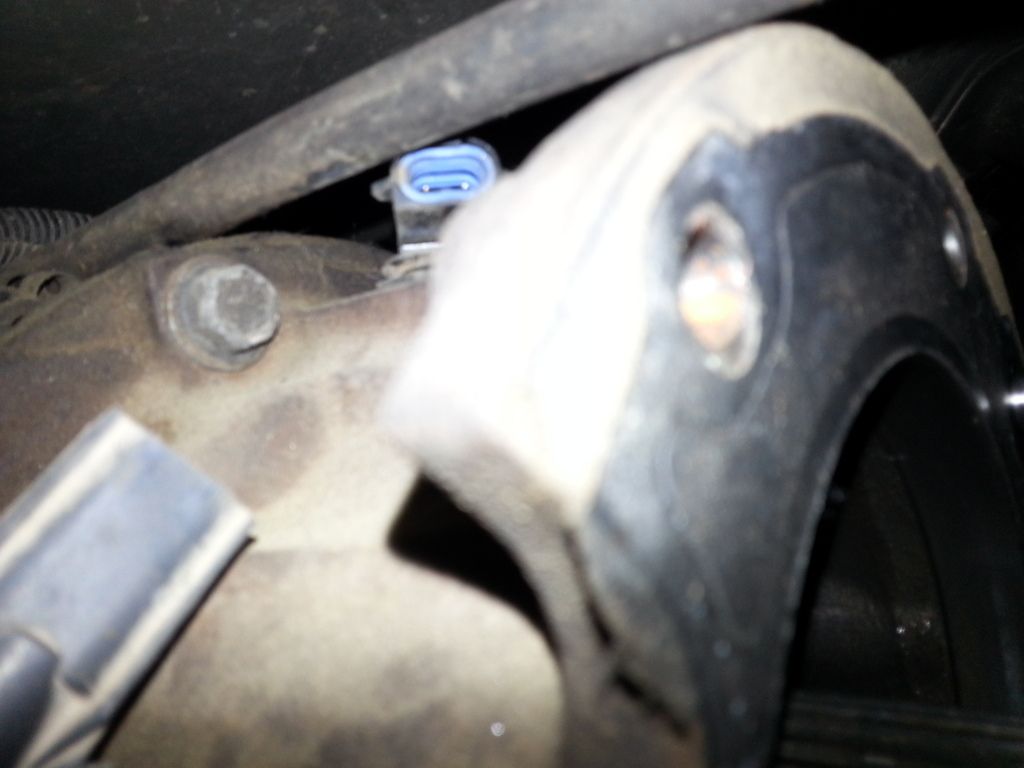
Follow the wiring loom down and you can see the connector.
Ha, ^^ found that missing bolt for the transfer case!


With front and rear lines removed I went onto carefully removing the 4 electrical connectors.
1 on top near the front driver side of the trans. 1 on top near the rear of the trans. 1 on the rear passenger side, and the gear selector part of the reverse lights.


Follow the wiring loom down and you can see the connector.

Ha, ^^ found that missing bolt for the transfer case!
