Modification of 80's Ford combination Washer res and Coolant tank. to fit a bump.
#1
 03-14-2015, 12:16 AM

Join Date: Sep 2014
Location: Elk
Posts: 415
Likes: 0
Received 0 Likes
on
0 Posts
Modification of 80's Ford combination Washer res and Coolant tank. to fit a bump.
Modification of Ford combination Washer res and Coolant tank from 80's f250 To fit a 69 f250.
tools needed
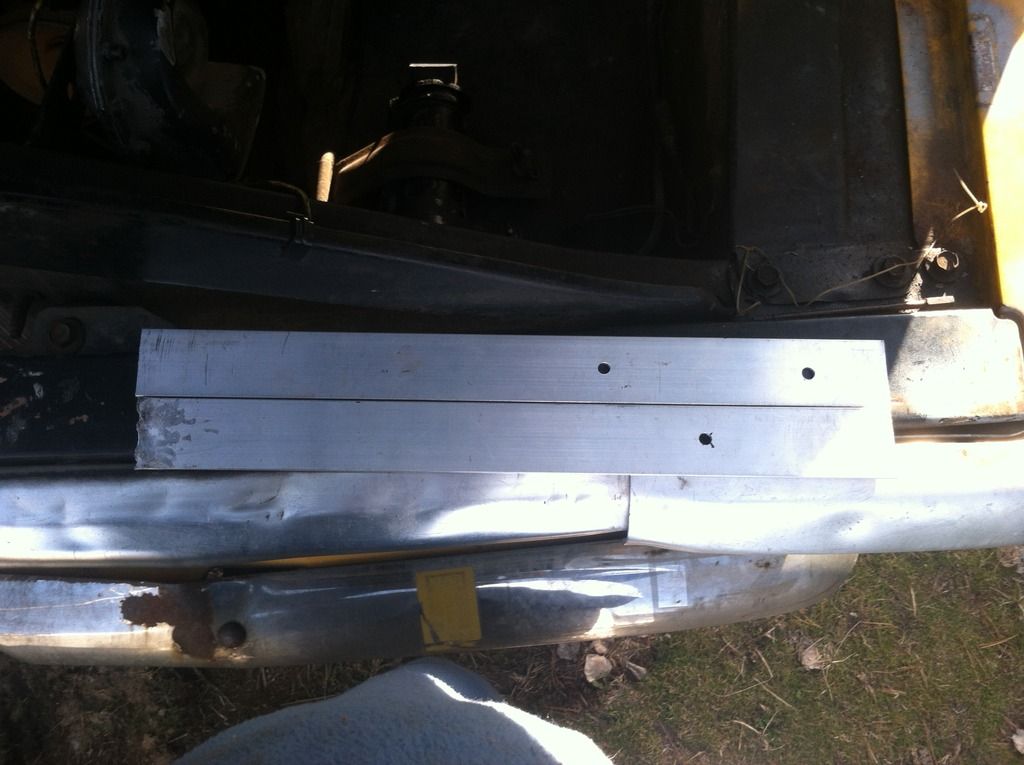
1 piece flat steel or aluminum stock mine was 15.5" long
1 Combination tank
3 nuts and bolts with washers for tank
1 self tapping screw
1 68-70 washer pump, washer pump grommet, plastic washer, pump screen
1 hack saw
1 vice
5' of hose for coolant
ratchet and socket set
drill and metal bits
file
silicone.
some form of stopper to fit in the location of the tank pump if missing or removed. .
"NOTE"
I was hoping to use the combo tank's washer pump but it was toasted and the hose nipple is twice the size of the original. and I wanted to keep the stock washer jets.
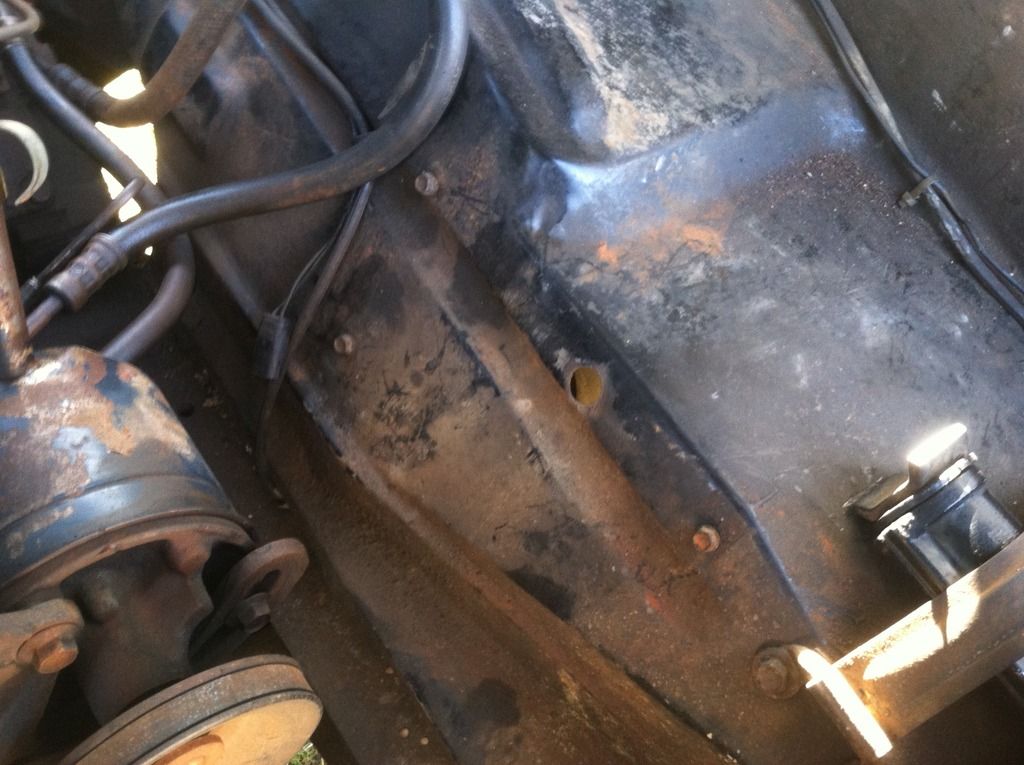
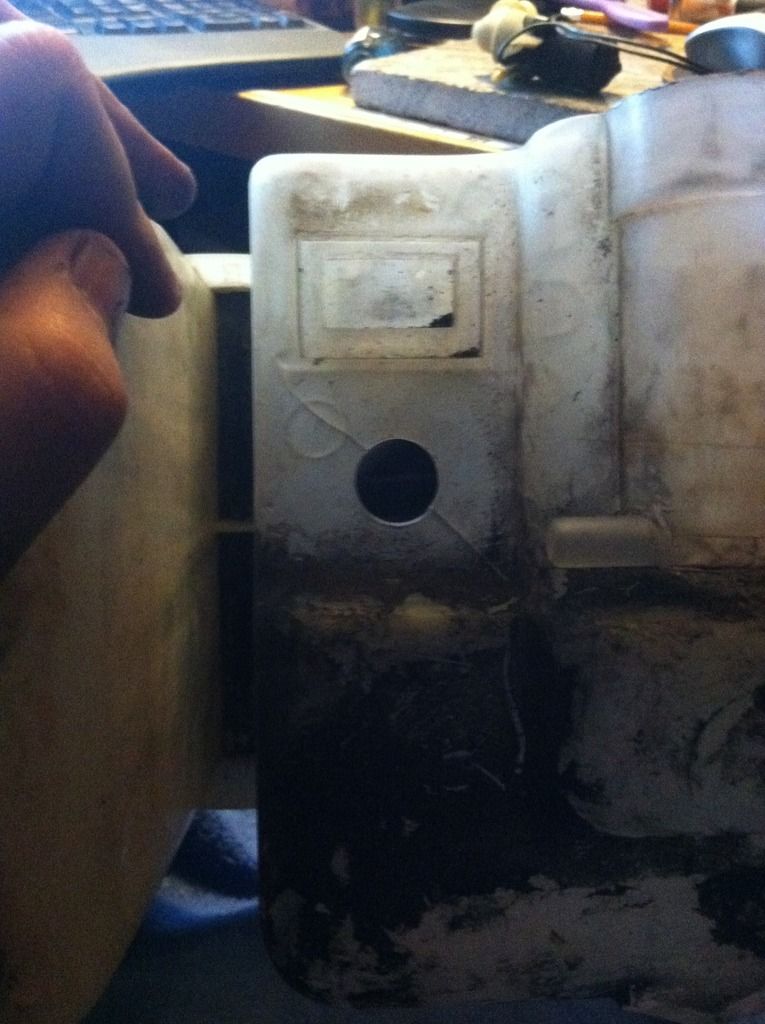
1. take tank and decide how high you want it above the original tank location. you want it to be level.
2. Cut flat stock in half
3. take the two pieces of flat stock and mark the locations of the original tanks bolts. ( make sure to leave room on the front bar for another hole. below the one bolt.
4. drill the first three holes
5. bolt the flat stock in place and by placing the combo tank where its meant to sit mark where the bends will need to go. take note how much bend you want.
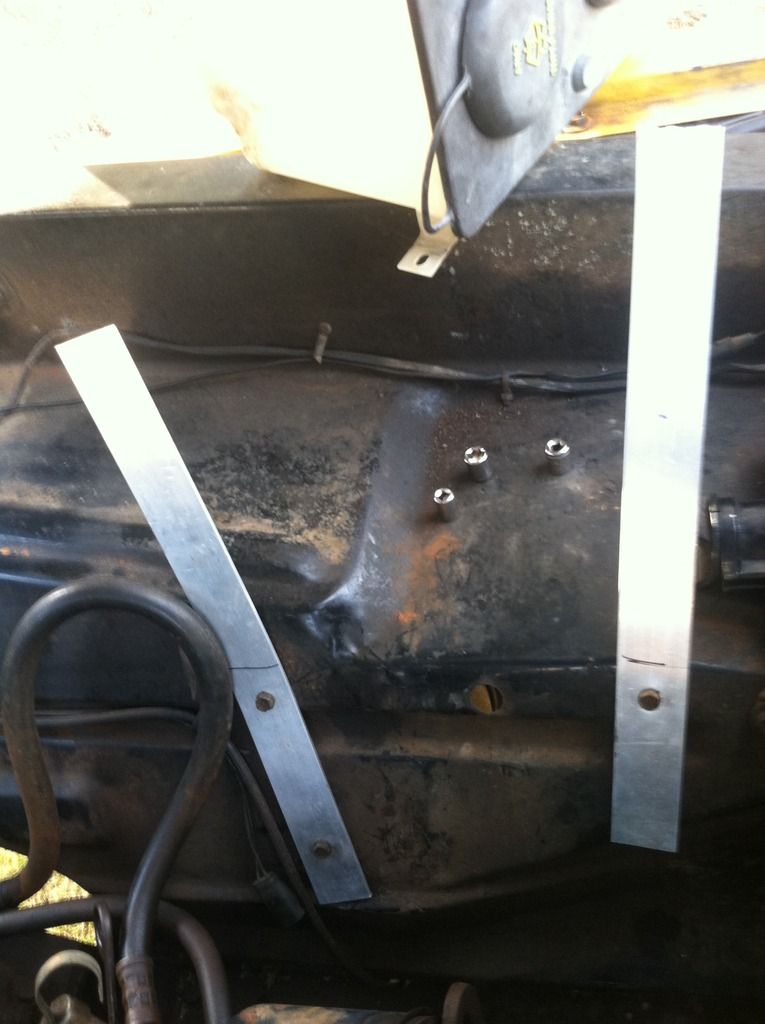
6. Bend the stock with use of the vice and a blow torch if needed
7. install the bars and check the tank location and stock bend adjust if needed.
8. Mark the locations for the tank bolts and, location of any extra stock to remove. remove stock and drill the holes and cut off excess.
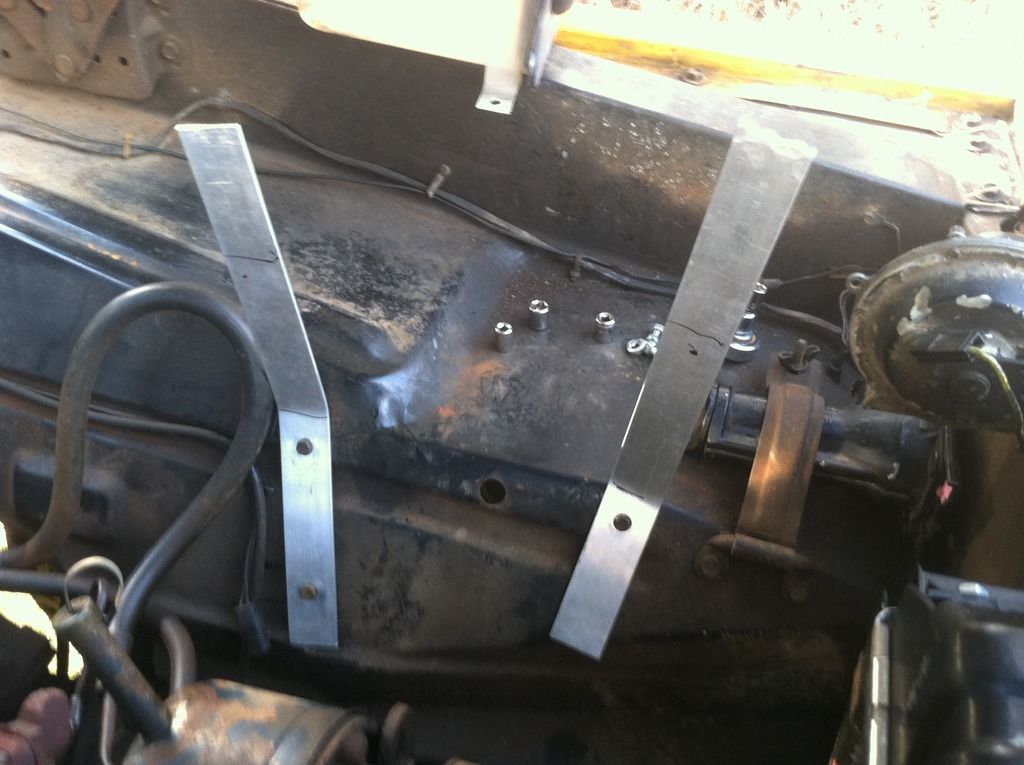
9. Reinstall stock and bolt tank in place.
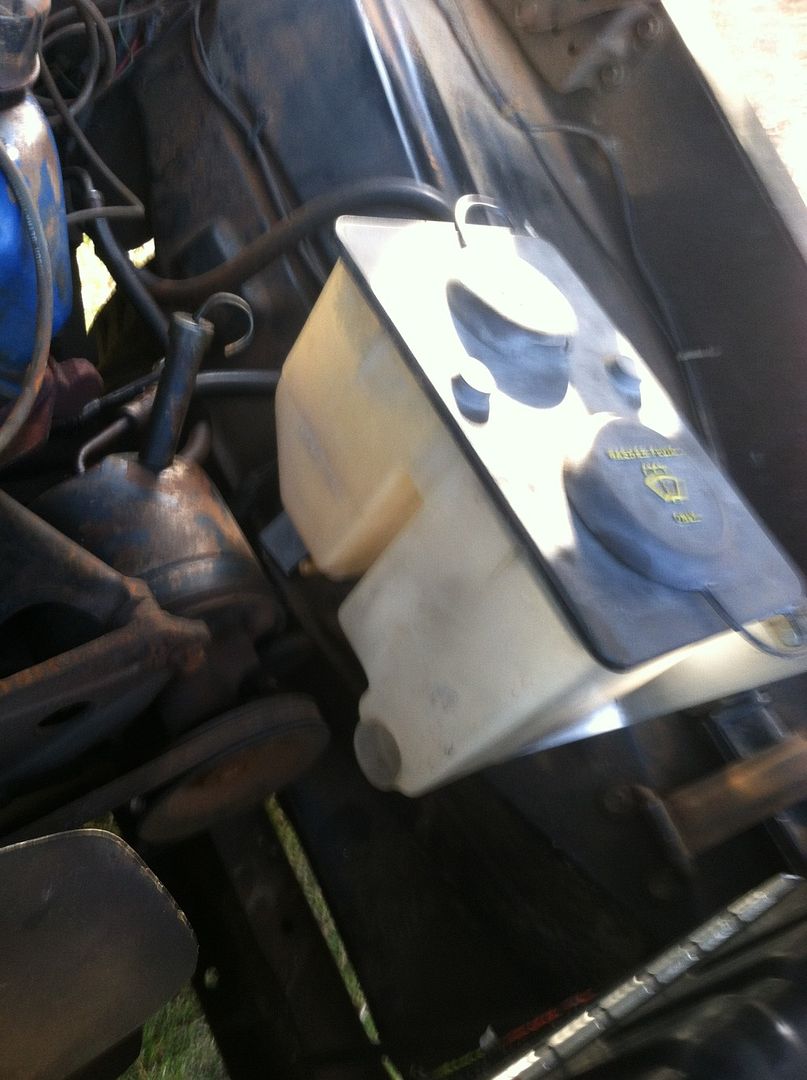
10. once you have the tank in its proper location remove it to install the washer pump.
******* If the pump in the tank works then solder-splice and heat shrink the bumps connection to slightly longer wires and then to the pump wires and call it a day. If not follow below to use the bumps pump.***********
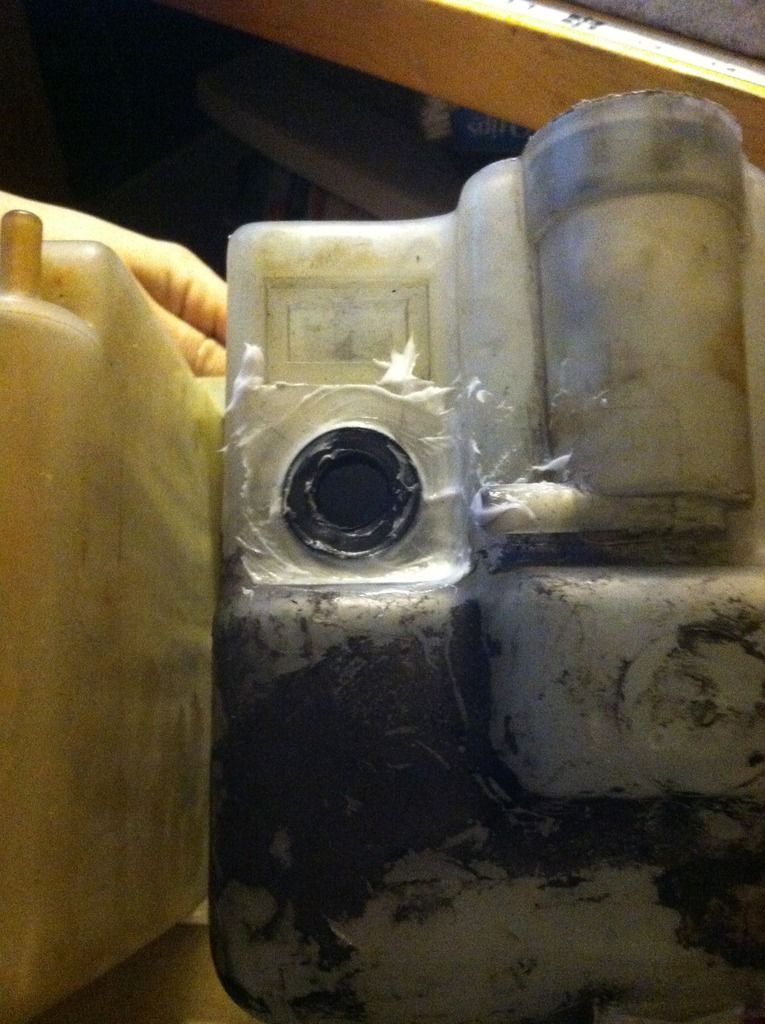
11. remove tank pump or cut wires and fill the pump outlet with silicone. I used a plastic drink cap that fit perfectly into the tank's pump location and siliconed it in place you can also but a rubber cork or an expandable rubber cork as well.

12. take bumps pump and cut the nub off half way.
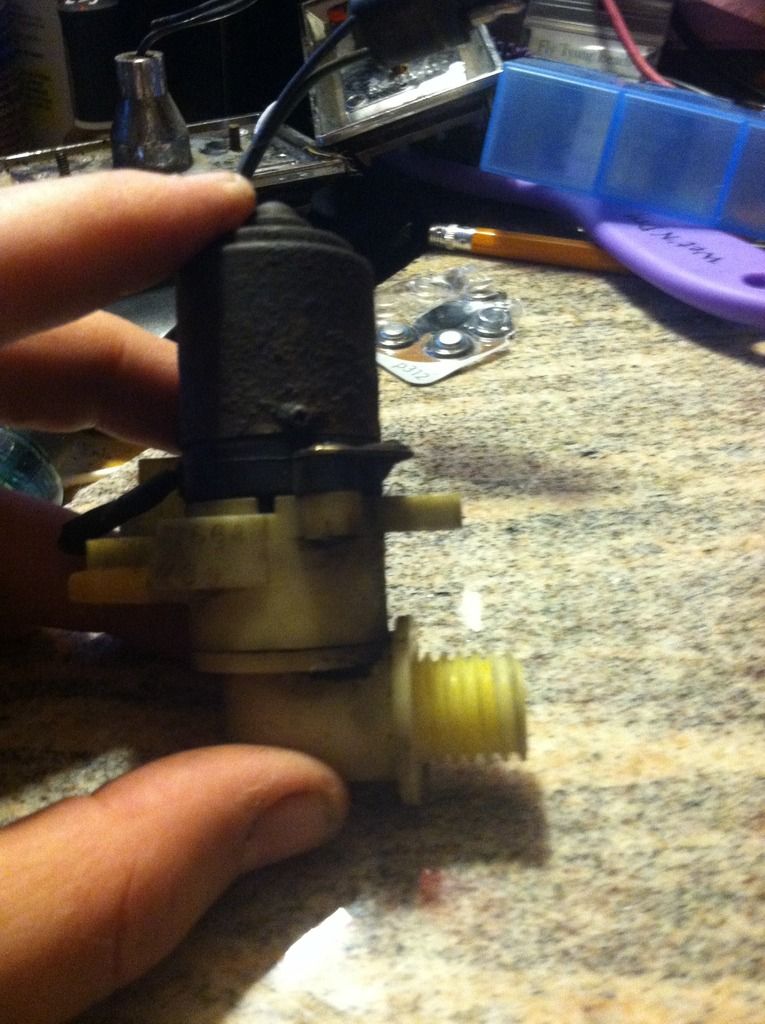
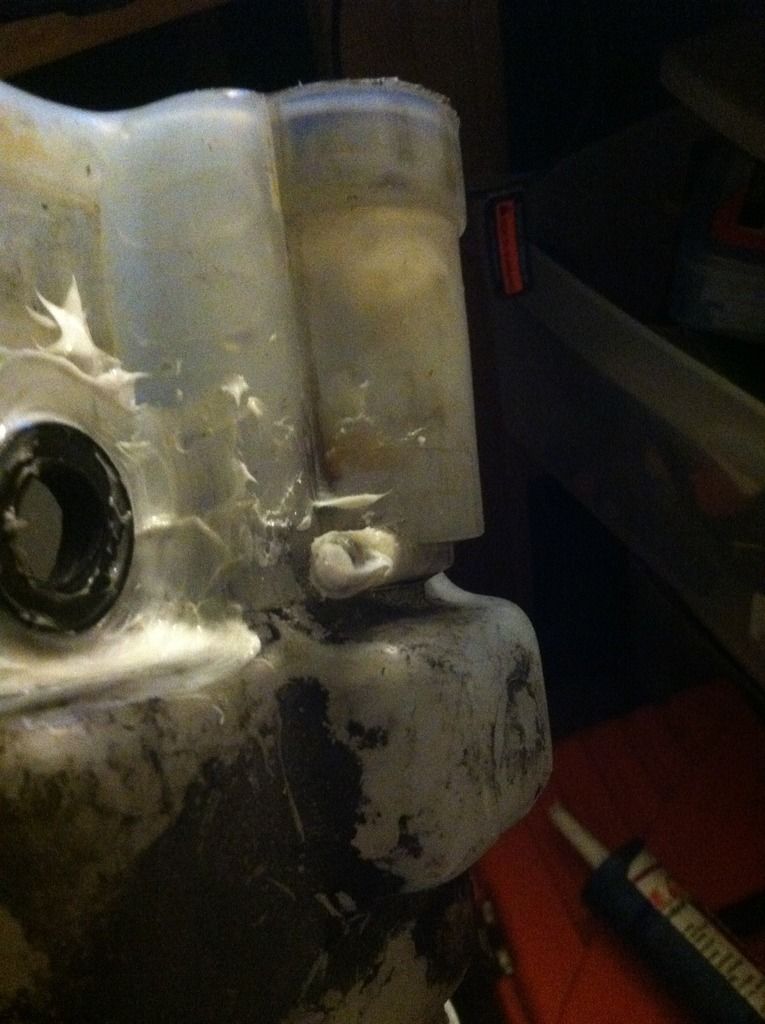
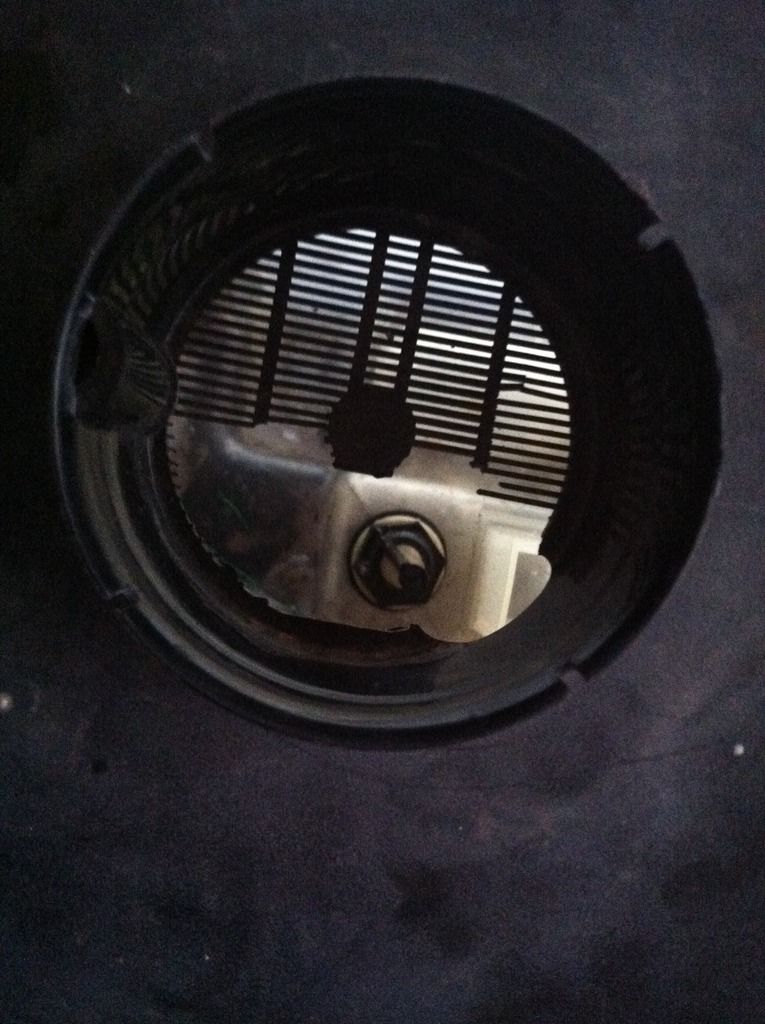
13. in the recess in the bottom of the tank. Carefully drill a hole just under 3/4" I started at 1/2" and slowly increased the hole till the grommet fit perfectly and tight. (i cracked mine a little bit because i put too much pressure with the drill press at first. easy fix with silicone.) this location also make final assembly much faster with a long socket and extenders.
14. add a light layer of silicone under the outer flap of the grommet, Also in and over and cracks if you made any. Allow silicone to dry. i didn't do a pretty job lol
15. insert the pump till flush. Turn over and use the long dowel or wooden match stick to place the washer over the threads. insert the screen into the socket and slowly turn the tank on its side and install the screen. till just tight you might need something to add pressure to the screen as you tighten it.
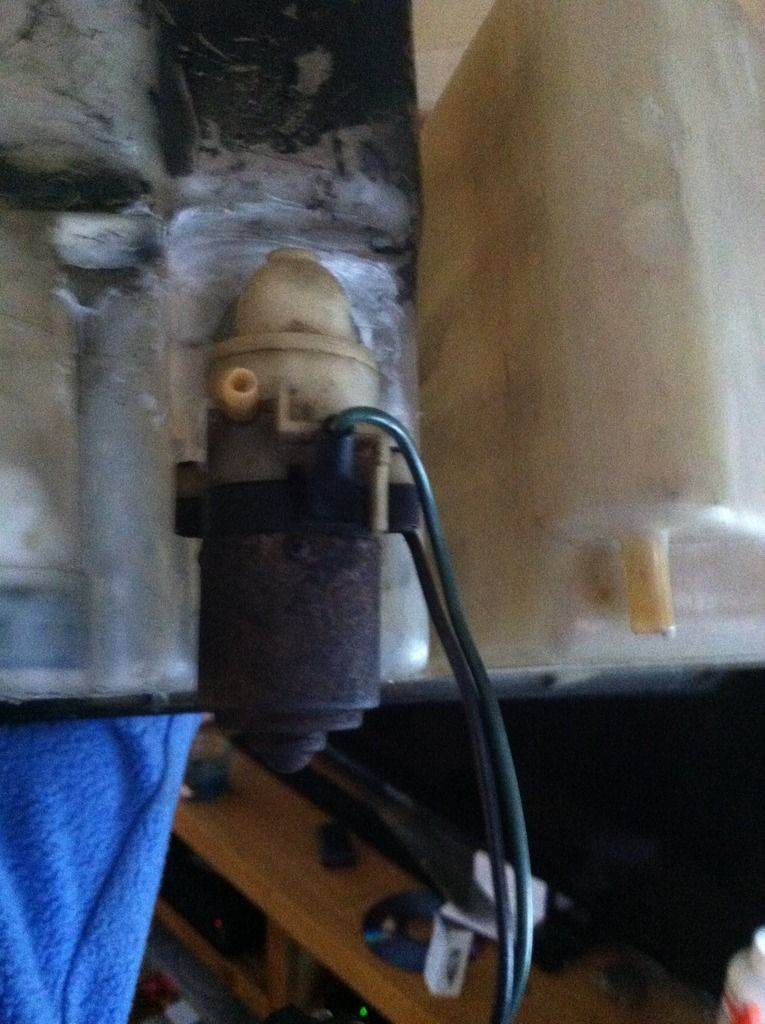
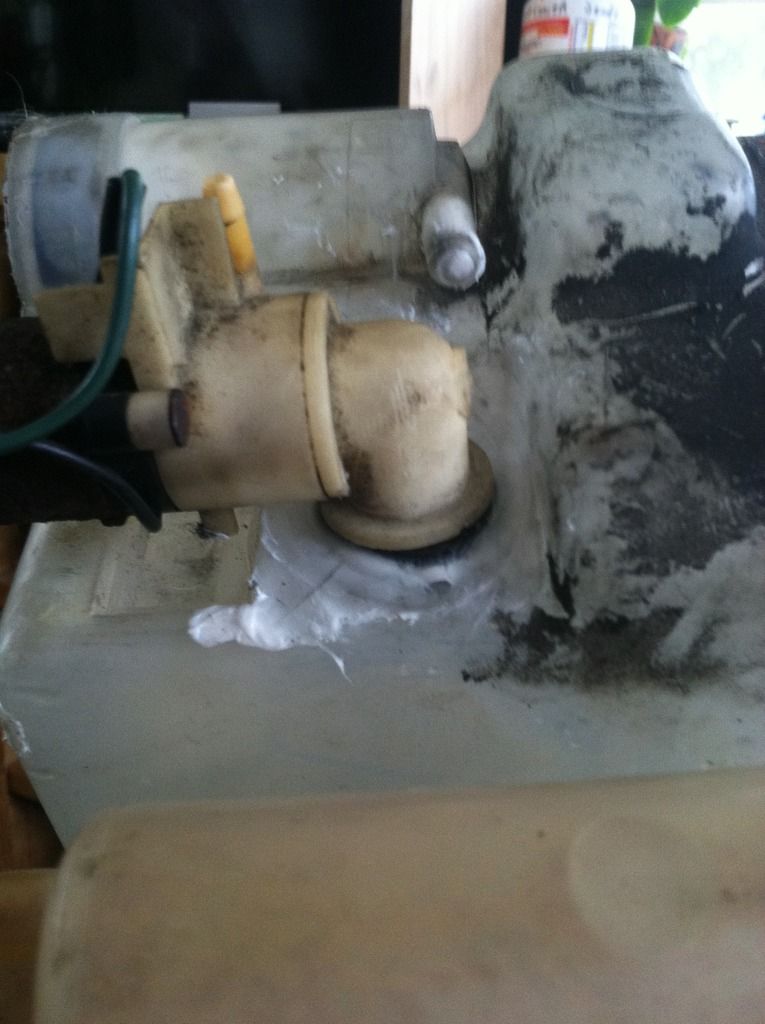
16 reinstall and connect everything and enjoy
tools needed
1 piece flat steel or aluminum stock mine was 15.5" long
1 Combination tank
3 nuts and bolts with washers for tank
1 self tapping screw
1 68-70 washer pump, washer pump grommet, plastic washer, pump screen
1 hack saw
1 vice
5' of hose for coolant
ratchet and socket set
drill and metal bits
file
silicone.
some form of stopper to fit in the location of the tank pump if missing or removed. .
"NOTE"
I was hoping to use the combo tank's washer pump but it was toasted and the hose nipple is twice the size of the original. and I wanted to keep the stock washer jets.
1. take tank and decide how high you want it above the original tank location. you want it to be level.
2. Cut flat stock in half
3. take the two pieces of flat stock and mark the locations of the original tanks bolts. ( make sure to leave room on the front bar for another hole. below the one bolt.

4. drill the first three holes

5. bolt the flat stock in place and by placing the combo tank where its meant to sit mark where the bends will need to go. take note how much bend you want.

6. Bend the stock with use of the vice and a blow torch if needed

7. install the bars and check the tank location and stock bend adjust if needed.
8. Mark the locations for the tank bolts and, location of any extra stock to remove. remove stock and drill the holes and cut off excess.

9. Reinstall stock and bolt tank in place.

10. once you have the tank in its proper location remove it to install the washer pump.
******* If the pump in the tank works then solder-splice and heat shrink the bumps connection to slightly longer wires and then to the pump wires and call it a day. If not follow below to use the bumps pump.***********
11. remove tank pump or cut wires and fill the pump outlet with silicone. I used a plastic drink cap that fit perfectly into the tank's pump location and siliconed it in place you can also but a rubber cork or an expandable rubber cork as well.

12. take bumps pump and cut the nub off half way.


13. in the recess in the bottom of the tank. Carefully drill a hole just under 3/4" I started at 1/2" and slowly increased the hole till the grommet fit perfectly and tight. (i cracked mine a little bit because i put too much pressure with the drill press at first. easy fix with silicone.) this location also make final assembly much faster with a long socket and extenders.

14. add a light layer of silicone under the outer flap of the grommet, Also in and over and cracks if you made any. Allow silicone to dry. i didn't do a pretty job lol

15. insert the pump till flush. Turn over and use the long dowel or wooden match stick to place the washer over the threads. insert the screen into the socket and slowly turn the tank on its side and install the screen. till just tight you might need something to add pressure to the screen as you tighten it.


16 reinstall and connect everything and enjoy
#2
03-14-2015, 06:43 PM


1967 washer reservoir uses a bag, its washer pump is remotely mounted on the fender apron.
1968/70 washer reservoir is a plastic tank, its washer pump fits inside the reservoir (see pic at left).
1971/72's use a different washer reservoir and pump (see pic at right).
And, there was no such thing as a combination overflow tank/washer reservoir available for these trucks. So what is the one that you are using...from?
In fact, the only "bumpsides" that have a factory installed overflow tank were 1971/72 F100/250's with 240 I-6's.
1970: FoMoCo came out with a dealer installed overflow tank kit (D0AZ-8522-A) for F100/350's and misc. cars. The same overflow tank could be purchased from auto parts stores.
#4
03-14-2015, 08:07 PM
Join Date: Sep 2014
Location: Elk
Posts: 415
Likes: 0
Received 0 Likes
on
0 Posts

Thread
Thread Starter
Forum
Replies
Last Post
jerry_s
1948 - 1956 F1, F100 & Larger F-Series Trucks
6
02-18-2015 11:07 PM
thepitshop
1948 - 1956 F1, F100 & Larger F-Series Trucks
9
11-18-2009 07:41 PM