48-50 gauge cluster customization
#46
 12-31-2015, 04:46 PM

I like the look of the speedo in there... What about making the Water, Fuel, Oil, & Volt openings smaller to create the same coverage as the speedo... I would create make some more plates and see what works best.. Add some colors to see what you want to frame the gauges. Keep it up... Your doing a great job.
#47
12-31-2015, 05:20 PM
Did some more work today. Figured some things out but found some more problems to figure out.
Here are some pictures of how much I had to remove from the cluster.
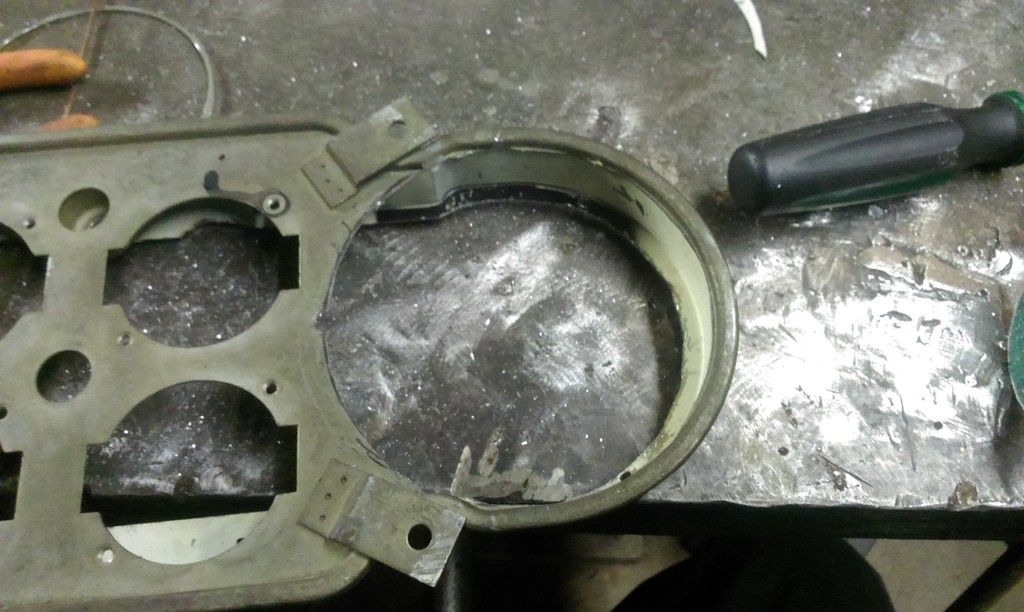
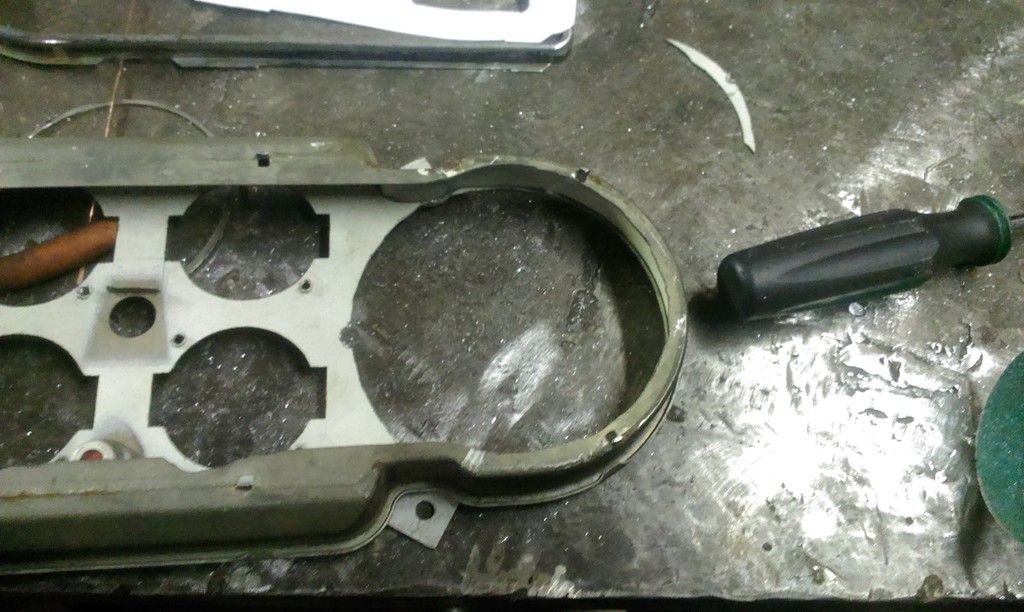
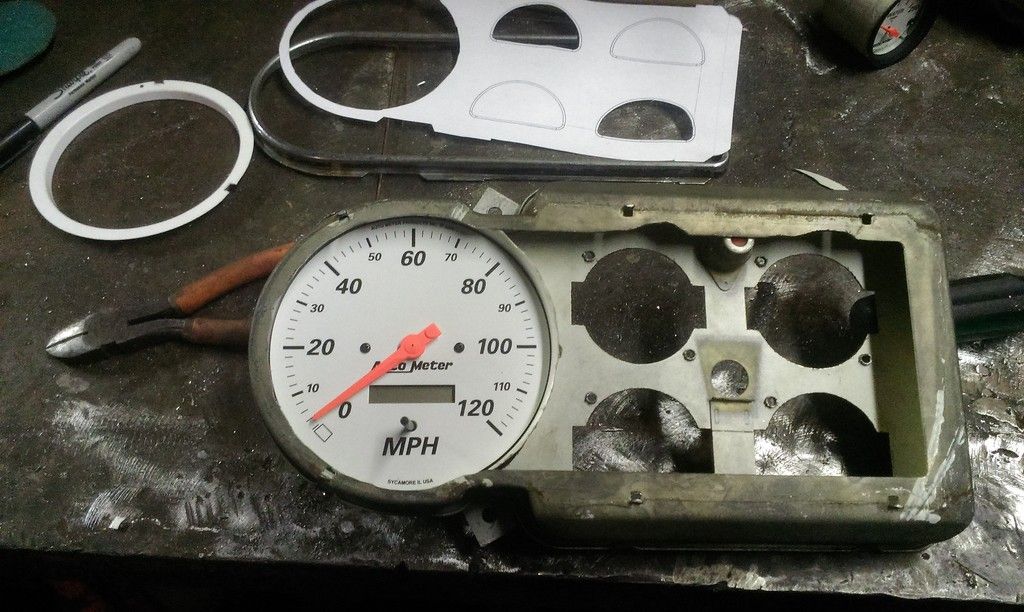
Here is the gauge in the cluster.
I came up with a way to locate the trim ring. I opened up the front of the cluster so that the ring fit tight in it. That way the ring is centered on the gauge.
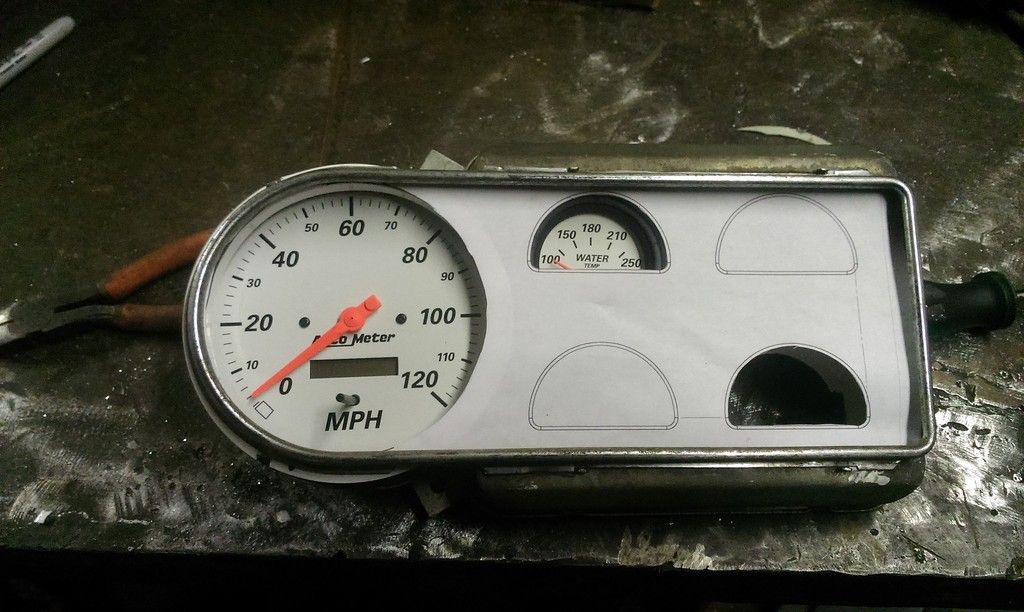
I painted the ring black in this picture. Can't see it too well though.
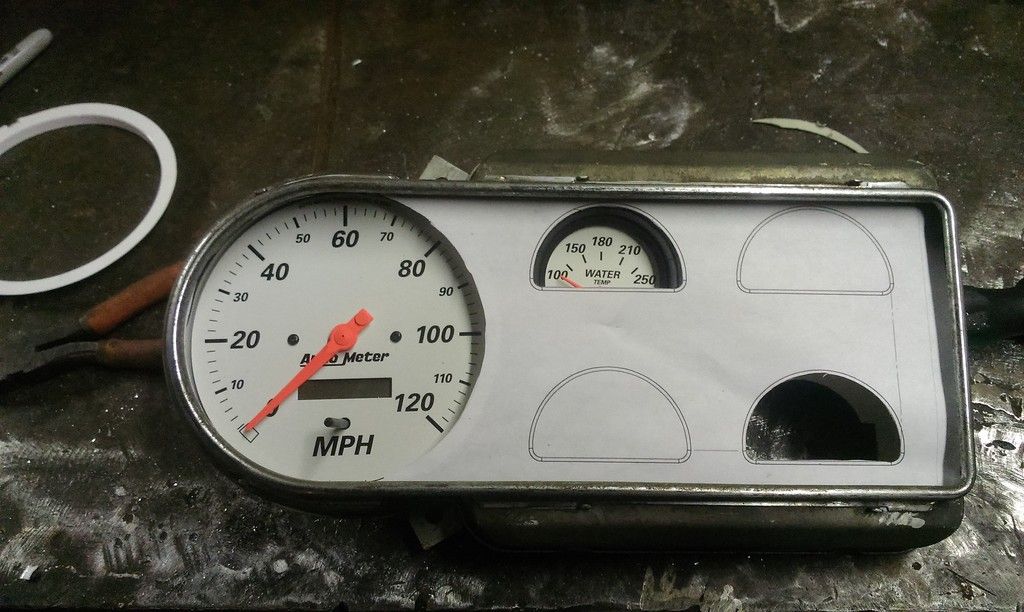
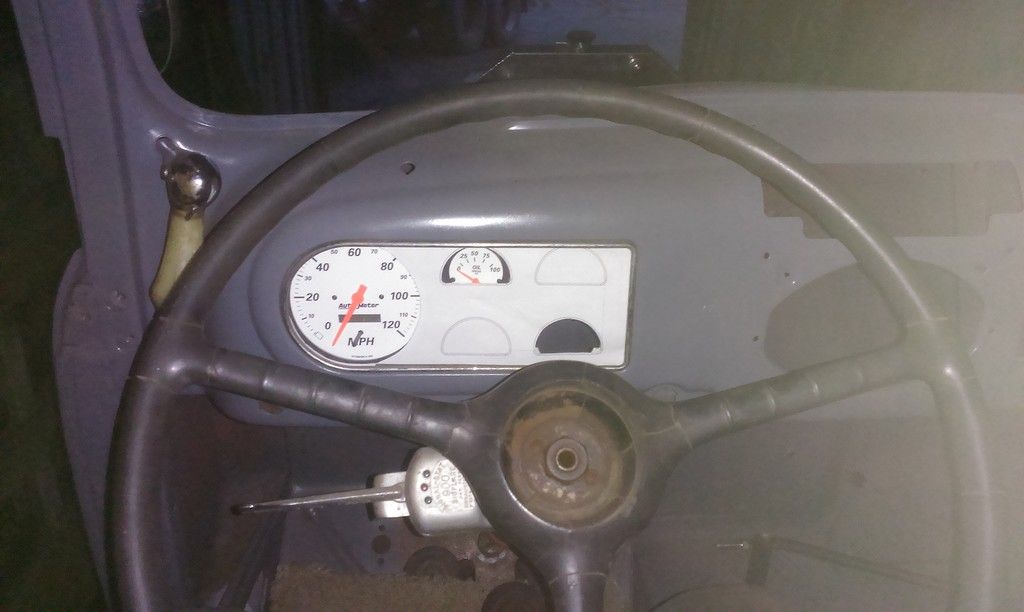
The new issue I have is that when the cluster is in the dash, you can't see the top tick marks. The two ideas I have for this are to cut down the gauge housing to bring the face out further. I could also try to angle the gauge to see it better. It is not too bad, so i might just leave it go.
I also have an idea to see the black ring better. When it is in the dash, you really can't see the cluster face on the left half of the speedometer. So I might just open up the right side of the speedometer hole to a larger diameter. I don't think it will look bad since the trim overs up most of the left side anyway.
Here are some pictures of how much I had to remove from the cluster.


Here is the gauge in the cluster.

I came up with a way to locate the trim ring. I opened up the front of the cluster so that the ring fit tight in it. That way the ring is centered on the gauge.


I painted the ring black in this picture. Can't see it too well though.

The new issue I have is that when the cluster is in the dash, you can't see the top tick marks. The two ideas I have for this are to cut down the gauge housing to bring the face out further. I could also try to angle the gauge to see it better. It is not too bad, so i might just leave it go.
I also have an idea to see the black ring better. When it is in the dash, you really can't see the cluster face on the left half of the speedometer. So I might just open up the right side of the speedometer hole to a larger diameter. I don't think it will look bad since the trim overs up most of the left side anyway.

 . Seriously, that is looking really good
  !
!
#49
12-31-2015, 06:09 PM
I think I would explore a cone shaped bezel, same outer diameter as opening and tapering in to meet the hash marks of the speedo. To me, the blank white space beween the hash marks and the border looks odd/vacant. You could trim the face to lower it in the bezel, and then be able to see the hashes all the way up, but then you'd have to come up with a way to fill the vacancy you've created at the top.
Cool is rarely easy... ;-)
Cool is rarely easy... ;-)
#50
12-31-2015, 08:20 PM
I think I would explore a cone shaped bezel, same outer diameter as opening and tapering in to meet the hash marks of the speedo. To me, the blank white space beween the hash marks and the border looks odd/vacant. You could trim the face to lower it in the bezel, and then be able to see the hashes all the way up, but then you'd have to come up with a way to fill the vacancy you've created at the top.
Cool is rarely easy... ;-)
Cool is rarely easy... ;-)
#52
01-01-2016, 04:15 AM

#53
01-03-2016, 08:46 PM
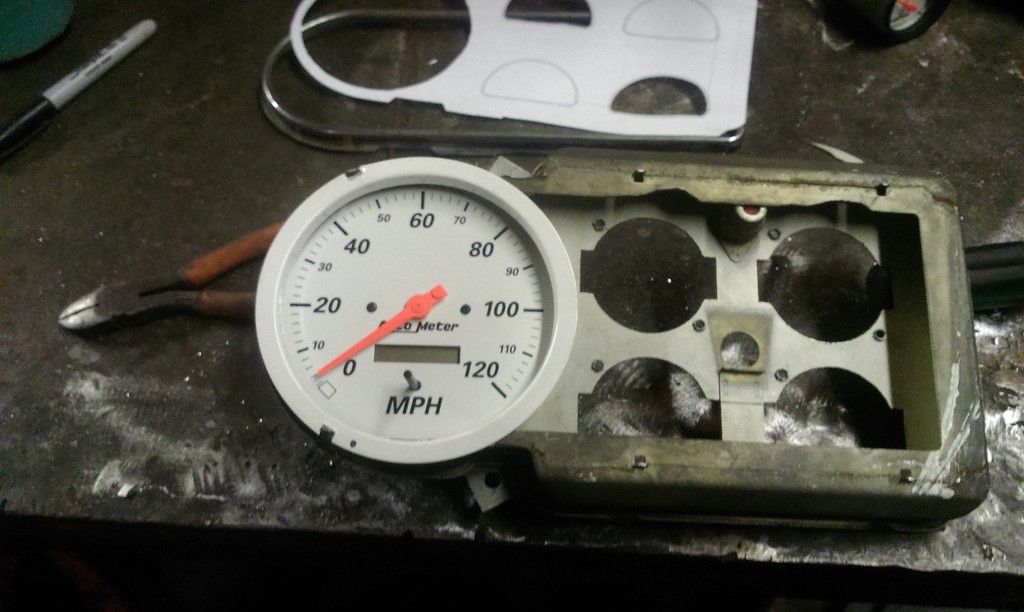
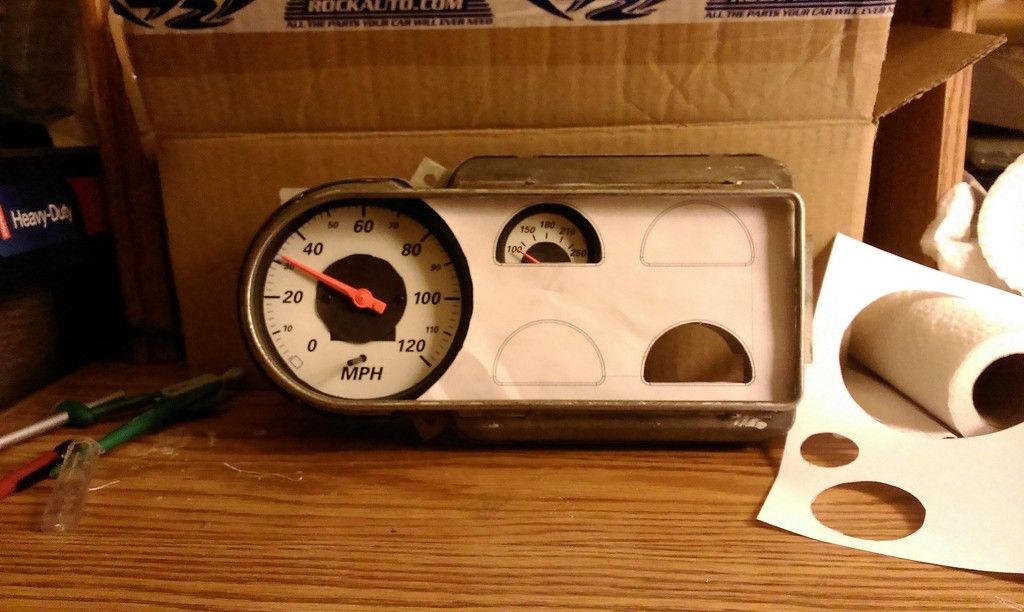
I did a little bit of experimenting with some paper. I made little black circles to go in the center of the gauges to add a little more black to the gauges. On the speedometer, I also added a black ring around the outside of the tick marks to cover some more white. I also tried what I said earlier about cutting the speedometer hole bigger and cutting the left half off. I think all of these changes were a good improvement. The newly cut speedometer hole is quite concentric to the trim ring, but I did this free hand and will be able to get it perfect in my CAD sketch. What do you guys think?

#55
01-04-2016, 12:26 AM

#56
01-04-2016, 06:20 AM
That is a good idea! Not sure what the bed way to do that would be. I could maybe use the 3d printer at school and have everything that would be painted black slightly raised to define the letters and tickmarks. I would have to check on how thin the 3d printer can print and if the resolution would be high enough for the small numbers. I could also maybe get a stencil laser cut at my old high school to paint the face, or maybe just be extremely carefull with an exact Ln fe to cut a stencil out.
#57
01-04-2016, 02:17 PM
Great ideas... I was just trying to think of a way to fix the problem of not being able to see the gauge. Also what about contacting AutoMeter and see if they have an unfinished gauge face for that speedo that you can use to make yours? Explain what your doing and why, seeing if they will help ya. Maybe they can paint it white and add their label on it and you make the stencil for the ticks and numbers. That way the mounting holes, window and the programing hole is already there.
#58
01-04-2016, 05:47 PM

Looks good. I like the look with the added black pieces.
I seem to recall an article or a thread (not sure if it was from this site or not) about redoing gauge faces. It seems like people were able to print off the new gauge face on decal sheets on a standard printer. Or you might ask a sign company or an industrial printer if its something they could do
Looks great, keep after it. You are going to have a very unique cluster
Bobby
#59
01-07-2016, 07:09 PM

#60
01-10-2016, 08:45 PM
I did a little bit a research after Bobby suggested getting the face printed and stumbled on this thread from another forum.
Making Custom Gauge Faces - Tutorials & How To Guides - Mazda626 Forums
They are basically using transparency sheets and printing them on an ink jet printer. I would not need to do as many layers as they are, since my gauge light come around the edge of the gauge face rather than through the number as ticks. I might attempt this and I am even thing about making a cover to go over the original rectangular gauge faces for an even closer to stock look. That will take a lot of work though, since I would need to figure out the exact angle of each tick mark, and transfer them to a straight line, rather than the arc of the autometer gauges. I'm gonna see if I can find a program that will allow me to do that and see what I can come up with.