When you click on links to various merchants on this site and make a purchase, this can result in this site earning a commission. Affiliate programs and affiliations include, but are not limited to, the eBay Partner Network.
I know self sufficiency is important, but when it comes to rebuilding the differential, would this be better left to a real mechanic with a real shop and not this shade tree wannabe mechanic?
I read through some instructions at: Ford 9 Inch Rebuild/Gear Setup | Ford Trucks
It does take some effort, but I believe you can do it. There are many articles on building and assembling Ford 9" rear ends. The hardest thing is setting the backlash on the gears, and there are tricks that help doing that too. If you do a search on the forum in either the bump (67 - 72) or dent (73 - 79) section there will be a multitude or references for you to use. At least try and do it yourself, and if you can't then go to the Pro.
If the differential is truly a '64 model component, it would be an Equa-lok. Traction-Lok debuted in 1969. However, the '69 Traction-Lok is the worst year to have due to 4 large holes on the left half of the differential casting. These are prone to crack between the holes causing the left differential bearing to separate from the rest of the differential. The Traction-Lok differential was revised in 1970 (up) so that the left side was a solid casting (no more large holes on that side). On the outside, the Equa-Lok differential has a rather rough looking casting, compared to a '70-'86 Traction-Lok differential casting, which has a machined surface on the ring gear bolt head side. The '69 Traction-Lok also has a fairly rough casting but, the 4 large holes on the left half make it easy to spot that it's a '69 Traction-Lok differential and not a '68 and earlier Equa-Lok. In link below are two Traction-Lok 3rd members. The one on the left is a '69 version (note 2 of the 4 holes showing near the ring gear bolt heads). '70-up Traction-Lok differential on right has a machined surface compared to '69 TL unit on left. Aside from the lack of holes, an Equa-Lok's rougher surface casting will look more like the '69 unit on the left. http://i1287.photobucket.com/albums/...ps6e68fd46.jpg Another '69 Traction-Lok showing the holes and the rather rough looking casting: Inside, an Equa-lok will have 3 friction discs and 5 ears or, tabs sticking out around the perimeter of those discs. If the differential halves were split open and you were looking down on top of it, the silhouette of the discs inside would look similar to the shape of a turtle. There's also a large conical (Belleville) spring that applies pressure to the clutches. Equa-Lok internals: http://www.kevinstang.com/elock3.jpg Inside a Traction-Lok, there are 4 clutch discs with four tabs around the perimeter and a square center block with 4 small coil springs and a stamped plate that applies pressure (no Belleville spring). 4 'tabs' on a Traction-Lok clutch disc/plate (Equa-Lok will have 5) : http://diyford.com/wp-content/uploads/2013/10/379.jpg The internal parts of the Traction-Lok can be seen here: http://www.ultrastang.com/ustang/Images/image/31-m.jpg '69 (4 hole) differential casting failure shown in following link. http://www.kevinstang.com/bn33.jpg
Ok so I finally got to take a look at it. Going off of all this, it's a trac loc, I believe a 1970 unit. I can make out what looks like a D00W number on the casting.
I think patience is key here. (HIO, how did that professor in your past word it. I remember he expressed it well) Getting the shims just right to create a good "pattern" on the gears take trial and error for us backyarders. Heck, there is one of us who installed some USED gears in the past few months. I don't remember who it was but he got a perfect pattern in them. THAT is extremelly rare and hard. Getting them "set-up" in a different rear end back to the same wear pattern. Phew.
Do it and take notes, I'm gonna be doing mine sometime soon.
After reviewing some of the documentation and talking to a co-worker who has done a few, I am not all that enthused about the prospects of rebuilding the differential.
Ok so I finally got to take a look at it. Going off of all this, it's a trac loc, I believe a 1970 unit. I can make out what looks like a D00W number on the casting.
An Equa-Lok differential only came with two pinion gears inside the differential. A Traction-Lok could have two or, a much stronger four pinion differential.
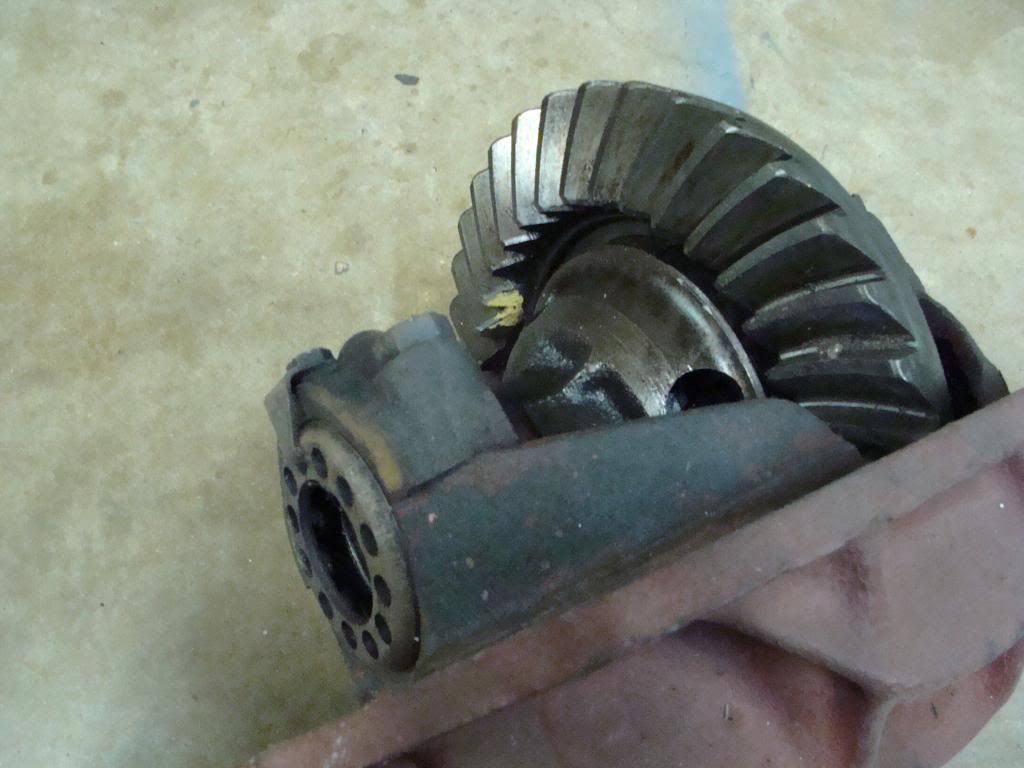
It's easy to tell how many pinion gears are inside by looking at the right half of the differential. If there is only one roll pin visible, It's a two pinion differential. If there are three roll pins visible, it's a four pinion differential.
In the following photo, you can see where I put 3 pieces of green tape on the teeth of the ring gear. Near those pieces of tape, you'll see the ends of 3 roll pins so, you can see that this differential is a 4 pinion unit.
A co-worker and I were chatting. He builds dragsters and race cars for fun. He could not fathom what I did that would make the differential non-functional and asked me how I concluded something was wrong.
I was down to just axles and the drum brake housing on both sides. I told him I turned, on the driver's side, the axle and noted that the drive shaft did not move.
Then I stuck the drum on the driver's side so I could see it turning and got under the truck and turned the drive shaft. Left side drum did not turn. I concluded I had screwed it up.
Since I had already removed the rear end, he said stick your axles back in and try turning both sides and also turn the yoke. Yep everything worked. Sems smooth, no grinding.
Did get the third member out of the housing today (made a mess of sorts).
Going to try to get everything cleaned up, repainted, put a new gasket on the housing and put the third member back on.
Pondering whether or not I am going to try to replace the pinion seal. Would like to get that leak fixed.
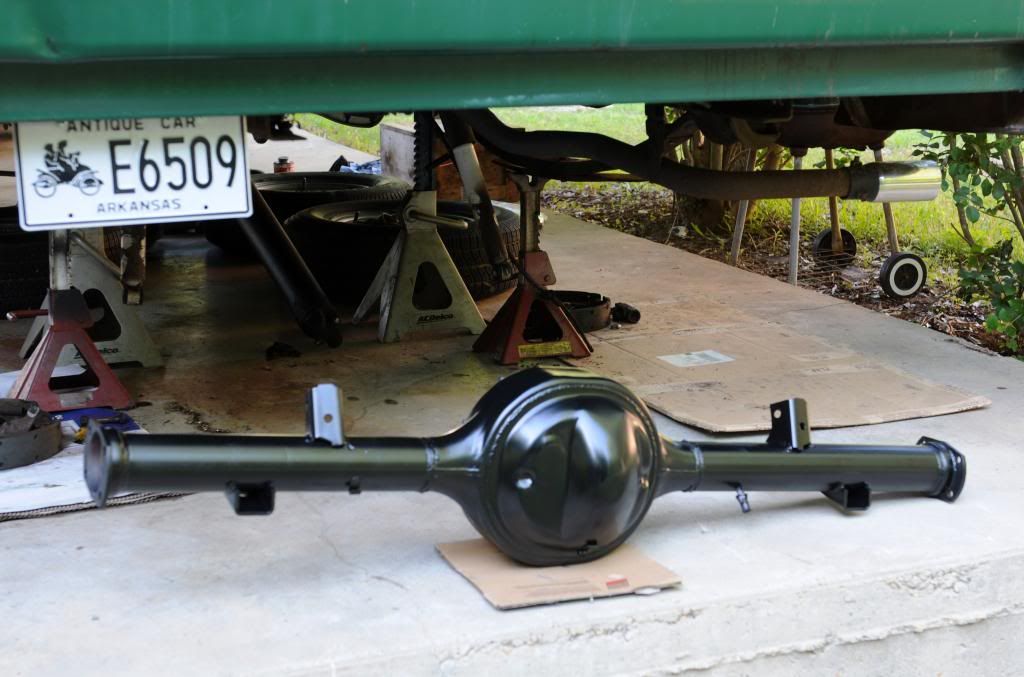
One dirty, grimey rear end housing.
Third member removed. Did not see any pieces in the housing. Gears turn smoothly.
Third member removed. Did not see any pieces in the housing. Gears turn smoothly.
Not much to say about it.
Not much to say, except that that thing looks like it's new from the factory - on the inside at least. Pretty amazing. I guess that's what it SHOULD look like, if it's been properly bathed in gear oil its whole life, but that's not what I would expect to see if I were taking apart a 40+ year old differential.
Don't forget those 3/8" I.D. copper washers under the carrier mount nuts. And yes, I would suggest changing the pinion seal now. If you don't have air for an Impact to get the yoke nut off take the 3rd member to a local shop. Have them handle it for ya.
Unless you are removing old driving pinion bearings/races to install new ones, NEVER use an impact on the driving pinion nut.
The rapid impacts can cause the roller bearing to chatter on the races which can brinnell the surfaces of rollers and the races (cause small pits on their surfaces).
The driving pinion nut will require a 1-1/16" socket to remove. Changing the seal is a fairly simple task, if you know what you're doing. The moment you loosen the nut, you will lose the driving pinion bearing preload settings. If you don't get the correct torque on the nut, after the seal has been changed, you can expect damage to the driving pinion bearings and the driving pinion and ring gears.
I'm not sure what the OP's rear end ratio is but, by the photo posted, I would guess it to be a 3.25. If that's so, and if by chance the driving pinion is going to be removed from the 3rd member case, they are non - hunting gears (in other words it's a 'timed' gear set). There are Hunting, Non-Hunting and Partial Non-Hunting gear sets. 'Hunting' means it's not a timed gear set and eventually all the teeth of the driving pinion will mesh with all the teeth of the ring gear. Non-Hunting means the gear set is timed and the same pinion gear teeth mesh with the same ring gear teeth.
The non-hunting driving pinion and ring gears were lapped together at the time of manufacture. If their timing is disturbed and put back together out of time, the gears will likely be noisy and they will wear at an accelerated rate. 3.25 and 3.50 ratios are non-hunting. A 3.70 ratio would be a hunting gear set (doesn't matter how a 3.70 ratio driving pinion and ring gear is assembled).
Look for the factory paint (timing) marks on the teeth of the gears. --one tooth of the driving pinion will have a paint mark that meshes in between two painted teeth on the ring gear. It is possible that over the years the paint has faded off but also a good chance they may still be there. If the driving pinion isn't going to be removed, no problem but, if it is, you will have to get the driving pinion and ring gear back into their proper timed position.
This is a 9-inch 3rd member I have with 3.25:1 gears. You can still see the factory timing paint marks on two of its ring gear teeth.
Thanks for the details on replacing that seal. At the moment I am inclined to leave it be and live with that leak and focus on getting it back together.
I will look and see if the timing mark is still there.
To that end, I started cleaning up and painting/priming rear end components this weekend.
I am of the opinion my rear end housing was repaired. The welds are not very attractive, primitive in my book.
I am painting the rear end housing gloss black and will paint the differential the red primer and seal with rattle can clear coat.
not a great picture. Have to sand down one area and repaint.
Third member in a bucket. Primer brought to attention some areas needing a little more scraping/sanding.
A co-worker suggested the red primer with clearcoat approach.
Welds on this rear end housing are primitive in my book making me think it was repaired at some point.
The rear end in my truck had a lot of weld dingle berries on it when I pulled it. I don't think it has ever had any repairs made to it. I think that's just the way it was from the factory. I doubt they had robotic welders back then. I took a chisel and knocked them off before I repainted the housing.
I painted my truck's 3rd member with red oxide primer and painted the driving pinion yoke with iron cast paint. My housing is painted in Ford semi-gloss black.
Well spent the week (after work) cleaning and painting the differential and rear end. Went ahead and put a coat on the drive shaft (it was primed with por 15) All has had two days to dry in warm weather.
Saturday, I tackle getting my truck back together.
Reassemble rear end (differential, axles);
Drill out vent for rear end;
position and hang rear end;
Build new brake lines for rear and install;
Install axle;
Install drum assembly;
Install drums and adjust shoes;
Install wheels and tires;
lower and put 2 quarts or so of 80-90 oil in differential.
May end up replacing the big u-bolts for the leaf springs. The brake lines will likely take the most time for me to fit.
Hope to be able to drive the ole truck by the end of the day.
On another good note. A couple of weeks ago I was told about a 71-71 F100 LB with v8 and A/c in a nearby town. Only has about 50K miles and has been mostly garage-kept (so the owner told me). Wants $3500 for it. I am about to get a little extra money and am thinking seriously about buying it and make it my daily so I can concentrat e more on getting the flareside up and going. Owner is not advertising it. So if it is still there, may take the plunge again.
This Hennessey Takes the Expedition Tremor's Off-Roading Capability to the Next Level
Slideshow: The VelociRaptor Expedition gains a lift, upgraded suspension, Brembo brakes, and trail-ready equipment while retaining the stock 440-horsepower EcoBoost V6.
Rezvani's Latest Post-Apocalyptic Monster Is a Ford F-150 Raptor Underneath
Slideshow: Called the Fortress, the 850-horsepower pickup combines Raptor underpinnings with military-inspired features, survival equipment, and a starting price of $285,000.