When you click on links to various merchants on this site and make a purchase, this can result in this site earning a commission. Affiliate programs and affiliations include, but are not limited to, the eBay Partner Network.
I saw this idea in another thread, but haven't been able to find it, so I thought I'd make my own.
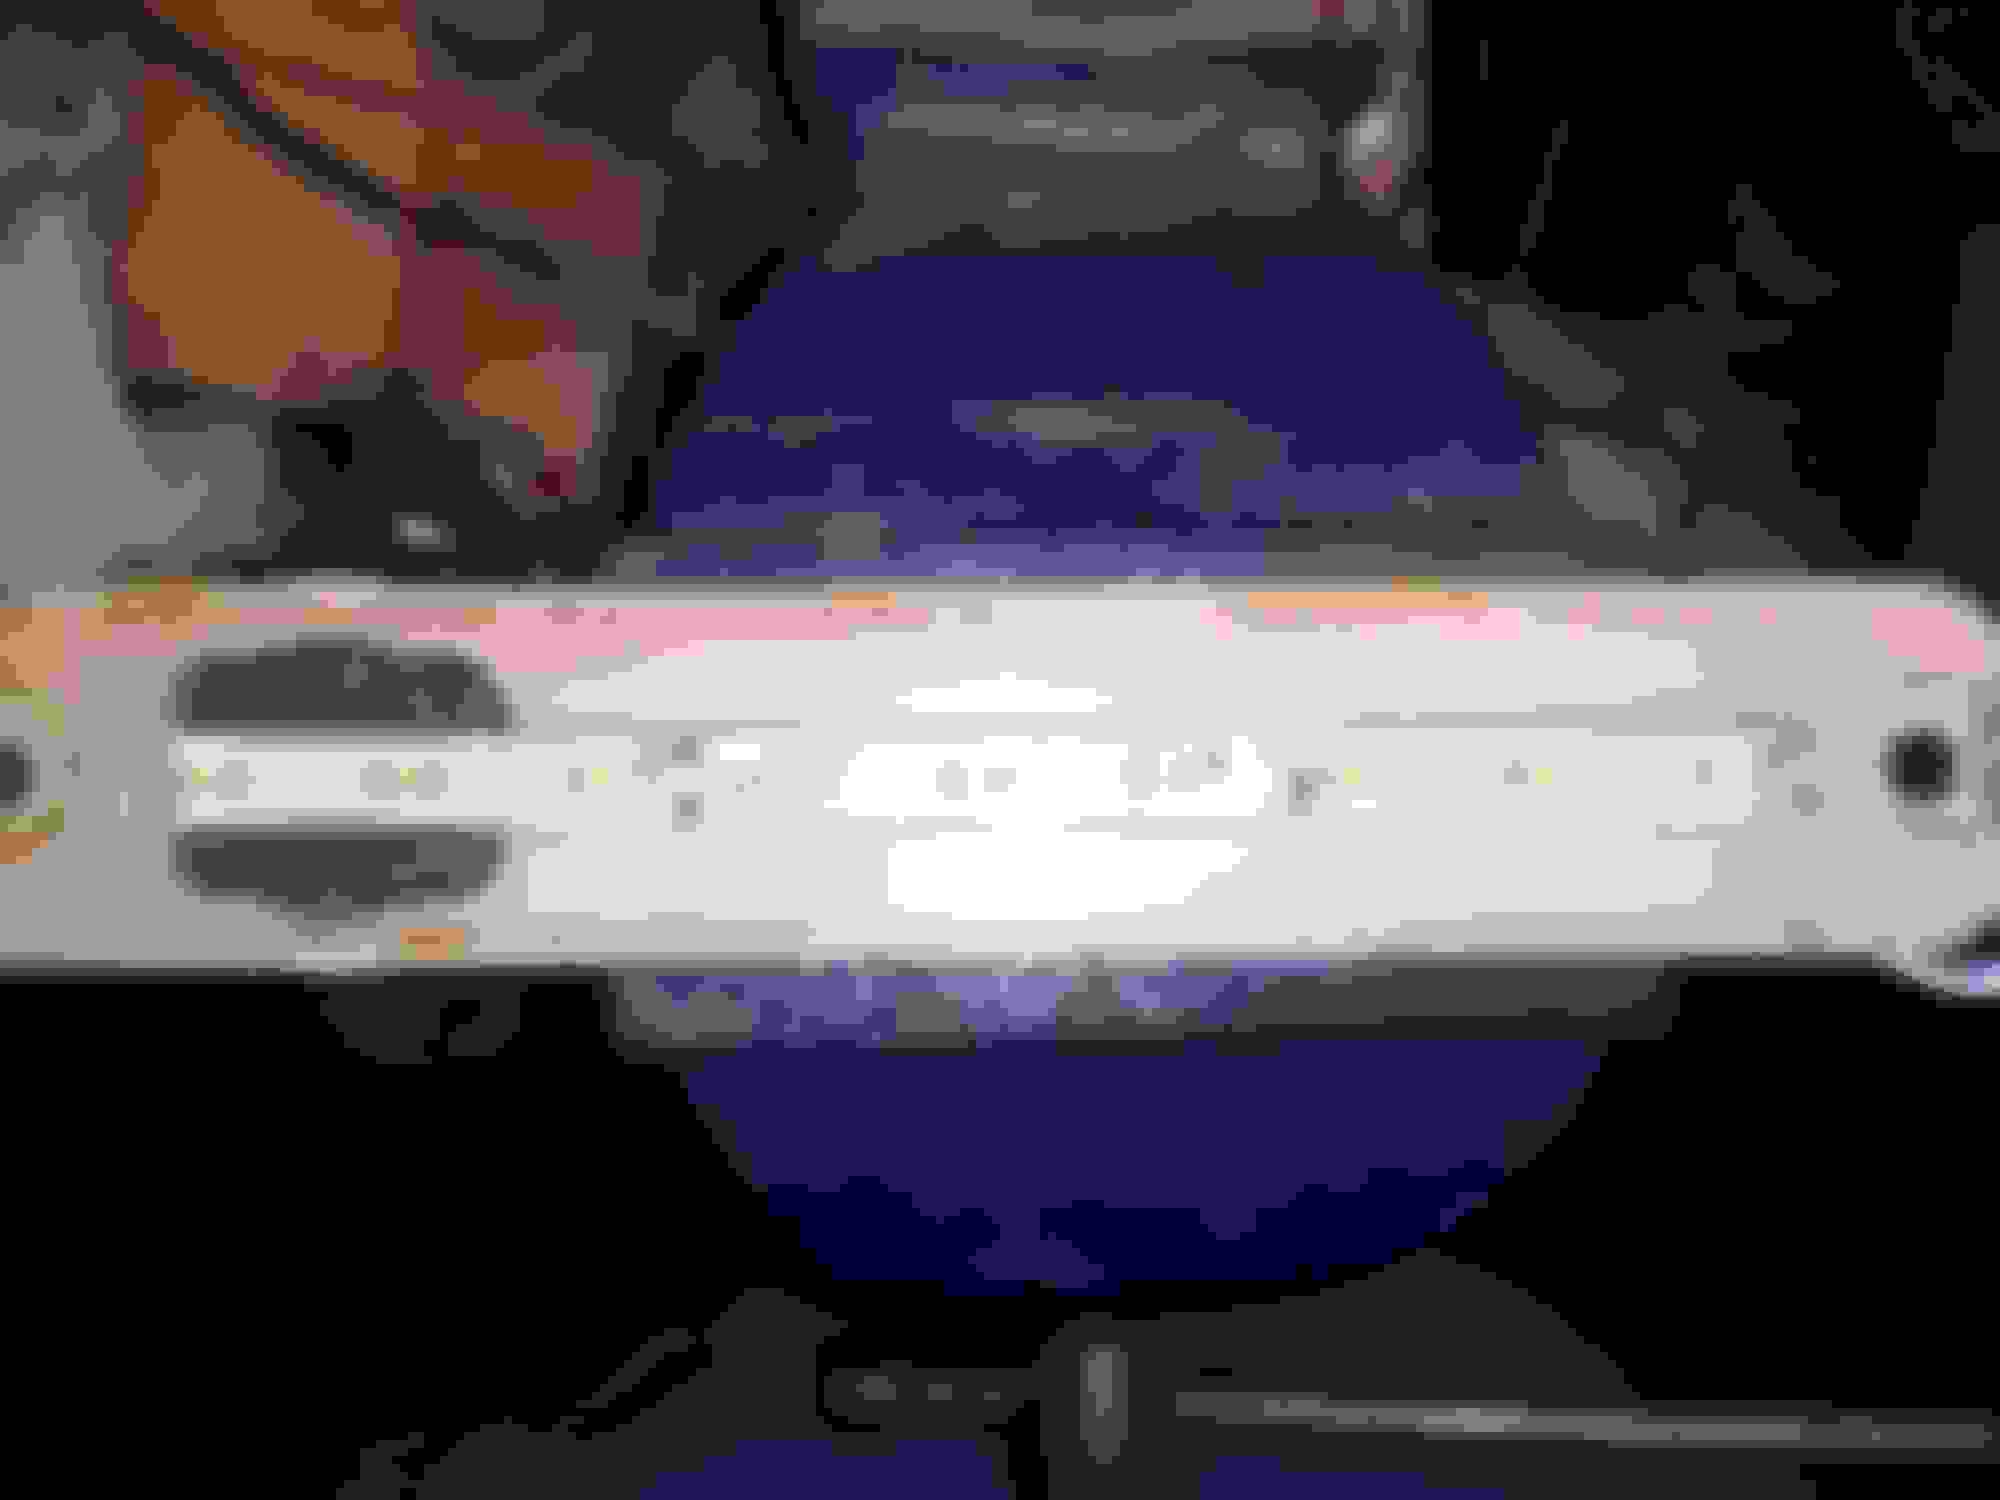
I started with the side markers from a parts truck I had. I picked up the led strips on ebay. The strips are the perfect size for the groove in side the housing. There is a thin divider between where the 194 bulb normally sits and the groove. I removed it with a file, as to avoid splintering the aging plastic. Then I filled the bulb cavity with a metal putty up to the level of the groove. I used some tape on the backside to keep it from oozing out. I trimmed the led strip to nine lights, which makes it a perfect fit with the ends bent up a little. I tested the strip prior to putting it in, to make sure I could power it from the middle of the strip. For the connections, I drilled small holes through the copper contacts, all the way through the housing. I enlarged the holes on the backside to allow the wire insulation to fit. Then it's just a simple solder job.
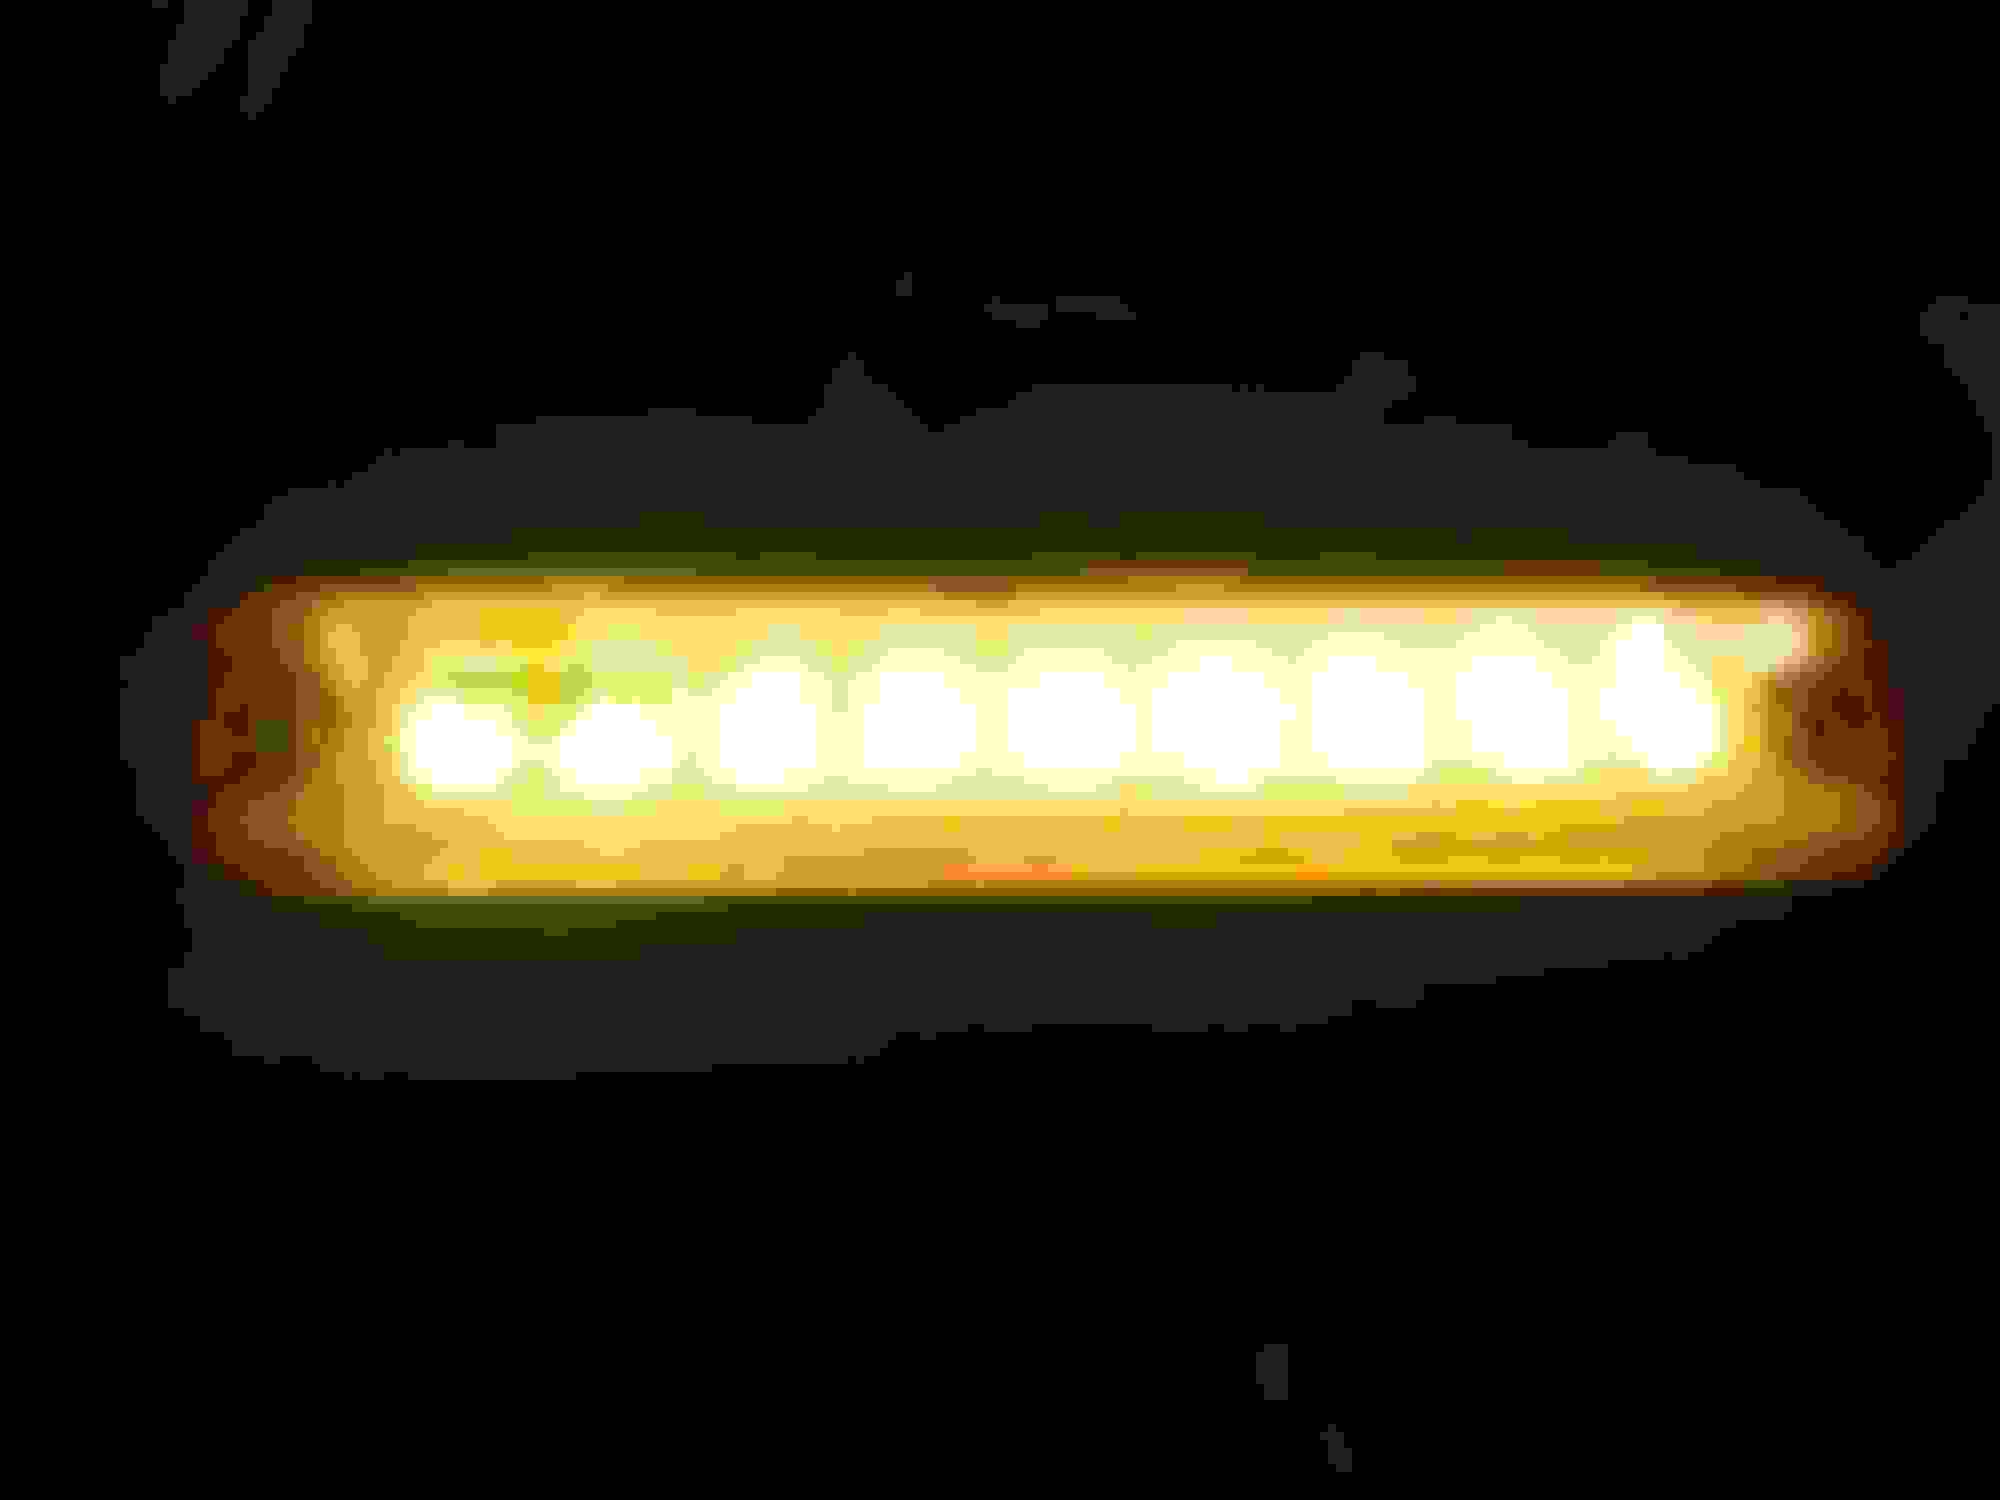
Man are these suckers bright! This is actually part of a full led conversion, coupled with relocating my battery and hiding all under-hood wiring. I plan on posting a thread on this process in the near future also.
It was probably my build thread, I like how you expanded upon the idea and made the strips go all the way across. I'll be doing that when I redo mine, since I got new housings.
Nice work on the lights. I will be looking forward to your battery relocating as well. I would like to relocate mine under the truck so will be keeping an eye out for where you end up with yours.
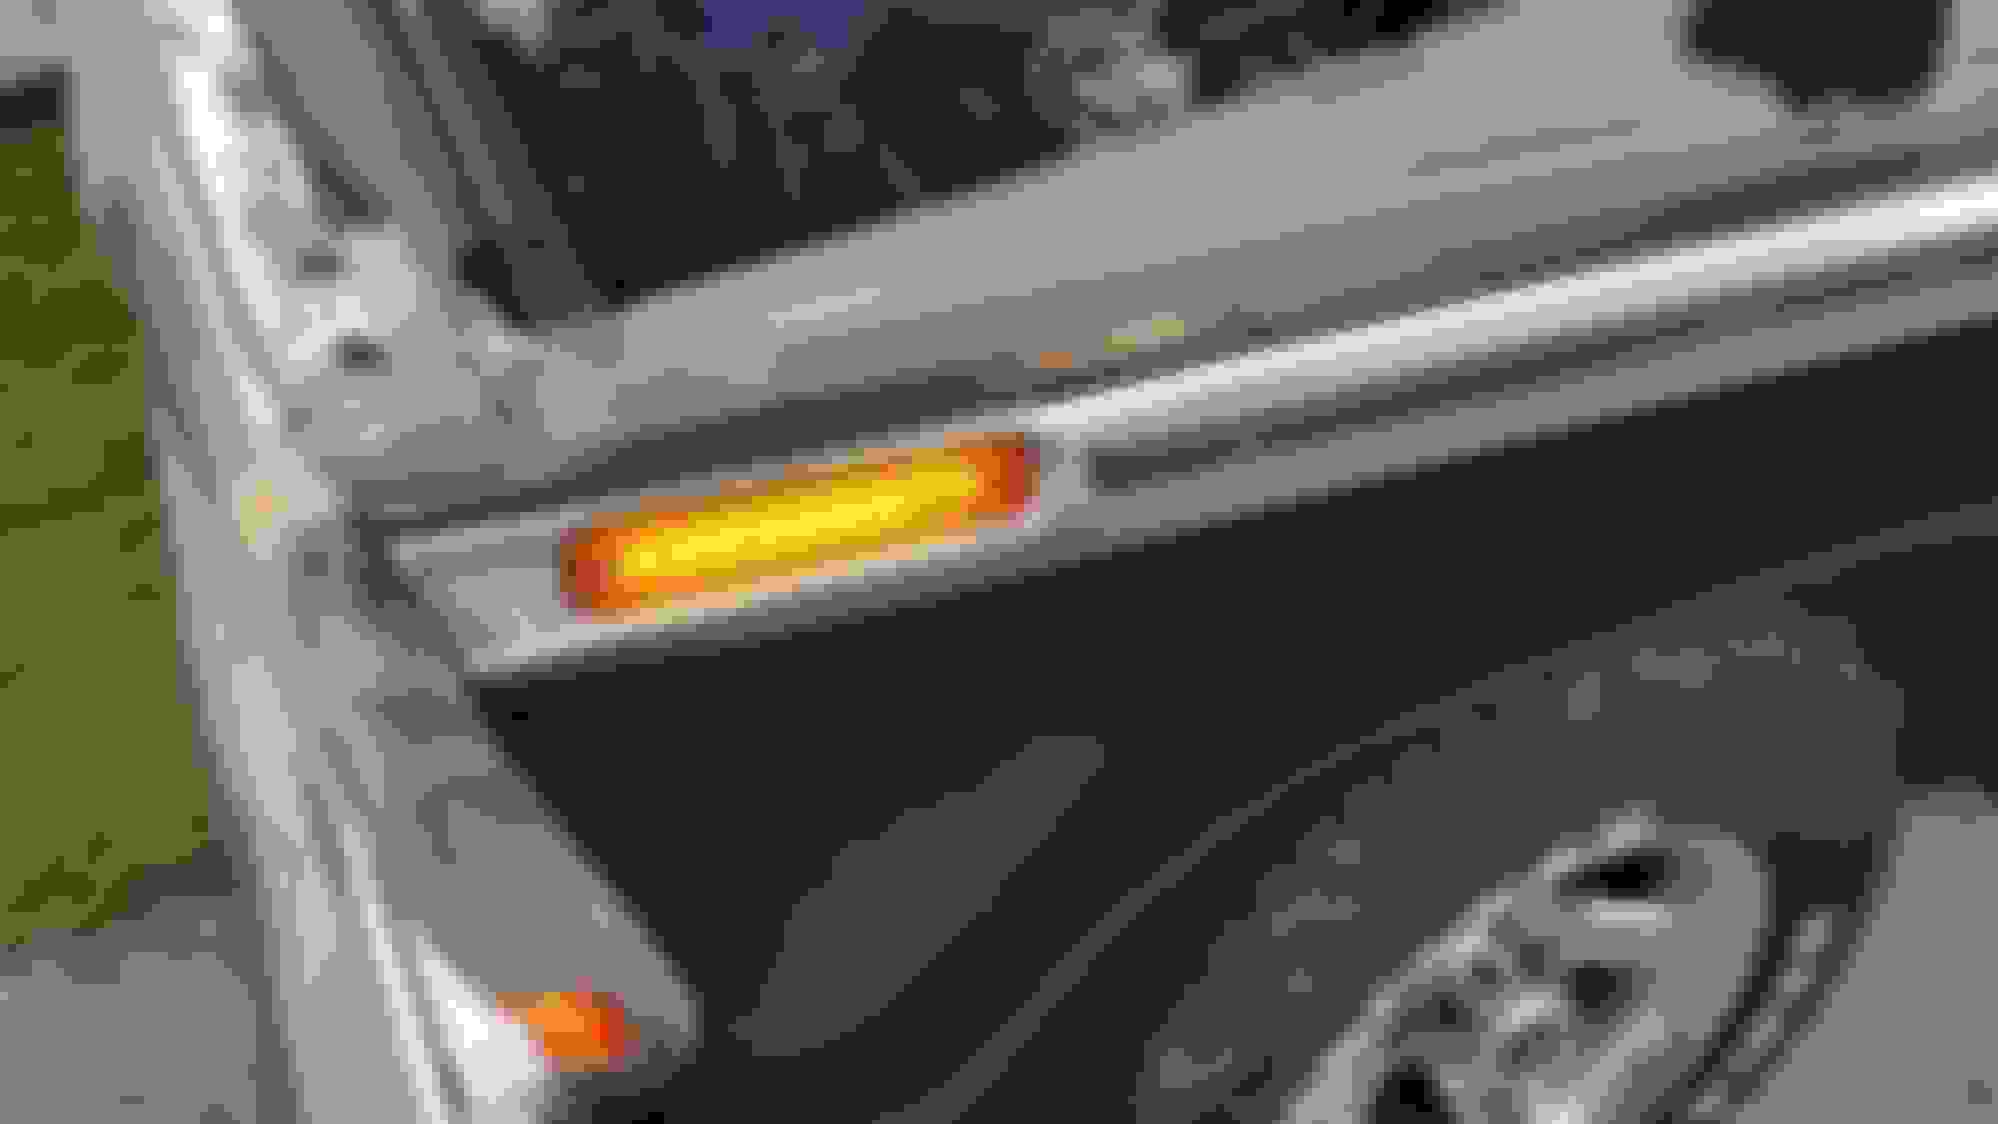
I finally got around to installing my side markers today.
My truck's wiring is really unmolested, so I didn't want to use wire taps or cut the original sockets off. My solution was to replicate the base of the 194 bulb. I used a piece of plastic the right thickness, trimmed to the same width as a 194. Then I stripped enough insulation from the wires to wrap around the plastic piece, just like the wires do on the 194. I tinned the bare wires before feeding them through holes drilled in the plastic pieces, and wrapped one from the front, the other from the back. Then it just slips into the socket exactly like the 194 bulb does. I probably should go back and take a pic for clarity on these, but anyway, here's the finished product...
Those turned out great. I got some strip lights too but been having a heck of a time making a good connection to the strip. I got some of those clamp on pigtails but they don't fit worth a flip. I'll be looking forward to some detail pictures if you decide to pull one out for a photo shoot.
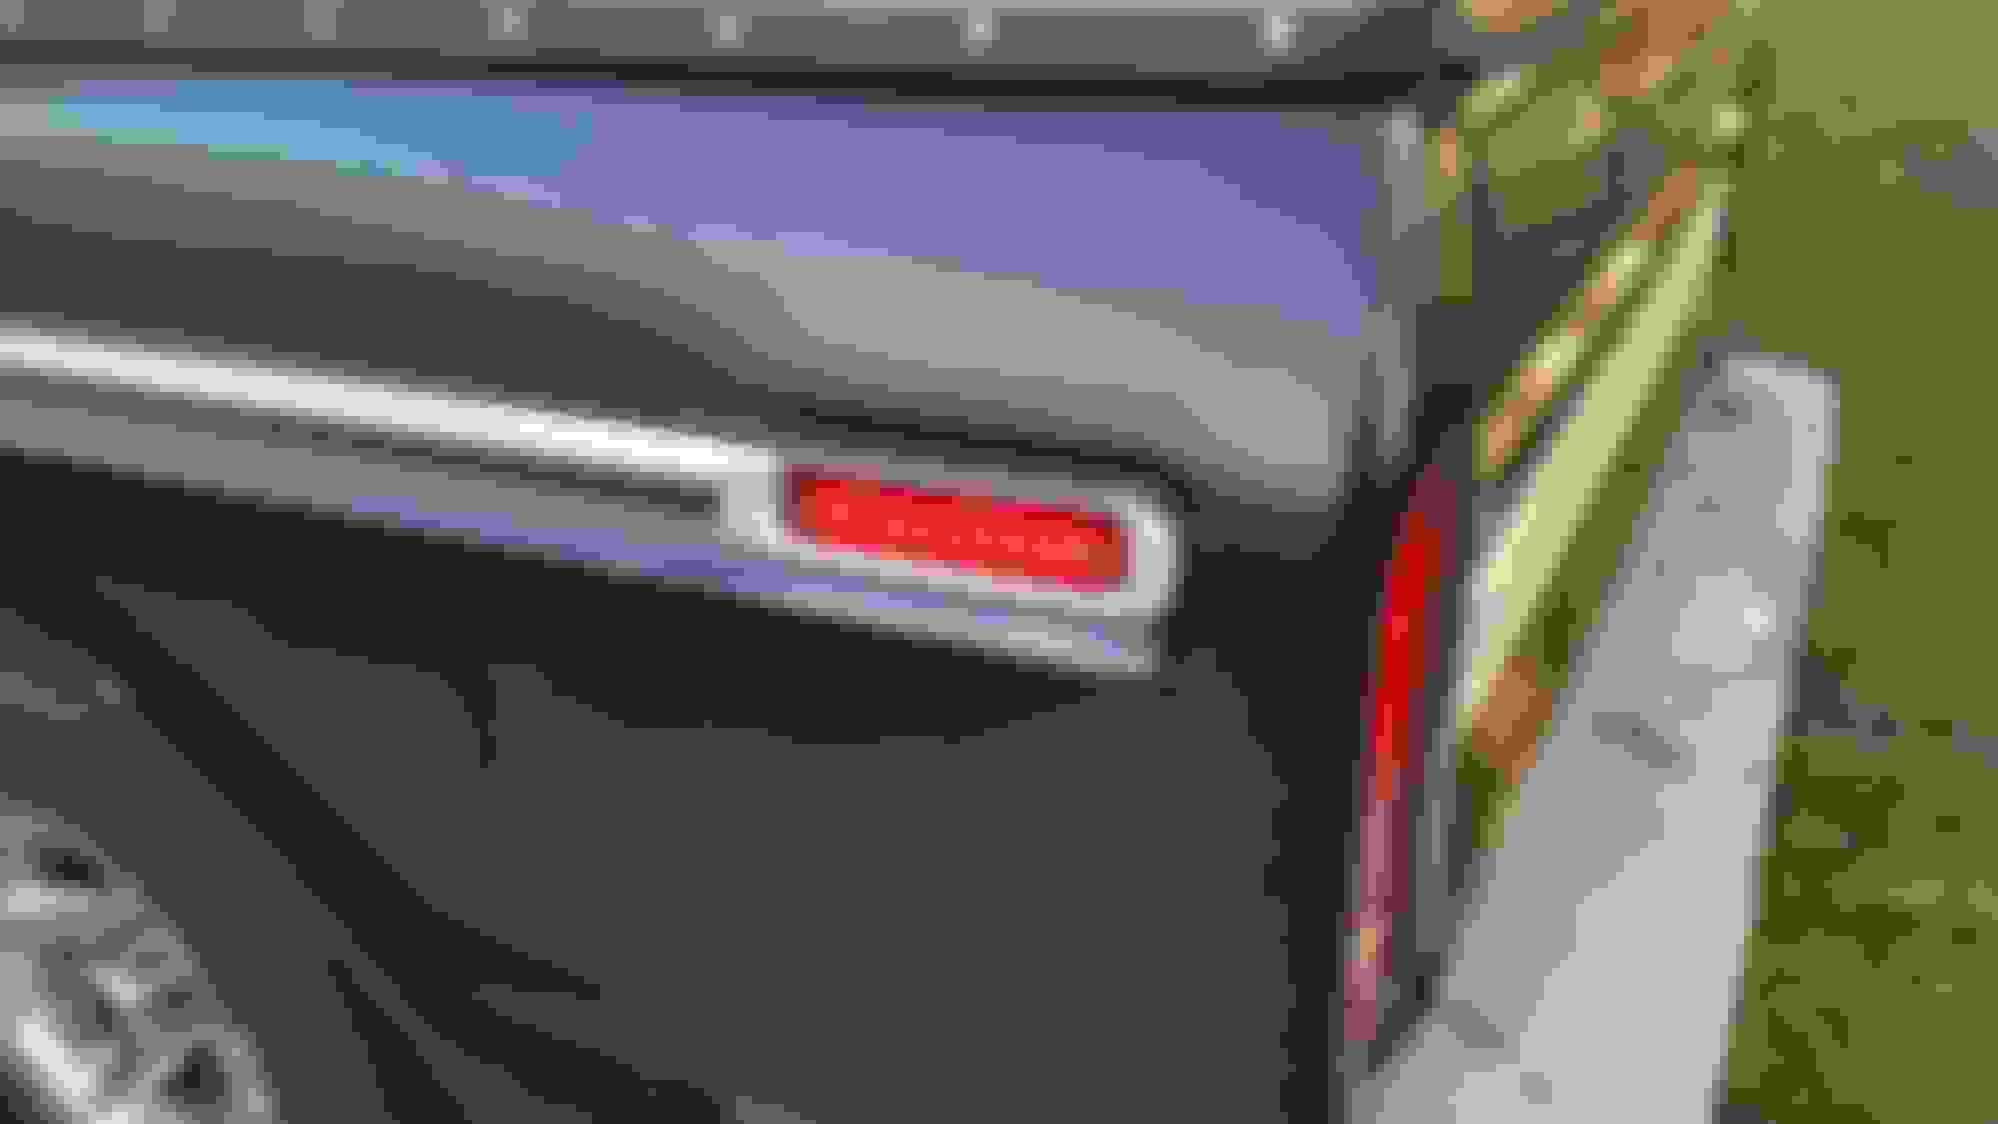
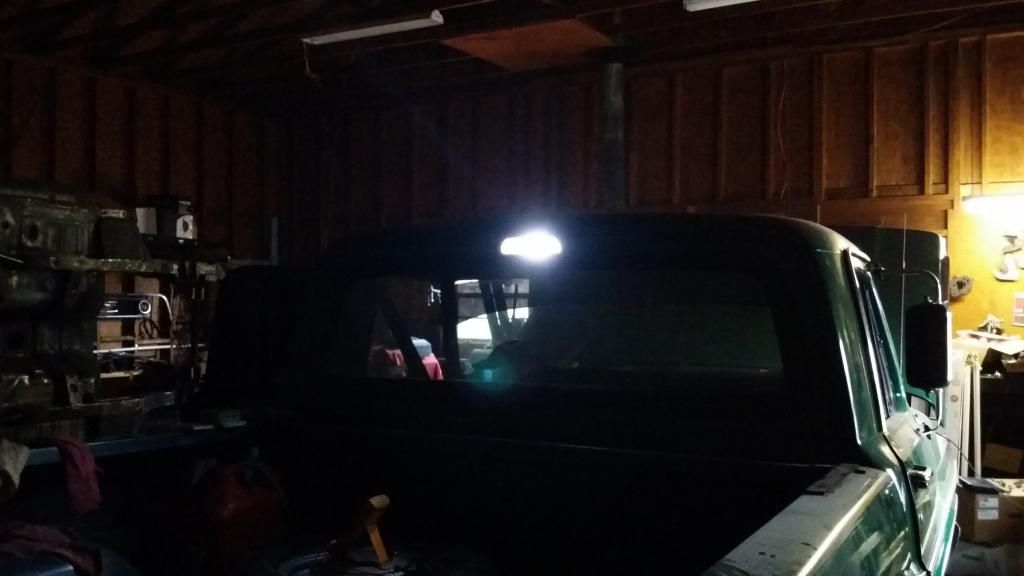
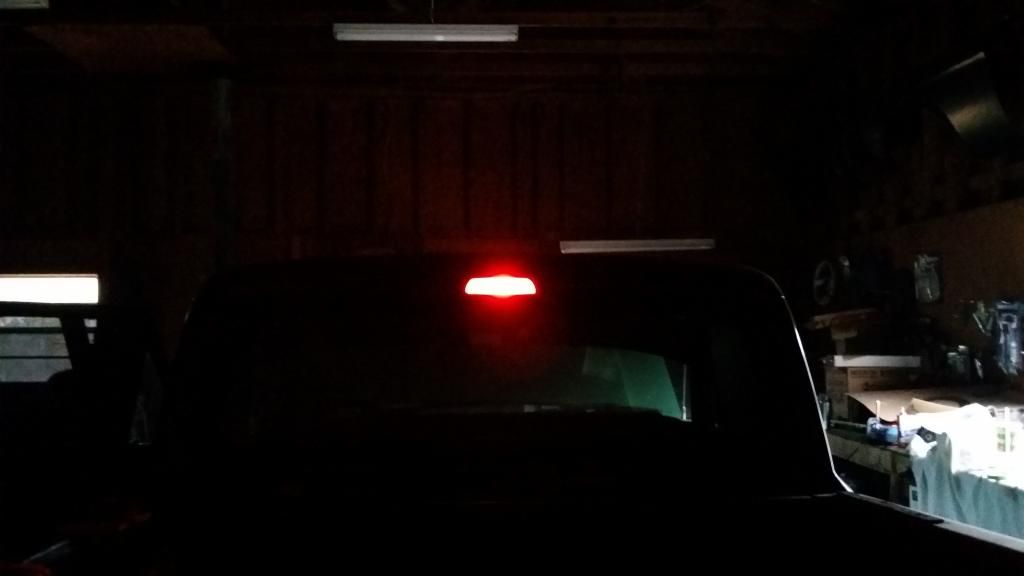
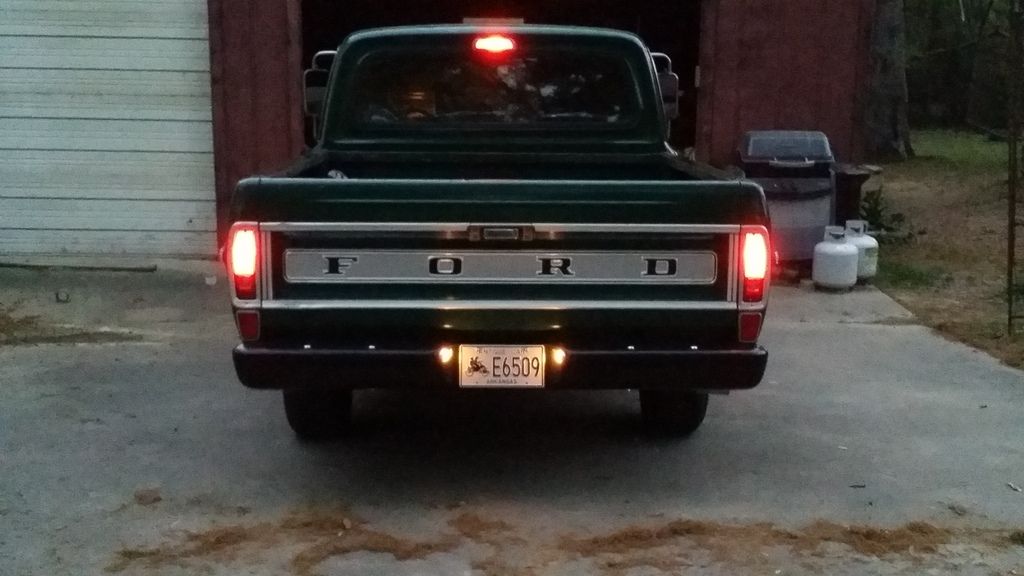
I removed the single filament socket from the cargo light on my '69 F100, replaced it with an 1157 socket and installed a white/red switch back LED.
The cargo light still functions as a cargo light when the **** on the dash is pulled out but, when I step on the brake pedal the cargo light doubles a high mount 3rd brake light.
This Hennessey Takes the Expedition Tremor's Off-Roading Capability to the Next Level
Slideshow: The VelociRaptor Expedition gains a lift, upgraded suspension, Brembo brakes, and trail-ready equipment while retaining the stock 440-horsepower EcoBoost V6.
Rezvani's Latest Post-Apocalyptic Monster Is a Ford F-150 Raptor Underneath
Slideshow: Called the Fortress, the 850-horsepower pickup combines Raptor underpinnings with military-inspired features, survival equipment, and a starting price of $285,000.