


HellRaiser Build Thread (1946 Pickup)
Thread Starter
|
Cross-Country


Joined: Aug 2012
Posts: 52
Likes: 0
From: Grand Junction, CO
Box
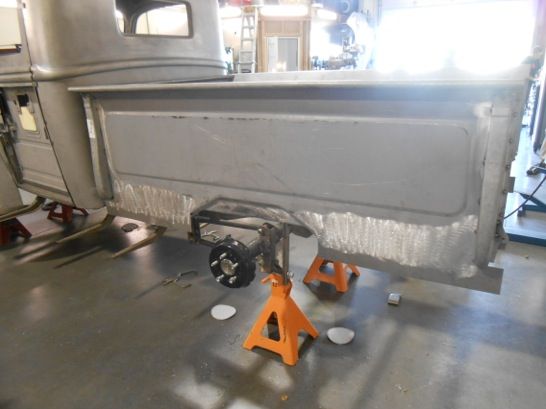
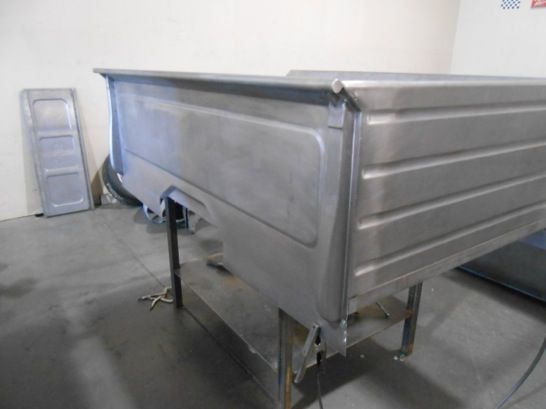
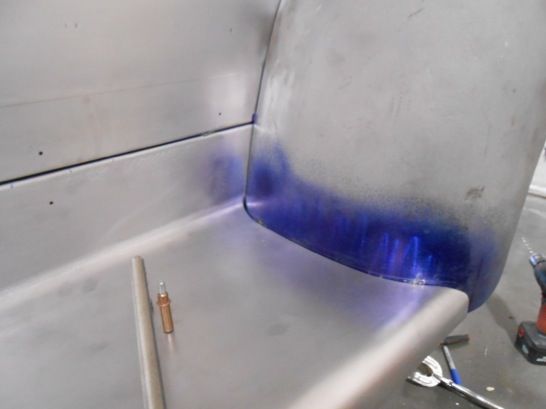
The original bed couldn't be used, it take hundreds of hours in labor. Mack Hills Truck beds!!! They are the very best in my opinion. Ordered mine unassembled without the stake pocket holes. They use original Ford Stampings too. The original bed was riveted together. We plug welded and fully welded the seams. We also cut the flanges off the stake pockets and welded those on too to smooth it all out. The lower bed sides were also welded to the bed. My favorite mod is how the bed now lines up perfectly to the bottom of the cab corners! Also raised the bed 1" so it sits higher and matches the door ridges when looking from an angle.

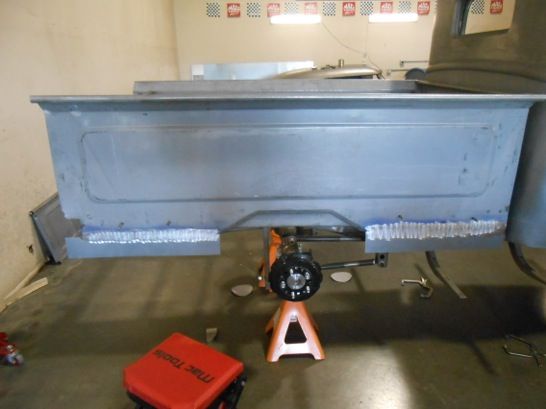
Lower Bed Sides Welded to Bed
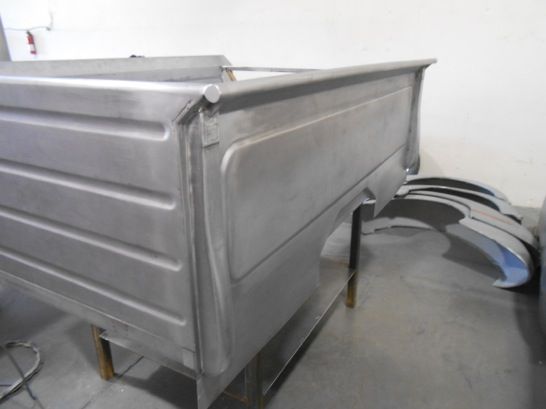
Bed Welded together, Plated Bed Rolls
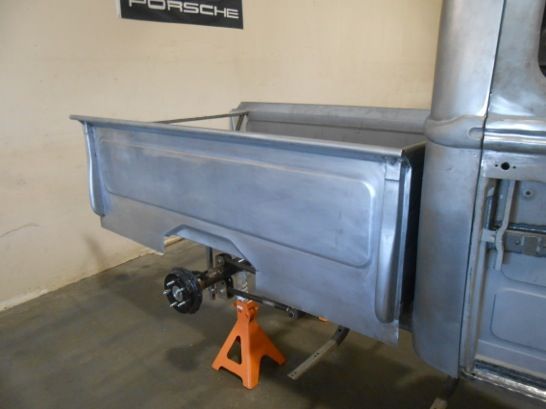
Bottom of the Bed now matches the Lower Cab Corners for an ultra clean look!


Lower Bed Sides Welded to Bed


Bed Welded together, Plated Bed Rolls


Bottom of the Bed now matches the Lower Cab Corners for an ultra clean look!
Thread Starter
|
Cross-Country
Joined: Aug 2012
Posts: 52
Likes: 0
From: Grand Junction, CO
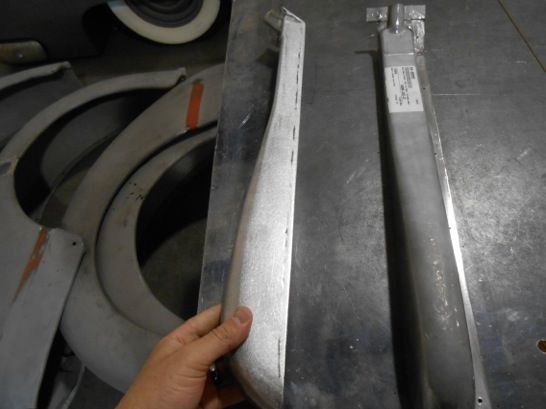
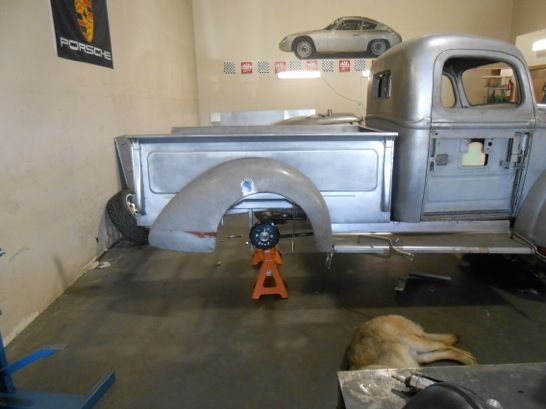
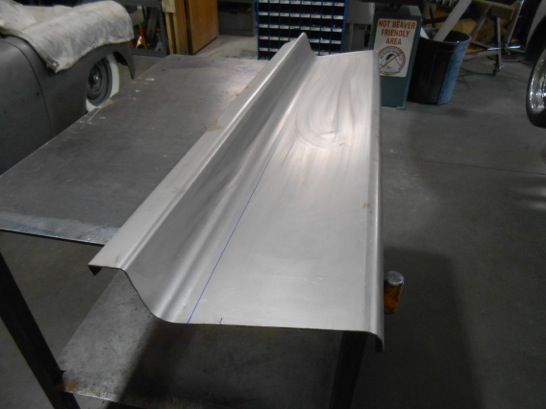
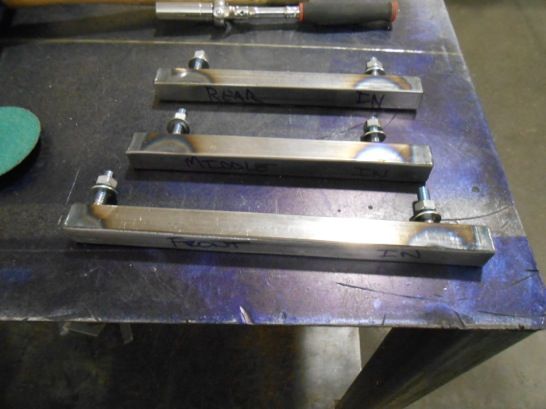
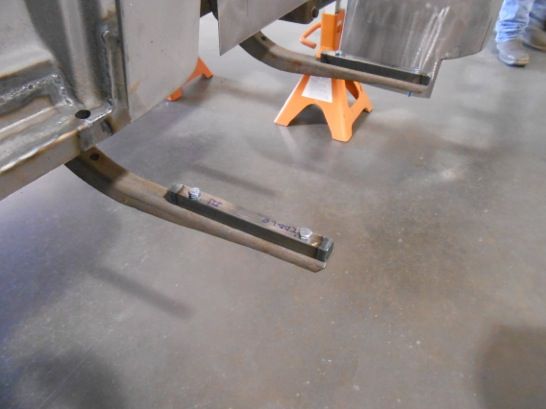
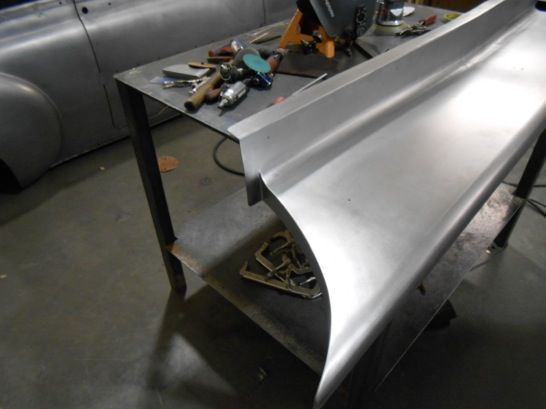
Running Boards
Since were smoothing all of the truck we mounted studs on the underside of the boards so you don't see any Bolt Heads up top. We also flushed them to the side of the bed so they're not stepped in like original. Much cleaner body line!
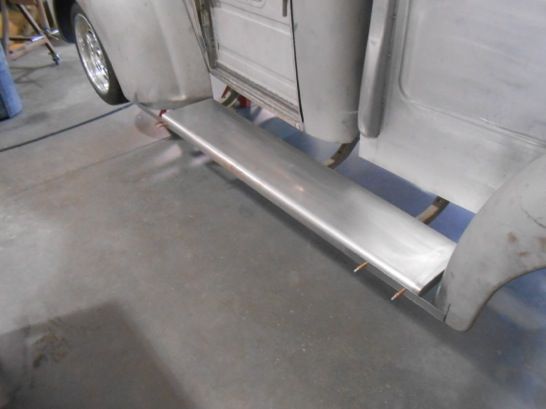
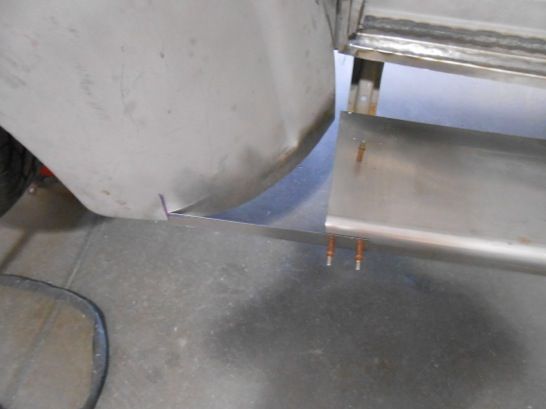
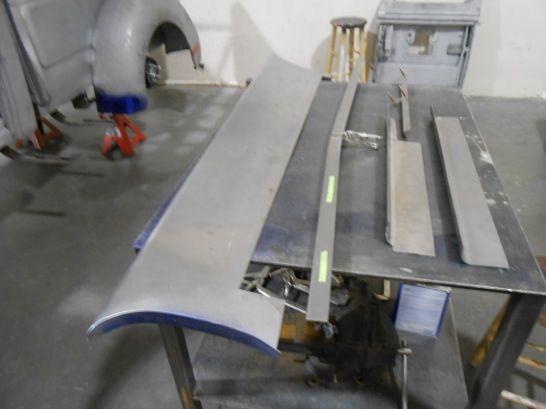
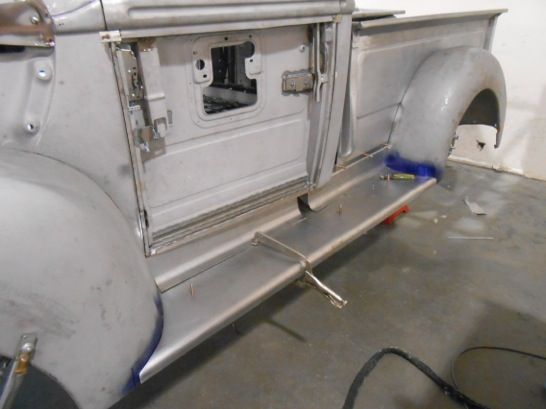
Flushed to the Bed Sides


Flushed to the Bed Sides
Thread Starter
|
Cross-Country
Joined: Aug 2012
Posts: 52
Likes: 0
From: Grand Junction, CO
I'm unsure what you mean Sir. I see all of them still!
Thread Starter
|
Cross-Country
Joined: Aug 2012
Posts: 52
Likes: 0
From: Grand Junction, CO
I really love how it sits lowered on a Mustang II IFS. I know I cited Progressive Automotive but, the customer service and tech support is top notch! Good luck on the build do you have a link?
Thread Starter
|
Cross-Country
Joined: Aug 2012
Posts: 52
Likes: 0
From: Grand Junction, CO
Chris, Love your build man!!! Been eagerly waiting for more updates!
Thread Starter
|
Cross-Country
Joined: Aug 2012
Posts: 52
Likes: 0
From: Grand Junction, CO
I had several duplicates in my photobucket. In the process of fixing ASAP!
FTE Stories
Ford Trucks for Ford Truck Enthusiasts

10 Things Every Truck Owner NEEDS (2026 Edition)
Michael S. Palmer
Rezvani's Latest Post-Apocalyptic Monster Is a Ford F-150 Raptor Underneath
Verdad Gallardo
Top 10 Most Expensive Ford Trucks Ever Sold on Bring a Trailer
Joe Kucinski
2027 Ford Super Duty Buyer's Guide (Every Model, Engine, & Package)
Brett Foote
Top 10 Ford Truck Tragedies
Joe Kucinski
AEV FXL Super Duty - the Super Duty Raptor Ford Doesn't Make
Brett Foote
Lobo Vs Lobo: Proof the F-150 Lobo Should Be Even Lower!
Michael S. Palmer
Ford's 2001 Explorer Sportsman Concept Looks For a New Home
Verdad Gallardo
10 Best Ford Truck Engines We Miss the Most!
Joe KucinskiThread Starter
|
Cross-Country
Joined: Aug 2012
Posts: 52
Likes: 0
From: Grand Junction, CO

Well you asked for it!!! Here you go


Thread Starter
|
Cross-Country
Joined: Aug 2012
Posts: 52
Likes: 0
From: Grand Junction, CO
Radiator Shroud/Hood Latch

Stock. Not mine but, a good example of how much it sticks up and an eyesore!

Fitment

Ready to weld to make a totally 1 piece front end

Baby Smooth

Ordered a Latch Kit from Watson Street Works. Cable operated. I'll unlatch the hood via a Lokar Release handle inside the cab. We will mount that where the original Vent Handle went.

New User
Joined: Jul 2014
Posts: 5
Likes: 0
Hi, great work your doing there, can't wait for the next instalment!
I have a complete newbie question.. I just wondered why you cut in a new panel for the roof seam instead of just filling in like you done on the front panel/wings seam?
Russ
I have a complete newbie question.. I just wondered why you cut in a new panel for the roof seam instead of just filling in like you done on the front panel/wings seam?
Russ
Thread Starter
|
Cross-Country
Joined: Aug 2012
Posts: 52
Likes: 0
From: Grand Junction, CO
"There are no dumb questions just dumb answers" I originally thought the same just weld the cab seam together. The cab is actually 2 stampings. you can see the top seam in the back of the roof line and all the way into the hood hinge area. To answer your question if you really look closely from the side at the rear seam its offset by as much as 1/4"- 3/8". So even welding it it would still be uneven and mismatched. Requiring quite a bit of bondo work. Our cabs also flex, since they're mounted on wooden blocks. Over time that plastic filler would crack and ruin a good paint job. Hope that answers your question.