


Cracked dashpad recovering tutorial/ How-to...
Thread Starter
|
Senior User
Joined: Jun 2013
Posts: 107
Likes: 9
From: Valley Mills, TX
Well about a month or so I ago was looking around the forum looking for -little walk-through tutorial/how-to on recovering the often ill-fated dashpad in our trucks after many failed trips to the junkyard trying to find a good one. I couldn't find anything so I took it upon myself to be the guinea pig and am pretty stoked with the results.
Just FYI I am not a pro, this my first time attempting something like this so if I can do it so can you.
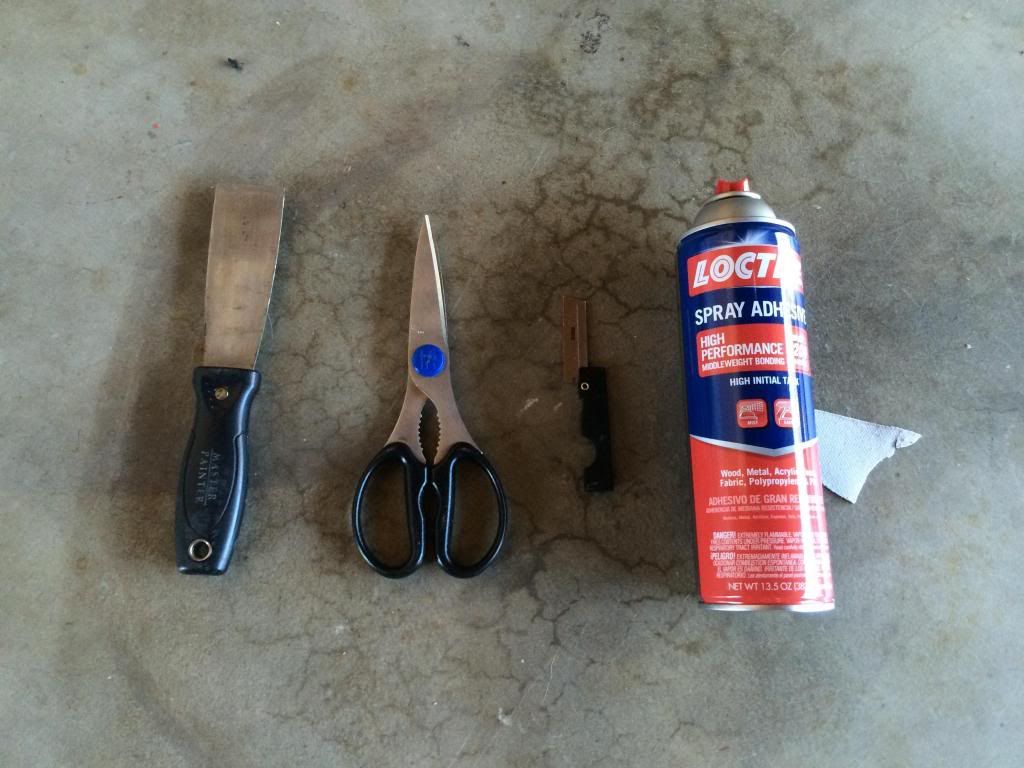
STEP 1: TOOLS/SUPPLIES
- Scraper to ease removal of old molded vinyl/plastic
- Scissors AND razor (your gonna want both)
- Spray adhesive I talked with the local auto upholstery shop and explained what I was doing he recommended the "Loctite high performance" brand and told me to stay away from 3M I dunno why thats just what he said...
- Desired fabric (Not pictured)I used small perforated cloth backed vinyl again recommended by local auto upholsterer..er..guy not only did it match my door panels he said its good for high UV areas.
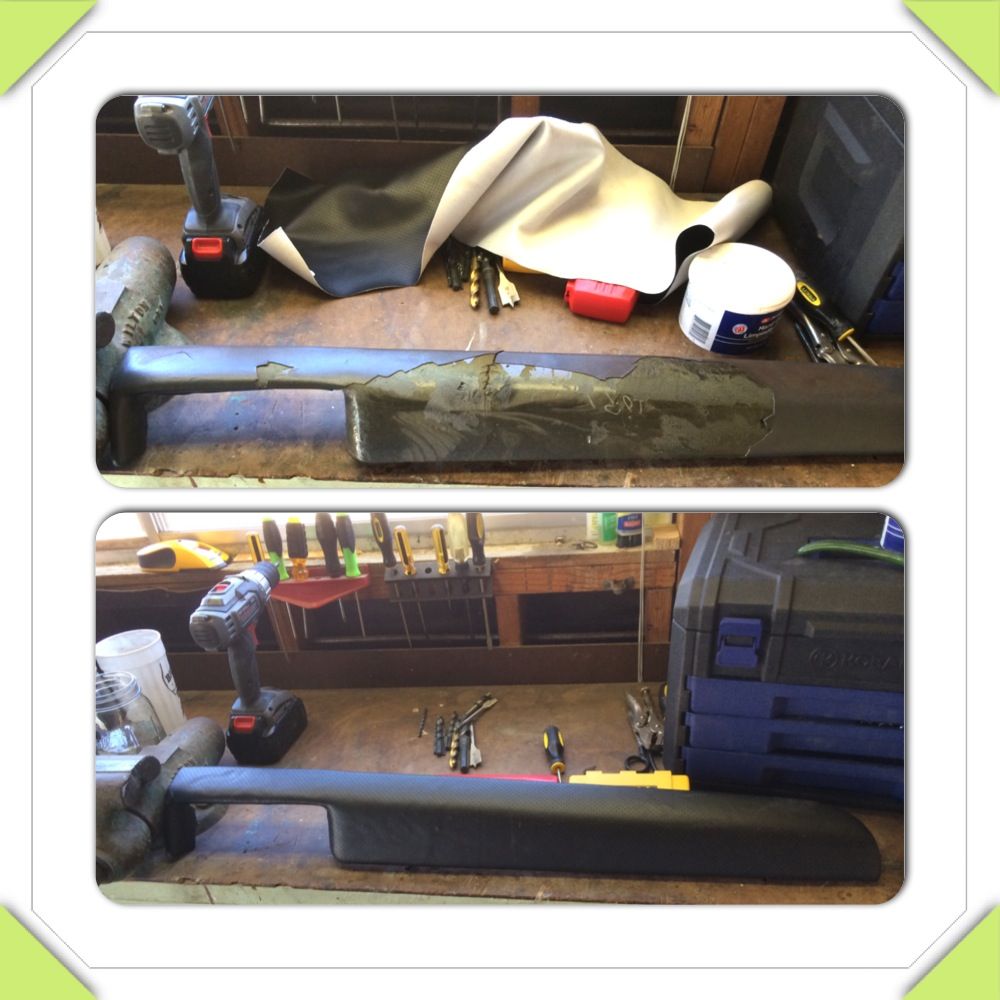
STEP 2: Start laying down your fabric
- I recommend starting in the middle and working away from your radio area (that's the hard part)

Take your time on this part. spray both the dash pad and the fabric and make sure it lays down flat. You get about 2 min of working time before the glue is set. Only lay the fabric on the top of the foam pad DO NOT go over the edges or around corners yet.
Step 3: Going Around the Radio bezel
I forgot to take pictures of this part partly because my figures had glue on them and partly because I was excited.
Start by doing a dry run pushing your fabric into the crease (it will bunch up don't worry about it). When you do this it will give you a good idea on where to make a relief cut. do it 2 or 3 times so your sure that's where its gunna be, use your thumbs to roll the fabric in. you can mark it or eyeball it and then make the relief cut with your scissors. then spray the glue and repeat for other corner.
Step 4: Edges
After the whole top and radio bezel are done and glued in the you can start working your way around the edges. I was able to go around the whole edge only making 2 relief cuts. just use your thumbs and roll the edges keeping the fabric tight.

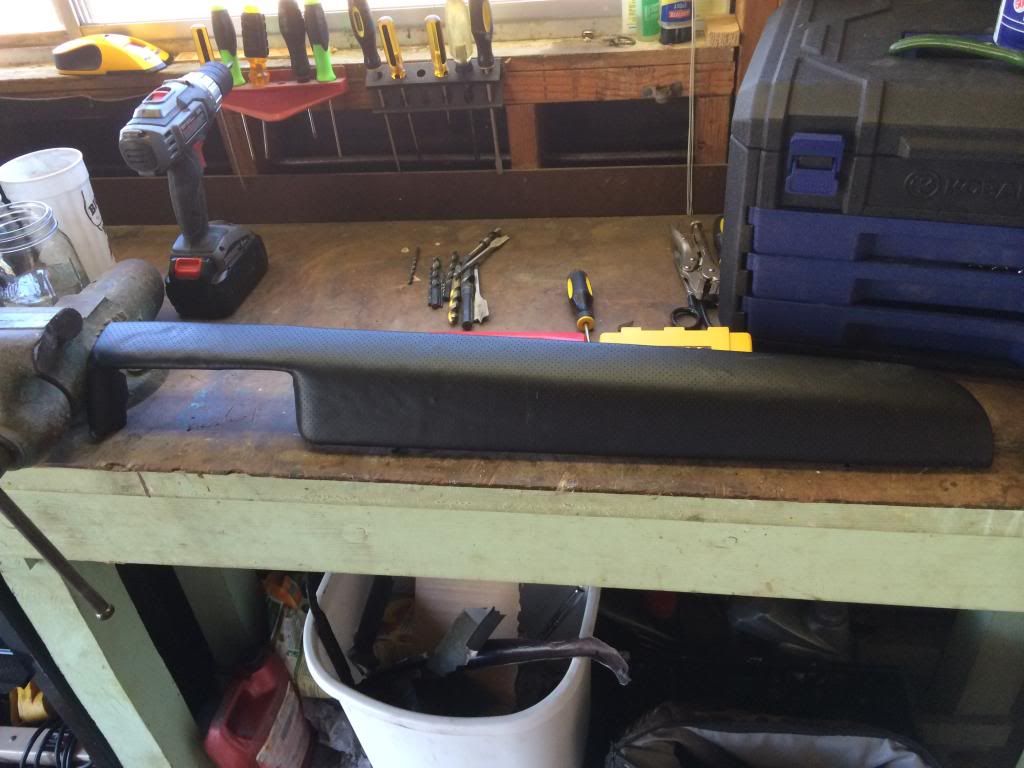
Step 5: Trim and DONE!
After all your corners and edges are wrapped (overlapping about 1/2" on the back) trimoff excess fabric with a razor (way easier than scissors). And you are done turn it over and check out your handy work. NOT TO SHABBY, see I knew you could do it!
Thanks for reading. If you have any questions feel free to message me on here and I'll help the best I can.
Just FYI I am not a pro, this my first time attempting something like this so if I can do it so can you.
STEP 1: TOOLS/SUPPLIES
- Scraper to ease removal of old molded vinyl/plastic
- Scissors AND razor (your gonna want both)
- Spray adhesive I talked with the local auto upholstery shop and explained what I was doing he recommended the "Loctite high performance" brand and told me to stay away from 3M I dunno why thats just what he said...
- Desired fabric (Not pictured)I used small perforated cloth backed vinyl again recommended by local auto upholsterer..er..guy not only did it match my door panels he said its good for high UV areas.

STEP 2: Start laying down your fabric
- I recommend starting in the middle and working away from your radio area (that's the hard part)

Take your time on this part. spray both the dash pad and the fabric and make sure it lays down flat. You get about 2 min of working time before the glue is set. Only lay the fabric on the top of the foam pad DO NOT go over the edges or around corners yet.
Step 3: Going Around the Radio bezel
I forgot to take pictures of this part partly because my figures had glue on them and partly because I was excited.
Start by doing a dry run pushing your fabric into the crease (it will bunch up don't worry about it). When you do this it will give you a good idea on where to make a relief cut. do it 2 or 3 times so your sure that's where its gunna be, use your thumbs to roll the fabric in. you can mark it or eyeball it and then make the relief cut with your scissors. then spray the glue and repeat for other corner.
Step 4: Edges
After the whole top and radio bezel are done and glued in the you can start working your way around the edges. I was able to go around the whole edge only making 2 relief cuts. just use your thumbs and roll the edges keeping the fabric tight.

Step 5: Trim and DONE!
After all your corners and edges are wrapped (overlapping about 1/2" on the back) trimoff excess fabric with a razor (way easier than scissors). And you are done turn it over and check out your handy work. NOT TO SHABBY, see I knew you could do it!


Thanks for reading. If you have any questions feel free to message me on here and I'll help the best I can.
More Turbo
Joined: May 2012
Posts: 603
Likes: 3
From: San Antonio
Thank you for the information. I looked at my tonight. The part you recovered is all that is needed. The rest is fine. You have given me inspiration to cover the dash and fix the glove box.
Why did you go with the perforated vinyl?
Why did you go with the perforated vinyl?
Thread Starter
|
Senior User
Joined: Jun 2013
Posts: 107
Likes: 9
From: Valley Mills, TX
Totally forgot to mention the most important part!
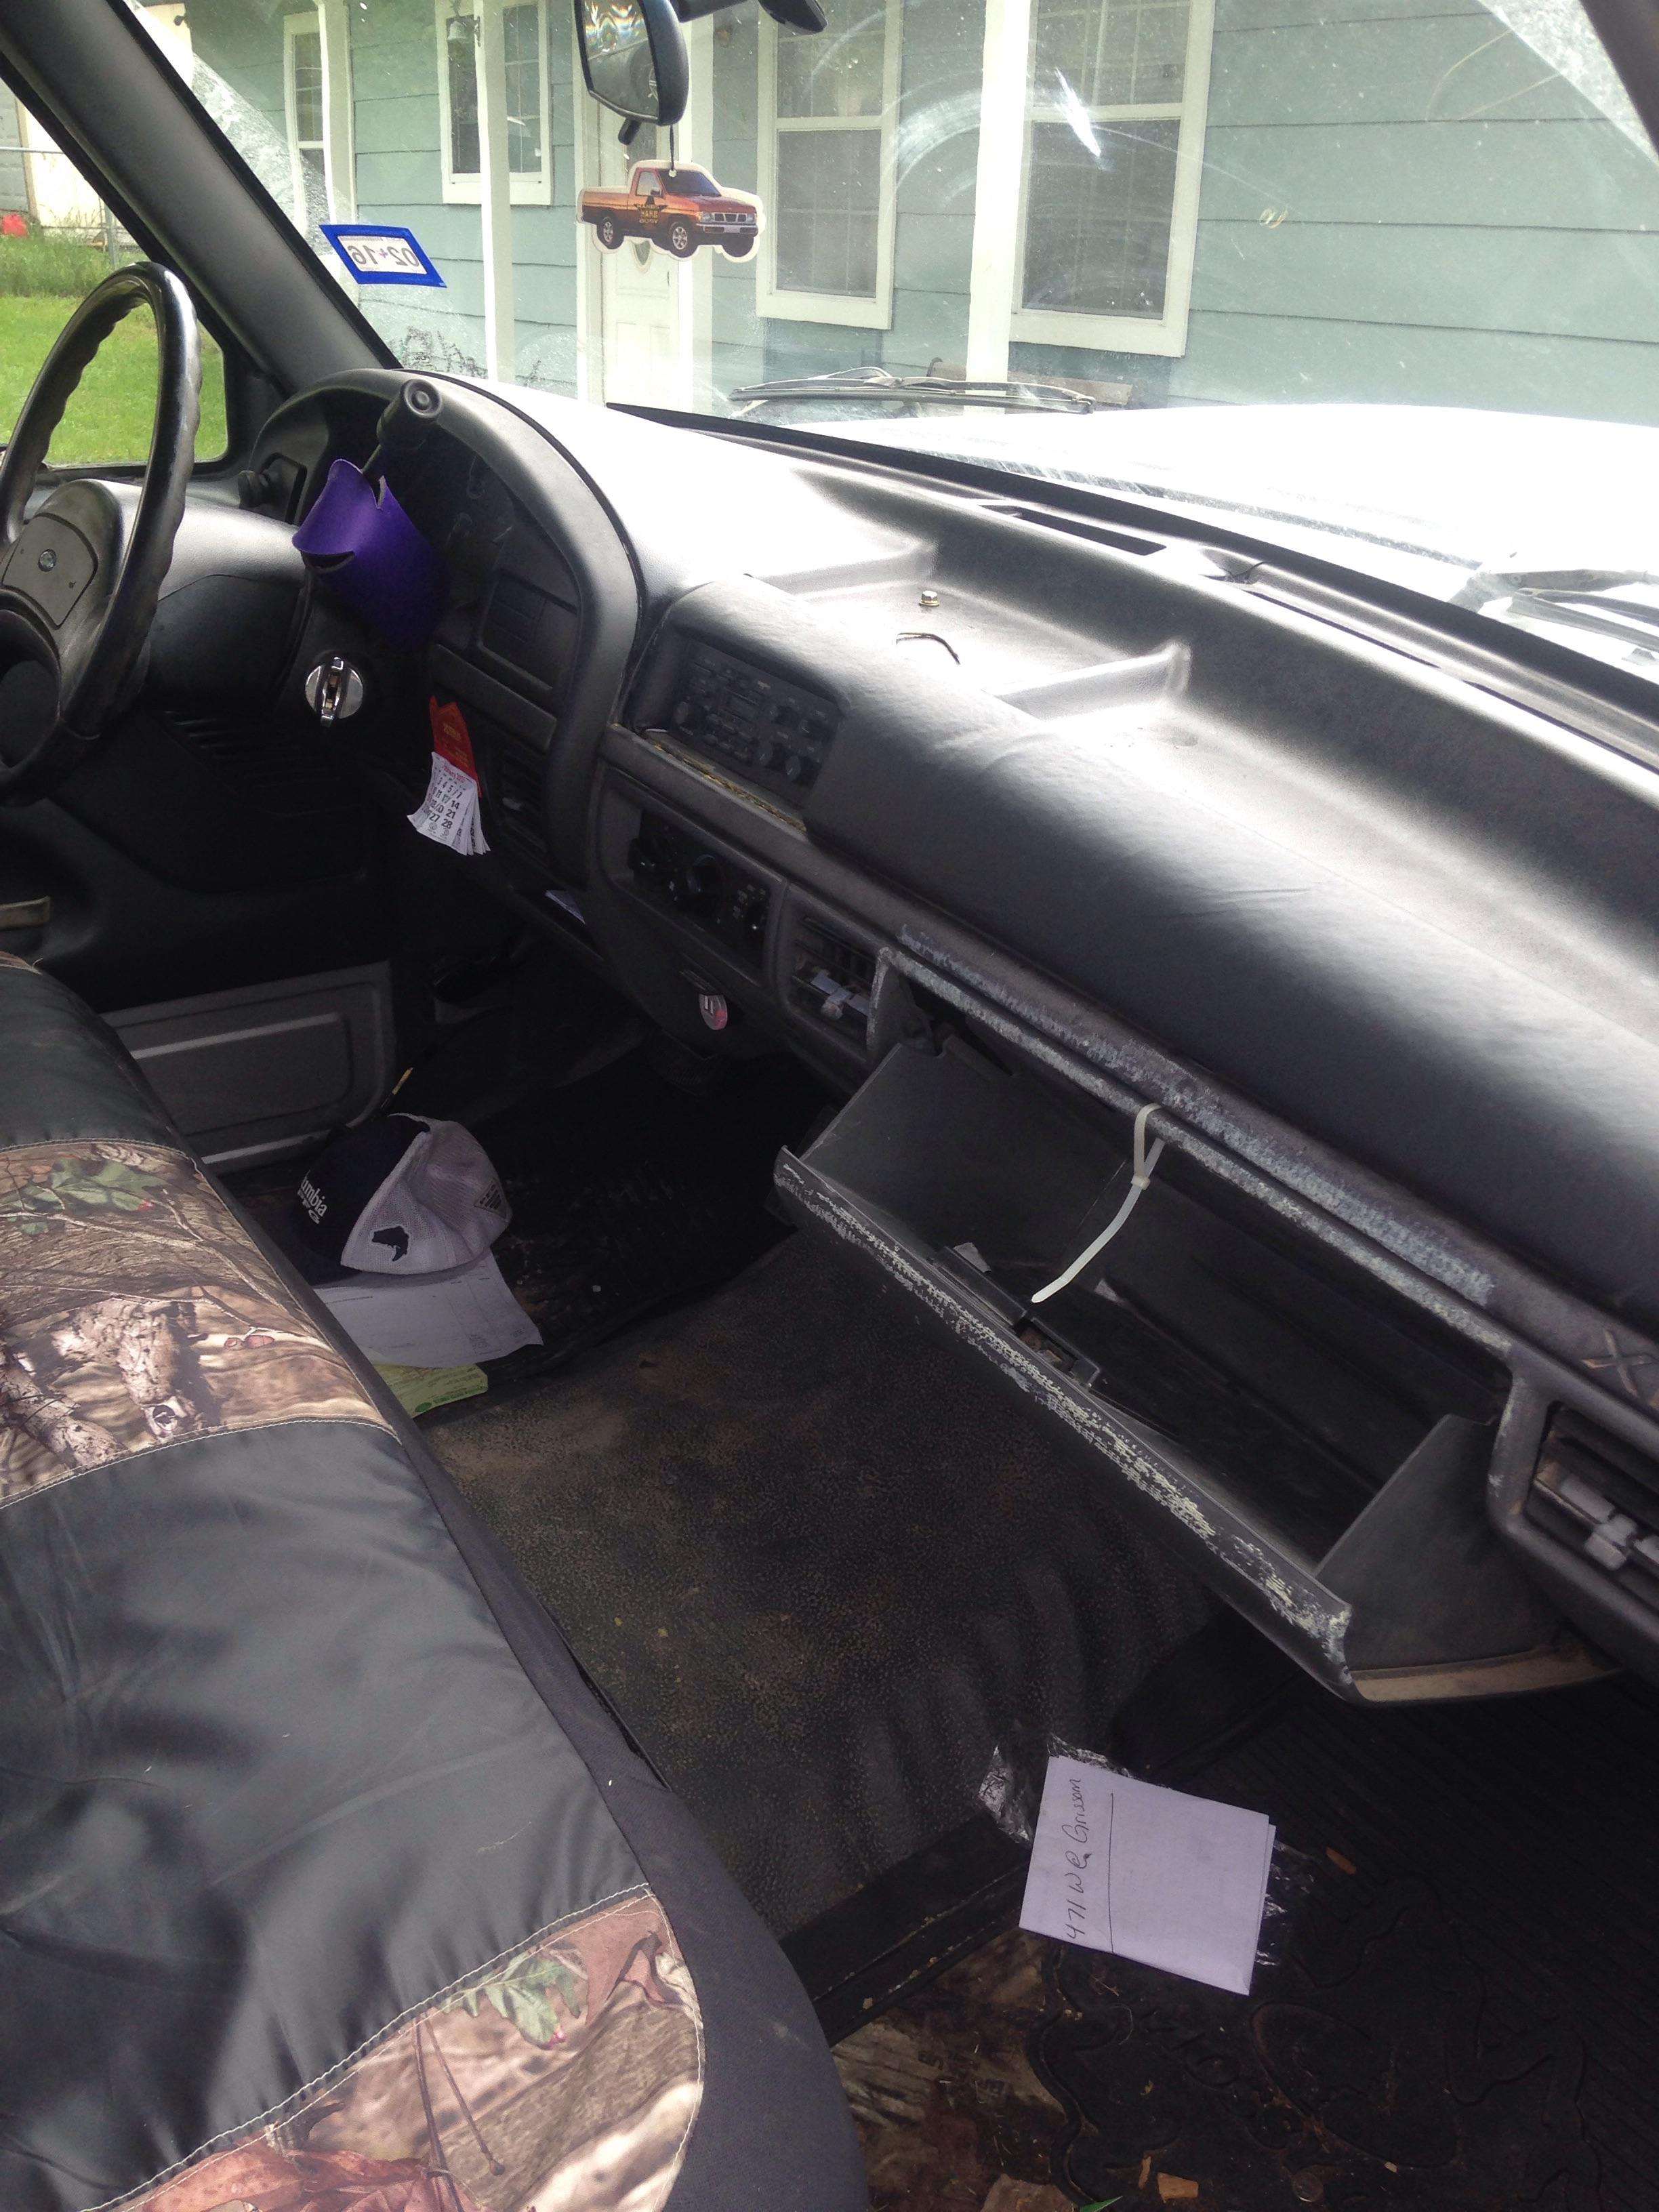
Step -1: Remove dash pad
Remove glove box and stereo. there are (6) six bolts on the backside of the dash pad. easy as that it is out.
Step -1: Remove dash pad
Remove glove box and stereo. there are (6) six bolts on the backside of the dash pad. easy as that it is out.
Freshman User
Joined: Nov 2014
Posts: 29
Likes: 0
How did you take the dash off of the truck?
thanks.
thanks.
Last edited by MrFlareside95; Nov 22, 2014 at 01:10 PM. Reason: wanted to say thanks for replying to my question.
Trending Topics
Laughing Gas

Joined: Nov 2013
Posts: 871
Likes: 6
From: Orcas Island, WA
Read post #4.
Honestly, it isn't that long of a thread.
Honestly, it isn't that long of a thread.
FTE Stories
Ford Trucks for Ford Truck Enthusiasts

Rezvani's Latest Post-Apocalytic Monster Is a Ford F-150 Raptor Underneath
Verdad Gallardo
Top 10 Most Expensive Ford Trucks Ever Sold on Bring a Trailer
Joe Kucinski
2027 Ford Super Duty Buyer's Guide (Every Model, Engine, & Package)
Brett Foote
Top 10 Ford Truck Tragedies
Joe Kucinski
AEV FXL Super Duty - the Super Duty Raptor Ford Doesn't Make
Brett Foote
Lobo Vs Lobo: Proof the F-150 Lobo Should Be Even Lower!
Michael S. Palmer
Ford's 2001 Explorer Sportsman Concept Looks For a New Home
Verdad Gallardo
10 Best Ford Truck Engines We Miss the Most!
Joe Kucinski
2026 Shelby F-150 Off-Road: Better Than a Raptor R?
Brett Foote
New User
Joined: Mar 2015
Posts: 11
Likes: 1
Well about a month or so I ago was looking around the forum looking for -little walk-through tutorial/how-to on recovering the often ill-fated dashpad in our trucks after many failed trips to the junkyard trying to find a good one. I couldn't find anything so I took it upon myself to be the guinea pig and am pretty stoked with the results.
Just FYI I am not a pro, this my first time attempting something like this so if I can do it so can you.
STEP 1: TOOLS/SUPPLIES
- Scraper to ease removal of old molded vinyl/plastic
- Scissors AND razor (your gonna want both)
- Spray adhesive I talked with the local auto upholstery shop and explained what I was doing he recommended the "Loctite high performance" brand and told me to stay away from 3M I dunno why thats just what he said...
- Desired fabric (Not pictured)I used small perforated cloth backed vinyl again recommended by local auto upholsterer..er..guy not only did it match my door panels he said its good for high UV areas.
STEP 2: Start laying down your fabric
- I recommend starting in the middle and working away from your radio area (that's the hard part)
Take your time on this part. spray both the dash pad and the fabric and make sure it lays down flat. You get about 2 min of working time before the glue is set. Only lay the fabric on the top of the foam pad DO NOT go over the edges or around corners yet.
Step 3: Going Around the Radio bezel
I forgot to take pictures of this part partly because my figures had glue on them and partly because I was excited.
Start by doing a dry run pushing your fabric into the crease (it will bunch up don't worry about it). When you do this it will give you a good idea on where to make a relief cut. do it 2 or 3 times so your sure that's where its gunna be, use your thumbs to roll the fabric in. you can mark it or eyeball it and then make the relief cut with your scissors. then spray the glue and repeat for other corner.
Step 4: Edges
After the whole top and radio bezel are done and glued in the you can start working your way around the edges. I was able to go around the whole edge only making 2 relief cuts. just use your thumbs and roll the edges keeping the fabric tight.
Step 5: Trim and DONE!
After all your corners and edges are wrapped (overlapping about 1/2" on the back) trimoff excess fabric with a razor (way easier than scissors). And you are done turn it over and check out your handy work. NOT TO SHABBY, see I knew you could do it!
Thanks for reading. If you have any questions feel free to message me on here and I'll help the best I can.

Junior User
Joined: Nov 2014
Posts: 52
Likes: 0
I attempted the dash pad recovery, it turned out pretty great. I went to a yard since I saw a parting out truck and the dash pad was in mint condition, though it had been there for weeks, well someone took apart the dash and left the doors open and it ended up cracking, not nearly as bad as my old one, but still cracks so I followed this and this is what I ended up with. Ignore my stupid ugly glove box, still working on that lol! The hardest part was taking out the radio, like I spent a good 45 minutes trying, while sweating since it was as humid as the amazon outside.
I went to Walmart for the vinyl, I used what is left of their stock and they said they weren't ordering anymore. Lol.
I went to Walmart for the vinyl, I used what is left of their stock and they said they weren't ordering anymore. Lol.

Junior User
Joined: Sep 2015
Posts: 57
Likes: 0
THAT'S what I was lookin for, thanks man. Great sticky! FTE comes through yet again!
