
Isspro fuel pressure/HPOP install
#1
 03-20-2014, 12:49 AM

Isspro fuel pressure/HPOP install
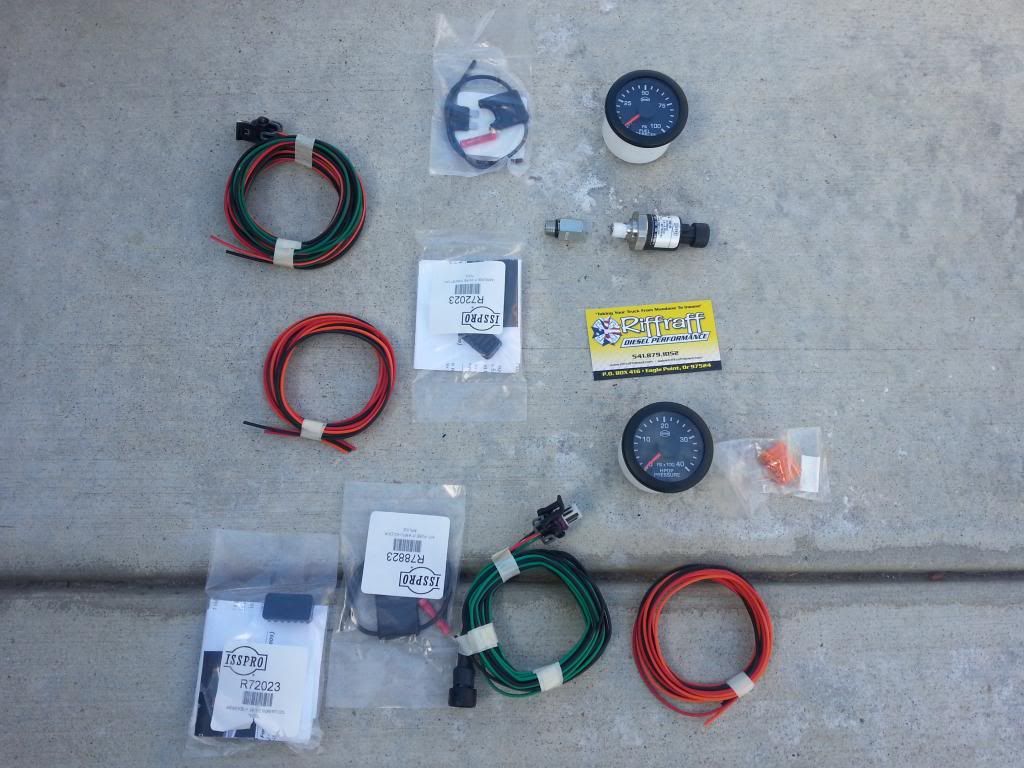
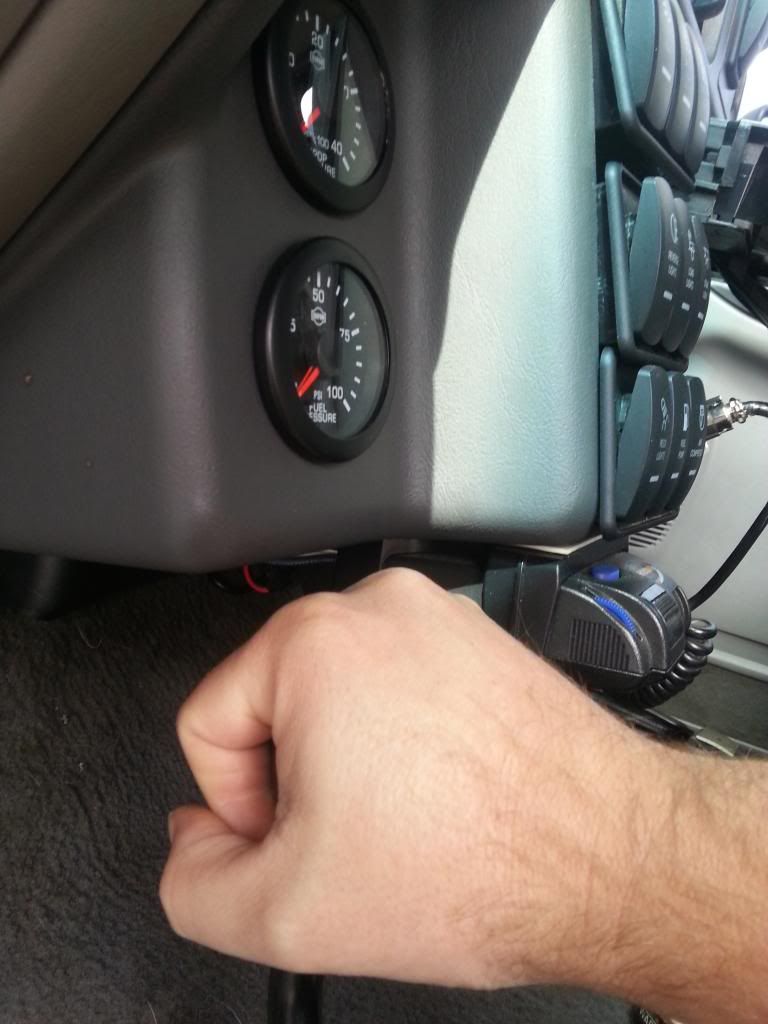
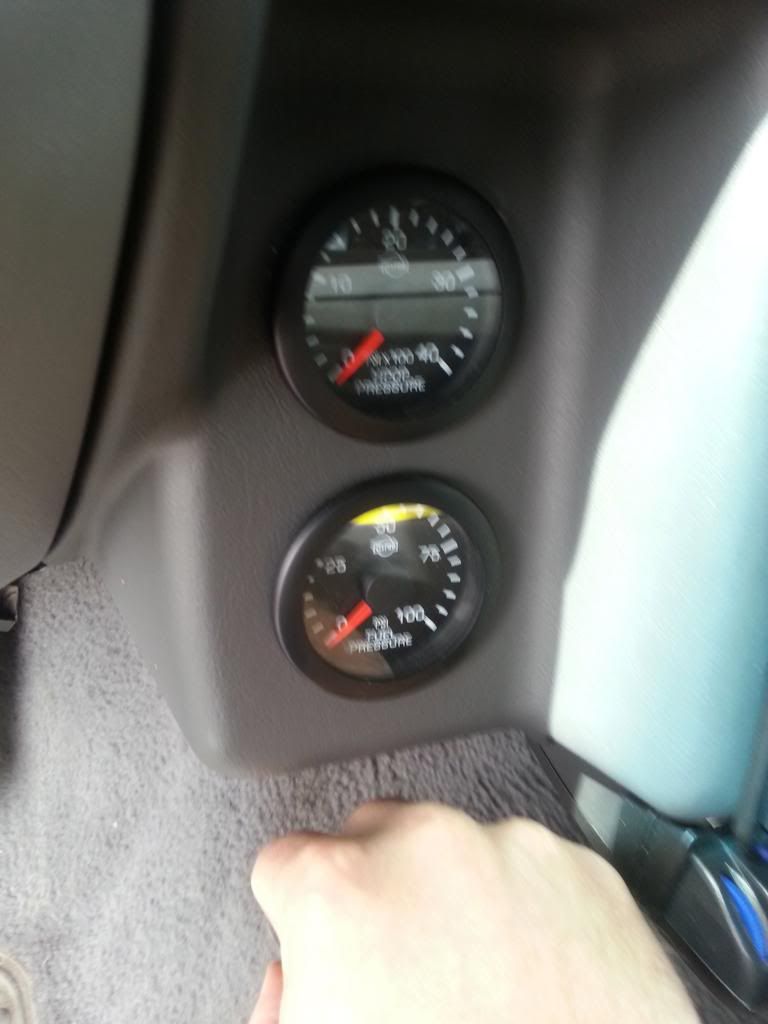
Here are some pics of my Isspro gauge install.
Everything laid out.
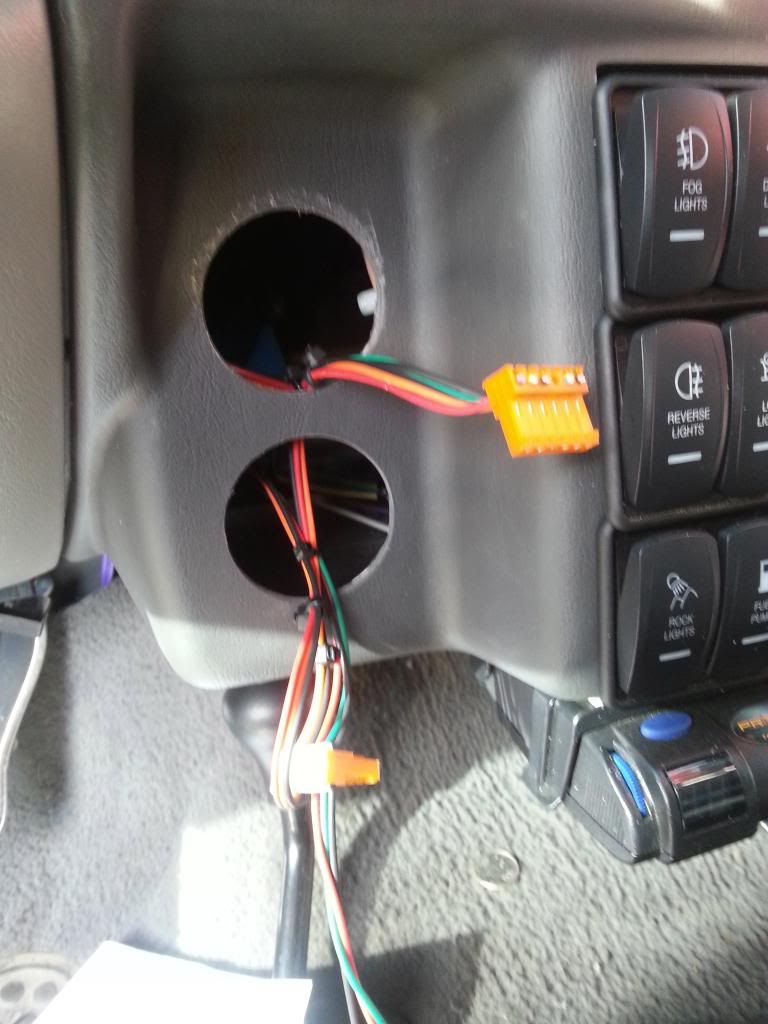
Cut out the holes for the gauges to be installed on the F650 dash kit with the wiring plumbed.
Un bolted the torx bolt on the post filter side.
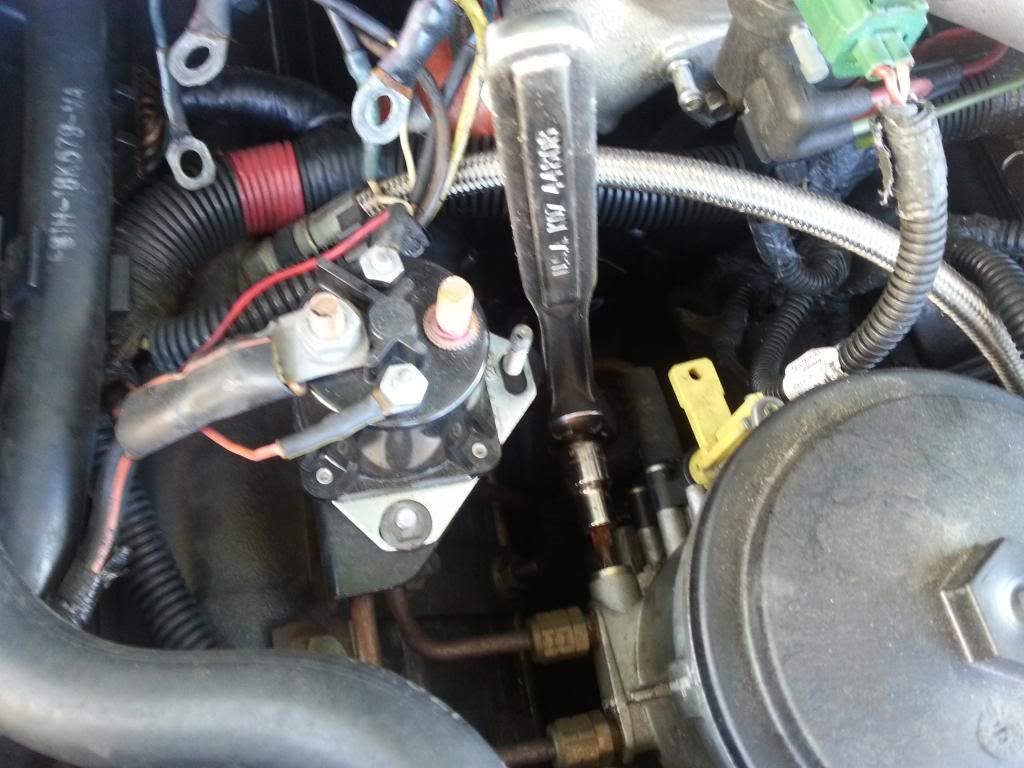
Sending unit installed.
Unplugged the stock wiring going to the ICP sensor and plugged it into the wires that come from the HPOP gauge that was included with the kit and plugged that back into the ICP sensor.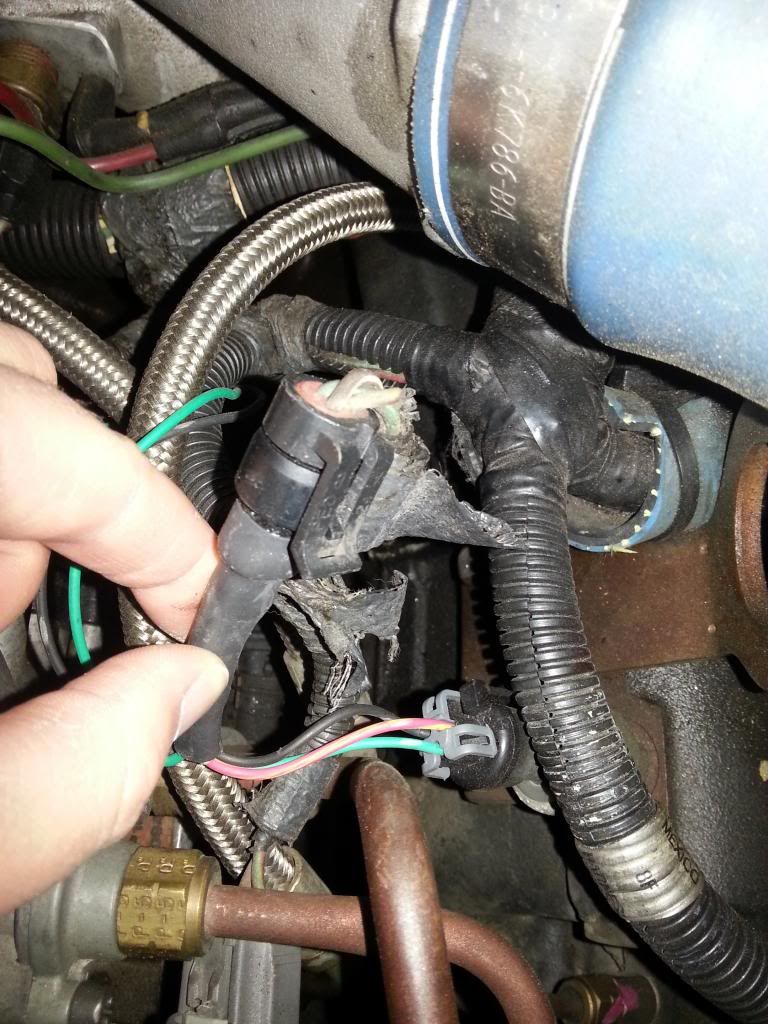
Up and running!
Everything laid out.

Cut out the holes for the gauges to be installed on the F650 dash kit with the wiring plumbed.

Un bolted the torx bolt on the post filter side.

Sending unit installed.

Unplugged the stock wiring going to the ICP sensor and plugged it into the wires that come from the HPOP gauge that was included with the kit and plugged that back into the ICP sensor.


Up and running!

#4
03-20-2014, 08:13 AM
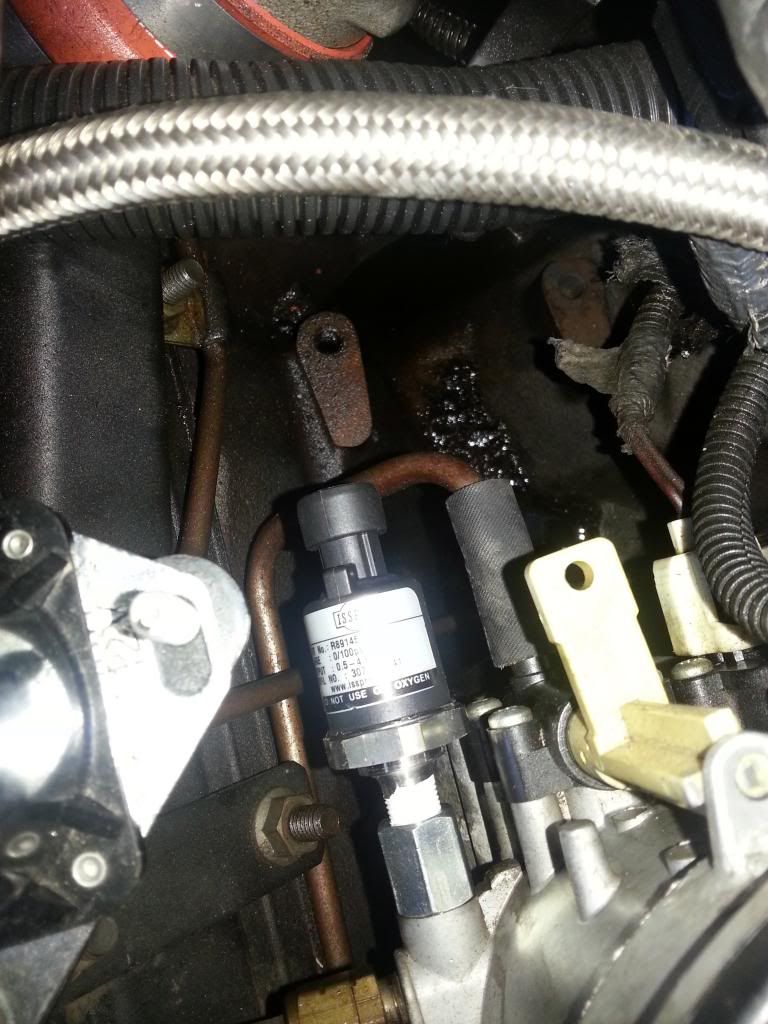
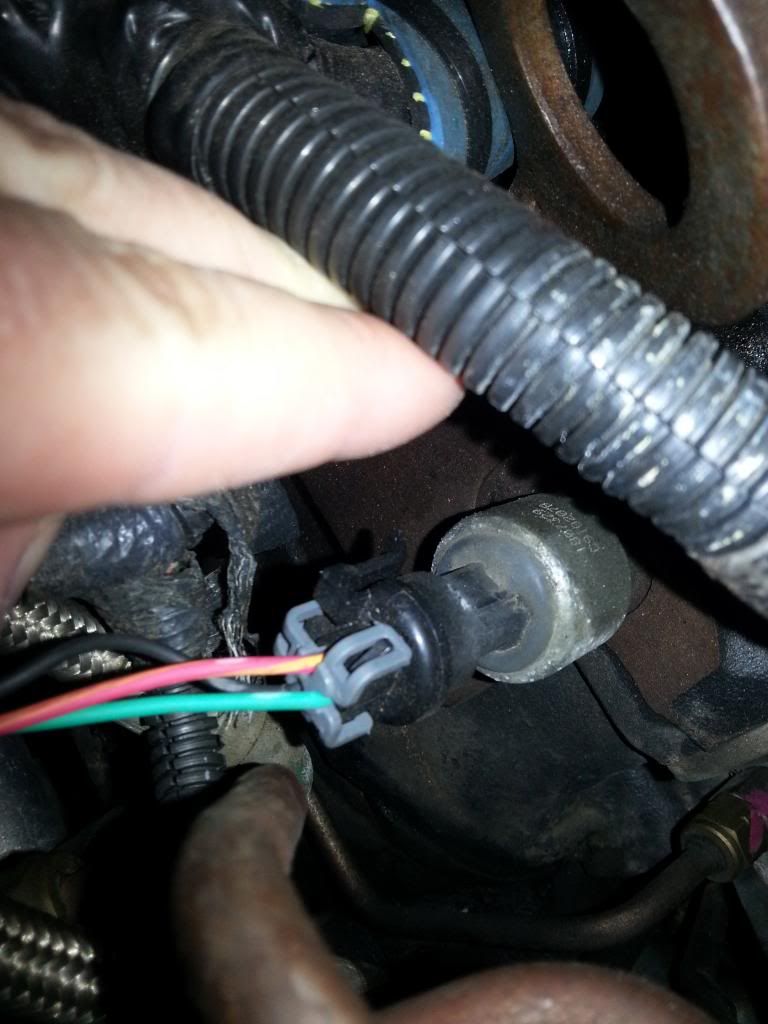
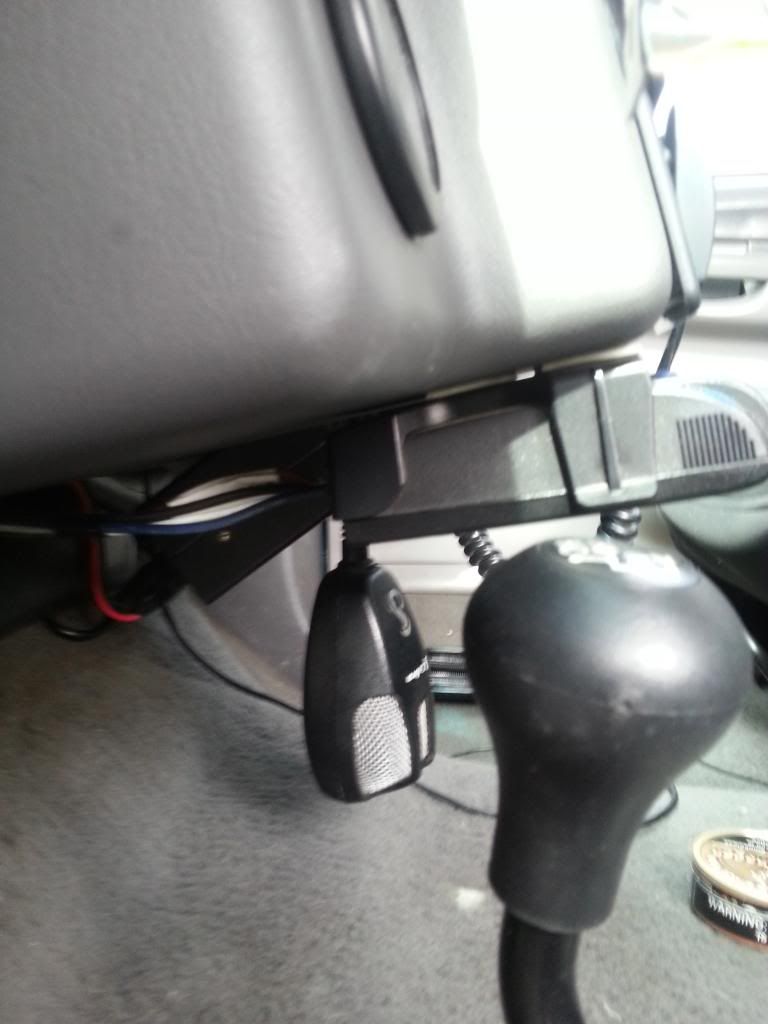
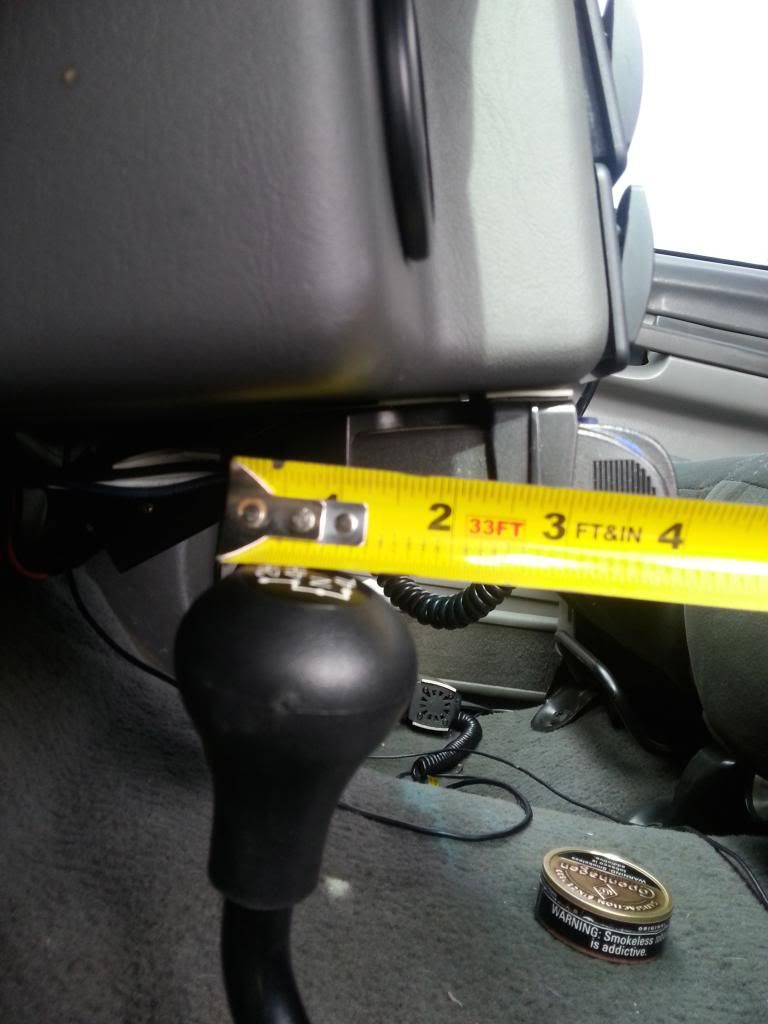
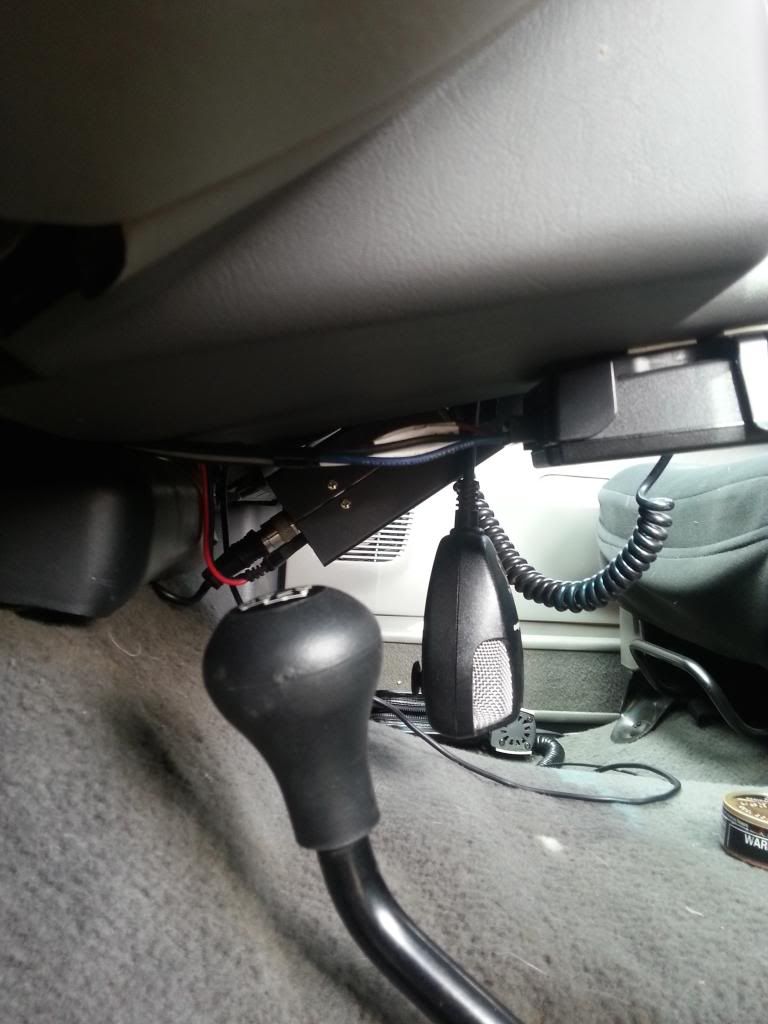
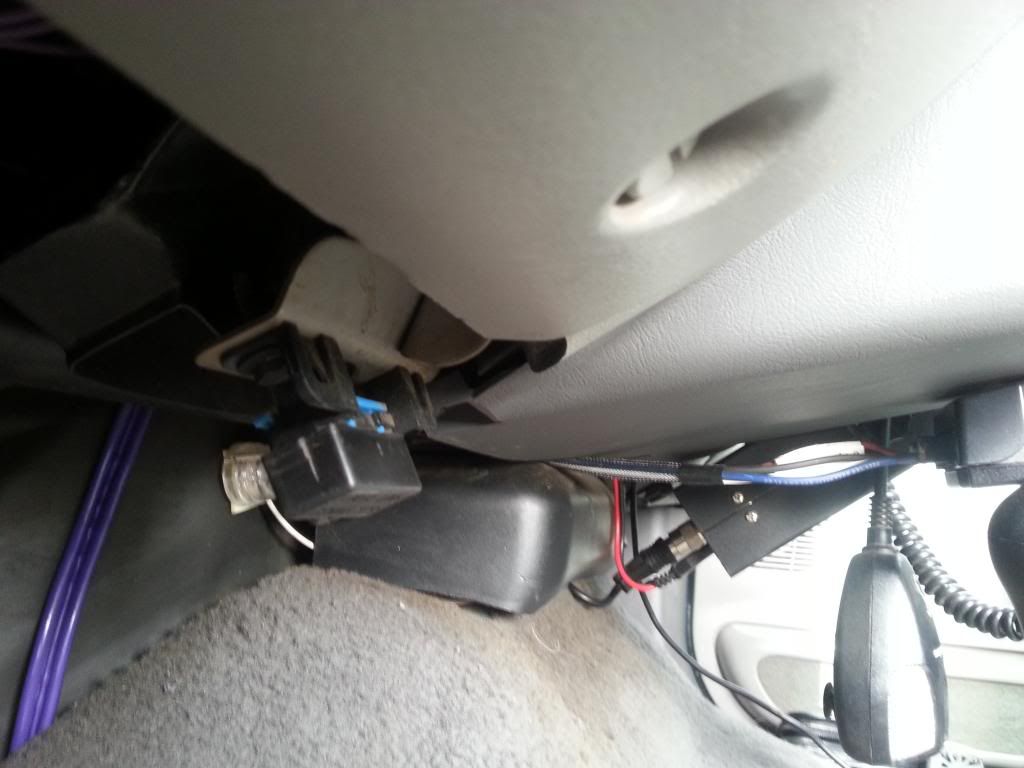
Looks good. That's where I mounted my sending unit for fuel pressure. Unfortunately it went kaput and the customer service guy wanted me to disconnect the wires and test with a multi meter. Trying to access it with the new stancor GPR was tight to say the least so I opted to use a braided stainless hydraulic line and relocated it to a much more accessible spot just in case it decides to crap out again. Might not be its permanent home but for now it seemed like a good spot. Hoping the rubber grommet on the mount will help reduce vibration on it. Don't know what killed the first one but figured less vibration couldn't hurt. [IMG] [/IMG]
 [/IMG]
#5
03-20-2014, 05:17 PM

#6
03-20-2014, 05:19 PM
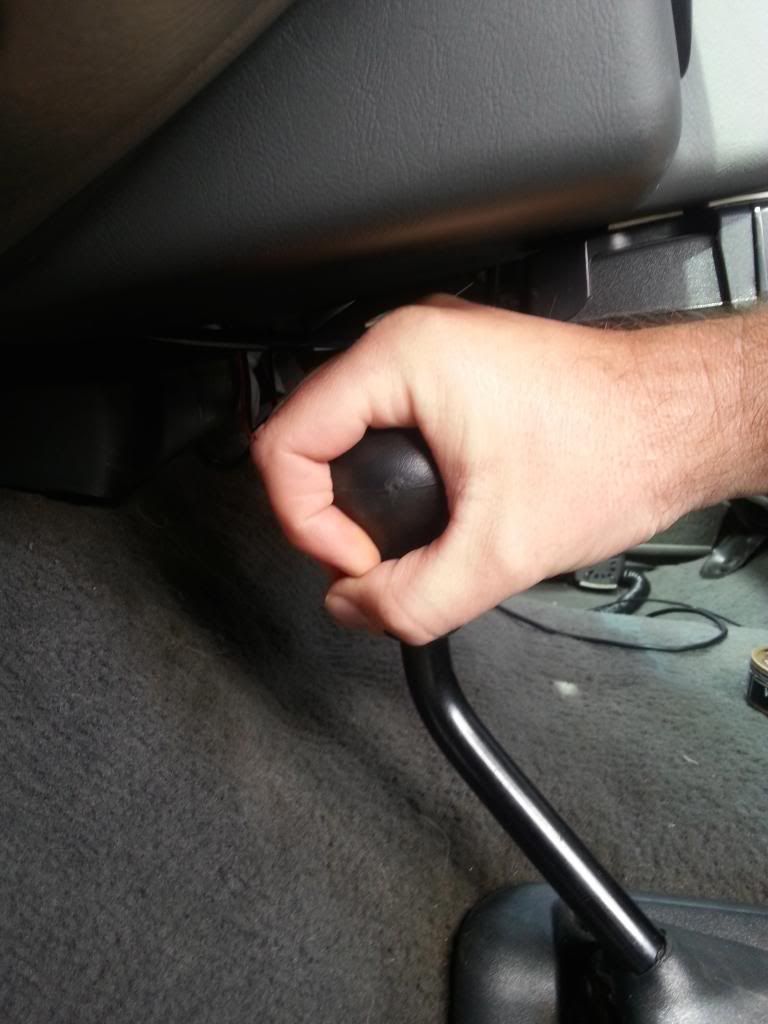
A few inches, its no problem at all. If you want I'll go measure it for you to be more exact.
#7
03-20-2014, 05:29 PM
Lead Driver
No need Jim. I was thinking it wouldn't fit at all and would need to be modified in order to fit, so if it's even an inch I would be okay with that. Currently my salt spreader controller is above it and if I am not careful I will cheese grate my knuckles on the bottom of it. I want to take it and my strobe controller apart and mount them to the 650 dash.
Thank you.
Thank you.
Trending Topics
#8
03-20-2014, 06:33 PM
Post Fiend
#9
03-21-2014, 02:39 PM
Senior User
Join Date: Aug 2004
Location: Los Angeles
Posts: 327
Likes: 0
Received 0 Likes
on
0 Posts
#10
03-21-2014, 04:07 PM
Sorry guy's, the internet has been disconnected due to excavation work in the backyard.
Thanks for the complements.
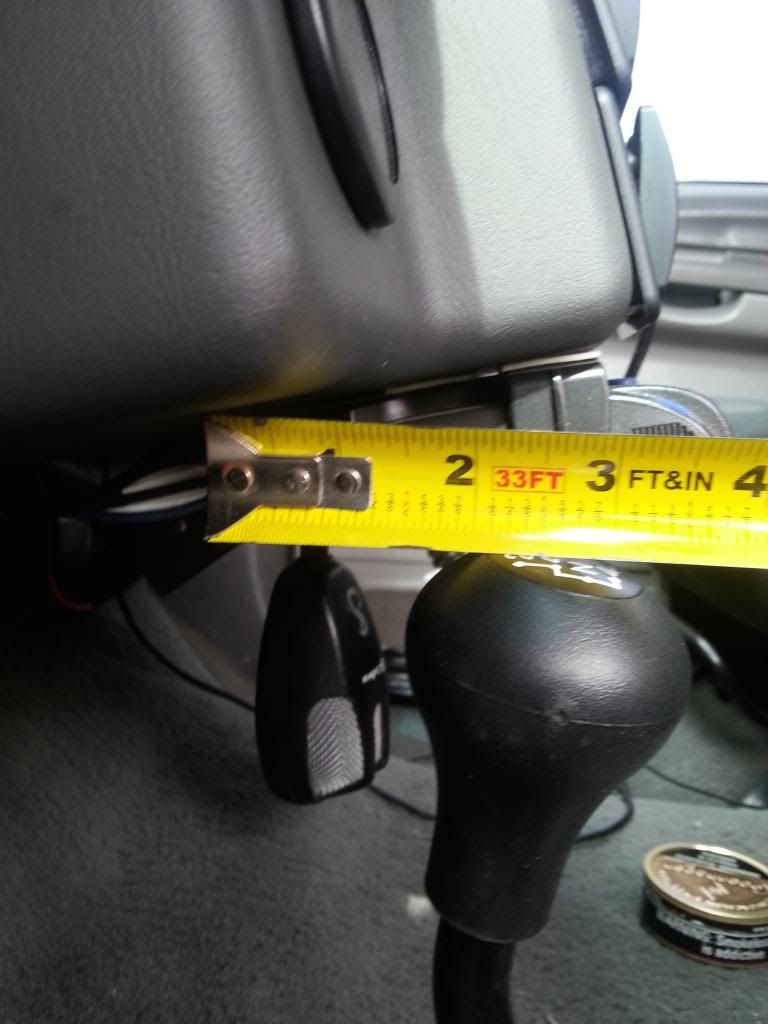
Jason got some measurements and pics for you.
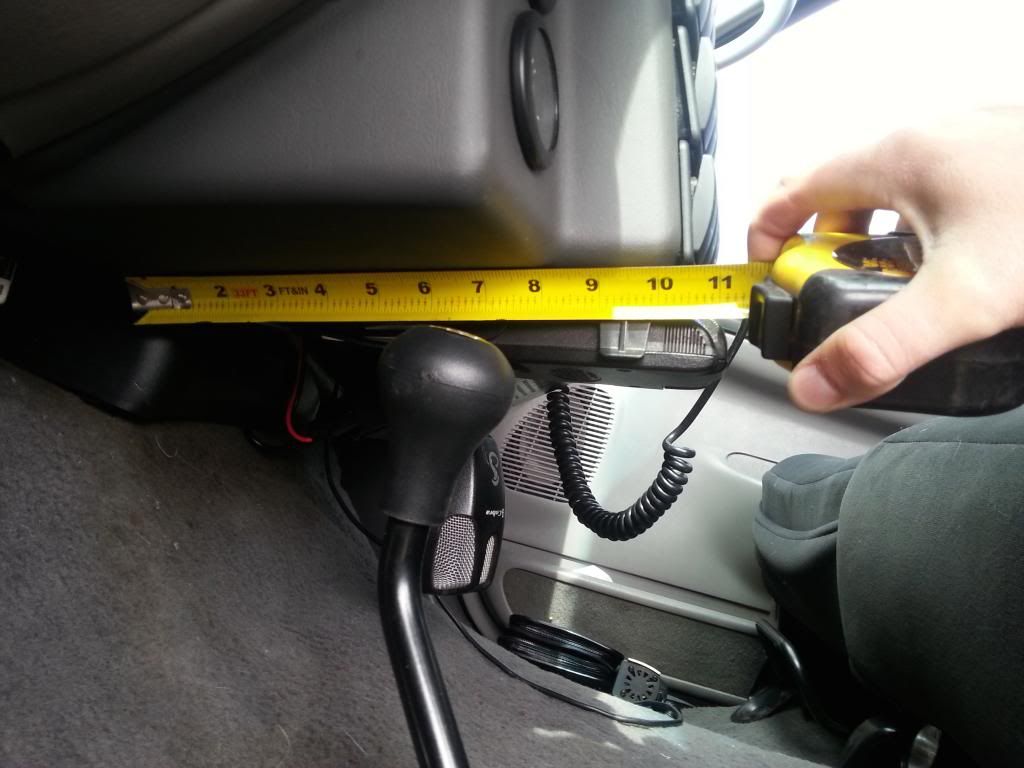
This photo shows the 4X4 shifter in 4L and is 9 1/4 from the shifter base.

From the 4X4 grab handle is 1 3/8 in the 4L position.
This 1st photo shows in 4L position the measurement taken is really nothing but from the grab handle up to the F-650 is 1 3/8. It's rough cause the grab handle does not sit under the dash in 4L.
These photos are when the 4X4 shifter is in 4N.
The first photo is roughly an 1 1/2 to the base of the F-650 dash.
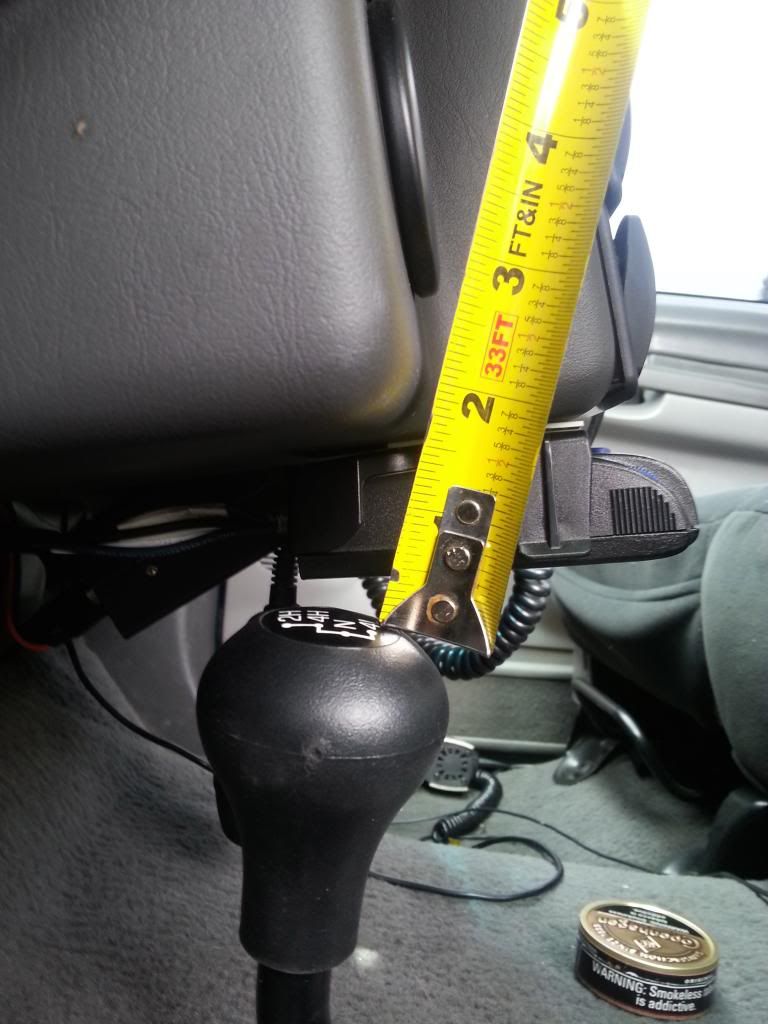
Basically the point of this photo is to show the tape measure sitting on it's side to show the amount of room which from my tape is slightly less than an inch, so total roughly 1 1/2 from the grab handle to the base of the dash.
It's hard to take a measurement with the shifter in 4H but will gladly take more if needed.
The 4X4 shifter in 2H.

This measurement is to show how long the dash kit is from OBDII back.
From the front to back where the gauges would sit is 7 1/2 inches, and is measured under the gauges. The 4X4 shifter is in the "N" position.
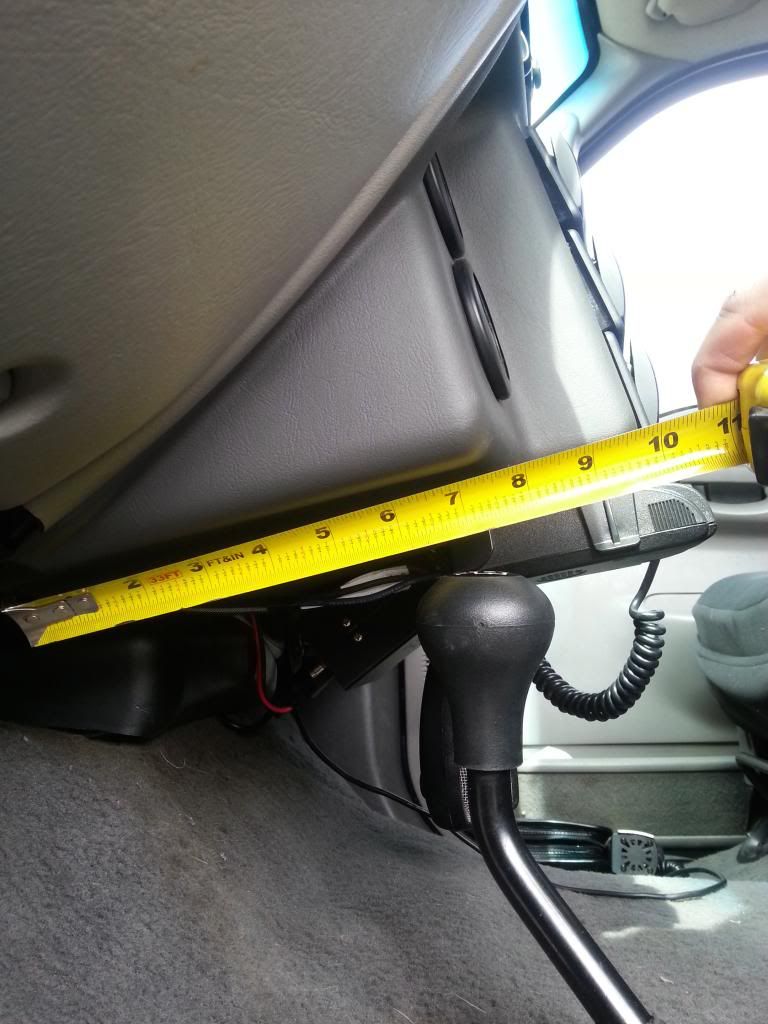
From the back to the front is 10 1/2 inches, and is measured under the switches.
Don't hesitate to let me know if you need any more pics or measurements.
Thanks for the complements.
Jason got some measurements and pics for you.
This photo shows the 4X4 shifter in 4L and is 9 1/4 from the shifter base.

From the 4X4 grab handle is 1 3/8 in the 4L position.
This 1st photo shows in 4L position the measurement taken is really nothing but from the grab handle up to the F-650 is 1 3/8. It's rough cause the grab handle does not sit under the dash in 4L.


These photos are when the 4X4 shifter is in 4N.
The first photo is roughly an 1 1/2 to the base of the F-650 dash.

Basically the point of this photo is to show the tape measure sitting on it's side to show the amount of room which from my tape is slightly less than an inch, so total roughly 1 1/2 from the grab handle to the base of the dash.

It's hard to take a measurement with the shifter in 4H but will gladly take more if needed.

The 4X4 shifter in 2H.


This measurement is to show how long the dash kit is from OBDII back.

From the front to back where the gauges would sit is 7 1/2 inches, and is measured under the gauges. The 4X4 shifter is in the "N" position.

From the back to the front is 10 1/2 inches, and is measured under the switches.
Don't hesitate to let me know if you need any more pics or measurements.

#11
03-22-2014, 09:35 PM
Lead Driver
Scotty, thanks so much for taking the time to do all of that. It looks to be about as much clearance as my salt spreader controller leaves me but the 650 dash looks like it would be far more forgiving on the knuckles if I were to hit it.
As it is now, I just turn my hand sideways and grip the handle with my knuckles pointing to the passenger side. Kind of like holding a cup.
As it is now, I just turn my hand sideways and grip the handle with my knuckles pointing to the passenger side. Kind of like holding a cup.
#12
03-22-2014, 10:38 PM
#13
03-23-2014, 10:11 AM
Lead Driver
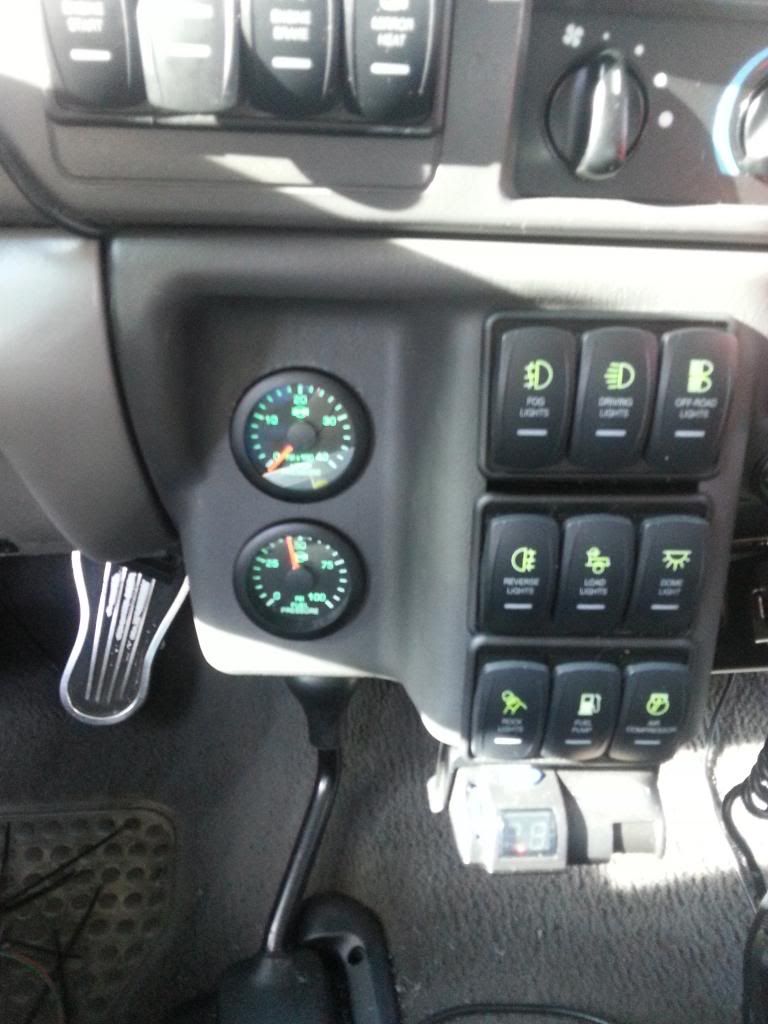
Maybe, it's about 3 times the size of your brake controller. That's one of the reasons I want the 650 dash though. I would like to take the controller apart and mount it's components in the dash and use 2 of the switches for main power and vibrator on/off. The controller has 2 rheostat **** with 2digit led displays that individually control/ monitor the spinner and auger speed. There are also codes it will display when there is a problem with either motor being jammed. I think I would like to mount those **** and digital displays where you have the extra gauges or maybe go with only 6 switches and mount them below the 6 where the last row of 3 go when you order 9 switches. If I did the 2nd option, then I could still have a place to put 2 additional gauges like you did.
I want dual EGT gauges and a fuel pressure gauge, So I would more than likely move boost off the A-pillar down to the 650 dash and add fuel pressure to it. Then put the 2 EGT gauges next to each other on the A-pillar with the tranny temp gauge. I drive by them more than anything when towing any way and would like them up where I can see them easier. Boost I hardly ever look at unless I am specifically trying to see it for a particular specific reason so it could go lower on the 650 dash.
I want dual EGT gauges and a fuel pressure gauge, So I would more than likely move boost off the A-pillar down to the 650 dash and add fuel pressure to it. Then put the 2 EGT gauges next to each other on the A-pillar with the tranny temp gauge. I drive by them more than anything when towing any way and would like them up where I can see them easier. Boost I hardly ever look at unless I am specifically trying to see it for a particular specific reason so it could go lower on the 650 dash.
#14
03-23-2014, 01:28 PM
Like this one?
If this is it we could come up with a very nice design, I found a website need to look it up pretty much they will build you a face plate any shape or size and have all the letters (vibrator, power, auger, spinner) light up at night if your into that kind of stuff and have the holes on the face plate drilled out for the switches and rheostat ***** and then just move all the guts over. If I recall it wasn't as much as I thought it would be to build the face plate. I look for the website.

Edit: Here is one website that will let you build what you want, but I am not familiar with this company.
http://www.frontpanelexpress.com/index.html
#15
03-26-2014, 04:17 PM
Post Fiend