Widening rear fenders
#1
Widening rear fenders
Thought I would post a thread on my first attempt to widen rear fenders. This is an extra set, so if I screw up, oh well. Learning experience. If anyone has any recommendations towards widening, feel free to hop in...
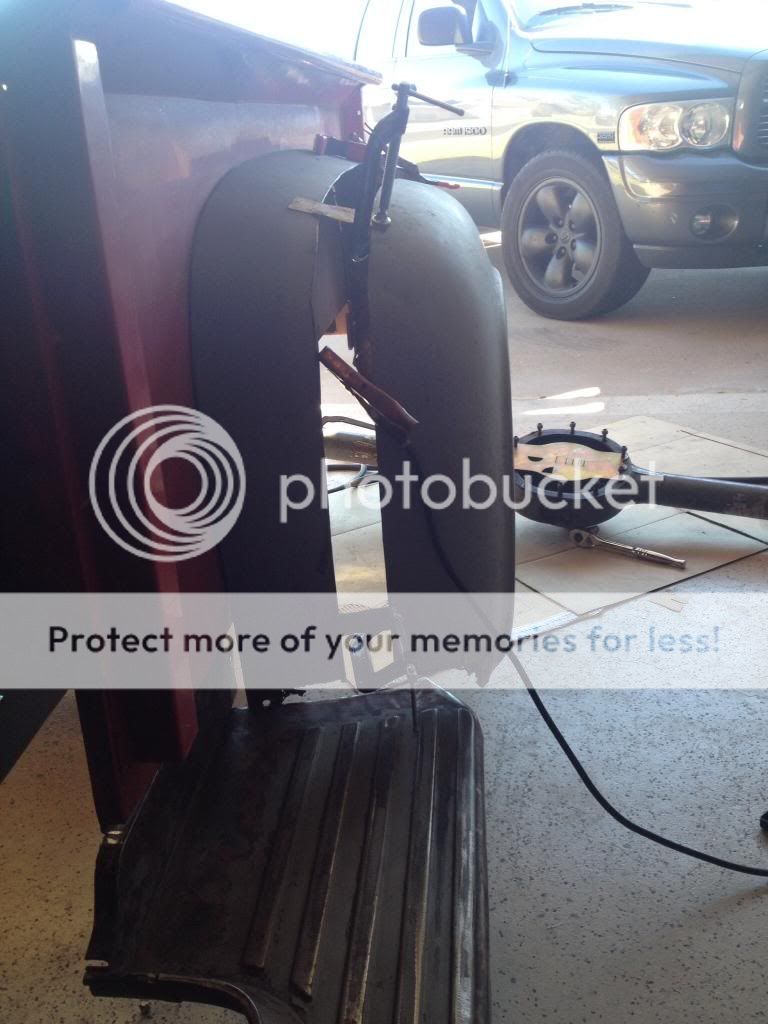
First I scribed a line while the fenders are mounted, t hat way the line was parallel to the bed side panel.

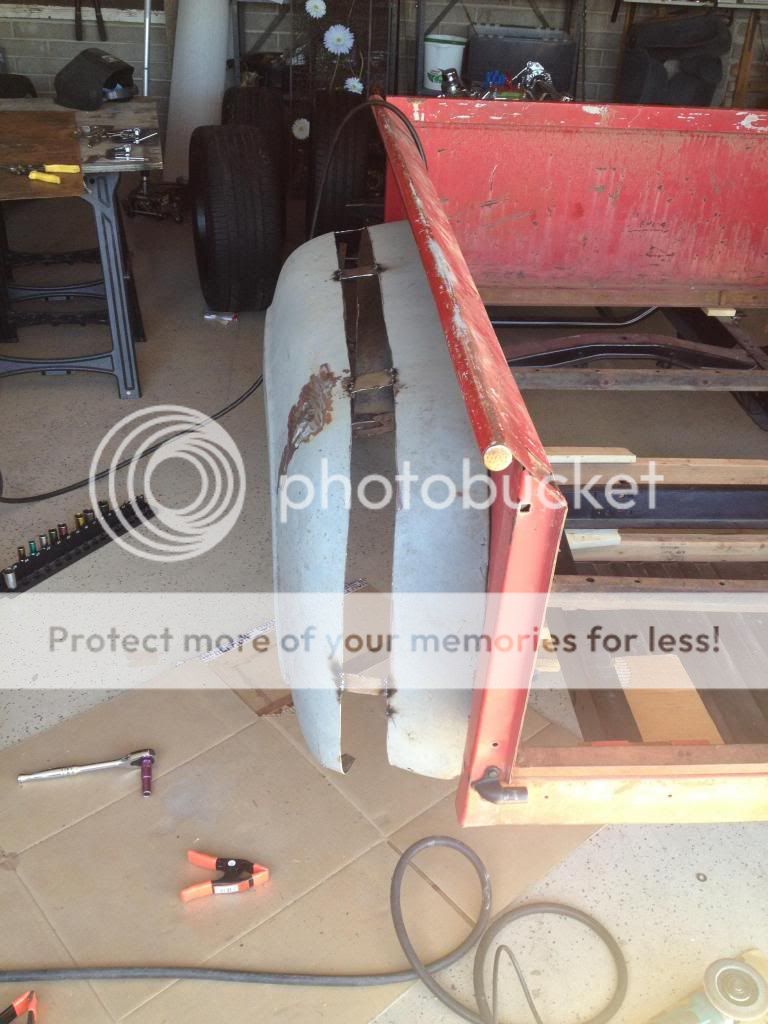
Second, I mounted the fender to a table top, and supported the fender with the fender brace screwed to the wooden table so the fender wouldn't "wiggle". When I made a cut, I actually pushed the grinder away from me so I could follow the line that I scribed.

And voila, I had 2 separate halves. Smoothed down the cuts, and that's where I stopped. I'll post more tomorrow..

First I scribed a line while the fenders are mounted, t hat way the line was parallel to the bed side panel.

Second, I mounted the fender to a table top, and supported the fender with the fender brace screwed to the wooden table so the fender wouldn't "wiggle". When I made a cut, I actually pushed the grinder away from me so I could follow the line that I scribed.

And voila, I had 2 separate halves. Smoothed down the cuts, and that's where I stopped. I'll post more tomorrow..

#2
The only advice I can offer from doing similar projects is you will have better luck making you cuts closer to the bed side of the fender because the metal is flatter (easier to blend in the patch) and with the break in the metal where it bolts to the bed it adds strength so there is less chance of warping. Good luck and have fun practicing.
#3
The only advice I can offer from doing similar projects is you will have better luck making you cuts closer to the bed side of the fender because the metal is flatter (easier to blend in the patch) and with the break in the metal where it bolts to the bed it adds strength so there is less chance of warping. Good luck and have fun practicing.
#4
#5
At this point in the process it is important that you keep the mounting flange section of the fender from flexing when you weld on the extension section. I made a fixture to hold fenders while I worked on them...see pic attached. It is rather simple but it works well.
IMO the wheel opening on these fenders is too large...since you have opted to cut the fender farther out on the curve, now may be a good time to take a look at reducing the opening on the fender. You will find that once you add the 3 inch band to your fender that the outer section of the fender will be too large to mate up with the extension. This is the result of the compound curve of the fender. I would make a vertical cut in the outer piece of the fender and then mate the pieces up until they fit the extension...this will close the wheel opening about 1.5 - 2 inches. Take care to keep the wheel centered in the new opening if you decide to go this route.
IMO the wheel opening on these fenders is too large...since you have opted to cut the fender farther out on the curve, now may be a good time to take a look at reducing the opening on the fender. You will find that once you add the 3 inch band to your fender that the outer section of the fender will be too large to mate up with the extension. This is the result of the compound curve of the fender. I would make a vertical cut in the outer piece of the fender and then mate the pieces up until they fit the extension...this will close the wheel opening about 1.5 - 2 inches. Take care to keep the wheel centered in the new opening if you decide to go this route.
#6
#7
Trending Topics
#8
At this point in the process it is important that you keep the mounting flange section of the fender from flexing when you weld on the extension section. I made a fixture to hold fenders while I worked on them...see pic attached. It is rather simple but it works well.
Charlie, what color blue are those fenders? That's a really nice color.
#9
Those fenders were off a truck I painted for a fellow club member. He had the paint mixed to match the stock color on the 55 F100 that he has. Tri-Cities paint has the code on file...they are on ebay, etc. and are probably better known as TCP. I can get the code if you like. Here is the whole truck, pic was taken acouple of years ago at the Western Nats...
BTW - just noticed that you are in Riverside...TCP is here in San Diego in the Miramar area.
BTW - just noticed that you are in Riverside...TCP is here in San Diego in the Miramar area.
#10
#11
So I thought I was gonna follow this example, 1953 Ford F100 Body Modifications Rear Fender Photo 1
But, since my fender was slightly bent and warped to begin with, I think when I made my cut it tweaked the outer portion, so it's difficult to get the 2 pieces to line up again. I think i'll take your guys recommendation, tack weld the 2 pieces back together and try to make a cut closer to the bed side panel..
But, since my fender was slightly bent and warped to begin with, I think when I made my cut it tweaked the outer portion, so it's difficult to get the 2 pieces to line up again. I think i'll take your guys recommendation, tack weld the 2 pieces back together and try to make a cut closer to the bed side panel..
#12
With sheetmetal you have to start at a point of reference and then work out from there. On a fender like this the best point of reference is the flat mounting flange...stabilize the fender along this plane and work out from there. Mount the fender section on a stable platform (your plywood may be sufficient), weld on your extension section being careful to maintain the proper alignment and "flow" of body lines with the orginal fender section. Once you are happy with the original fender section and the extension, then move on to adding the outer section. The outer section will then be stabilized by the rest of the fender assembly as you join them together.
#13
You have run into the classic problem of extending a compound curve. If it was a box, extending them with a plain strip of metal would work no problem, but the fenders are not a box, but closer to a 1/4 ball. If you take a styrofoam ball from a craft shop you can simulate the problem: Cut the ball into 1/4 sections by cutting it in 1/2 vertically and horizontally to represent 4 compound curve fenders. now slice one of the wedges vertically near the center, and another take a thin slice off one flat side. Now set the sliced "fender" parts on the table so they are sitting upright, and move the 2 pieces a distance apart. Now cut a strip of paper and try to bridge the gap between the pieces. There is no way a straight strip of paper will cover the gap in the first set of pieces (the one cut near the middle) even if you traced the curved strip that would be required, the strip will not fit the edge on both pieces and the fender will have an obvious flat spot over the gap and a hump at the seam, not a smooth curve. Working with the second section you cut like slicing off a slice of baloney you can come closer to making a flat strip fit in between.
This is the major issue customizers run into when doing a top chop on a rounded top vehicle where the top needs to be widened and/or lengthened, or where the two parts need to be rejoined to the body. The entire arc of the curve needs to change. A highly skilled metal shaper could do this successfully with a LOT of work (most would tell you it would be easier to make a new set of widened fenders from scratch). A less skilled body man would weld in several strips of metal to fill the gap and act as a support for a thick coat of filler and sand in the new curve. A smart novice would bolt the flange to a 3/4" plywood support. cut the fender no more then 3/4" from the flange then add 5 filler strips: 3 straight ones, a horizontal one along the flattish top up to where it begins to curve down, 2 on the vertical portions front and back up to where the curve starts, and 2 shaped and fitted curved corner pieces in between. You will still need to start with about a 1/4" thick layer of putty from the flange to the outside edge of the curve down to the wheel opening and block it down to a smooth curve. Do all the welding and filler work with the fender bolted to the support.
This is the major issue customizers run into when doing a top chop on a rounded top vehicle where the top needs to be widened and/or lengthened, or where the two parts need to be rejoined to the body. The entire arc of the curve needs to change. A highly skilled metal shaper could do this successfully with a LOT of work (most would tell you it would be easier to make a new set of widened fenders from scratch). A less skilled body man would weld in several strips of metal to fill the gap and act as a support for a thick coat of filler and sand in the new curve. A smart novice would bolt the flange to a 3/4" plywood support. cut the fender no more then 3/4" from the flange then add 5 filler strips: 3 straight ones, a horizontal one along the flattish top up to where it begins to curve down, 2 on the vertical portions front and back up to where the curve starts, and 2 shaped and fitted curved corner pieces in between. You will still need to start with about a 1/4" thick layer of putty from the flange to the outside edge of the curve down to the wheel opening and block it down to a smooth curve. Do all the welding and filler work with the fender bolted to the support.
#14


