FABRICATION!! We want to see what you've built.
#61
 02-21-2014, 08:31 AM

Drew saw my post on another thread and suggested that I should put the picture up here about the pair of rusty fenders I bought a few weeks ago.
Here's what I got and what I'm have been doing the last few nights. You dry, sunny southwestern guys can stop laughing and go to another post. Up here in the rust belt these are considered normal, not really desired, but normal.


I started on the right fender. It looked like someone must have had some kind of rack bolted to this fender and it got caught on something. Their were three 1/2" bolt holes and a nice 1/2" deep crease in the upper fender. There was also the normal rust.

Hammered out the dent.

Made a patch panel for the rust out on the side of the fender.

Welded the hole closed and welded in the patch.

The inside support piece was rotted so I made a new one, I used a bent bolt, hammer and my bench vice to form the bead.


The front of the fender and bottom matting surface was also pretty far gone so I cut out the rusted metal, made a patch and welded it in. The front patch took a little time because it has a compound curve I had to shape.


I know some will think I'm wasting time on a set of fenders that are so far gone but I wanted to let people know that sometimes even the worst looking fenders can be saved. I also like a challenge and repairing rust.
Here's what I got and what I'm have been doing the last few nights. You dry, sunny southwestern guys can stop laughing and go to another post. Up here in the rust belt these are considered normal, not really desired, but normal.
I started on the right fender. It looked like someone must have had some kind of rack bolted to this fender and it got caught on something. Their were three 1/2" bolt holes and a nice 1/2" deep crease in the upper fender. There was also the normal rust.
Hammered out the dent.
Made a patch panel for the rust out on the side of the fender.
Welded the hole closed and welded in the patch.
The inside support piece was rotted so I made a new one, I used a bent bolt, hammer and my bench vice to form the bead.
The front of the fender and bottom matting surface was also pretty far gone so I cut out the rusted metal, made a patch and welded it in. The front patch took a little time because it has a compound curve I had to shape.
I know some will think I'm wasting time on a set of fenders that are so far gone but I wanted to let people know that sometimes even the worst looking fenders can be saved. I also like a challenge and repairing rust.


#66
04-19-2014, 07:30 PM
Elder User
Join Date: Aug 2012
Location: Cuba, AL (NO internet)
Posts: 751
Likes: 0
Received 0 Likes
on
0 Posts
My creation..
Well this isn't truck related but metal fab. I was pulling this off my bike today and this thread came to mind. Best I know to do is post this link and let you guys check it out on my motorcycle forum. Hope you enjoy as I know there are quite a few fellow bikers on here.....
Fabbed a Backrest Thingy.... - Suzuki Volusia Forums : Intruder Volusia and Boulevard Forum
Fabbed a Backrest Thingy.... - Suzuki Volusia Forums : Intruder Volusia and Boulevard Forum
#67
04-19-2014, 08:17 PM
Not specifically old Ford truck related but it is something I made for my other project, my 1937 Buick.
The grills on these cars are made of pot metal and are prone to break into two pieces and like any other pot metal piece they deteriorate over time. To find an unbroken set with good chrome is getting impossible after 70 years. Some time back someone made reproduction pieces out of aluminum but they also don't fare well in the front of a car bouncing down the road.
Here's my solution made out of stainless steel, these should last forever, at least longer than the owner and car. There are 41 horizontal slats, 15 different lengths with a curve and the grill has a slight outward belly with a twist. I give a lot of thanks to Chris Freeman for helping make a welding jib to make these, well he did most of the work, I just got in the way:

 .
.


#69
04-20-2014, 06:39 AM

Not specifically old Ford truck related but it is something I made for my other project, my 1937 Buick.
The grills on these cars are made of pot metal and are prone to break into two pieces and like any other pot metal piece they deteriorate over time. To find an unbroken set with good chrome is getting impossible after 70 years. Some time back someone made reproduction pieces out of aluminum but they also don't fare well in the front of a car bouncing down the road.
Here's my solution made out of stainless steel, these should last forever, at least longer than the owner and car. There are 41 horizontal slats, 15 different lengths with a curve and the grill has a slight outward belly with a twist. I give a lot of thanks to Chris Freeman for helping make a welding jib to make these, well he did most of the work, I just got in the way:
The grills on these cars are made of pot metal and are prone to break into two pieces and like any other pot metal piece they deteriorate over time. To find an unbroken set with good chrome is getting impossible after 70 years. Some time back someone made reproduction pieces out of aluminum but they also don't fare well in the front of a car bouncing down the road.
Here's my solution made out of stainless steel, these should last forever, at least longer than the owner and car. There are 41 horizontal slats, 15 different lengths with a curve and the grill has a slight outward belly with a twist. I give a lot of thanks to Chris Freeman for helping make a welding jib to make these, well he did most of the work, I just got in the way:
#70
04-20-2014, 09:59 AM

Nice work guys!!!
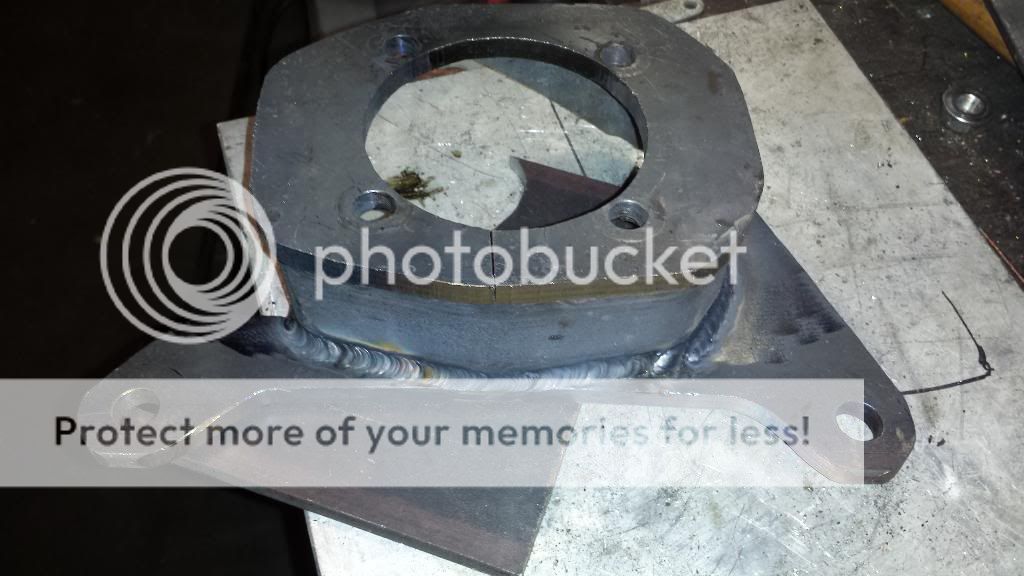
Here's my latest. I recently fabricated a lower dash panel to house my heater control panel, headlight switch, and ignition switch. Here's what I came up with;

More details in this thread;
https://www.ford-trucks.com/forums/1...-progress.html
Thanks
Bobby
Here's my latest. I recently fabricated a lower dash panel to house my heater control panel, headlight switch, and ignition switch. Here's what I came up with;

More details in this thread;
https://www.ford-trucks.com/forums/1...-progress.html
Thanks
Bobby
#71
04-20-2014, 10:26 AM

Magic Air heater cover part
The small top vent pc. was missing from a Magic Air heater cover so one was fabbed from a pc. of sheet metal. Made a pattern out of tag board first. The hardest part was visualizing what it looked like flat & making the bends in the correct order .
Had 7 heater covers w/ fins missing so made some new ones a fuzz wider , used dremel to make very small slits in side of cover & secured not by welding . Tried that , it did not work .JB weld did the trick .
Heater cover had fin area messed up . Another cover had a large hole in the front where some one attached a 12 V motor & it stuck out the front but had all the fin areas good . So indexed the cover area on both ,cut out the good face and welded to the other .Placement was critical as it centers the motor in the housing . Checked it & was good .
#73
04-20-2014, 06:54 PM
Fleet Mechanic

#74
04-20-2014, 09:09 PM

Freshman User
Join Date: Feb 2014
Location: Napa, California
Posts: 31
Likes: 0
Received 0 Likes
on
0 Posts
The previous owner covered the speaker hole with a piece of sheetmetal
which he screwed to the dashboard. Since I am in the middle of rewiring
the truck and I needed a place to mount the fuses and relays, I made this.
BEFORE

THIS IS THE FUSE PANEL BRACKET. I MADE IT OUT OF AN ALUMINUM
DOOR KICK PLATE!
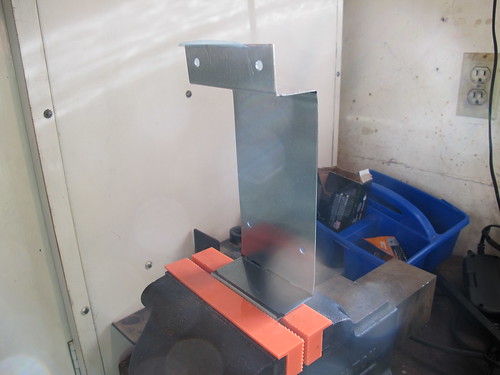
FUSE PANEL MOUNTED. I COVERED THE ALUMINUM IN SEVERAL LAYERS
IN DUCT TAPE FOR INSULATION.

ACCESSORY SPEAKER COVER I GOT FROM VINTAGE FORD IN SACRAMENTO

WOOD SCREWS AND INSERT NUTS FROM THE HARDWARE STORE
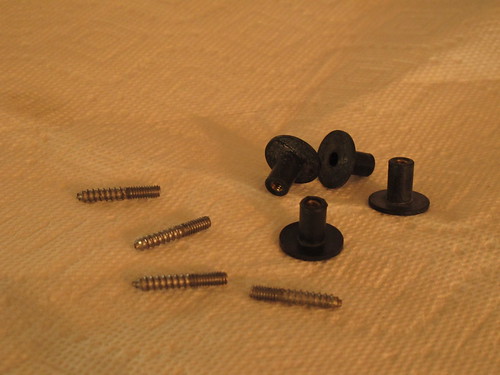
I SCREWED THE STUDS INTO THE PLASTIC AND THE NUTS ARE EASY
TO SCREW ON AND OFF. IT IS VERY EASY TO REACH UNDER THE DASH
AND UNSCREW THEM WITH MY FINGERS SO THE PLATE CAN COME ON
AND OFF VERY EASILY.
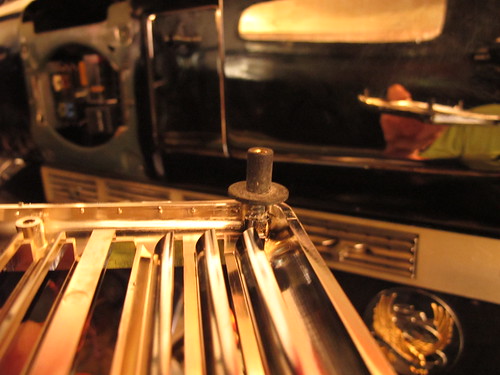
HERE IT IS. TERRIBLE PHOTO BUT YOU GET THE IDEA

which he screwed to the dashboard. Since I am in the middle of rewiring
the truck and I needed a place to mount the fuses and relays, I made this.
BEFORE
THIS IS THE FUSE PANEL BRACKET. I MADE IT OUT OF AN ALUMINUM
DOOR KICK PLATE!
FUSE PANEL MOUNTED. I COVERED THE ALUMINUM IN SEVERAL LAYERS
IN DUCT TAPE FOR INSULATION.
ACCESSORY SPEAKER COVER I GOT FROM VINTAGE FORD IN SACRAMENTO
WOOD SCREWS AND INSERT NUTS FROM THE HARDWARE STORE
I SCREWED THE STUDS INTO THE PLASTIC AND THE NUTS ARE EASY
TO SCREW ON AND OFF. IT IS VERY EASY TO REACH UNDER THE DASH
AND UNSCREW THEM WITH MY FINGERS SO THE PLATE CAN COME ON
AND OFF VERY EASILY.
HERE IT IS. TERRIBLE PHOTO BUT YOU GET THE IDEA
#75
04-21-2014, 08:33 PM

