
1989 F250 Project
#31
 09-15-2013, 11:15 AM

Awesome info bdelmar! Thanks!
The cab and front clip from the '87 2-tone grey truck is in incredible shape for it's age but I'll definitely check it out for hidden rust. I will also have to swap the rad support from the black ext. cab (the donor box truck) in as it's the best gasser support we have. Probably end up using the 460 rad to make life easy with the swap. Won't have to worry about any cooling issues with the 300 then.
My plan is still to do the engine during the week at work in my off time and do the body work on the weekends. Hopefully after getting the rest of the engine apart today I can start pulling the interior out of my grandfather's cab and get back on track.
I looked into that Masterseries paint but unfortunately it looks like they only ship within the USA. SPI has a distributor in Canada, I'll look into that.
Otherwise, I have 3 choices for painting my frame and underside cab/box around here and that's Rustoluem, which would be the cheapest and easiest.
Chassis Saver which my brother used on his frame and it's already flash rusted so he's getting it sandblasted and powder coated instead.
And finally Por15, expensive and from what I've seen hit or miss as far as it working the way it claims.
The main idea behind Rustoleum-ing the frame and underside of the box and cab was just to give it a little added protection and to look half decent. But if you got rust, I'll have to go back to the drawing board.
I'll try to check out of the cowl, firewall and cab corner drain plugs on the '87 cab today as well. I believe that truck was brought in for the issue from the factor about paint peeling on the fenders so the cowl TSB might have been dealt with then. I'll see.
My truck doesn't have a catalytic converter either, good to know that the air pump delete doesn't have a negative impact on anything. I have the head put away right now but when I do final assembly I'll plug the holes.
#32
09-15-2013, 11:29 AM

Don't forget the seal around the cargo light, Mine had a 3/8" gap at the top. I think its responsible for the majority of the rust in my cab.
I was thinking the same thing about the rustoleum, something has to be better than nothing. I was pretty unhappy to see rust coming out so soon though. I laid the paint on fairly heavy when I did it, and it had plenty of time to dry before I installed it, a month or better. I used the flat black. Its so much more forgiving appearance wise, but perhaps the gloss would hold up better.
I was thinking the same thing about the rustoleum, something has to be better than nothing. I was pretty unhappy to see rust coming out so soon though. I laid the paint on fairly heavy when I did it, and it had plenty of time to dry before I installed it, a month or better. I used the flat black. Its so much more forgiving appearance wise, but perhaps the gloss would hold up better.
#33
09-15-2013, 09:35 PM
Didn't get to check out the cab today but I have plenty of time to assess it now that I have the engine completely apart.
I'll check into all those things you mentioned bdelmar when I do. While I don't want to make this into a show truck or anything, I do want to make sure it's going to last for quite awhile in our winters and as a work truck. So I'm going to have to look into something good for coating the frame, diffs, underside of cab and box, etc. with.
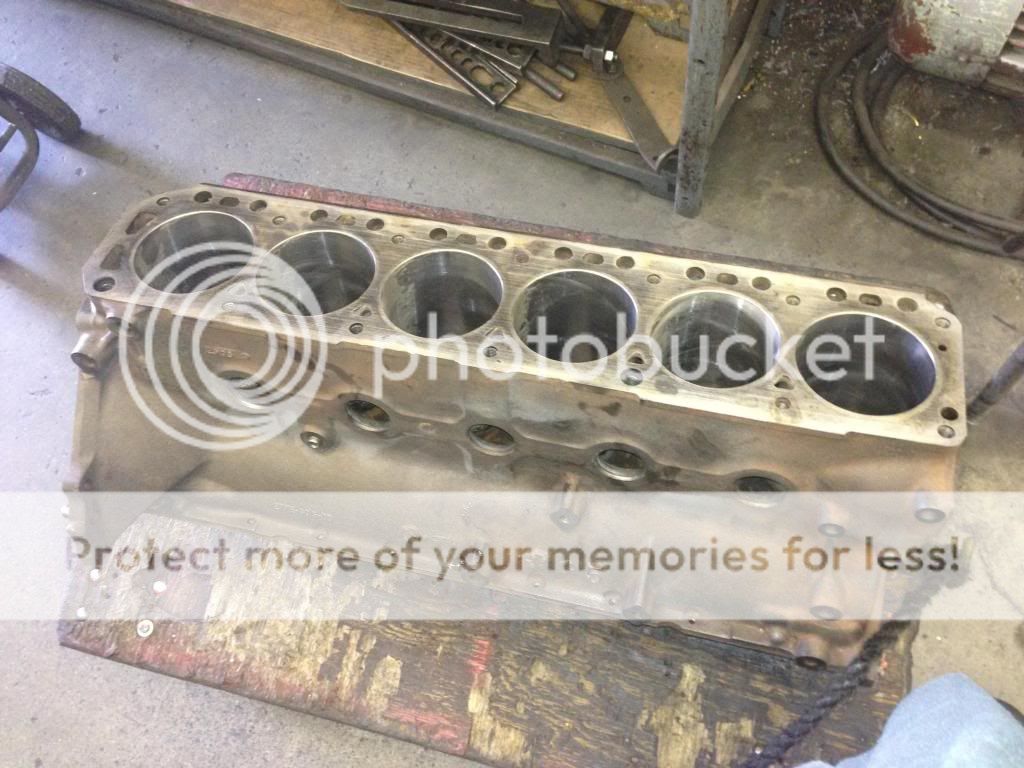
Anyways, the engine tear down continued.
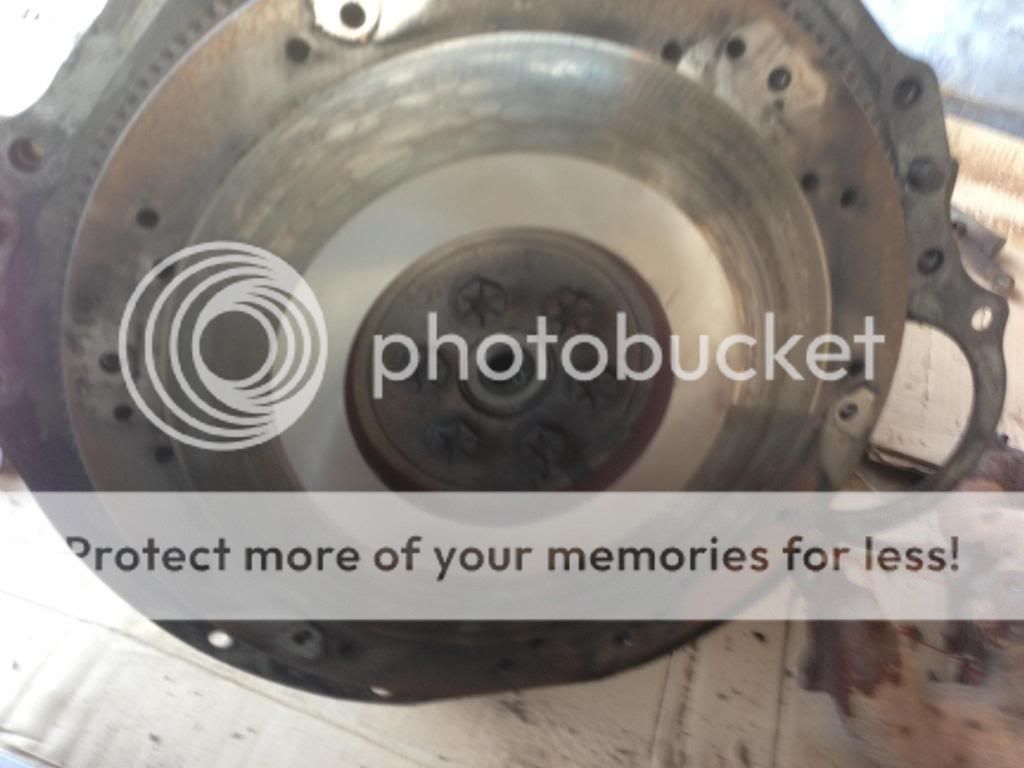
The flywheel looked decent, will resurface it anyways since it's apart.
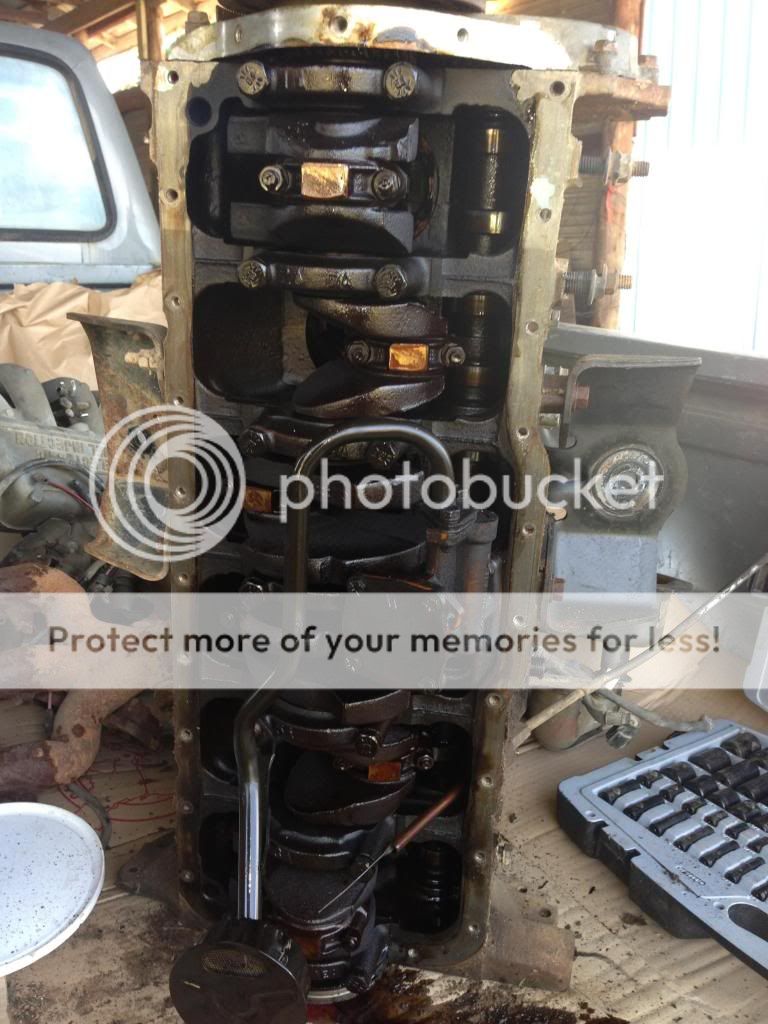
First glace with the oil pan off didn't seem too bad...
I was surprised by the amount of crap in the timing gear cover...

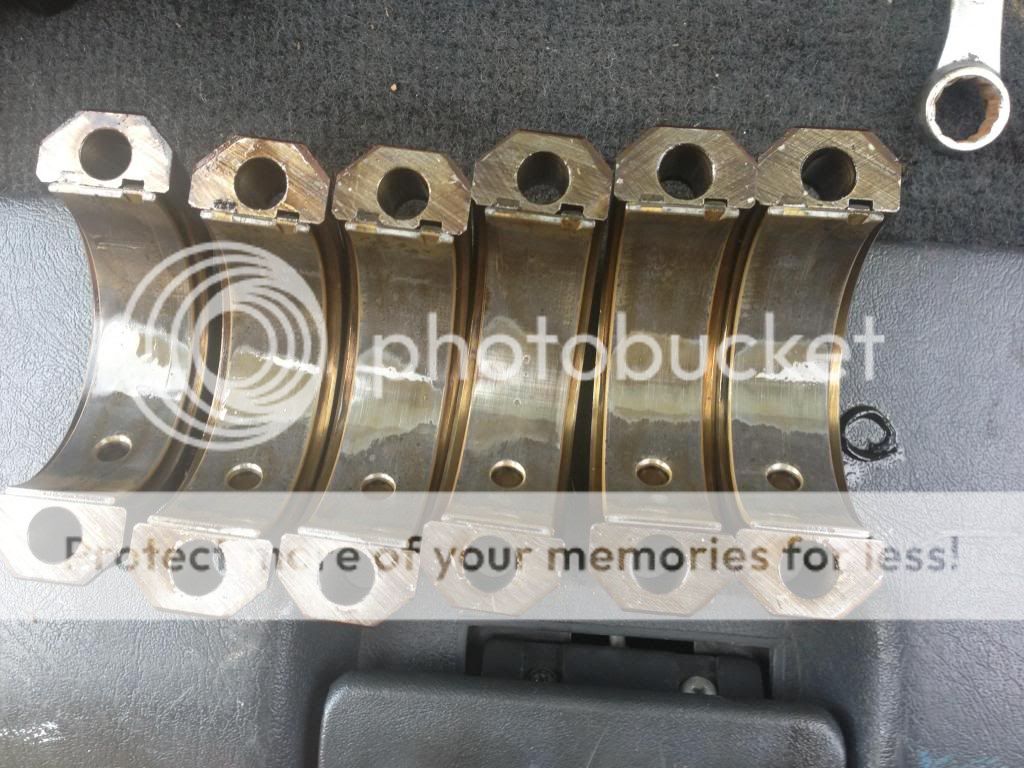
Pulled the con. rod caps even those looked decent...
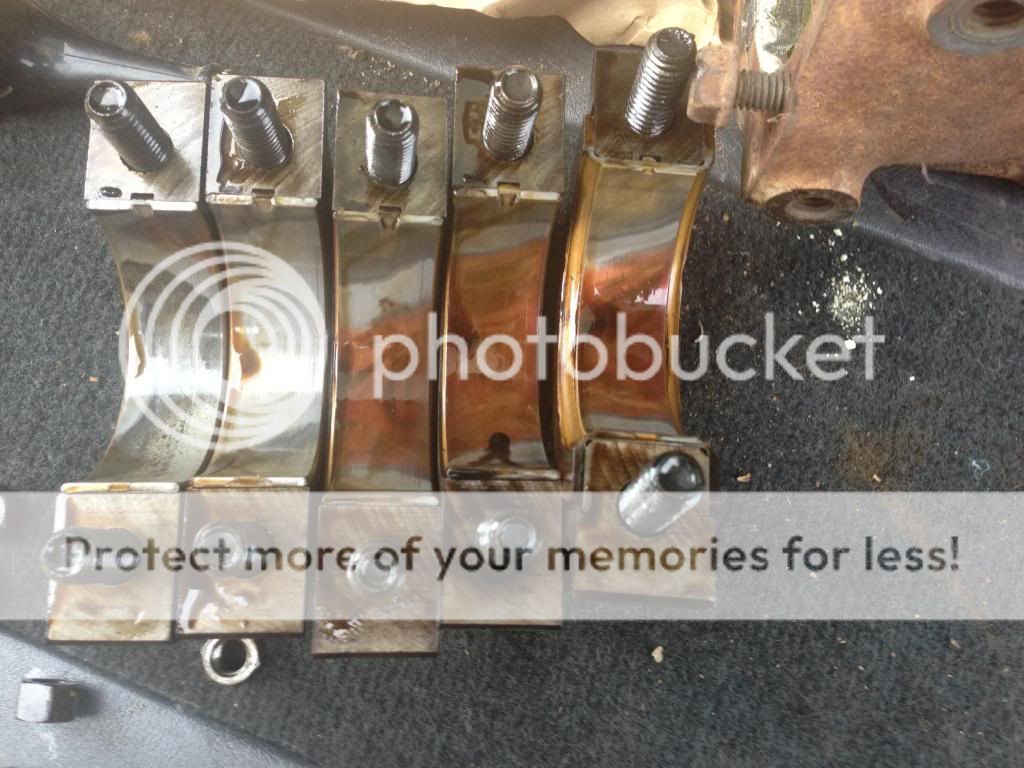
Main caps told a different story though...
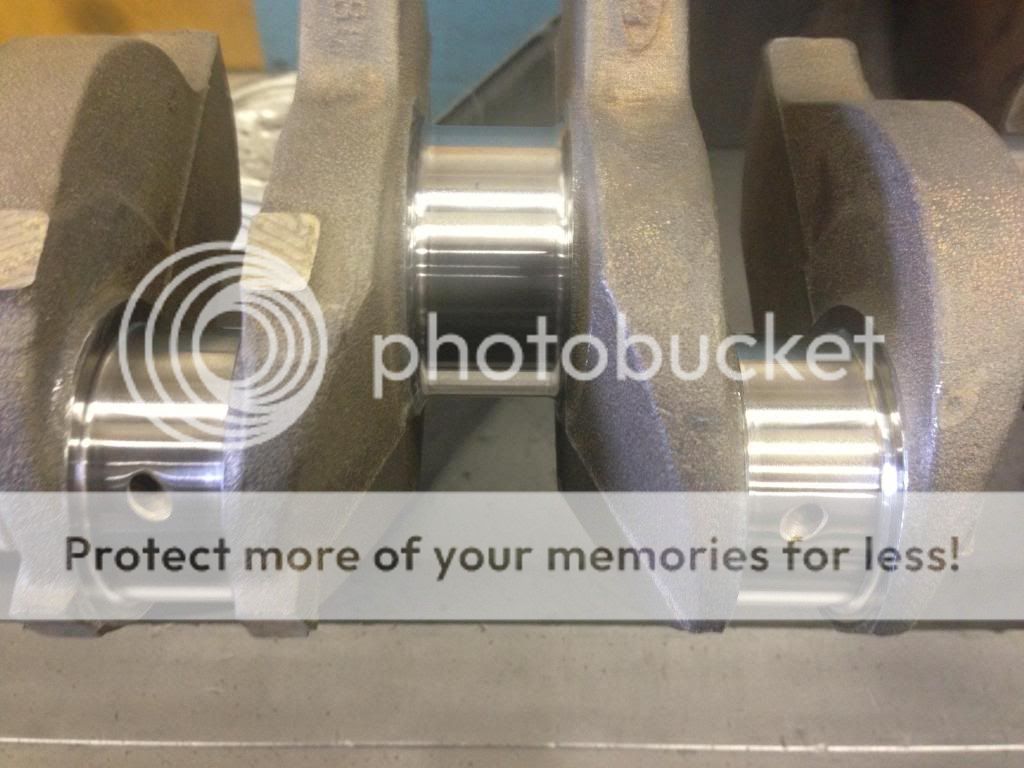
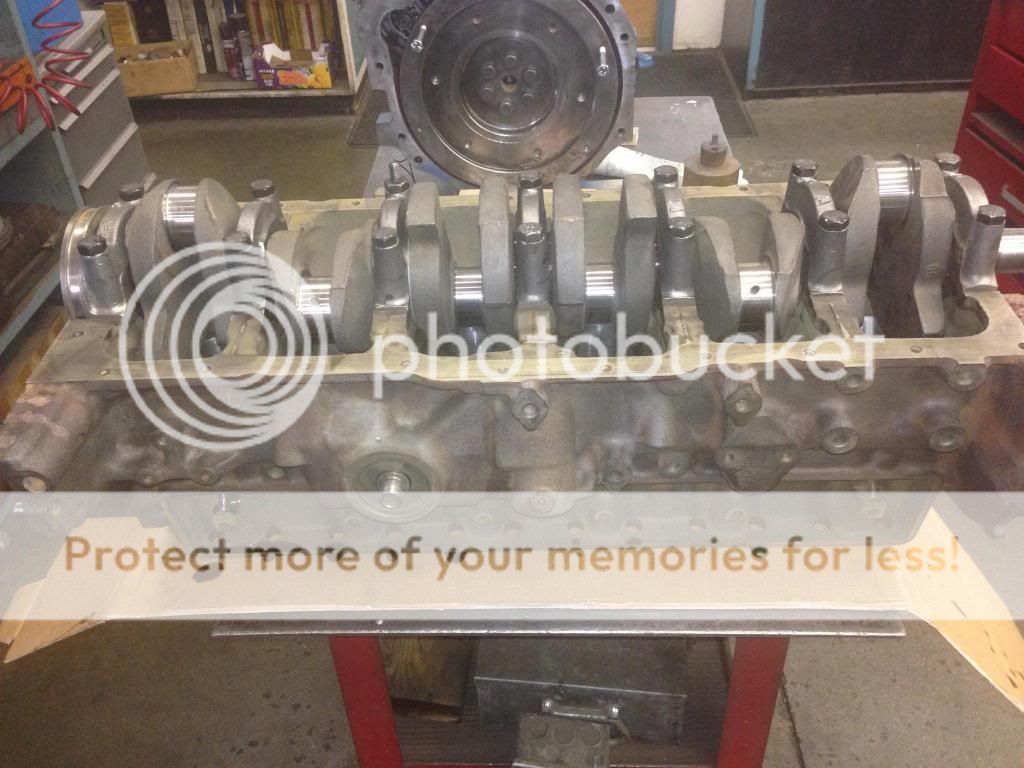
Crank looked good though, have to mic it tomorrow to be sure but at first glance it looks like just a polish might be in order.
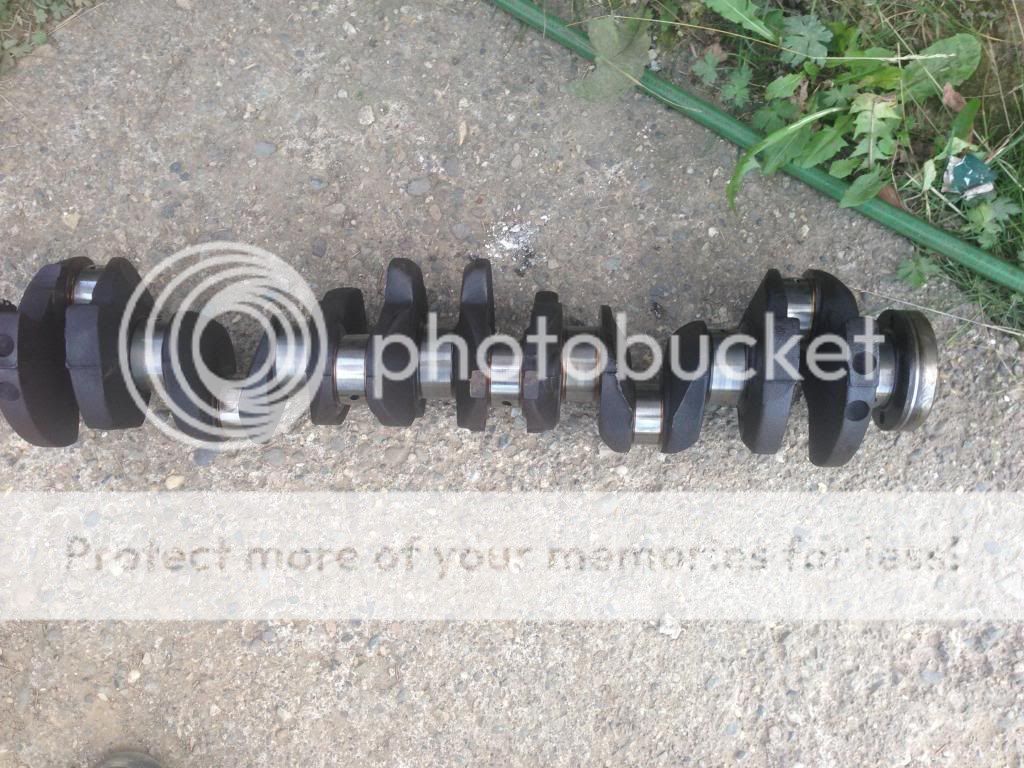
Definitely some wear on the main saddles and con. rod bearings though.
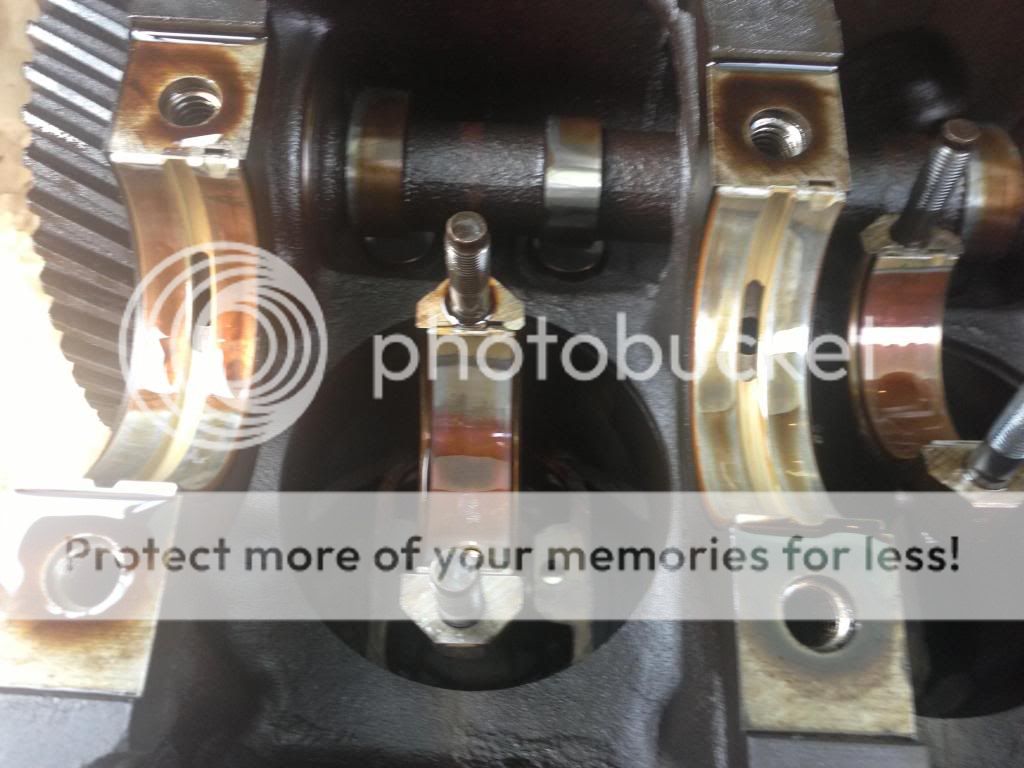
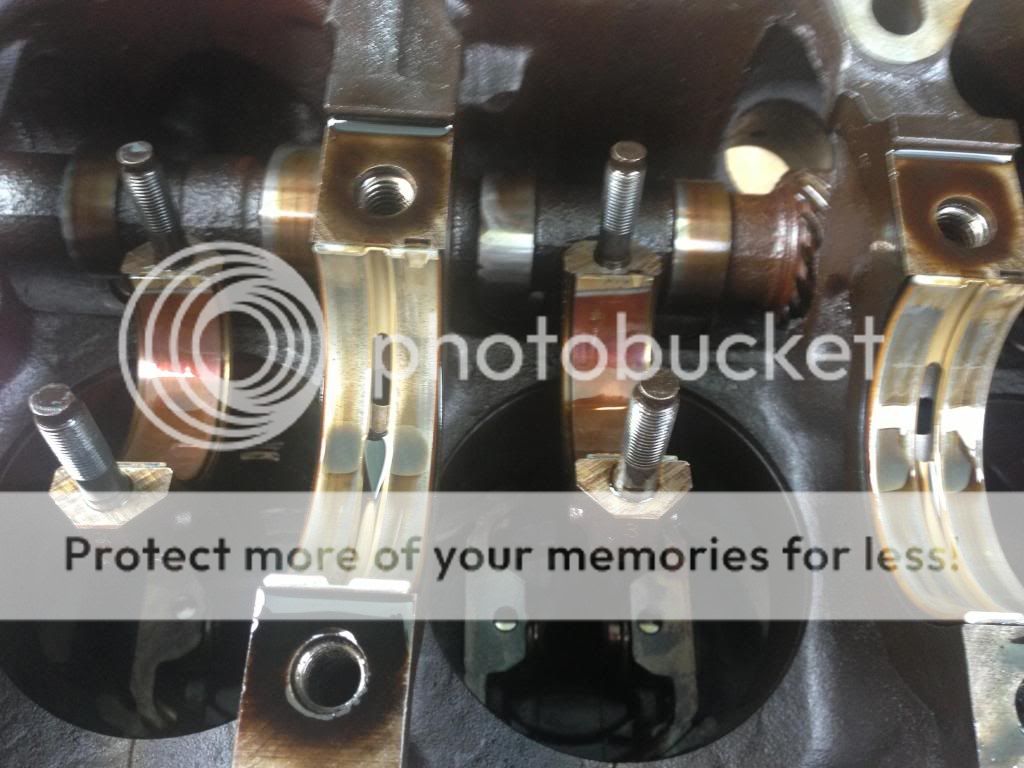
I did notice something worrisome when I was putting the main caps back on and I'll have to get it double checked this week as I'm not great with blocks yet. A few of the caps have quite of bit of play when you twist them back and forth on the saddle. Could be evidence of it needing a line bore but I'm not sure. I'll know more tomorrow or later this week.
I'll check into all those things you mentioned bdelmar when I do. While I don't want to make this into a show truck or anything, I do want to make sure it's going to last for quite awhile in our winters and as a work truck. So I'm going to have to look into something good for coating the frame, diffs, underside of cab and box, etc. with.
Anyways, the engine tear down continued.
The flywheel looked decent, will resurface it anyways since it's apart.

First glace with the oil pan off didn't seem too bad...

I was surprised by the amount of crap in the timing gear cover...

Pulled the con. rod caps even those looked decent...

Main caps told a different story though...

Crank looked good though, have to mic it tomorrow to be sure but at first glance it looks like just a polish might be in order.

Definitely some wear on the main saddles and con. rod bearings though.


I did notice something worrisome when I was putting the main caps back on and I'll have to get it double checked this week as I'm not great with blocks yet. A few of the caps have quite of bit of play when you twist them back and forth on the saddle. Could be evidence of it needing a line bore but I'm not sure. I'll know more tomorrow or later this week.
#34
09-16-2013, 07:46 PM
Update for today. No line bore needed! Was pretty happy about that. I'll most likely be boring the block .020 over. It is currently sitting overnight in the hot tank.
The crank was a little worn, on min. spec, so after a polish it'll just need .001 oversize bearings.
While not a productive day for getting stuff done it was productive in seeing where this rebuild needs to go
The crank was a little worn, on min. spec, so after a polish it'll just need .001 oversize bearings.
While not a productive day for getting stuff done it was productive in seeing where this rebuild needs to go
#35
09-16-2013, 08:15 PM

#37
09-17-2013, 09:22 PM
This morning I got the block out of the tank and steamed but that's it for this morning.
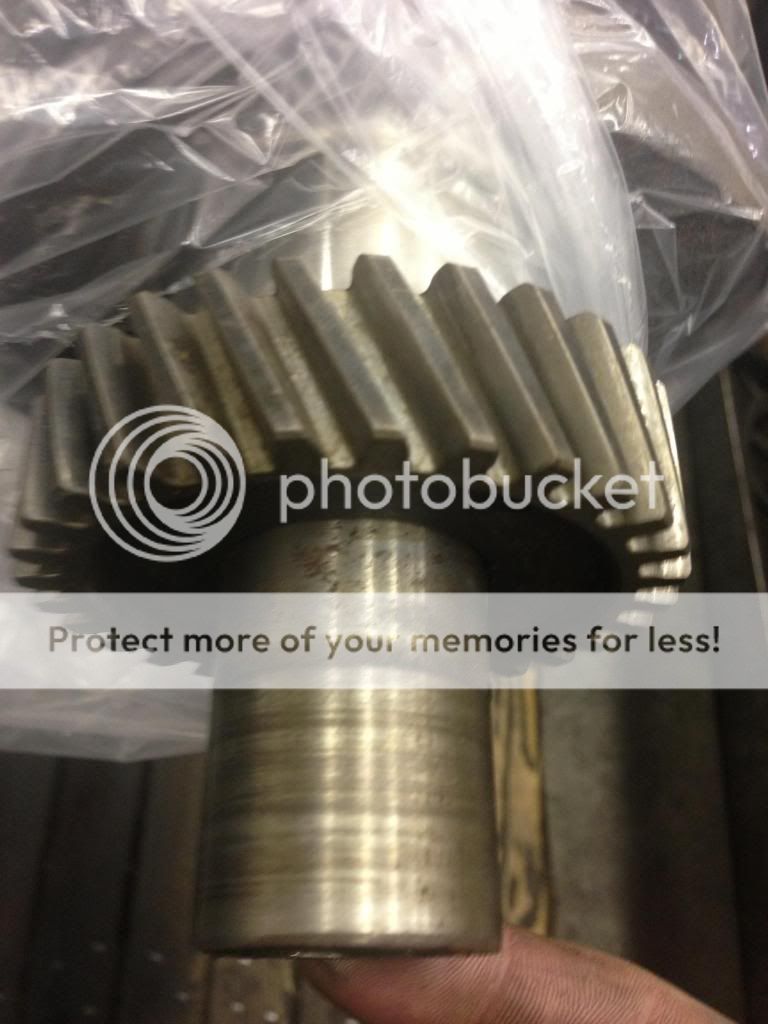
Lunch time I got the crank polished and it turns out I won't be needing .001 undersize bearings. I did a really light polish and I'm still within spec so standard bearings it will be. Managed to snap some pics while I did the crank which slowed me down a little bit. Usually I can get a automotive crank polished in about 20 minutes. Mine took 30
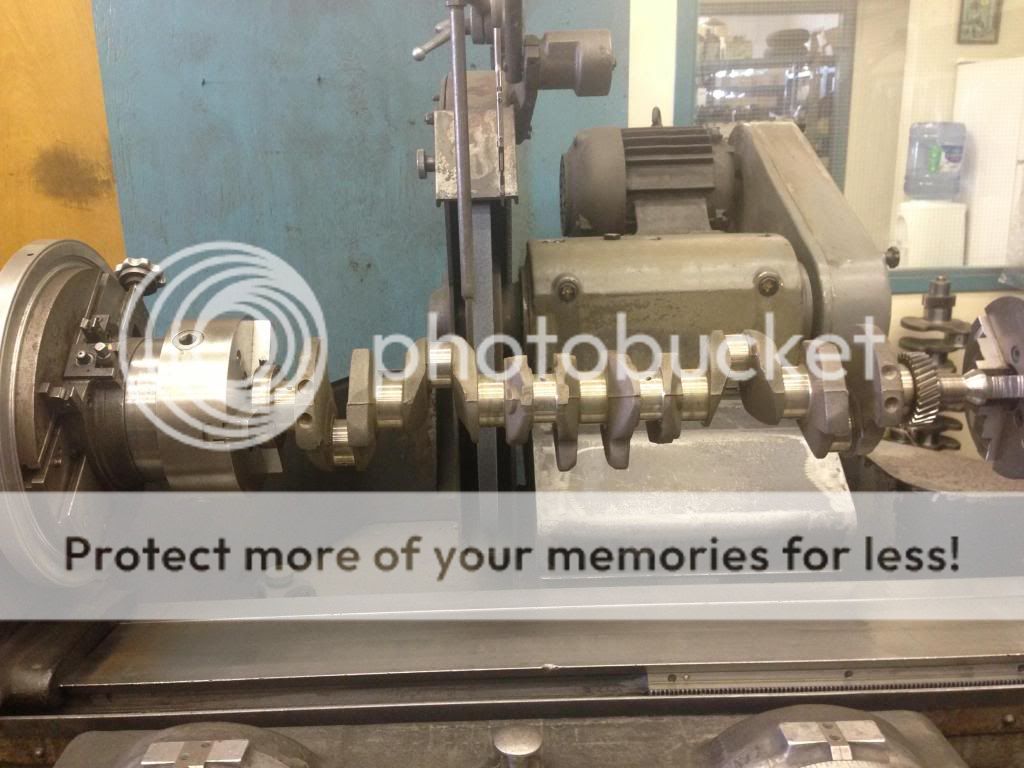
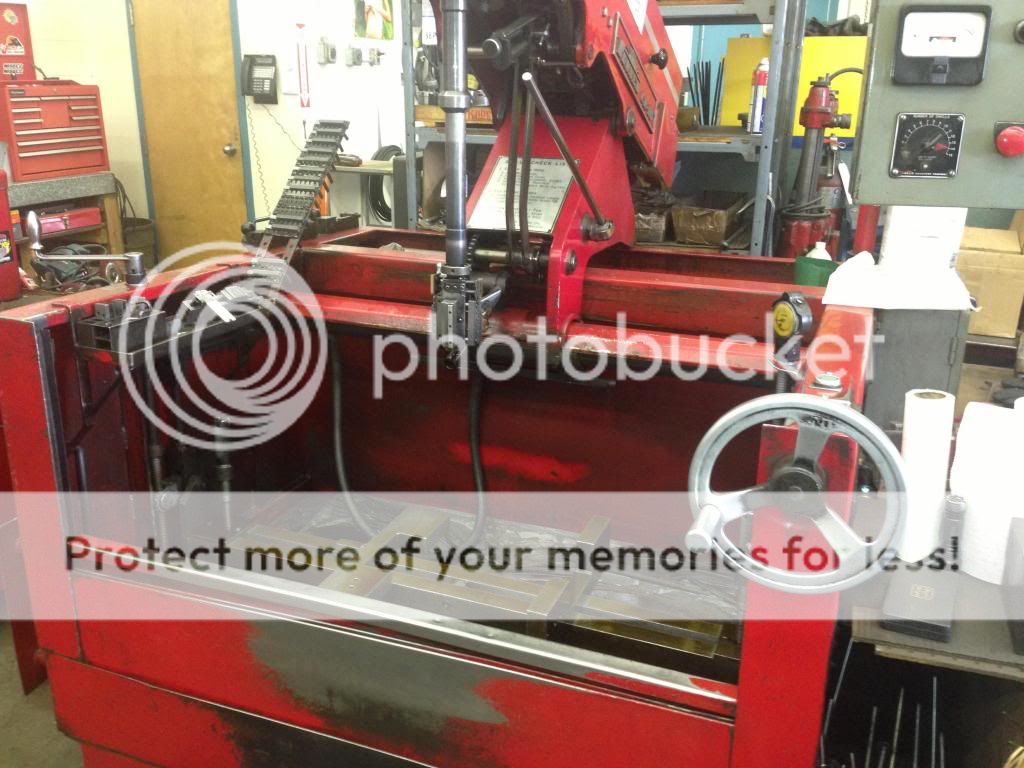
Mounted in the crank grinder, you might be able to make out the goldish hue the journals have from wear/coming out of the hot tank.
First thing I do before diving into polishing a crank is run a thinly ripped belt in the radii to clean them up. Some people don't but I think the finished product looks so much better.
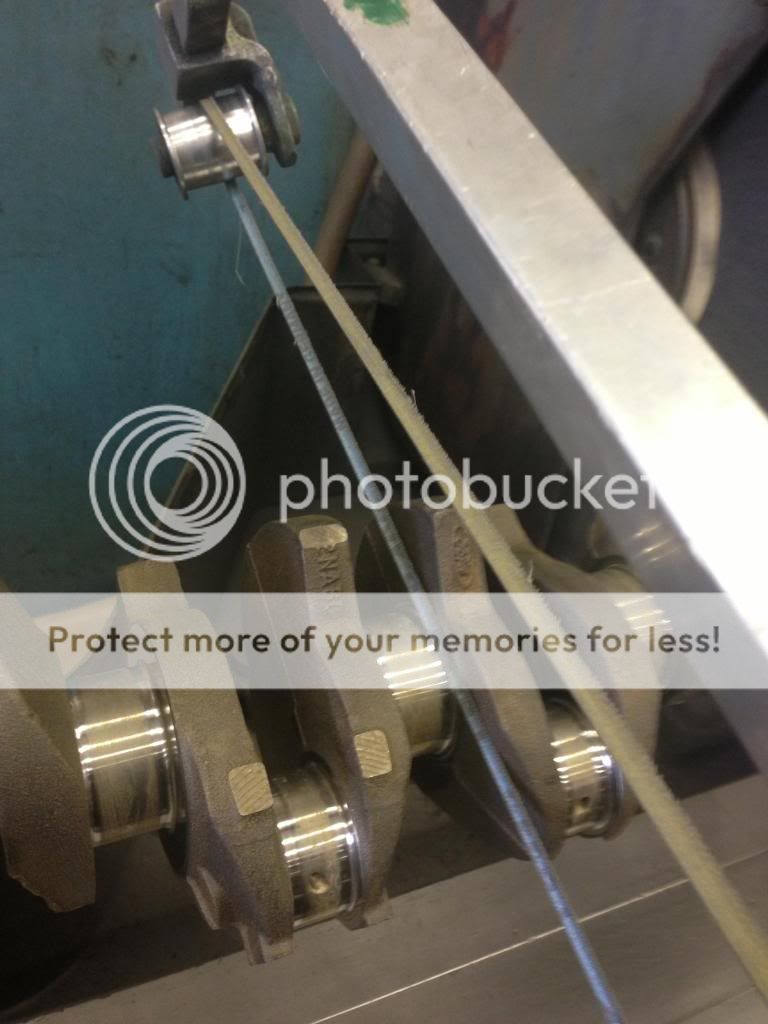
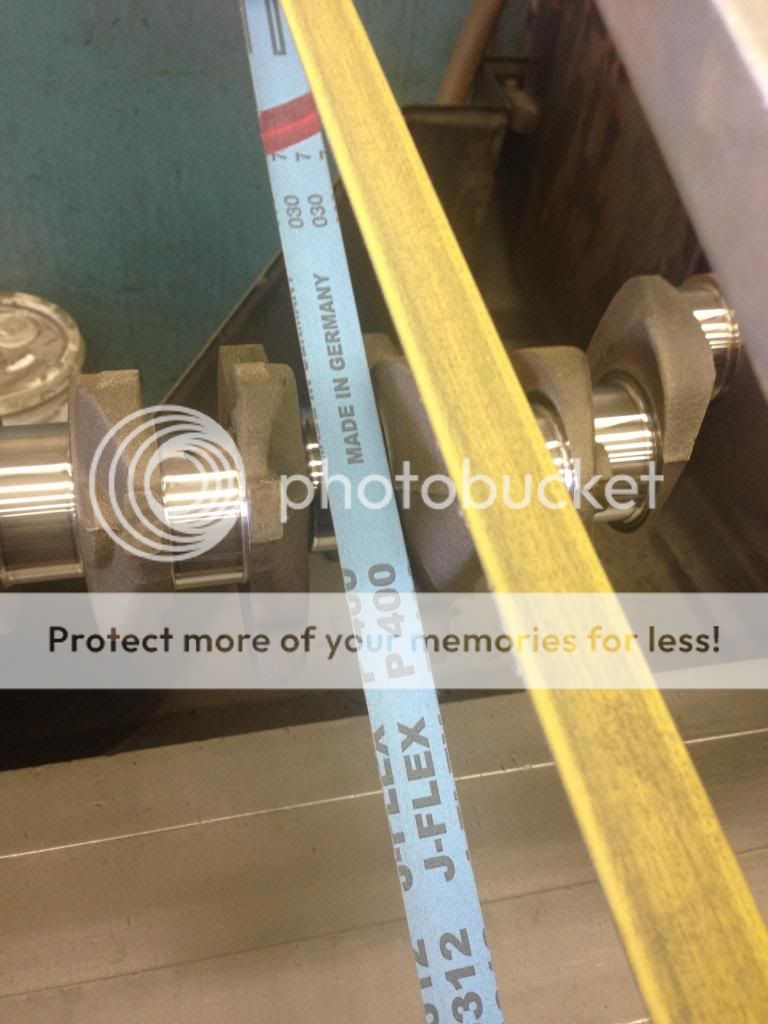
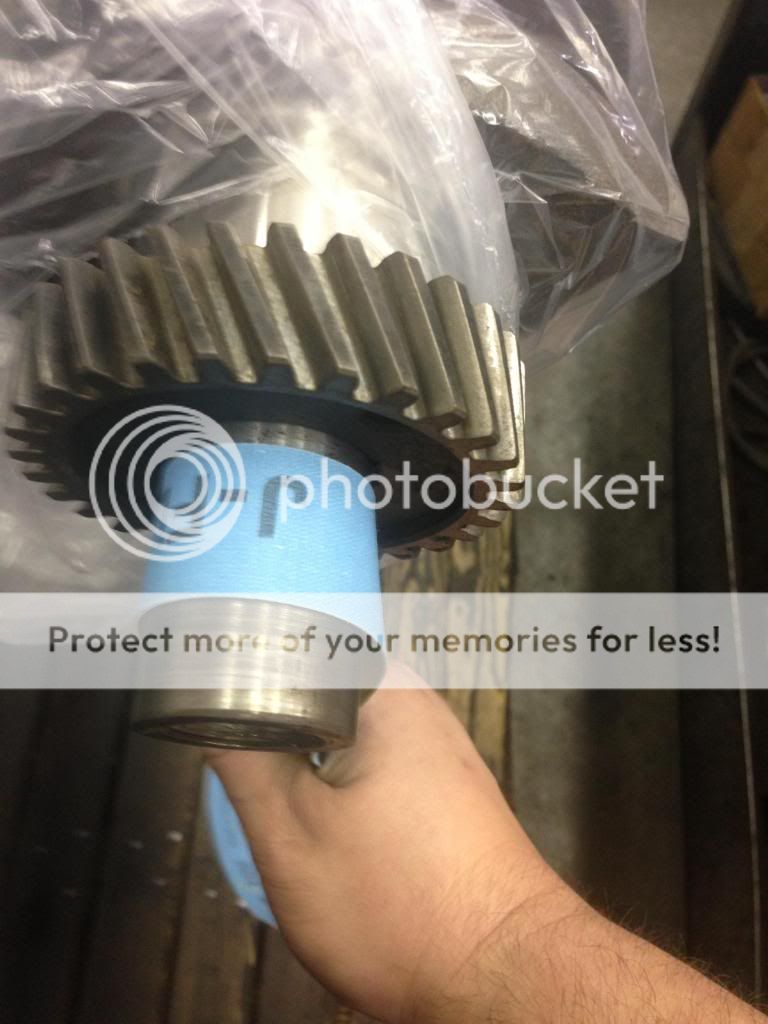
Next I run through a series of belts with various grit ranging from 320, 400, old/used 400, cork and finally a felt belt for a good finish. You can see I snapped this pic on one of the 400 belts.
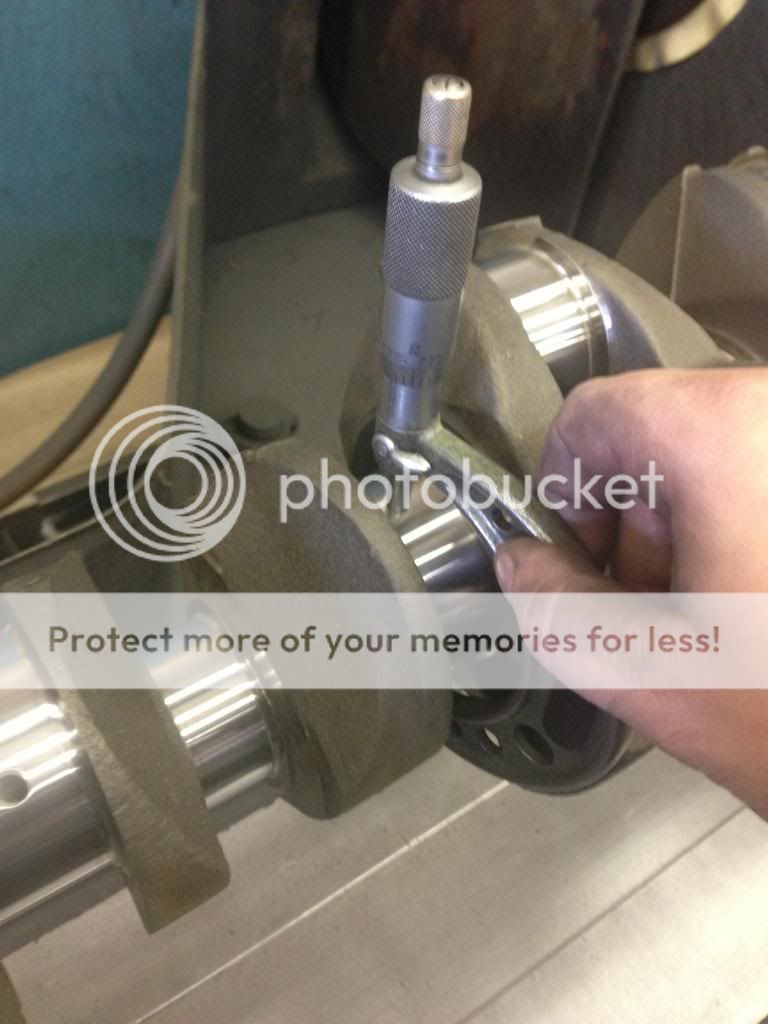
I do a final size check between the cork and felt belt so there's no marks left behind from the mic.
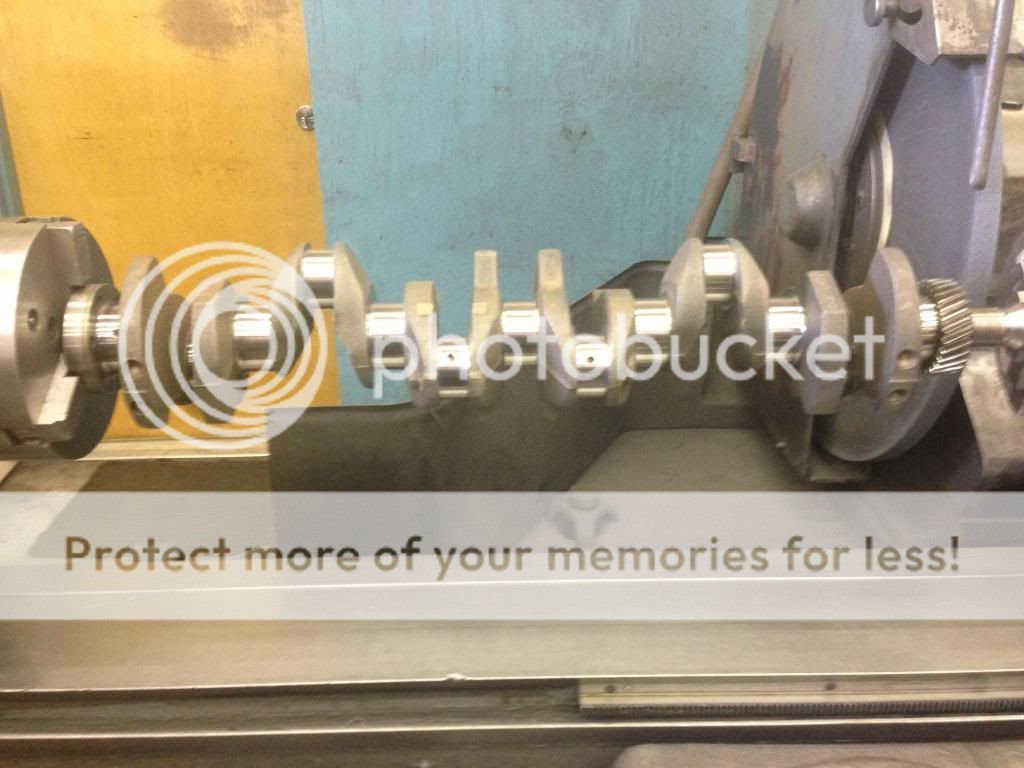
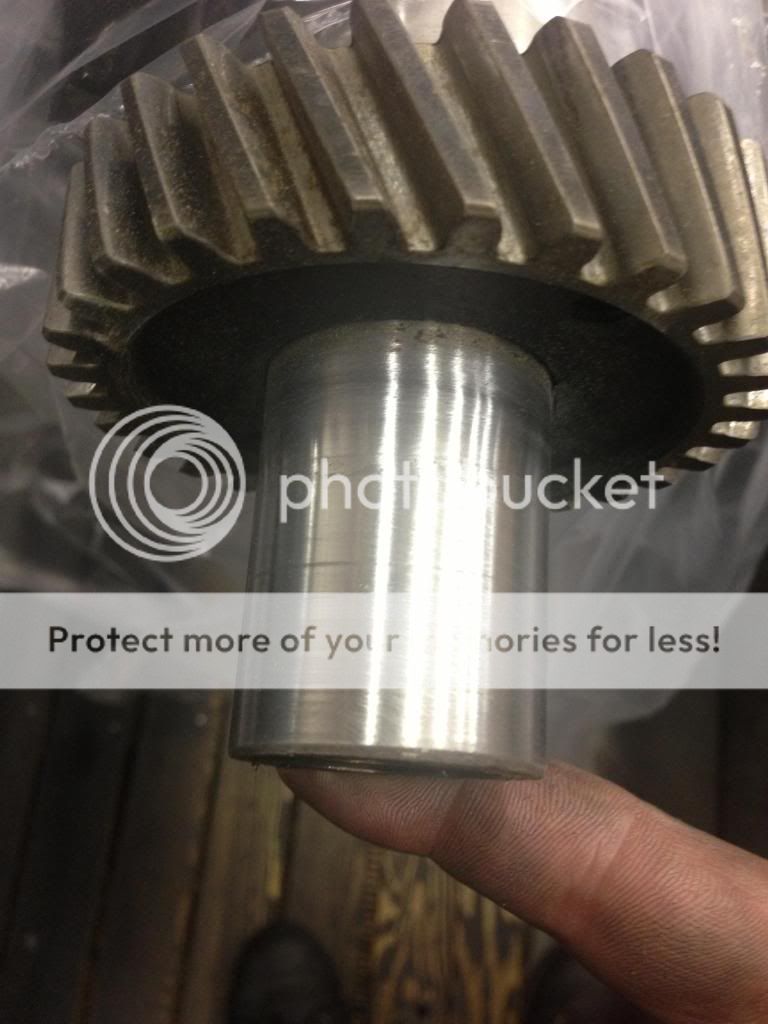
Finished the journals!
I start to wrap the crank, still in the machine, in plastic to help keep it clean and protected for the customer. In this case it'll protect it while I keep it in storage until the other pieces are done.
Before I button up the ends I give the seal surfaces a quick clean.
Before:
After:
And all wrapped for storage.
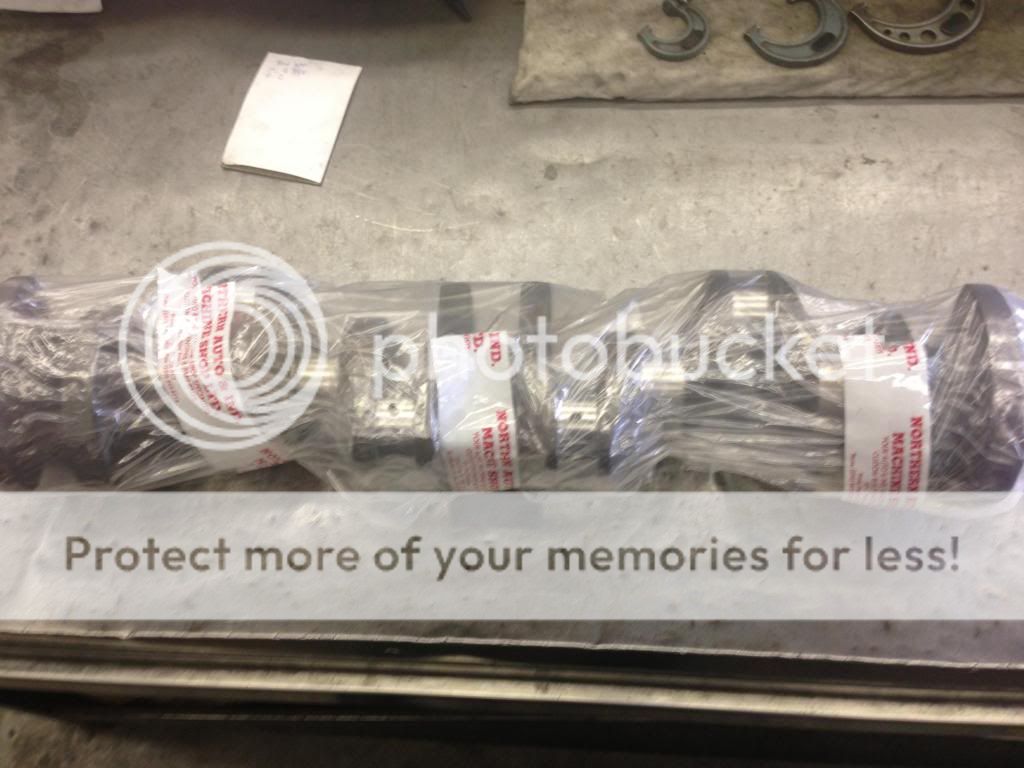
While the plastic will keep it relatively clean I will steam it before install as there could be crap that fell into the oil holes that could scratch the journals or bearings.
Tomorrow will most likely be just cleaning up the block, I'll try to snap some pics but I'll warn you all it's not terribly exciting
Lunch time I got the crank polished and it turns out I won't be needing .001 undersize bearings. I did a really light polish and I'm still within spec so standard bearings it will be. Managed to snap some pics while I did the crank which slowed me down a little bit. Usually I can get a automotive crank polished in about 20 minutes. Mine took 30
Mounted in the crank grinder, you might be able to make out the goldish hue the journals have from wear/coming out of the hot tank.

First thing I do before diving into polishing a crank is run a thinly ripped belt in the radii to clean them up. Some people don't but I think the finished product looks so much better.

Next I run through a series of belts with various grit ranging from 320, 400, old/used 400, cork and finally a felt belt for a good finish. You can see I snapped this pic on one of the 400 belts.

I do a final size check between the cork and felt belt so there's no marks left behind from the mic.

Finished the journals!


I start to wrap the crank, still in the machine, in plastic to help keep it clean and protected for the customer. In this case it'll protect it while I keep it in storage until the other pieces are done.
Before I button up the ends I give the seal surfaces a quick clean.
Before:


After:

And all wrapped for storage.

While the plastic will keep it relatively clean I will steam it before install as there could be crap that fell into the oil holes that could scratch the journals or bearings.
Tomorrow will most likely be just cleaning up the block, I'll try to snap some pics but I'll warn you all it's not terribly exciting
#38
09-19-2013, 09:17 PM
Unfortunately I didn't get any pictures of the block cleaning yesterday but it's just awaiting a rebore.
Today was slow so I did some stuff during work hours. I didn't get to snap any pictures while I was doing the work since we don't bring phones in the shop area normally.
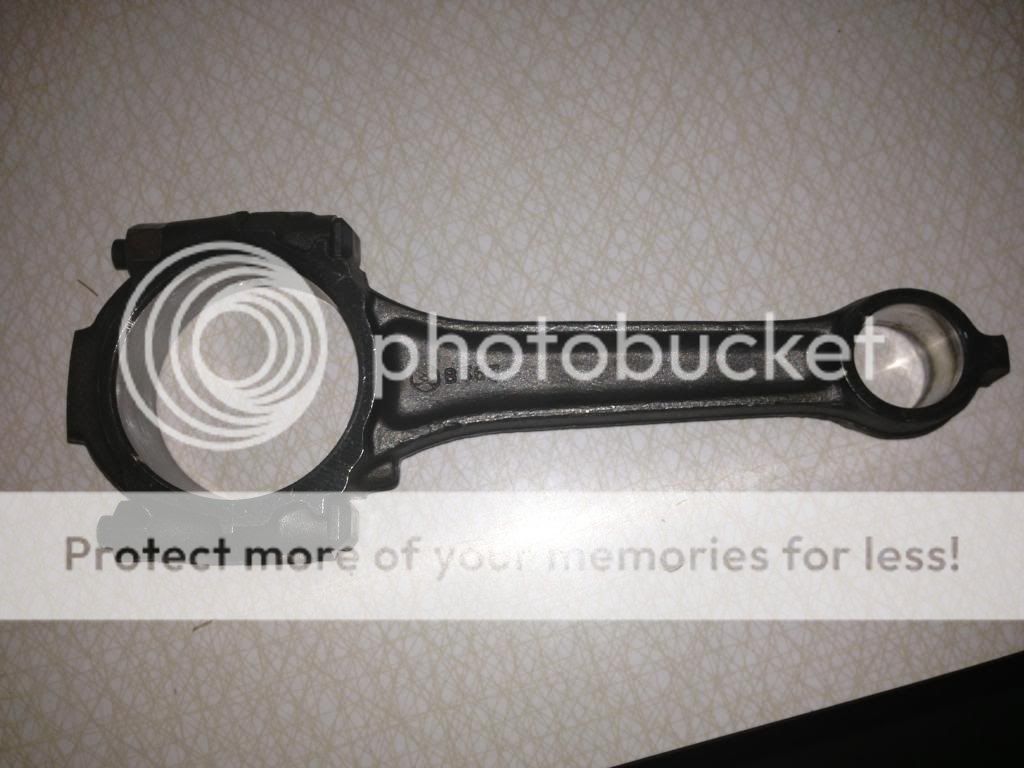
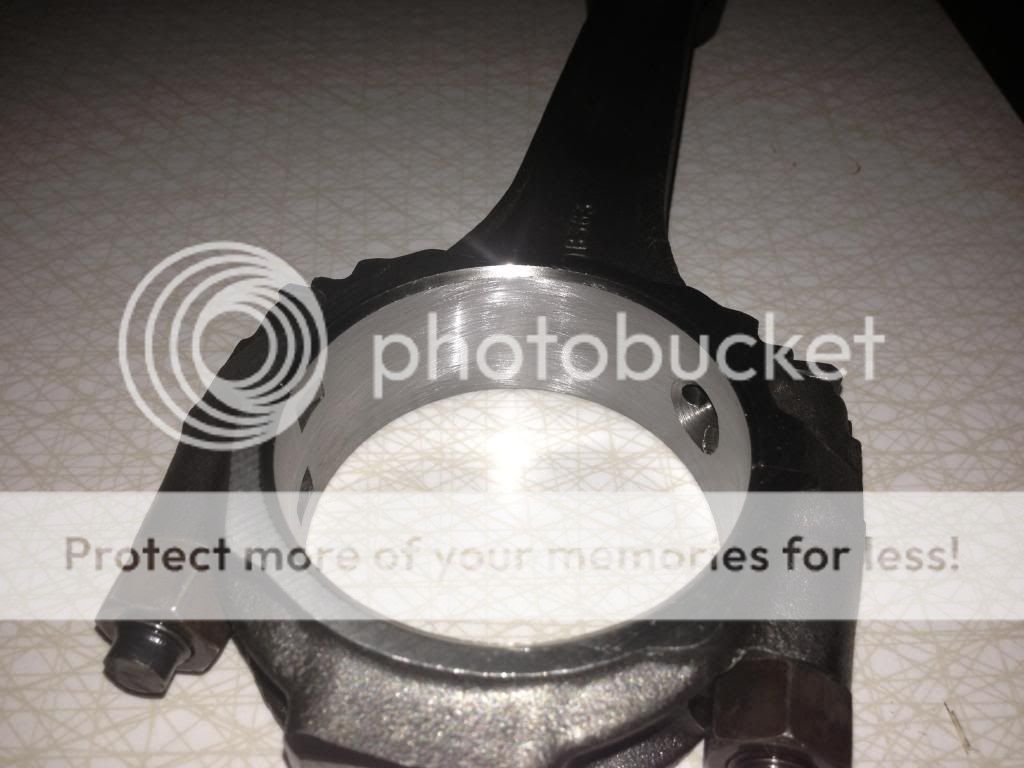
I cleaned and checked the connecting rods for size, roundness and just machined them lightly to size and to clean them up.
The end result:
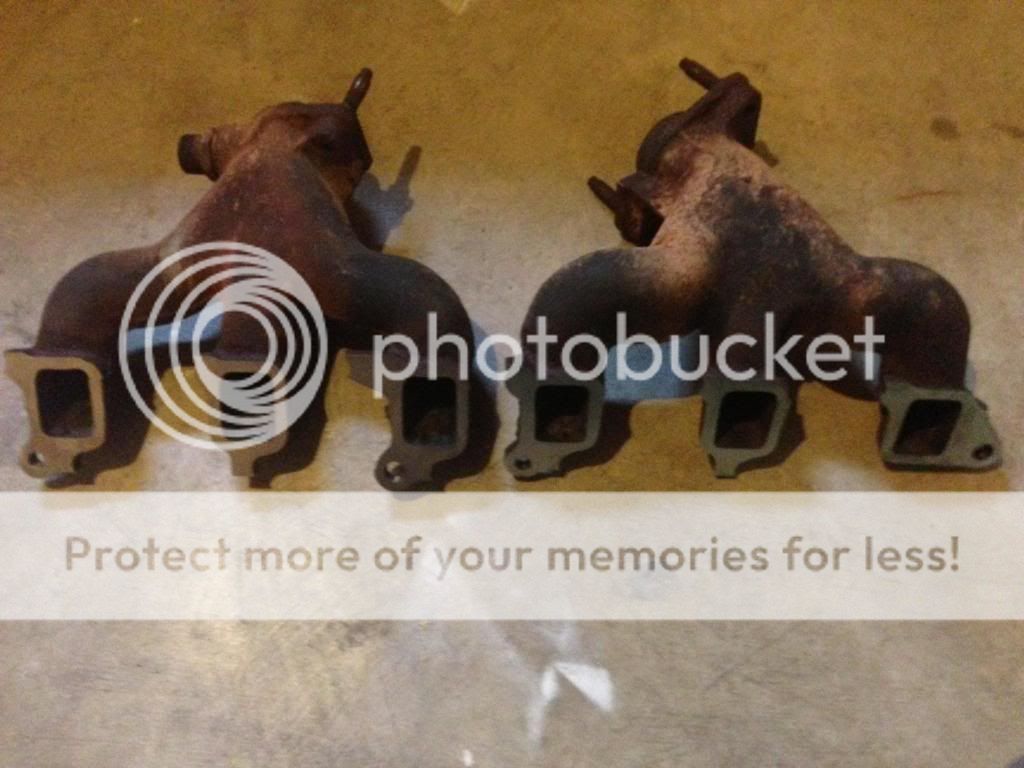
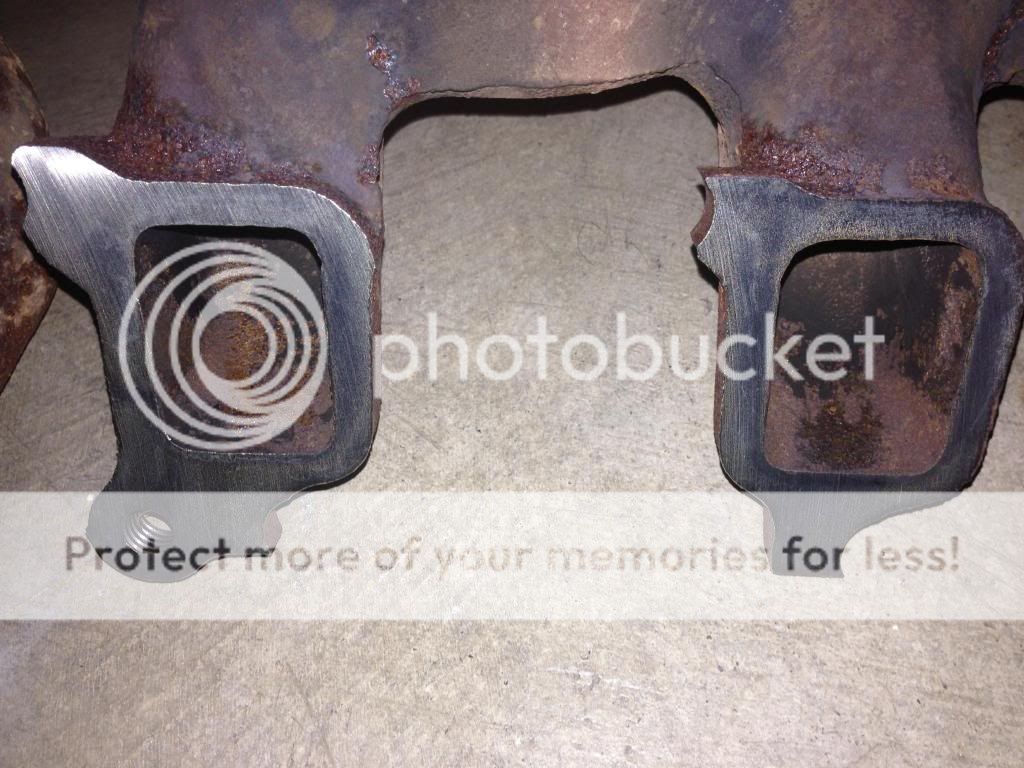
I figured while I had the exhaust manifolds off I would resurface them to make sure they're true and I'll have no exhaust leaks when everything goes back together. The first was pretty well flat and only needed a few thou to true it up. The second required a bit more (~0.015 thou) to true up the middle chamber to the 2 outer.
End result was:
So after the block is finished I just have the flywheel to machine and then it's just left over pieces to hot tank and clean (valve cover, oil pan, intake, etc) and final assembly.
Not sure if I'll get to much this weekend as there's family gatherings happening. Hopefully I'll be able to gut the interior, pull the box and cab over the next couple weekends. Then start on the frame.
Today was slow so I did some stuff during work hours. I didn't get to snap any pictures while I was doing the work since we don't bring phones in the shop area normally.
I cleaned and checked the connecting rods for size, roundness and just machined them lightly to size and to clean them up.
The end result:


I figured while I had the exhaust manifolds off I would resurface them to make sure they're true and I'll have no exhaust leaks when everything goes back together. The first was pretty well flat and only needed a few thou to true it up. The second required a bit more (~0.015 thou) to true up the middle chamber to the 2 outer.
End result was:


So after the block is finished I just have the flywheel to machine and then it's just left over pieces to hot tank and clean (valve cover, oil pan, intake, etc) and final assembly.
Not sure if I'll get to much this weekend as there's family gatherings happening. Hopefully I'll be able to gut the interior, pull the box and cab over the next couple weekends. Then start on the frame.
#39
09-20-2013, 07:36 PM
So I need some confirmation. I got an vague email back from Comp Cams when I asked about the computer friendliness of the 252H (as well as the 260H and 268H) cams. They said they do a custom grinds for the EFI 300s and gave me a price on one with new lifters.
Now has anyone used a 252 or 260 on their old speed density EFI 300s and was there any issues?
Did you get new lifters installed?
I could've swore people used the 252H in EFI 300s without issue but then again I could be mistaken.
Now has anyone used a 252 or 260 on their old speed density EFI 300s and was there any issues?
Did you get new lifters installed?
I could've swore people used the 252H in EFI 300s without issue but then again I could be mistaken.
#40
09-21-2013, 12:36 AM
Today was slow for most of the day so I got some training on the rebore machine and dove right in reboring my block .020 over. Again it was during normal work hours so no pics taken during machining.
What I was working with:
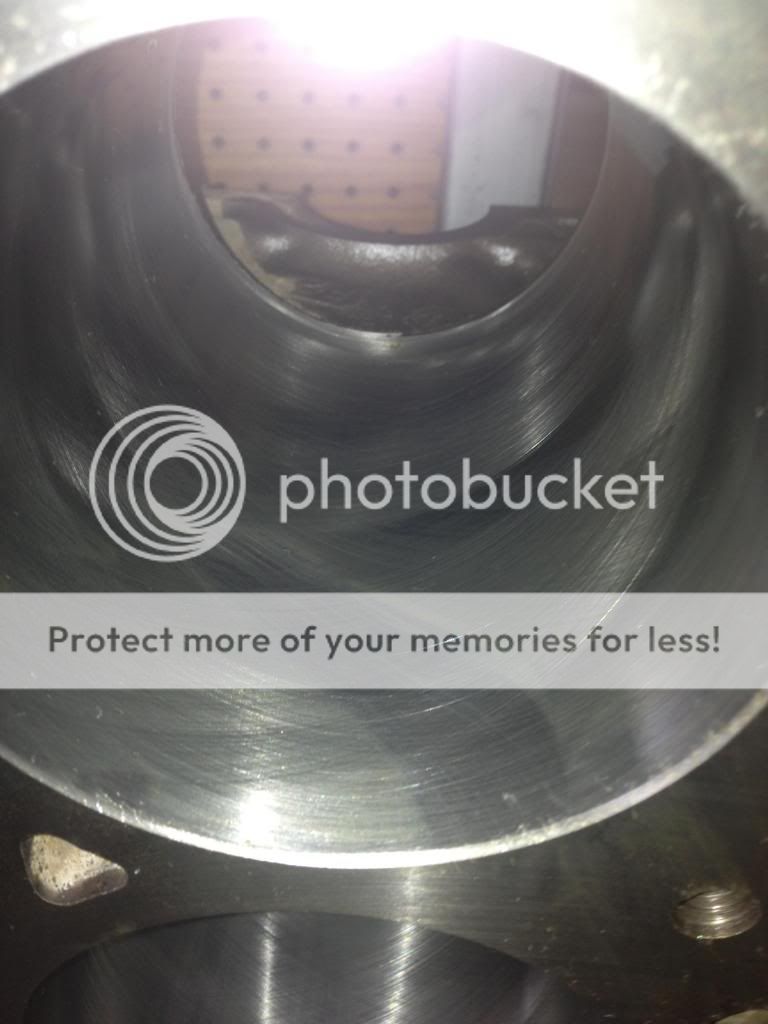
Decent crosshatching for my first rebore I think
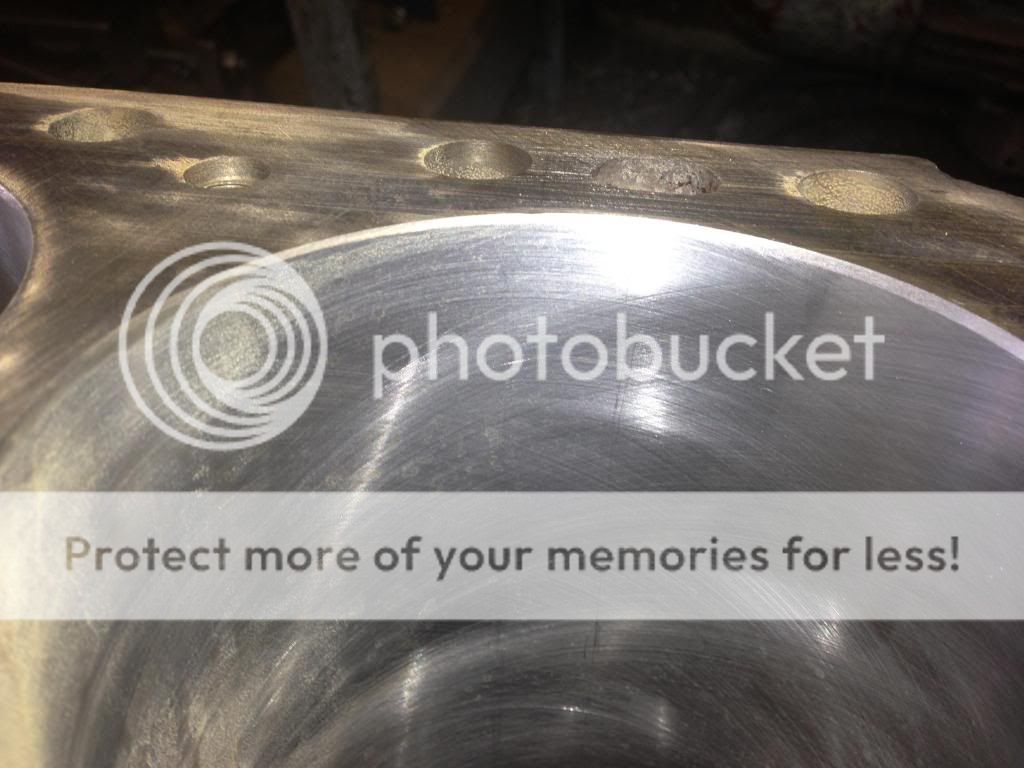
After reboring I figured I should deck the block just so I know the head to gasket to block surfaces will all be true.
Before:
After:

I took ~0.006 to 0.008 thou off the block so I'm expecting a pretty minor bump in compression ratio
Now if I can figure out my cam "problem" I should be good to go with final assembly when it slows down again.
What I was working with:

Decent crosshatching for my first rebore I think


After reboring I figured I should deck the block just so I know the head to gasket to block surfaces will all be true.
Before:

After:

I took ~0.006 to 0.008 thou off the block so I'm expecting a pretty minor bump in compression ratio
Now if I can figure out my cam "problem" I should be good to go with final assembly when it slows down again.
#41
09-27-2013, 08:01 PM
88 F250 project
Hey Vadis,
Thanks for all the pics I have an 88 F250 Custom 5.8L EFI. Since the PO camo painted over everything I needed a good set of pics of what the truck's supposed to look like. I'm going to buy a new grille cheap off eBay, but if you have any extra fender emblems please send me a private message.
Once I figure out how to insert pics I will start a rebuild thread as well. Good Luck!
#42
10-01-2013, 10:21 PM
Thanks Charles, I don't think I have any extra complete emblems. The parts 6.9 truck is missing part of the drivers side one and I was just going to use the emblems off my grandpa's truck just cause it will be a "custom" when I'm done with it.
As for the slow updates as of late, there hasn't been anything to report. I was playing the waiting game for my pistons to come in for the last week. But today I have started on final assembly.
Got the frost plugs and cam bearings in and test fitted the camshaft. Tomorrow will be laying the crankshaft and putting the pistons and con. rods together, at least that's the plan
#43
10-02-2013, 02:51 PM
F250 emblems
Thanks Charles, I don't think I have any extra complete emblems. The parts 6.9 truck is missing part of the drivers side one and I was just going to use the emblems off my grandpa's truck just cause it will be a "custom" when I'm done with it.
As for the slow updates as of late, there hasn't been anything to report. I was playing the waiting game for my pistons to come in for the last week. But today I have started on final assembly.
Got the frost plugs and cam bearings in and test fitted the camshaft. Tomorrow will be laying the crankshaft and putting the pistons and con. rods together, at least that's the plan
As for the slow updates as of late, there hasn't been anything to report. I was playing the waiting game for my pistons to come in for the last week. But today I have started on final assembly.
Got the frost plugs and cam bearings in and test fitted the camshaft. Tomorrow will be laying the crankshaft and putting the pistons and con. rods together, at least that's the plan
I am watching several on eBay best price looks like a complete set of XLT emblems or an XLT Lariat complete with dashboard emblem so my custom might be an "XLT" once repainted

#44
10-03-2013, 10:39 PM
Got the crankshaft and rear main seal in and torqued the main caps down yesterday. Crank spins nicely
This morning I put the pistons on the connecting rods and check them for straightness and ringed them up. At lunch time I got them all into the block and torqued to spec. From this point on is all new territory as far as my engine building experience goes. Looking forward to the learning experience.
If it's slow tomorrow I should make some decent headway with assembly. So fingers crossed for a slow day
Also I should mention I opted to go with a stock camshaft just because there was no waiting and no issues with getting a performance one here and IF it would work with the computer. I didn't want the headache of one not working right with my first engine rebuild. I'll go big with my 351w build instead
#45
10-03-2013, 10:46 PM
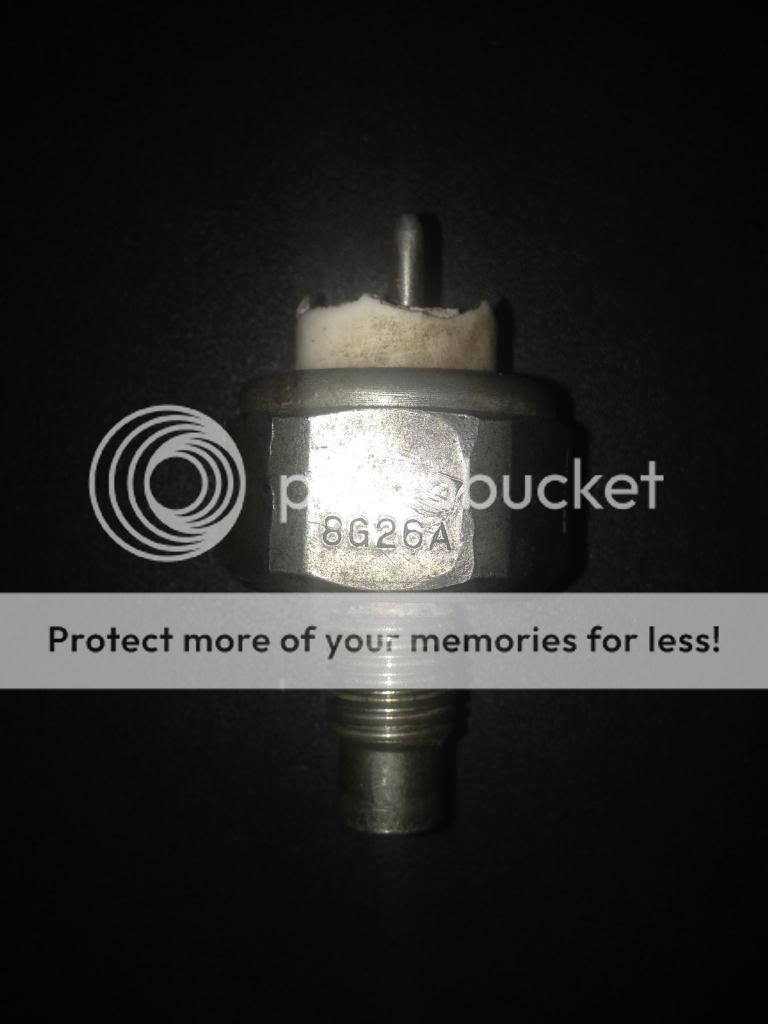
I also had a question. I broke what I believe is the knock sensor when I was removing it before hot tanking the block. I just wanted to know if I'm correct that it is the knock sensor. I'm having a hell of a time trying to find one online to get a picture and rough idea of a price for a replacement.
This is it. What I believe is the part # on it is "8G26A".
This is it. What I believe is the part # on it is "8G26A".
