


Plastic Fender (Rub) Pull-Back Mod
Thread Starter
|
Logistics Pro


Joined: May 2011
Posts: 4,832
Likes: 668
From: Maine
Plastic Fender (Rub) Pull-Back Mod
So, being the genius that I am, I had an idea today when I was in True Value... and I decided to spend the $10 on hardware.

I purchased 2 bolts, 2 large washers, a flat-backed nut, small chain (1' is more than enough) and 2 eye/hook turnbuckles.
Entire "mod" took 10 minutes.
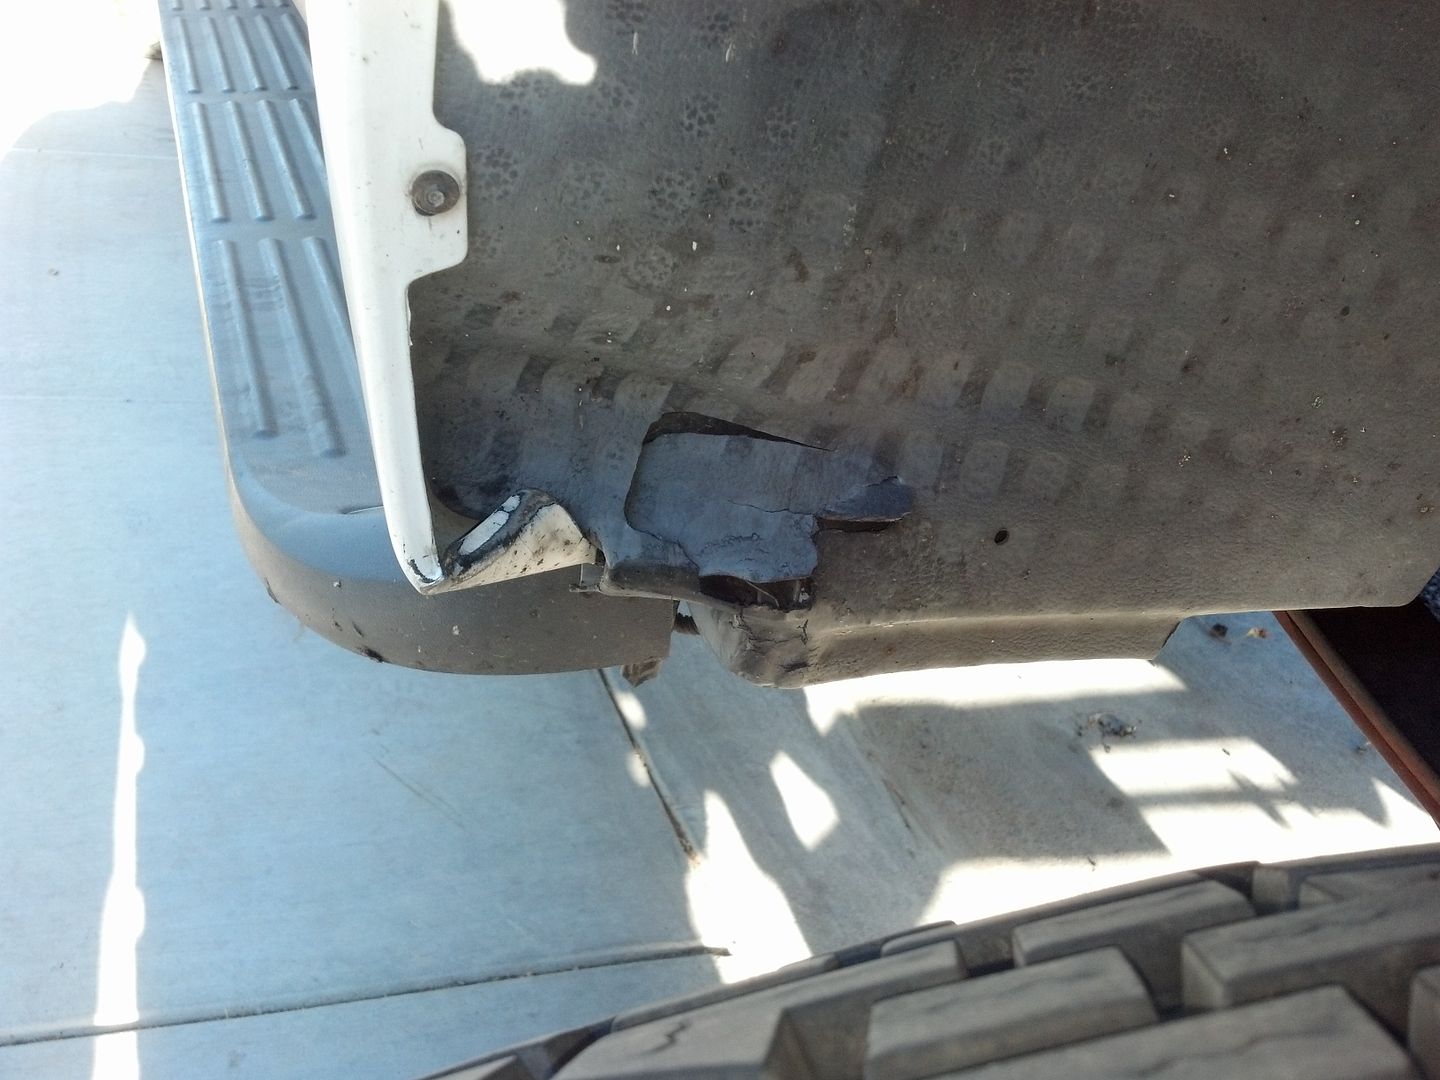
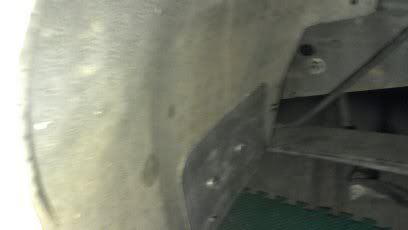
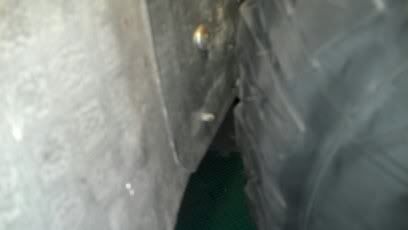
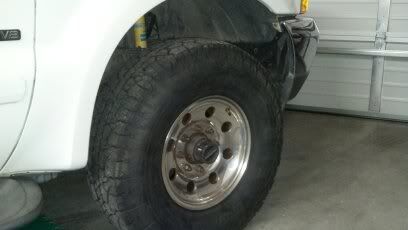
Basically, put the bolt through the washer, then through the existing hole in the plastic inner fender, right in the bottom-rear middle.


Widen the end of the chain just enough to slip the bolt through, then put on the flat-nut.
Cut the chain as short as you can while still able to hook to the turnbuckle.
I used the open end of the turnbuckle to an existing hole under the truck (see pics) opened the other end of the chain and attacked it to the eye-side of the turnbuckle.

Tighten, pulling back the fender. Easy as that.
I went off-roading in my fields being sure to hit the bumps at full-turns, not even a slight rub. I just wish I thought of this months ago BEFORE my fenders started rubbing through.
Anyway, no more concerned looks when turning in parking lots!
I purchased 2 bolts, 2 large washers, a flat-backed nut, small chain (1' is more than enough) and 2 eye/hook turnbuckles.
Entire "mod" took 10 minutes.
Basically, put the bolt through the washer, then through the existing hole in the plastic inner fender, right in the bottom-rear middle.
Widen the end of the chain just enough to slip the bolt through, then put on the flat-nut.
Cut the chain as short as you can while still able to hook to the turnbuckle.
I used the open end of the turnbuckle to an existing hole under the truck (see pics) opened the other end of the chain and attacked it to the eye-side of the turnbuckle.
Tighten, pulling back the fender. Easy as that.
I went off-roading in my fields being sure to hit the bumps at full-turns, not even a slight rub. I just wish I thought of this months ago BEFORE my fenders started rubbing through.
Anyway, no more concerned looks when turning in parking lots!
Thread Starter
|
Logistics Pro
Joined: May 2011
Posts: 4,832
Likes: 668
From: Maine
Yeah....winters in New England mean lots of Salt.

Logistics Pro


Joined: Aug 2009
Posts: 3,609
Likes: 324
From: Arizona

So, being the over engineering type that I am I did the same thing only it took me a few hours.
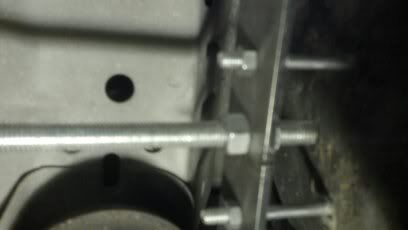

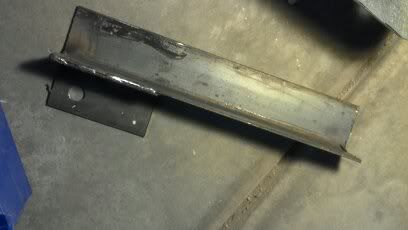
Instead of a washer I cut some sheet metal big enough to cover the damage. Then I put 2 carrige bolts thru it and bolted a piece of flat 3/16" to them behind the fender well. This plate has another hole in the middle which has a piece of 1/2" all thread thru it which is bolted to a bracket I welded up and bolted to the frame. By turning the nuts on the all thread I can pull the fender wells back however far I need to, then I lock the nuts together to hold in place.
Instead of a washer I cut some sheet metal big enough to cover the damage. Then I put 2 carrige bolts thru it and bolted a piece of flat 3/16" to them behind the fender well. This plate has another hole in the middle which has a piece of 1/2" all thread thru it which is bolted to a bracket I welded up and bolted to the frame. By turning the nuts on the all thread I can pull the fender wells back however far I need to, then I lock the nuts together to hold in place.
Trending Topics
Elder User
Joined: Jul 2012
Posts: 947
Likes: 0
From: Glen Rose, Texas
I looked at this post a few times, and still cant figure it out. Are you guys rubbing, or what? If so, what size tires, and lifts you running to rub?
FTE Stories
Ford Trucks for Ford Truck Enthusiasts

Top 10 Fords at 2026 Carlisle Ford Nationals
Joe Kucinski
3 Best / 3 Worst Parts of Modern Ford Ownership
Brett Foote
10 Amazing Upgrades That Solve Common Ford Truck Owner Headaches
Pouria Savadkouei
Every 2026 Ford Engine Explained
Brett Foote
10 Ugly Ford Trucks That We Still Kinda Love
Joe Kucinski
10 Things Every Truck Owner NEEDS (2026 Edition)
Michael S. Palmer
Rezvani's Latest Post-Apocalyptic Monster Is a Ford F-150 Raptor Underneath
Verdad Gallardo
Top 10 Most Expensive Ford Trucks Ever Sold on Bring a Trailer
Joe Kucinski
2027 Ford Super Duty Buyer's Guide (Every Model, Engine, & Package)
Brett FootePost Fiend
Joined: May 2009
Posts: 5,470
Likes: 3
From: Pea Ridge, AR

Levelled 2.7" with 35's for me. Yes rubbing slightly, also had to space my front bumper out after flexing the suspension a little more.
Logistics Pro
Joined: Aug 2009
Posts: 3,609
Likes: 324
From: Arizona
I am running these 285 BFG Rugged Terrains with no lift, they rubbed on the driver side from day 1. I only drove from the tire store to the house before doing the mod, already had a hole worn in it..
Thread Starter
|
Logistics Pro
Joined: May 2011
Posts: 4,832
Likes: 668
From: Maine
I have X-Codes (6,000lb) which gave me 2" over my worn/flat U-Codes. (4,800lb) springs, plus a 2" leveling kit (mini-spring pack) and 315-75-16E Duratracs on 16/10" Rims.


Cargo Master
Joined: Jan 2005
Posts: 2,902
Likes: 2
From: Pasadena, Maryland
This is exactly what I want to do. Do you still have this set up? Do you like it? I have a set of 16x10 Weld rims already and planning to get the dura tracs as well. I'm getting the parts together now to rebuild the front end so I'm going to do this all at once. Thanks!
Thread Starter
|
Logistics Pro
Joined: May 2011
Posts: 4,832
Likes: 668
From: Maine