
Betty turns oil burner
#646
 02-18-2014, 09:09 AM

Nope, it's the same paint as the outside. Majic brand tractor implement matte black. The outside will get bed lined eventually though. Either in black or my factory color sequoia poly brown.
#647
02-18-2014, 06:58 PM
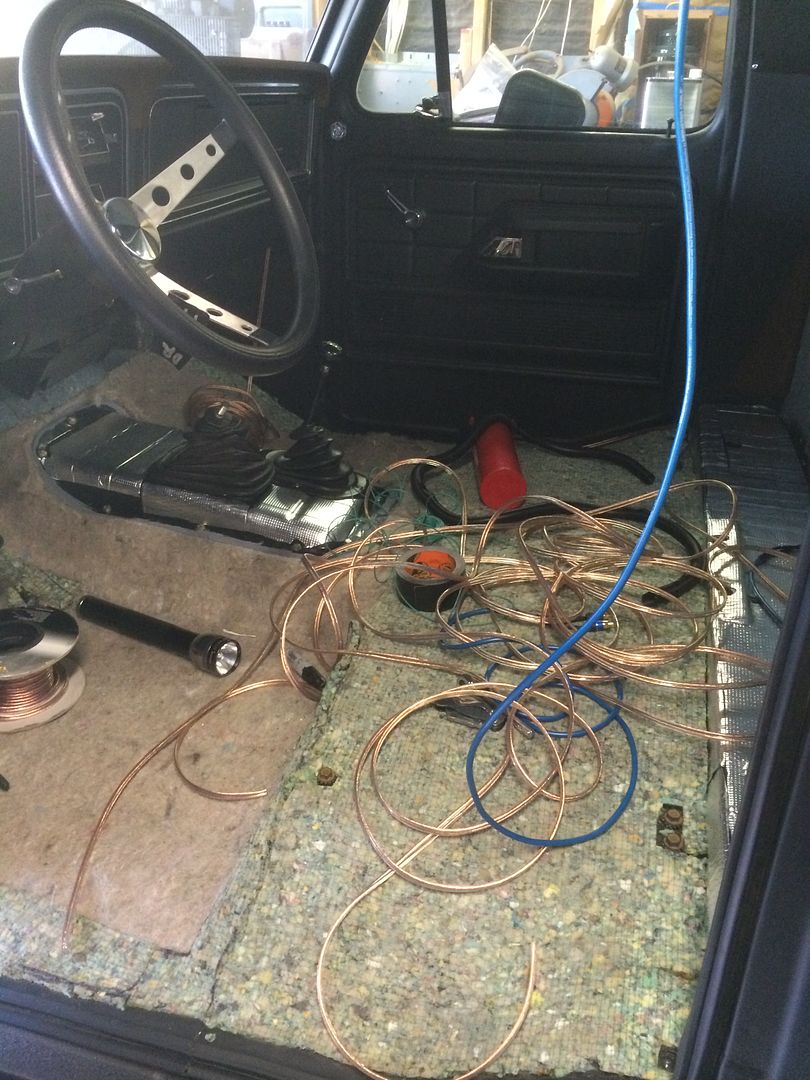
Had an appointment this morning but I got some work done this afternoon. I laid B-Quiet down on the spot below where the fuel tank was. After that I pulled the head liner down and ran all the speaker wiring up and over the door pillars.
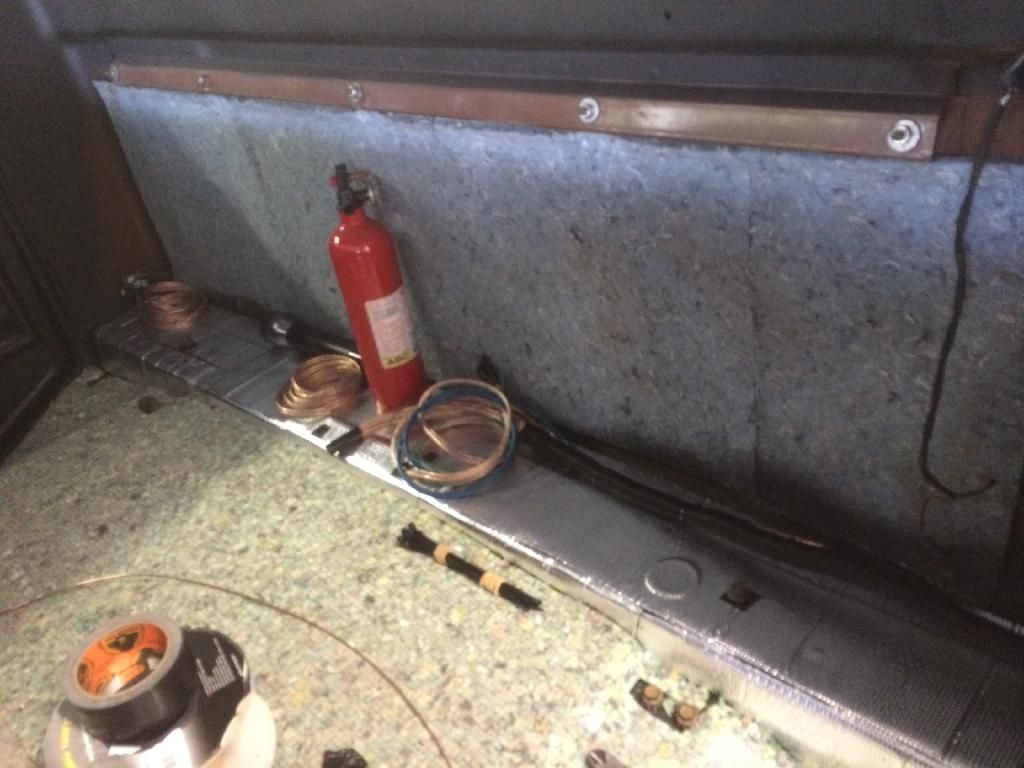
I was a little nervous that my driver side wire run wouldn't fit. I ran 5 pairs of 12 guage speaker wire, a 16 gauge trigger wire for the amp, and an RCA line out cable for the sub. On the drivers side 1 speaker wire back for the left front speaker and 4 forward from the amp to the head unit for FL, FR, RL, RR. On the passenger side I drilled a 1/2 hole at the bottom of the cab to run 1 speaker wire for the right front speaker.
Fortunately all this fit. Just under 100' of speaker wire. I know I'll have some wasted wire. I just wanted to make sure I had everything long enough.
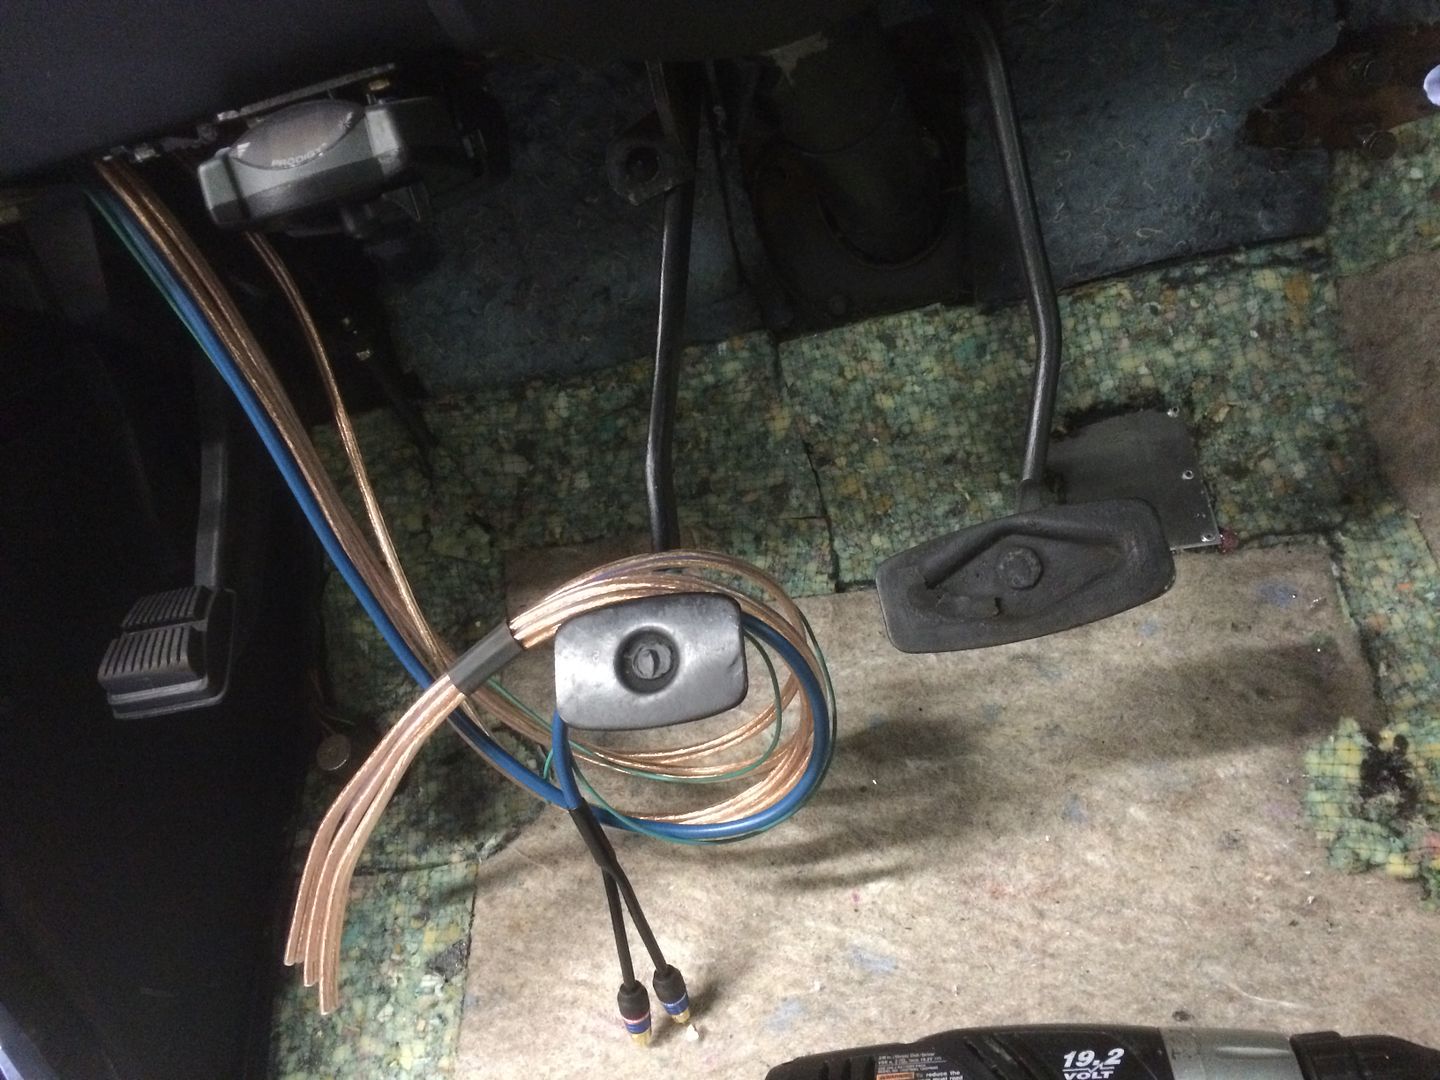
Cleaned up and the back half in some 3/4" split loom.
And the front to the head unit.
After all that I put the headliner back in. Now it's time to pull my radio delete dash out and dig out one I have in storage with the radio hole.
I was a little nervous that my driver side wire run wouldn't fit. I ran 5 pairs of 12 guage speaker wire, a 16 gauge trigger wire for the amp, and an RCA line out cable for the sub. On the drivers side 1 speaker wire back for the left front speaker and 4 forward from the amp to the head unit for FL, FR, RL, RR. On the passenger side I drilled a 1/2 hole at the bottom of the cab to run 1 speaker wire for the right front speaker.
Fortunately all this fit. Just under 100' of speaker wire. I know I'll have some wasted wire. I just wanted to make sure I had everything long enough.

Cleaned up and the back half in some 3/4" split loom.

And the front to the head unit.

After all that I put the headliner back in. Now it's time to pull my radio delete dash out and dig out one I have in storage with the radio hole.
#648
02-21-2014, 12:10 PM

Logistics Pro
By the way, great build! I just got through it, and had a couple comments from a ways back, when you were dealing with your brakes. You had considered a line lock as a parking brake but ended up adding a real parking brake, so this is more for anyone thinking about going the other direction. I've got a line lock in my Bronco and it works great as a short-term parking brake. But if it sits for more than a half hour or so the line pressure drops enough to trigger the low pressure warning signal. It still holds the vehicle fine at that point, but it shows I'm losing pressure. And it looks like I'm losing it from one of my rear calipers. Also the line lock can't be used as an emergency brake. I'm not too worried about that, but I've been told that it might not be legal to not have a working emergency brake.
The other thing was the braided stainless brake lines. The last time I looked was a while ago, but most braided lines weren't DOT-compliant. and a friend of mine had a friend (isn't that how these stories always go?) that had a braided brake line blow on him. The story I heard was that some grit got into the braided covering and worked a hole through the hose. Not sure if that's true, but it could give a reason they aren't (or at least weren't) DOT compliant. The disk brake conversion kit I got for my Bronco came with braided stainless hoses where there was a clear plastic sheath over the stainless. Those were DOT compliant and made my friend less concerned about me putting them on my Bronco. Just food for thought.
#649
02-21-2014, 01:59 PM

Posting Guru
#650
02-21-2014, 03:17 PM

#651
02-21-2014, 09:04 PM
A friend of mine once installed an antenna under his dash, running across the vehicle, completely hidden. Didn't seem like a great idea to me, burying it behind all the sheet metal. But it worked well enough for him. Just a thought for you.
By the way, great build! I just got through it, and had a couple comments from a ways back, when you were dealing with your brakes. You had considered a line lock as a parking brake but ended up adding a real parking brake, so this is more for anyone thinking about going the other direction. I've got a line lock in my Bronco and it works great as a short-term parking brake. But if it sits for more than a half hour or so the line pressure drops enough to trigger the low pressure warning signal. It still holds the vehicle fine at that point, but it shows I'm losing pressure. And it looks like I'm losing it from one of my rear calipers. Also the line lock can't be used as an emergency brake. I'm not too worried about that, but I've been told that it might not be legal to not have a working emergency brake.
The other thing was the braided stainless brake lines. The last time I looked was a while ago, but most braided lines weren't DOT-compliant. and a friend of mine had a friend (isn't that how these stories always go?) that had a braided brake line blow on him. The story I heard was that some grit got into the braided covering and worked a hole through the hose. Not sure if that's true, but it could give a reason they aren't (or at least weren't) DOT compliant. The disk brake conversion kit I got for my Bronco came with braided stainless hoses where there was a clear plastic sheath over the stainless. Those were DOT compliant and made my friend less concerned about me putting them on my Bronco. Just food for thought.
Thanks for the kind words. See below for antenna response.
I may actually end up putting in a line lock as well. Really just for s*&ts and giggles.
As far as braided lines not being DOT. They come stock on quite a few motorcycles so thats not entirely true. Mine were labeled off road only, but you know damn well that they are the same construction. Most companies do that to avoid paying the DOT testing fees, or CARB
 , and EPA regs etc. Honestly its going to take a freak occurance to pierce a braided line. The rubber lines cut like butter with a knife, ever cut a rubber line or have one fail?
 I used a power antenna on my 61 Econoline as I didn't want to drill a hole anywhere, was a flat one about 12" long that mounted to the glass, I put it up behind the rearview mirror and it worked great. Got it from PepBoys and didn't expect it to work as good as it did.
Thank you. I am planning on a 10" sub. If I cannot find a JVC DRVN sub, I will probably end up buying a 10" JVC arsenal sub.
#652
02-23-2014, 12:19 AM
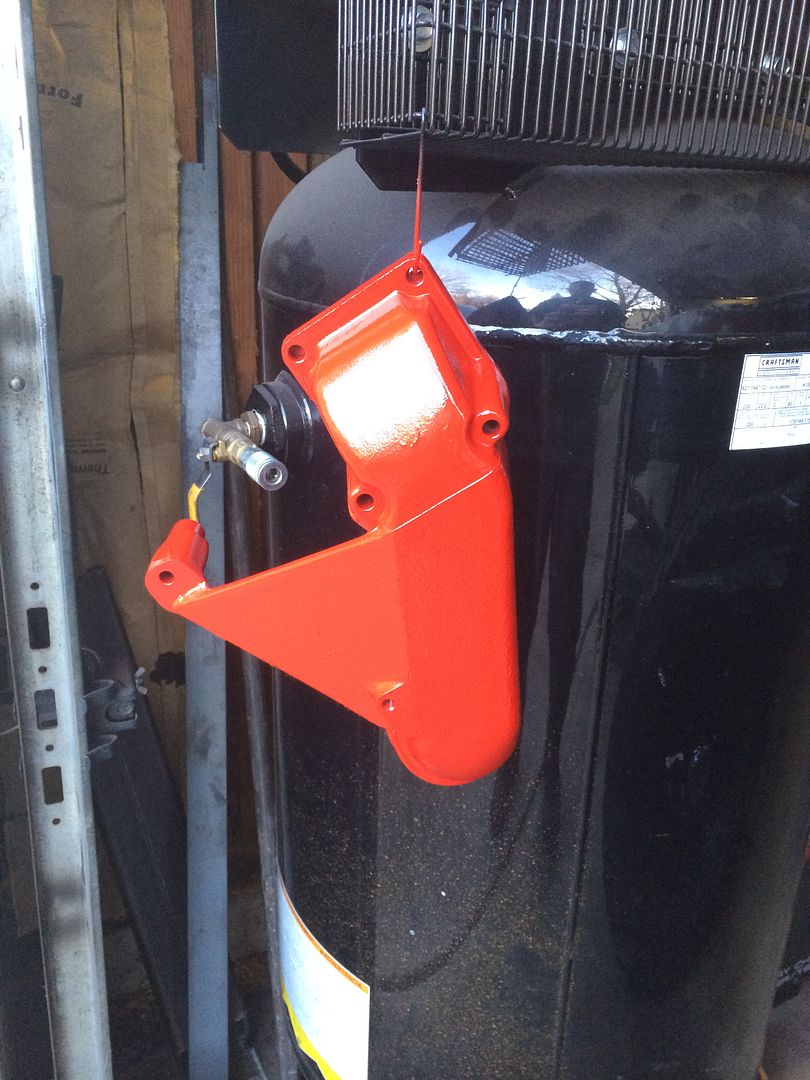
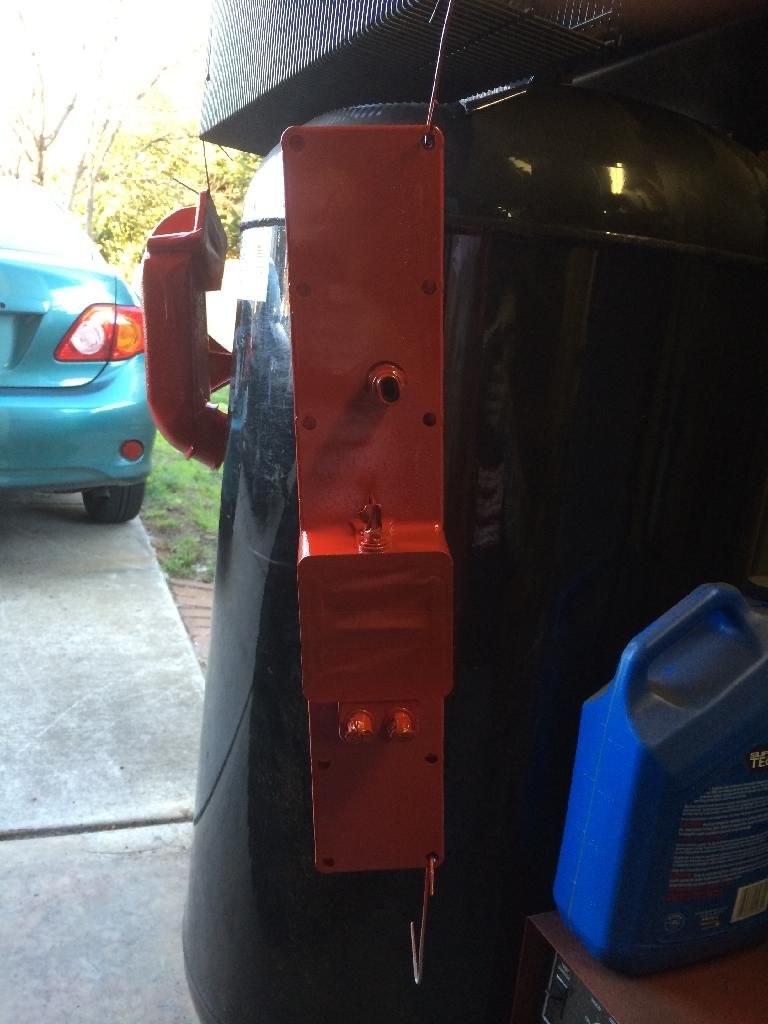
Ok folks, mid day update today. Well mid day for me that is. I decided to go ahead and paint the stock intake and intake plate. I figured I can buy the hot rod dual intake later. I really want to get my truck back on the road.
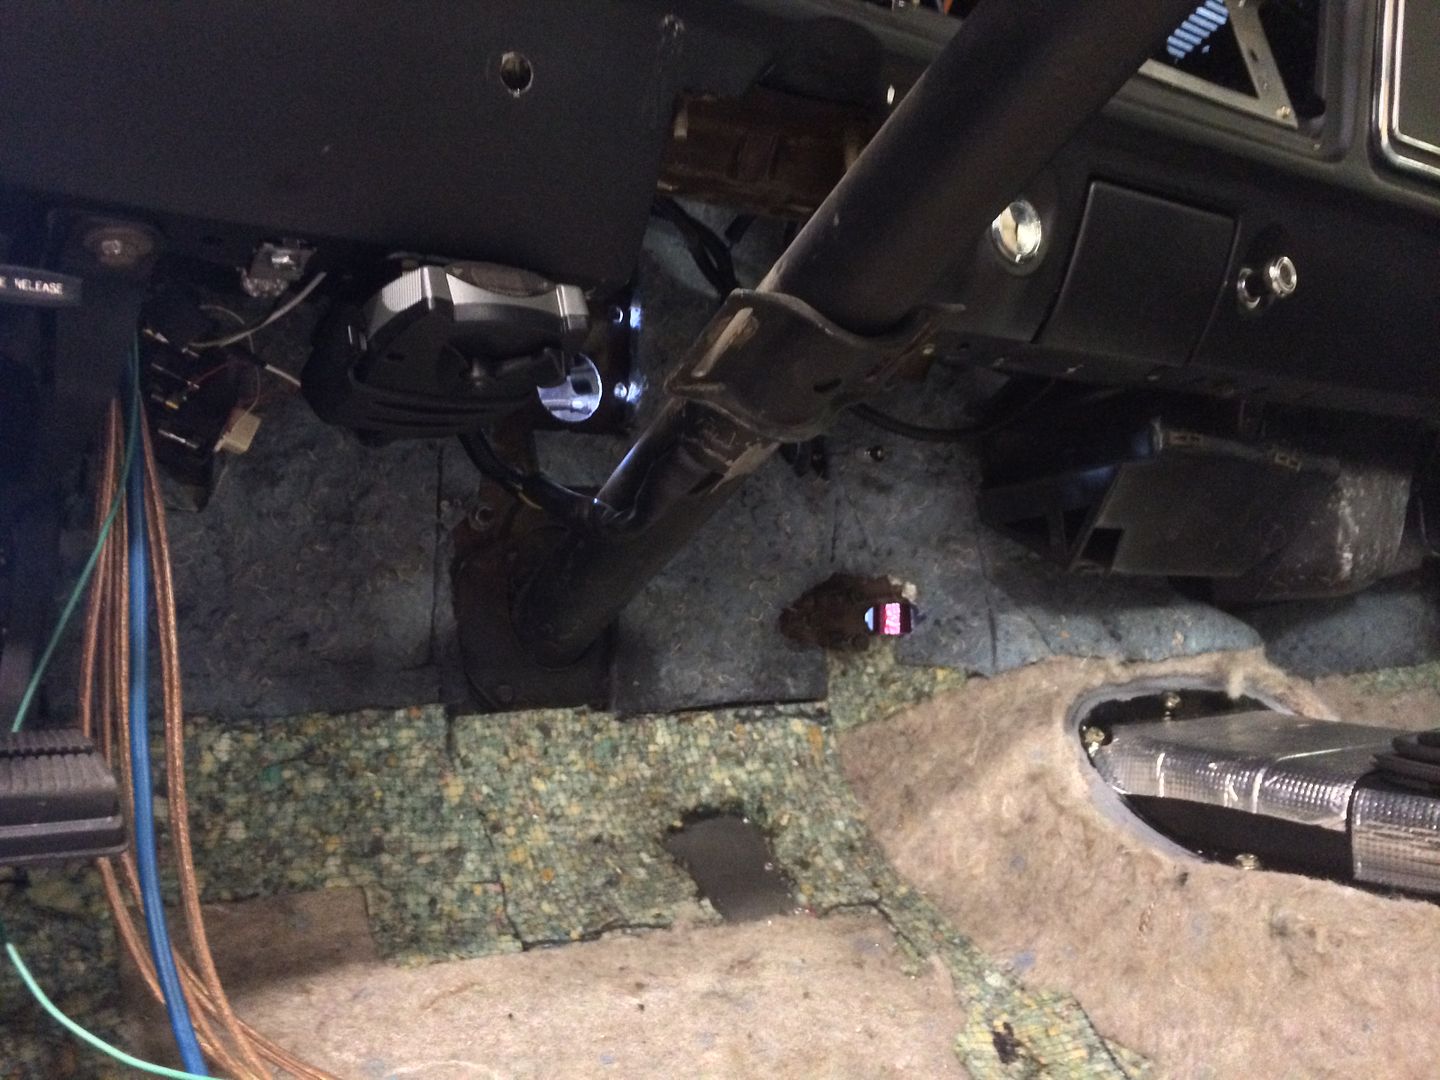
Next I removed the hydro boost out of the way so I can remove the pedals.

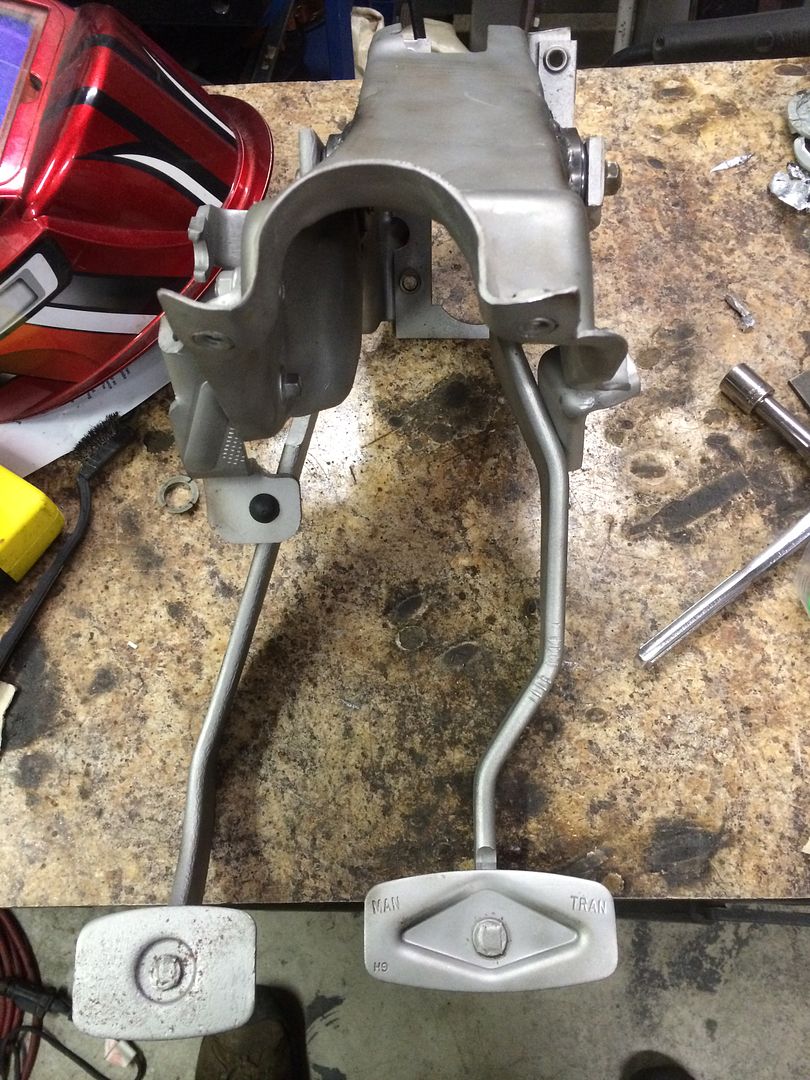
Stock pedals out.
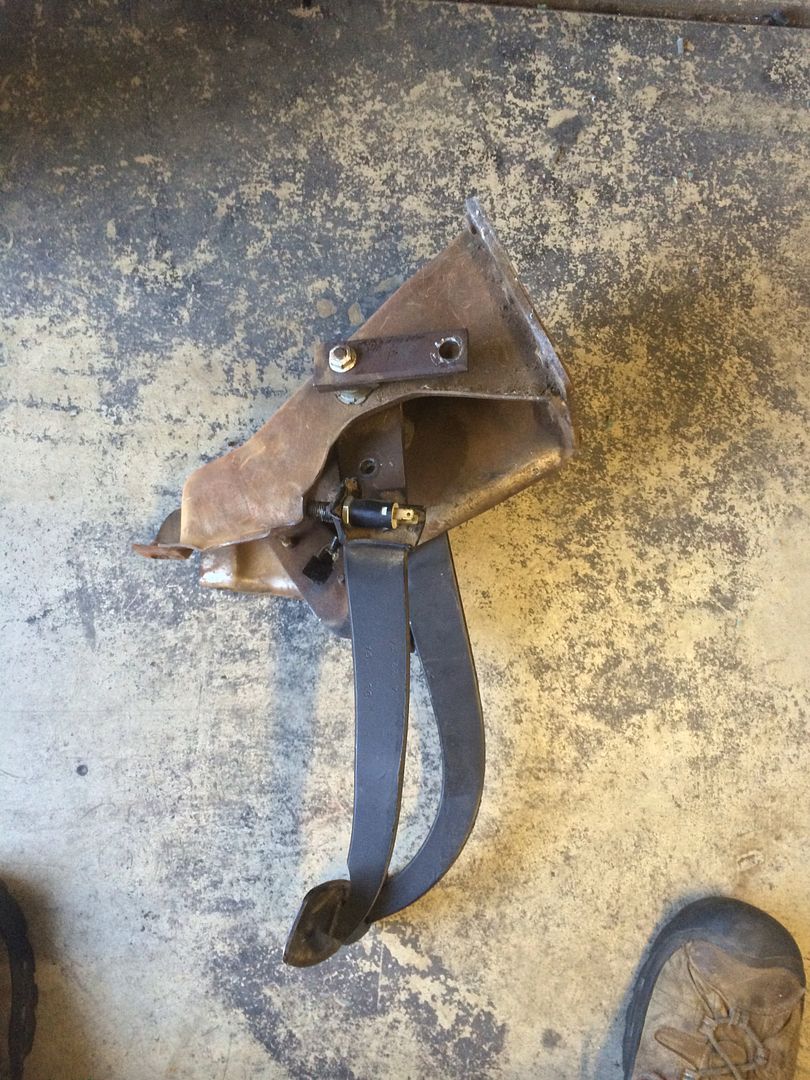
Out with the later model pedals that I bead blasted awhile back. I think they were out of a 78.
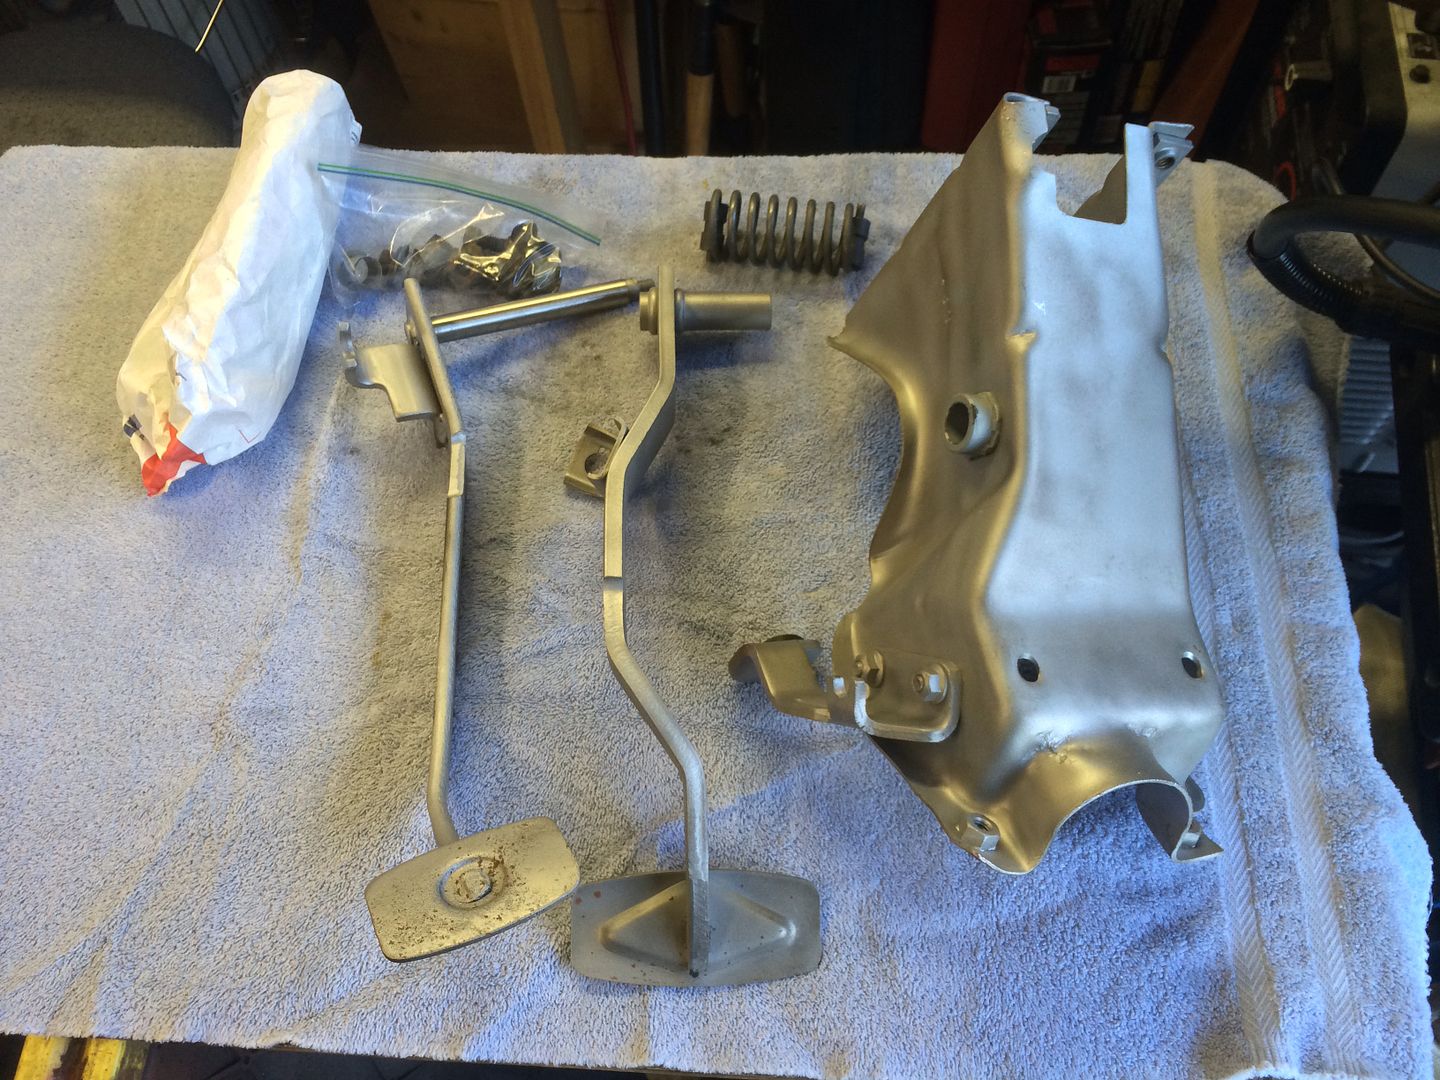
Comparing everything just to make sure they are the same.

The only difference between the two is the shape of the pedal arms. Other than that the pivots and the brake rod hole is in the same place.
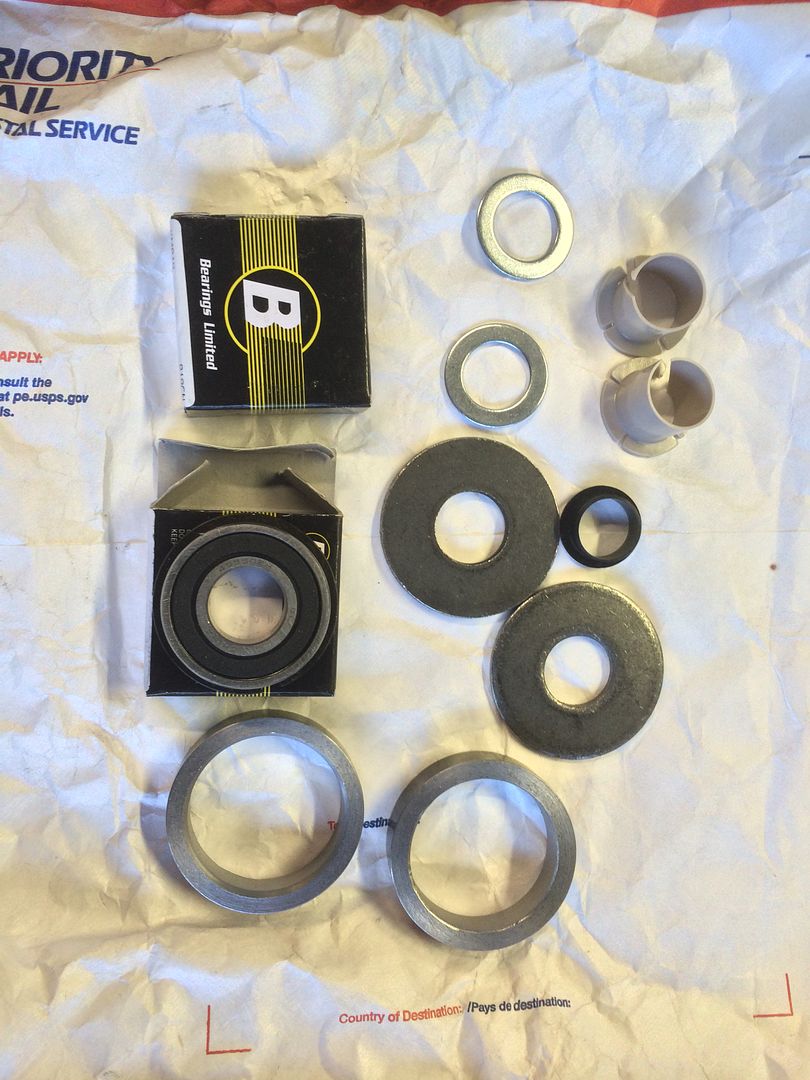
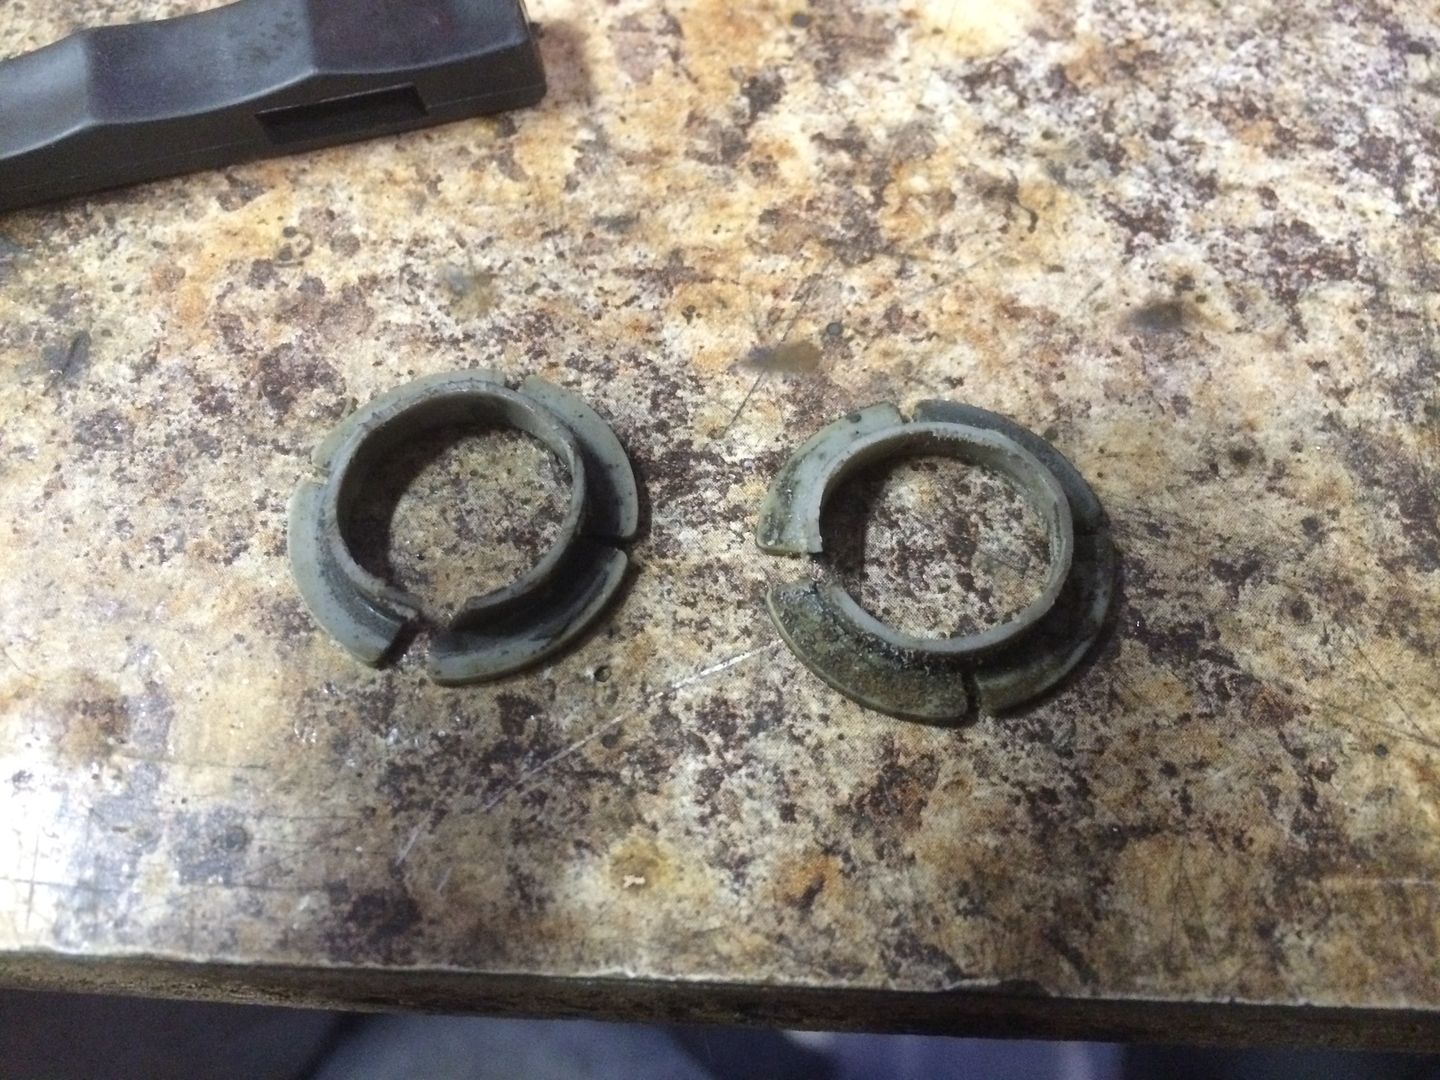
I'm doing this to put in a bearing conversion from mustangsteve.com $45.00 shipped to get rid of those nylon bearings for the clutch pivot. Not bad in my book. Here is the kit.
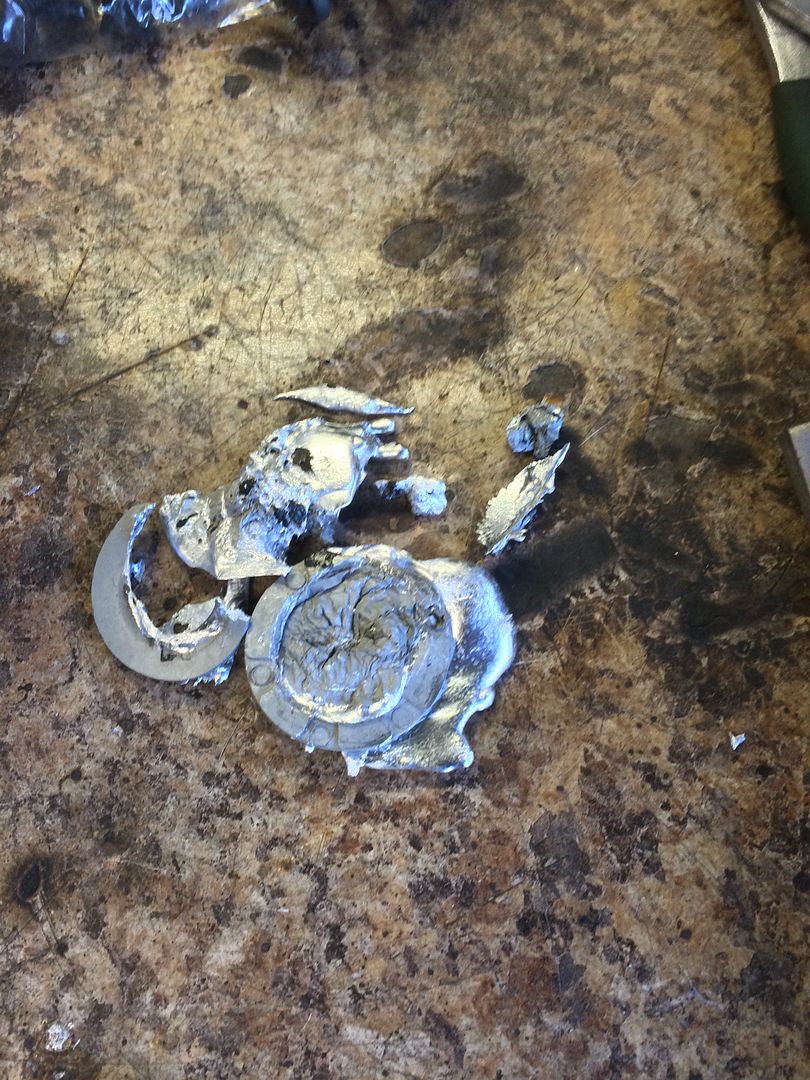
First thing you have to do is grind or melt out the outer nylon bearing holders.

I just used my map gas torch.
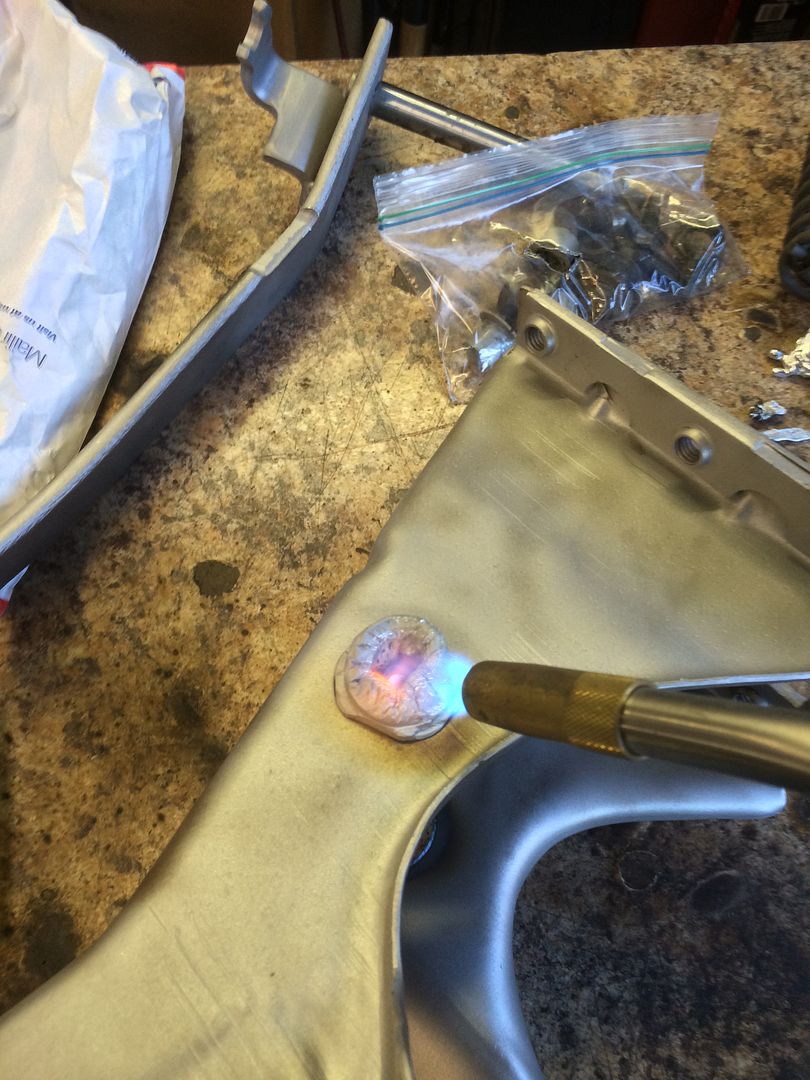
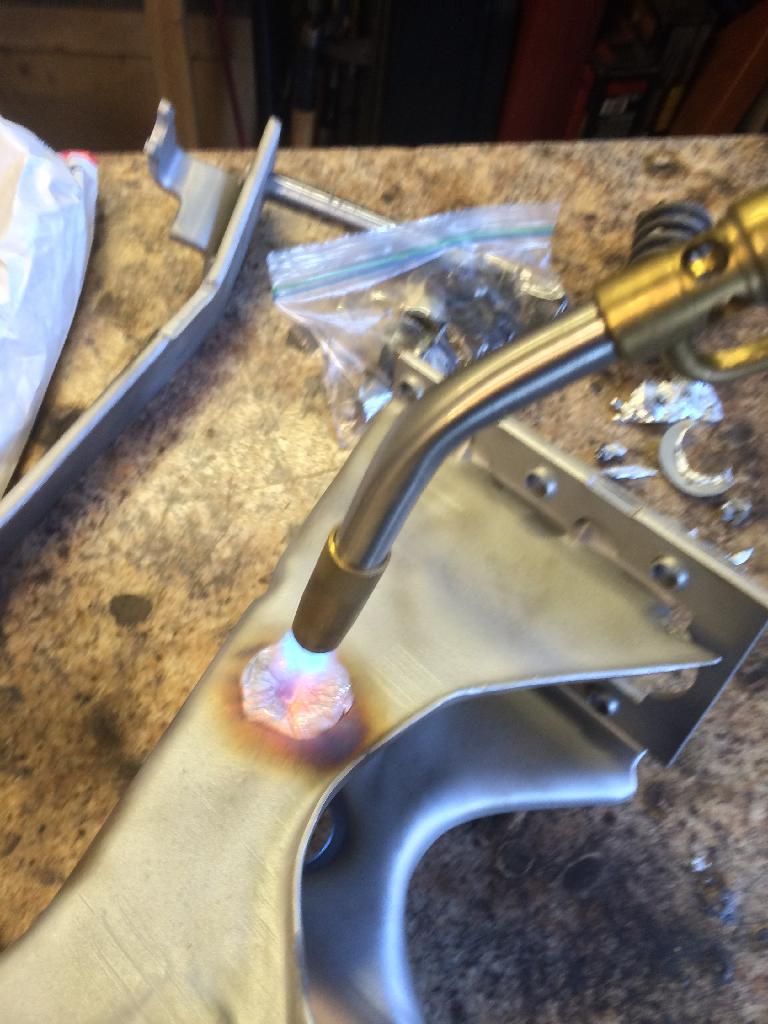
Easy as pie. 2 minutes and gone.
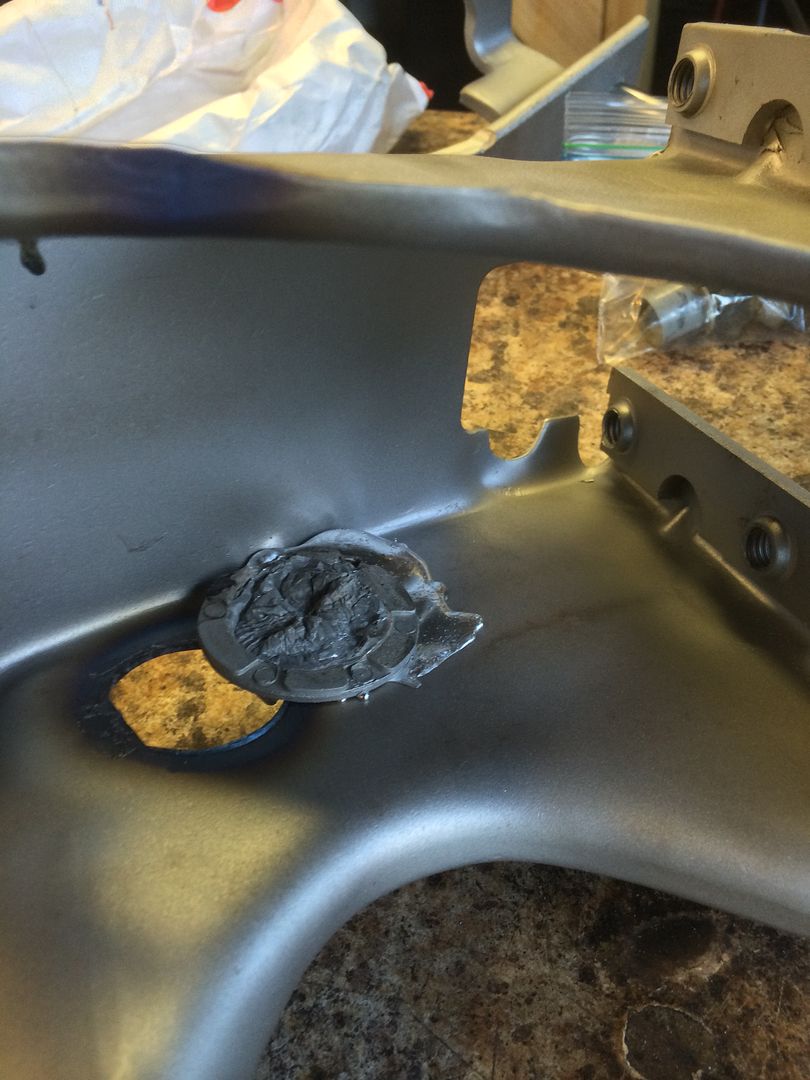
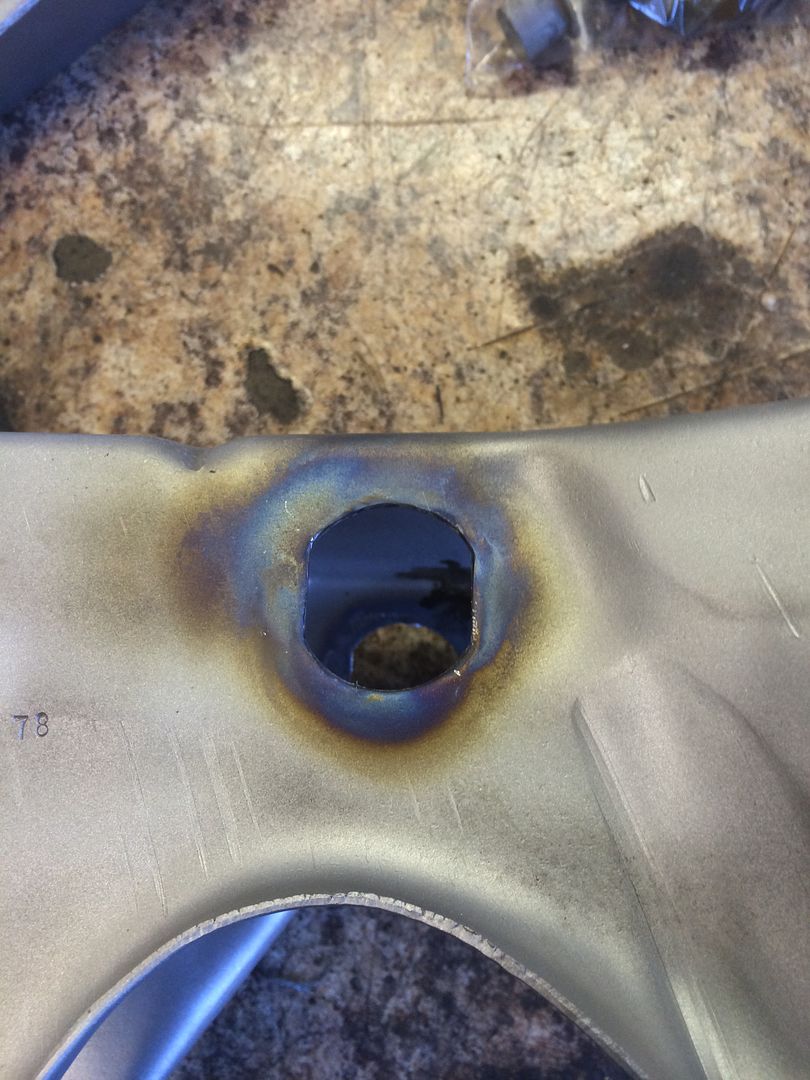
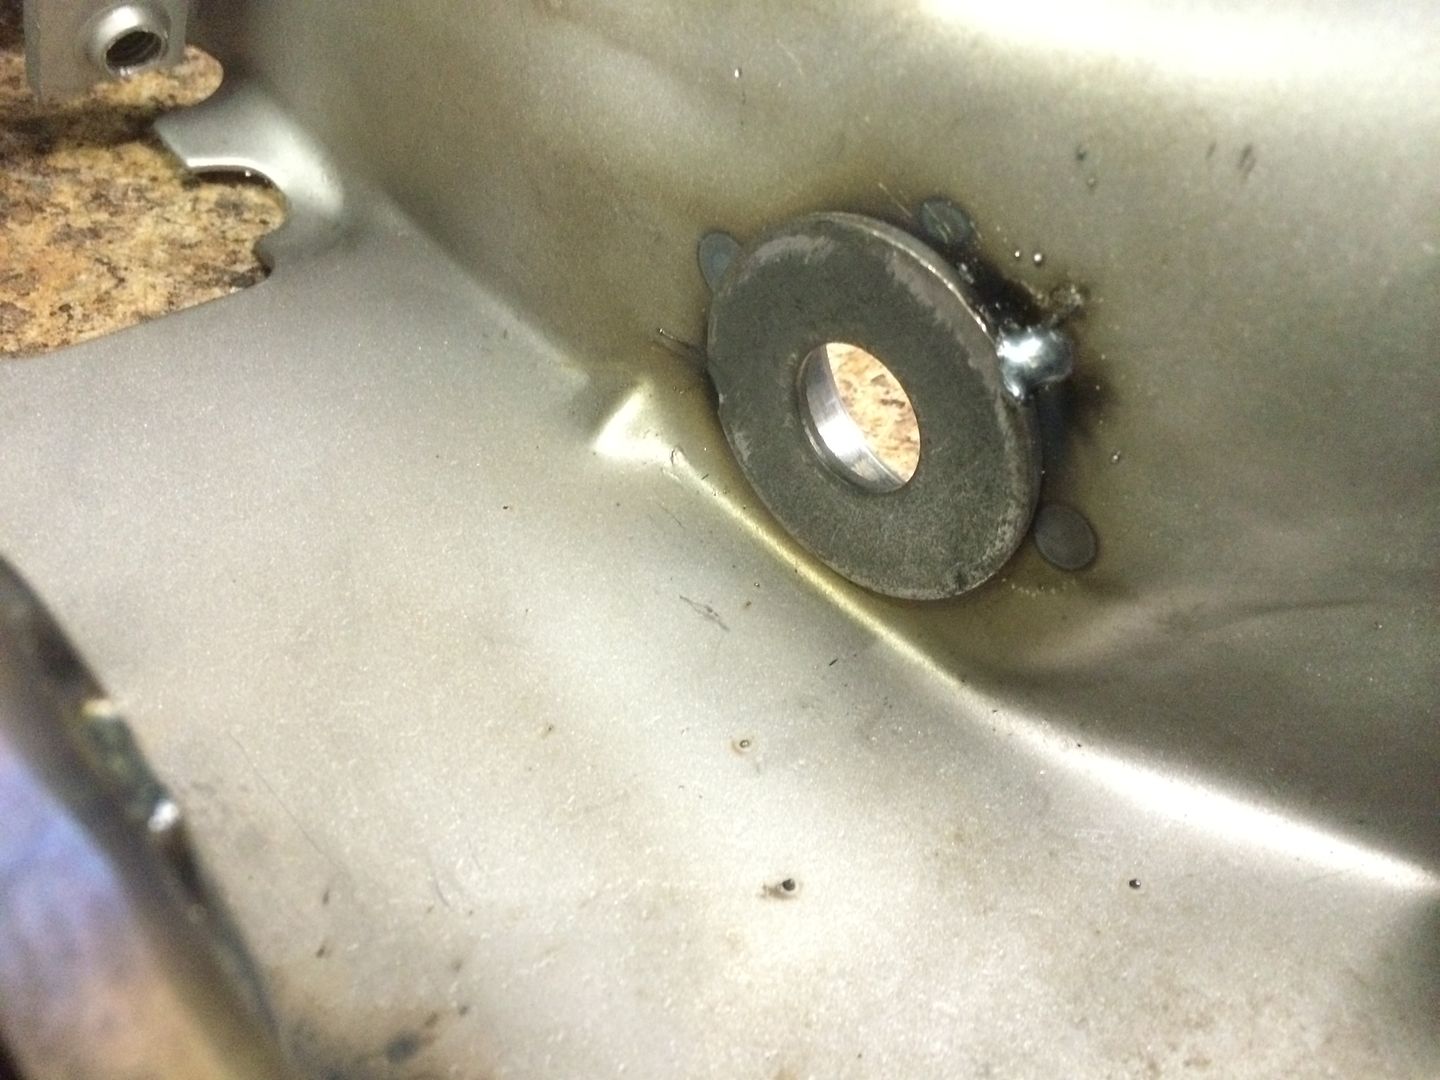
Next up is to tack the bearing shells in place.
Then you sand down the old nylon bearings to shim the big washers in place.
Tacked the big washers in.
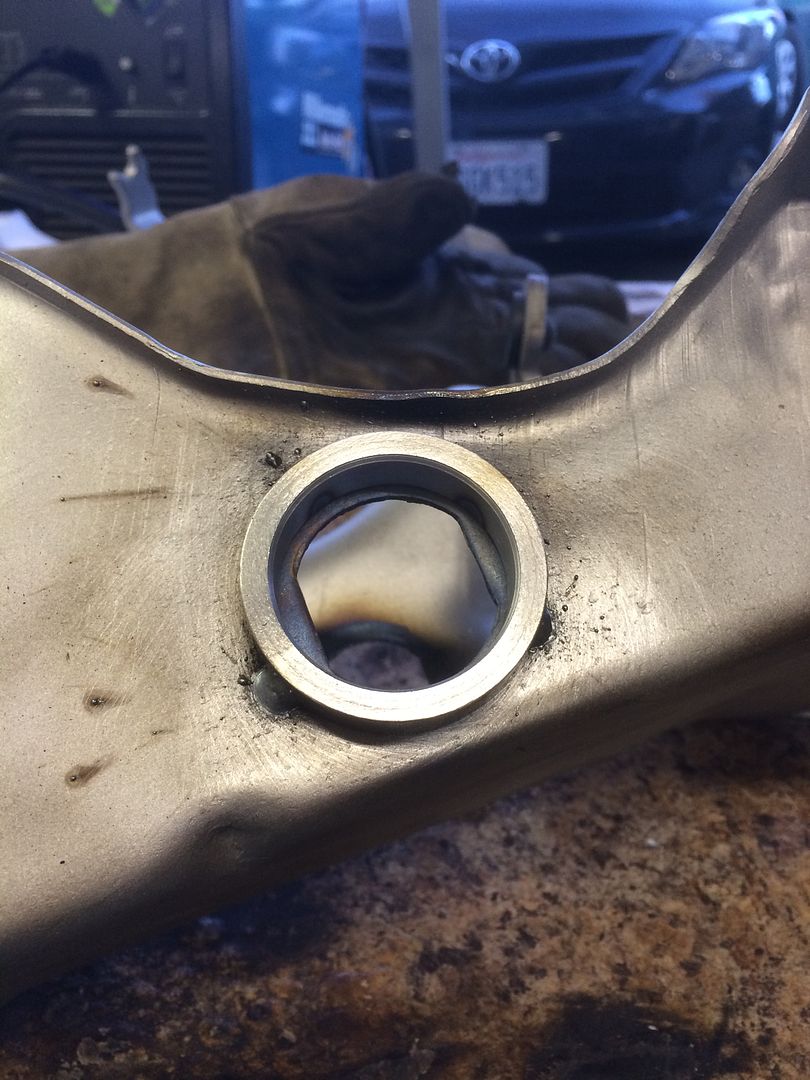
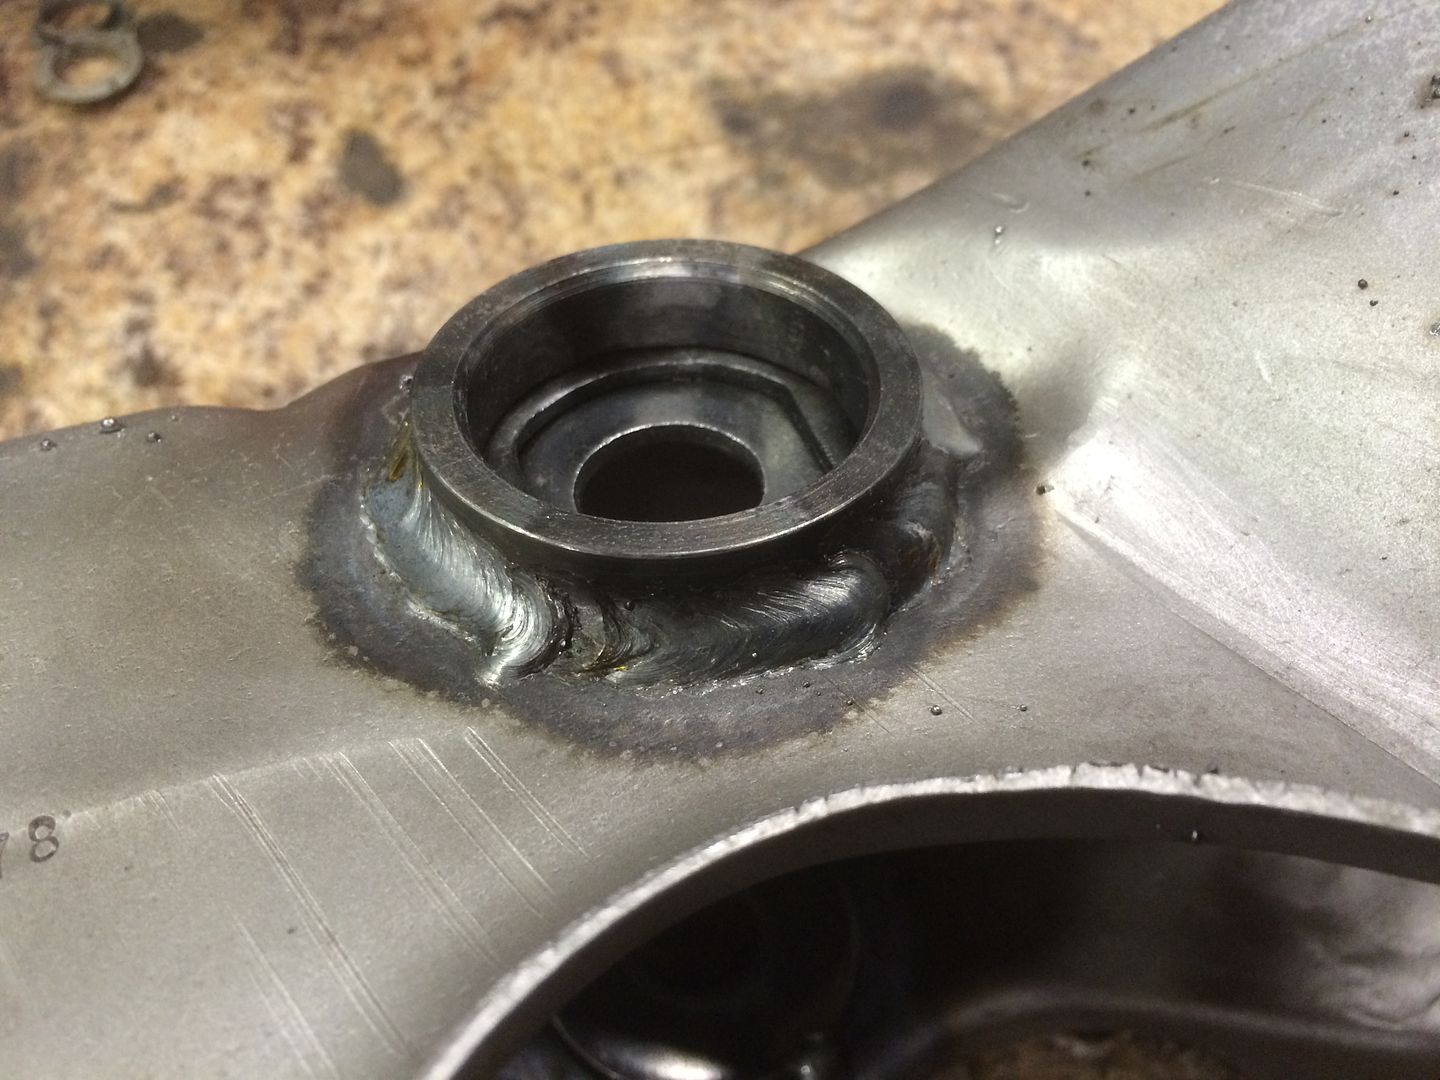
Finish welded the bearing shells.
Also tacked a washer inside the clutch arm.
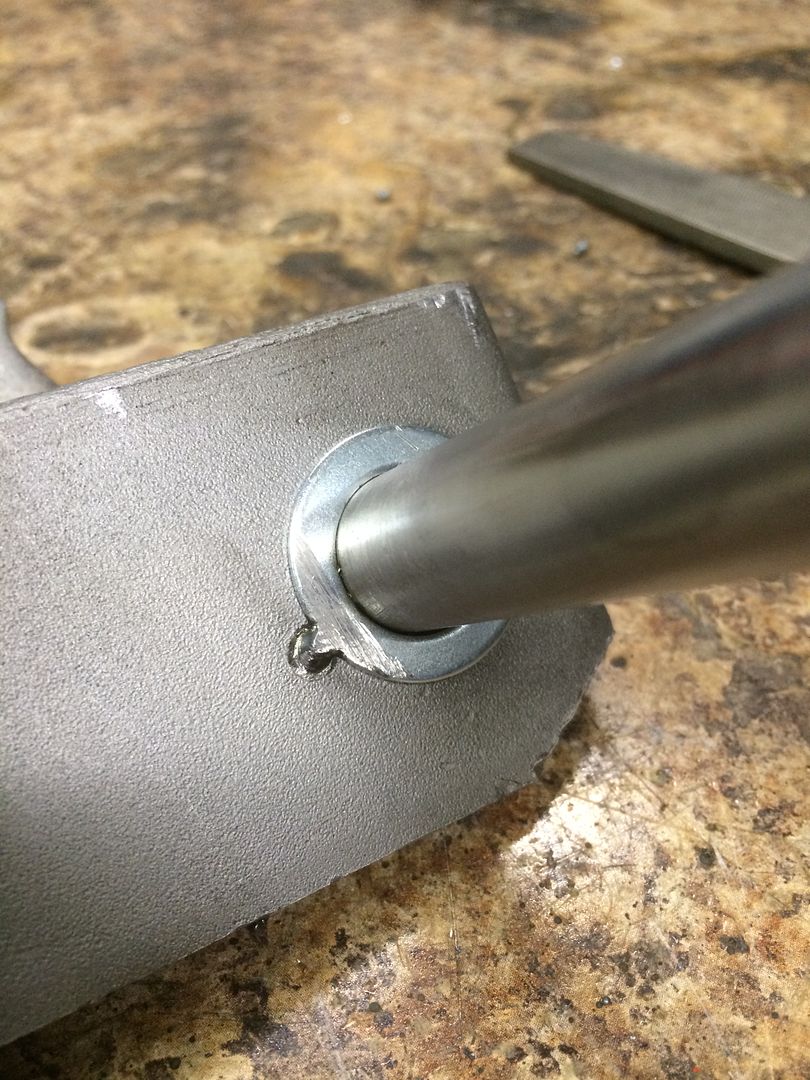
I had to sand the inside of the bearing shells due to a little warping. Other than that everything went together smooth.
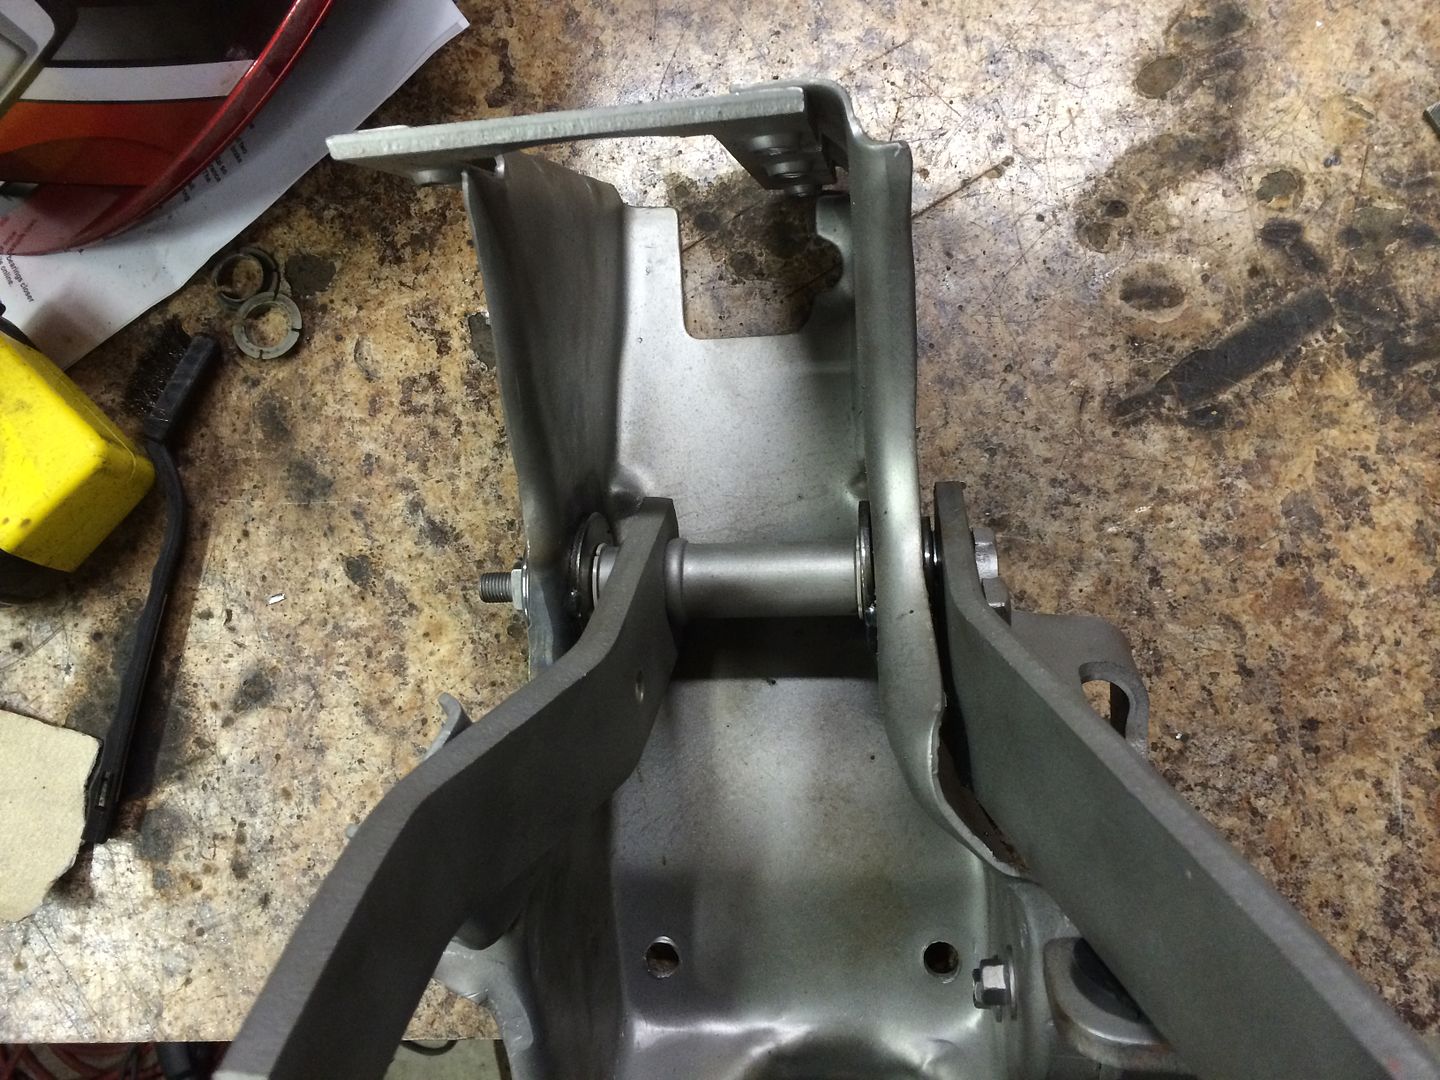
And installed for mock up of the clutch master.
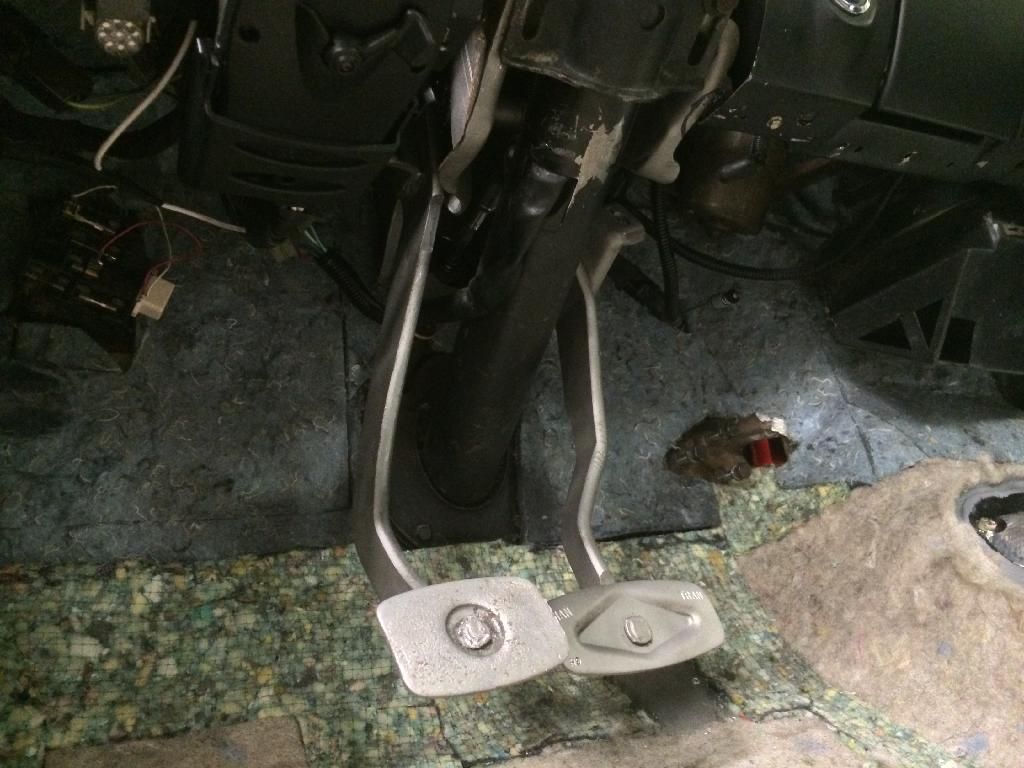
So far I'm completely happy with the conversion. No slop in the pedals no like before. Everything moves really smoothly. I have a feeling that these bearing will probably never need replacing like the old nylon ones.


Next I removed the hydro boost out of the way so I can remove the pedals.

Stock pedals out.


Out with the later model pedals that I bead blasted awhile back. I think they were out of a 78.

Comparing everything just to make sure they are the same.

The only difference between the two is the shape of the pedal arms. Other than that the pivots and the brake rod hole is in the same place.
I'm doing this to put in a bearing conversion from mustangsteve.com $45.00 shipped to get rid of those nylon bearings for the clutch pivot. Not bad in my book. Here is the kit.

First thing you have to do is grind or melt out the outer nylon bearing holders.

I just used my map gas torch.


Easy as pie. 2 minutes and gone.


Next up is to tack the bearing shells in place.

Then you sand down the old nylon bearings to shim the big washers in place.

Tacked the big washers in.

Finish welded the bearing shells.

Also tacked a washer inside the clutch arm.

I had to sand the inside of the bearing shells due to a little warping. Other than that everything went together smooth.


And installed for mock up of the clutch master.

So far I'm completely happy with the conversion. No slop in the pedals no like before. Everything moves really smoothly. I have a feeling that these bearing will probably never need replacing like the old nylon ones.
#653
02-23-2014, 12:34 AM
I have no doubt your itching like a junkie wanting to get your truck going again,
And with all your upgrades I can't wait for a review of the upgrades. so I can decide to add them or not to my list of todos.
I'm very interested to hear how much slop is left in your steering after all the work you have done.
And with all your upgrades I can't wait for a review of the upgrades. so I can decide to add them or not to my list of todos.
I'm very interested to hear how much slop is left in your steering after all the work you have done.
#654
02-23-2014, 02:04 AM
I have no doubt your itching like a junkie wanting to get your truck going again,
And with all your upgrades I can't wait for a review of the upgrades. so I can decide to add them or not to my list of todos.
I'm very interested to hear how much slop is left in your steering after all the work you have done.
And with all your upgrades I can't wait for a review of the upgrades. so I can decide to add them or not to my list of todos.
I'm very interested to hear how much slop is left in your steering after all the work you have done.

Also I'll throw in another little update. After eating some lunch I got the injection lines, intake plate and the intake horn installed.


That's it for today. Until next update.
#655
02-23-2014, 02:35 AM
#656
02-23-2014, 04:21 AM
I think all hydro boost systems are set up this way. It is probably due to the huge amount of force between the hydro boost unit and the master cylinder.


#658
02-23-2014, 02:01 PM
No problem. I've had that kit for awhile. I was really tired of all the slop in the old pedals. That fixed that right up. I wonder if there's enough meat in that brake tube to put in a zerk fitting??? It would be nice to be able to grease that sucker without disassembly.
#659
02-23-2014, 08:05 PM
Posting Guru
I've been looking at making the pedals grease-able and was wishing there was a bearing kit, you saved me a bunch of research, thanks!
I used a 94 F-450 HydroBoost on my 78 CCSB and got away without any adapter between that and the firewall so mine isn't as far out there. Totally agree it's the best braking EVER!
As usual your work is top notch!
I used a 94 F-450 HydroBoost on my 78 CCSB and got away without any adapter between that and the firewall so mine isn't as far out there. Totally agree it's the best braking EVER!
As usual your work is top notch!
#660
02-23-2014, 08:38 PM