Brake caliper rebuild
#1
 02-06-2012, 11:49 AM

Brake caliper rebuild
1989 Aerostar.
In 2012 calipers are remanufactured and available at around $40 per side. Therefore diy is probably for the hobbyist or for someone you really wants to inspect and control quality. A benefit of diy is that the system gets an inspection BY YOU, revealing any issues and resetting the health to a known state.
I suspect my caliper seal and boots to be 23 yr old original. There were no outstanding issues rather this was part of a search and replace vendetta I had against all things rubber. By "rebuild" we mean cleaning up the surfaces and replacing the piston seal and outer boot. This should not be confused with brake pad replacement, an independent project.
A minimal DIY effort costs $5/side. Budget $15/side to do it thoroughly. Inspection could reveal a need for pistons.
**** Supplies and tools ******
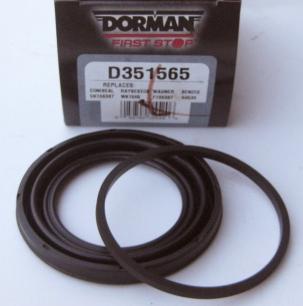
- Caliper rebuild kit: O-ring, boot, typically one kit per side.
- Slider pins used to mount the calipers to the car. Sold in pairs or quads, optional.
- Bleed screw. One per side, optional.
- Crush washer. At the hose banjo bolt, two per side. Optional but recommended.
- Thread sealant. At the hose.
- Brake fluid. Not from that can you had open for five years.
- Heavy grease. Hi-temp, for slider pins.
- Floor jack and stands.
- Fine (000) steel wool. For cleaning up the piston.
- Sand paper (220). For cleaning up the bore.
- Dental pick. For pulling the old o-ring and cleaning up the o-ring groove.
- Sockets and wrenches. 11mm for bleed screw, 9/16 for brake hose at caliper. Something to remove wheels.
- Hefty screw driver or rod. For knocking out the caliper pins.
- Clamps. For managing piston removal/replace.
- Air compressor, or perhaps a bicyle pump. For blowing out the piston.
- Some brake bleeding method. Maybe pedal pumping works for you, maybe not.
- I really like wearing gloves.
*******************
Remove the hydraulic hose...
...and knock out the two mounting pins.
The pins have a rubber core and by knocking them at an angle, you easily compress the pin and knock it past the end stops.

The aerostar has a single piston caliper and the mounting pins also serve as sliders to allow clamping pressure to be even between both surfaces of the rotor. Note: only one of the two brake pads are in the pic.
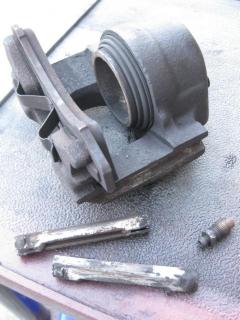
If the mounting/slider pins bind on the grooves then pressure could be uneven or a pad may drag on the rotor.
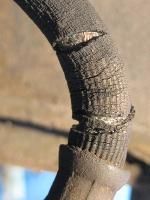
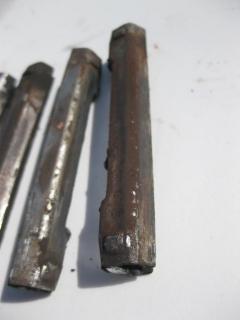
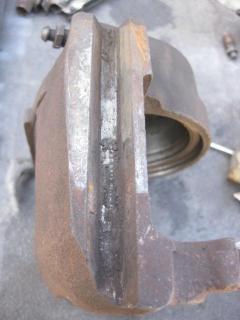
Clean up the both halves of both grooves on both sides and count on replacing those rusty pins containing rubber cores. The grooves are greased at install.
The old boot may be removed before or after blowing the piston.
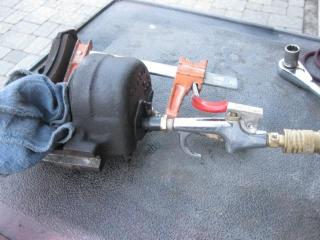
Round up about 20 psi of air pressure and blow out the piston.
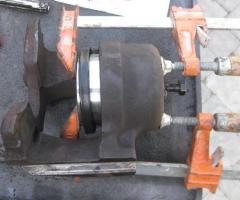
Note carefully, the opposing pad is left in as a back stop, a cushion is included, and just to make a point I included a clamp in the picture. For fun, I once embedded a piston into a sheetrock wall 20 feet away. I'll leave it to Mythbusters to (dis)prove whether that actually happened.
I've seen better.
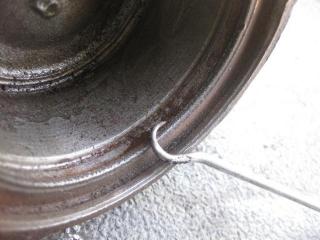
A dental tool grabs the o-ring ...
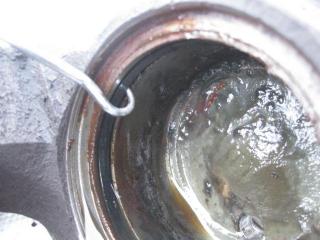
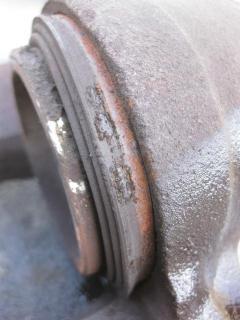
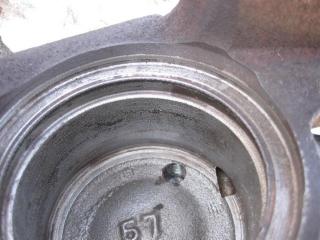
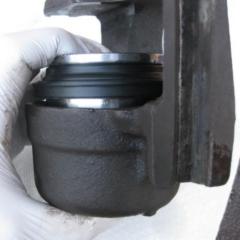
...and also makes an excellent rust removal tool. The crap inside the bore tells me that the rebuild was overdue.
Grit (rust particles or ???) can mess with the piston seal.
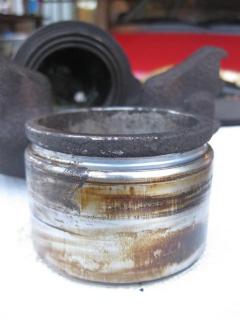
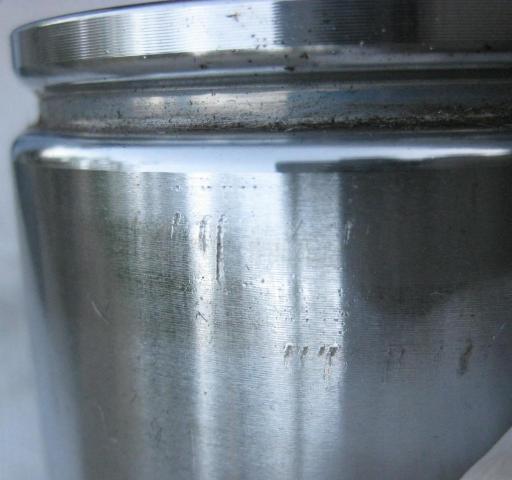
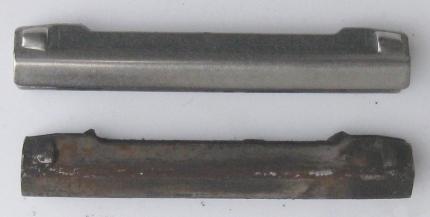
Use 000 steel wool to polish up the piston. I've got minor scuffing on one...
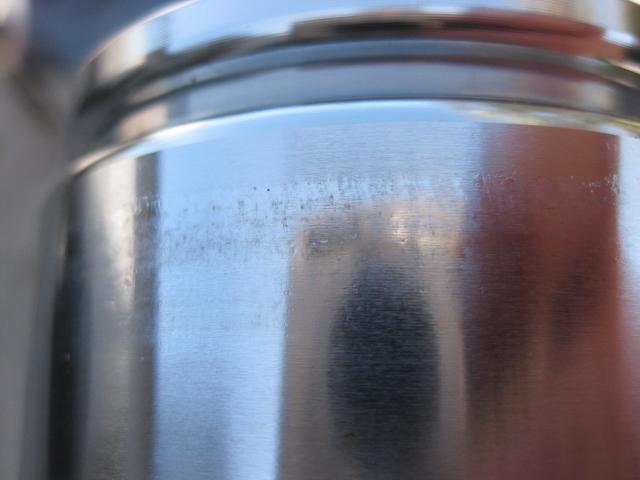
...and on the other, small scratches along the axial direction. Replacement pistons are available ($10/ea).
Use 220 sandpaper and steel wool to clean up the rust bucket.
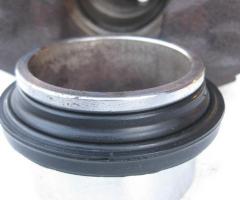
Install new seal and boot, then use brake fluid to wet the piston and seal.
Squarely force the piston past the new o-ring. Getting the new piston in requires a real man's grip. In fact use both hands after you take a picture.
When that fails too, plan B is a moderate (!) use of clamps. I found my greatest success by dropping some additional fluid in and using air to reverse the piston travel. That gets the o-ring squared away in the groove and its becomes absurdly easy to continue.
Seating the boot is even tougher. Tip: I found that if the piston is compressed fully, the boot groove at the top of the piston is positioned nicely to provide relief while the boot outer edge is seated into the caliper.
********
On install, grease the slider pins ($4/side)
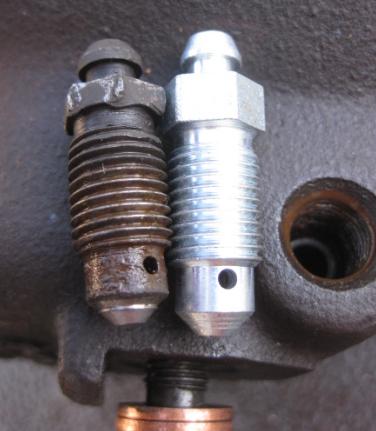
...and replace the rusted bleed screw ($3/side).
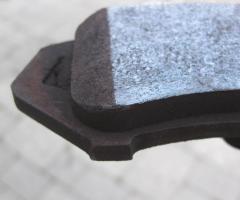
Check the brake pad for thickness. This one has a life ahead.
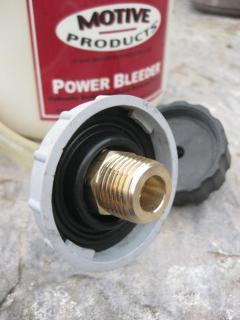
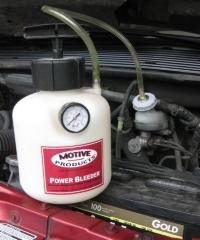
I had a Motive Products bleeder around. Then I had to build an adapter for the Aerostar reservoir because I had the MP european version. A new (2-tab) cap and membrane was procured ($10), and used the old one for this adapter. Tip for adapter builders: The inner edge of the membrane must be captured and sealed around the new penetration, otherwise barometric relief channels designed into the cap will compromise the rim seal.
In 2012 calipers are remanufactured and available at around $40 per side. Therefore diy is probably for the hobbyist or for someone you really wants to inspect and control quality. A benefit of diy is that the system gets an inspection BY YOU, revealing any issues and resetting the health to a known state.
I suspect my caliper seal and boots to be 23 yr old original. There were no outstanding issues rather this was part of a search and replace vendetta I had against all things rubber. By "rebuild" we mean cleaning up the surfaces and replacing the piston seal and outer boot. This should not be confused with brake pad replacement, an independent project.
A minimal DIY effort costs $5/side. Budget $15/side to do it thoroughly. Inspection could reveal a need for pistons.
**** Supplies and tools ******
- Caliper rebuild kit: O-ring, boot, typically one kit per side.
- Slider pins used to mount the calipers to the car. Sold in pairs or quads, optional.
- Bleed screw. One per side, optional.
- Crush washer. At the hose banjo bolt, two per side. Optional but recommended.
- Thread sealant. At the hose.
- Brake fluid. Not from that can you had open for five years.
- Heavy grease. Hi-temp, for slider pins.
- Floor jack and stands.
- Fine (000) steel wool. For cleaning up the piston.
- Sand paper (220). For cleaning up the bore.
- Dental pick. For pulling the old o-ring and cleaning up the o-ring groove.
- Sockets and wrenches. 11mm for bleed screw, 9/16 for brake hose at caliper. Something to remove wheels.
- Hefty screw driver or rod. For knocking out the caliper pins.
- Clamps. For managing piston removal/replace.
- Air compressor, or perhaps a bicyle pump. For blowing out the piston.
- Some brake bleeding method. Maybe pedal pumping works for you, maybe not.
- I really like wearing gloves.
*******************
Remove the hydraulic hose...
...and knock out the two mounting pins.
The pins have a rubber core and by knocking them at an angle, you easily compress the pin and knock it past the end stops.
The aerostar has a single piston caliper and the mounting pins also serve as sliders to allow clamping pressure to be even between both surfaces of the rotor. Note: only one of the two brake pads are in the pic.
If the mounting/slider pins bind on the grooves then pressure could be uneven or a pad may drag on the rotor.
Clean up the both halves of both grooves on both sides and count on replacing those rusty pins containing rubber cores. The grooves are greased at install.
The old boot may be removed before or after blowing the piston.
Round up about 20 psi of air pressure and blow out the piston.
Note carefully, the opposing pad is left in as a back stop, a cushion is included, and just to make a point I included a clamp in the picture. For fun, I once embedded a piston into a sheetrock wall 20 feet away. I'll leave it to Mythbusters to (dis)prove whether that actually happened.
I've seen better.
A dental tool grabs the o-ring ...
...and also makes an excellent rust removal tool. The crap inside the bore tells me that the rebuild was overdue.
Grit (rust particles or ???) can mess with the piston seal.
Use 000 steel wool to polish up the piston. I've got minor scuffing on one...
...and on the other, small scratches along the axial direction. Replacement pistons are available ($10/ea).
Use 220 sandpaper and steel wool to clean up the rust bucket.
Install new seal and boot, then use brake fluid to wet the piston and seal.
Squarely force the piston past the new o-ring. Getting the new piston in requires a real man's grip. In fact use both hands after you take a picture.
When that fails too, plan B is a moderate (!) use of clamps. I found my greatest success by dropping some additional fluid in and using air to reverse the piston travel. That gets the o-ring squared away in the groove and its becomes absurdly easy to continue.
Seating the boot is even tougher. Tip: I found that if the piston is compressed fully, the boot groove at the top of the piston is positioned nicely to provide relief while the boot outer edge is seated into the caliper.
********
On install, grease the slider pins ($4/side)
...and replace the rusted bleed screw ($3/side).
Check the brake pad for thickness. This one has a life ahead.
I had a Motive Products bleeder around. Then I had to build an adapter for the Aerostar reservoir because I had the MP european version. A new (2-tab) cap and membrane was procured ($10), and used the old one for this adapter. Tip for adapter builders: The inner edge of the membrane must be captured and sealed around the new penetration, otherwise barometric relief channels designed into the cap will compromise the rim seal.
Last edited by RojoStar; 05-10-2018 at 07:47 PM. Reason: PB pic link repair

Thread
Thread Starter
Forum
Replies
Last Post
WVVan
1968-Present E-Series Van/Cutaway/Chassis
10
05-27-2015 03:53 AM
ifrythings
Pre-Power Stroke Diesel (7.3L IDI & 6.9L)
3
04-03-2015 11:21 PM