


Excursion Roof Rack Modifications

Posting Guru
Joined: Oct 2011
Posts: 1,076
Likes: 1
From: Las Vegas, Nevada
How did you get the horizontal bar off? How do I get the clip type lock at the end of the rack to stay down to get the horizontal bar off.
Thanks,
Thanks,
Well I finally hit the point of no return in frustration over the factory roof rack. As you all know it is worthless so I took several ideas from the site here and combined and modified them to fit my needs. I hope this helps someone else here with an idea or two. I know the completed product will be different then the plan as it always is. 

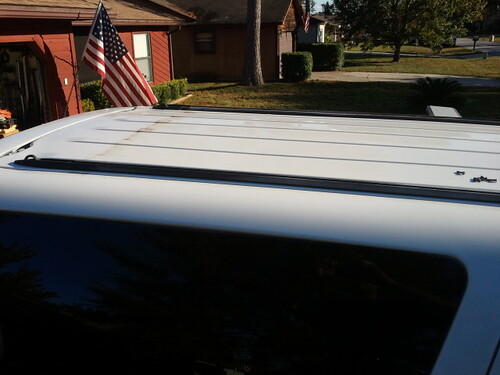
I started with pulling off the cross bars and cleaning the stuff from under them, thankfully no rust.

Under the side rails was a lot more nasty buildup but nothing worse.
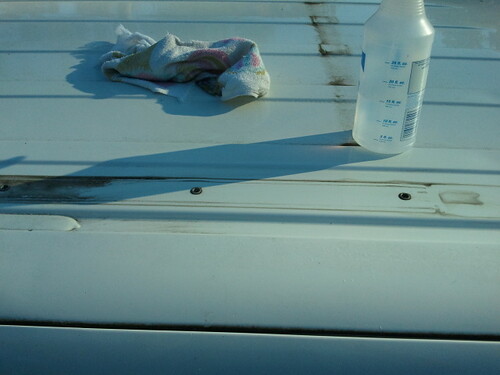
The gunk cleaned up pretty easy, the marks took a lot of elbow grease.
The next parts I missed getting pictures as I was trying to get things done before work. I used 2 layers of 3/8 inch thick rubber running the length of the rails with a little added to each end. I cut the top piece a 1/2 inch wider then the rail, the bottom piece 1 inch wider. I stacked them and centered them to help spread the load across the roof a little more. I figure the rubber will also cushion anything the hits the rack. If you are looking I got the rubber from Tractor Supply, it is floor mat they will cut to length. I got longer fasteners in stainless phillips and allen head. I had to mix as they only had 10 of each in the right length.
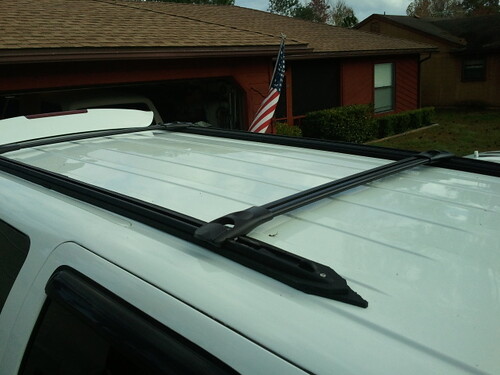
Finished pics.

So nice to see a little light under there.
Now I have to go fight the camera to get the pics of the Safari Rack I am working on to add to the roof rack.
I started with pulling off the cross bars and cleaning the stuff from under them, thankfully no rust.
Under the side rails was a lot more nasty buildup but nothing worse.
The gunk cleaned up pretty easy, the marks took a lot of elbow grease.
The next parts I missed getting pictures as I was trying to get things done before work. I used 2 layers of 3/8 inch thick rubber running the length of the rails with a little added to each end. I cut the top piece a 1/2 inch wider then the rail, the bottom piece 1 inch wider. I stacked them and centered them to help spread the load across the roof a little more. I figure the rubber will also cushion anything the hits the rack. If you are looking I got the rubber from Tractor Supply, it is floor mat they will cut to length. I got longer fasteners in stainless phillips and allen head. I had to mix as they only had 10 of each in the right length.
Finished pics.
So nice to see a little light under there.
Now I have to go fight the camera to get the pics of the Safari Rack I am working on to add to the roof rack.
Lead Driver
Joined: Mar 2010
Posts: 5,250
Likes: 10
From: West Virginia
I have a suggestion to people trying this project, and this is just an idea based on reading through this thread: instead of cobbling up these rubber pieces and j bolts and all of that, why not replace the factory side rails with a thin piece of rubber sufficient to space the rack off the roff, and a long piece of flat stock approximately the same width as the factory crossbars? Drill out the holes at the same spacing as the factory cross member, and then build your rack off these new steel side rails. you could weld everything for strength, and honestly I'm not sure it would be much harder to take off by unbolting than it would be to mess with those J bolts.
Also, for what its worth, I think I'd want the bottom of my rack to be perforated steel or maybe expanded steel (though the expanded will sag under weight if not properly reinforced by crossbars, which is why the perforated would be ideal) so that small items could be put into the rack without fear of them scratching the roof or falling through.
I've wanted to do a rack like this to hold my spare in the middle and my shovel on one side and hilift on the other, but my ex is mostly stock and I guess I'll save that for when its paid off and I have another daily driver.
Cool idea though, and very well executed. thanks for documenting the process and sharing it.
Maybe I'll build something like this for my flatbed when its finished. Might give it a cool look.
Also, for what its worth, I think I'd want the bottom of my rack to be perforated steel or maybe expanded steel (though the expanded will sag under weight if not properly reinforced by crossbars, which is why the perforated would be ideal) so that small items could be put into the rack without fear of them scratching the roof or falling through.
I've wanted to do a rack like this to hold my spare in the middle and my shovel on one side and hilift on the other, but my ex is mostly stock and I guess I'll save that for when its paid off and I have another daily driver.
Cool idea though, and very well executed. thanks for documenting the process and sharing it.
Maybe I'll build something like this for my flatbed when its finished. Might give it a cool look.
Lead Driver
Joined: Mar 2010
Posts: 5,250
Likes: 10
From: West Virginia
On mine, though I'm assuming they are all the same, I had to lift the lever and turn it 90 degrees, which released the tension and allowed me to wiggle the bars loose. Honestly though the spring clips inside that hold it all together, are really the whole design of the factory cross bars, is junk. 2 of my clamps were broken before I touched them, and a third fell apart once I had the crossbars off. I'd strongly caution anyone from mounting anything solely to the factory crossbars... I feel like its just as likely that they would fall off as it is that they would stay put.
Posting Guru
Joined: Sep 2011
Posts: 1,287
Likes: 0
From: Fraser Valley
I accidentally did that even though I was welding outside with a face shield and it made me incredibly sick for 2 days. It gives a horrible fever with hot and cold flashes constantly as well as more symptoms depending on severity
Senior User
Joined: Feb 2011
Posts: 144
Likes: 0
From: Denver, Colorado
Are there plans for this anywhere? How does it mount?
FTE Stories
Ford Trucks for Ford Truck Enthusiasts

2027 Ford Super Duty Buyer's Guide (Every Model, Engine, & Package)
Brett Foote
Top 10 Ford Truck Tragedies
Joe Kucinski
AEV FXL Super Duty - the Super Duty Raptor Ford Doesn't Make
Brett Foote
Lobo Vs Lobo: Proof the F-150 Lobo Should Be Even Lower!
Michael S. Palmer
Ford's 2001 Explorer Sportsman Concept Looks For a New Home
Verdad Gallardo
10 Best Ford Truck Engines We Miss the Most!
Joe Kucinski
2026 Shelby F-150 Off-Road: Better Than a Raptor R?
Brett Foote
2027 Super Duty Carhartt Package First Look: 12 Things You NEED to Know!
Michael S. Palmer
10 Most Surprising 2026 Ford Truck Features!
Joe Kucinski
TreadLightly
Joined: Oct 2006
Posts: 1,608
Likes: 0
From: SE Missouri
It is a one-off design. You will have to dig around and find what others have done. It will take some research. It is "custom". You will want to find roof loads, mounting points, etc. You can either buy the rack and have the ladder built or have someone fab the whole rack. You can probably find a lot of ideas over here: Expedition Portal Forum
Rather than high jack this older thread you may want to just start a new one.... but first do a search for baskets and roof racks.
Rather than high jack this older thread you may want to just start a new one.... but first do a search for baskets and roof racks.
Senior User
Joined: Feb 2011
Posts: 144
Likes: 0
From: Denver, Colorado
It is a one-off design. You will have to dig around and find what others have done. It will take some research. It is "custom". You will want to find roof loads, mounting points, etc. You can either buy the rack and have the ladder built or have someone fab the whole rack. You can probably find a lot of ideas over here: Expedition Portal Forum
Rather than high jack this older thread you may want to just start a new one.... but first do a search for baskets and roof racks.
Rather than high jack this older thread you may want to just start a new one.... but first do a search for baskets and roof racks.
Elder User
Joined: Aug 2006
Posts: 918
Likes: 1
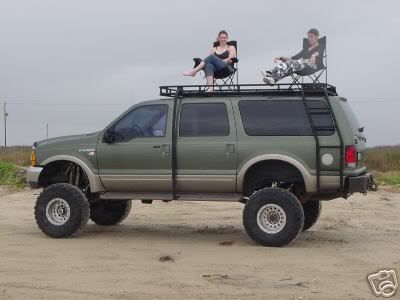
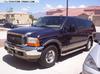
hi to answer the question of where can i get one of these .. it was custom built and everything comes of by undoing bolts .. and yes it will hold the weight of the truck  take that pic and print it out and go to a welder and say i would like one of these on this ( then point to your excursion) it should cost $500-$1200 dependable upon the company and friend or not
also there should be some more pics of that in this thread or somewhere elce on this site that showes the closer pics .. also its rhino lined
take that pic and print it out and go to a welder and say i would like one of these on this ( then point to your excursion) it should cost $500-$1200 dependable upon the company and friend or not also there should be some more pics of that in this thread or somewhere elce on this site that showes the closer pics .. also its rhino lined
Thread Starter
|
Elder User
Joined: Nov 2007
Posts: 854
Likes: 2
From: Middleburg FL
Modifying it again!!
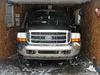
I figured I would resurrect my old thread rather then starting an new one so guys can see the evolution of the rack mods. I had to take it off to have bodywork done. They had to replace my entire windshield frame due to rust from an improperly installed windshield before I bought the Ex so I'm using that as the reason to do some more mods that I wanted before but ran out of time.
The before pics.
http://www.flickr.com/photos/53700883@N06/7121615657/http://www.flickr.com/photos/53700883@N06/7121615657/ by http://www.flickr.com/people/53700883@N06/, on Flickr
http://www.flickr.com/photos/53700883@N06/6975534816/http://www.flickr.com/photos/53700883@N06/6975534816/ by http://www.flickr.com/people/53700883@N06/, on Flickr
And after
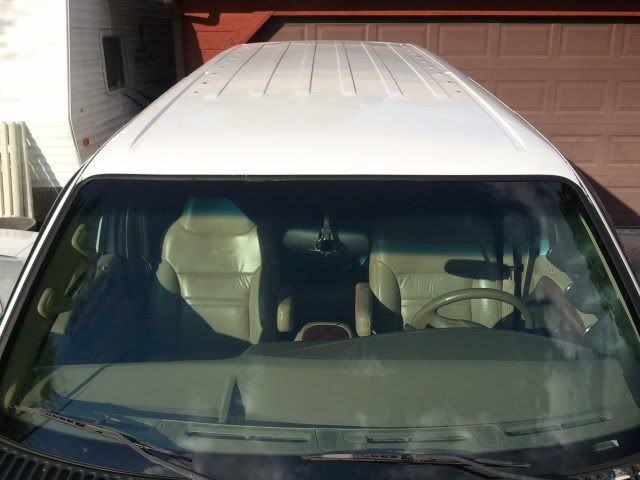
So now that it is all fixed and pretty I am working on the rack to put it back on. The plan is to use solid 1/2" thick rubber cut 3" wide as a cushion on the roof itself. On top of that I am using 1 1/2" X 1 1/2" angle that will be bolted to the roof. I am then planning on welding the rack to it. I am also extending the rack another 12" forward to allow more useable room while the spare is up there. I still need to get a High Lift jack so I can build the mounts to have it and a shovel mount for good measure. After I mount it still need to figure out how to run power to the rack to I can use the lights on it, along with adding a pair in the back for reverse and camper hook up use.
I shall load up some pics of the new parts and progress as it moves along.
The before pics.
http://www.flickr.com/photos/53700883@N06/7121615657/http://www.flickr.com/photos/53700883@N06/7121615657/ by http://www.flickr.com/people/53700883@N06/, on Flickr
http://www.flickr.com/photos/53700883@N06/6975534816/http://www.flickr.com/photos/53700883@N06/6975534816/ by http://www.flickr.com/people/53700883@N06/, on Flickr
And after
So now that it is all fixed and pretty I am working on the rack to put it back on. The plan is to use solid 1/2" thick rubber cut 3" wide as a cushion on the roof itself. On top of that I am using 1 1/2" X 1 1/2" angle that will be bolted to the roof. I am then planning on welding the rack to it. I am also extending the rack another 12" forward to allow more useable room while the spare is up there. I still need to get a High Lift jack so I can build the mounts to have it and a shovel mount for good measure. After I mount it still need to figure out how to run power to the rack to I can use the lights on it, along with adding a pair in the back for reverse and camper hook up use.
I shall load up some pics of the new parts and progress as it moves along.
Elder User
Joined: Jan 2012
Posts: 777
Likes: 2
I think it's been said, but to anyone grinding/welding galvanized... make sure you don't breath it in.
I'm a welder and let me tell you the flu like symptoms of welders fever are not fun.
Any welding fumes should be avoided anyway
Btw, nice build.
I'm a welder and let me tell you the flu like symptoms of welders fever are not fun.
Any welding fumes should be avoided anyway
Btw, nice build.
Thread Starter
|
Elder User
Joined: Nov 2007
Posts: 854
Likes: 2
From: Middleburg FL
Yesterday was spent modifying the safari basket to make it a little longer. All of the pics are taken from the rear of the basket.
As it was. (except it is sitting upside down)
On the saw horses with the tape line to mark where to cut.
Amazing that a sawzall can destroy hours of work in under a min.
Here are the extension pieces I made.
They are cut 12" long then the galvanizing was stiripped. I made 3" slugs from some more tube to strengthen the joints. Then they were inserted and plug welded in place.
I placed the extension pieces in place.
And put the back end on again. After fighting with it alot to keep it all level and square.
There is more to be done to it but I ran out of time so I threw a quick coat of paint on it for now to keep it from rusting where I stripped the galvanizing.
Today I spent time with the angle drilling all of the mounting screw holes and placing it on the roof. It was uncut a first because I didn't know for sure where I was going to have it end on the front side. Yes, I am using the basket on horses as scaffolding.
This was the first try with the yellow end being the proposed cut off.
A closer look.
And here is where I finally decided to cut it 8" in front of the forward most mounting screw.
I bolted a 3/8" thick piece of rubber to the angle to fill the gap where the roof starts to slope down.
I had to stop for the day so next up will be building the driver side angle to match the passenger side. Then place the rack, make the mounting bars, weld it all together, take it off, paint it, reinstall it, wire the lights, add lights, add High Lift, etc...