


Sunpro Tach Install
Thread Starter
|
Junior User
Joined: Feb 2008
Posts: 72
Likes: 1
Sunpro Tach Install
Hello,
I am installing a Sunpro Tach. The instructions are pretty straight forward but I just want to be sure.
I grounded the black wire to a bolt in the engine bay.
I hooked up the green wire to the - side to coil
I hooked the white wire to my other guages for the lighting
The red one was hooked up to the yellow power wire coming from behind the ignition switch.
Do yall agree with this wiring?

Elder User
Joined: Jul 2011
Posts: 609
Likes: 1
From: Stockholm, NJ
I literally just did this exact install yesterday on my 1978 F250 and followed the same basic wiring. I have a 1984 351W in the truck, so I just tapped into the Tach Test wire in the harness. I also found a switched 12V source as well. The one thing that I didn't do right was I tapped into the headlight wiring harness for the light on the tach, except the light only works when I put the lights on and when I switch to high-beams, I lose light. I am going back into the harness to find the instrument panel lights.
Frank
Frank
Posting Guru
Joined: Sep 2003
Posts: 2,313
Likes: 12
From: Northeast LA
I literally just did this exact install yesterday on my 1978 F250 and followed the same basic wiring. I have a 1984 351W in the truck, so I just tapped into the Tach Test wire in the harness. I also found a switched 12V source as well. The one thing that I didn't do right was I tapped into the headlight wiring harness for the light on the tach, except the light only works when I put the lights on and when I switch to high-beams, I lose light. I am going back into the harness to find the instrument panel lights.
Frank
Frank
Posting Guru
Joined: Sep 2009
Posts: 1,159
Likes: 1
From: Suburbs of Chicago
x2 on the bulb for behind the windshield wiper/headlight switch for the white wire for the lights.
I don't agree on the red wire though. For that one, there is a yellow harness that hangs in the dash behind the headlight switch. It is a 12v switched, and you can connect to it with a bullet connector on your red wire. Don't mess with the wires that lead to the tumbler if you can help it.
I don't agree on the red wire though. For that one, there is a yellow harness that hangs in the dash behind the headlight switch. It is a 12v switched, and you can connect to it with a bullet connector on your red wire. Don't mess with the wires that lead to the tumbler if you can help it.
Fleet Mechanic
Joined: Jun 2007
Posts: 1,931
Likes: 2
From: Ohio
Trending Topics
Posting Guru
Joined: Sep 2009
Posts: 1,159
Likes: 1
From: Suburbs of Chicago
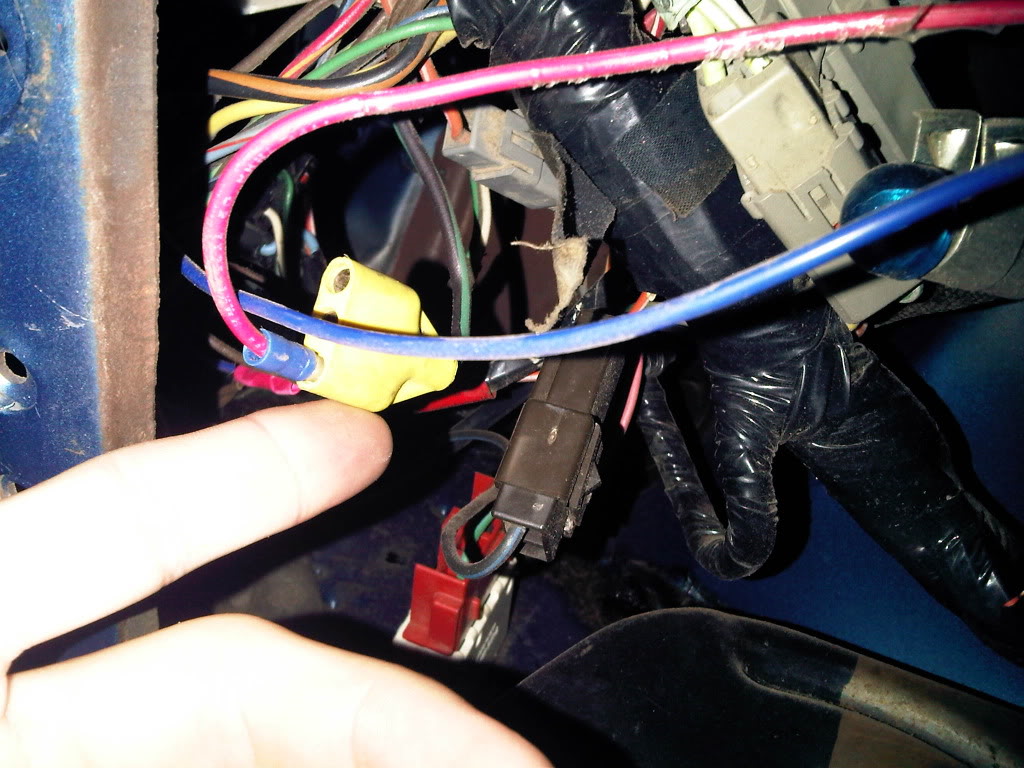
No problem! This is what it looks like. It's the yellow harness with 3 female bullet connectors. It has a black wire with a green stripe going into it. In this picture, my red gauge wire is coming out of it.
FTE Stories
Ford Trucks for Ford Truck Enthusiasts

10 Things Every Truck Owner NEEDS (2026 Edition)
Michael S. Palmer
Rezvani's Latest Post-Apocalyptic Monster Is a Ford F-150 Raptor Underneath
Verdad Gallardo
Top 10 Most Expensive Ford Trucks Ever Sold on Bring a Trailer
Joe Kucinski
2027 Ford Super Duty Buyer's Guide (Every Model, Engine, & Package)
Brett Foote
Top 10 Ford Truck Tragedies
Joe Kucinski
AEV FXL Super Duty - the Super Duty Raptor Ford Doesn't Make
Brett Foote
Lobo Vs Lobo: Proof the F-150 Lobo Should Be Even Lower!
Michael S. Palmer
Ford's 2001 Explorer Sportsman Concept Looks For a New Home
Verdad Gallardo
10 Best Ford Truck Engines We Miss the Most!
Joe KucinskiThread Starter
|
Junior User
Joined: Feb 2008
Posts: 72
Likes: 1
Wycked,
Thank you for that picture. I will make sure to tap into that wire. Is this connection just hanging around? Can i use this for more than one 12v source since it looks like it has three outputs?
Thank you for that picture. I will make sure to tap into that wire. Is this connection just hanging around? Can i use this for more than one 12v source since it looks like it has three outputs?
Last edited by puroford; Jul 13, 2011 at 02:23 PM. Reason: added words to clear up the statement
Postmaster
Joined: Mar 2011
Posts: 2,698
Likes: 7
From: Taxachusetts
Not sure if I understand yer question but on the DSII, a green/white stripe wire goes to the TACH TEST horseshoe connection on the coil.....from the loom. The distributor has a three wire connection - orange, purple and black

Senior User
Joined: Apr 2017
Posts: 116
Likes: 0
From: Spokane, WA
I don't know why I said distributor in my last post. I mean the wire that goes to the coil. Wondering is someone has a picture of where this wire splices in?
Postmaster
Joined: Mar 2011
Posts: 2,698
Likes: 7
From: Taxachusetts
If you're looking to hook up a tach...(as the thread title suggests)...you can wire the tach to the neg (-) connection on the coil.
If you're looking for where the G/w wire splices into the loom from the coil, give me a few and I'll go look at an old (haha) harness....but I think it runs into the ICM and another 4 prong plug harness....
If you're looking for where the G/w wire splices into the loom from the coil, give me a few and I'll go look at an old (haha) harness....but I think it runs into the ICM and another 4 prong plug harness....
Postmaster
Joined: Mar 2011
Posts: 2,698
Likes: 7
From: Taxachusetts
Can't give you a picture...but - the G/w 16 ga wire from the coil's TACH TEST runs into the loom that houses the oil sending unit wire (and some others)......over to the ICM area. The ICM has a rectangular connection - R/g, R/w, etc and next to that is a circular 4 connection dealie. The 16ga G/w wire connects opposite to a solid, light Green, 18 ga wire.....then runs into the cab. From there.........?
Hope this helps/is what you wanted...
Hope this helps/is what you wanted...