


gauge installation
Laughing Gas
Joined: Nov 2010
Posts: 915
Likes: 1
From: oriental NC.

no problem joe pm me if you need my info maybe on a sat i can help you out . my dad lives in hamstead, but i rarely get time to leave here as im always at the shop. i didnt do the overhead thing i got two on the pillar and i custom made my dash so i could fit more . 
thanks jason
thanks jason

Laughing Gas

Joined: Mar 2004
Posts: 789
Likes: 16
From: West Coast/L.A. Area
I got the same gauges and it took me the better part of the day to put mine in. Pretty much standard stuff for the trans temp and the boost. Gotta tell you - scared the hell out of me drilling the manifold for the pyro. But I took my time, and took it slow, held the drill as straight as I could and it worked and has held for several years now. Only thing weird was in their instructions they said to mark up one of the gauge lites with a marker pen to make it darker. I did as they said and it's about right.
BTW, i went with the under dash mount for the same gauges you got and love it. I never did care for the column mounts.
BTW, i went with the under dash mount for the same gauges you got and love it. I never did care for the column mounts.
of American machinists
Joined: Oct 2004
Posts: 1,014
Likes: 0
From: NORTH IDAHO
 Most likely you will need to remove the anchor for the rear view mirror and move it down to make room for the pod.
Thread Starter
|
Joe28443
Joined: Jul 2009
Posts: 1,163
Likes: 4
From: Hampstead NC
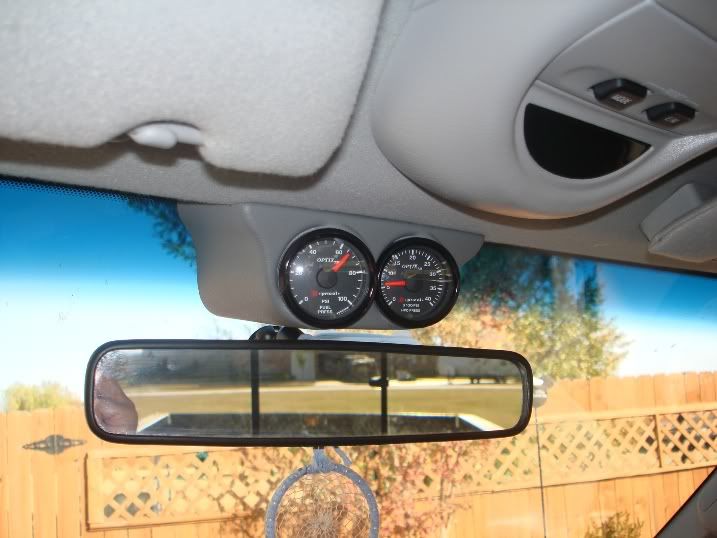
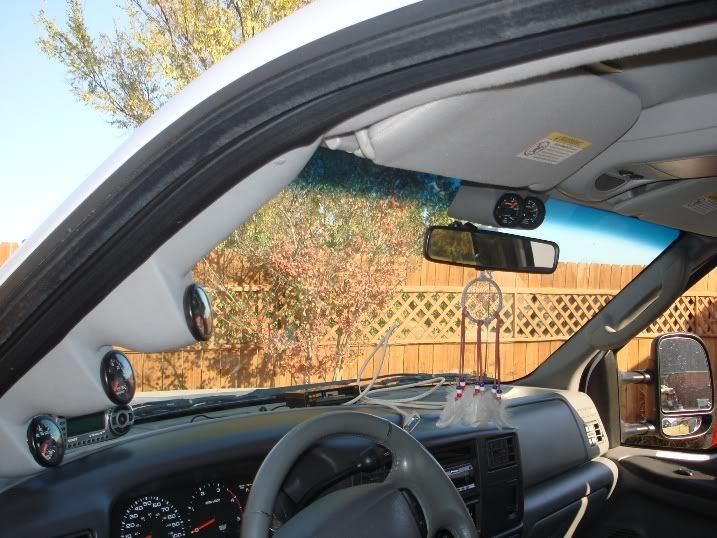
I done a test fit for the pod mount this morning. It looks like I may not have to move the mirror mount. The only thing is the far pod is partially blocked by the overhead console. I probably will put the gauge less looked at in that spot. It will look awesome when complete.
FTE Stories
Ford Trucks for Ford Truck Enthusiasts

Top 10 Fords at 2026 Carlisle Ford Nationals
Joe Kucinski
3 Best / 3 Worst Parts of Modern Ford Ownership
Brett Foote
10 Amazing Upgrades That Solve Common Ford Truck Owner Headaches
Pouria Savadkouei
Every 2026 Ford Engine Explained
Brett Foote
10 Ugly Ford Trucks That We Still Kinda Love
Joe Kucinski
10 Things Every Truck Owner NEEDS (2026 Edition)
Michael S. Palmer
Rezvani's Latest Post-Apocalyptic Monster Is a Ford F-150 Raptor Underneath
Verdad Gallardo
Top 10 Most Expensive Ford Trucks Ever Sold on Bring a Trailer
Joe Kucinski
2027 Ford Super Duty Buyer's Guide (Every Model, Engine, & Package)
Brett Foote
Elder User
Joined: Jan 2006
Posts: 718
Likes: 0
I'd suggest picking up some additional wires that match the wires included in the kit. When I installed my performax gauges, it seemed like they gave me just enough to reach the 4th pillar gauge. I ended up splicing and giving myself an additional 3 feet so all the wiring was loose between each gauge, and enough for when I do my overhead. Obviously ev2's are different, but same concept with wire. Maybe pick up shrink tube, wire looming, a solder torch and decent solder. 5 hour job takes 10 hours when you have to run back and fourth to the store
Post Fiend
Joined: Sep 2006
Posts: 7,426
Likes: 6
From: Sioux Falls, SD
FYI - The EV2's can be "daisy chained" except for the wires coming from the sending unit/sensor. A much quicker install,
From the install instructions:
"Daisy Chain Your Gauges – If multiple EV2™ gauges are being installed in
one location (such as a pod), you may use a single set of the Ignition, Ground, and Dimmer wires to connect all of the gauges. Simply pass the wires from one orange connector to the next one in a “daisy chain” configuration.

Laughing Gas
Joined: Nov 2010
Posts: 915
Likes: 1
From: oriental NC.
joe . i had time after i closed to check out the ev2s no problem trans is easy we just need enough wire ,and sender should fit the test port// boost im guessing you got a tee adapter ? gauge should have plastic tubing and fittings from gauge to under hood. easy // egt WHAT SIZE IS THE FITTING ON THE PROBE we need to know what size to drill and tap.and being a auto you got easy access to a hole in the fire wall that i didn't have.i forgot to ask you an important question where are you mounting this stuff? if we get it all straight before it should go fast. wes
wes
PREMIUM SPONSOR


Joined: Feb 2009
Posts: 6,039
Likes: 74
joe . i had time after i closed to check out the ev2s no problem trans is easy we just need enough wire ,and sender should fit the test port// boost im guessing you got a tee adapter ? gauge should have plastic tubing and fittings from gauge to under hood. easy // egt WHAT SIZE IS THE FITTING ON THE PROBE we need to know what size to drill and tap.and being a auto you got easy access to a hole in the fire wall that i didn't have.i forgot to ask you an important question where are you mounting this stuff? if we get it all straight before it should go fast. wes
wesThe EV2 boost gauges use an electronic sensor so no boost tube. It will go in the AIH delete plug in the spider.
Drill and tap are included in the kit.


Thread Starter
|
Joe28443
Joined: Jul 2009
Posts: 1,163
Likes: 4
From: Hampstead NC
I'm sure Claysent everything I need. I know I have a tap for the kit. Its all going in a 3 pod over mirror which I test fit and should not have to move the mirror at all. Where could I pick up some extra wire in case its not enough?