


Rusty rear spring mount replacement with pics

Thread Starter
|
Junior User
Joined: Oct 2010
Posts: 60
Likes: 0
Rusty rear spring mount replacement with pics
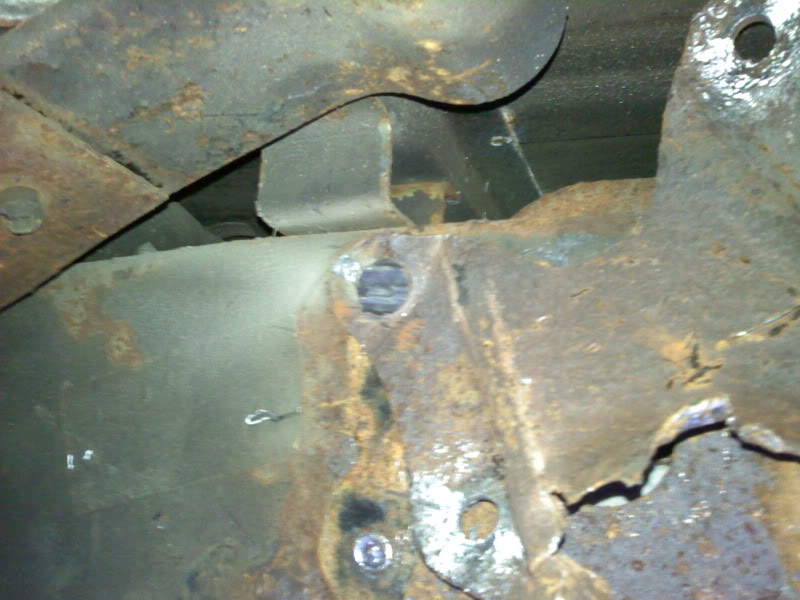
Figured I post this up, I didn't find too much in the way of pics when I was seaching. Here is my stab at replacing the left rear leaf spring mount and shackle on my 93 f150. As Im sure your aware, you need to remove the 4 factory rivets to get the old mount off so you can bolt the new one on. I just bought the truck and lucked out as the seller gave me a new mount and shackle with the truck when I bought it, I did end up buying a new nut and bolt that connects the shackle to the mount due to rust. I could probably reused the old shackle, but since I had a new one, i went with that.
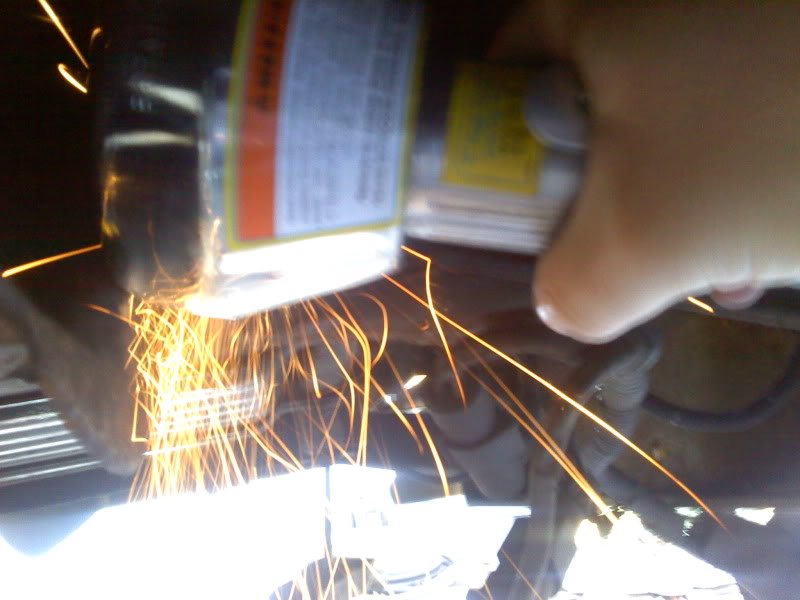
Other than an impact gun and typical hand tools, these are the tools I used to get those rivets off. I used a cut off wheel and an air chisel, both of which were harbor freight specials, probably cost me like $5 each. I'm sure if i was using real tools, it would not have taken me so long!
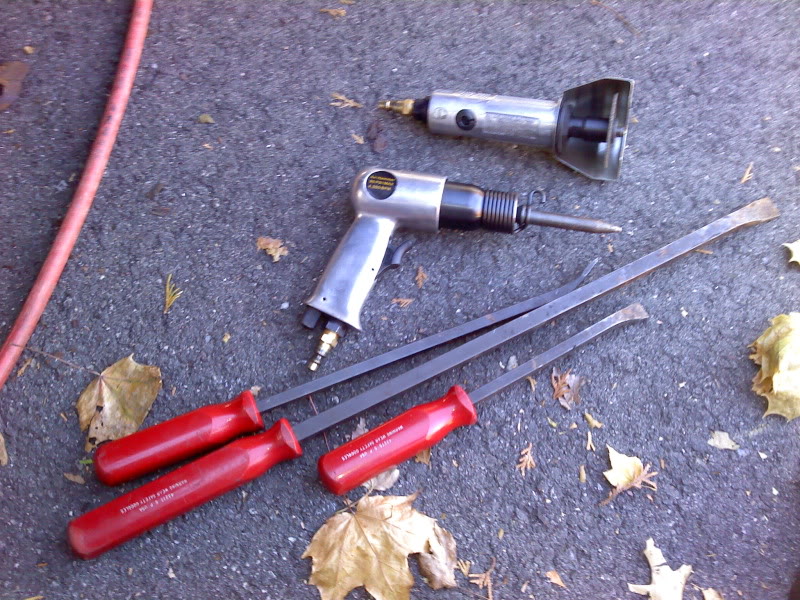
I found that the cut off wheel worked best and I just pretty much ground off as much of the rivets as I could, but room was tight and it was hard to get the thing in there. The air chisel came in handy at those times. It did not help that the bolt holding the shackle to the mount would not come loose(even with my IR 2180ti) and without undoing the lower shackle bolt, you cannot disconnect the leaf spring from the shackle as the bolt is stopped by the frame from coming out!
2 done
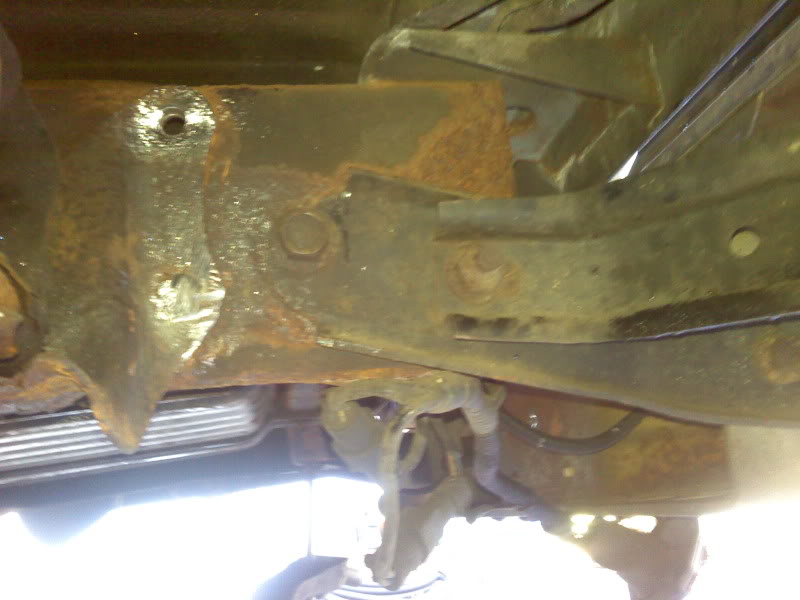
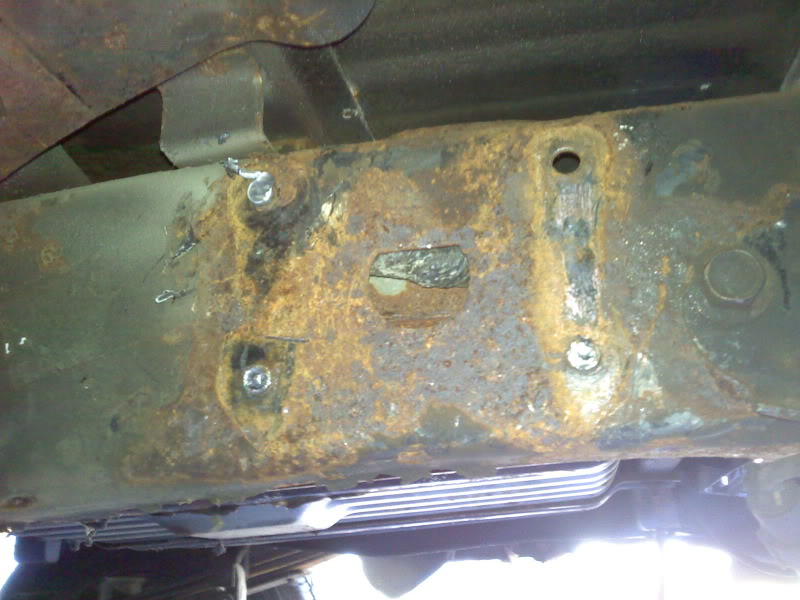
I was able to rotate the mount once 3 were ground off to get the leaf spring out of the way so I could get to the 4th rivet.
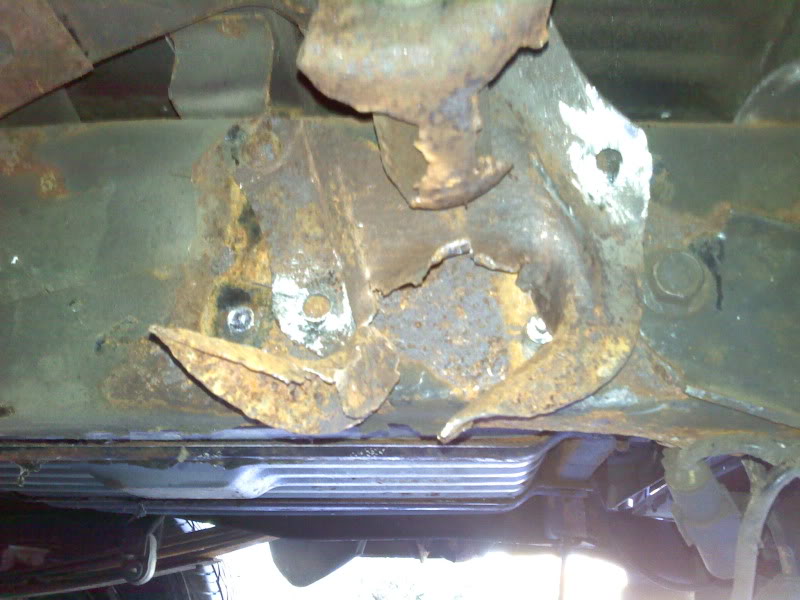
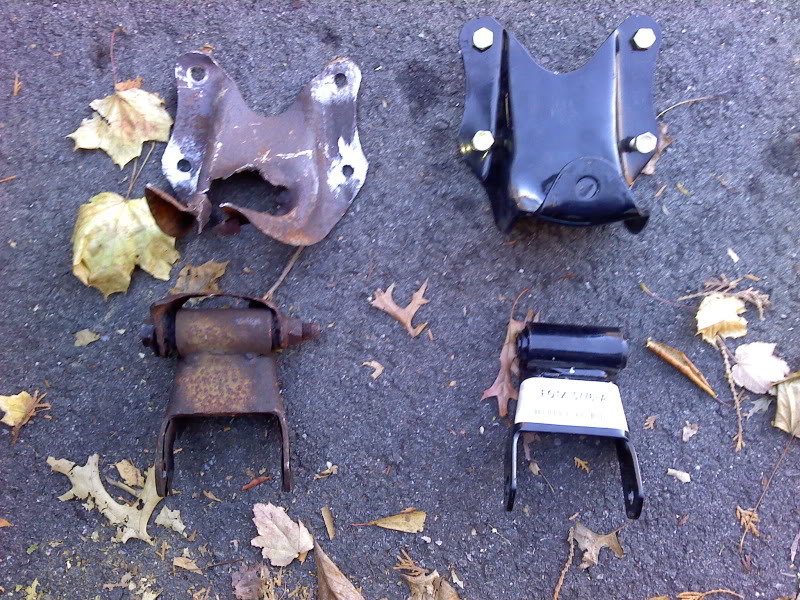
Finally got all 4 four out and got the old bracket off. You can see my old one compared to the new one. Strangely, my right side bracket is solid.
I wire brushed the area alittle and hit it with some primer and paint before bolting the new bracket on, fit like a glove. Took some advice from some forum members and installed the bolts for the shackle to mount and shackle to leaf spring loosely then put the truck back on the ground and tightened them up once the suspension was under load. The reason behind this is that if you tighten the bolts while the truck is in the air, the axle is at droop, once you lower the truck, the joints twist and rubber bushings in those joints would be under pressure and won't last long like that.
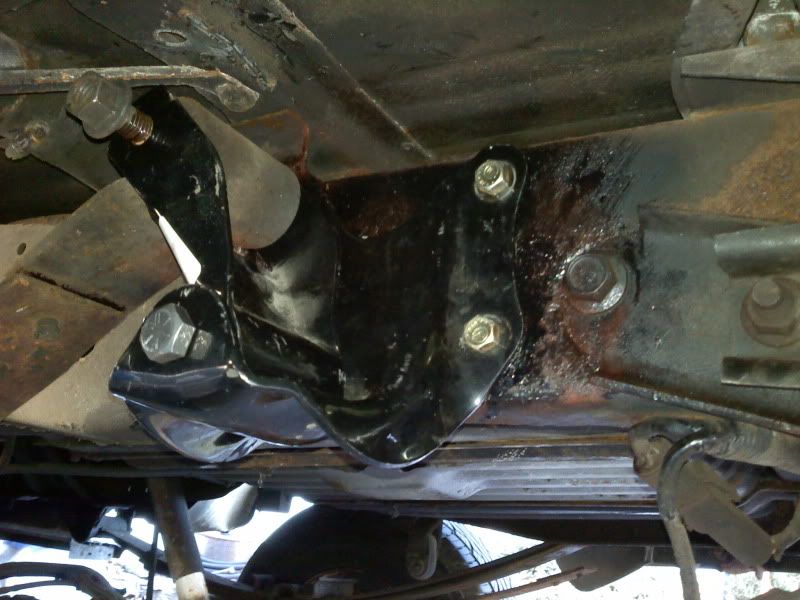
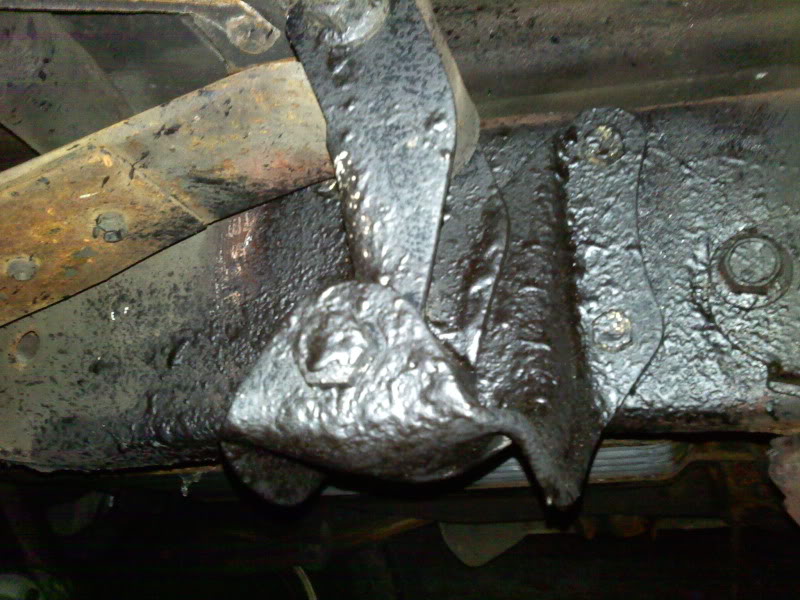
Then I hit the whole thing with some undercoating I had eventually I'll do the whole frame.
Hope this helps anyone who is weary about the repair. I am in no means a professional mechanic, I like say i'm on the higher end of the curve for the backyard wrench. It took me about 5-6 hours, i was taking my time and my 4 y/o son stopped me every 10 minutes or so to see what I was doing. I did not have to drop the rear gas tank, or disconnect anything for that matter. If you have any questions, post em up and I'll answer them as best as I can for you.
Jeff
Other than an impact gun and typical hand tools, these are the tools I used to get those rivets off. I used a cut off wheel and an air chisel, both of which were harbor freight specials, probably cost me like $5 each. I'm sure if i was using real tools, it would not have taken me so long!
I found that the cut off wheel worked best and I just pretty much ground off as much of the rivets as I could, but room was tight and it was hard to get the thing in there. The air chisel came in handy at those times. It did not help that the bolt holding the shackle to the mount would not come loose(even with my IR 2180ti) and without undoing the lower shackle bolt, you cannot disconnect the leaf spring from the shackle as the bolt is stopped by the frame from coming out!
2 done
I was able to rotate the mount once 3 were ground off to get the leaf spring out of the way so I could get to the 4th rivet.
Finally got all 4 four out and got the old bracket off. You can see my old one compared to the new one. Strangely, my right side bracket is solid.
I wire brushed the area alittle and hit it with some primer and paint before bolting the new bracket on, fit like a glove. Took some advice from some forum members and installed the bolts for the shackle to mount and shackle to leaf spring loosely then put the truck back on the ground and tightened them up once the suspension was under load. The reason behind this is that if you tighten the bolts while the truck is in the air, the axle is at droop, once you lower the truck, the joints twist and rubber bushings in those joints would be under pressure and won't last long like that.
Then I hit the whole thing with some undercoating I had eventually I'll do the whole frame.
Hope this helps anyone who is weary about the repair. I am in no means a professional mechanic, I like say i'm on the higher end of the curve for the backyard wrench. It took me about 5-6 hours, i was taking my time and my 4 y/o son stopped me every 10 minutes or so to see what I was doing. I did not have to drop the rear gas tank, or disconnect anything for that matter. If you have any questions, post em up and I'll answer them as best as I can for you.
Jeff
Hotshot


Joined: Sep 2001
Posts: 11,958
Likes: 228
Thanks for sharing your repair job. I'm sure this will be usefull for others.
I'm not sure I would have put undercoating on it. I definitely don't think I would do the rest of the frame. All that stuff will do is hold in make it rust faster, unless you get every bit of rust removed.
I'm probably going to have to replace them on my truck.
I'm not sure I would have put undercoating on it. I definitely don't think I would do the rest of the frame. All that stuff will do is hold in make it rust faster, unless you get every bit of rust removed.
I'm probably going to have to replace them on my truck.

Posting Guru

Joined: Jun 2010
Posts: 1,008
Likes: 2
From: Freehold
Best thing I ever used for rust besides some specialty coatings that cost alot for just a quart of paint, was rustoleum rust reformer paint. Its made to go right over surface and cleaned up rust (no loose stuff) and does work. I painted a toyota truck with it a few years back then coated it with satin black over it and very little rust has returned. I wanted also mention that I didnt really clean it all that well of the dirt and grime either? I did coat it 2 different times tho.

Junior User
Joined: Nov 2010
Posts: 86
Likes: 0
From: Rust/Salt Belt in SW Mich
Good replacement job. I live in the salt/rust belt of Michigan and that salt is quite nasty to anything on vehicles. I have been through this job on both sides of my truck as well as the radius arms.
I found that local Ford dealer always stock the brackets & shackles because this is a very common problem.
I found that local Ford dealer always stock the brackets & shackles because this is a very common problem.
Posting Guru
Joined: Jul 2004
Posts: 2,244
Likes: 2
From: Cottage Grove, WI
I just did this fix this weekend on a buddys truck. Lucky we had a torch though, only took me like an hour total. Good job man!
Trending Topics
Freshman User
Joined: Nov 2010
Posts: 28
Likes: 0
From: Tennessee
I'm planning on replacing both my rear leafspring hangers as soon as I get enough money. Would it be possible to remove the rivets with a reciprocating saw? And if my shackle isn't in too bad of condition should I still replace it or just put the old one back on?
FTE Stories
Ford Trucks for Ford Truck Enthusiasts

Top 10 Most Expensive Ford Trucks Ever Sold on Bring a Trailer
Joe Kucinski
2027 Ford Super Duty Buyer's Guide (Every Model, Engine, & Package)
Brett Foote
Top 10 Ford Truck Tragedies
Joe Kucinski
AEV FXL Super Duty - the Super Duty Raptor Ford Doesn't Make
Brett Foote
Lobo Vs Lobo: Proof the F-150 Lobo Should Be Even Lower!
Michael S. Palmer
Ford's 2001 Explorer Sportsman Concept Looks For a New Home
Verdad Gallardo
10 Best Ford Truck Engines We Miss the Most!
Joe Kucinski
2026 Shelby F-150 Off-Road: Better Than a Raptor R?
Brett Foote
2027 Super Duty Carhartt Package First Look: 12 Things You NEED to Know!
Michael S. PalmerJunior User
Joined: Feb 2010
Posts: 87
Likes: 0
Thanks for the post, I had to replace my rear springs and when taking them off with fire I noticed that my rear hangers are rusted through. I was dreading doing them but this seems like something I can tackle. Thanks again!
Hotshot
Joined: Sep 2001
Posts: 11,958
Likes: 228
I would at least put a new bushing in the shackle.
Postmaster
Joined: Jan 2009
Posts: 4,558
Likes: 2
....Yes a sawzall with a good metal cutting blade is the fastest , i like to use a air chissle to make a small notch then saw it off , use the long blade to , ....Lew
Fleet Owner

Joined: May 2009
Posts: 21,437
Likes: 76
From: Gilbert, PA
7" is a bit big unless you have the bed off, which make the whole process alot easier
Senior User
Joined: Dec 2007
Posts: 294
Likes: 0
From: Noblesville,IN
Thanks again for posting this thread. It gave me the motivation to do this repair myself!
Some things I'd like to add for posterity. A Sawzall was invaluable for cutting off the shackle even with the spring eye so that I could get to the frame bracket rivets. The air chisel didn't work so hot for me at punching out the leaf spring bolts and rivets once the rivet heads were out but the pointed bit did work well in conjuction with a BFH.
Also, my truck is 4WD with a bit of lift which kept the spring eye against the bed even when the rearend was lowered. To get the spring eye down to line up the shackle bolts and to cut the spring eye bolt with a Sawzall I had to take the rear wheels off to get the rearend down - the 6 ton jackstands were at the highest notch.
The reason I had to cut the spring eye bolt in 4 total pcs was because it wouldn't clear the top of the frame or bed bracket and I have a Reese hitch that the bolt wouldn't clear on the bottom side. I put the new bolt in the spring eye from the opposite way.
Post Fiend
Joined: Oct 2003
Posts: 6,214
Likes: 13
From: New Jersey
The way I did it was use a cutting disk and cut through the bracket, then jacked up the rear axle a bit so the eye of the spring went above the bracket and out of the way. One could also lower the axle and achieve the same thing.
I had to jack the axle up because my jack stands under the frame couldn't be adjusted any higher and the tires just barely touched on the ground. I had to go up.