Uncle Stosh's D60 and Sterling 10.25 swap
#1
 05-26-2008, 07:48 PM


Uncle Stosh's D60 and Sterling 10.25 swap
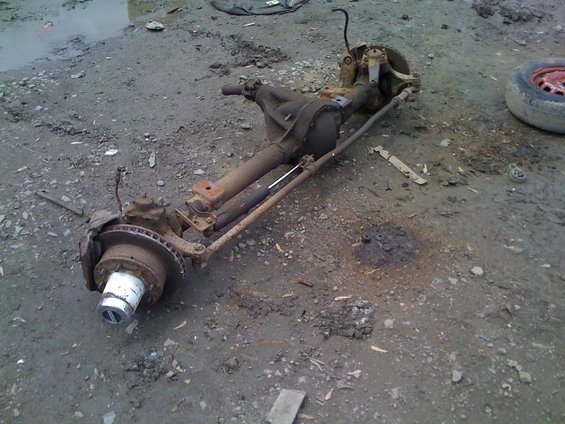
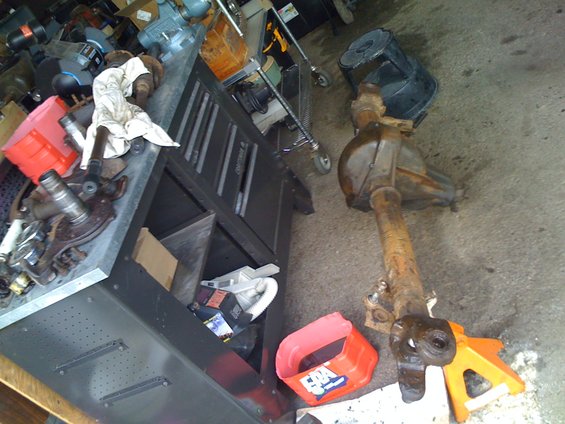
I was finally able to pull apart the $100 D60 that I got last week, and I'll be ready to finish the cleanup and painting of it this week.
I've got an idea for a really cool front drop/narrowed hanger setup for it, and I'll try and get some pics of it once it's finished in SolidWorks.
Man, what a PITA to get the knuckles off. One of the studs on the driver's side was really shot. The nut was totally rusted off, and I had to drill it out to get the steering arm off.
I didn't take any pics of the hubs, but by the looks of it I don't think they were EVER greased.
Here is a before and after pic of the axles.
Rear axle ($200) with 4.10 gears, limited slip and F350 springs.
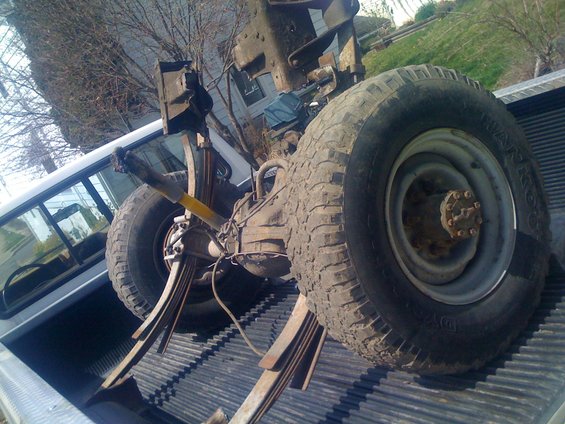
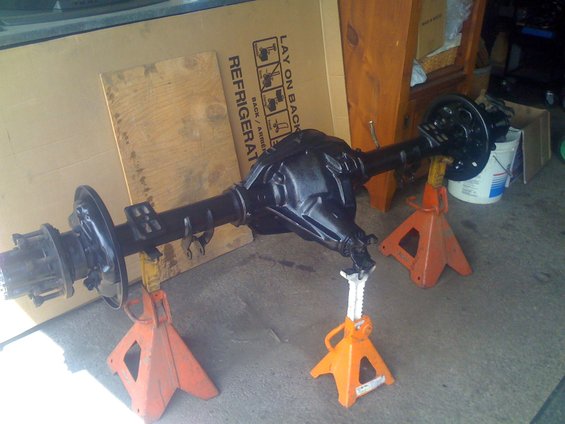
Front axle ($100) 4.10 gears and Warn hubs.
I've got an idea for a really cool front drop/narrowed hanger setup for it, and I'll try and get some pics of it once it's finished in SolidWorks.
Man, what a PITA to get the knuckles off. One of the studs on the driver's side was really shot. The nut was totally rusted off, and I had to drill it out to get the steering arm off.
I didn't take any pics of the hubs, but by the looks of it I don't think they were EVER greased.
Here is a before and after pic of the axles.
Rear axle ($200) with 4.10 gears, limited slip and F350 springs.
Front axle ($100) 4.10 gears and Warn hubs.

#3
05-26-2008, 08:17 PM
Yeah, considering the spring perches on 77/79 axles are 41 1/2 inches (narrower by 4 1/2 inches) you have two choices:
1) Cut and re-weld the perches wider on the axle to match the 80 and up frame (46 inches). I really don't want to do that though, it gives you less tire clearance at full lock.
2) Move the perches on your frame inward to match the axle. More clearance for wider tires/more offset and better articulation. Best way IMO.
I want to put some lift in it any way, and I am going to build a drop bracket for the front frame horns and drop the pivot points about 4-5 inches. At the same time, I'll move the shackles to the rear perches and move them inward under neath the existing frame rails. This combined with some multi-leaf springs will net me almost 10" of lift.
Both areas of the frame horns and rear hangers will be boxed up for strength. I'm going to cut the frame horns off another donor truck and weld the driver's side onto the passenger side, and vise versa to box them and widen them at the same time.
I'll show some more pics as I progress.
#5
05-26-2008, 10:36 PM
Post Fiend
#6
05-26-2008, 11:54 PM
#7
06-09-2008, 03:44 PM
Well I started working on the front spring perch drop brackets for my D60 swap today in Solidworks. I need to get the drop plates finished so I can cut them out on the laser.
I'm having some difficulties with the software, and I can't quite figure out how to bend the drop brackets like a "z" to make up the difference in my frame (36") to the D60 spring pads which are 31.5" center to center.
I'll be adding some "wings" to the drop bumper/cross brace that will follow the lines of the stock bumper and I'll be adding some cutouts for "D" rings in the center of the cross brace for pulling as well.
Here is a preview of the encapsulated cross brace - sub bumper idea that I came up with:
Trending Topics
#8
06-09-2008, 04:54 PM

I missed something somewhere. Is this a D60 from a 70's pickup, and that's why you have to make an adapter for it? If so, what models did the d60 in the 70ish trucks come in? They also made a 8 lug d44 correct?
Also, if it's from a 70's pickup, it may require the lift. I think I read somewhere that the 70's pumpkin/driveshaft may interfere with the large front crossmember of the 80-up trucks.
Also, if it's from a 70's pickup, it may require the lift. I think I read somewhere that the 70's pumpkin/driveshaft may interfere with the large front crossmember of the 80-up trucks.
#9
06-09-2008, 05:44 PM
Yeah, it's out of a 78/79 F250. They mostly came with D44's (8 lug) but some HD models had the High Pinion King Pin D60 which is what I got.
You are correct that the pumpkin is more centered on the early models and usually requires cutting and re-welding the front engine cross member for clearance. I may or may not have to cut it, it really depends on how much lift you have. This particular model is very sought after for the guys that are doing a coil lift with extended radius arms. There is more clearance to bolt/weld the wedges.
With the custom front drop bracket - sub bumper and new rear hangers with extended shackles I should be pushing 10-12 inches of lift. Hopefully I won't have to hack up the cross member too much if any at all.
I had the idea of incorporating the sub bumper into the drop bracket because they are really strict here in PA with bumper height limits. I believe it's 30-32 inches and the sub bumper should qualify. It'll be painted black and hang right below the stock bumper.
#10
06-09-2008, 08:41 PM
#11
06-09-2008, 09:17 PM
Thanks, but I like the simplicity and clean lines of only having one set of drop brackets. I just need to figure out how to draw them. The drop brackets shown aren't the correct shape any way. I'm going to re-use the front shackle holes and the ones from the radiator support in the existing frame to mount them.
They'll be replacing what you see now and the shape is going to change. These drop brackets will also strengthen the frame by boxing the front section in at the same time.
Here are two more that I did. One shows the wing extensions that will match the contour of the bumper and I added some tabs for D rings that will go through the support and be welded on both sides.


Keep in mind that the drop plates are currently too big and they won't have as much extra material around the perimeter to flex. It's hard to explain but the contour of the plates will be much closer to the 2 x 4 cross brace/sub bumper.
Another thing that I need to figure out is how to make the wings sweep back about 10 degrees like my front bumper does. It appears as one straight bar now, but it won't be like when it's finished.
I may also add a threaded tubular brace to the bottom between the spring eyes instead of using nuts. This will also add some additional support.
Here are the 1" thick D ring brackets:


They'll be replacing what you see now and the shape is going to change. These drop brackets will also strengthen the frame by boxing the front section in at the same time.
Here are two more that I did. One shows the wing extensions that will match the contour of the bumper and I added some tabs for D rings that will go through the support and be welded on both sides.
Keep in mind that the drop plates are currently too big and they won't have as much extra material around the perimeter to flex. It's hard to explain but the contour of the plates will be much closer to the 2 x 4 cross brace/sub bumper.
Another thing that I need to figure out is how to make the wings sweep back about 10 degrees like my front bumper does. It appears as one straight bar now, but it won't be like when it's finished.
I may also add a threaded tubular brace to the bottom between the spring eyes instead of using nuts. This will also add some additional support.
Here are the 1" thick D ring brackets:
#12
06-10-2008, 03:32 PM
Well after a couple of hours of struggling with SolidWorks, I was finally able to figure out how to make the "Z" bends in the drop brackets.
I also added a 10 degree cut in the main support for the wings and modified the "D" ring brackets.
Now all I have to do is figure out how to mirror the drop brackets and wing to install it on the passenger side.
Here is another peek:

And here is a shot of the back side. I left enough on the "D" bracket to weld it on both front and back.

I also added a 10 degree cut in the main support for the wings and modified the "D" ring brackets.
Now all I have to do is figure out how to mirror the drop brackets and wing to install it on the passenger side.
Here is another peek:
And here is a shot of the back side. I left enough on the "D" bracket to weld it on both front and back.
#13
06-11-2008, 06:04 PM

Elder User
Join Date: May 2008
Location: near Liverpool, England
Posts: 672
Likes: 0
Received 0 Likes
on
0 Posts
#14
06-11-2008, 06:28 PM
There are only three ways that I know of to fit 38's. Cut the fenders, body lift or put a suspension lift on.
I'm not cutting my rust free fenders or bed and I'm sure as hell not going to put a body lift on.
This is a shop truck so I'm not worried about getting the axles stuck in the mud either.
#15
06-30-2008, 07:06 PM
Well, I haven't had much time to work on this lately but I did manage to find some more parts today.
I was looking through a salvage yard and found an 06 Super Duty and I was able to convince the guy to sell me the front springs out of it.
Paid $100 bucks for them and they are removing them. I'm going to pick them up tomorrow. They have a pretty cool shackle/hanger setup on them and I was going to grab them too but they wanted another $50 for them.
I'm going to stick with my original design above and make my own drop hanger for it.
They look like they have a nice arch to them, and they should give me some nice lift and hopefully a decent ride.
Has anyone ever tried putting the Super Duty springs on an SAS?

Thread
Thread Starter
Forum
Replies
Last Post
Sooper Camper
1973 - 1979 F-100 & Larger F-Series Trucks
7
03-30-2014 11:58 PM
uncle.stosh
1980 - 1986 Bullnose F100, F150 & Larger F-Series Trucks
12
04-22-2009 12:08 PM