
Quadrajet anyone?
#1
 05-09-2011, 01:06 AM

#2
05-09-2011, 02:42 AM
Posting Guru
I used to run Q-jets on all my cars when I was younger. Everyone else complained about them and didn't like them but I found them easy to work on and dependable. I think all my young buddies just wanted to say they had a Holley.
Anyway, you can tune a Q-jet and get it to run beautifully and they will last forever. The only thing that needs fixing are the bushings for the butterfly rods. There are kits to do this. Install brass bushings are you are good to go.
There are different size Q-jets, 600 cfm up to 750 cfm so you can tune for your motor.
#3
05-09-2011, 10:13 AM

The thing about a Q-Jet is it will only give your engine what it needs. Just because it's rated at 750cfm doesnt mean it will give it. I love Q-Jets and plan on one for my next engine project.The Carb Shop
#4
05-09-2011, 12:26 PM
Posting Guru
You will need to run a 1 inch spacer, and blend the radius down from the secondarys. So you the path is smoother. The rear of a Q-jet is about 1 wider then a holley. So I like to widen up the manifold base, and spacer so its more like GM intended.
I've only done in once on a Weiland Stealth manifold that I put on a 350sbc. It worked great, and had great all around performance.
If I remeber correctly I used epoxy to glue down the spacer. Then I started grinding to port match it.
I've only done in once on a Weiland Stealth manifold that I put on a 350sbc. It worked great, and had great all around performance.
If I remeber correctly I used epoxy to glue down the spacer. Then I started grinding to port match it.
#5
05-09-2011, 01:09 PM
Is it strictly by the venturi size I can tell the different sizes?
I guess I'll try to find one from '75 or later. My reading says that is when they solved the leading plugs prob.
Also, I see they were made by Rochester, Carter, and Edelbrock. I assume that dialing one in for my 305 (300 I6 bored) would simply be a matter of experimenting with jets and m.rods, lean/rich springs until the right combo is found?
I am assuming that the one that came oem on a 305 v8 would be a bit rich for my 300, since the v8 has two extra cylinders and sets of valves? But it is a good starting point.
Feedback is appreciated.
#6
05-09-2011, 02:07 PM
Posting Guru
#7
05-09-2011, 02:25 PM
Trending Topics
#8
05-09-2011, 03:04 PM
Posting Guru
#9
05-09-2011, 03:06 PM
Senior User
Join Date: Aug 2010
Location: Sandy Level
Posts: 419
Likes: 0
Received 0 Likes
on
0 Posts
#10
05-09-2011, 03:26 PM
Posting Guru
#11
05-09-2011, 03:43 PM
Senior User
Join Date: Aug 2010
Location: Sandy Level
Posts: 419
Likes: 0
Received 0 Likes
on
0 Posts
Anytime you can match port something like this to make it an easier transittion it is worth the time. If you get a high quailty spacer not just the autozone cheapo it will be less work a better outcome.
#12
05-09-2011, 06:12 PM

Elder User
Join Date: Apr 2008
Location: Dixon, IL
Posts: 542
Likes: 0
Received 0 Likes
on
0 Posts
#13
05-09-2011, 10:25 PM
Elder User
Join Date: Jun 2010
Location: High Point NC
Posts: 677
Likes: 0
Received 0 Likes
on
0 Posts
#14
06-04-2011, 07:36 PM
I contacted Cliff Ruggles, the author of the book, and he recommended the jets/m.rods for my engine. I also bought his kit, and will make the needed mods he suggested.
Anyway, here are some photos of my progress.
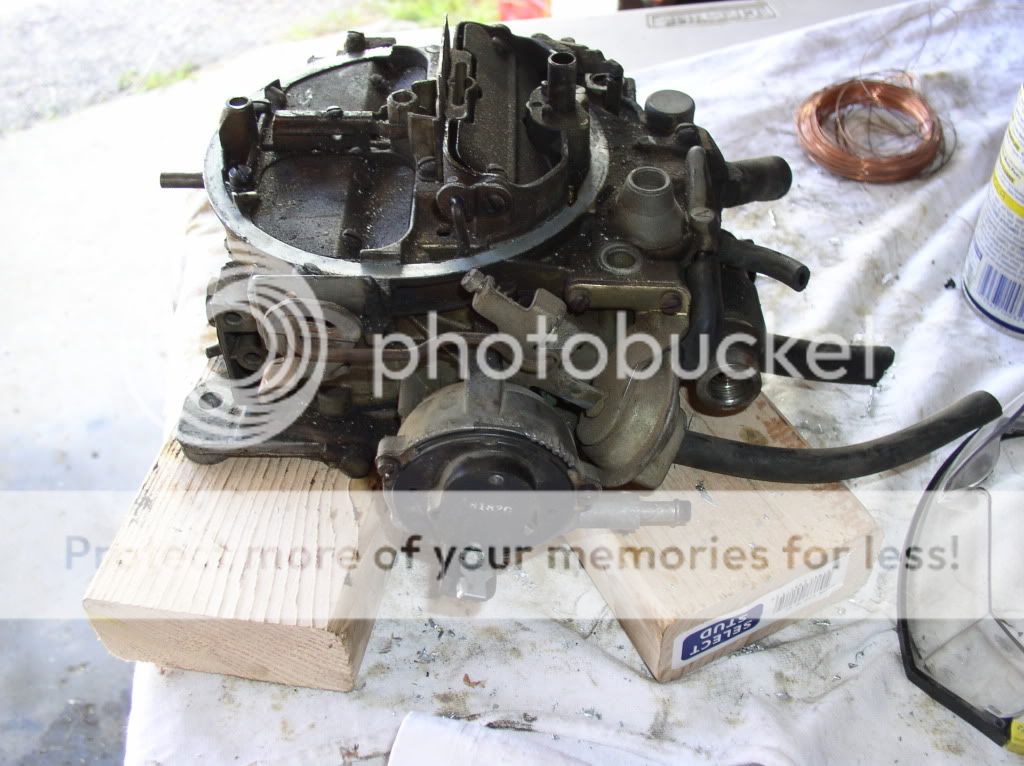
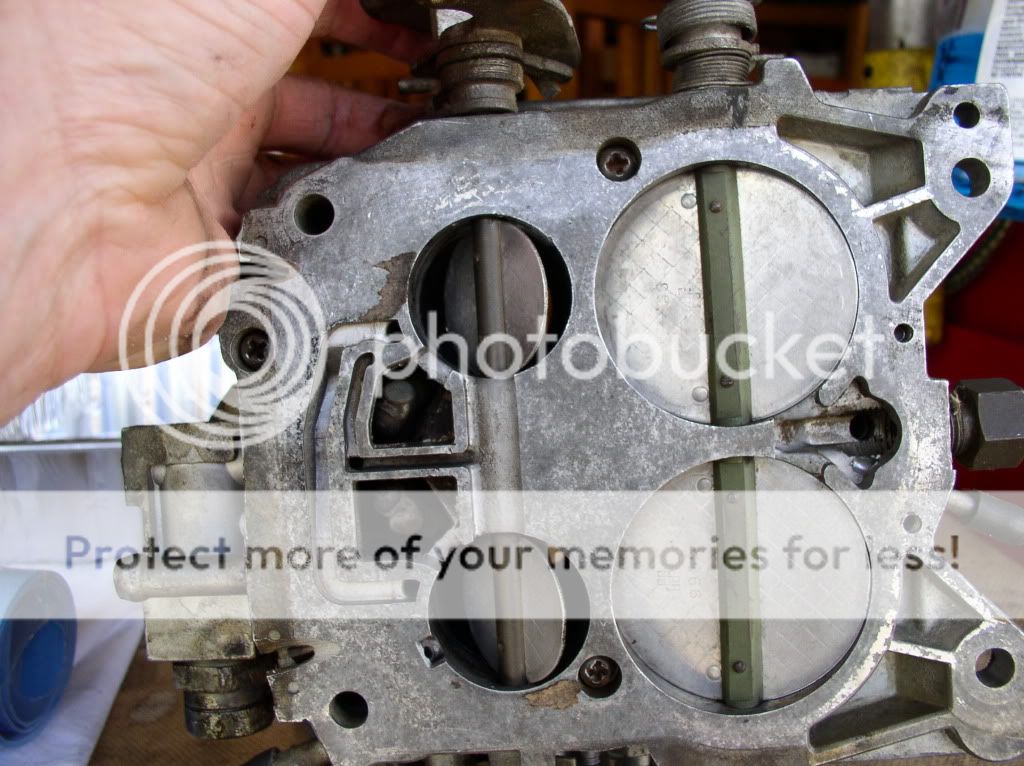
You have to love those toilet-flusher secondaries.
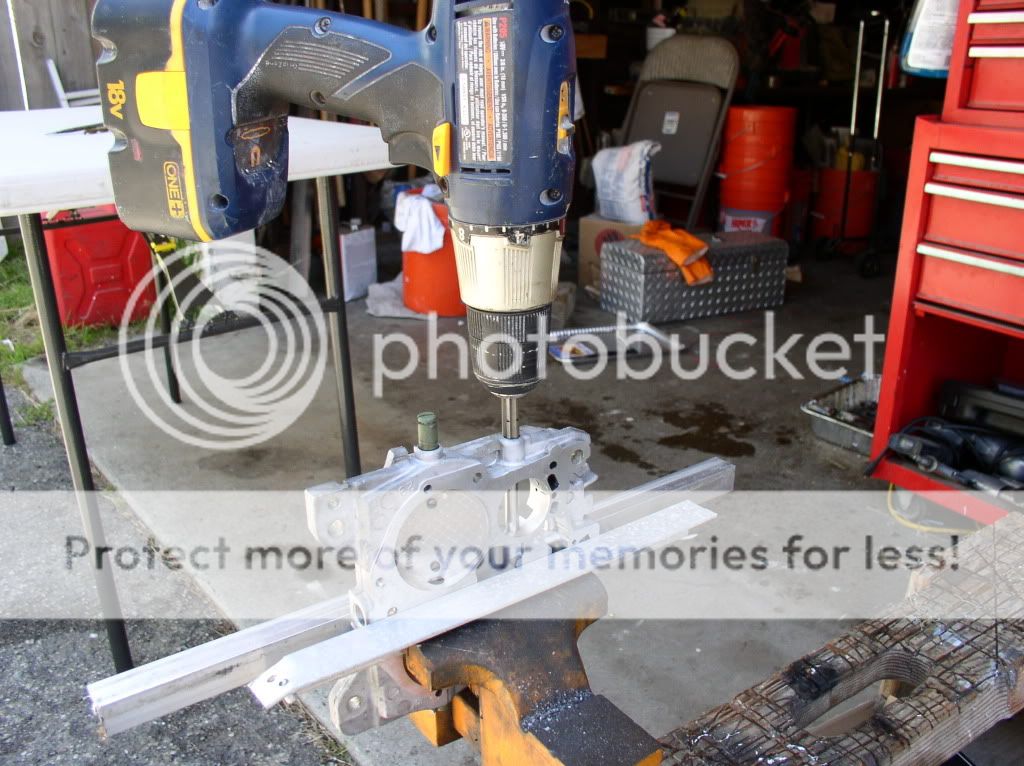
Here is the bushing kit I bought to repair/tighten/stop v. leak in the t.shaft. $45 on ebay. Interesting how the cutting side of the reamer goes into the drill bit, and you drill in reverse. The shaft is in the other t.shaft holes when you cut, so it is perfectly alligned.
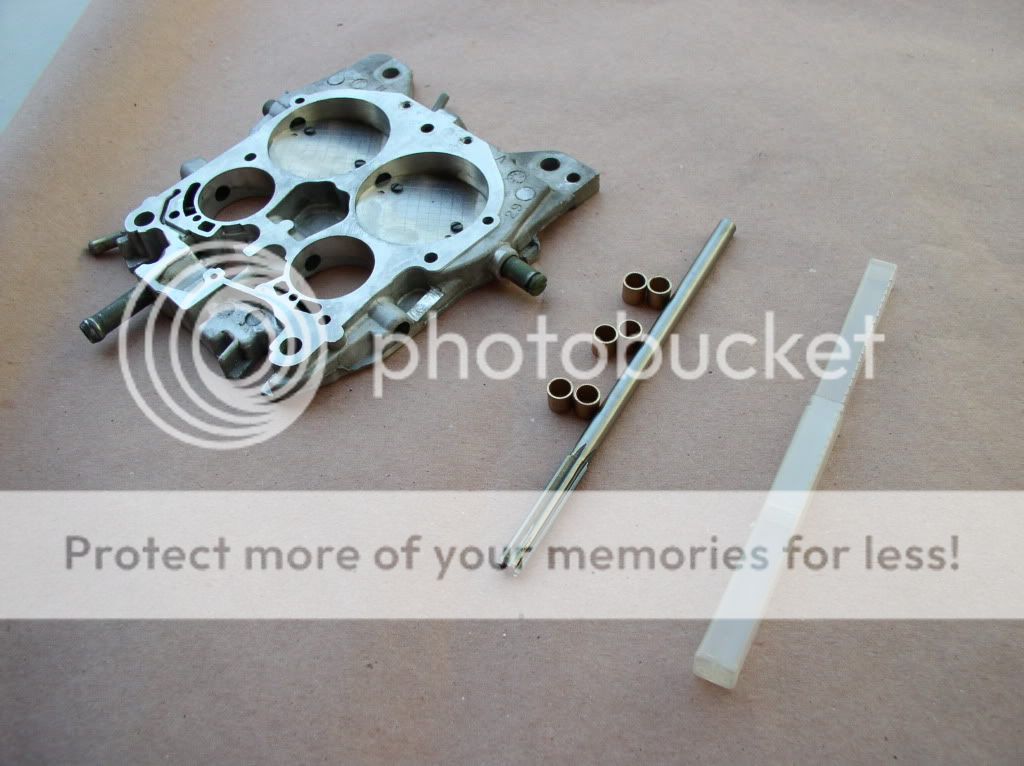
Tapped the bushings into place with a stud and nut.

The next photo is the part that bothered me. I didn't want to do it, but when I read how it was the part that messed up more rebuilds than anything else, I did it. I had to heat the casing with a torch, and tap down the inside copper tube 1/8", then cut off the tip of a drywall screw, and screw it into the idle tube collar. Once in, I put a piece of aluminum on top of the housing for protection, and used a pair of wire cutters to pry the idle tubes from the casing. C. Ruggles included new ones with my kit. You can see one of tube to the left of the wire cutters.

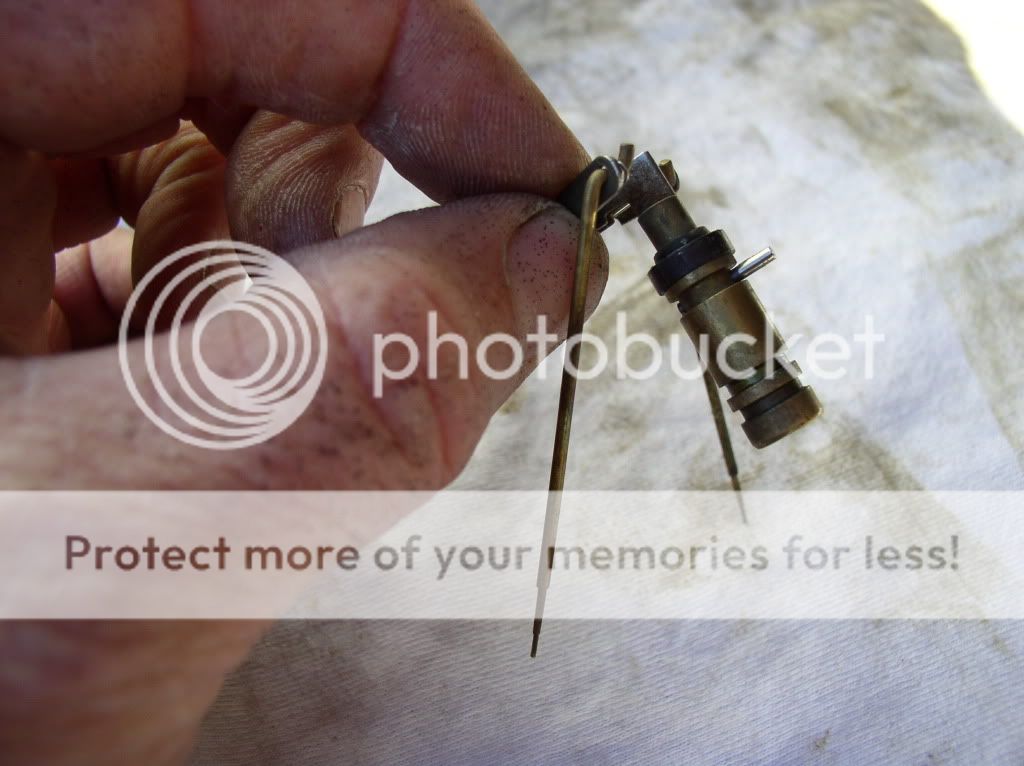
Another part that had me bothered was this seal on the power piston. With the little stud blocking removal/installation, I couldn't figure out how to replace the hard, dry old seal. Then I found on a site that they sell wrap around and click ones so you don't have to disassemble. I hope I have that type in the new kit.
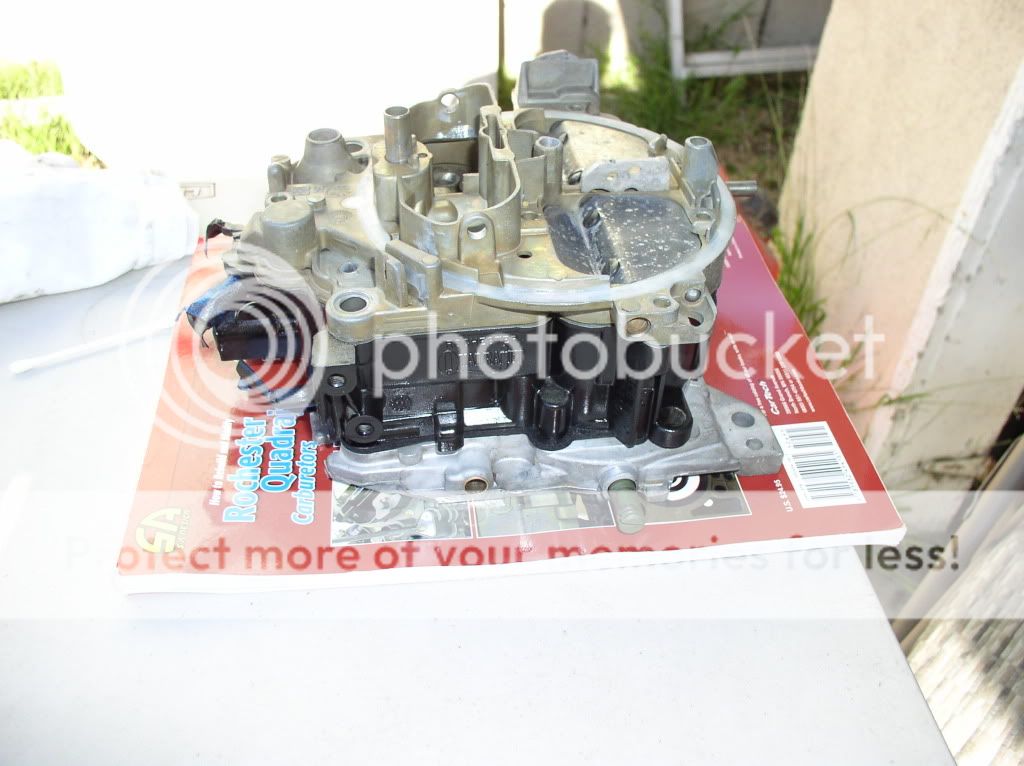
And here is a show of the carb w/o any of the linkage. I just wanted to get an idea of what it would look like black.
Even though this was on a sbc, and is now going on a Ford 300, Cliff Ruggles Kept saying how lean it was, being a Cal. emissions carb. So, with the new, larger idle tubes, and better jet/m.rod combo, it should be fine.
I do have to say, however, that I never thought I would be installing a 750 cfm carburetor for economy reasons!! However, that is the beauty of the Q.J.: its v.secondaries make it a variable cfm carb. Keep in mind that GM put this carb I6's, V6's, 305's to the huge pontiac v8's.
Please IM me about seeing that adapter porting you were speaking about. Thanks.
P.S. Yes, I know I should of had it replated. But this carb takes A LOT of work to rebuild. The rebuild kit and jets/m.rods were $120. By the time I finish I'll be into it for close to $300 ... w/o replating! At this point I am trying to conserve cash.
Anyway, here are some photos of my progress.
You have to love those toilet-flusher secondaries.
Here is the bushing kit I bought to repair/tighten/stop v. leak in the t.shaft. $45 on ebay. Interesting how the cutting side of the reamer goes into the drill bit, and you drill in reverse. The shaft is in the other t.shaft holes when you cut, so it is perfectly alligned.
Tapped the bushings into place with a stud and nut.
The next photo is the part that bothered me. I didn't want to do it, but when I read how it was the part that messed up more rebuilds than anything else, I did it. I had to heat the casing with a torch, and tap down the inside copper tube 1/8", then cut off the tip of a drywall screw, and screw it into the idle tube collar. Once in, I put a piece of aluminum on top of the housing for protection, and used a pair of wire cutters to pry the idle tubes from the casing. C. Ruggles included new ones with my kit. You can see one of tube to the left of the wire cutters.
Another part that had me bothered was this seal on the power piston. With the little stud blocking removal/installation, I couldn't figure out how to replace the hard, dry old seal. Then I found on a site that they sell wrap around and click ones so you don't have to disassemble. I hope I have that type in the new kit.
And here is a show of the carb w/o any of the linkage. I just wanted to get an idea of what it would look like black.
Even though this was on a sbc, and is now going on a Ford 300, Cliff Ruggles Kept saying how lean it was, being a Cal. emissions carb. So, with the new, larger idle tubes, and better jet/m.rod combo, it should be fine.
I do have to say, however, that I never thought I would be installing a 750 cfm carburetor for economy reasons!! However, that is the beauty of the Q.J.: its v.secondaries make it a variable cfm carb. Keep in mind that GM put this carb I6's, V6's, 305's to the huge pontiac v8's.
Please IM me about seeing that adapter porting you were speaking about. Thanks.
P.S. Yes, I know I should of had it replated. But this carb takes A LOT of work to rebuild. The rebuild kit and jets/m.rods were $120. By the time I finish I'll be into it for close to $300 ... w/o replating! At this point I am trying to conserve cash.
#15
06-10-2011, 02:02 PM
[SIZE=4]I thought I'd post this here for research purposes. I called Cliff Ruggles, the guru of these carbs, also author of a book on them, and he mentioned that it was a CAL. emissions carb, and lean. Solution? Insert tiny plugs into the air bleeds, with smaller orifices in them, thereby reducing the amount of air entering and enriching the mix. Here are some photos.


They are a bugger to install.

I had to cut off the oem throttle fitting, and use a ball from a kit made by Holley.

I may use this crappy Spectre adapter. If I do it will see some porting to remove the top and bottom lip, and huge vertical ridge in the bores.
I prob. already posted this photo above, but if not here it is. It shows one reason why so many people have problems with rebuilds on the Q.J. They don't remove the idle tubes and clean. C.Ruggles also supplies newer one in his rebuild kits which allow for better idle quality with larger orifices. You can see one laying atop the aluminum piece. They consist of a longer tube and a collar. One taps the inside tube down 1/8", and using a drywall screw with the tip cut off to screw into the collar. They you place a piece of aluminum atop the carb and grip the screw with a pair of wire cutters and prying. Gently. If they don't move, you have to heat the housing about 30 seconds with a propane touch. The new ones are tapped into place after cleaning hole with a bottle brush or pipe cleaner. Presto.
My over all opinion of this carb? If it runs great and gets me 3 mpg better in town, then it is worth the trouble. But speaking as a mechanic, these carbs are made of three pieces sandwiched together: the base, the main body, and the air horn. Each piece requires specialty tools and procedures, hones, epoxy, disc sanders to correct warping, a torch, die grinder, dremel, and specialty parts available only by mail. To assemble, one has to follow the book CAREFULLY with each tiny step. Also, I know that tuning it will be the same. It is definately NOT easy. Yes, it is highly adjustable, but highly adjustable, unless you follow the book, can quickly turn into a can of worms. I will find out the low down of tuning them soon enough.
They are a bugger to install.
I had to cut off the oem throttle fitting, and use a ball from a kit made by Holley.
I may use this crappy Spectre adapter. If I do it will see some porting to remove the top and bottom lip, and huge vertical ridge in the bores.
I prob. already posted this photo above, but if not here it is. It shows one reason why so many people have problems with rebuilds on the Q.J. They don't remove the idle tubes and clean. C.Ruggles also supplies newer one in his rebuild kits which allow for better idle quality with larger orifices. You can see one laying atop the aluminum piece. They consist of a longer tube and a collar. One taps the inside tube down 1/8", and using a drywall screw with the tip cut off to screw into the collar. They you place a piece of aluminum atop the carb and grip the screw with a pair of wire cutters and prying. Gently. If they don't move, you have to heat the housing about 30 seconds with a propane touch. The new ones are tapped into place after cleaning hole with a bottle brush or pipe cleaner. Presto.
My over all opinion of this carb? If it runs great and gets me 3 mpg better in town, then it is worth the trouble. But speaking as a mechanic, these carbs are made of three pieces sandwiched together: the base, the main body, and the air horn. Each piece requires specialty tools and procedures, hones, epoxy, disc sanders to correct warping, a torch, die grinder, dremel, and specialty parts available only by mail. To assemble, one has to follow the book CAREFULLY with each tiny step. Also, I know that tuning it will be the same. It is definately NOT easy. Yes, it is highly adjustable, but highly adjustable, unless you follow the book, can quickly turn into a can of worms. I will find out the low down of tuning them soon enough.