Injector cup sanity check
#46
#49
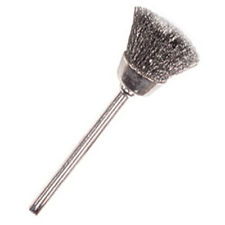
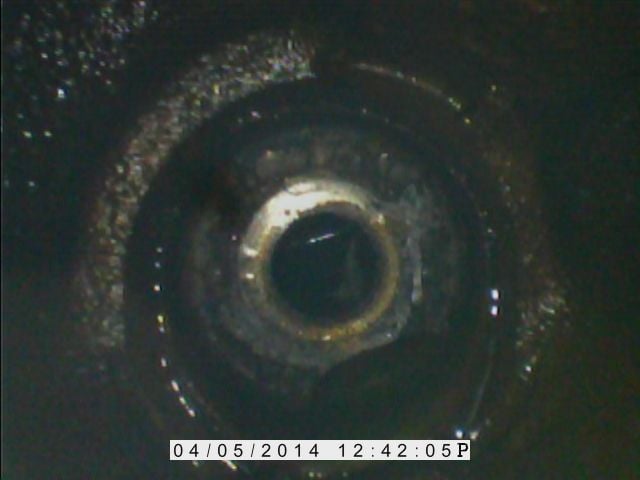
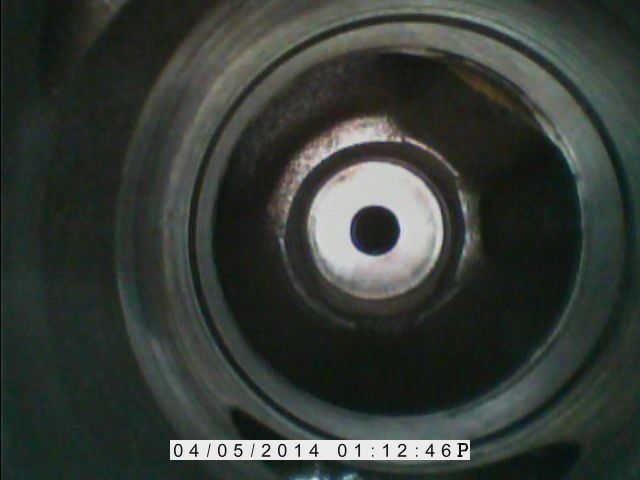
well the brush didn't fall into the cylinder, it got wedged in the upper coolant channel towards the fire wall. I was able to see it with a bore scope, and after removing the rockers for that cylinders a set of bent needle nose did the trick, thank god.
All the new cups are installed and curing, so just a bump in the road at this point. I'll start installing the injectors tomorrow, hope to be starting it in the next couple days.
All the new cups are installed and curing, so just a bump in the road at this point. I'll start installing the injectors tomorrow, hope to be starting it in the next couple days.
#51
Thoughts on the bristles: The real fear is if it goes in the fuel rail at the low side of the hole. I taped over the fuel rail in each hole, giving me a "line of death" I didn't want to cross with the Dremel. After going on the rampage with the spinning bristles of death, I just applied a shop vac to the opening when done. Even with that, I used a flexible 22 caliber rifle cleaning cable with a lint-free swab on the end to clean the fuel rail immediately after installing the cups. I couldn't leave the tape in there when installing the cups, and the likelihood of sealant in the fuel rail is very high.
MEK is bad juju. If that wanders off to other seals, you will soften those other seals. If a Dremel bristle sparks, you are staring right down the barrel of a cannon. Projectile or not, flames shooting toward your face at well over mach 2 is going to give you a bad hair day.
MEK is bad juju. If that wanders off to other seals, you will soften those other seals. If a Dremel bristle sparks, you are staring right down the barrel of a cannon. Projectile or not, flames shooting toward your face at well over mach 2 is going to give you a bad hair day.
#52
Join Date: Sep 2014
Location: Asheville-where weird is
Posts: 2,404
Likes: 0
Received 2 Likes
on
2 Posts
We can all agree that MEK is more volatile than carb cleaner and certain other solvents. The reference to it was made due to a question being asked because there was a reluctance to use a brush and in lieu of a brush. Or at least that was my interpretation.
We can all agree that having a clean mating surface for the new install of cups is of paramount importance unless you want to do the job again and, if you had to do it again after not having used a brush the first time, most would probably use one the second time.
So, for more clarity this time, while taking into consideration all of the above reasons to not use a brush, if a person decided against using a brush, what solvent would you use?
Or should we remove all reference to it?
#53
#54
#55
#56
I used my air technique with silicone spray on the cups and no coolant in the system. Air compresses and leaks through bad seals quite easily - so a leak shows in up pretty quick. With pressurized coolant, you have to look for leaks in the cups - and it can be a very slow drip at 15 PSI max.
One other tool available is the HF radiator pressure tester [LINK] - this is one of the very few HF tools that actually works as advertised.
One other tool available is the HF radiator pressure tester [LINK] - this is one of the very few HF tools that actually works as advertised.
#57
I have been down this road as well. I use either rather than Brake cleaner. As some brake cleaners have chlorine in it. Either dries very fast in comparison. Also BEFORE YOU GO AND START IT. Pull your glow plugs. Turn over the engine your going to have to prime the HPOP oil anyways with cranking. This pulling of GP helps by allowing the engine to turn over faster/easier. As well as push out any oil diesel or coolant you may have had left in the holes. You wont get 100% but it will be enough. As well as shortens the duration on the "smokey start up"
I too when doing my 1 cup had to go back and do again. I will now always suggest you replace all when doing this. As the others are probably not far off. You have things apart anyways may as well do it all. Doesnt take much more time.
I also used a brush like tugg there but welded a threaded rod on it so I could use my drill on it. IE an extension to it, to reach to the bottom. The #7 n #8 are still a pain in the *** to clean.
I rather enjoyed your vids. Those were perfect examples. Also that thermostat housing. I just took mine off and cleaned mine on my bench grinder wire wheel. inspected(and painted). Then replaced with "The Right Stuff" gasket sealer. In place of the gasket witch was trashed upon removal. I wasnt going to run back to town for it either. It has held to date with no leaks. Mine was not as bad as yours but was also leaking.
Hope your still with me at this point. But did your truck run bad or ??? how did you suspect this, is what I am asking.
#58
mister tugly you have helped me bunches in past but we never got a answer to the torque question on injectors. I was not to shure about that problem til it happened to me.
Had some MEK on the shelf so I used it on a cup job today since I read this. It worked and I aint got no burnt hair or nothing else. Did use military tooth brush on the small end. Did not eat the metal in head cause if it would it would eat the can it comes in too and it dont take much. the others was talking about cutting old glue not rust in there from bad mantenance. Put some antifreeze in there it will not happen then and you dont need a brush. Common since goes a long way with solvens and most other things. Used this stuff way back in the service a long time past.
your doin it right doin all of them.
mister 3 could you write american so i dont need a dictionery for lieu of
#59
i feel your pain. I had ordered all my parts and the tool from Clay to tackle this job weekend before last. BUt UPS temporarily lost the package from Clay. What was supposed to be 3 day shipping ended up taking 11 days and screwed me on my window of opportunity to do it myself. I had to end up taking it somewhere. Not bad, I dropped it off saturday and picked it up today. Said that I had at least one maybe two cups that he could tell for sure were leaking and I had a cut o-ring on one of the injectors. I think i read somewhere that someone had a theory to the cup cracking was due to loose injectors rattling around in the bores. I had followed Tugly's lead and retorqued my injectors twice before and I could tell by the sound of things for past few months that i needed to do it again, but i kept putting it off. Well, low and behold i ended up with a cup job. Not exactly sure if that was cause, but its plausible. Anyway, reading about your adventure, i cant say that Im glad i took it somewhere to be worked on (its only the 3rd time someone else has turned wrenches on my gal, trans, a/c, and now cups) but I am relieved not to be fighting this job in this sweltering summer heat down here on the gulf coast.
#60
Since injector torque is involved in this thread soon, this is entirely on-topic: I never really got an answer on injector torque myself. The most reliable method I've come up with is to use a slow-set blue thread lock, torque to 125 INCH pounds, heat up truck, and hot-torque. Even with that, one can come loose within a couple thousand miles once in a while. If one comes loose, I just hot-torque it again and button up the covers.
I've recently learned how "unstable" my torque wrench is. It's not a professional $500 unit, but it's not a $20 Harbor Freight special either. I bought an electronic torque adapter to read the torque setting, and found that every torque wrench in my inventory will read something different every time I set it. Once a wrench is set - I'm good. Given the degree of differences in the "set" of a torque wrench (once verified by the torque gauge), it is probable I keep stretching my bolts - but I haven't yet ruled out damaged threads in the head.
This will all be answered soon enough, though. I am swapping the block, buying new bolts, and I will use the digital torque adapter to set the wrench before I tighten things up.


