
Tailgate Finish Panel Mounting
#1
 03-27-2014, 09:53 PM

Join Date: Jul 2009
Location: Twin Cities
Posts: 396
Likes: 0
Received 0 Likes
on
0 Posts
Tailgate Finish Panel Mounting
Guys,
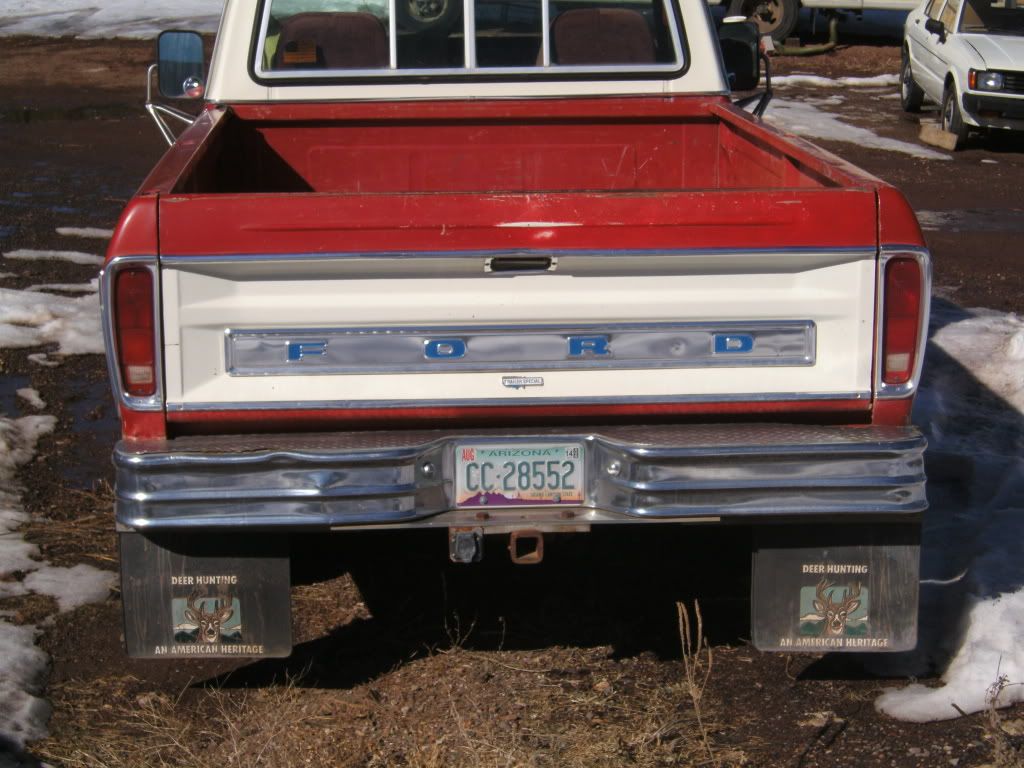
Could one of you with the FORD script tailgate finish panel (pictured below) please post a picture of the backside of the tailgate?

I'm looking to add this panel to my plain tailgate and cannot find a good picture of this and how it should be properly mounted. I've seen mention of just drilling for pan head screws, but would like to see an original one before drilling into my nice tailgate.
I'm also curious if any of you that have added this to a plain tailgate have noticed dimples to use as a guide? I've searched the forums and seen this mentioned briefly, but all the threads were years old and the photos had all been removed.
Thanks,
Jim
#2
03-27-2014, 10:07 PM
Post Fiend
That style uses clips and screws...
TO MOUNT:
Apply tape the tailgate and the good face of the decor panel. Mark the centerlines (vertical and horizontal) of the decor panel.
Hole layout.... apply 2-inch wide blue masking tape to the entire back side of the decor panel. Mark the centerline of the panel on the tape and punch the mounting holes through the tape.
Now, carefully remove the tape as a single piece, transfer to the tailgate, align to your marks on the tailgate, and stick 'er on level and plumb. VERIFY LEVEL AND PLUMB
Drill 'em.
Last edited by HIO Silver; 03-27-2014 at 10:16 PM. Reason: Missed a step... and added emphasis on LEVEL AND PLUMB.
#3
03-27-2014, 10:12 PM
Hotshot
That style uses clips and screws...
TO MOUNT:
Apply tape the tailgate and the good face of the decor panel. Mark the centerlines (vertical and horizontal) of the decor panel.
Hole layout.... apply 2-inch wide blue masking tape to the entire back side of the decor panel. Mark the centerline of the panel on the tape and punch the mounting holes through the tape.
Now, carefully remove the tape as a single piece, align to your marks on the tailgate, and stick 'er on level and plumb.
Drill 'em.

#5
03-27-2014, 10:21 PM
Hotshot
I guess so. Maybe because nothing I seem to get myself into is simple. 
I have that panel on the back of Earthquake. I'll try to remember to take a picture tomorrow.

You can see the mounting holes in this shot. Long sheet metal screws go through the back of the gate and in to the clips on the trim panel.

I have that panel on the back of Earthquake. I'll try to remember to take a picture tomorrow.

You can see the mounting holes in this shot. Long sheet metal screws go through the back of the gate and in to the clips on the trim panel.

#7
03-28-2014, 10:11 AM
Join Date: Jul 2009
Location: Twin Cities
Posts: 396
Likes: 0
Received 0 Likes
on
0 Posts
That style uses clips and screws...
TO MOUNT:
Apply tape the tailgate and the good face of the decor panel. Mark the centerlines (vertical and horizontal) of the decor panel.
Hole layout.... apply 2-inch wide blue masking tape to the entire back side of the decor panel. Mark the centerline of the panel on the tape and punch the mounting holes through the tape.
Now, carefully remove the tape as a single piece, transfer to the tailgate, align to your marks on the tailgate, and stick 'er on level and plumb. VERIFY LEVEL AND PLUMB
Drill 'em.
Earthquake, if you can get a shot of the back that would be great as well. Hopefully I'll get some time this weekend to add it and get some pictures.
Thanks a bunch guys,
Jim
Trending Topics
#8
03-29-2014, 07:31 PM
Join Date: Jul 2009
Location: Twin Cities
Posts: 396
Likes: 0
Received 0 Likes
on
0 Posts
Thought I would post up some pics to illustrate HIO's procedure. Worked slick!
Marked centerlines on finish panel and popped holes in:

Taped tailgate and marked centerline on it:

Transferred entire template to the tailgate, doublechecked level, centerpunched and drilled holes:

And there it is! My clips on the back were rusty and I didn't have any screws. At my local fastener store they had a bag with the needed clips and bought stainless screws as well. Slightly longer on the bottom than the top.


#12
03-30-2014, 09:18 AM
Join Date: Jul 2009
Location: Twin Cities
Posts: 396
Likes: 0
Received 0 Likes
on
0 Posts
No problem Justin, I'm just putting pictures to HIO's procedure. Lot's of guys on here willing to give awesome advice, I'm just glad to contribute what I can to the forum.
Any reason you don't want to drill the holes and test fit the panel before the paint gets sprayed? I'd probably want the holes in there first in case the paint did decide to chip out from drilling or peel off when removing the tape. (Even though you would be using blue or green painter's tape, right? )
)
Any reason you don't want to drill the holes and test fit the panel before the paint gets sprayed? I'd probably want the holes in there first in case the paint did decide to chip out from drilling or peel off when removing the tape. (Even though you would be using blue or green painter's tape, right?
)
#13
03-30-2014, 10:29 AM
No problem Justin, I'm just putting pictures to HIO's procedure. Lot's of guys on here willing to give awesome advice, I'm just glad to contribute what I can to the forum.
Any reason you don't want to drill the holes and test fit the panel before the paint gets sprayed? I'd probably want the holes in there first in case the paint did decide to chip out from drilling or peel off when removing the tape. (Even though you would be using blue or green painter's tape, right?)
Any reason you don't want to drill the holes and test fit the panel before the paint gets sprayed? I'd probably want the holes in there first in case the paint did decide to chip out from drilling or peel off when removing the tape. (Even though you would be using blue or green painter's tape, right?
)Thanks to HIO Silver as well. Id rep you but I guess I need to spread it around.
#15
03-30-2014, 04:03 PM
Elder User
Join Date: Jun 2012
Location: Florida
Posts: 850
Likes: 0
Received 0 Likes
on
0 Posts
 that is very useful and should be mandatory reading