1970 F250 4x4 Cummins Conversion Build Thread - Lots of Pics!
#196
 12-16-2014, 08:18 AM

Join Date: Oct 2011
Location: Willard
Posts: 207
Likes: 0
Received 0 Likes
on
0 Posts
It is time to resurrect this build thread from the dead. My wife got a job, so I actually have a little bit of money to work on this thing again. I hope to have the majority of this thing done by the end of summer 2015 
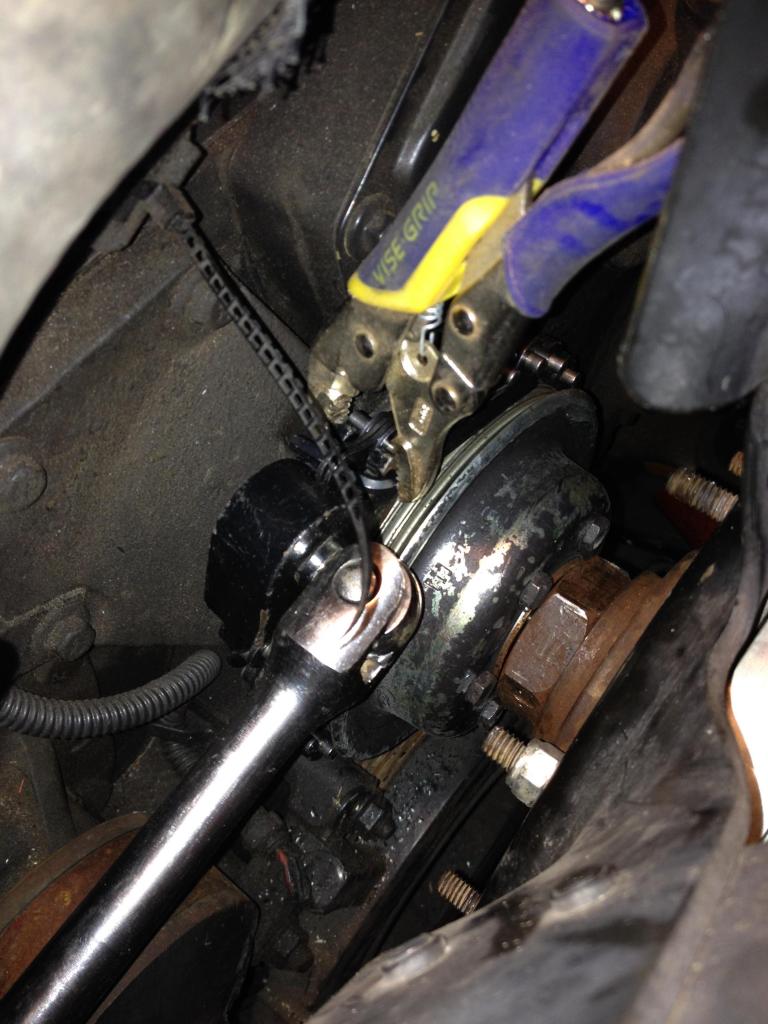
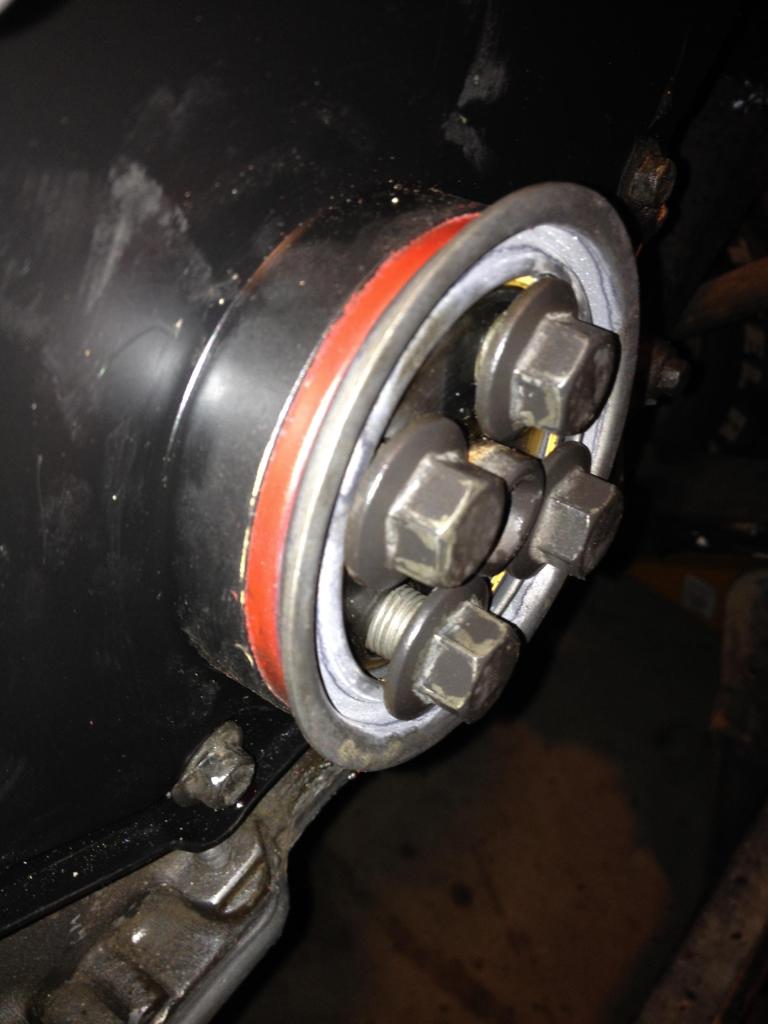
Removing the fan proved to be more complicated than I thought. I ended up buying a cheap chain wrench from harbor freight. It was a little short, so I had to put a allan wrench through the last unused chain length to reach. I wrapped it around the pulley to keep things from spinning and . Note: fan nut is reverse thread.
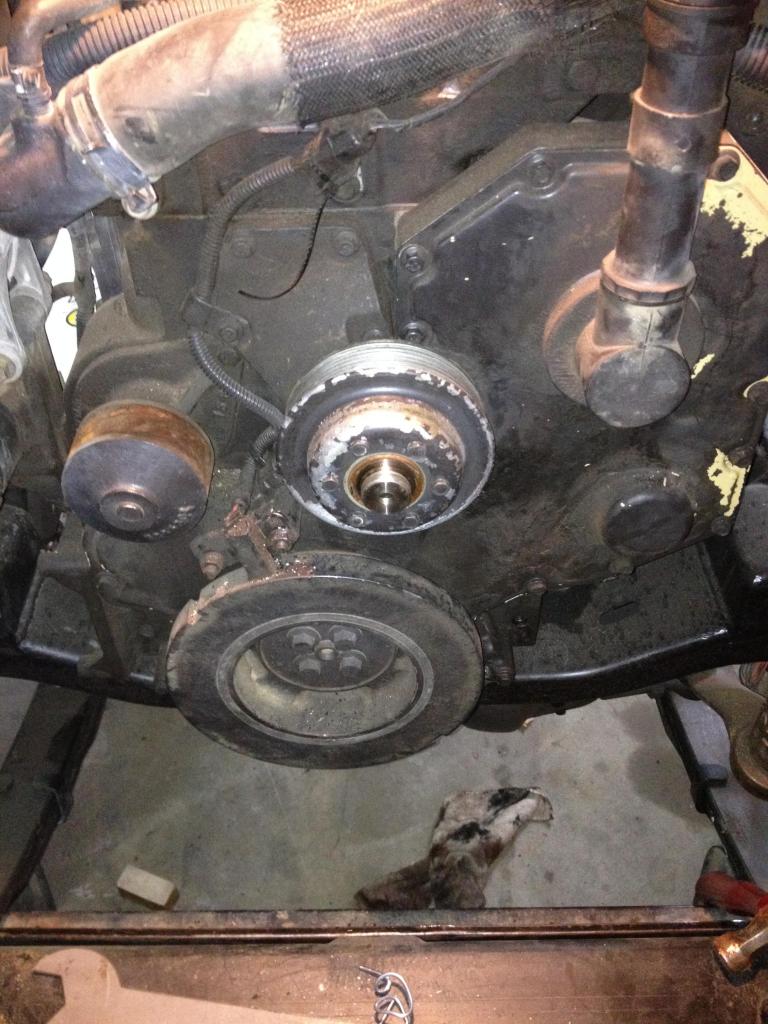
Now time for that Killer Dowel Pin...
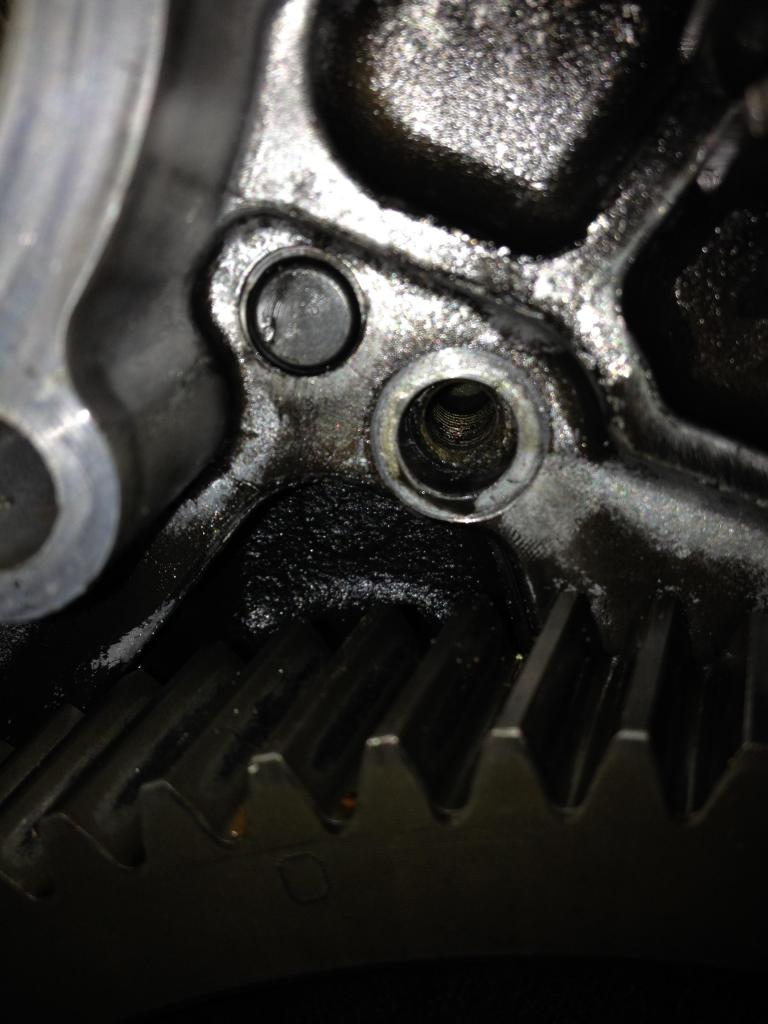
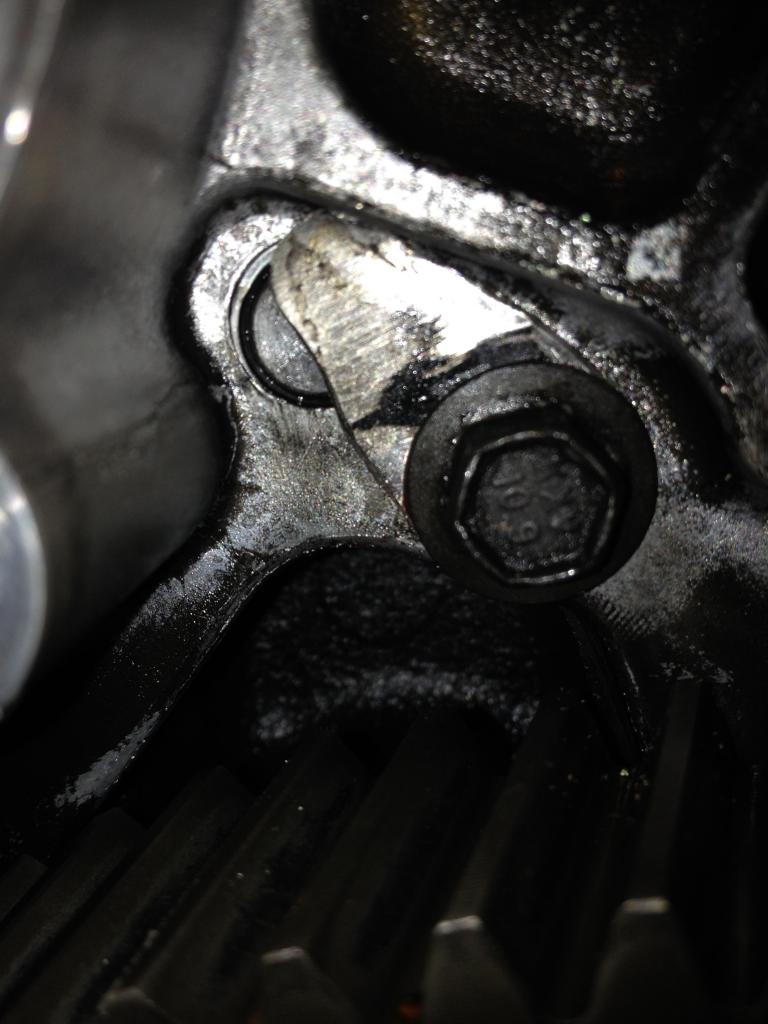
Nothing fancy, I just fabricated a retainer out of some thin sheet metal. This should work perfectly.
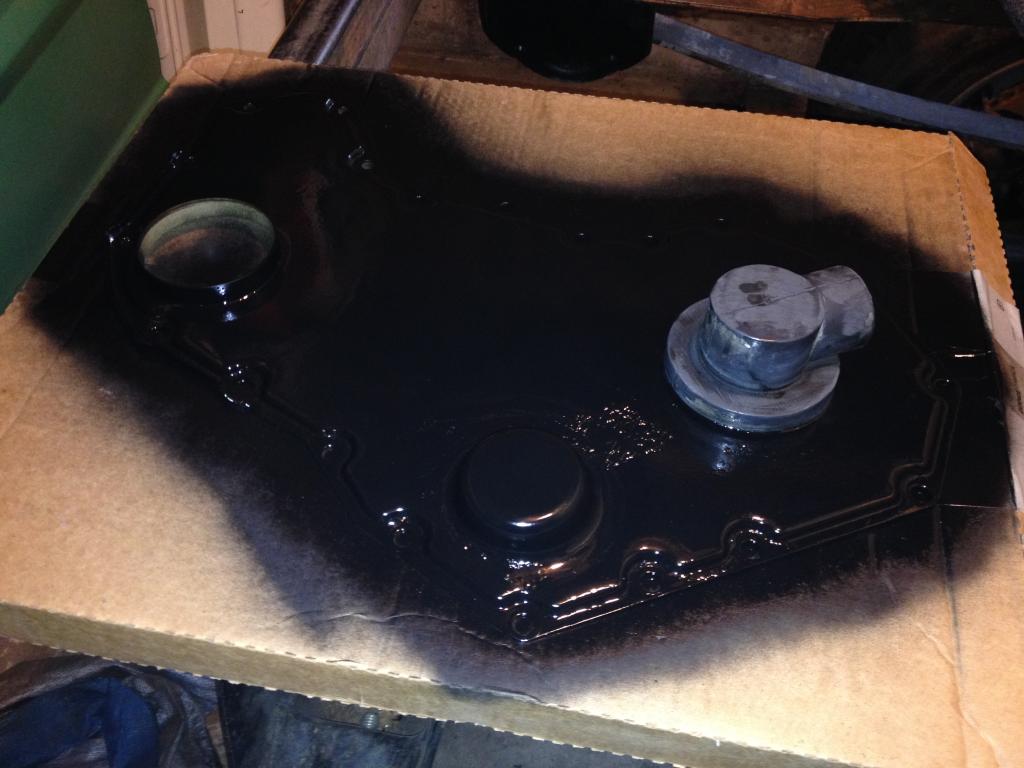
A little paint for the cover before re-installation. Then I installed a new front crankshaft seal. I used the crankshaft pull bolts against the installation tool that came with the seal to center and guide the new seal in place. A slight tap of the hammer after everything was under tention, and it popped right in. I finished tapping the seal into place with a rubber hammer and the installation tool.
Gapped the crank sensor to .050
And there you have it! KDP, front crank seal done.

Removing the fan proved to be more complicated than I thought. I ended up buying a cheap chain wrench from harbor freight. It was a little short, so I had to put a allan wrench through the last unused chain length to reach. I wrapped it around the pulley to keep things from spinning and
. Note: fan nut is reverse thread.
Now time for that Killer Dowel Pin...


Nothing fancy, I just fabricated a retainer out of some thin sheet metal. This should work perfectly.

A little paint for the cover before re-installation. Then I installed a new front crankshaft seal. I used the crankshaft pull bolts against the installation tool that came with the seal to center and guide the new seal in place. A slight tap of the hammer after everything was under tention, and it popped right in. I finished tapping the seal into place with a rubber hammer and the installation tool.

Gapped the crank sensor to .050

And there you have it! KDP, front crank seal done.

#197
12-16-2014, 09:04 AM
#199
12-18-2014, 12:03 PM
Join Date: Oct 2011
Location: Willard
Posts: 207
Likes: 0
Received 0 Likes
on
0 Posts
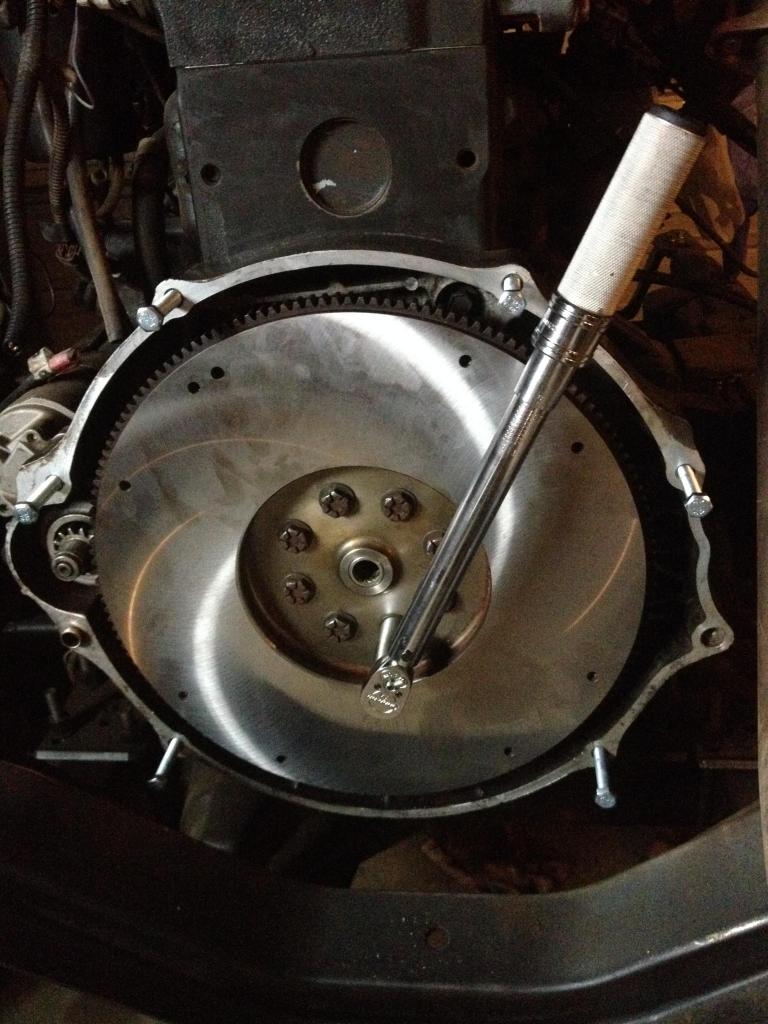
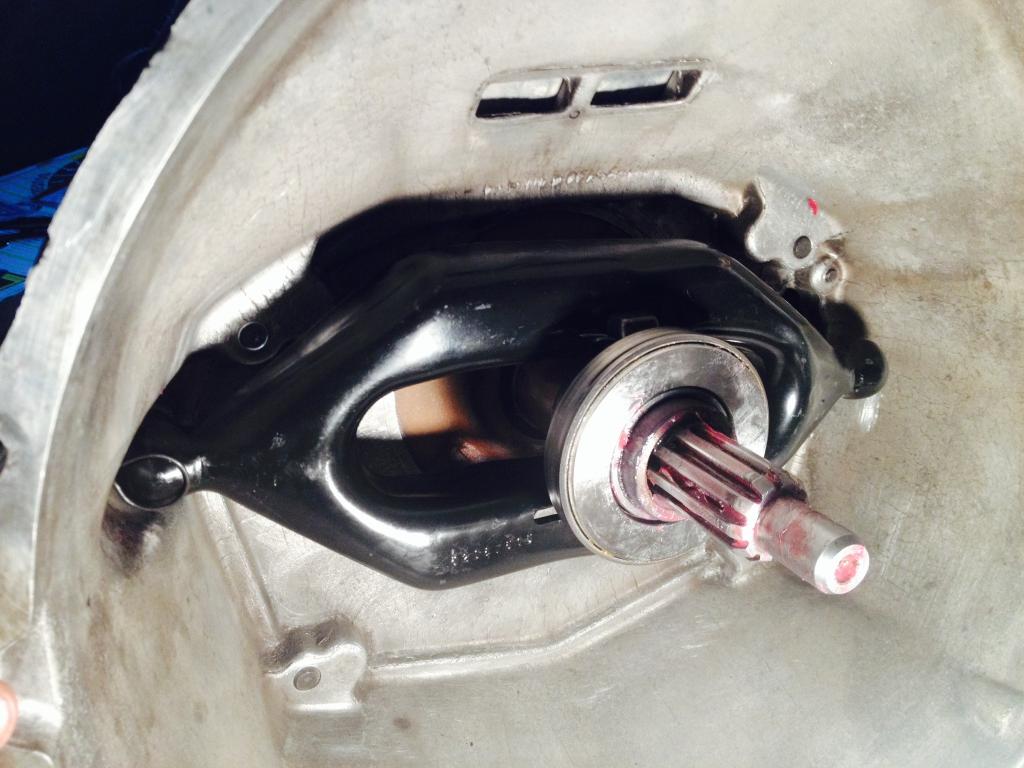
Next step: rear main seal & clutch. I used some flywheel bolts with oversized washers to evenly start the rear main seal. Once it was started, it tapped into place easily.
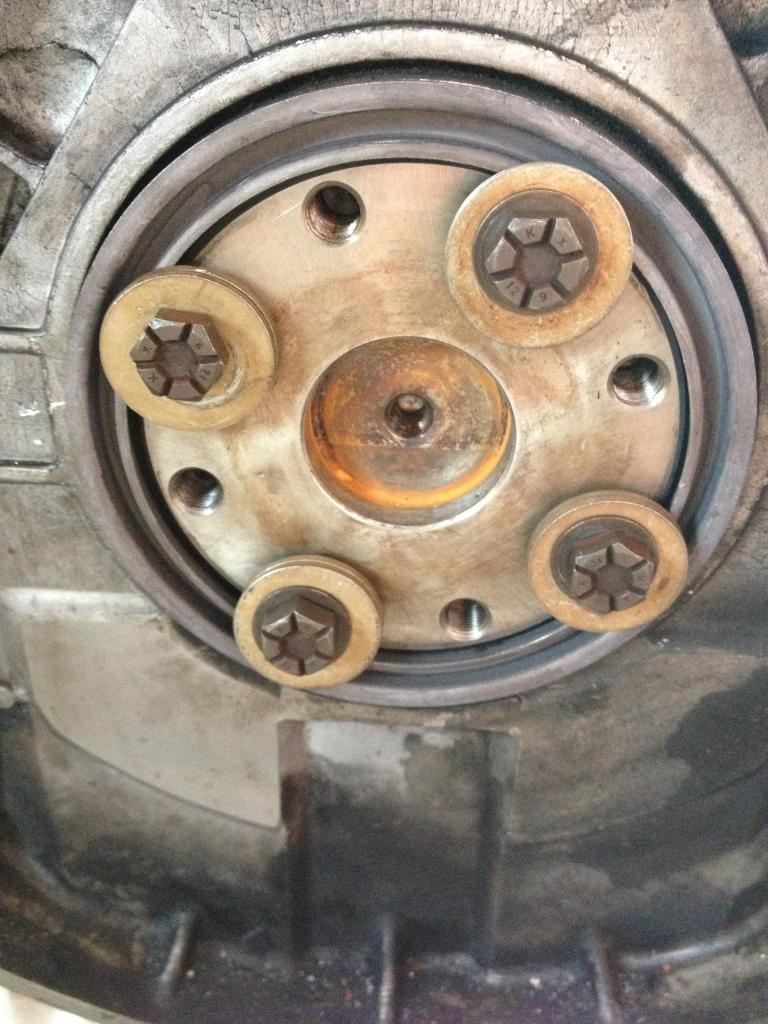
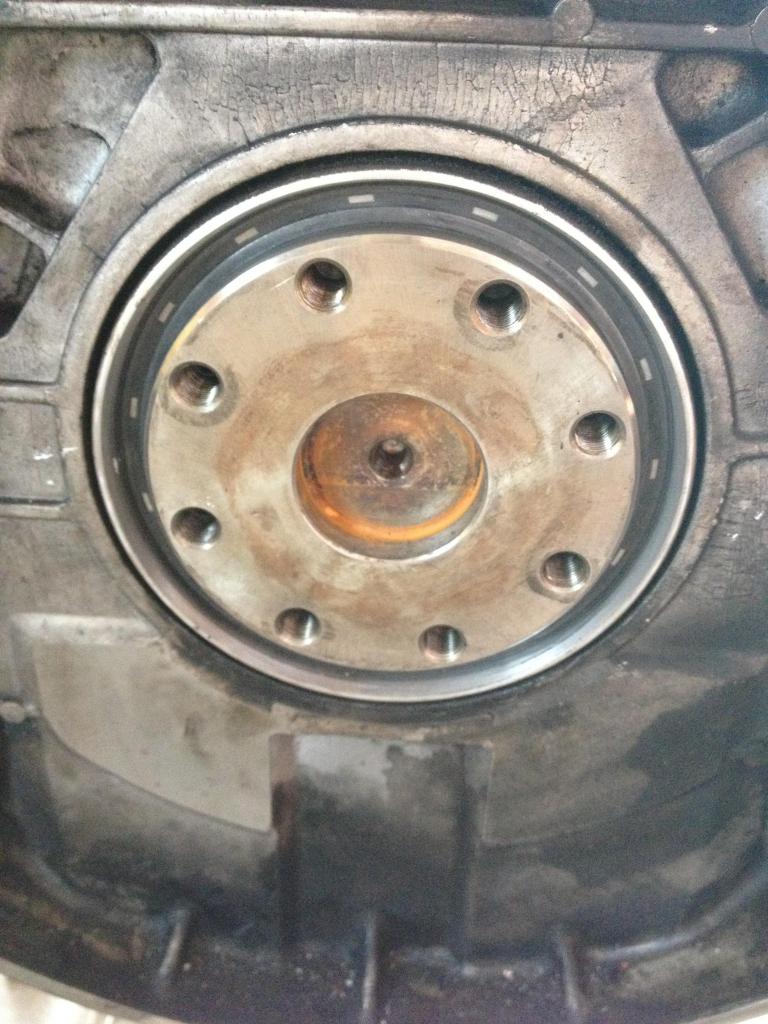
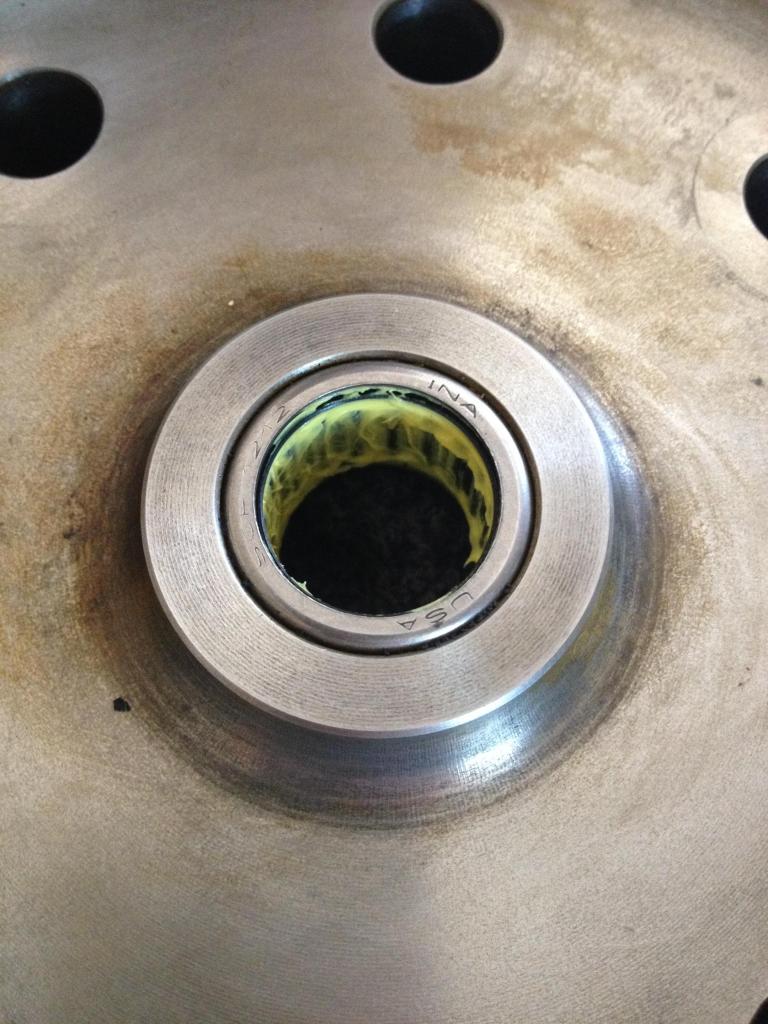
I took the flywheel to the local machine shop for resurfacing, then installed the new pilot bearing.
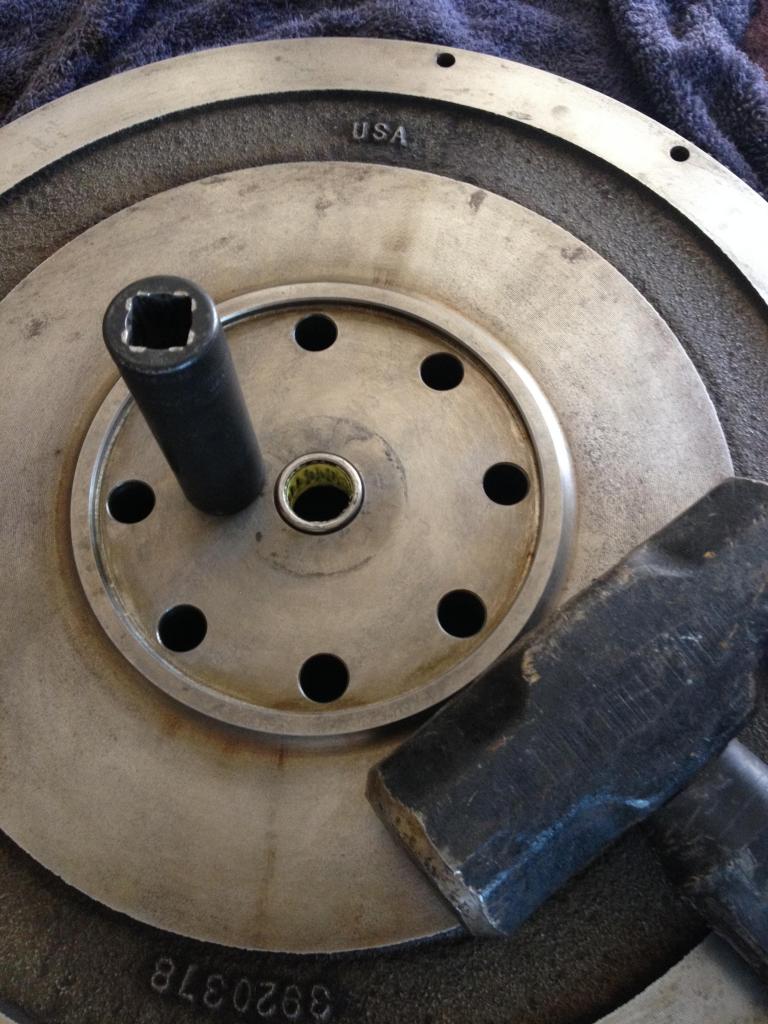
I installed the newly machined flywheel and torqued the bolts to 101 ft lbs.
Finally, I installed the new clutch. I torqued the pressure plate bolts to 21 ft lbs.
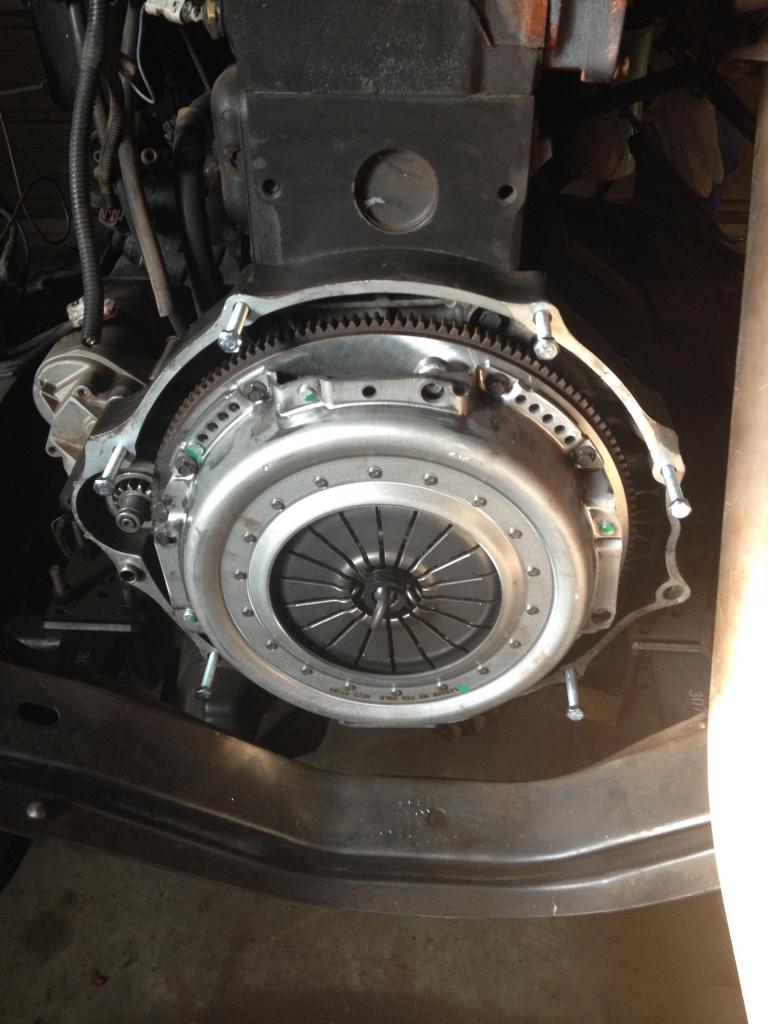
I wanted a nice Valair clutch, but $900 bucks was a bit pricy for a project whose budget is already out of control. I decided to go with a Luk Pro Gold Performance. At $250, it was a little bit more budget conscience. I figure since a clutch is a consumable item, I can always replace it with a $900 clutch later on down the road. I think the Luk will perform for my application just fine.
I somehow lost my clutch release arm that goes in the bell housing when I moved last year. I spent all day looking for it, but it is no where to be found. $65 from the dealer. Money, I did't want to have to spend


I took the flywheel to the local machine shop for resurfacing, then installed the new pilot bearing.


I installed the newly machined flywheel and torqued the bolts to 101 ft lbs.

Finally, I installed the new clutch. I torqued the pressure plate bolts to 21 ft lbs.

I wanted a nice Valair clutch, but $900 bucks was a bit pricy for a project whose budget is already out of control. I decided to go with a Luk Pro Gold Performance. At $250, it was a little bit more budget conscience. I figure since a clutch is a consumable item, I can always replace it with a $900 clutch later on down the road. I think the Luk will perform for my application just fine.

I somehow lost my clutch release arm that goes in the bell housing when I moved last year. I spent all day looking for it, but it is no where to be found. $65 from the dealer. Money, I did't want to have to spend
#201
02-11-2015, 04:14 PM
Join Date: Oct 2011
Location: Willard
Posts: 207
Likes: 0
Received 0 Likes
on
0 Posts
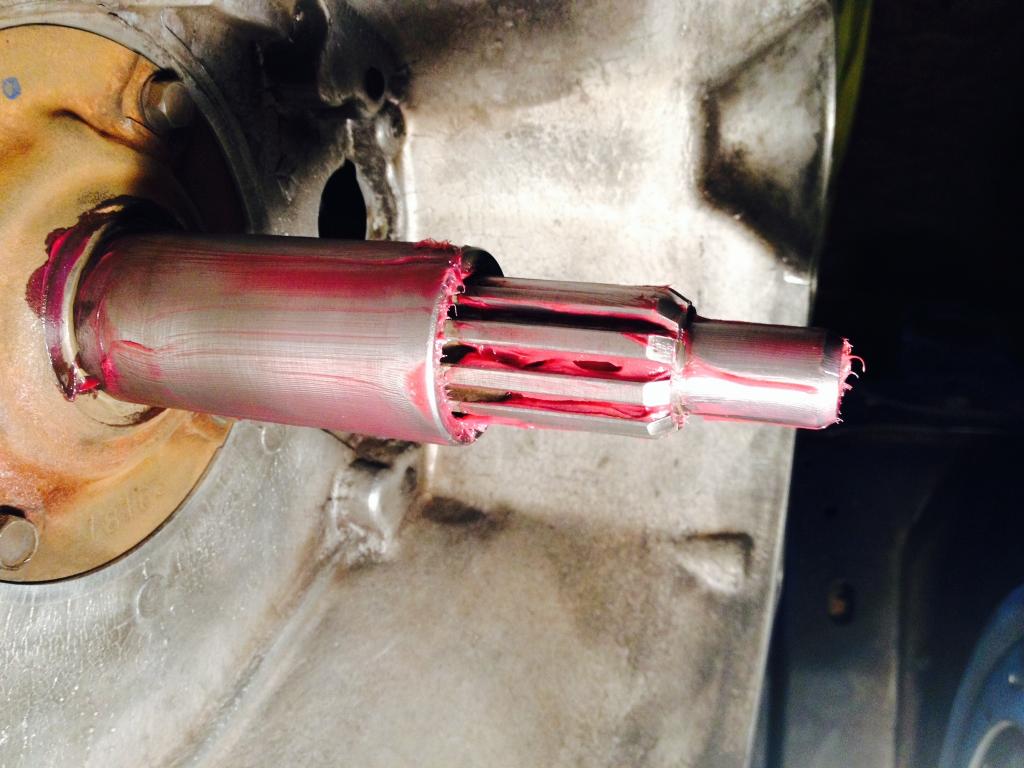
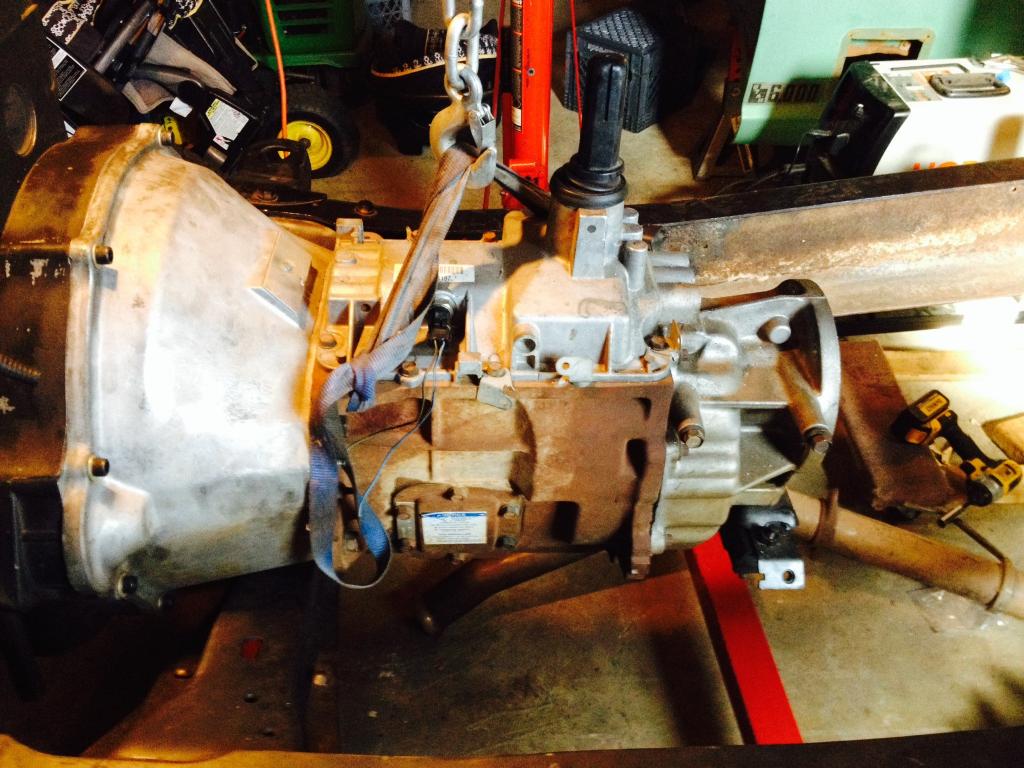
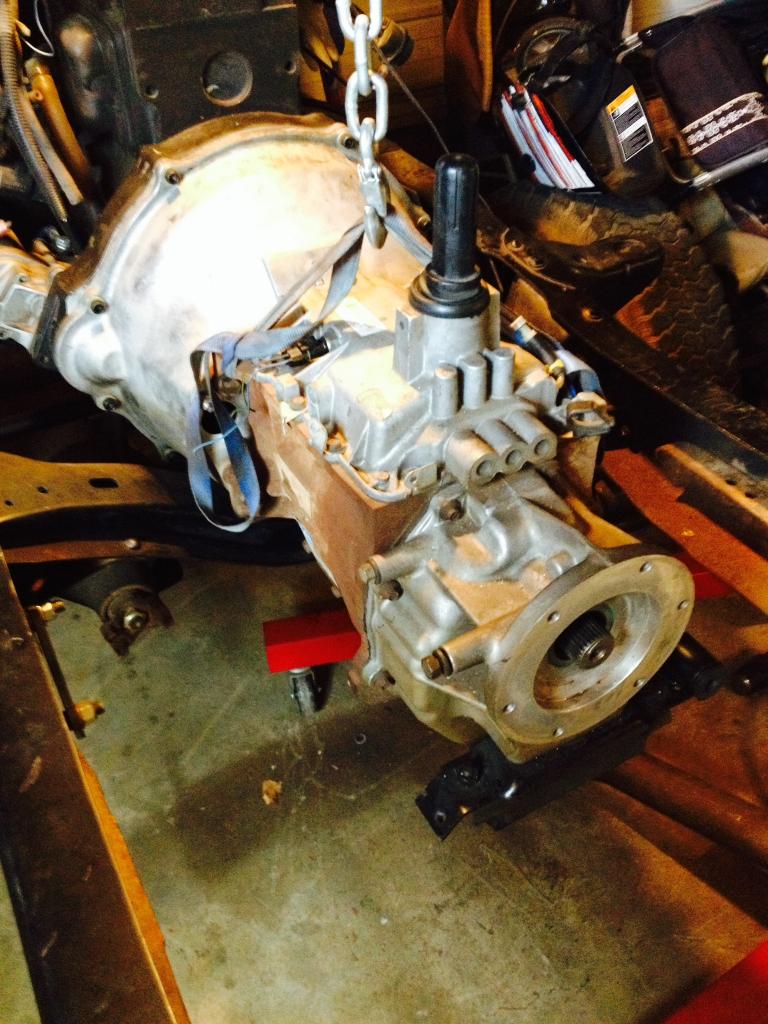
I lost the NV4500 clutch release arm and clip during my move, so I had to buy a new ones at the dealer  . I installed the transmission today. One step closer.
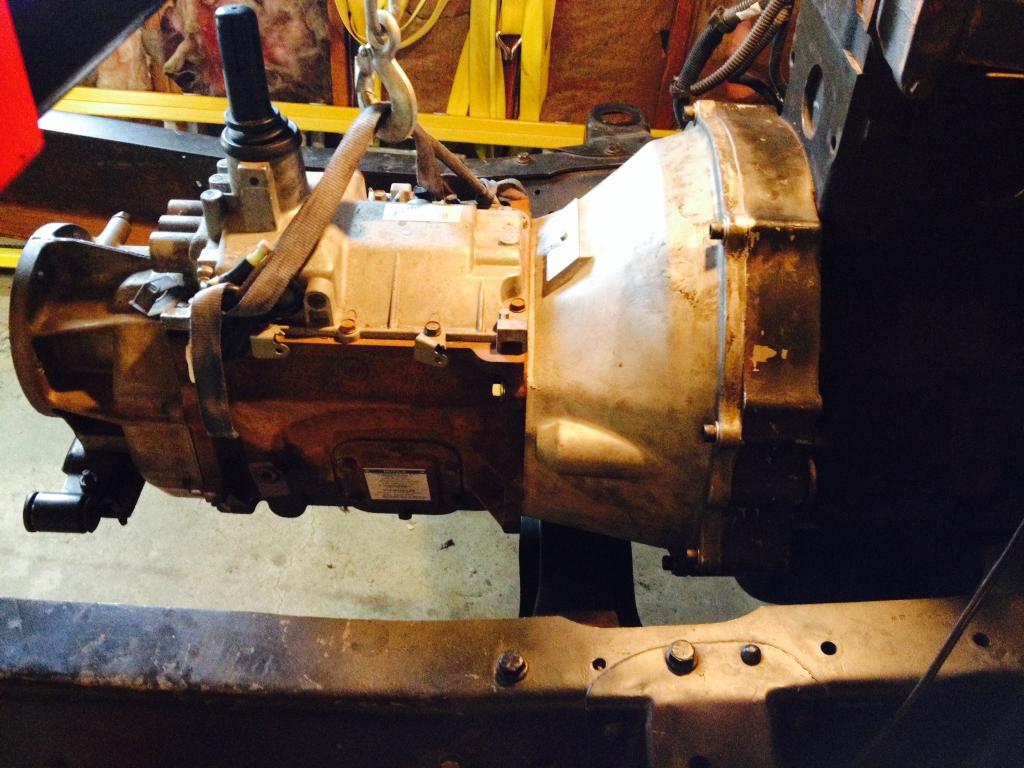
After researching Advanced Adapters options for my set up, I think I am going to wait to install the transfer case after they come out with a new option in 6 weeks. Check this option out:
50-9550: Dodge NV4500 29 Spline to Ford NP205 | Advance Adapters
It requires a transfer case rebuild, but that probably needs to happen anyway.
. I installed the transmission today. One step closer.


After researching Advanced Adapters options for my set up, I think I am going to wait to install the transfer case after they come out with a new option in 6 weeks. Check this option out:
50-9550: Dodge NV4500 29 Spline to Ford NP205 | Advance Adapters
It requires a transfer case rebuild, but that probably needs to happen anyway.
#202
02-11-2015, 08:11 PM
Cargo Master
#203
04-22-2015, 04:21 PM
Join Date: Oct 2011
Location: Willard
Posts: 207
Likes: 0
Received 0 Likes
on
0 Posts


#204
04-23-2015, 05:12 PM
Join Date: Oct 2011
Location: Willard
Posts: 207
Likes: 0
Received 0 Likes
on
0 Posts
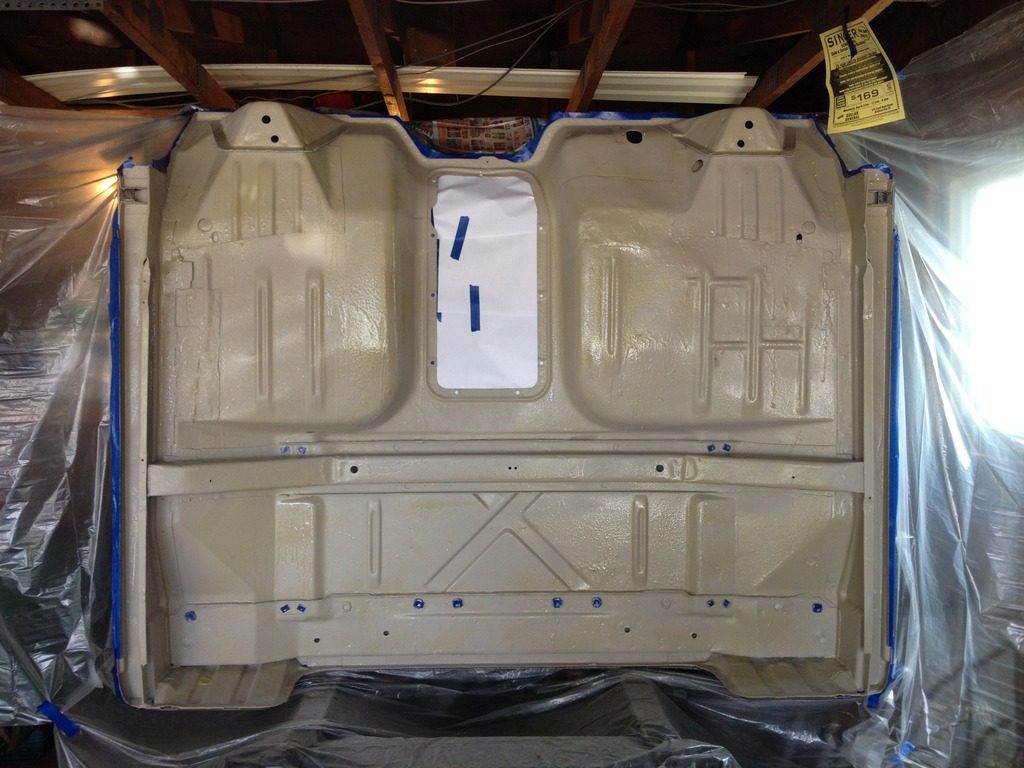
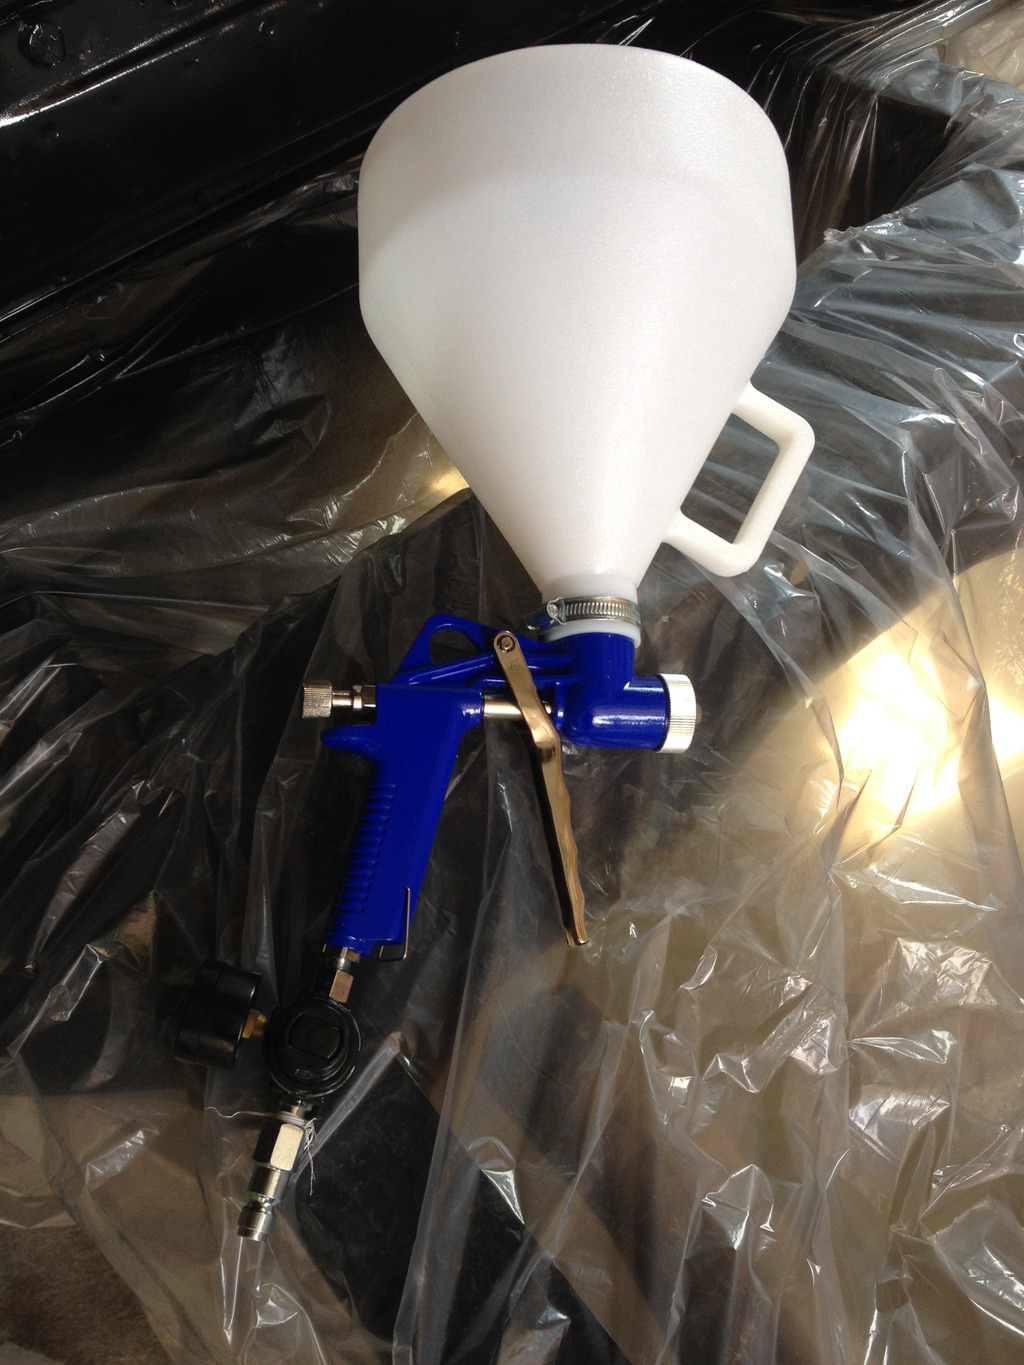
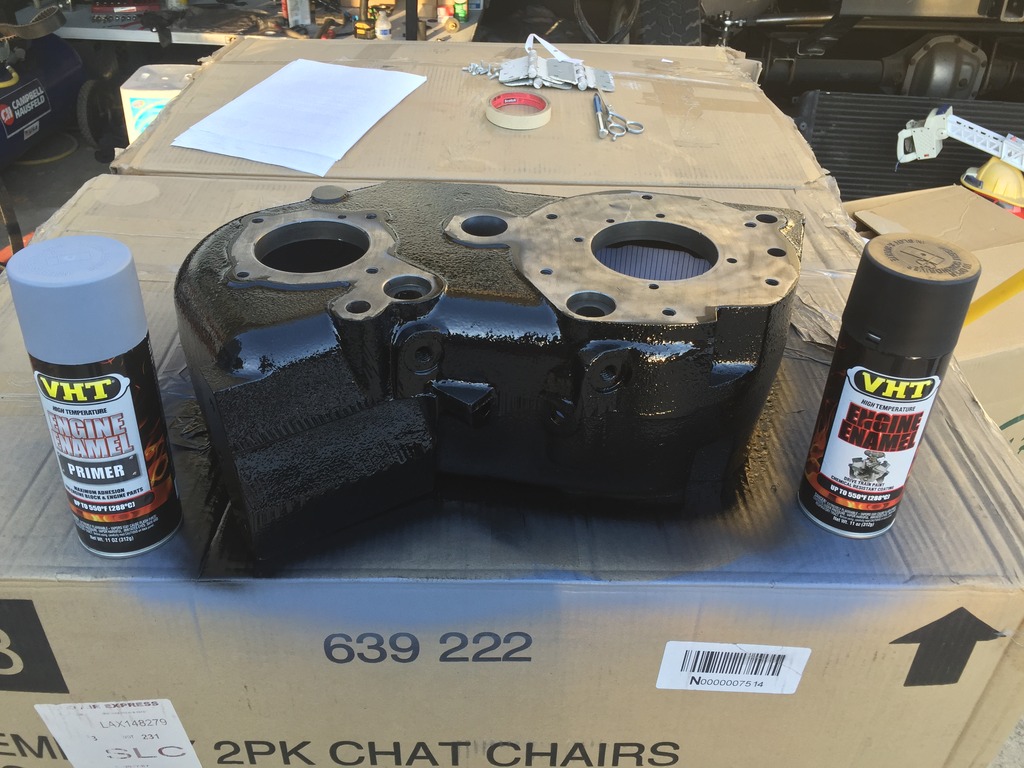
I sprayed Al's Liner Heat and Noise Reducer over the primer. Word of advise, Al's Liner Spray Gun comes with 3 different tips for different viscosities. I used the large for the HNR and it applied way to much product at once. No big deal, I just got some runs that had to be sanded out when the HNR dried. I switched over to the smallest tip to shoot the last bit, and it worked great.
Here's Al's Gun
I applied Al's adhesion promotor and went ahead an sprayed on Al's Bed Liner to the bottom pan of the cab. It was a messy job, but over all I am very pleased with the results. To me, it looks every bit as good as Line-X or Rhino Liner
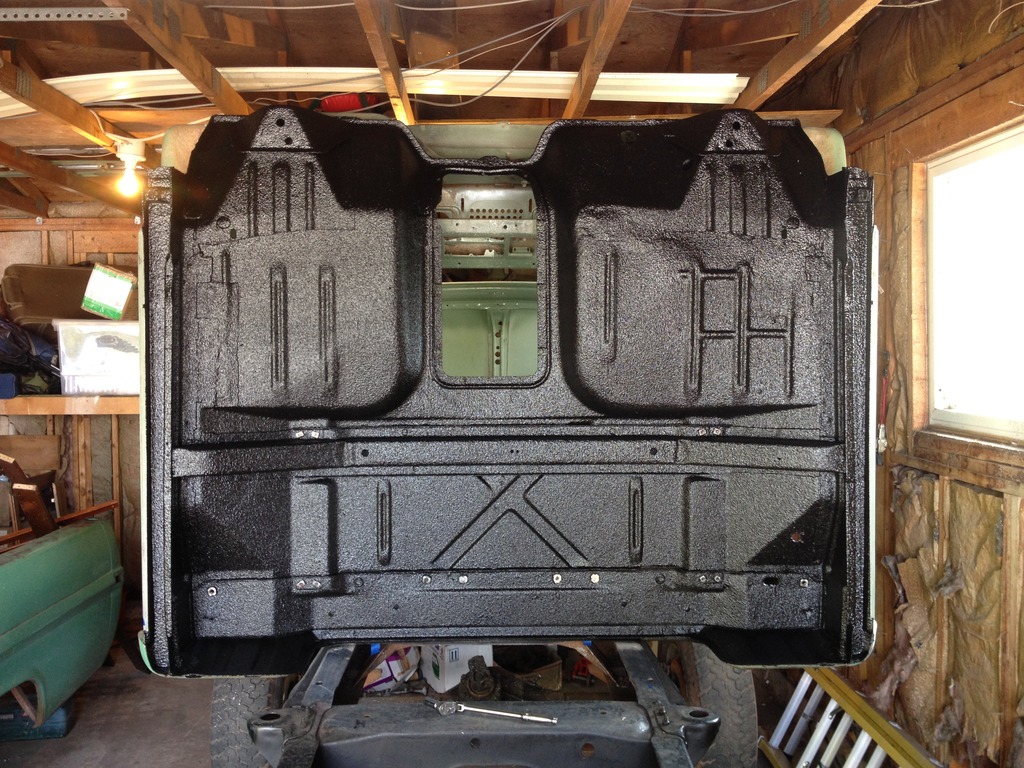
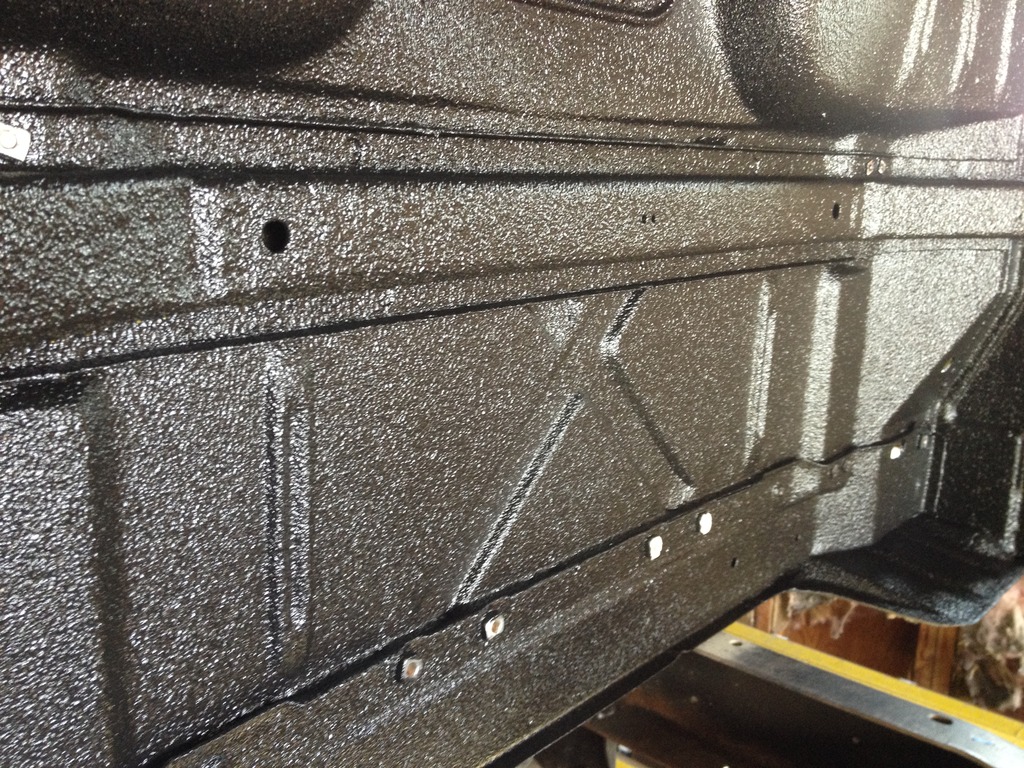
It even made my added metal pan patchwork almost unknoticable
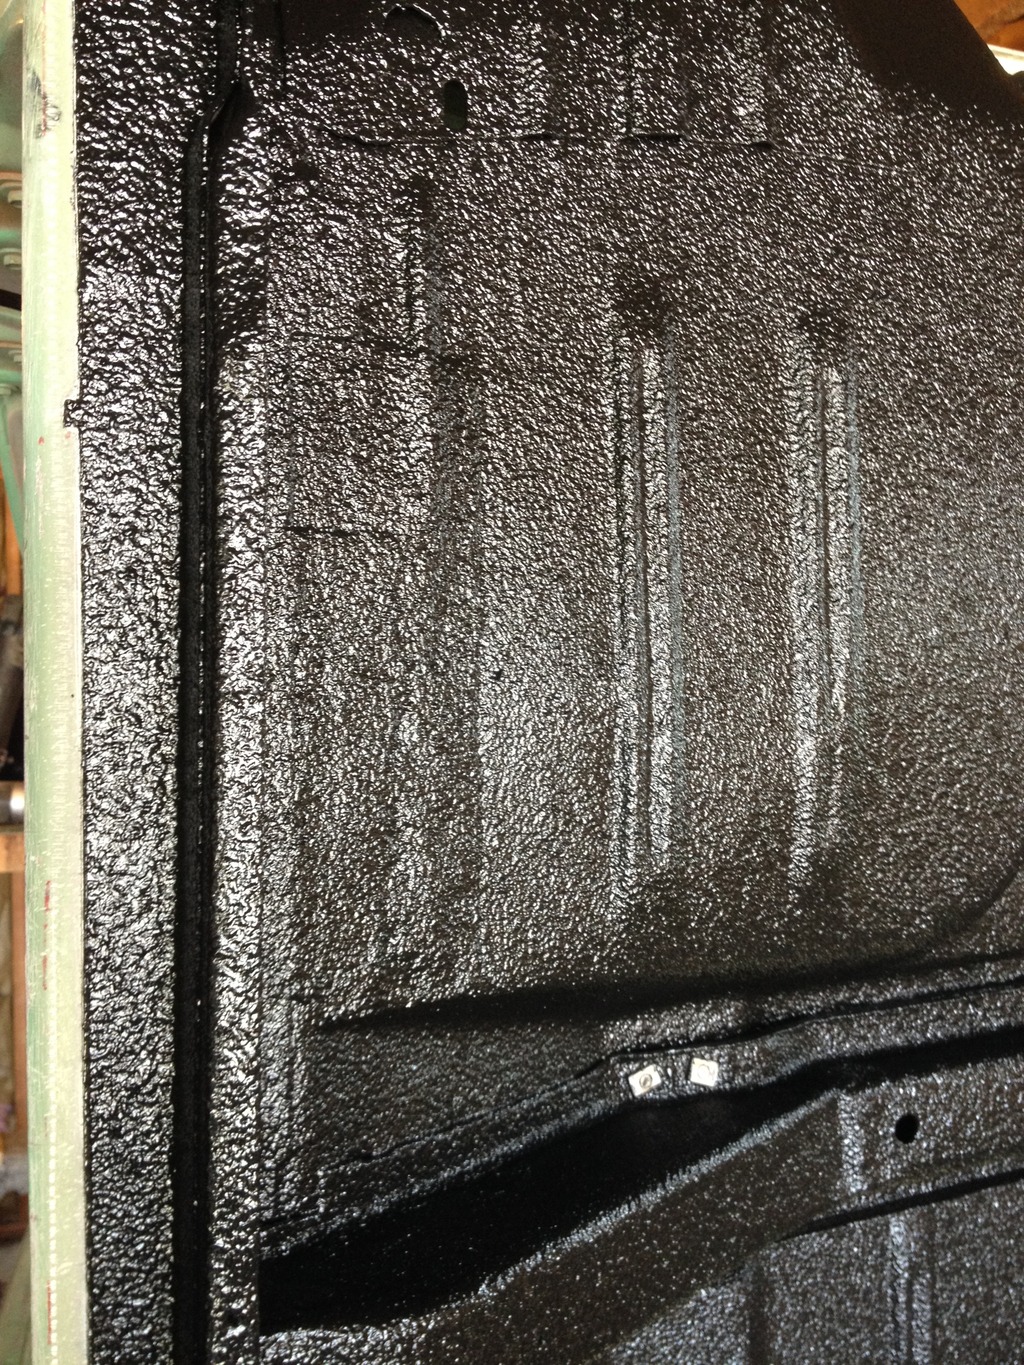
Over all I am very happy with the results. I am going to go ahead and use Al's Liner again inside the cab on the floorboard.

Here's Al's Gun

I applied Al's adhesion promotor and went ahead an sprayed on Al's Bed Liner to the bottom pan of the cab. It was a messy job, but over all I am very pleased with the results. To me, it looks every bit as good as Line-X or Rhino Liner


It even made my added metal pan patchwork almost unknoticable

Over all I am very happy with the results. I am going to go ahead and use Al's Liner again inside the cab on the floorboard.
#205
04-23-2015, 09:32 PM
Logistics Pro
#206
04-26-2015, 10:49 PM
Join Date: Oct 2011
Location: Willard
Posts: 207
Likes: 0
Received 0 Likes
on
0 Posts
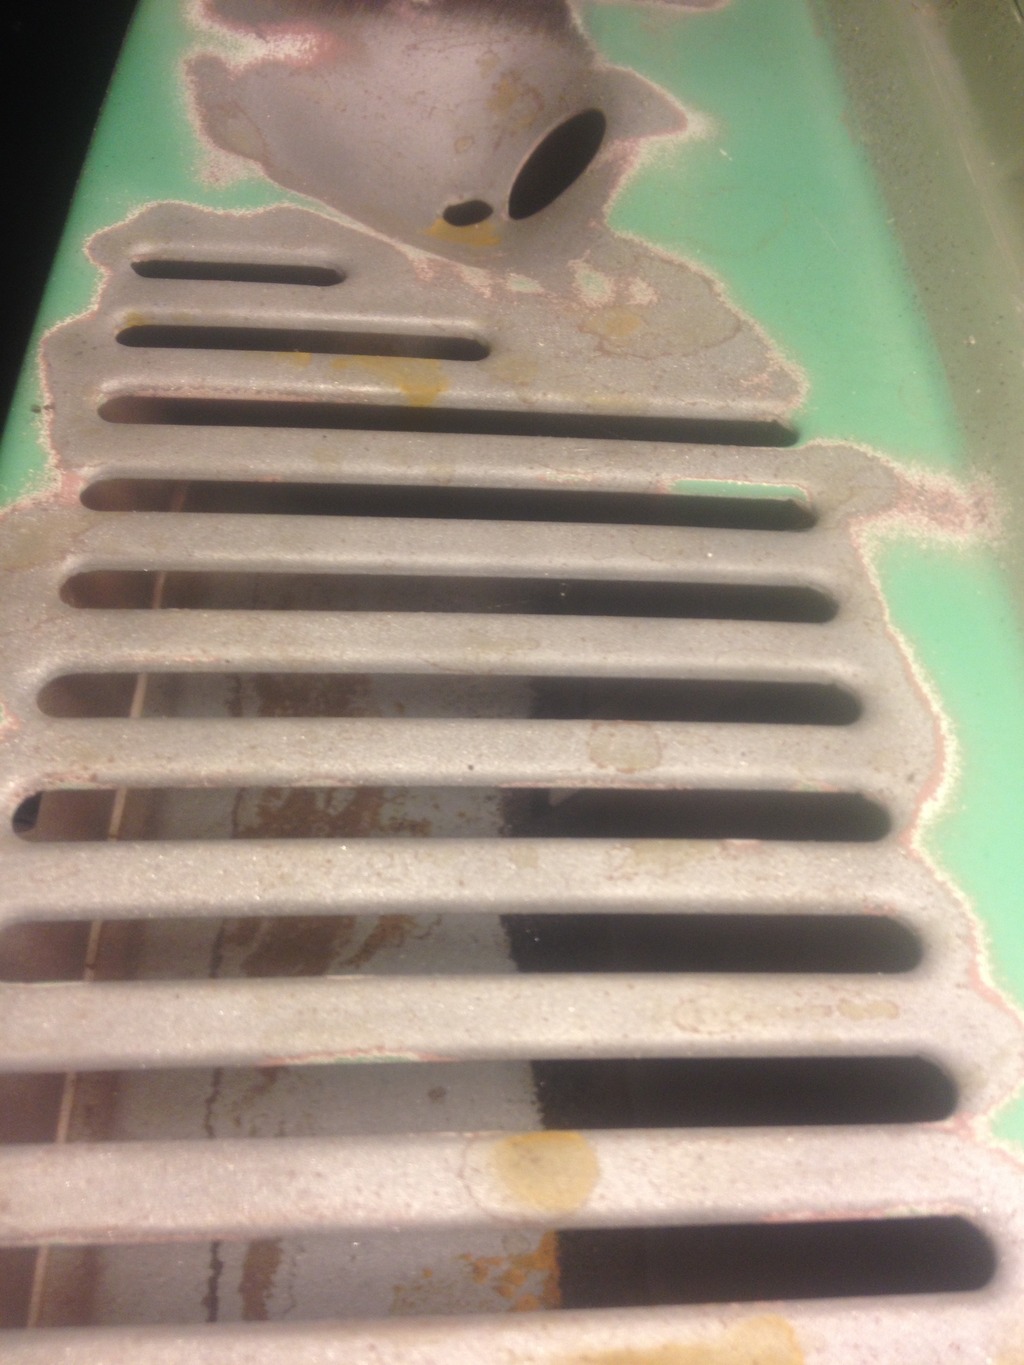
How do you paint inside of the cowl?
So what is the best way to paint inside of the cowl? I sandblasted the inside, so it is down to bare metal. What are the best options for painting inside of the cowl? So far my research has lead me to three options.
1. Spray etching primer then paint with a standard paint gun through the slotted grill on the top of the cab and try to cover the inside by spraying at different angles.
2. Remove about 200 spot welds. Remove the cowl. Paint. Re-weld.
3. Get some type of aerosol paint with a extension straw that can slip through the cowl grill.
Does anyone have any experience with painting the inside of the cowl? What worked? What didn't work?
Any recommendations?

#207
04-28-2015, 07:02 PM
Hotshot
I remember back in the day when I was a young man spray undercoating was big business in the rust belt. To do the inside the doors they drilled holes in the back of them and then went inside the doors with a wand. There was a spray tip at the end of the wand. Those wands were solid tubing but I wonder if you can find a flexible wand attachment for a paint spray gun?
#208
04-29-2015, 01:06 PM
I seen this awhile back,,,, Just what you need...
Need to paint inside rockers, frame rails, subframe??? - NastyZ28.com
or you could just use a regular old weed sprayer, thin the paint down a little bit...
Need to paint inside rockers, frame rails, subframe??? - NastyZ28.com
or you could just use a regular old weed sprayer, thin the paint down a little bit...
#209
04-29-2015, 11:25 PM
Join Date: Oct 2011
Location: Willard
Posts: 207
Likes: 0
Received 0 Likes
on
0 Posts
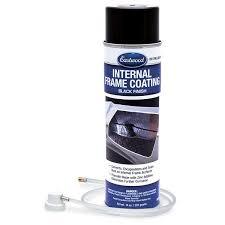
Well, I ended up ordering a couple of cans of this stuff from eastwood: Eastwood Internal Frame Coating Black 14oz Aerosol
I am going to see if I can purchase or rig a extension wand for my paint spray gun to spray the finish paint. If not, I will spray the best I can through the cowl from the top so that the visible areas are covered. Thank you for the suggestions guys, I definitely have a plan of attach now.
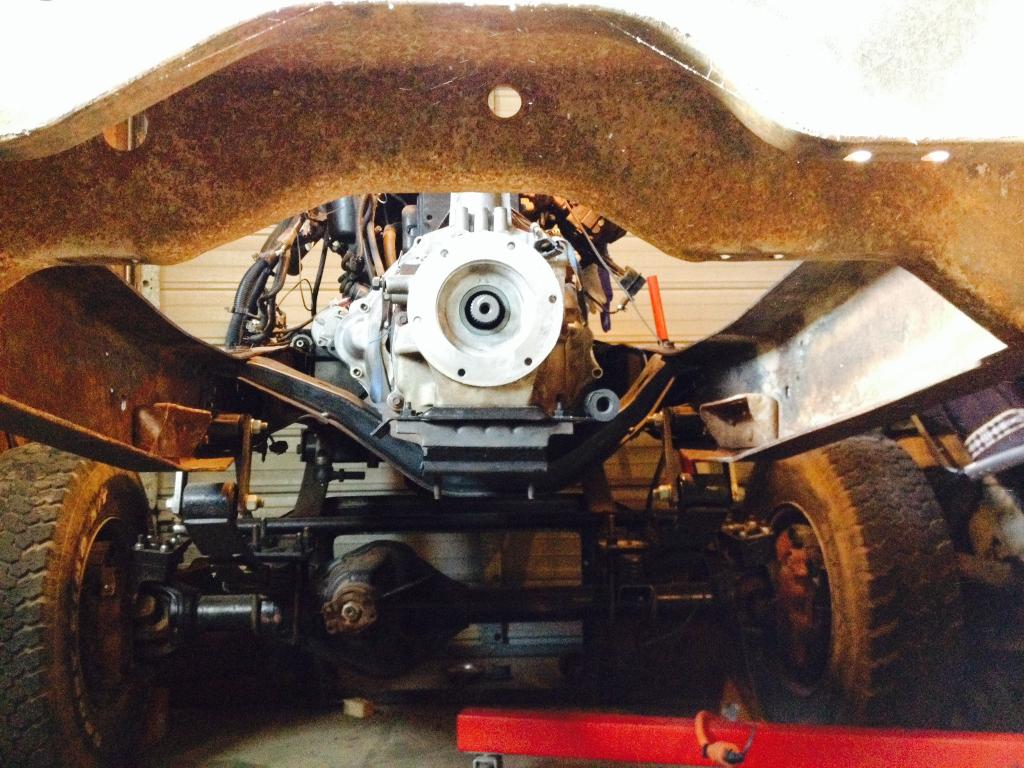
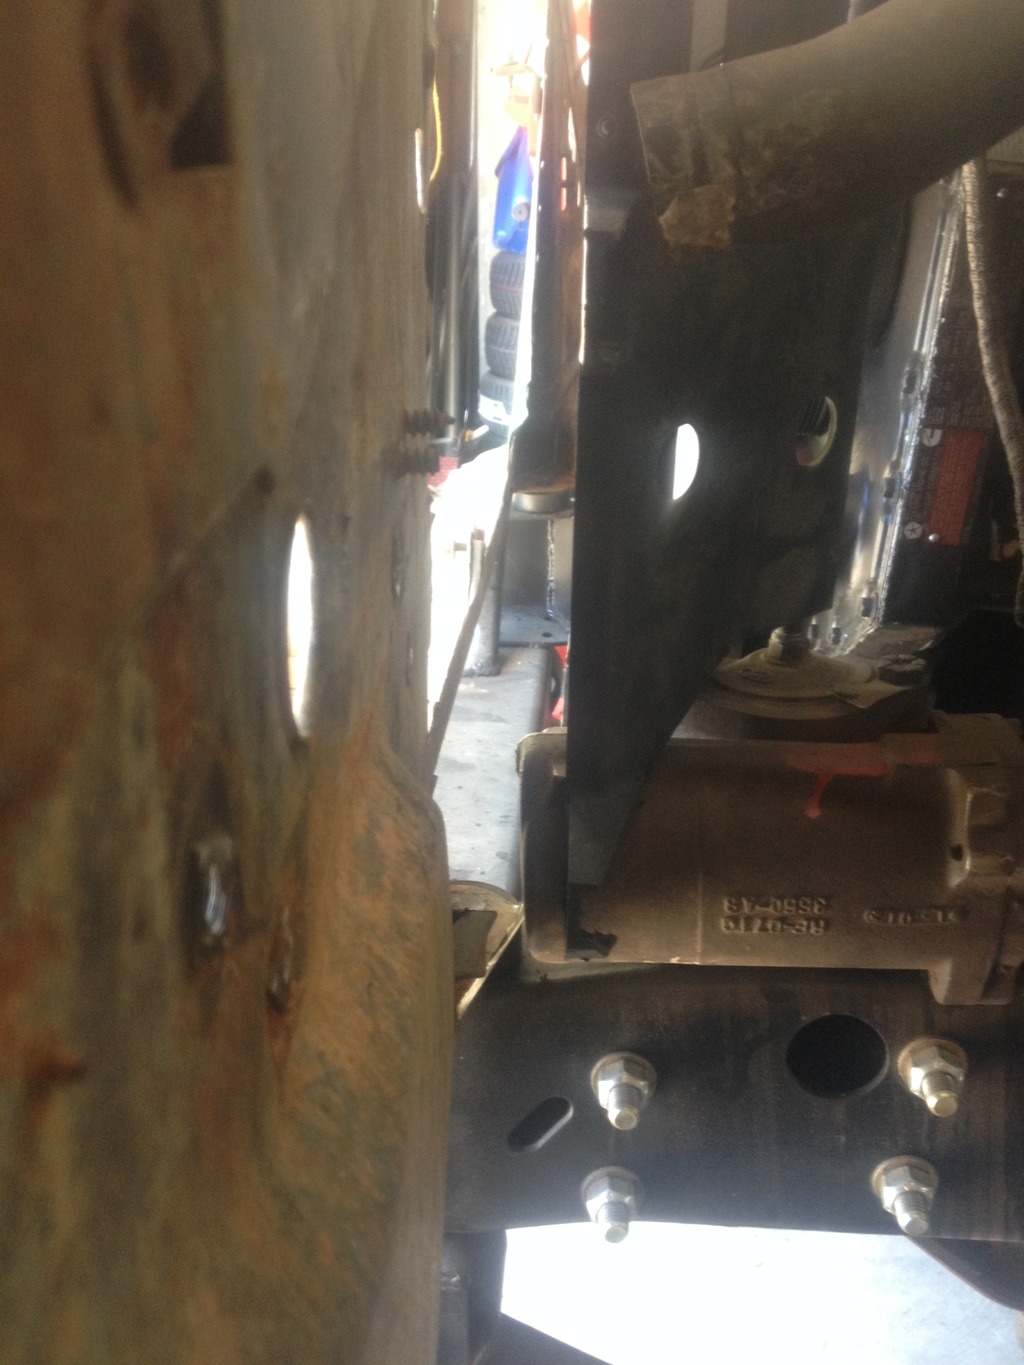
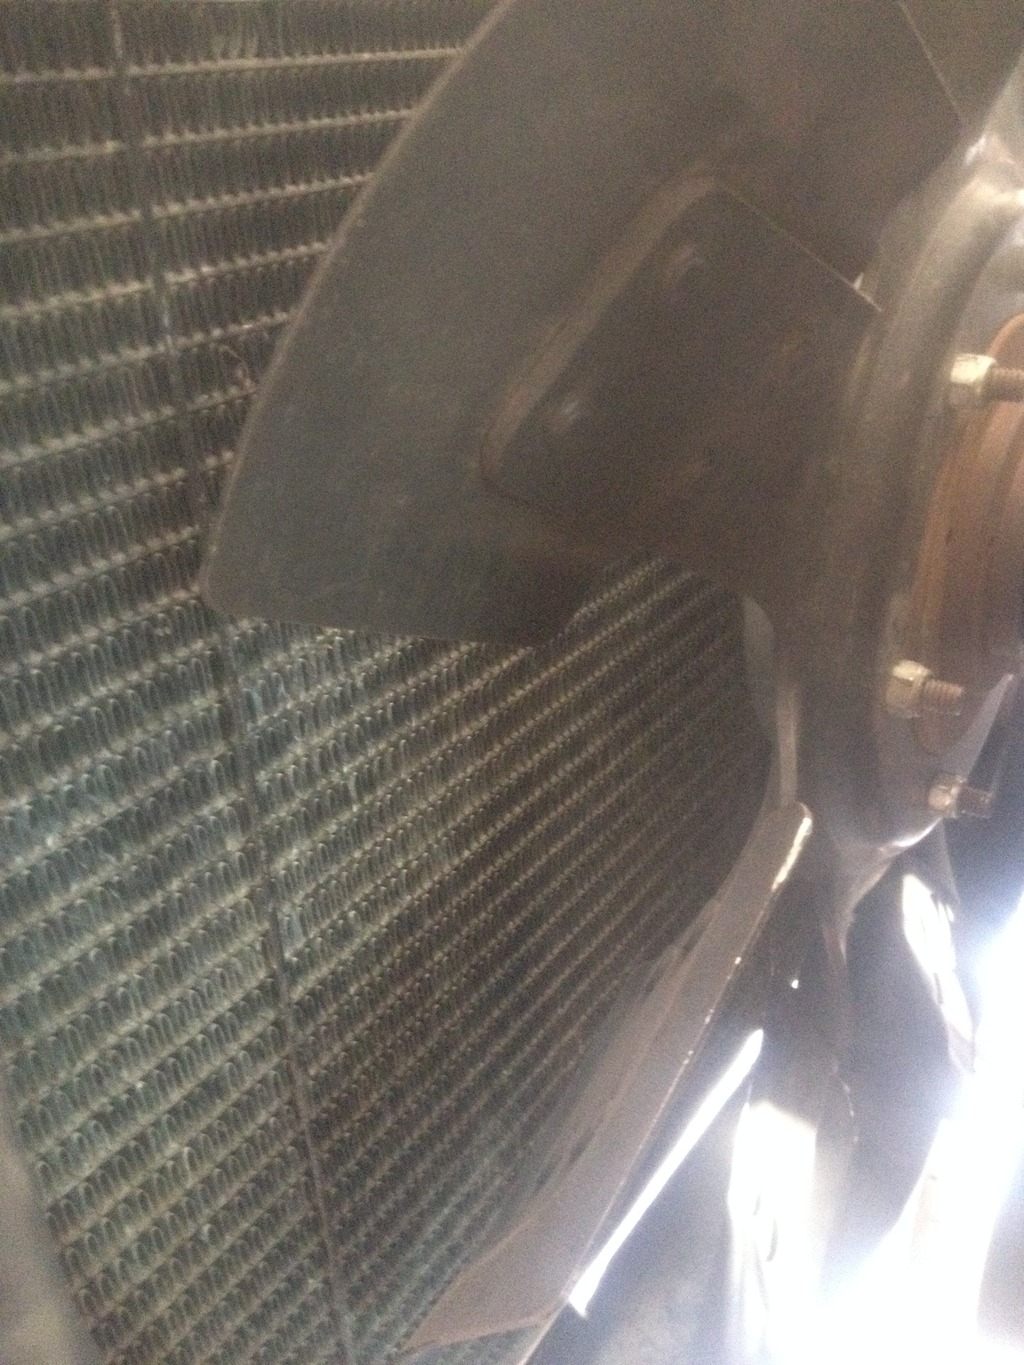
I went ahead and started cutting into the front radiator support. The radiator support contacts the custom '79 steering gear I installed, so I had to trim it back quite a bit. I drilled out the spot welds and removed the factory radiator retainers on the support.
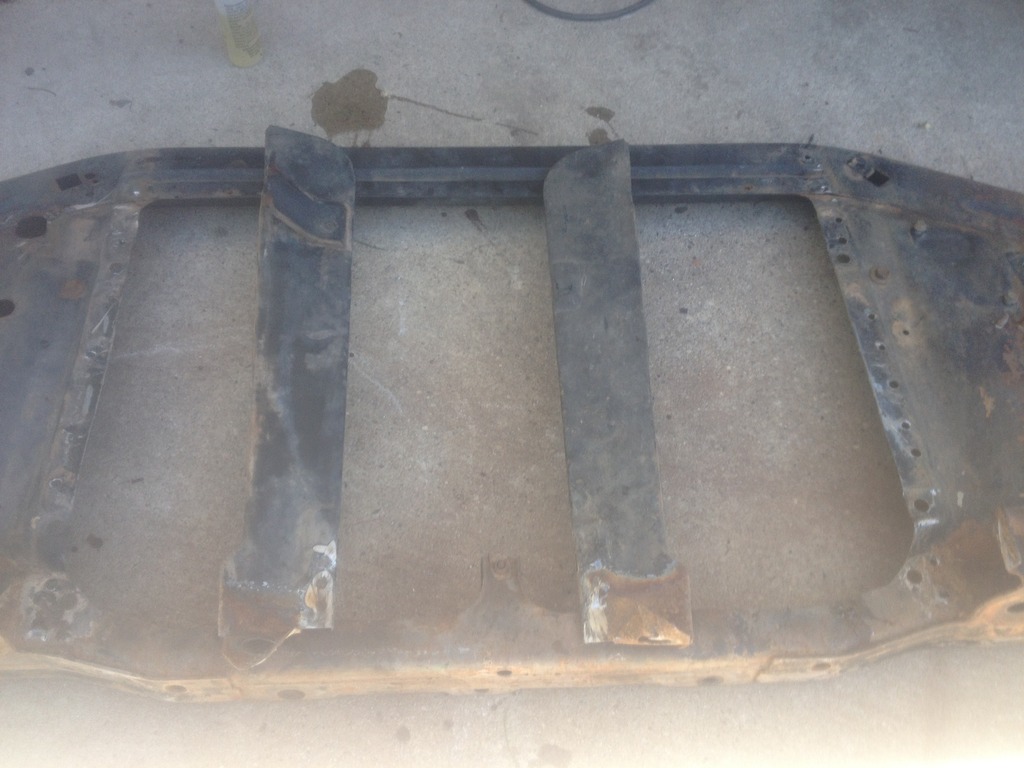
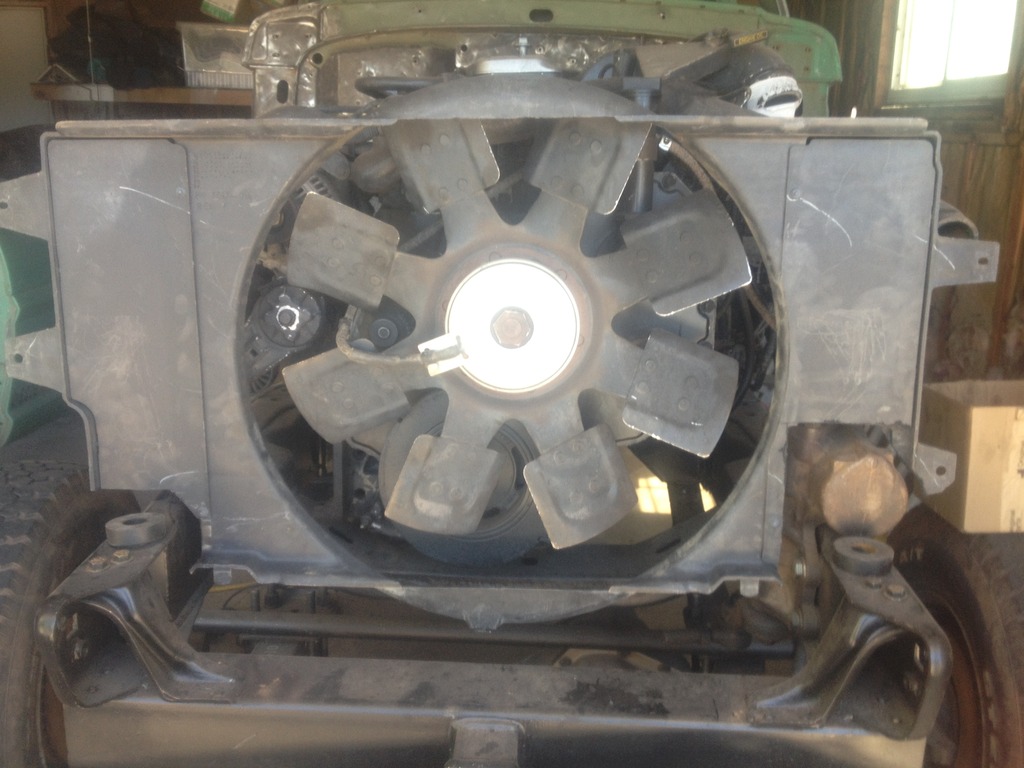
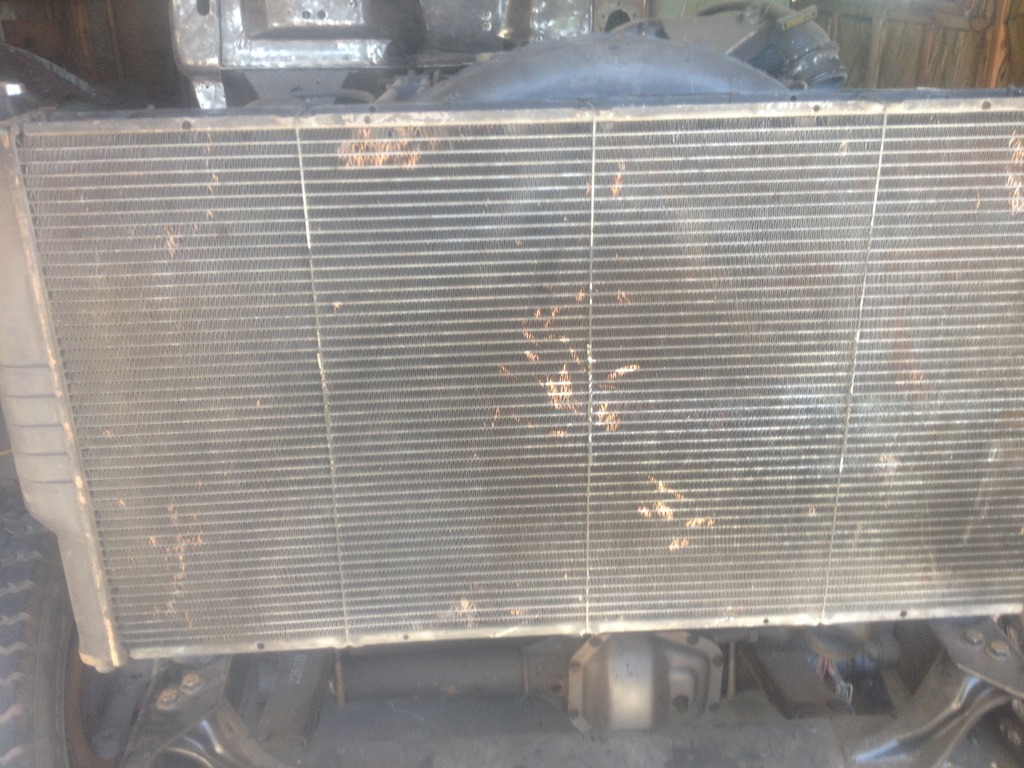
I want to use all the factory Dodge cooling stuff, since I have a perfectly good radiator and shroud available. to get the shroud to fit I had to trim it quite a bit. After sizing up the radiator with the shroud, I basically will have to cut the bottom half of the shroud off to get it to fit. Since the Dodge radiator is longer than the factory Ford one, it sits higher above the frame rails. A quick look seems to indicate that everything would fit under the hood, but would sit 3" higher or so than a stock position. I have a plan now of how to make it work, but I will have to get everything mocked up to see how it comes together.

I am going to see if I can purchase or rig a extension wand for my paint spray gun to spray the finish paint. If not, I will spray the best I can through the cowl from the top so that the visible areas are covered. Thank you for the suggestions guys, I definitely have a plan of attach now.
I went ahead and started cutting into the front radiator support. The radiator support contacts the custom '79 steering gear I installed, so I had to trim it back quite a bit. I drilled out the spot welds and removed the factory radiator retainers on the support.

I want to use all the factory Dodge cooling stuff, since I have a perfectly good radiator and shroud available. to get the shroud to fit I had to trim it quite a bit. After sizing up the radiator with the shroud, I basically will have to cut the bottom half of the shroud off to get it to fit. Since the Dodge radiator is longer than the factory Ford one, it sits higher above the frame rails. A quick look seems to indicate that everything would fit under the hood, but would sit 3" higher or so than a stock position. I have a plan now of how to make it work, but I will have to get everything mocked up to see how it comes together.


#210
07-26-2015, 11:09 PM
Join Date: Oct 2011
Location: Willard
Posts: 207
Likes: 0
Received 0 Likes
on
0 Posts
I began rebuilding the NP205 transfer cast today.
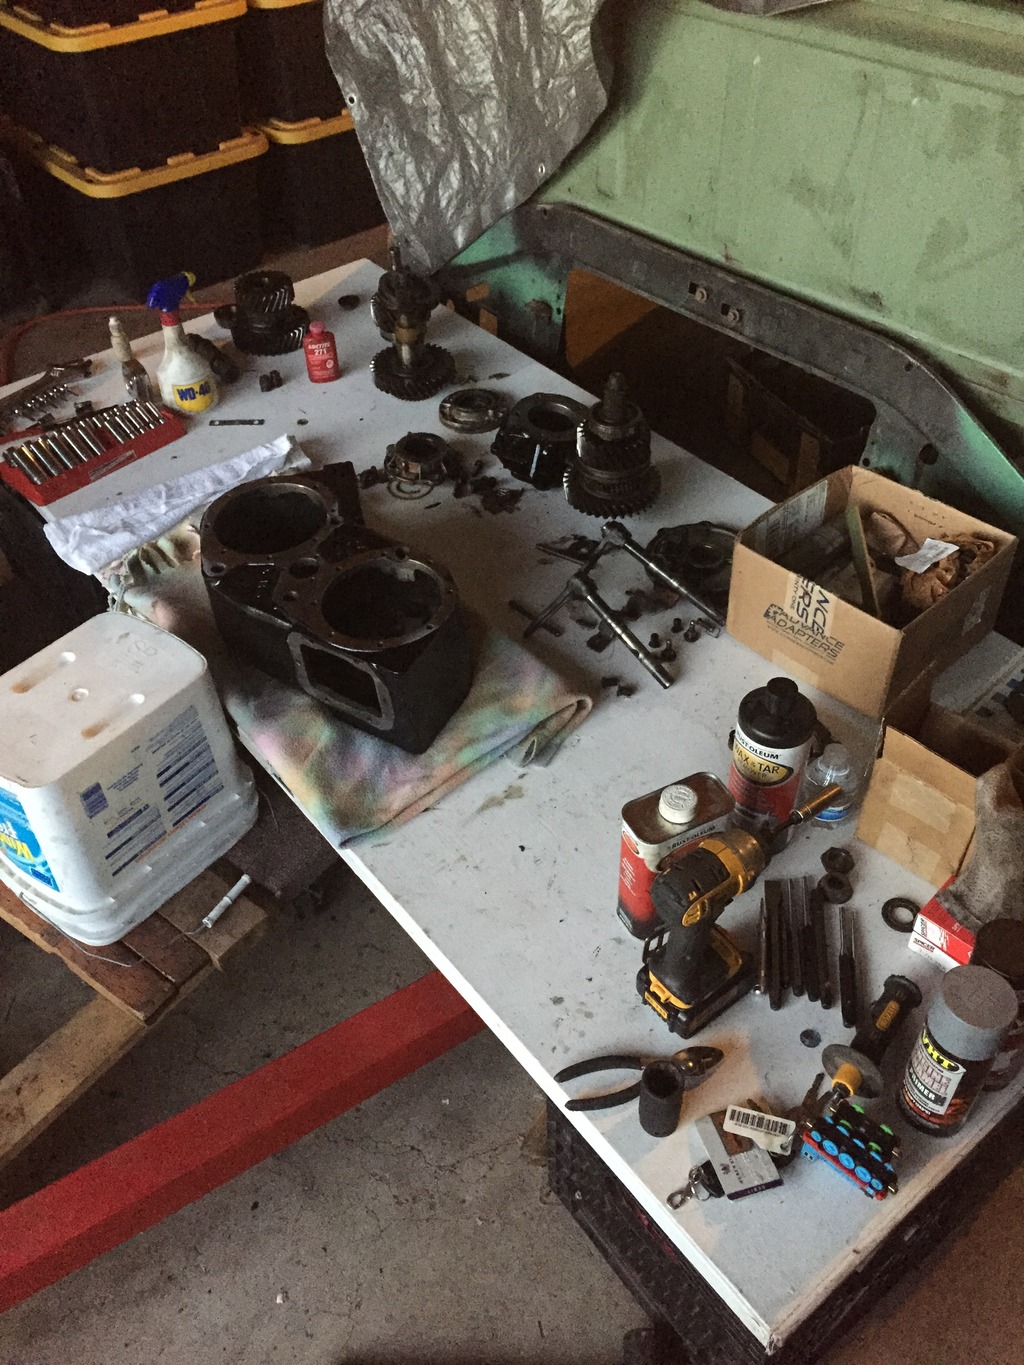
One question I did have was regarding the center cluster idler shaft. The bearing spacer made a significant wear pattern on the shaft. Most information I have found is saying that the wear is fine because it is not a bearing surface. Any thoughts from some experienced NP205 rebuilders out there? Should I replace it? Or is this normal acceptable wear?
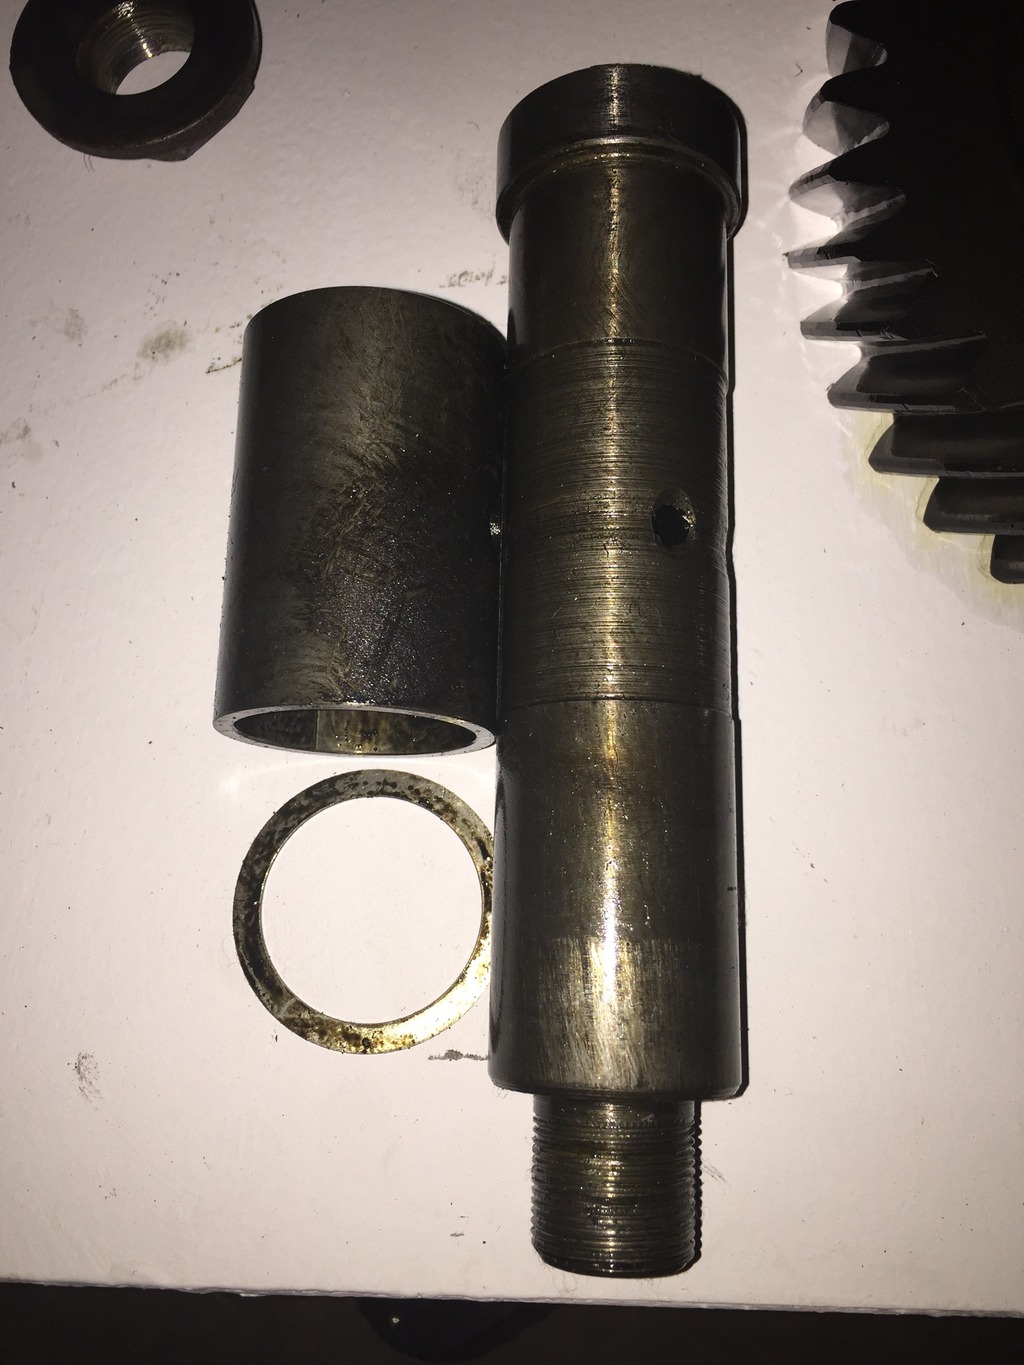
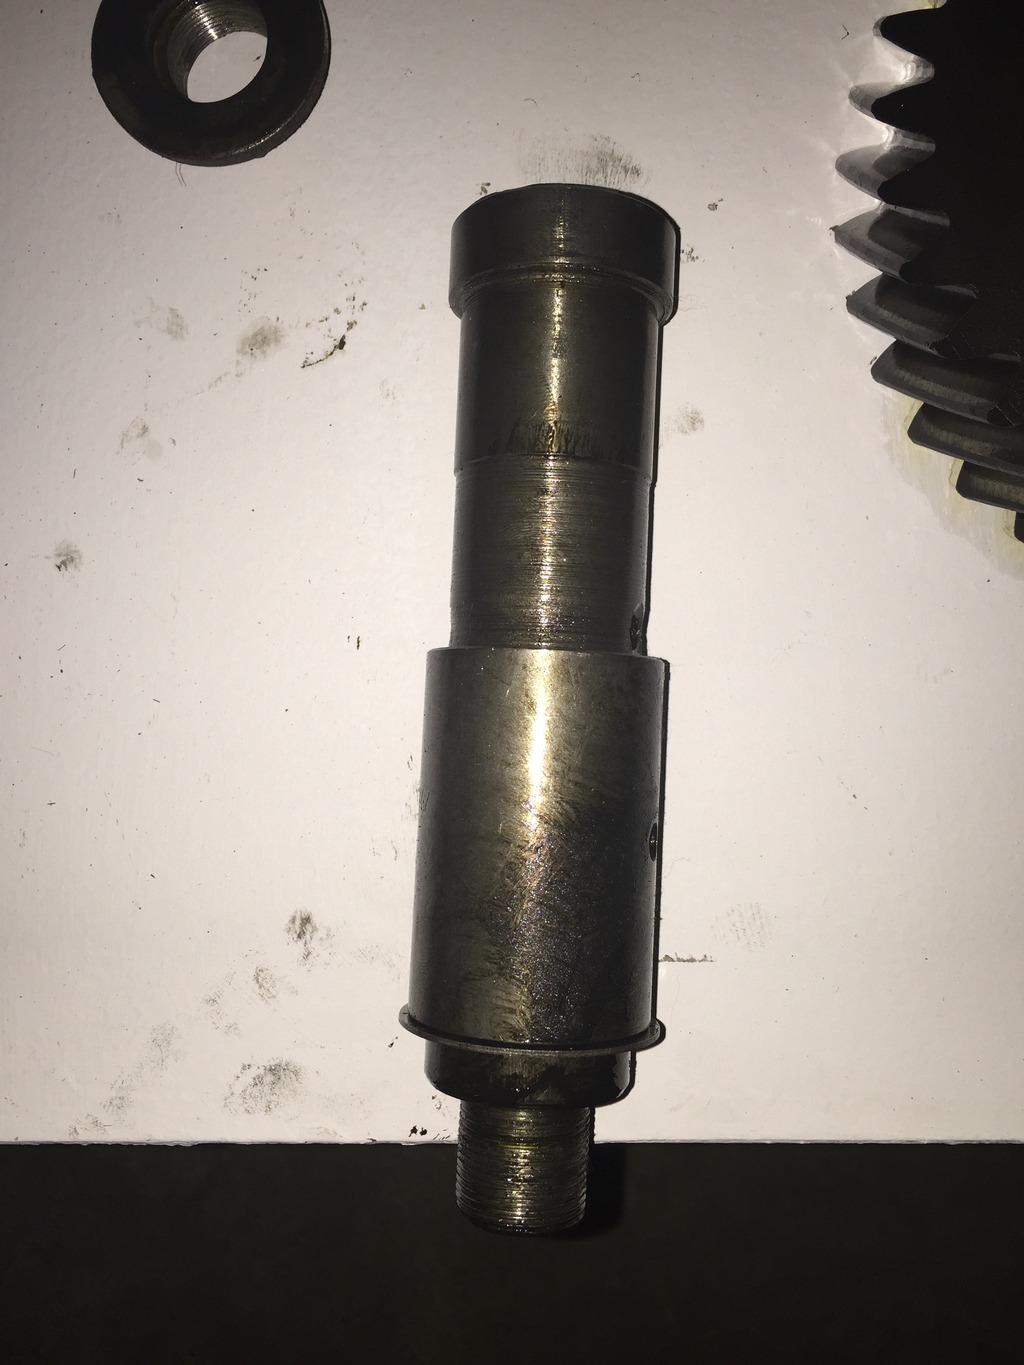


One question I did have was regarding the center cluster idler shaft. The bearing spacer made a significant wear pattern on the shaft. Most information I have found is saying that the wear is fine because it is not a bearing surface. Any thoughts from some experienced NP205 rebuilders out there? Should I replace it? Or is this normal acceptable wear?

