BedRug Tech Review
BedRug Tech Review
By Arthur Krewat
9/20/2010
I had a chance recently to get my hands on a new product called
a BedRug. The manufacturers say it can handle
basically anything you can throw at it, hose it off, and it’s as good as new.
We’ll see after a few months of what I will be putting it through, but for now,
this article goes over the install and reviews the quality of the product. It
turned out to be very easy to do. Read the directions and go slowly and you
will have great results! It took me less than three hours total to do.
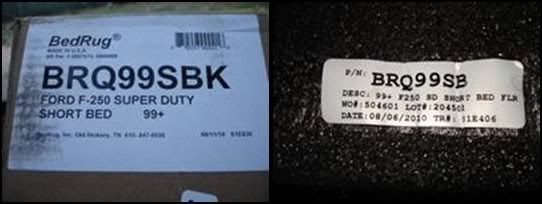
First, before you do anything, open the box, check the
packing slip and the rug and make sure you have the correct part number. This
goes for anything really, but in this case if you get the wrong part, it might
start to go in right but you will quickly find it won’t fit.
You will need a roll of paper towels and a bottle of rubbing
alcohol. A few notes before installation.
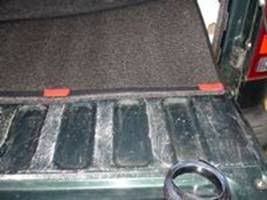
· Clean the bed with soap and water and allow to
dry thoroughly. I have a cap/topper on the bed, and I washed the bed out a week
or two prior to getting the Bedrug. It was still
dirty in spots, so I went over it with a damp rag and got the rest of the dirt
up. Some of the pictures show dirt where I actually went back over with the
damp rag and removed it. I also took the time to remove some paint that spilled
on the tailgate, visible in the first picture.
· In my case, the bed is scratched pretty much
everywhere, and it shows in the pictures but there is no bare metal. If you
have bare metal or rust, I would suggest spot-repairing it with rust converter
and/or paint before doing this installation. Water trapped under the Bedrug evaporates over time, but with bare metal, it will
definitely cause problems. Rust is just going to cause problems no matter what,
so now is the time to take care of that too.
· I removed the tailgate to make access to the bed easier. When it came
time to attach the rug to the tailgate, I reinstalled it of course.
· I removed the clamps you see in the pictures holding down the
cap/topper. It was much easier to install the sides of the Bedrug
with them out of the way. The clamps are padded with pipe insulation because I
carry my dog in the bed and I don’t want him getting hit in the face with the
clamps. There is also a piece of pipe insulation under the front window where
he rests his head.
· The instructions say you can either cut slits
in the Bedrug to allow the tie downs to come through,
or you can remove the tie-downs and after installation, poke holes through the Bedrug with an awl and bolt them down over the rug. I opted
to bolt the tie downs on top of the rug because it was going to be a permanent
installation. And, even though the instructions say the
rug can be sliced with no problems, I wasn’t willing to do more than poke a
hole through just in case I got it in the wrong spot and had to move it. Also,
removing the tie-downs to pull the BedRug out would
add about a whole 5 minutes to the job.
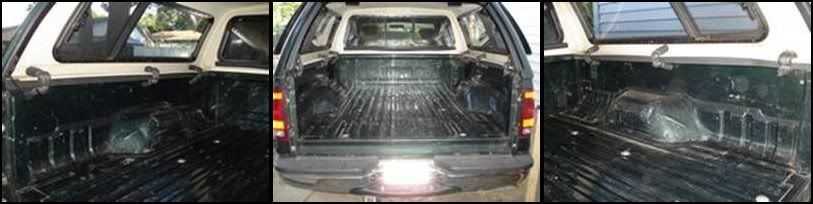
The bed:
Removing the tie-downs:
Use a 10mm socket wrench and remove the tie-down bolts and
remove all four tie-downs. Be careful if the bolts
rusted. If they are hard or impossible to get out, you might want to rethink if
you want to remove them at all at this point. Mine were easy, because of the
cap/topper and the low miles my truck has on it, even with all the road salt we
have here in New York.
Bed prepped for work:
Still have the clamps for the cap/topper on in these pics, to be removed later. With the tailgate off, the bed
is all ready to go. Because I didn’t have a large flat clean place to
lay out the BedRug, I unrolled it in the bed of the
truck.
Verifying the part number
and application:
Check the box, and the rug itself
and make sure you have the correct part before starting. Just to be on the safe
side. Been there done that, got the t-shirt!
Laying the BedRug out in the truck bed:
Unroll the BedRug, check it all
over. Using a box to hold up the BedRug made it
somewhat easier to zip the sides of the BedRug to the
bottom while it was upside down. Zipper shown here holds the sides of the BedRug to the bottom. Very sturdy
construction and stitching.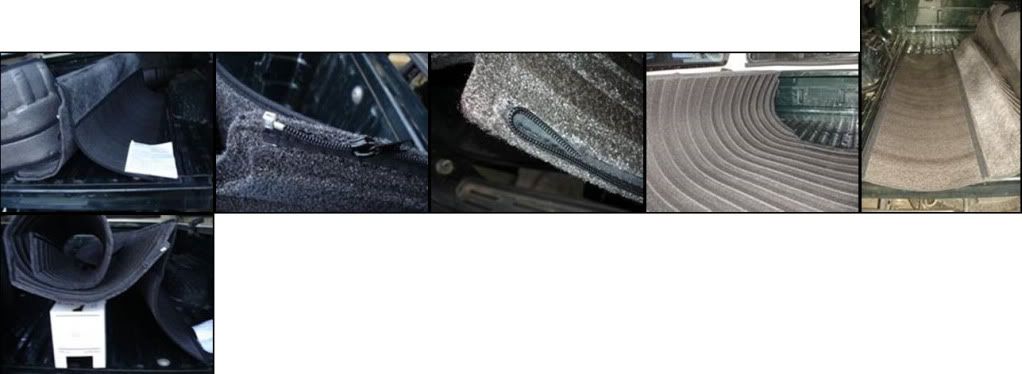
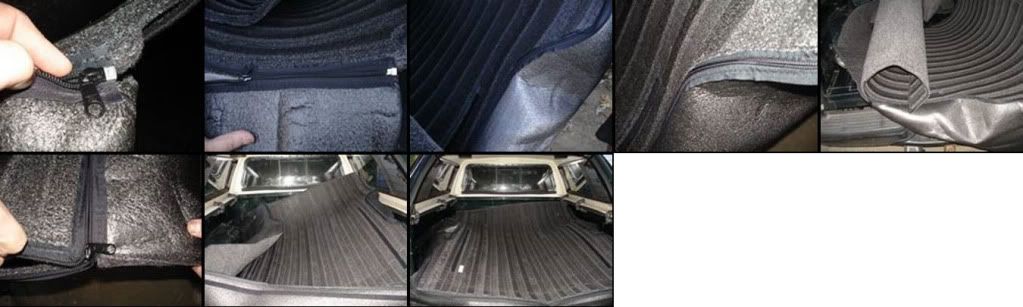
Zipping the two pieces
together:
The BedRug uses a zipper to hold
the sides (all one piece) to the base. Starting the zipper correctly is key. Be careful and slow when you get to the corners, just
to make sure you don’t dislodge the zipper teeth or catch any of the rug in it. Because I did it in the bed of the truck, it took
some maneuvering to work around the outside edge, but it was pretty easy
overall. Without the cap/topper, it would have been even easier.
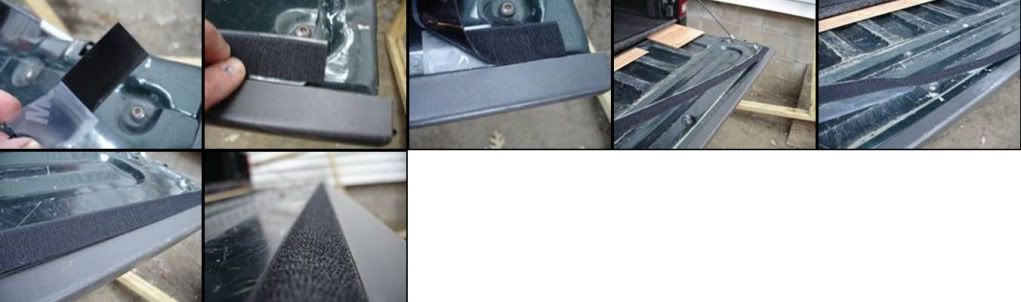
Installing the Velcro on
the base:
The instructions show exactly how to do this, it’s quiet easy. This is probably the most important part of
the installation, getting the Velcro applied to the correct spots, straight,
and flat. Basically you apply the Velcro onto the base and sides, then flip it
over and lay it out making sure it is straight and in the correct location.
Once it’s in the correct place, you remove the backing on the Velcro and press
it onto the bed. But first”¦
Open the installation kit, and locate the two long pieces
that go on the bottom, matching the lengths of Velcro to the fabric pieces on
the base. Apply them to the base of the BedRug while
it’s upside down. In this kit, they had red peel-away plastic on them, but they
may or may not be that color in your kit. In these pictures, you can also see
the black-faced long piece of Velcro, as well as smaller short pieces that go
on the front of the BedRug that lays
up against the front of the bed. The next section covers those. 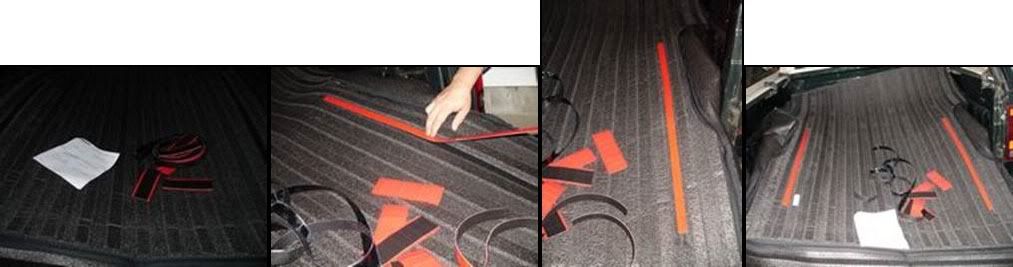
Installing the Velcro on
the front of the BedRug:
This is the area where the front of the BedRug
lays up against the front of the bed. There is a long piece of black-faced
Velcro that attaches to the front of the BedRug, and
then smaller short pieces of Velcro that you apply at evenly-spaced intervals.
The instructions do a better job of displaying where they go. Apply the long
piece making sure to put it in the center of the fabric. The last picture shows
the red pieces evenly spaced. WARNING: I got this part backwards according to
the instructions. The long piece should be at the TOP of the front of the bed
when finished. Either way, it worked out quite well. I will eventually get more
Velcro and fix this, but for now it looks perfect.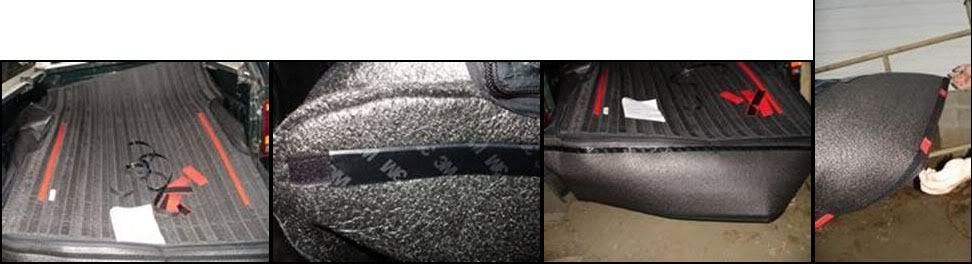
Continue applying the
Velcro pieces all around the sides of the BedRug:
Apply the rest of the Velcro pieces around the sides of the BedRug where it will lay against the sides of the bed
(inner fenders). Again, the instructions do a better job of showing where the
Velcro should be applied, but here are some pics
showing what that will look like. The last pic is
what the BedRug looks like just before it is laid
into the bed the final time.

Install the BedRug and check fitment and lay:
At this point, flip the BedRug
over and install into the bed where it will finally rest. This is the point
where I realized I had to remove the cap/topper clamps to get the Velcro
applied correctly along the sides. The base of the BedRug
is padded and ribbed to fit into the corrugated bed floor, so that helps locate
the base of the BedRug left-to-right. Here are some
more pics of this process. Make sure to push the
front of the BedRug fully against the front of the
bed, pushing the seam as far forward as you can. Push the sides into place, and
check the fitment around the back near where the tailgate will go. At the back
near the tailgate, in the final picture, you will see three pieces of Velcro on
each side. At this point, with all Velcro used, I still had two more pieces
left. So, I used FOUR to hold the sides against the uprights, more on that
later. Again, this is probably the most important part, locating the BedRug in the bed correctly. Take your time, and make
absolutely sure it’s located correctly. The last pic
also shows the tailgate reinstalled.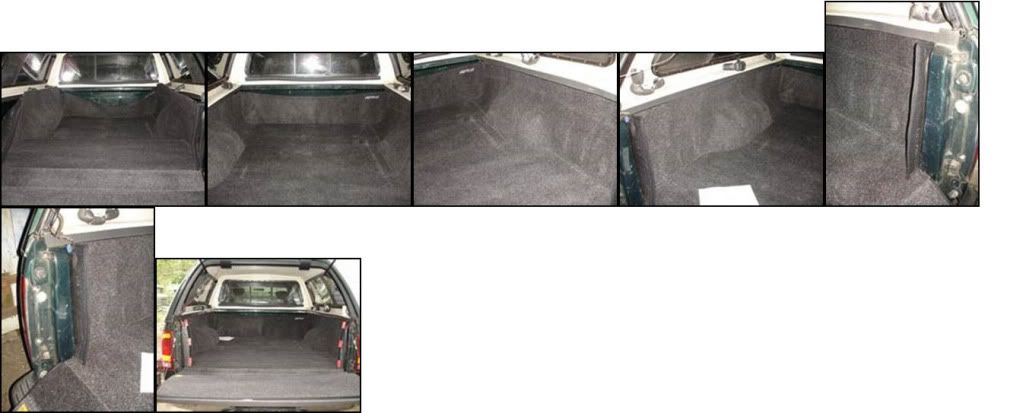
Cleaning the bed surfaces,
and sticking down the Velcro:
At this point, you’ll need that rubbing alcohol and some
paper towels. This is to remove any grease or even wax that may be on the paint.
With totally clean hands, and the paint totally clean of anything, rub your
finger tips on the paint where the Velcro will stick. If it isn’t “squeaky”
clean, keep wiping until it is. The second pic shows
the BedRug rolled up and away from where the long
base piece of Velcro will sit. Using your weight kneeling on the BedRug to keep it from shifting, peel off the red plastic,
and gently roll the BedRug back into place. Push down
on the Velcro. The instructions say 15 seconds of pushing on the Velcro to make
sure the adhesive bonds to the paint. It’s pretty strong stuff, and 15 seconds
seemed to work like magic. Make sure you push on the corners of the Velcro too,
because in case you need to pull the BedRug up for
any reason, this will be the place where the Velcro will peel away. Repeat the
“roll away” process for the other side, and the base
is in place.

One note: At this point, if you manage to get the BedRug installed slightly off, you can pull up the BedRug off the Velcro and reposition. It won’t be easy, but
it’s doable. Just realize that at this point, or at any time in the
installation, you can pull the BedRug up and
reposition if necessary because of the Velcro. I never needed to at any point
in this installation, but it’s good to know.
Continue applying the
Velcro on the front of the bed:
Clean the paint, peel off the backing from the long bottom
piece of Velcro first, and press into place, making sure you have the base of
the BedRug on the bottom of the bed first, and then
press into place. It goes over the lower portion of the rubber plugs. Remember,
if you need to, you can pull the BedRug off the
Velcro and reposition if necessary. After the lower long piece is applied, peel
off the backing on the top small pieces, and press into place. Again, I got
this backwards, and the long piece should be at the top.
Apply the Velcro to the
sides of the bed:
Not a lot of pictures here, the instructions do a good job
of showing what to do at this point. Roll the sides of the BedRug
away from the bed sides, one side at a time. Peel and stick to the bed using
the “15 second press” rule for EVERY piece of Velcro. Reposition as necessary.
I did a foot or two at a time, not the entire side at once. It would have been
impossible to do the entire side in one motion without the Velcro getting stuck
somewhere I didn’t want it to be.
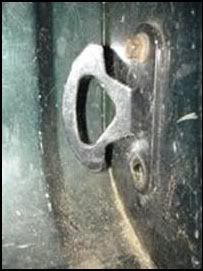
Install the front
tie-downs:
After the front of the BedRug is
installed and in place, and you are satisfied with it’s
location, peel the BedRug away from the bed again.
The Velcro pieces should stick to the bed nicely. If they do not, and the
corners start to pull, STOP and press the Velcro into place for another 15
seconds or even longer. With the BedRug peeled away
from the sides, locate the tie-down holes. You can use an awl, or even a small
Phillips-head screwdriver to make a hole in the BedRug.
The first one is the hard one. One you have one, install a bolt through the
tie-down and start the bolt in the hole. Tighten the bolt just until the
tie-down is still loose, and locate the second hole using the tie-down as a
guide. If you couldn’t remove the tie-downs, or didn’t want to in the first
place, carefully make a slice in the BedRug with a
razor knife. They say it won’t hurt the rug, just make sure it’s in the
absolute correct place. Pics below show the process
of locating and making the holes, and the reinstalled tie-down. This example
shows the right-front tie-down.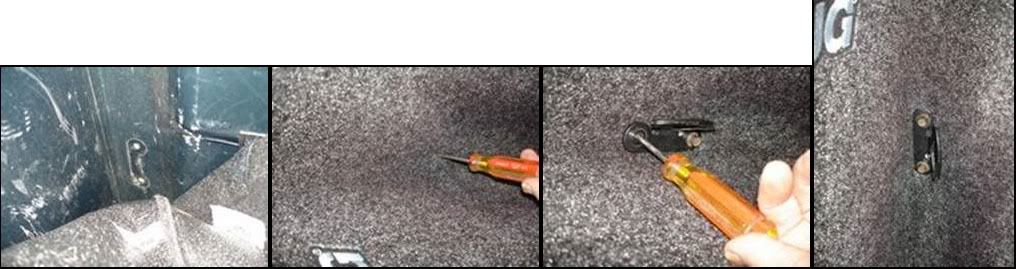
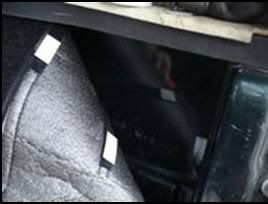
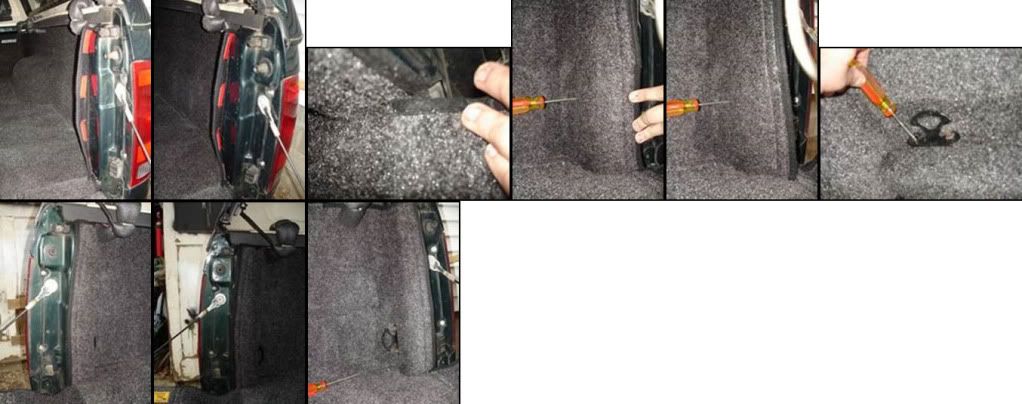
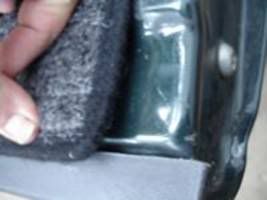
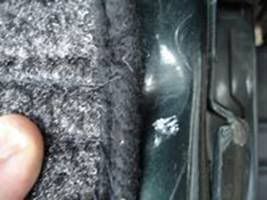
Apply the rear of the BedRug against the uprights and install the rear tie-downs:
At this point, the bed sides are done, but the rear
tie-downs are not yet reinstalled. I put the cap/topper clamps back on at this
point.
The ends of the BedRug sides that
go against the uprights near the tailgate are somewhat tricky. Being careful to
position the ends correctly, holding the rug against where the tie-down bolts
to, use the awl or screwdriver to make one hole for the tie-down, and again
bolt the tie down up and use the tie-down as a guide for the second hole. These
pics show locating the BedRug,
and where the rug actually winds up.
Wipe the surfaces where the Velcro will be going with
alcohol and use the “squeaky clean” method to verify it. The instructions show
three pieces on each side, but there were two extras, so I used four total. This is one spot where a continuous piece of Velcro
might have been a better idea. If you find this area pulls away or looks
uneven, buy a straight piece of Velcro at a local store and use that instead.
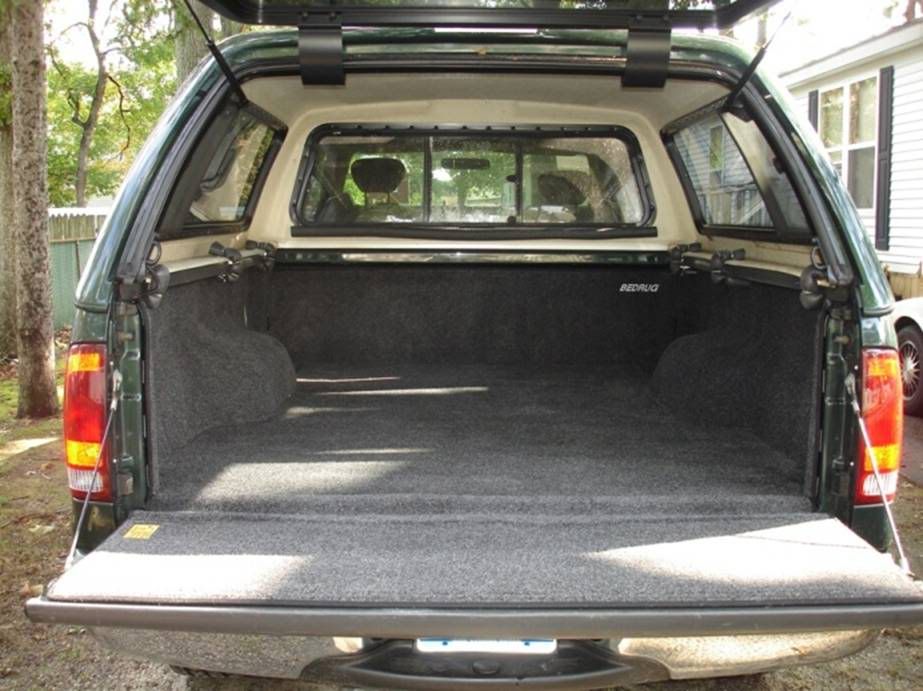
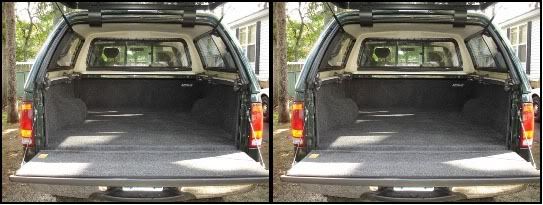
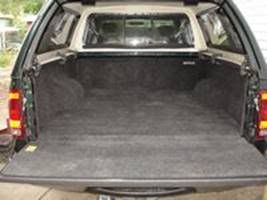
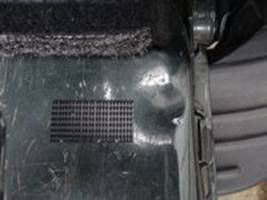
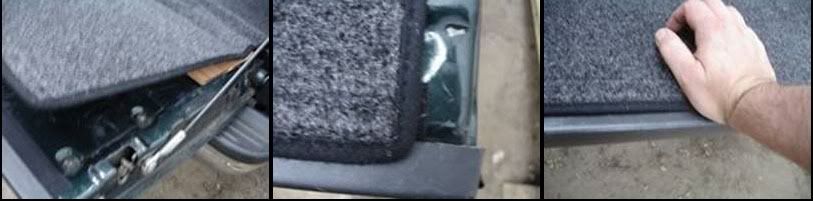
Bed portion finished!
This is a picture of the completed bed installation. Notice
the nice snug fit around the uprights. At this stage, the tailgate portion is
not affixed yet.
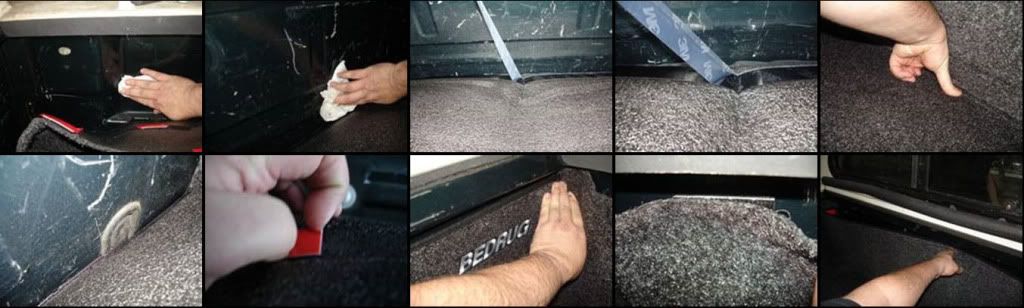
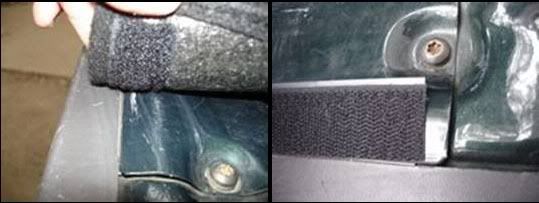
Tailgate flap installation
This was another tricky area, at least for me being a
perfectionist. I wanted the end of the flag to fit snugly against the tailgate
so that it wouldn’t catch on things being pushed into the bed, or people/kids/dog
getting up and into the bed. The first pic here shows
where I wanted the flap to line up, and where the Velcro must go to accomplish
that. The Velcro actually has to lay right at the edge of the plastic tailgate
trim. The metal of the tailgate is curved downward towards the plastic at this
point, so it was a perfect place to put the Velcro and have the rug angled down
towards the plastic trim. The second picture here shows the Velcro laid down
for positioning, but not yet glued down.
Now, having the edge of the rug wind up at this perfect
place is not easy, when you also have to apply the rest of the Velcro that
holds the rug to the tailgate. There is the long single piece of Velcro at the
edge, but there are also five short pieces that are installed further up the
tailgate. In this pic with the flap folded up, you
can see some of those short pieces and around where they will go. On the other
side of the flap, it’s obvious where the stitching is for the fabric side of
the Velcro.
First making sure the tailgate flap was again where I wanted
it to go:
I marked the tailgate at both sides with a white crayon at
the line where the short Velcro pieces will be installed.
Peel the backing off a piece of Velcro, and stick it on the
tailgate at this line, spacing them out evenly.
Once they are all down, I covered them with a piece of
hardwood floor laminate so I could get the rest of the flap installed without
it sticking to the already applied pieces of Velco.
You could use a piece of cardboard, newspaper, just about anything to keep the
Velcro from attaching to the fabric on the back of the rug flap. Apply the long
piece of Velcro to the end of the tailgate like so, folding back the backing
about an inch or so. Once the end is in the exact spot you want it like in the
third picture, hold the Velcro up, and pull the backing off as you stick down
and go:
One the Velcro is applied straight, fold the flap back and
press down, making sure you have it exactly where you want it to go. Of course,
you can pull it back up and move it as you wish.
Smooth the rug gently towards the front of the truck to get
any wrinkles out, and pull the hardwood flooring, cardboard, whatever out from
between the rug and the tailgate, and press down. The last pic
here shows the flap stuck down, and nice and taught.

INSTALLATION COMPLETE!
The job is done! Now clean up your tools and scraps and sit
back and enjoy the look of a well-fitted, padded rug that can stand up to just about
anything you can throw at it. I haven’t done anything “dirty” to it yet, but rupejosh has, including gutting fish, shoveling
dirt, pouring bleach on it, and a few other dirty jobs and it holds up like a
plastic drop-in liner. I plan on using mine to sleep on for camping, giving the
dog a nice place to ride, and maybe carrying scrap/garbage but nothing like
pouring bleach on it.
A quality product with great fit, detailed instructions, and
with a lifetime warranty, will last a long long time.
For the BedRug website, click
here: http://www.bedrug.com/
For the installation instructions, click here: http://www.bedrug.com/experience/Bedrug-Installation.pdf
The finished
product