OEM Nav, upfitter switches, rigid lights and front and rear camera install w/ LOTS of pics
#1
 01-22-2014, 10:27 PM

Join Date: Aug 2012
Location: Houston
Posts: 233
Likes: 0
Received 0 Likes
on
0 Posts
OEM Nav, upfitter switches, rigid lights and front and rear camera install w/ LOTS of pics
Ok this may be picture overloaded but hopefully it might help someone out in the future. I recently over the last couple of weeks did some upgrades to my 2012 XLT. I added a new OEM navigation with a lockpick to use the features anytime. Also installed front and rear cameras, upfitter switches, rigid dually back up lights in flood pattern and rigid D2's in the front. I'm not gonna do step by step detailed instructions and didn't take pictures of everything but here it goes.
Started off with the factory Nav. Honestly, it was for the most part plug in play and didn't require and splicing or cutting of wires.
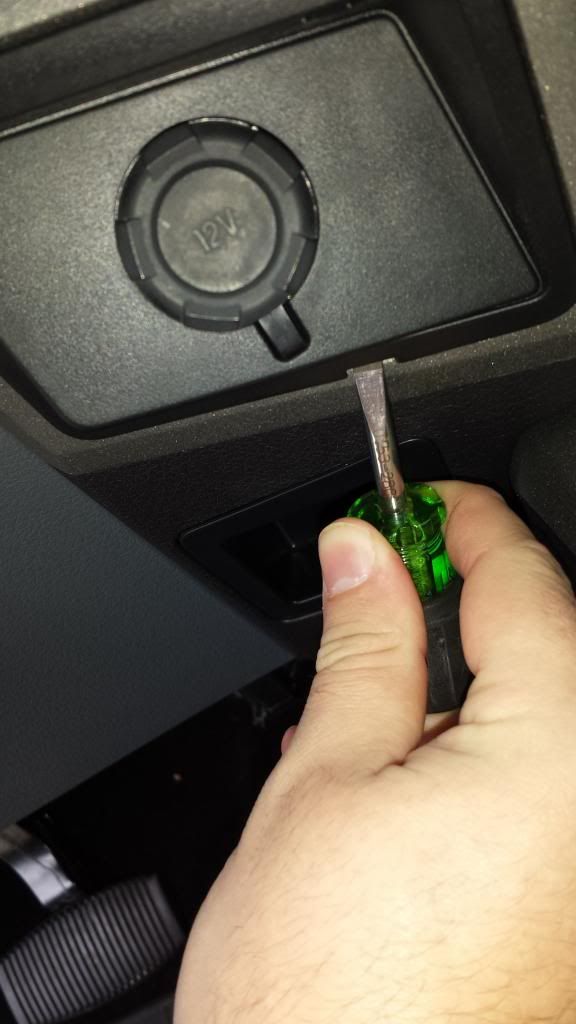
First thing was removing the center dash. After popping the 2 trim piece over the cig lighter and usb port its just 2 screws.
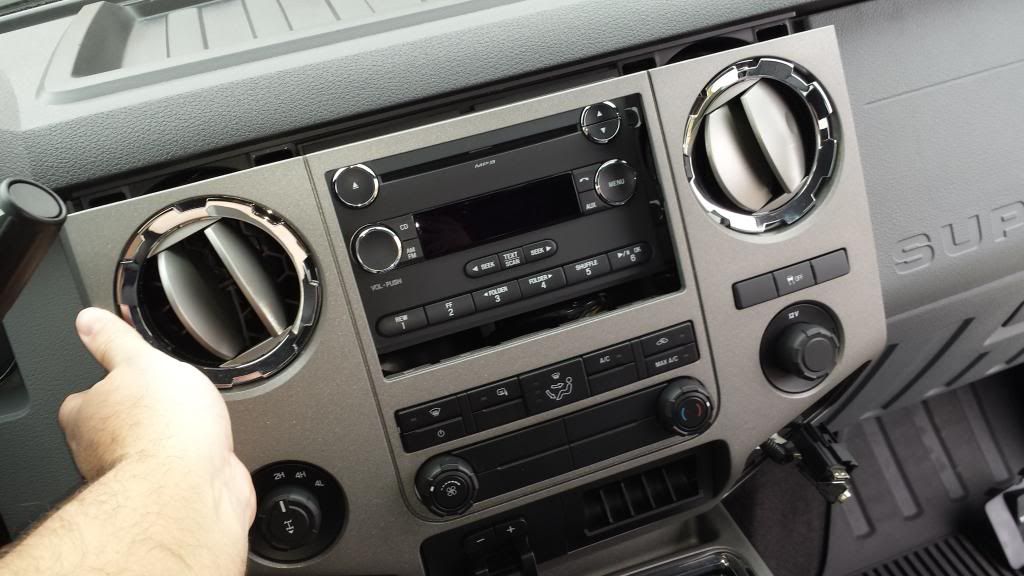
After that just pull it off until the clips release.
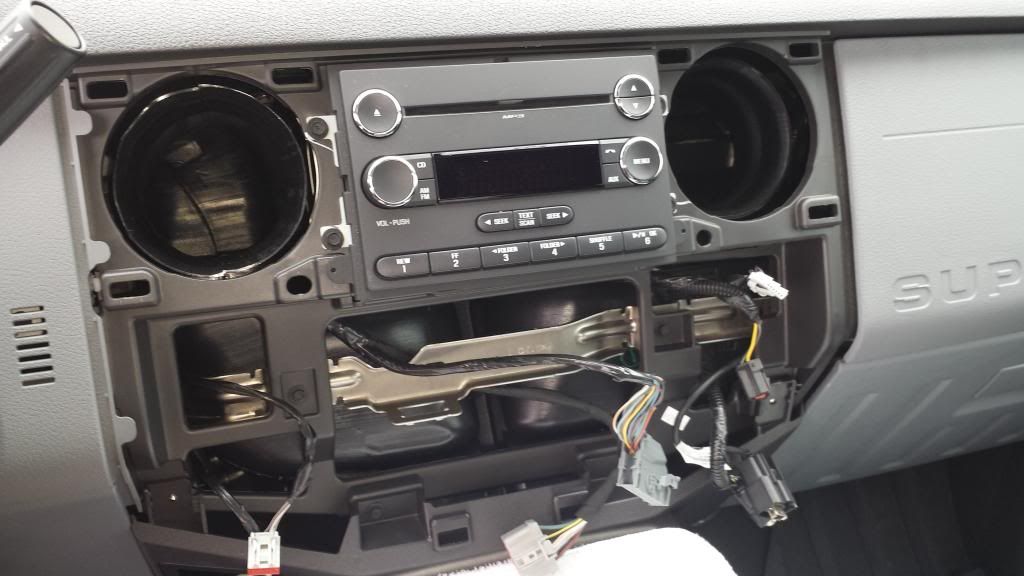
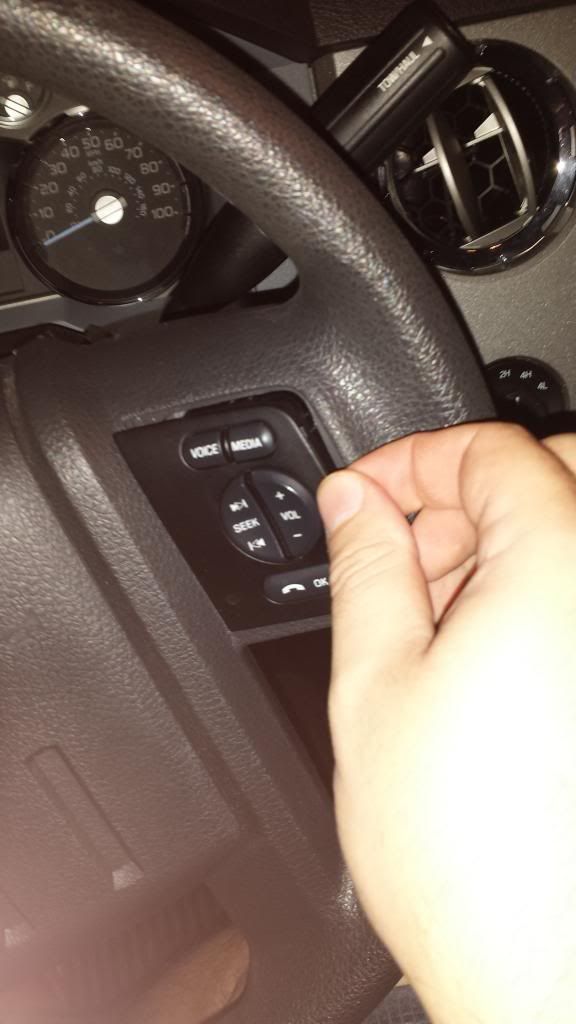
I also had to replace the steering wheel control with a new one. All you do is literally just pull the old one and and plug the new one in and press it into place.
After that it's just mounting the amp under the steering column (in my case I just zipped tied it secure since I didn't have an amp bracket), running the wires back to the radio and then hooking up the lock pick.
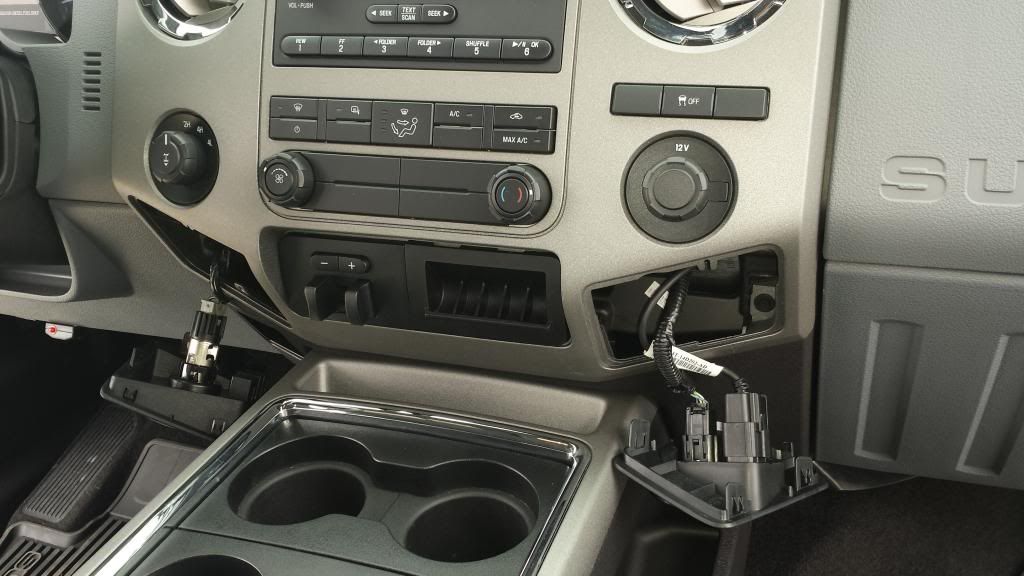
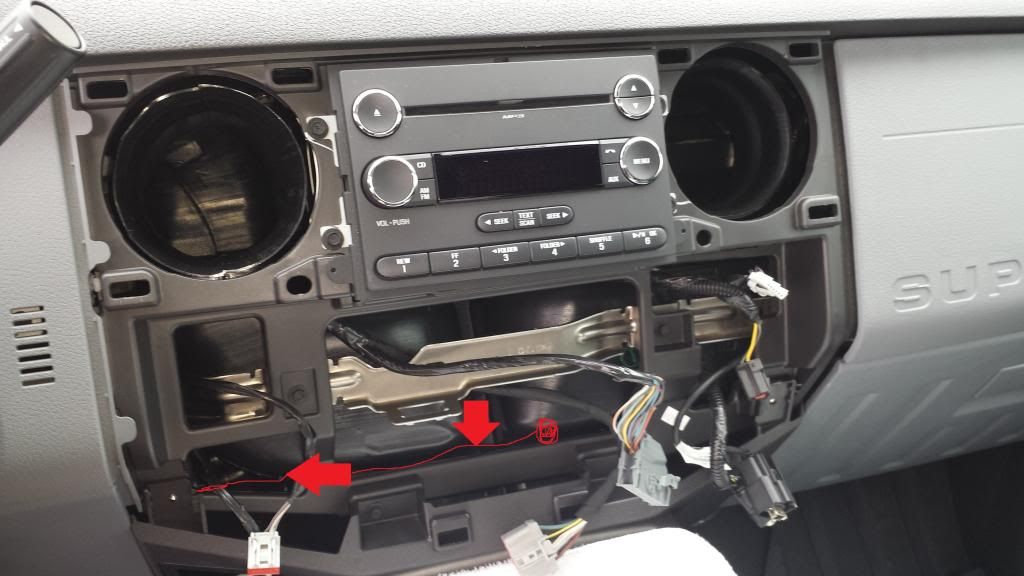
Also, since I added upfitter switches this was the best time to run the wires while the center trim was off. It was easy to fish the wires through as you can tell by my ghetto drawing on how I did it. The hardest part by adding the upfitter was what everyone runs into..plugging it into the plug way up behing the steering wheel. You have to remove the cover that's over the plug first which to me was the hardest part. After squeezing my hand around there for about 15 minutes, a few curse words and cuts it was plugged in. The upfitter switches themselves justplug into where you remove the coin tray at. I connected the ground wire for the switches underneath the steering column.
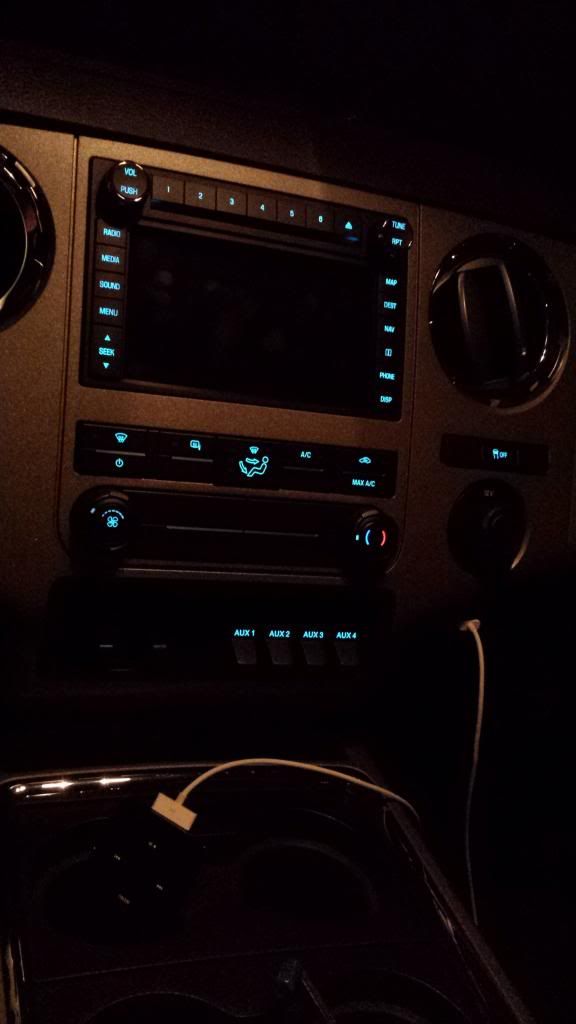
With the Nav and upfitters in
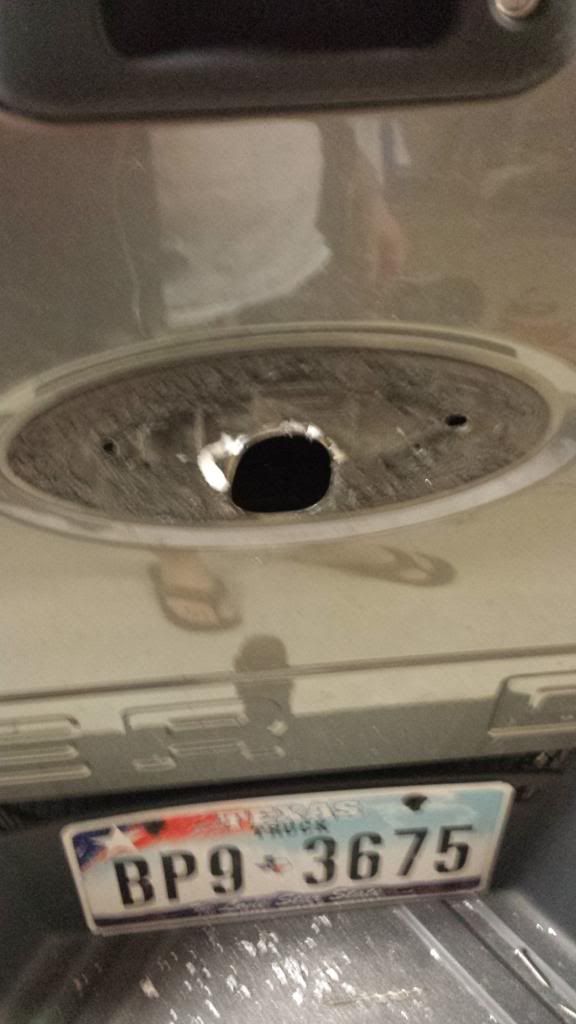
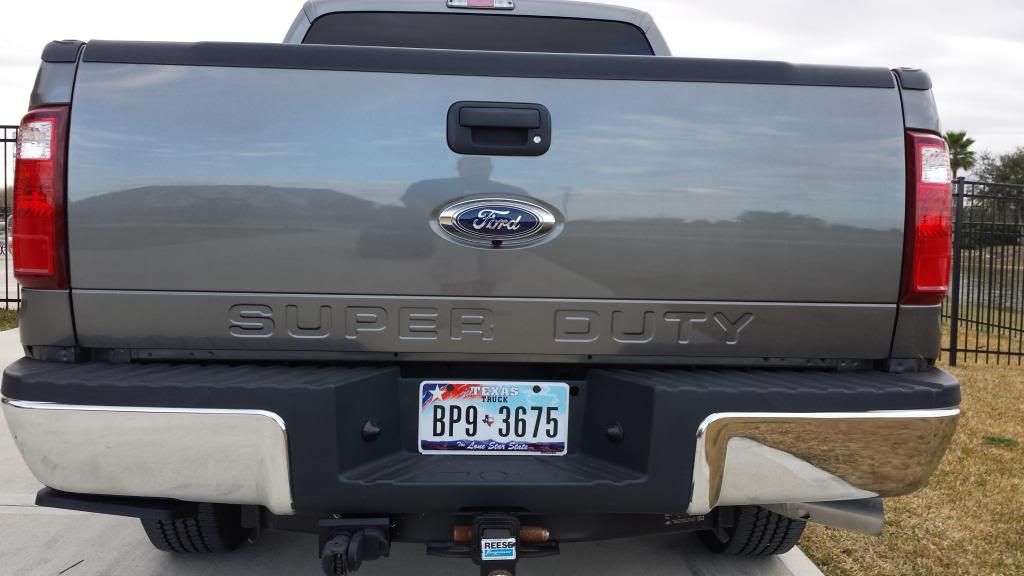
Next was adding the front and rear cameras. I purchased my cameras from camerasource.com and have been pleased with the quality. I added the rear camera first which required taking the old emblem off, drilling a 1 3/4 hole in the tailgate and a 1 inch hole through the back of the bed to pass the wire through.
Drilling and grinding the tailgate hole
Hole for the pass through wire in the back of the bed with a grommet.

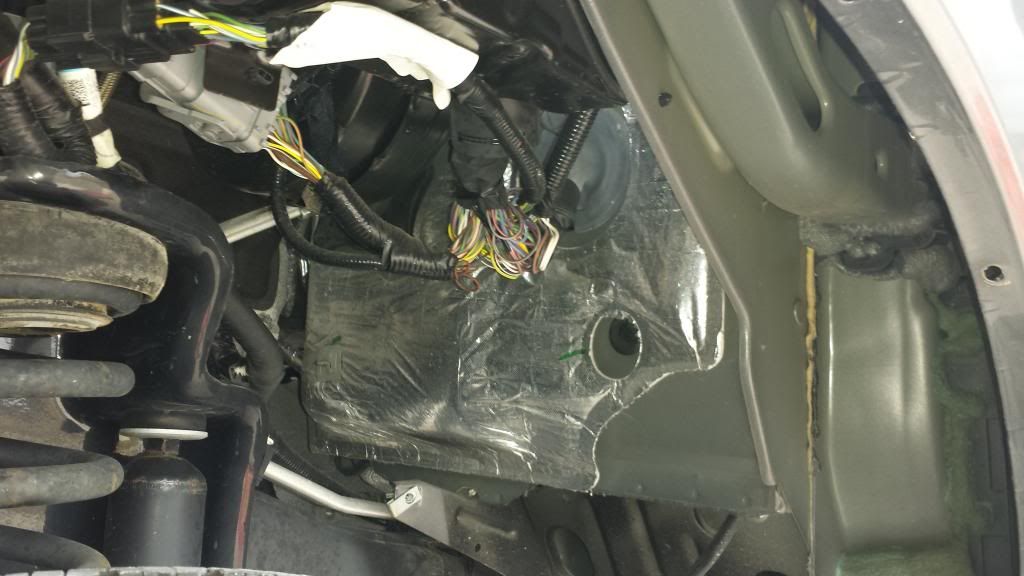
After that it was just a matter or running the wire along the frame and up to the firewall to pass through the firewall grommet. You need to remove the front wheel well cover to get access to the grommet in the firewall unless you want to make it difficult. Here you can see the grommet in the firewall.
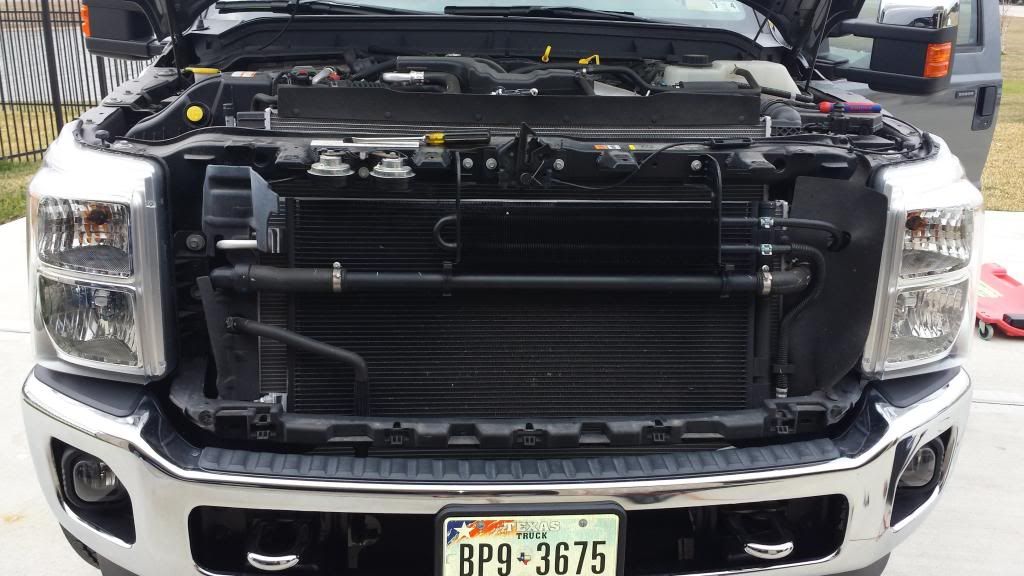
After the rear camera wires were run I installed the front camera. It was pretty easy and obviously require removal of the front grill.
Once the grill was off, you have to grind out a notch for the front camera. I thought you would have to drill a hole in the grill for the camera but per the instructions you just cut a notch and zip tie it which holds the camera and makes it surprisingly secure. Also the way the front grill is it would be a pain to try to drill a hole.
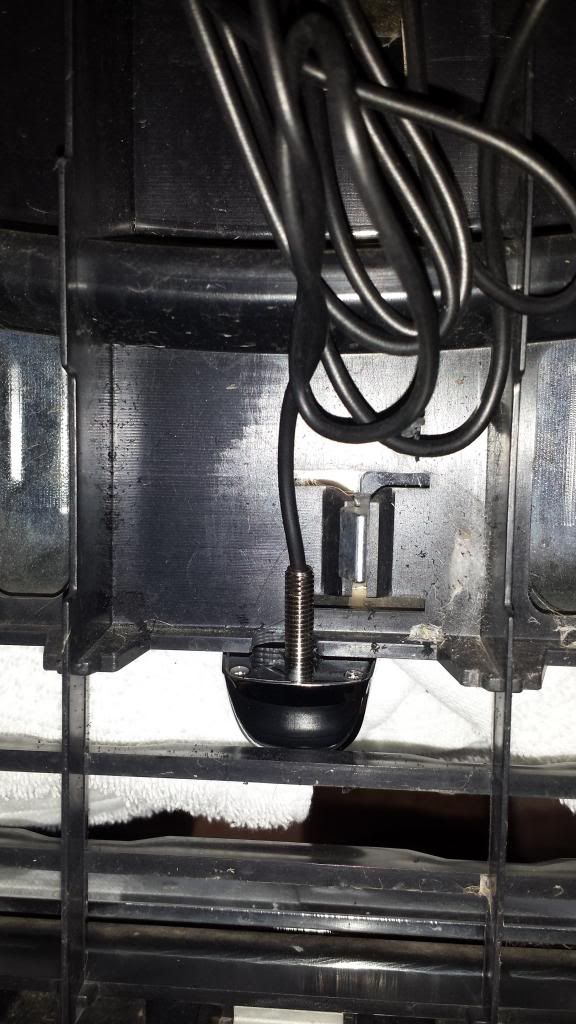
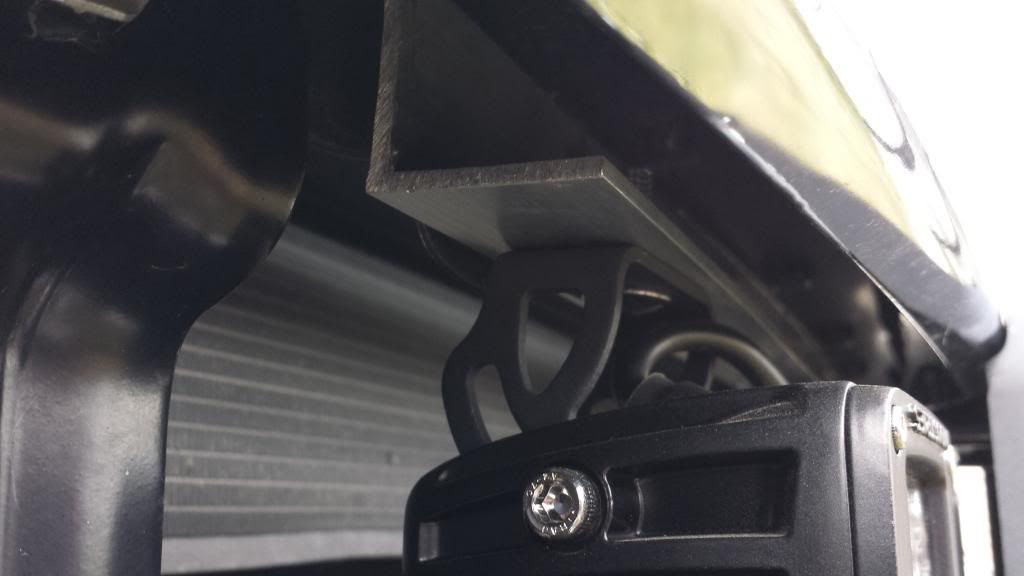
Here's the back side of the grill with the notch I cut. it's hard to explain but the way the camera is shaped and with the zip ties there's enough pressure where the camera doesn't move and gets "sucked in" to the grill.
After that I reinstalled the grill and ran the wires through the firewall.
All the camera wires zip tied together. There was about 20 extra feet of front camera wire but I didn't want to risk cutting and splicing it to make it shorter so zip tied it went.

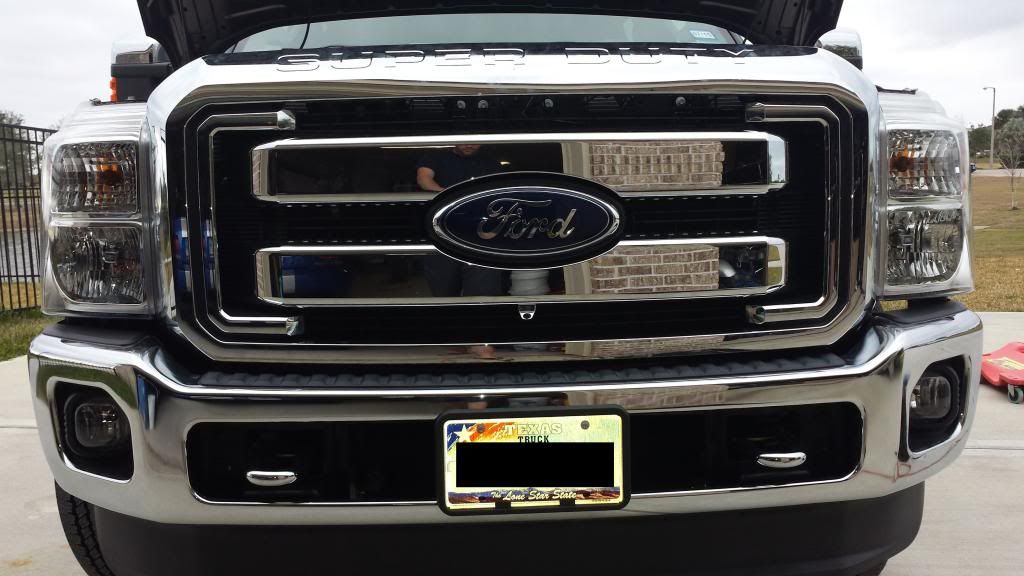
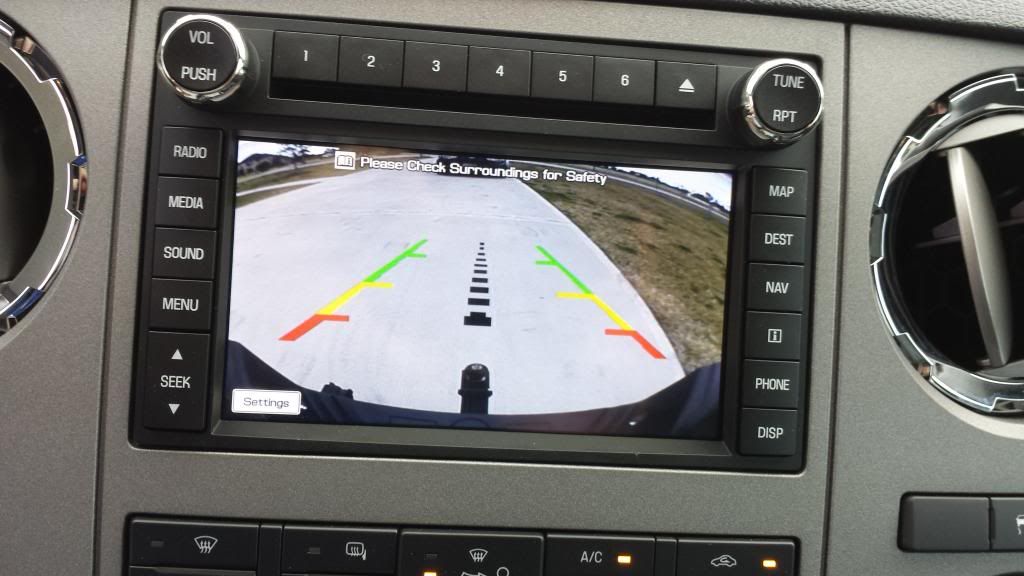
Here's some pics of the front and rear camera.
Front
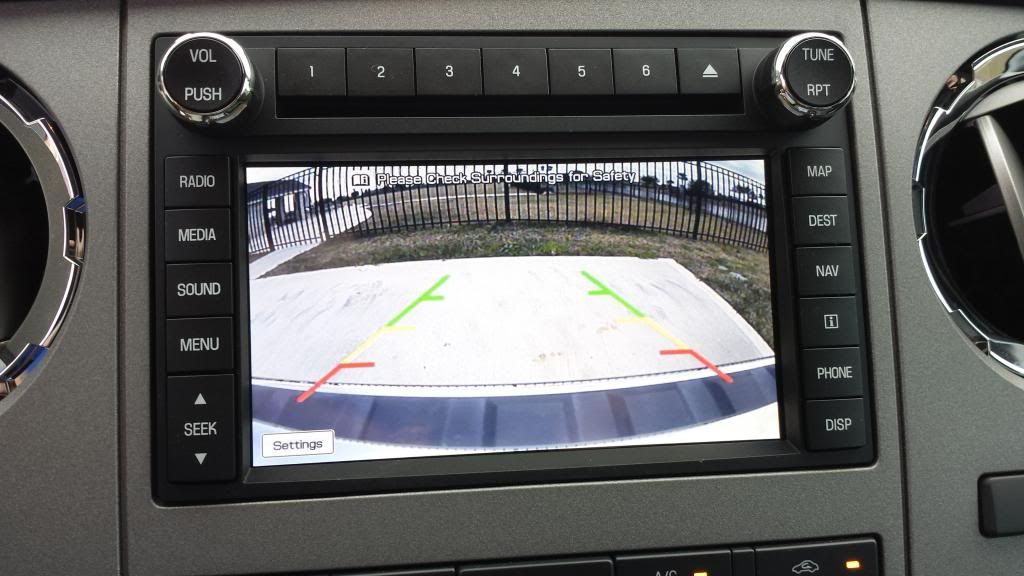
Rear
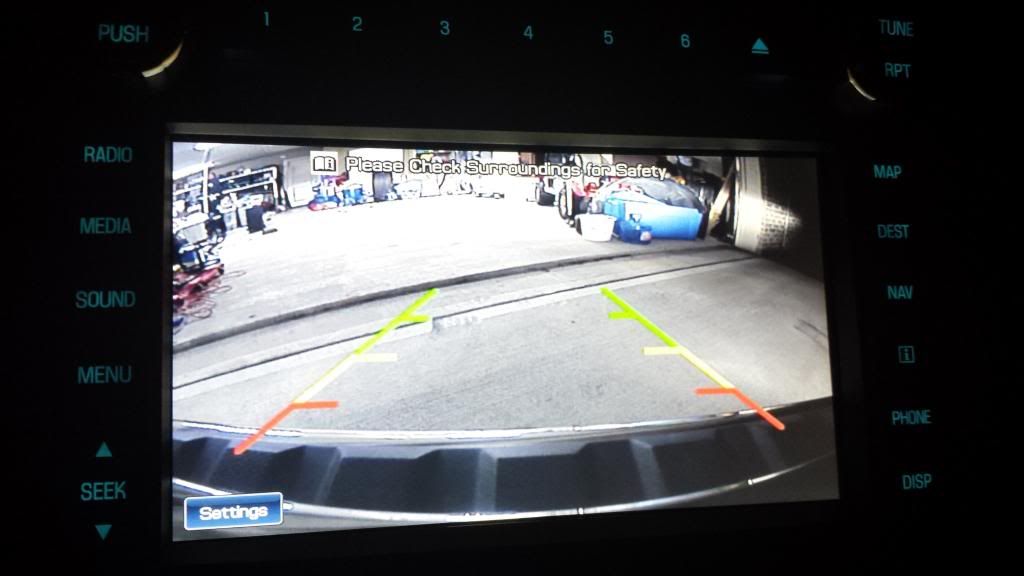
at night

Video of cameras
<iframe src="//www.youtube.com/embed/2zrBQ85O3KM?list=UU0IE7NPa__POptCvljZwLVg" allowfullscreen="" width="560" frameborder="0" height="315"></iframe>
Next was the front and rear rigid light install. Like I said in my previous post, I put two dually D2's on the front in the driving pattern and 2 dually in the spot pattern in the rear. I added plastic wire loom over the wires I got at Lowes for protection and looks. In the space in the front bumper there are already some predrilled holes. I used a 1 1/2 piece of aluminum angle iron and bolted them to the existing holes. I used one long piece of aluminum and instead of cutting it two for each hole. In my opinion it will hold better and cant ever move/rotate.
Kind of a crappy picture but here you can see the angle iron bolted in the grill with the light.
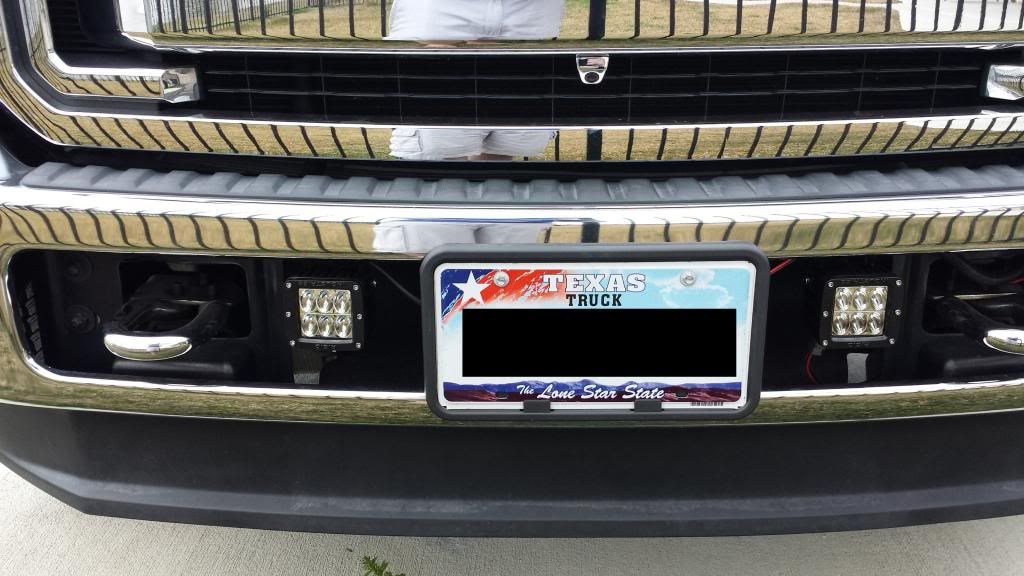
I hooked the front lights to Aux 1 and the rear to Aux 2.
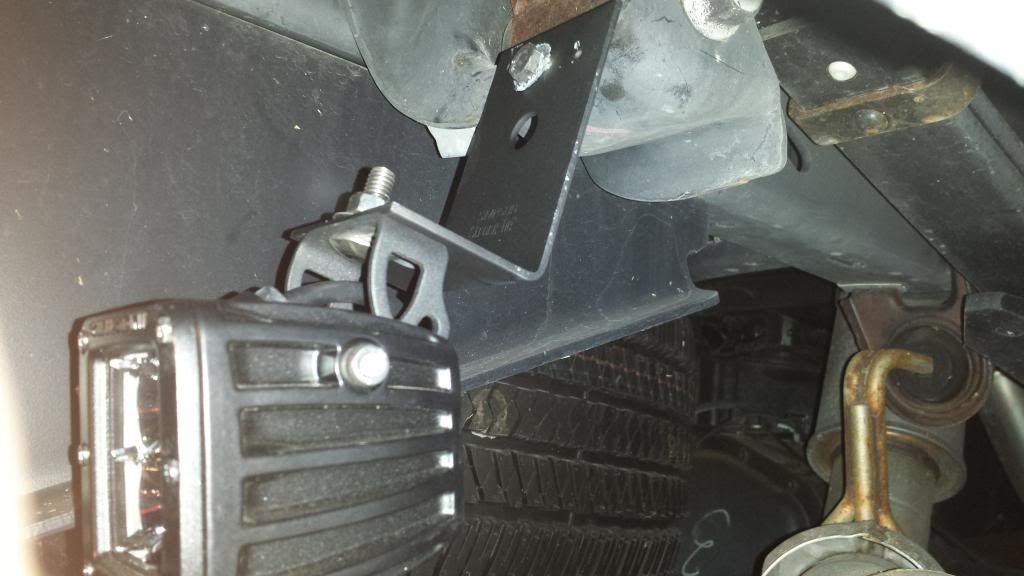
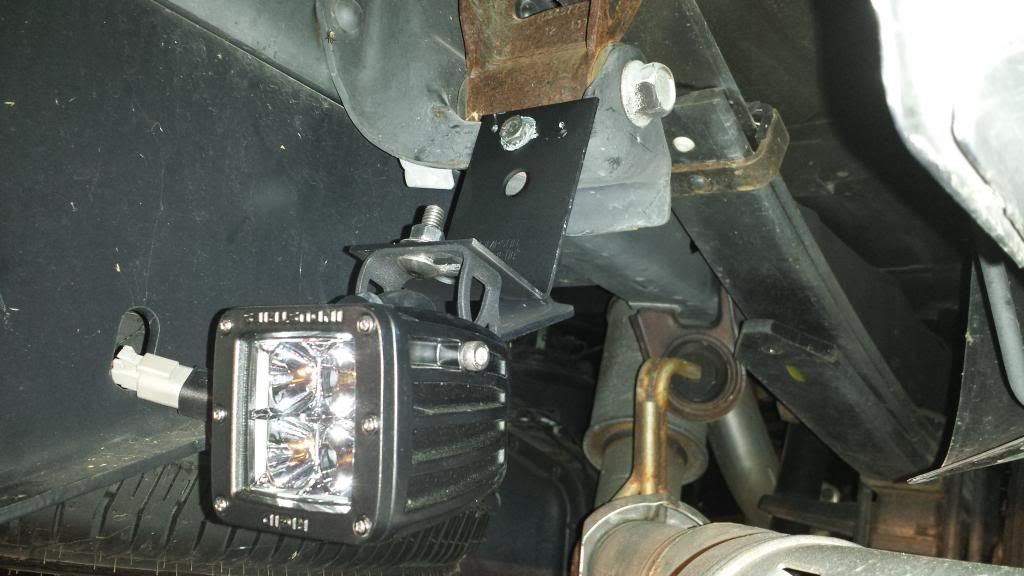
For the rear lights I used some 12 gauge steel angle brackets and primed and painted them.
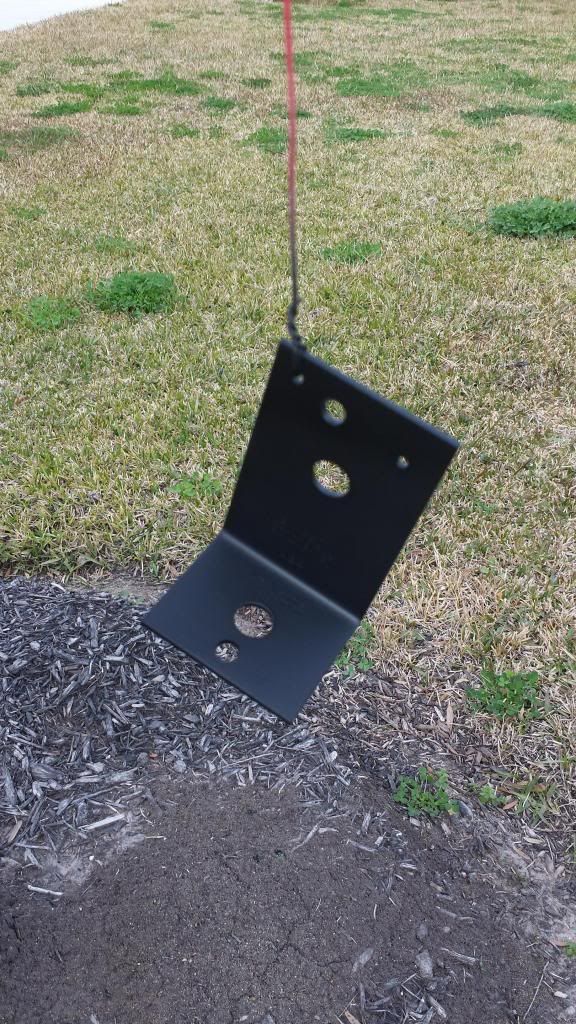
I mounted the rear lights on the rear leaf spring shackle mounts. I saw the F-150 guys do this but they can bolt the lights directly to them. I guess out suspension brackets are up higher, hence why I had to use the angle brackets to drop the lights down about 3-4 inches. I also chose this location as it makes the lights a lot less noticeable unless your bent down. They do no affect light output and still look great.
Mounted the shackle mount.
Notice you can't seethe lights from standing behind the truck.
Bent down you can see them here.

The pictures don't do it justice but the lights are VERY bright.
Rears
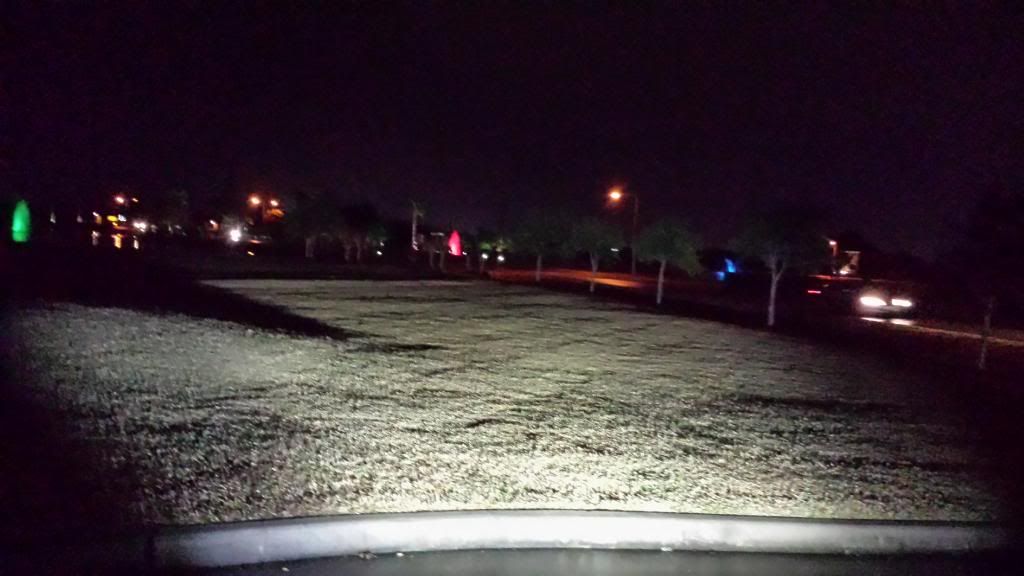
Fronts, just the D2's on and it was very dark
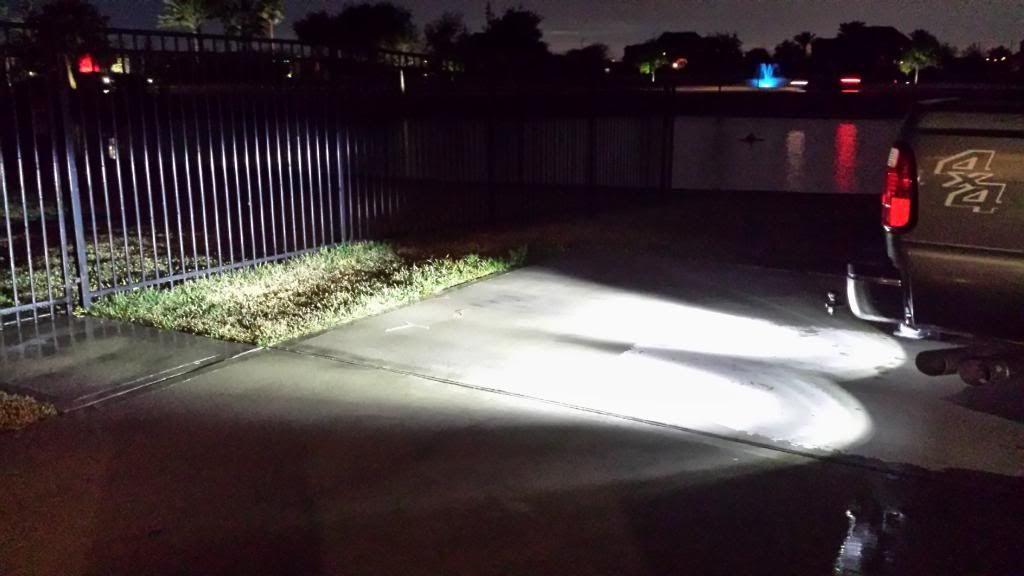
Rear dually lights
<iframe src="//www.youtube.com/embed/dXdPVvNFlTw?list=UU0IE7NPa__POptCvljZwLVg" allowfullscreen="" width="560" frameborder="0" height="315"></iframe>
So that about sums it up for the most part. Any questions let me know. Thanks.
Wes
Started off with the factory Nav. Honestly, it was for the most part plug in play and didn't require and splicing or cutting of wires.
First thing was removing the center dash. After popping the 2 trim piece over the cig lighter and usb port its just 2 screws.


After that just pull it off until the clips release.


I also had to replace the steering wheel control with a new one. All you do is literally just pull the old one and and plug the new one in and press it into place.

After that it's just mounting the amp under the steering column (in my case I just zipped tied it secure since I didn't have an amp bracket), running the wires back to the radio and then hooking up the lock pick.
Also, since I added upfitter switches this was the best time to run the wires while the center trim was off. It was easy to fish the wires through as you can tell by my ghetto drawing on how I did it. The hardest part by adding the upfitter was what everyone runs into..plugging it into the plug way up behing the steering wheel. You have to remove the cover that's over the plug first which to me was the hardest part. After squeezing my hand around there for about 15 minutes, a few curse words and cuts it was plugged in. The upfitter switches themselves justplug into where you remove the coin tray at. I connected the ground wire for the switches underneath the steering column.

With the Nav and upfitters in

Next was adding the front and rear cameras. I purchased my cameras from camerasource.com and have been pleased with the quality. I added the rear camera first which required taking the old emblem off, drilling a 1 3/4 hole in the tailgate and a 1 inch hole through the back of the bed to pass the wire through.
Drilling and grinding the tailgate hole

Hole for the pass through wire in the back of the bed with a grommet.

After that it was just a matter or running the wire along the frame and up to the firewall to pass through the firewall grommet. You need to remove the front wheel well cover to get access to the grommet in the firewall unless you want to make it difficult. Here you can see the grommet in the firewall.

After the rear camera wires were run I installed the front camera. It was pretty easy and obviously require removal of the front grill.

Once the grill was off, you have to grind out a notch for the front camera. I thought you would have to drill a hole in the grill for the camera but per the instructions you just cut a notch and zip tie it which holds the camera and makes it surprisingly secure. Also the way the front grill is it would be a pain to try to drill a hole.
Here's the back side of the grill with the notch I cut. it's hard to explain but the way the camera is shaped and with the zip ties there's enough pressure where the camera doesn't move and gets "sucked in" to the grill.

After that I reinstalled the grill and ran the wires through the firewall.
All the camera wires zip tied together. There was about 20 extra feet of front camera wire but I didn't want to risk cutting and splicing it to make it shorter so zip tied it went.


Here's some pics of the front and rear camera.
Front


Rear

at night

Video of cameras
<iframe src="//www.youtube.com/embed/2zrBQ85O3KM?list=UU0IE7NPa__POptCvljZwLVg" allowfullscreen="" width="560" frameborder="0" height="315"></iframe>
Next was the front and rear rigid light install. Like I said in my previous post, I put two dually D2's on the front in the driving pattern and 2 dually in the spot pattern in the rear. I added plastic wire loom over the wires I got at Lowes for protection and looks. In the space in the front bumper there are already some predrilled holes. I used a 1 1/2 piece of aluminum angle iron and bolted them to the existing holes. I used one long piece of aluminum and instead of cutting it two for each hole. In my opinion it will hold better and cant ever move/rotate.
Kind of a crappy picture but here you can see the angle iron bolted in the grill with the light.


I hooked the front lights to Aux 1 and the rear to Aux 2.
For the rear lights I used some 12 gauge steel angle brackets and primed and painted them.

I mounted the rear lights on the rear leaf spring shackle mounts. I saw the F-150 guys do this but they can bolt the lights directly to them. I guess out suspension brackets are up higher, hence why I had to use the angle brackets to drop the lights down about 3-4 inches. I also chose this location as it makes the lights a lot less noticeable unless your bent down. They do no affect light output and still look great.
Mounted the shackle mount.


Notice you can't seethe lights from standing behind the truck.

Bent down you can see them here.

The pictures don't do it justice but the lights are VERY bright.
Rears

Fronts, just the D2's on and it was very dark

Rear dually lights
<iframe src="//www.youtube.com/embed/dXdPVvNFlTw?list=UU0IE7NPa__POptCvljZwLVg" allowfullscreen="" width="560" frameborder="0" height="315"></iframe>
So that about sums it up for the most part. Any questions let me know. Thanks.
Wes
#2
01-22-2014, 11:04 PM
GREAT UPGRADES MAN! Dude you should really grab a dual zone climate control module and add to the looks of your truck brother. I just did a video and I was wondering, since you took such good pictures mind if I use them for the write up?  Also, I really like your nav screen, how much did it run you if you don't mind me asking?
Also, I really like your nav screen, how much did it run you if you don't mind me asking?
#3
01-22-2014, 11:20 PM
Join Date: Aug 2012
Location: Houston
Posts: 233
Likes: 0
Received 0 Likes
on
0 Posts
GREAT UPGRADES MAN! Dude you should really grab a dual zone climate control module and add to the looks of your truck brother. I just did a video and I was wondering, since you took such good pictures mind if I use them for the write up? Also, I really like your nav screen, how much did it run you if you don't mind me asking?
Also, I really like your nav screen, how much did it run you if you don't mind me asking?Nav with amp and all parts $1795 on ebay. You can get this cheaper by parting it out yourself but I was lazy and wanted everything all together.
Front and rear camera with lock pick $700ish
Rigid lights $485 on amazon (found the best price for the D2's there)
Use whatever you want.
#4
01-22-2014, 11:24 PM

Join Date: Jan 2006
Location: North Central Washington
Posts: 17,674
Received 3,568 Likes
on
1,426 Posts
#5
01-22-2014, 11:48 PM
Join Date: Aug 2012
Location: Houston
Posts: 233
Likes: 0
Received 0 Likes
on
0 Posts
There are manual and auto options. For instance right now my front camera comes on automatically when I put it in drive then goes away once the truck hits a little over 5MPH. You can manually turn it on by holding down the phone button on the steering wheel control. Unfortunately I still have to get my steering wheel button programmed for my truck because for some reason the phone button doesn't work. What I do now it just double tap the on/off button on the radio it gives me the options for the cameras, Nav input while driving etc.
Here's a quick video I just took. Keep in mind normally you would bring up the menu with the phone button then select what you want on the screen.
<iframe width="560" height="315" src="//www.youtube.com/embed/B0kTjtSx3ik" frameborder="0" allowfullscreen></iframe>
#6
01-23-2014, 12:00 AM
#7
01-23-2014, 12:15 AM
Join Date: Aug 2012
Location: Houston
Posts: 233
Likes: 0
Received 0 Likes
on
0 Posts
Not too impressed so far. Mine loses signal more than it finds it. I'm not sure if it's a possible antenna issue or not. The antenna I have doesn't appear to be an OEM one. I may replace it and see if it helps but at the moment I'll leave it be.
Trending Topics
#8
01-23-2014, 06:11 AM
FTE Legend
Join Date: Mar 2009
Location: North Bay Ont Canada
Posts: 161,148
Received 5,160 Likes
on
1,689 Posts
#9
01-23-2014, 07:00 AM


#12
01-23-2014, 10:58 AM
Elder User
Join Date: Sep 2013
Location: On a Lake in Idaho
Posts: 848
Likes: 0
Received 0 Likes
on
0 Posts
Excellent job Wes, thanks for the share!
Little different idea on the rear light mount than I've seen, but I like it.
I have the rear lights ready to go, just haven't taken the time to do it, thanks for the motivation. I missed it: Did you run backups to switch or to reverse? What was the front camera of choice?
Front camera is on my list this year, would be a handy addition for sure.
#13
01-23-2014, 11:13 AM
More Turbo
#14
01-23-2014, 11:43 AM
Join Date: Aug 2012
Location: Houston
Posts: 233
Likes: 0
Received 0 Likes
on
0 Posts
Excellent job Wes, thanks for the share!
Little different idea on the rear light mount than I've seen, but I like it.
I have the rear lights ready to go, just haven't taken the time to do it, thanks for the motivation. I missed it: Did you run backups to switch or to reverse? What was the front camera of choice?
Front camera is on my list this year, would be a handy addition for sure.
Little different idea on the rear light mount than I've seen, but I like it.
I have the rear lights ready to go, just haven't taken the time to do it, thanks for the motivation. I missed it: Did you run backups to switch or to reverse? What was the front camera of choice?
Front camera is on my list this year, would be a handy addition for sure.
#15
01-23-2014, 07:23 PM