


1966 F100 Shortbed Styleside Full Stock Resto Build Thread
Cargo Master


Joined: Oct 2011
Posts: 2,219
Likes: 648
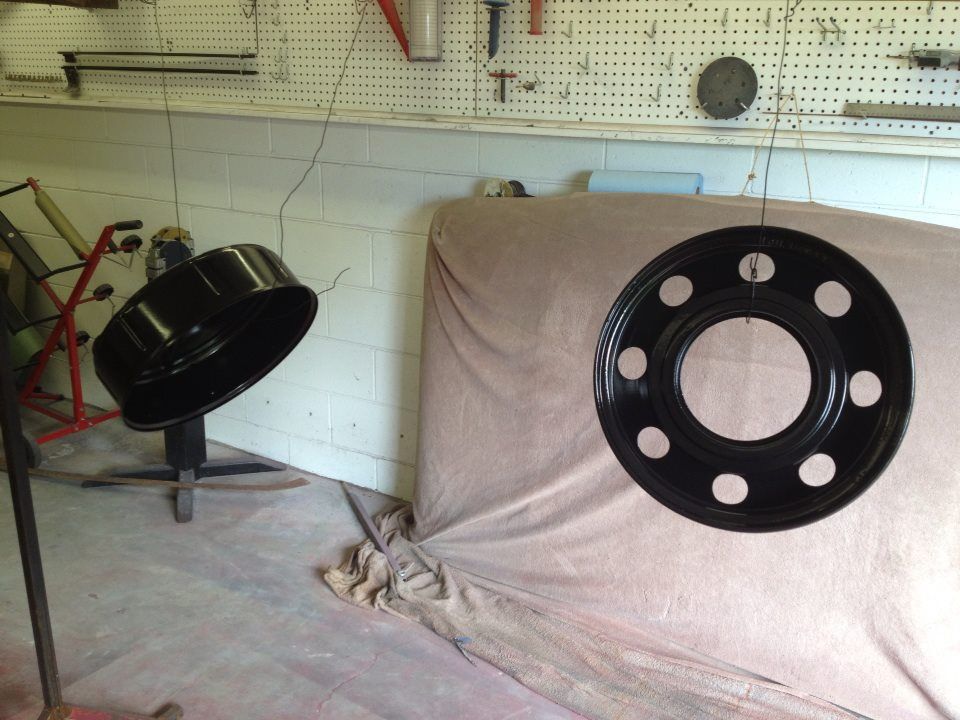
Thanks for that info, we have been debating on what color to paint the wheels- either Sahara Beige or Wimbledon White. We're leaning towards Sahara Beige since it will have thin whitewall tires, and the Beige would add a little more color and contrast. The owner had painted the wheel edges red at some point, as seen in the old picture that the owner gave us.
Thread Starter
|
Laughing Gas

Joined: Mar 2013
Posts: 771
Likes: 309
Unless a '66 F 100 had a special order paint job, wheels were always painted Wimbledon White. This color is not a bright white or gloss white, it is a off white that seems to have a little cream color already in it that will have a great contrast with your beige truck.
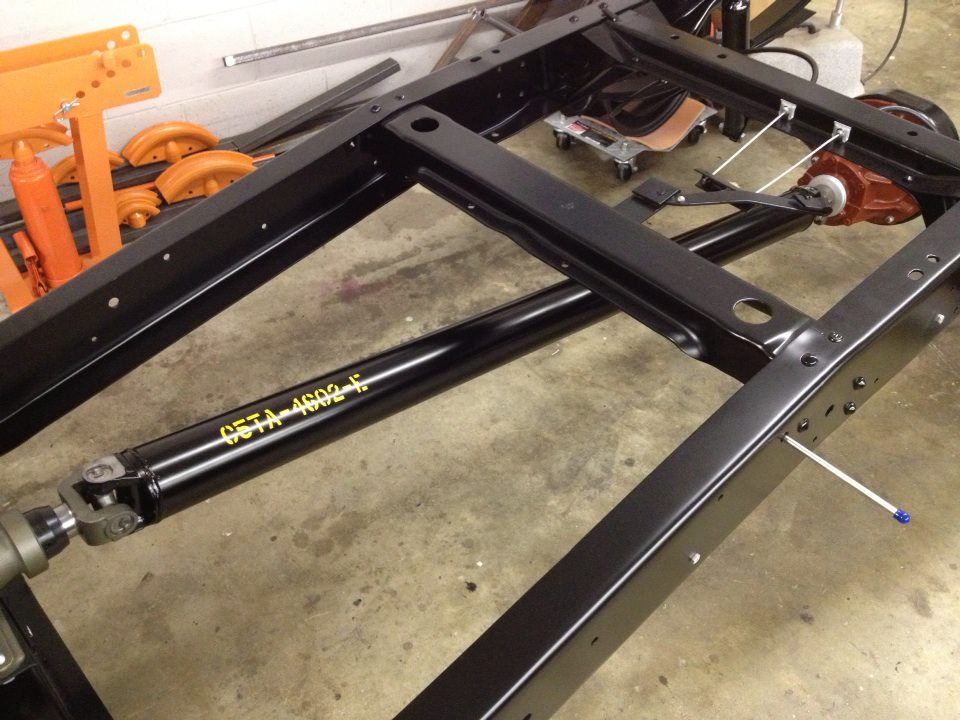
We have the engine/trans back in the frame.


Thread Starter
|
Laughing Gas
Joined: Mar 2013
Posts: 771
Likes: 309
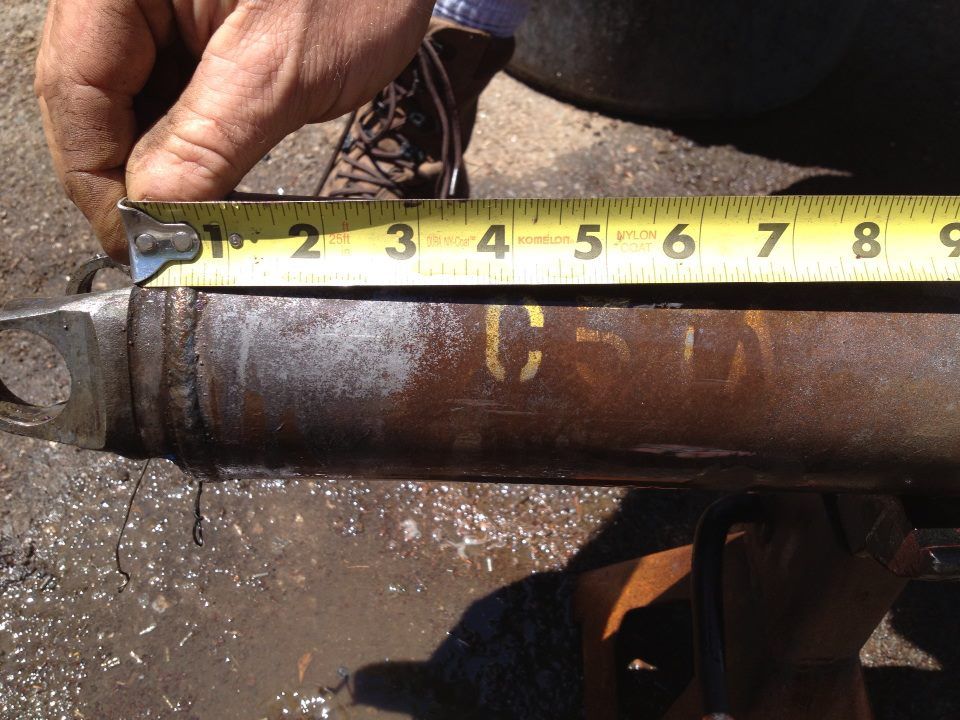
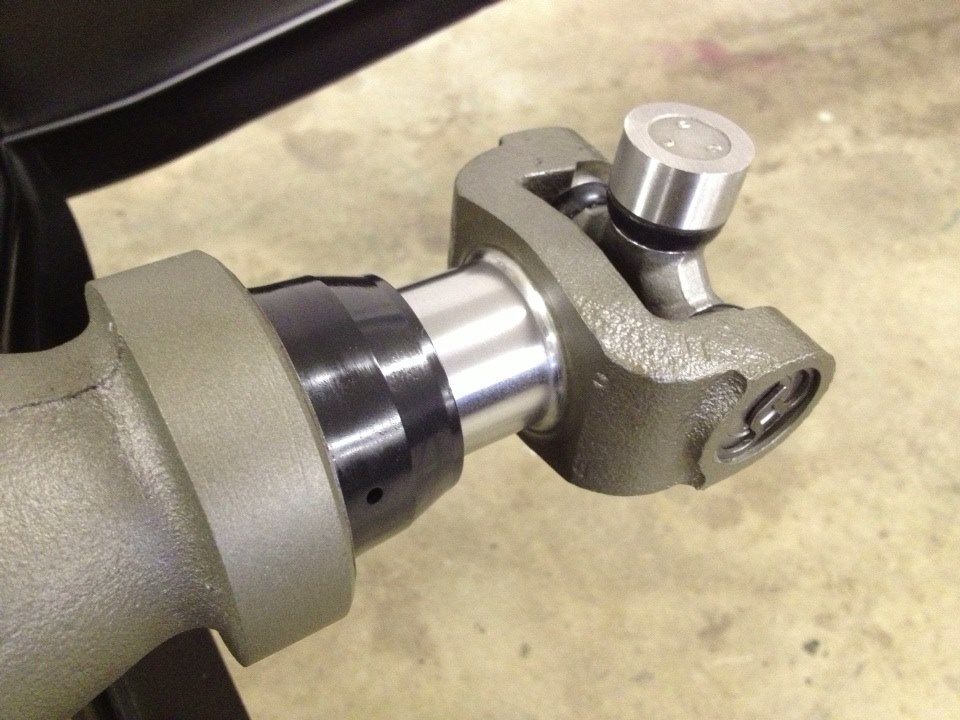
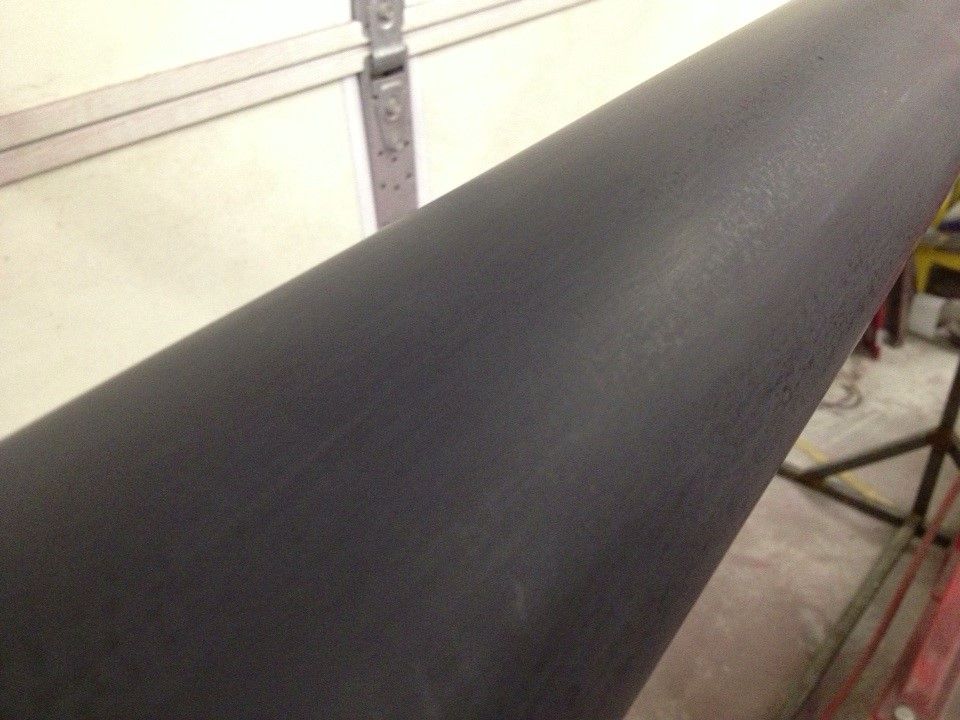
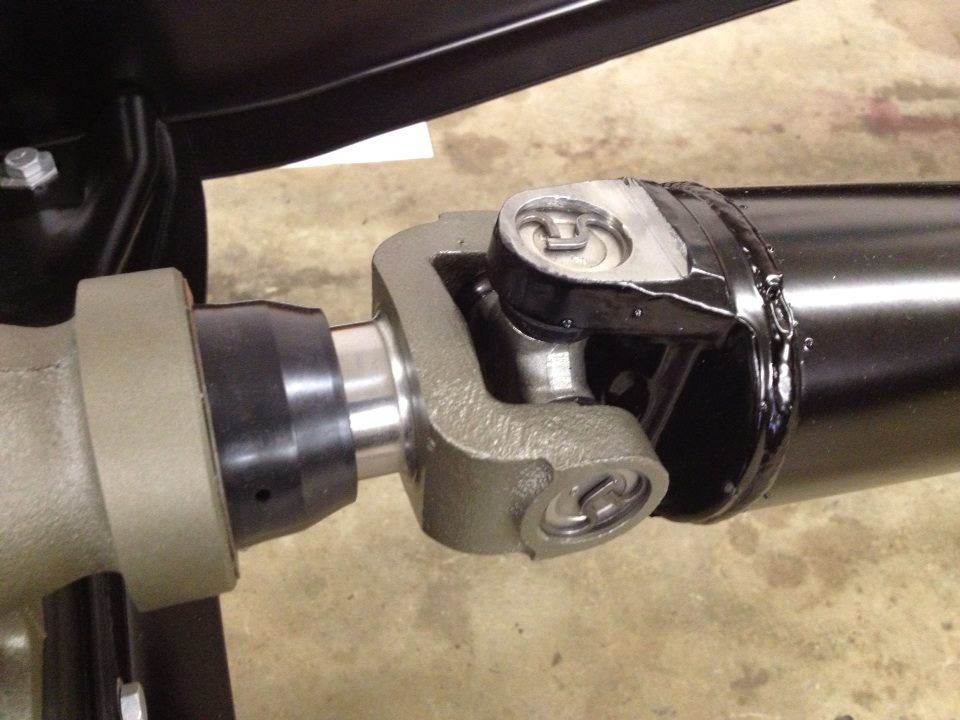
Found numbers stamped on the driveshaft so we'll replicate them. Also detailed the yoke and installed it. Wetsanded the shaft and put it on the buffer before masking and painting it a cast color.


Cargo Master
Joined: Oct 2011
Posts: 2,219
Likes: 648
Your welcome! Tag is mounted to bolt that holds coil down. Nice progress, your thread is well on its way to be the ultimate stock '66 restoration reference thread.

Thread Starter
|
Laughing Gas
Joined: Mar 2013
Posts: 771
Likes: 309
Thanks tripleframe, we'll get it installed in the right spot.
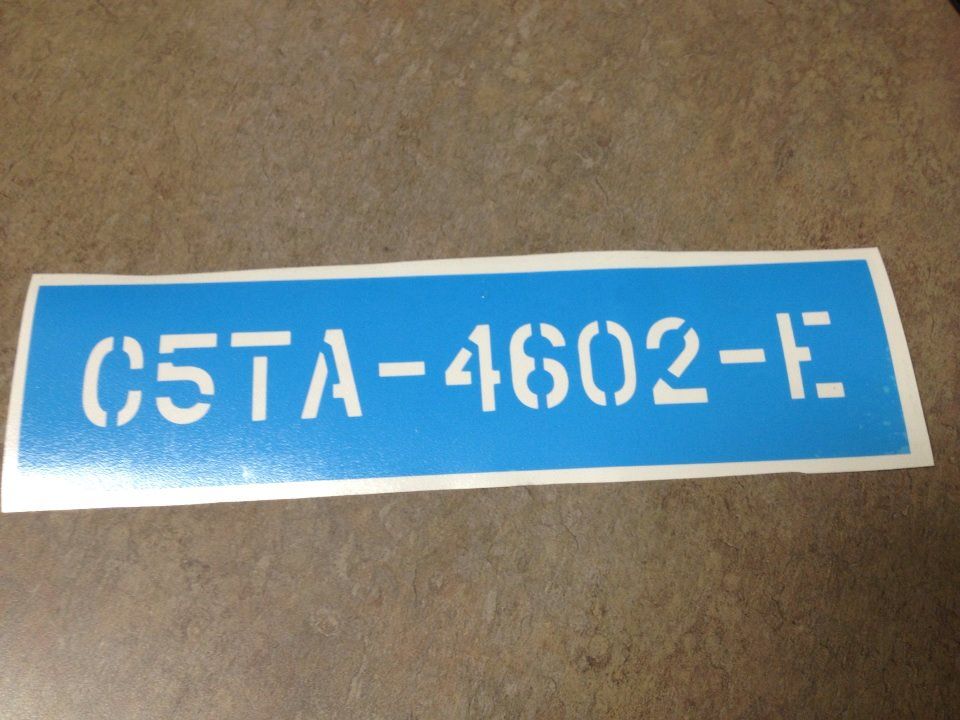
Had a local decal shop make a vinyl mask for the driveshaft stamps.
Primed the driveshaft with epoxy and nibbed it with 500 grit to prep it for paint.
Had a local decal shop make a vinyl mask for the driveshaft stamps.

Primed the driveshaft with epoxy and nibbed it with 500 grit to prep it for paint.

New User
Joined: Apr 2013
Posts: 7
Likes: 0
Awesome!! Nice job! How difficult is it to get the leaf springs back in place on the front suspension? Someone told me those springs are pressed by a machine to get them in place? I'm busy sandblasting my '66's chassis, would be realy pleased if it turns out have as good as yours!
New User
Joined: Apr 2013
Posts: 7
Likes: 0
FTE Stories
Ford Trucks for Ford Truck Enthusiasts

Top 10 Fords at 2026 Carlisle Ford Nationals
Joe Kucinski
3 Best / 3 Worst Parts of Modern Ford Ownership
Brett Foote
10 Amazing Upgrades That Solve Common Ford Truck Owner Headaches
Pouria Savadkouei
Every 2026 Ford Engine Explained
Brett Foote
10 Ugly Ford Trucks That We Still Kinda Love
Joe Kucinski
10 Things Every Truck Owner NEEDS (2026 Edition)
Michael S. Palmer
Rezvani's Latest Post-Apocalyptic Monster Is a Ford F-150 Raptor Underneath
Verdad Gallardo
Top 10 Most Expensive Ford Trucks Ever Sold on Bring a Trailer
Joe Kucinski
2027 Ford Super Duty Buyer's Guide (Every Model, Engine, & Package)
Brett FooteThread Starter
|
Laughing Gas
Joined: Mar 2013
Posts: 771
Likes: 309
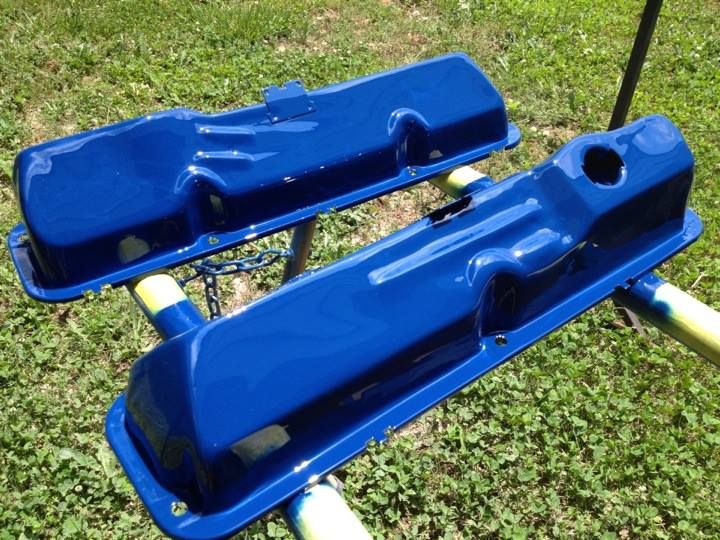
We blasted the valve covers, then I shot them with DTM high build to fill the minor rust pits, wetsanded them smooth, then sprayed three coats of urethane single stage.
Driveshaft is installed with detailed U-joints.
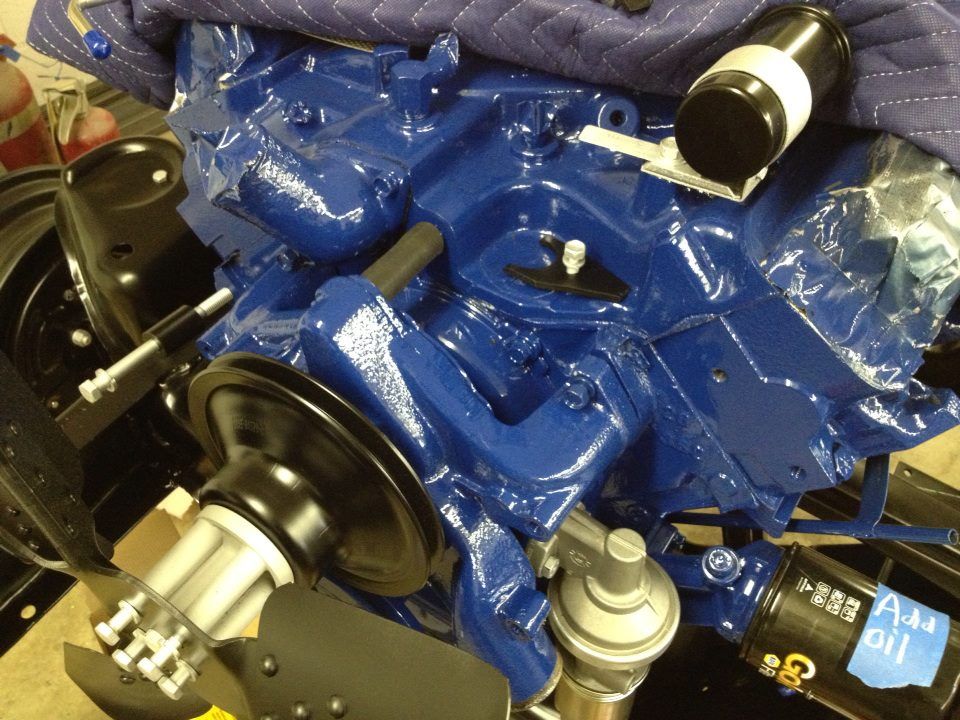
Started painting and installing some of the engine parts. Waiting on the bypass hose clamps, alternator, distributor, flanged manifold bolts, and starter to come in so we can finish it up. Also need to find a carburetor.

Driveshaft is installed with detailed U-joints.


Started painting and installing some of the engine parts. Waiting on the bypass hose clamps, alternator, distributor, flanged manifold bolts, and starter to come in so we can finish it up. Also need to find a carburetor.


New User
Joined: Jul 2007
Posts: 14
Likes: 0
From: Hannover
 really crazy / great job
 Like following such kind of restauration threads. I also try to restore my F100 like original and rework every original part if possible before buying a spare part.
 Greetings from Germany
Carsten
Thread Starter
|
Laughing Gas
Joined: Mar 2013
Posts: 771
Likes: 309
Thanks Carsten!
Thread Starter
|
Laughing Gas
Joined: Mar 2013
Posts: 771
Likes: 309
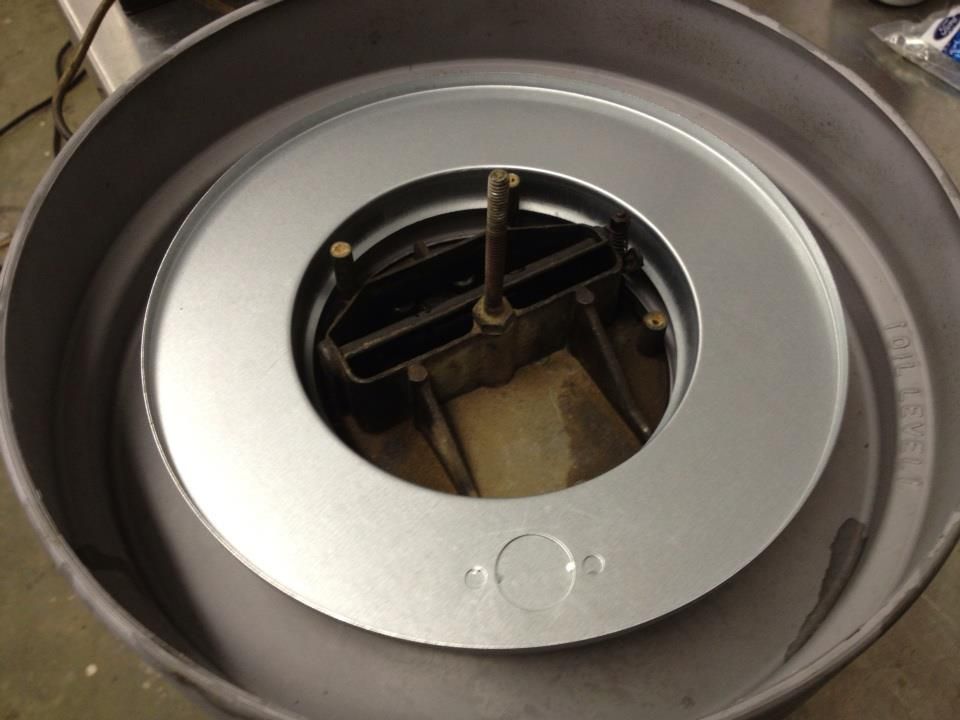
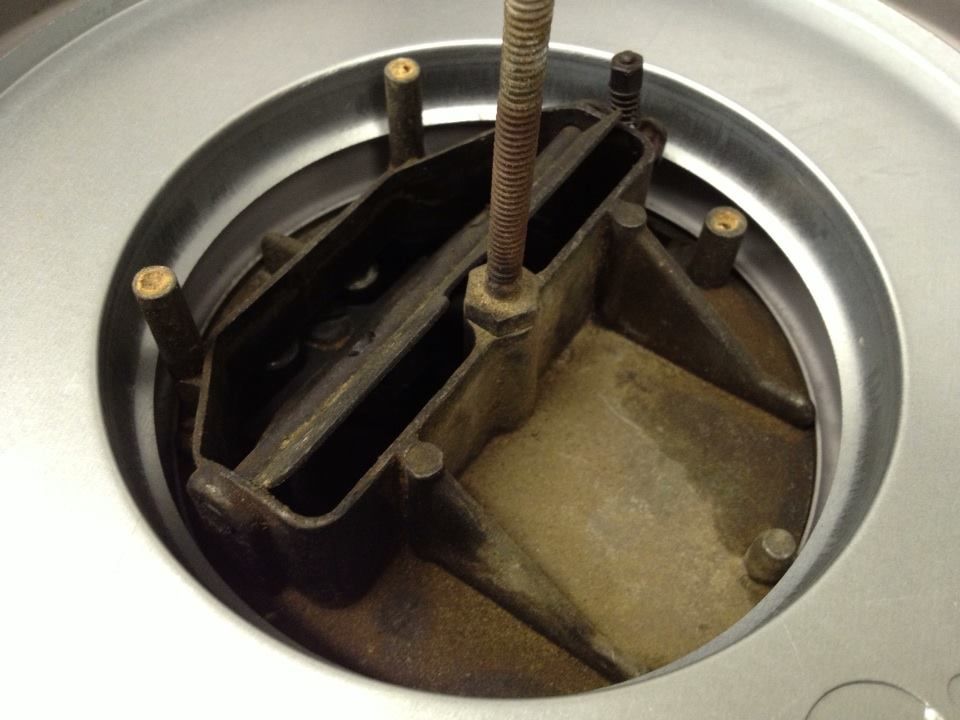
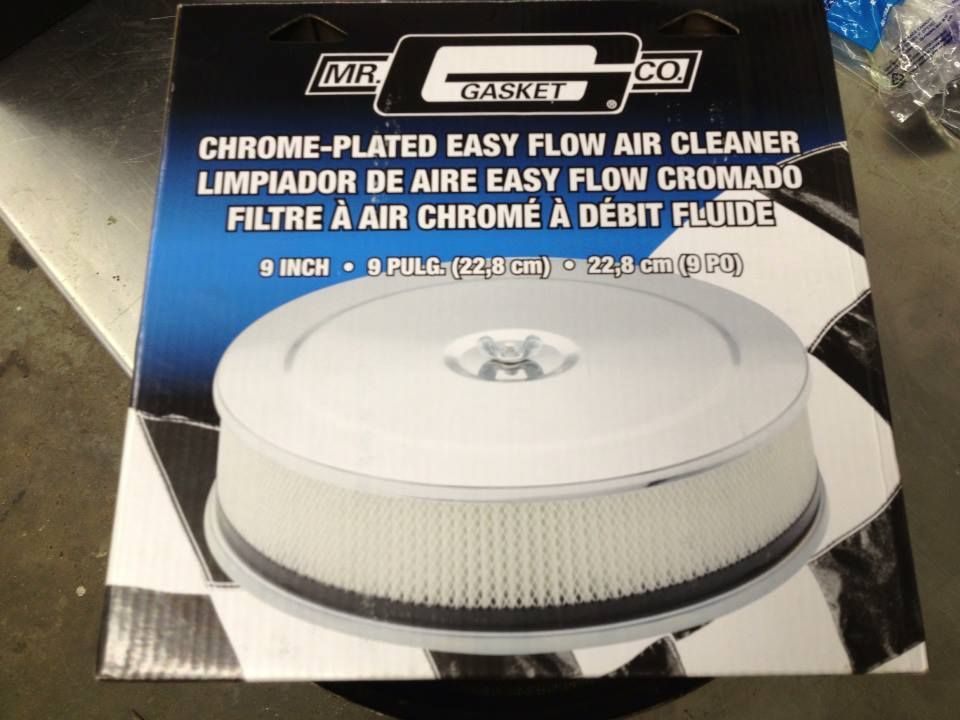
Just converted the oil bath on the '66 to a paper filter using a universal 9" round Mr Gasket air cleaner. The height is perfect to keep the outer lid in the right position. No need to fabricate or weld in upper/lower plates to seal the filter or hunt around for the right filter. The original fiber filter was falling apart so we didn't want any of it getting it in the engine. Also didn't want it backfiring and puking oil all over the detailed engine!
Uncrimped the inner flange and cut the "spokes" around the edges to remove the old filter material that was disintegrating.
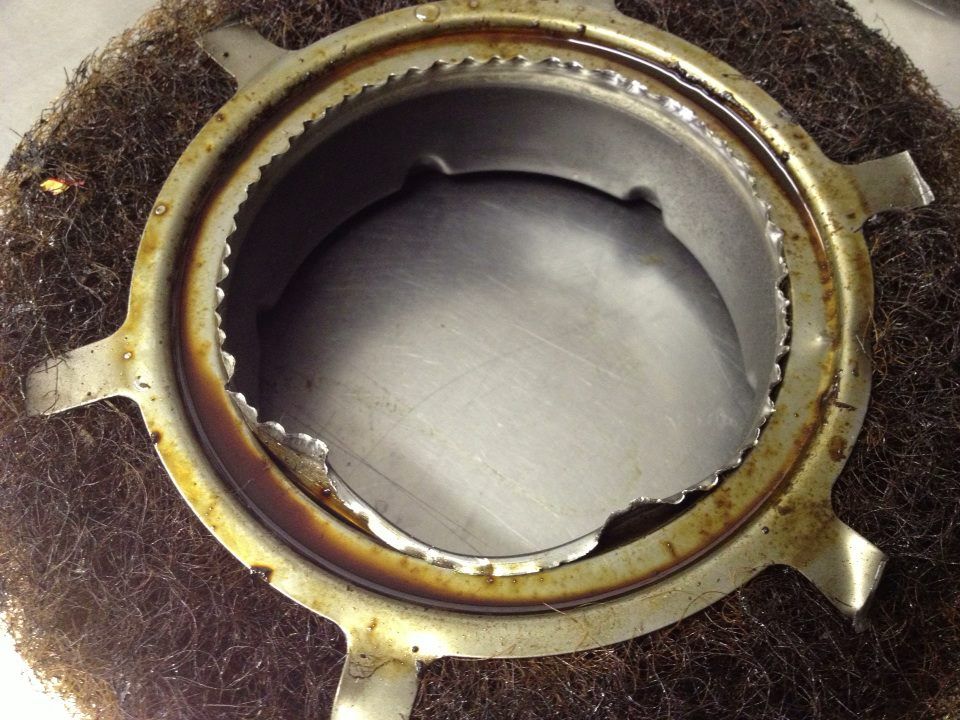
I still need to remove the inner ring on the original lid for more filter clearance.
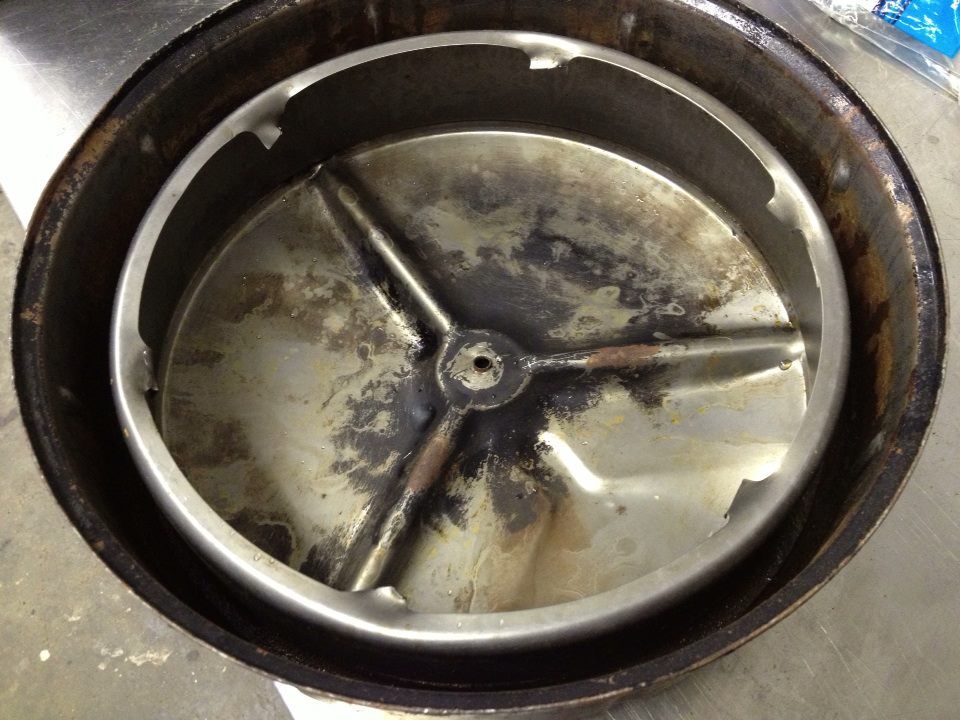
The new air filter base fits perfectly over the original base. I will drill ~1" holes around the perimeter of the original base for easier air intake.
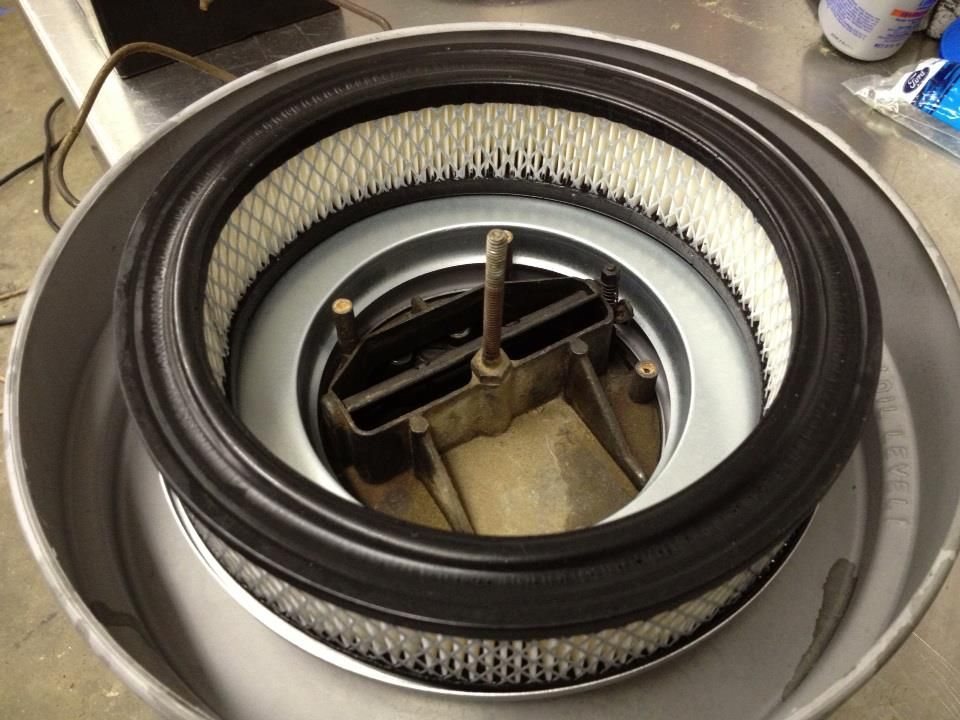
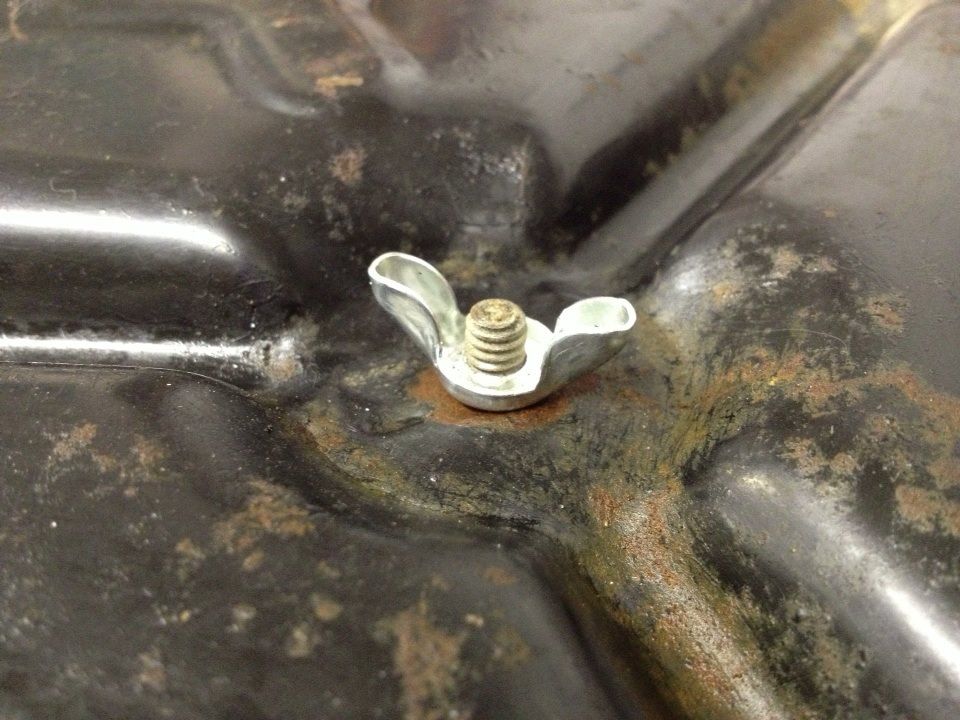
Just enough of the stud sticks through for the wingnut.


Thread Starter
|
Laughing Gas
Joined: Mar 2013
Posts: 771
Likes: 309
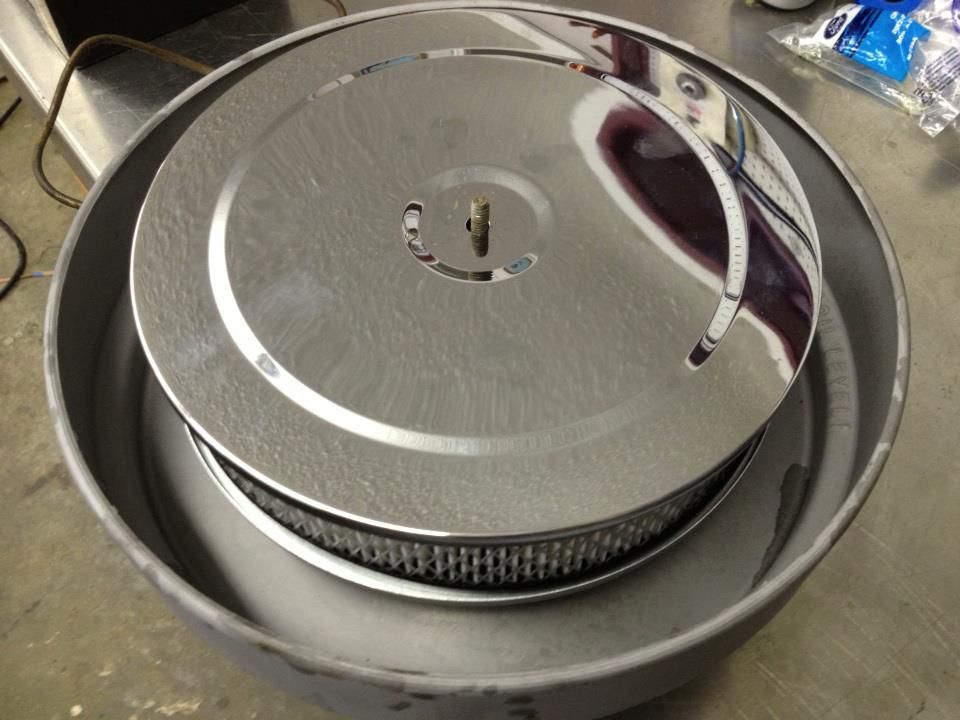
Finished up the mods on the air cleaner- drilling holes in the base for better air flow and cutting out the inner ring of the lid to clear the new inner filter. Then blasted and primed it with DPLF epoxy.
The new fuel lines came in so they're installed with new stainless clamps.


The new fuel lines came in so they're installed with new stainless clamps.


