1966 F100 Shortbed Styleside Full Stock Resto Build Thread
#31
 04-10-2013, 09:31 AM

The brake drums, hinges, and manifolds are sprayed with Ospho. We'll get the drums turned and spray them with epoxy tomorrow, along with the hinges and the wheels.
#32
04-11-2013, 06:40 PM
Fleet Mechanic

#33
04-12-2013, 07:12 AM


Like tripleframe says and - I presume you will also want to replicate the two-tone paint scheme. Different plants, and maybe different painters, painted two-tones in various ways. Variations can found at the leading edge of the hood, door jambs, and especially at the cowl and firewall.
Eric
Eric
#34
04-12-2013, 08:12 AM
This will be more difficult since your not working with an original paint truck. What are you using for reference? There were many paint rules that get covered up when a truck gets repainted. I recommend studying a few low mileage original paint vehicles before any painting. Biggest violation on exterior repaints is covering up the argent gravel shield on '64-'66 Custom Cab F100 2WD F100 and F 250's. Interiors are usually found with incorrect seat covers, incorrect arm rest colors and incorrect steering column and wheel colors.
Like tripleframe says and - I presume you will also want to replicate the two-tone paint scheme. Different plants, and maybe different painters, painted two-tones in various ways. Variations can found at the leading edge of the hood, door jambs, and especially at the cowl and firewall.
Eric
Eric
I found pictures of this 15K mile original paint truck which has the same color scheme. It show the dash painted white, tan column/wheel and gas tank, and the masking lines in the rear door jamb.


#35
04-12-2013, 04:14 PM

#37
04-15-2013, 09:58 AM
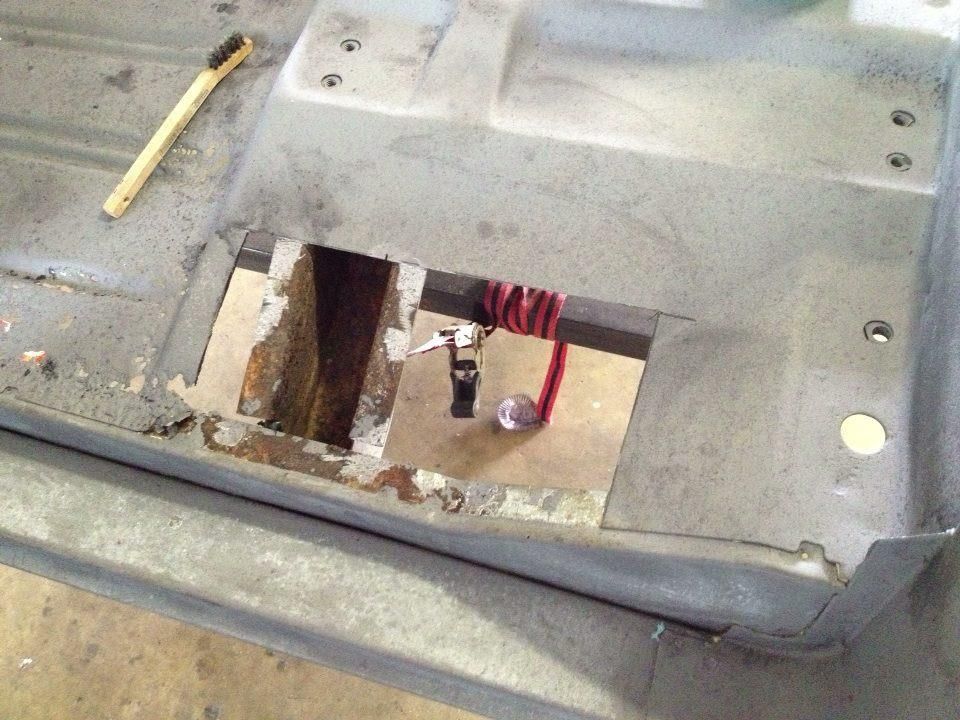
Cut out the rear floor rust to get inside the floor brace. We'll blast and prime inside the brace before welding the floor pans back in. We didn't cut the front floors out yet since the new pans aren't here yet- didn't want to cut too much.

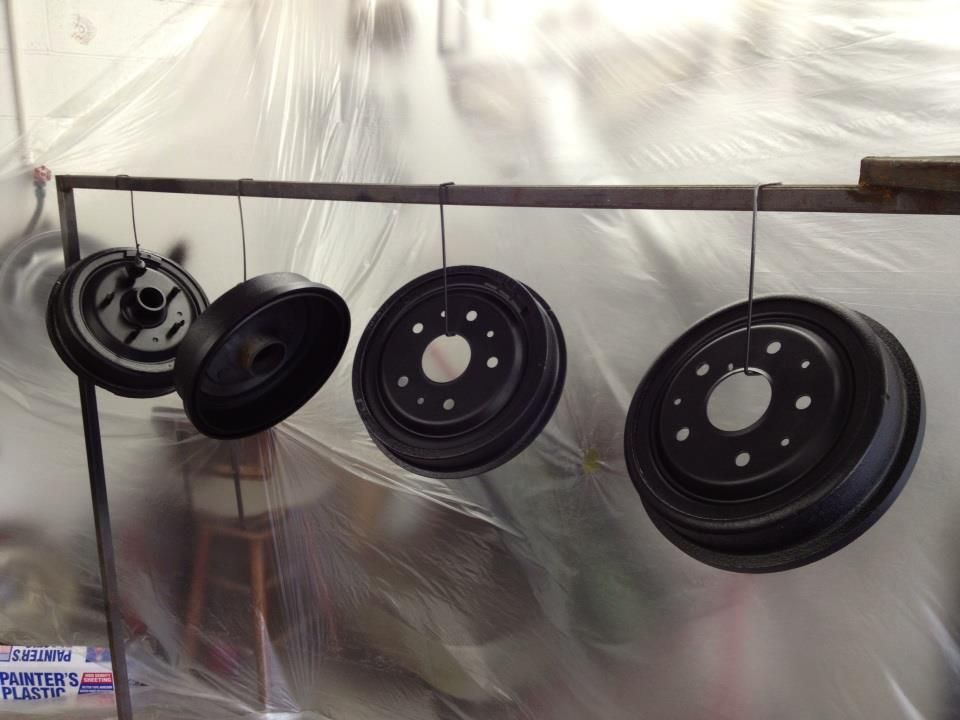
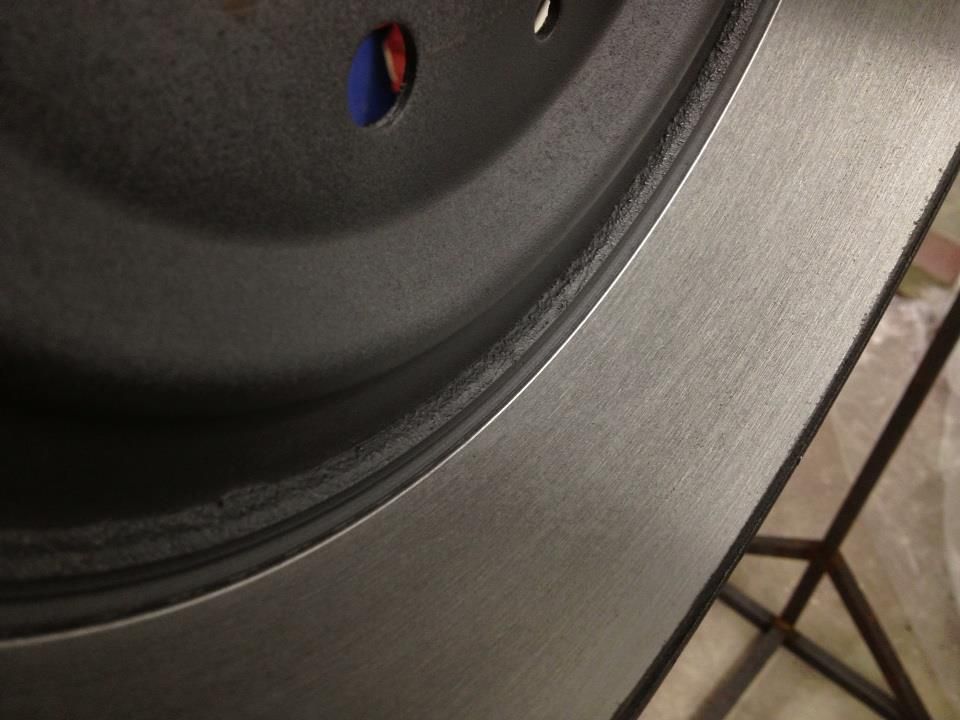
Blasted and primed the wheels and brake drums with PPG DPLF epoxy.
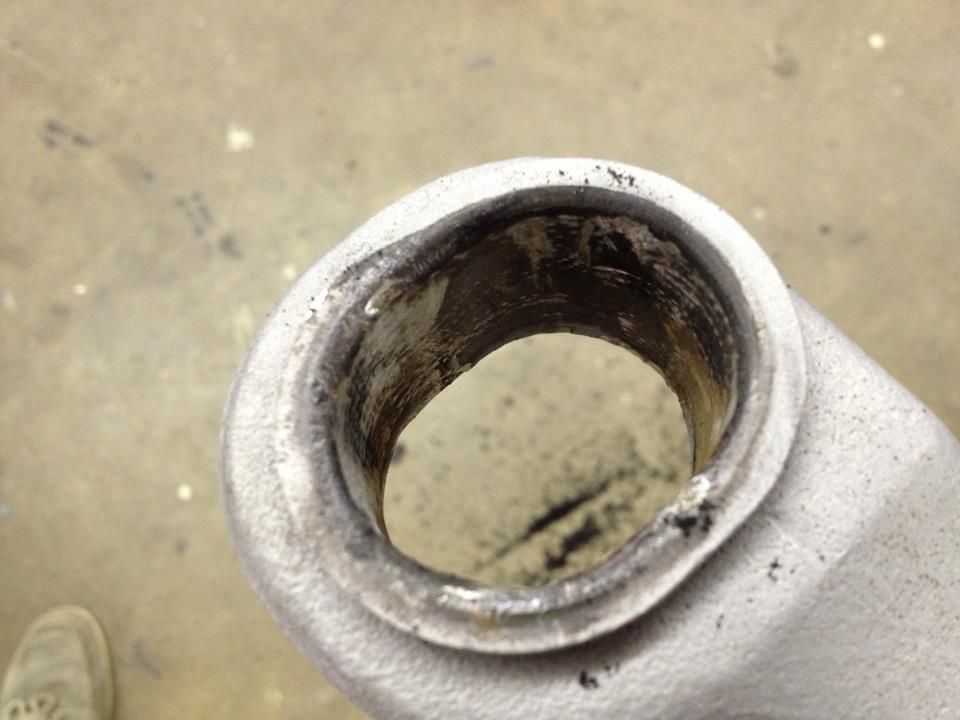
Cleaned out the drums, had new races installed, and had them turned.
Sandblasted the front suspension parts and pulled the bushings out. We are sending them out to have the king pins replaced and then we'll prime/paint them all separately.


Blasted and primed the wheels and brake drums with PPG DPLF epoxy.


Cleaned out the drums, had new races installed, and had them turned.


Sandblasted the front suspension parts and pulled the bushings out. We are sending them out to have the king pins replaced and then we'll prime/paint them all separately.

#38
04-17-2013, 01:21 PM
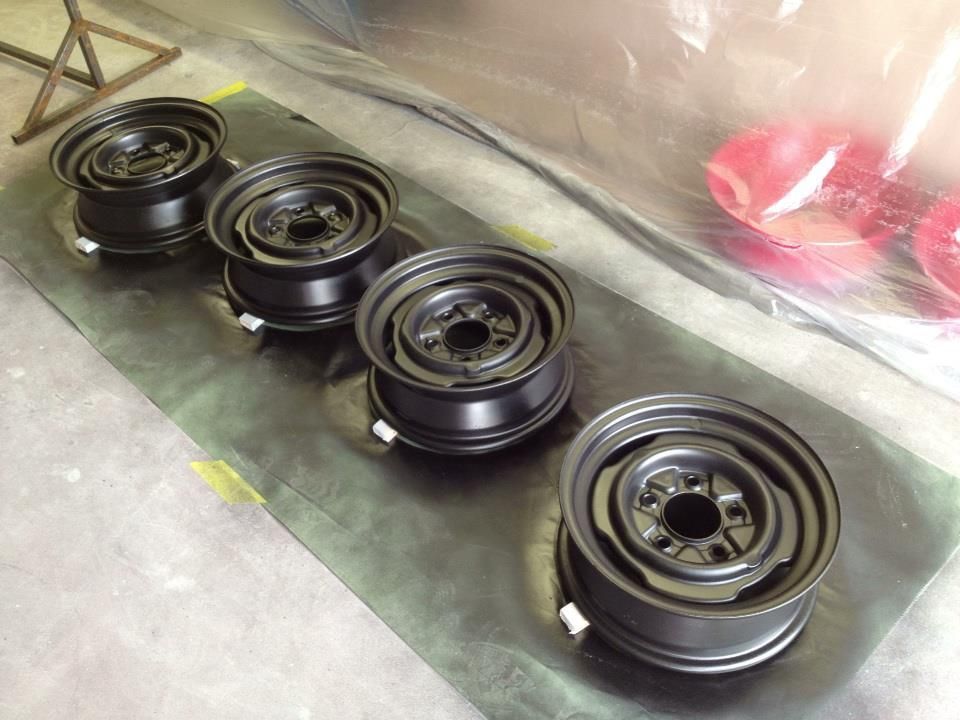
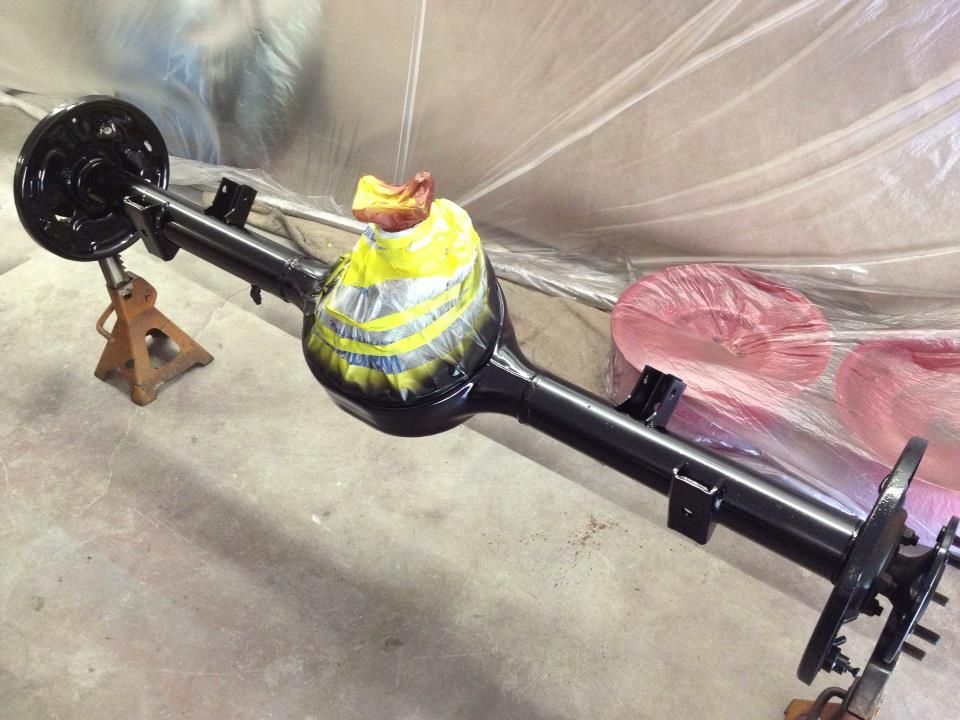
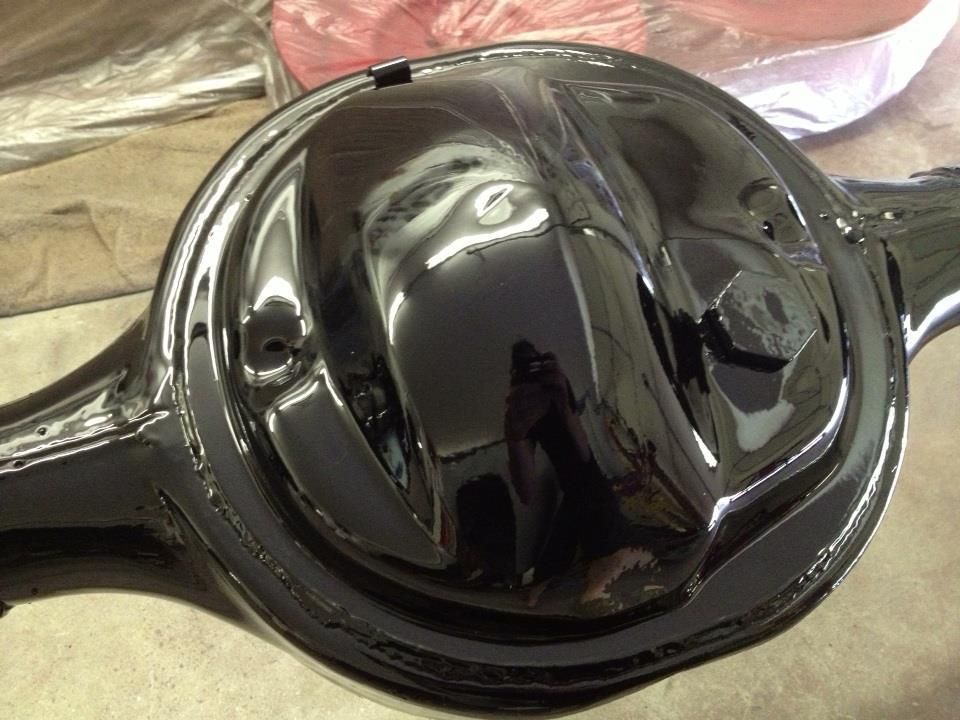
The front drums are painted, cleaned, and bearings are packed and installed. I sprayed epoxy on the axle last night, then nibbed it and sprayed flattened single stage urethane on it after lunch today. We're getting more of the pieces blasted so we can start reassembling the frame. I will get the rear brakes installed on the axle later today.

Picked up a bunch of parts yesterday at Early Ford V8 Sales in Easley SC.


Picked up a bunch of parts yesterday at Early Ford V8 Sales in Easley SC.

#39
04-17-2013, 04:19 PM


#40
04-17-2013, 06:01 PM
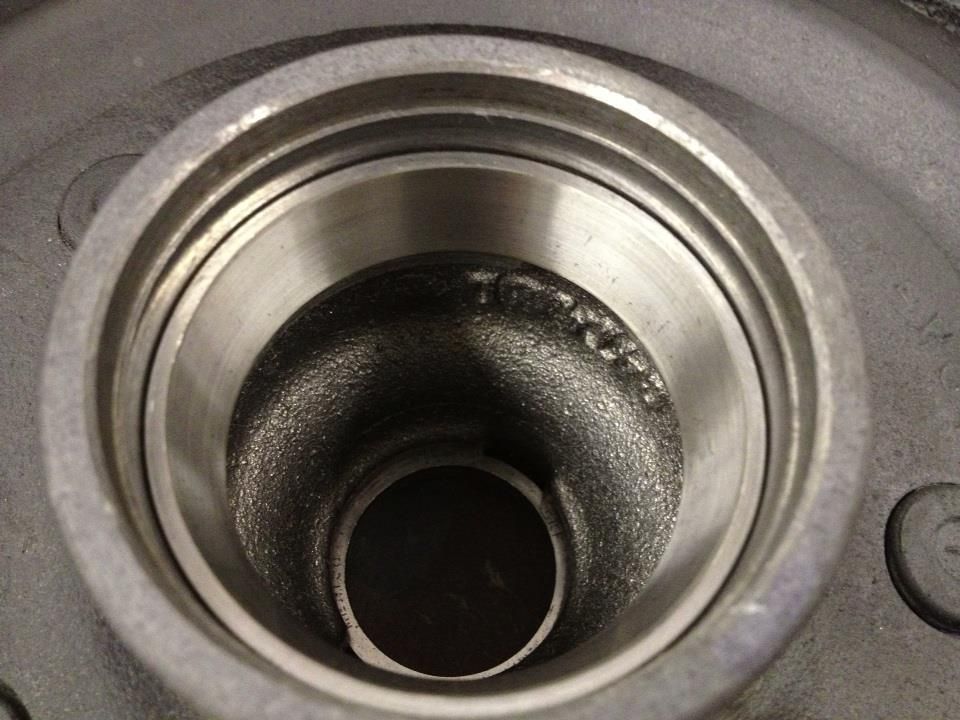
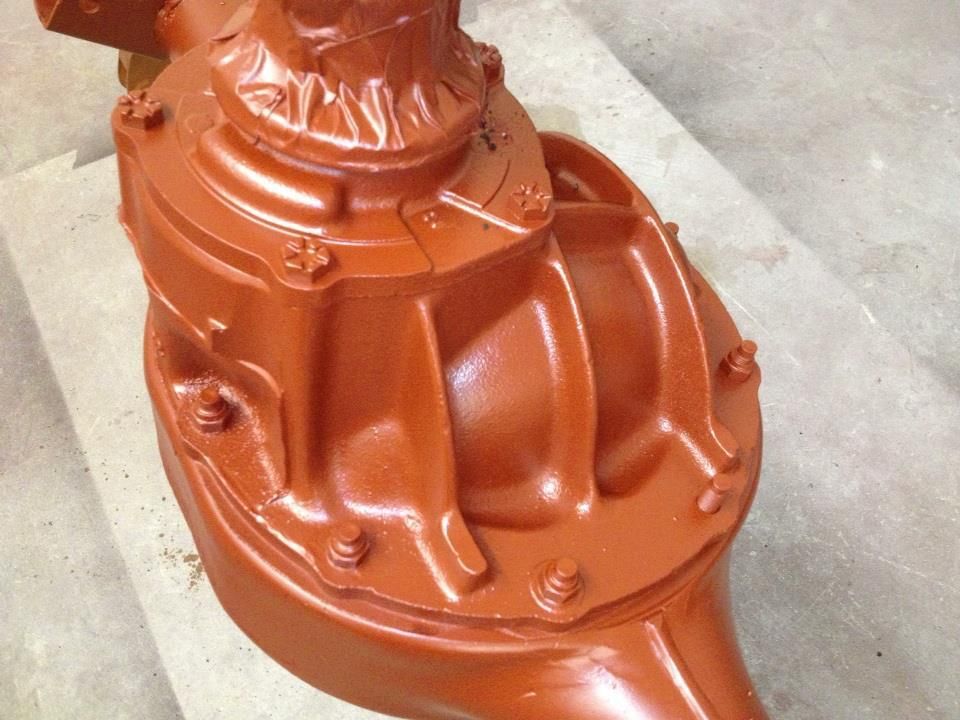
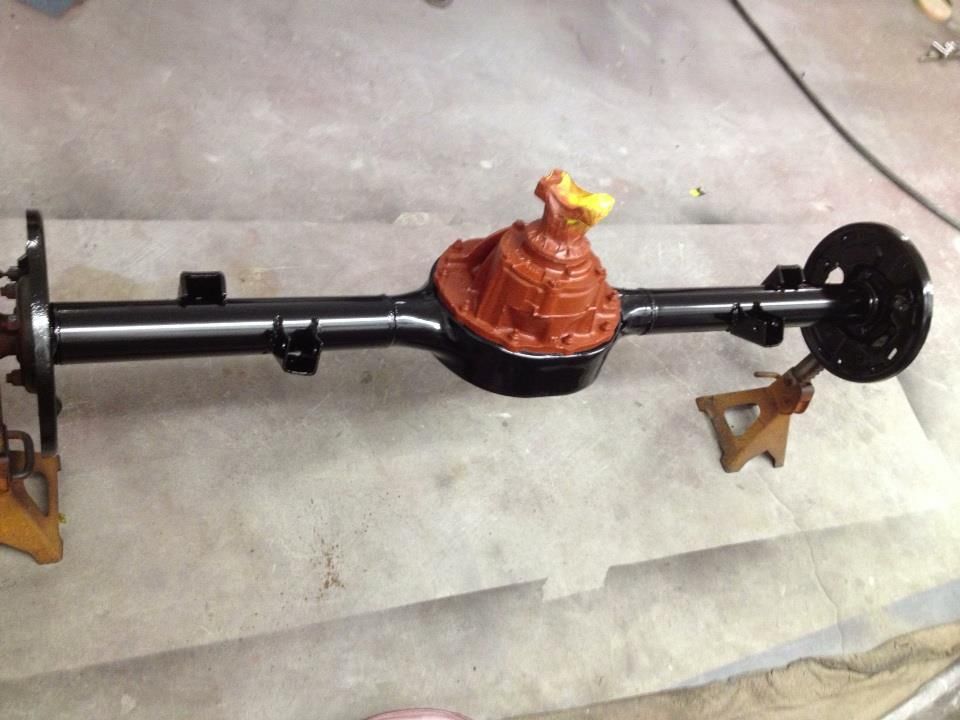
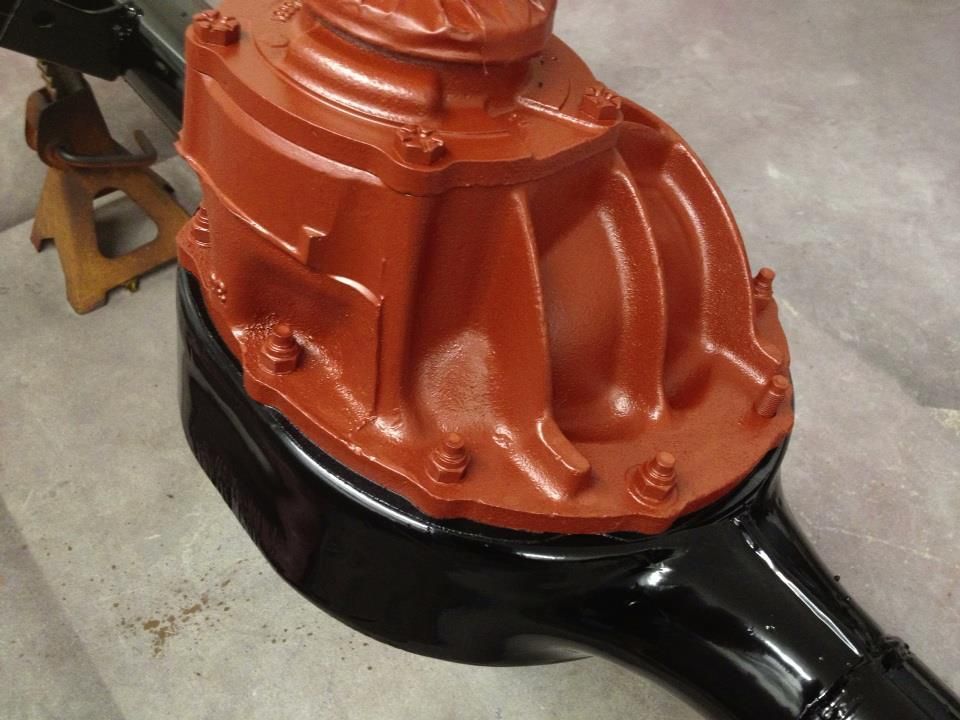
Astronaut you may want to take the nuts off that hold the center section to the housing an and spray them with something that makes them look like bare metal (Cast Iron paint etc.) The center sections were painted red oxide before they were installed in the housing so the nuts would not have been painted. Just a small detail, it just depends how far you want to go. Keep up the good work.
#41
04-18-2013, 02:14 PM
Astronaut you may want to take the nuts off that hold the center section to the housing an and spray them with something that makes them look like bare metal (Cast Iron paint etc.) The center sections were painted red oxide before they were installed in the housing so the nuts would not have been painted. Just a small detail, it just depends how far you want to go. Keep up the good work.
Thanks! I did that today, found copper washers at our local Ace hardware.

#42
04-18-2013, 02:42 PM
#43
04-18-2013, 03:47 PM

#44
04-18-2013, 03:48 PM
Thanks Masked Rider! We'll detail the whole truck this way; mirrors would help show off the bottom side details if the owner takes it to shows.