


Patch panel radius forming
Thread Starter
|
Tuned


Joined: Aug 2007
Posts: 458
Likes: 123
From: Maryland
Patch panel radius forming
For those that may need to form up some patch panels but don't have those shrinker/stretchers at your disposal, here's a how-to on tuck shrinking.
Here are some "tucking" pliers I made out of neccessity when forming up a replacement piece for rust repair, and I'll have to admit, their biggest flaw is not providing accurate, consistent tucks. Of course, the operator could also be flawed.....
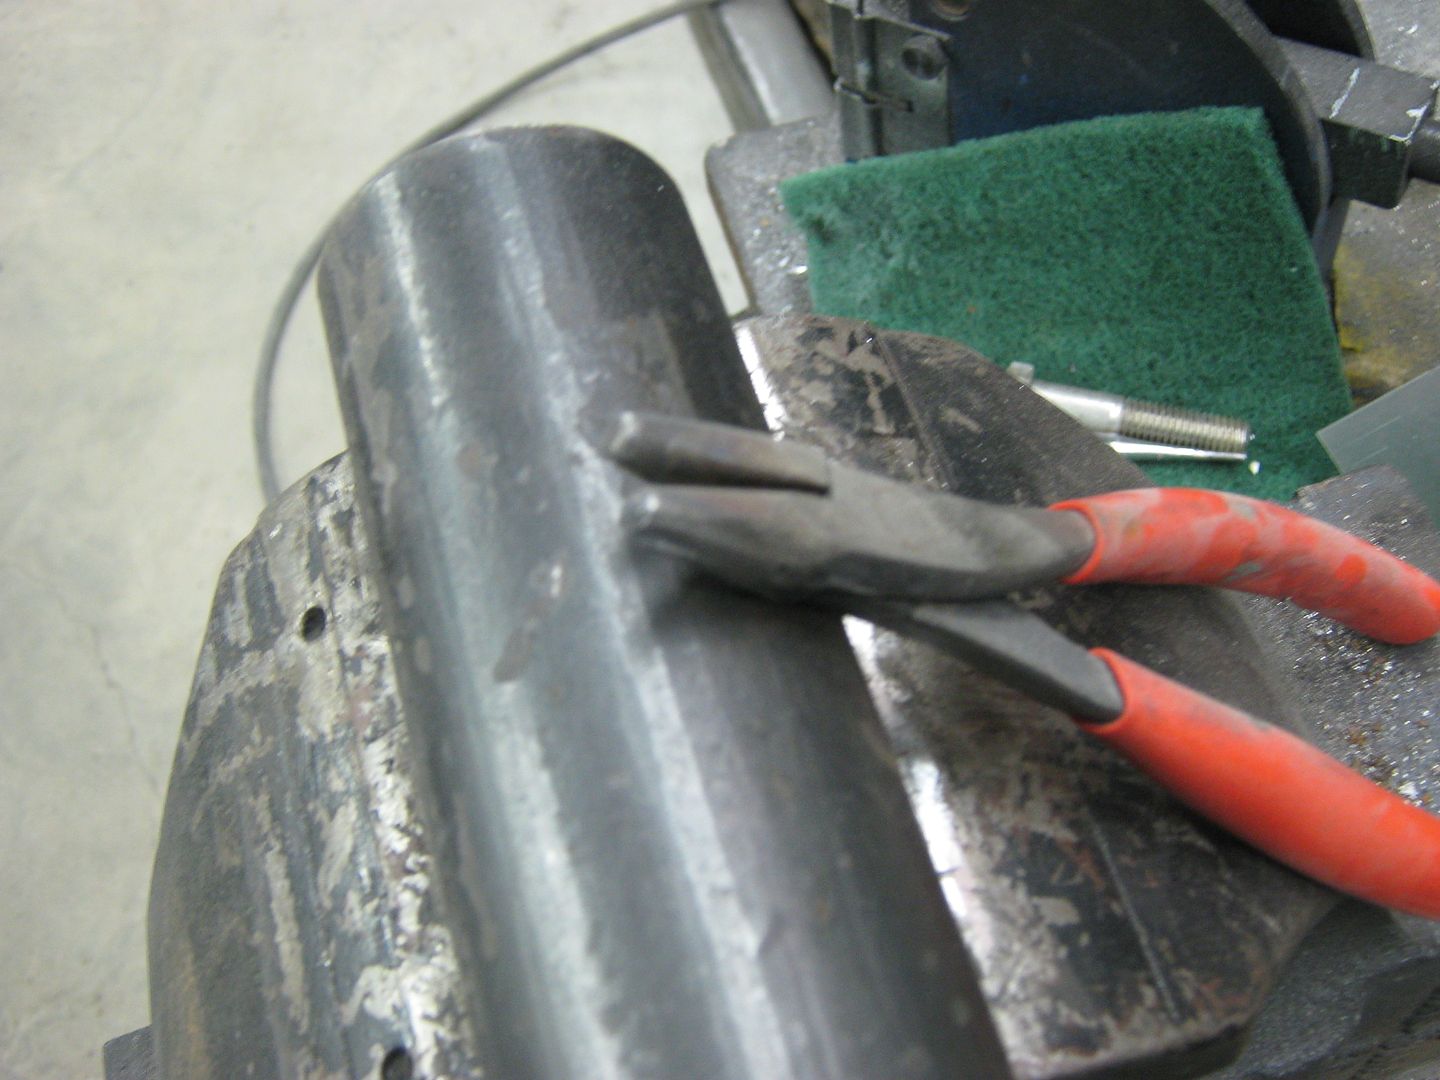
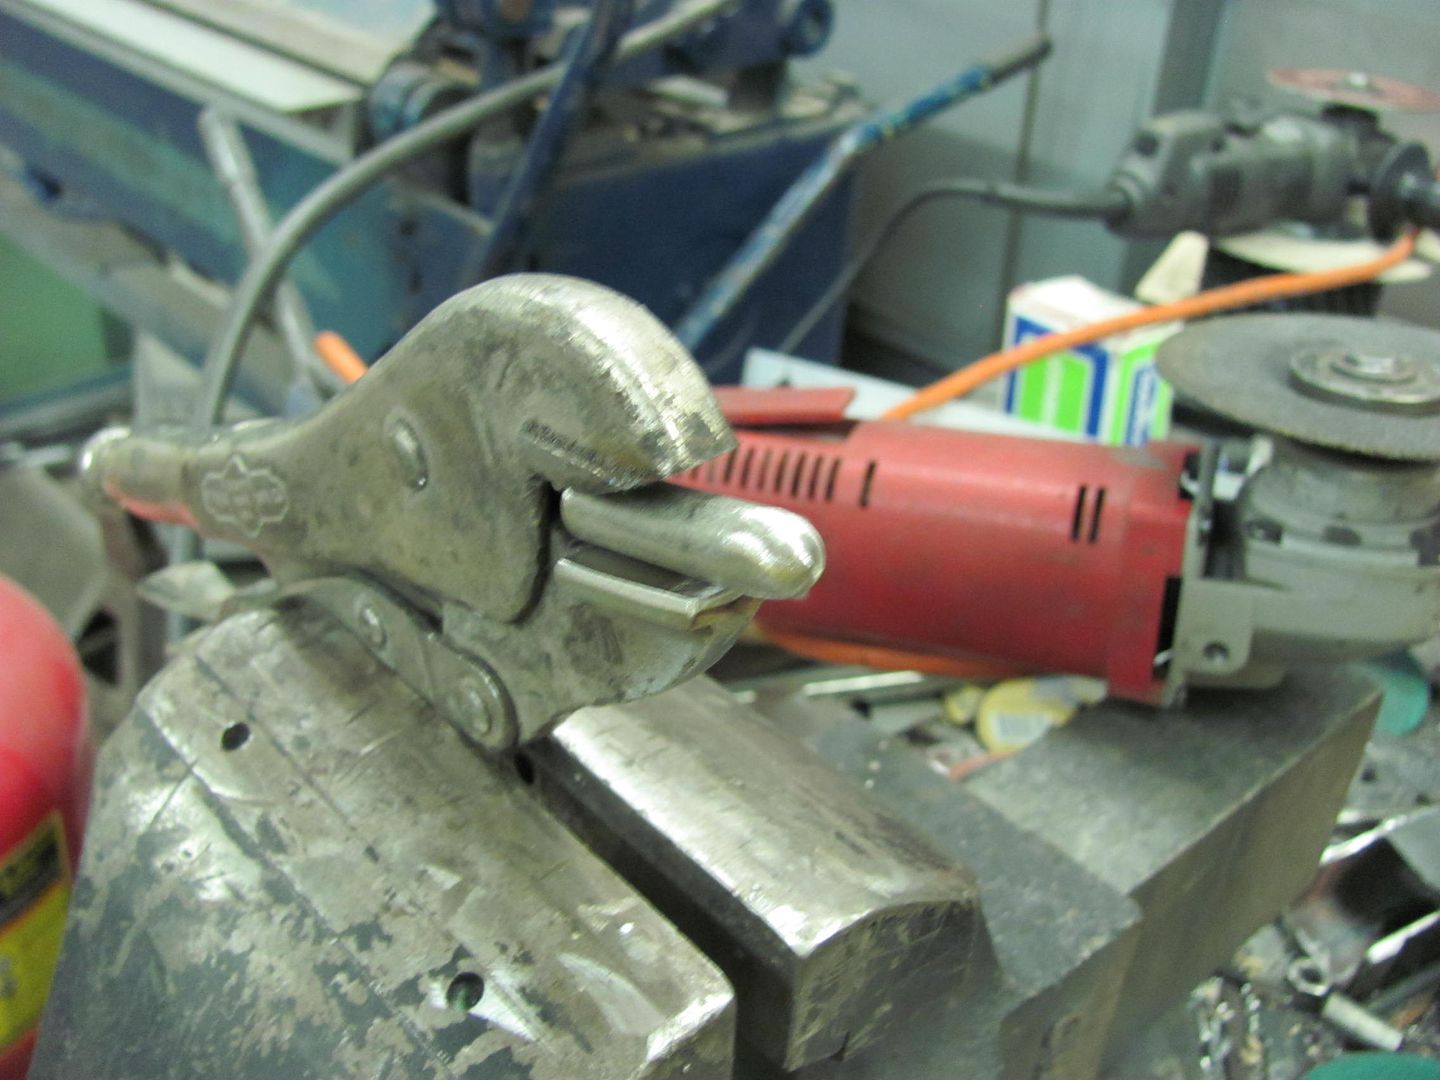
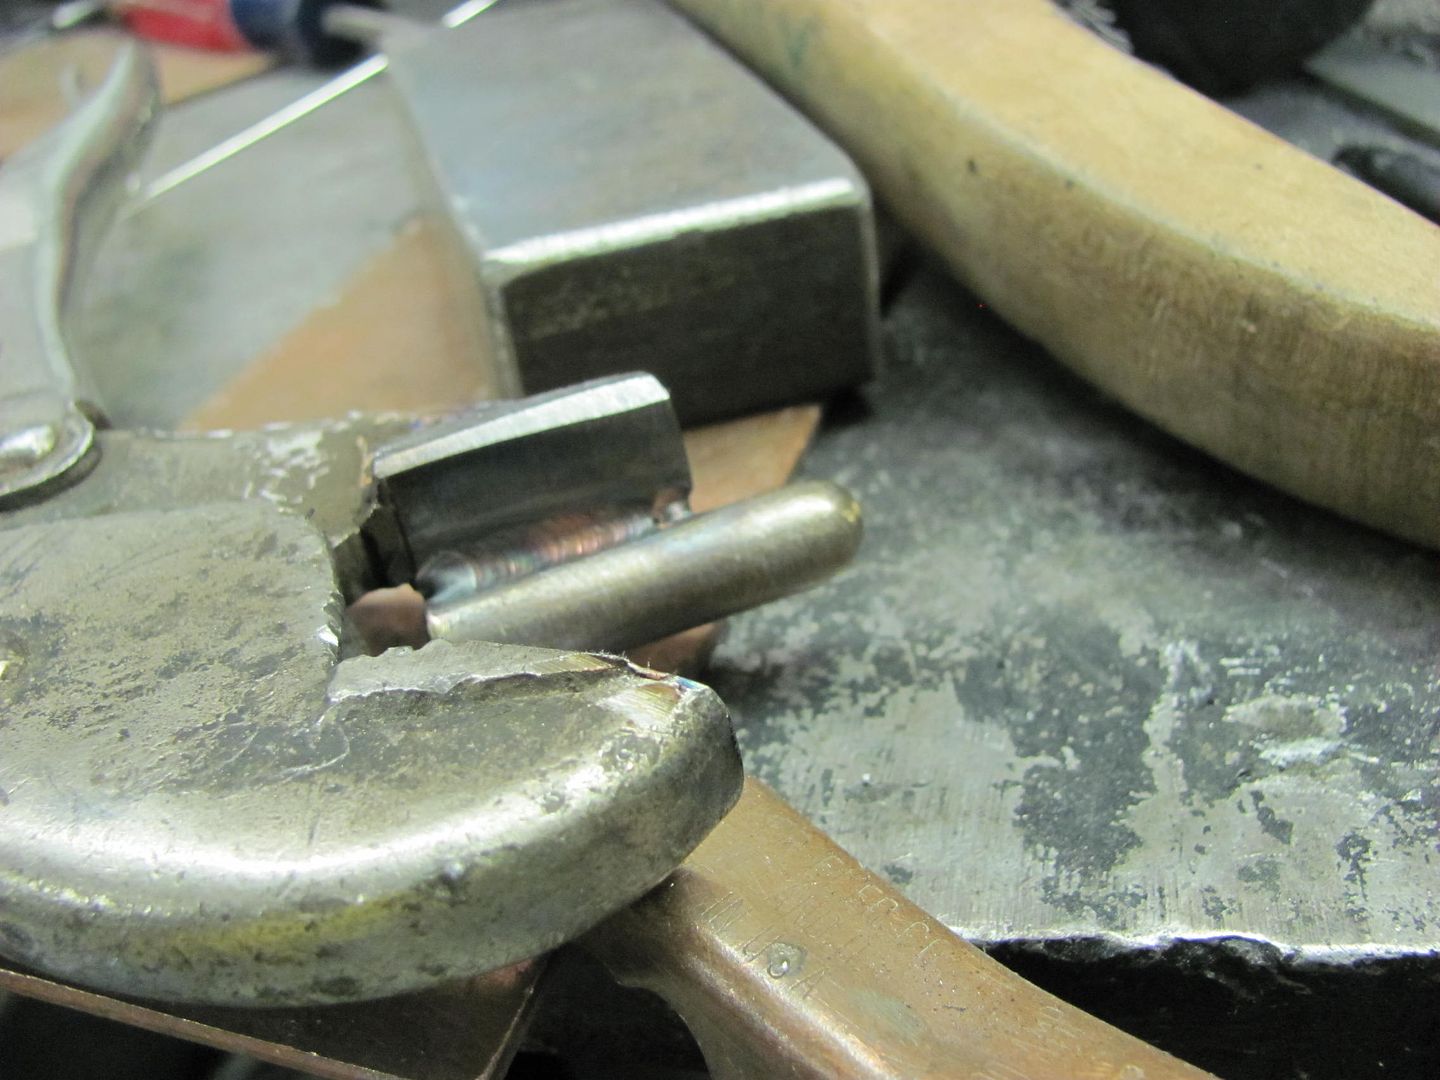
The more consistent the tucks, the more consistent the distance between them, in the end, the more consistent our radius will be. To improve on the tucks I'll start out by making a tool that will more accurately duplicate consistent tucks. We'll start off by finding a pair of vise grips suitable for the job, which in this case means the jaw serrations are starting to wear and round off. Finish what has started by removing the serrations to produce a nice flat jaw on the bottom, and cut the top one off at about 30 degrees from its original position.
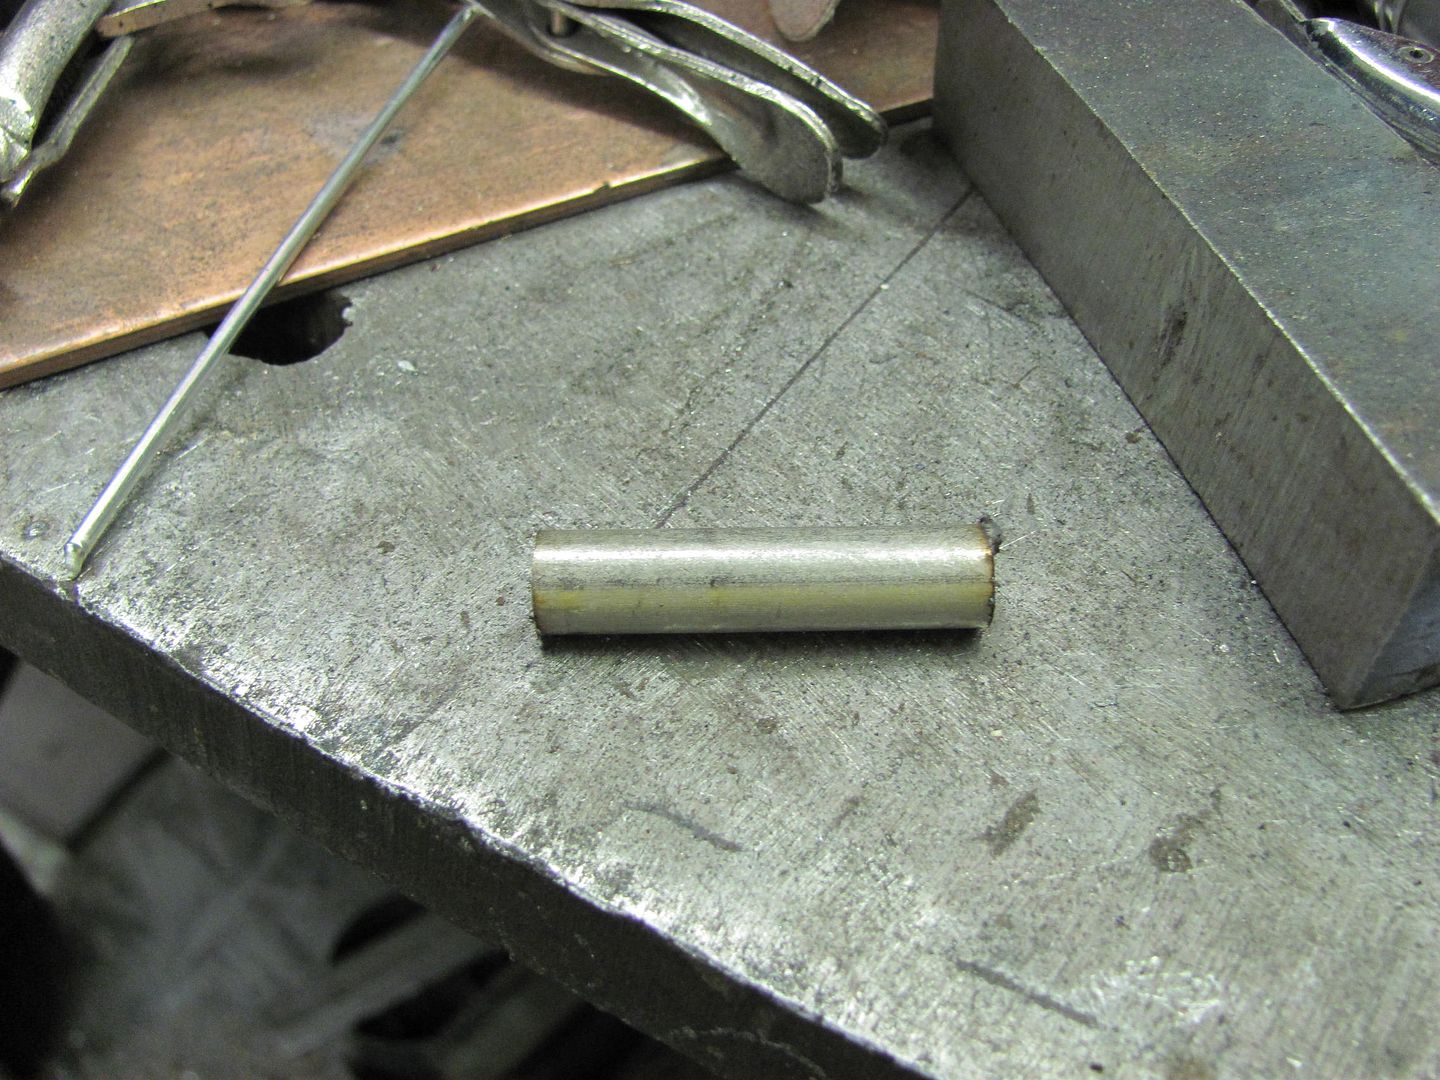
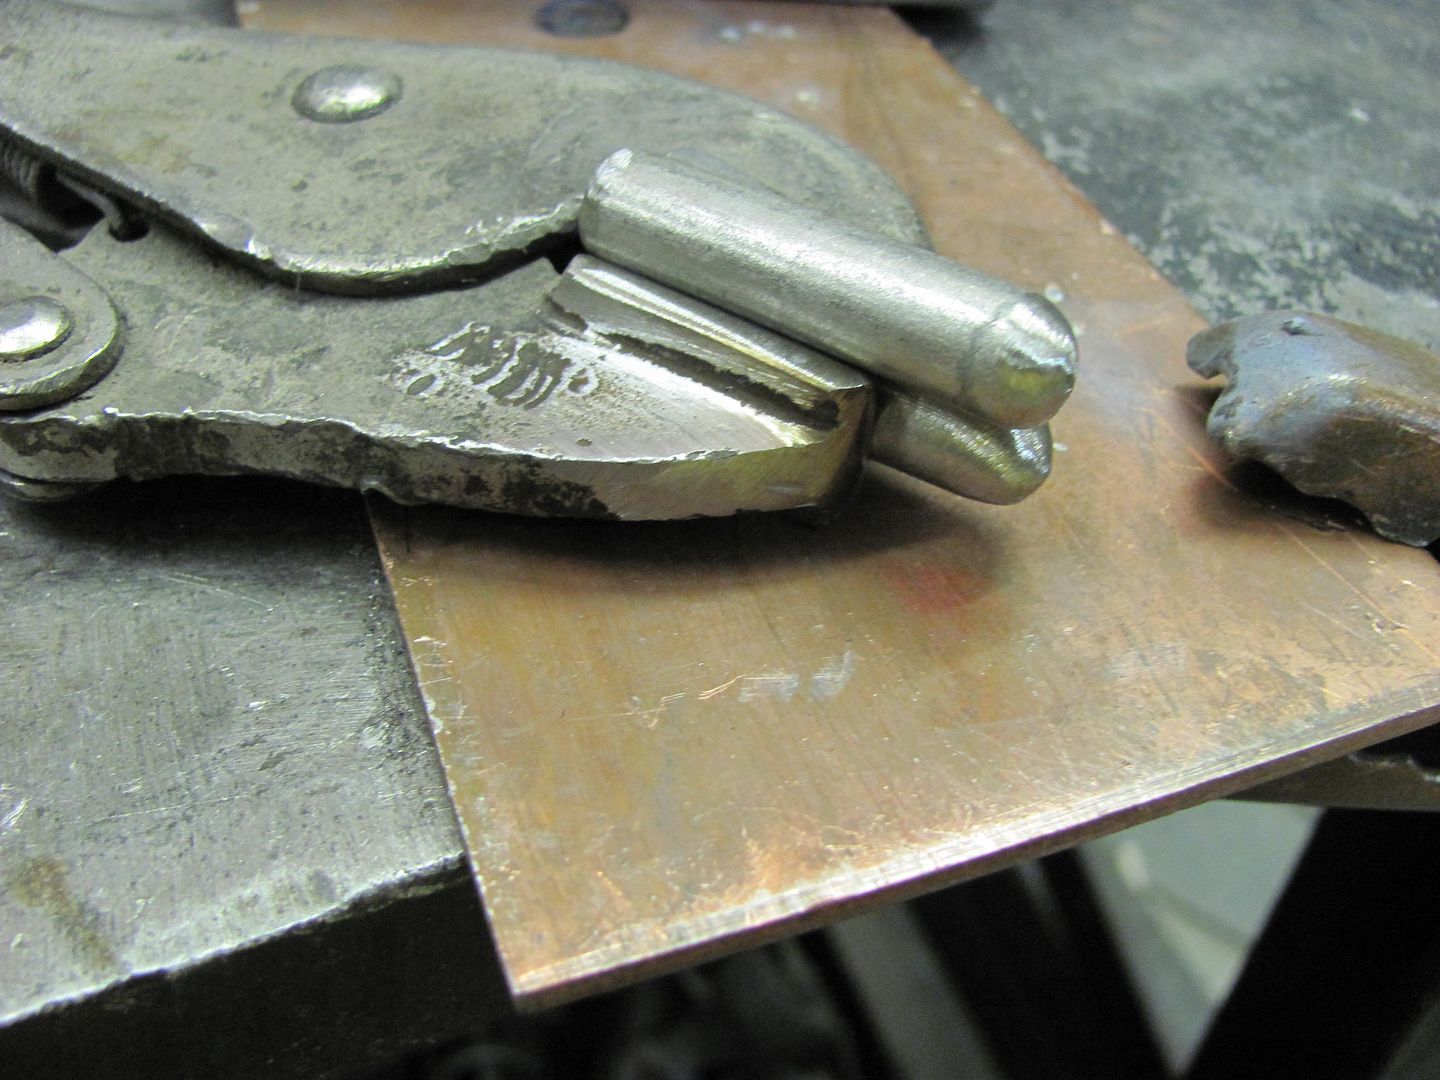
I had some extra long shouldered 3/8 bolts, perfect round stock for the job. Three of them were cut off to 1-1/2" length.
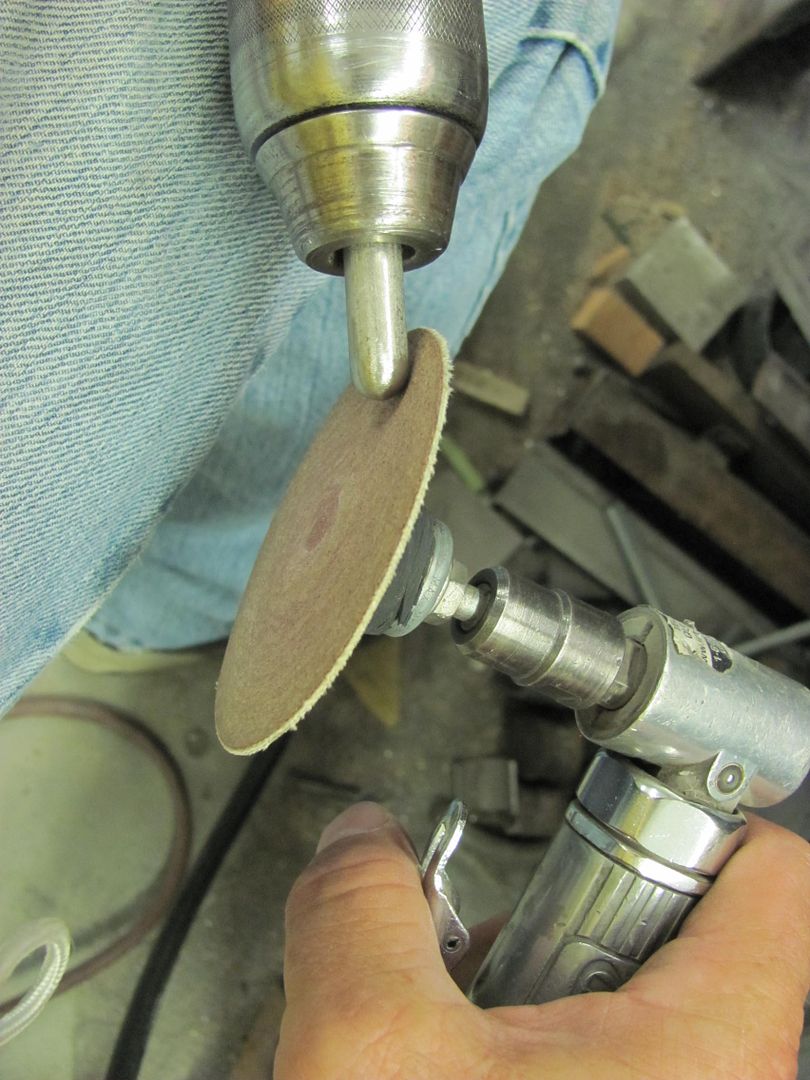
Now because we don't have a fancy shrinker-stretcher machine likely means we don't have a lathe either. No sweat, use this economy model made by Dewalt...
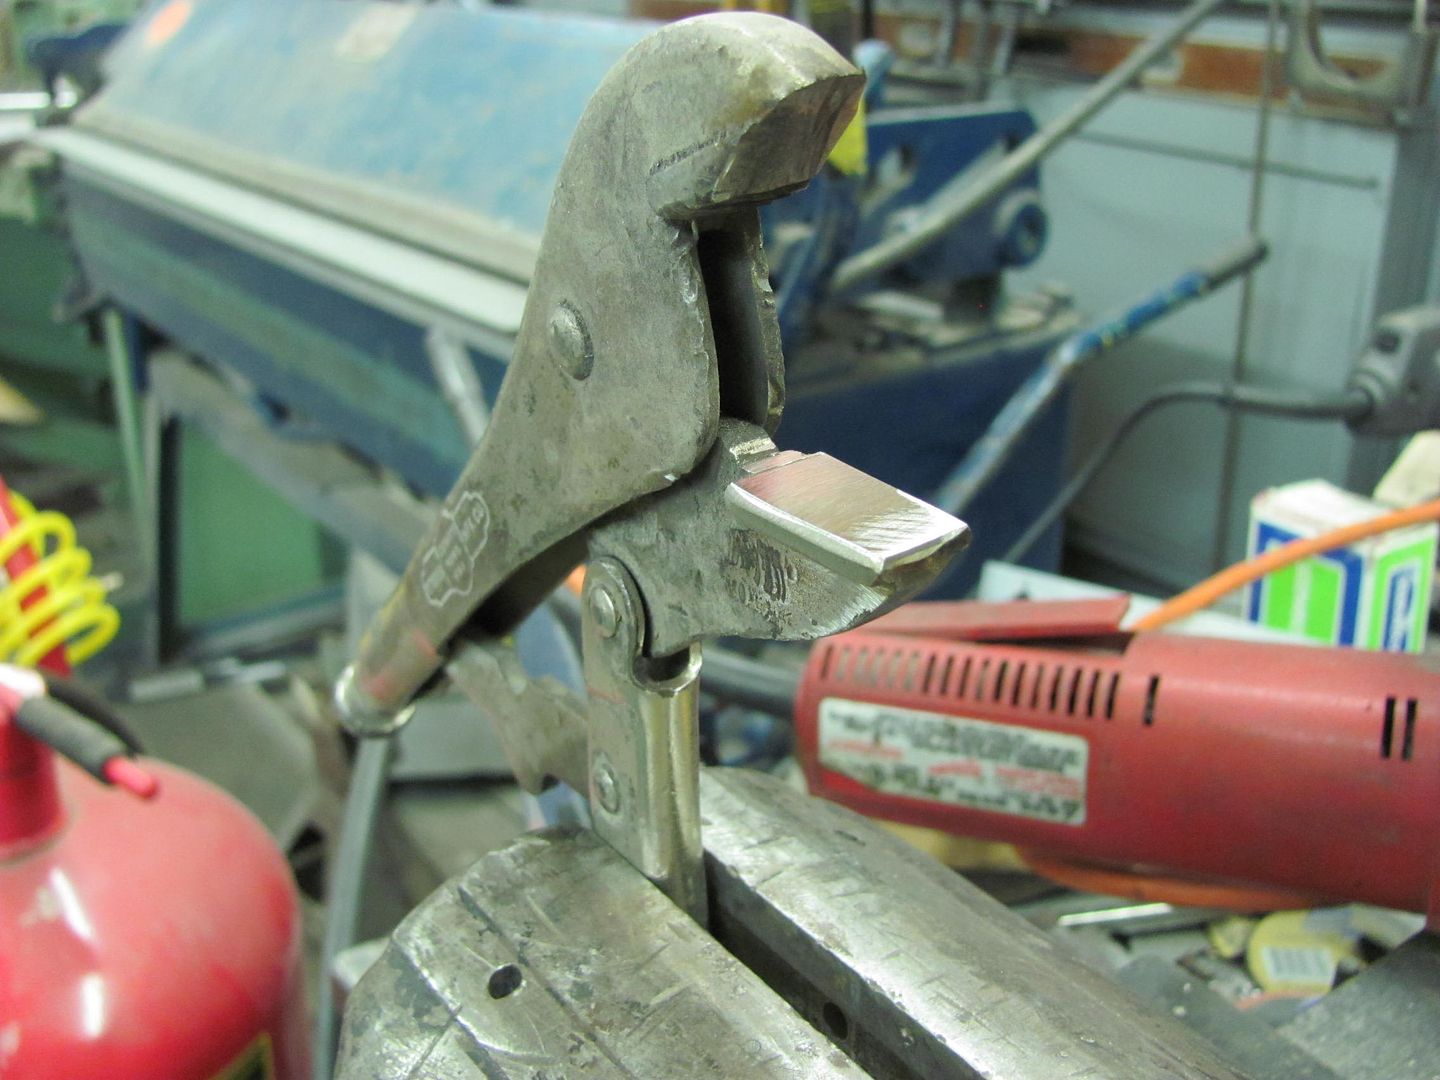
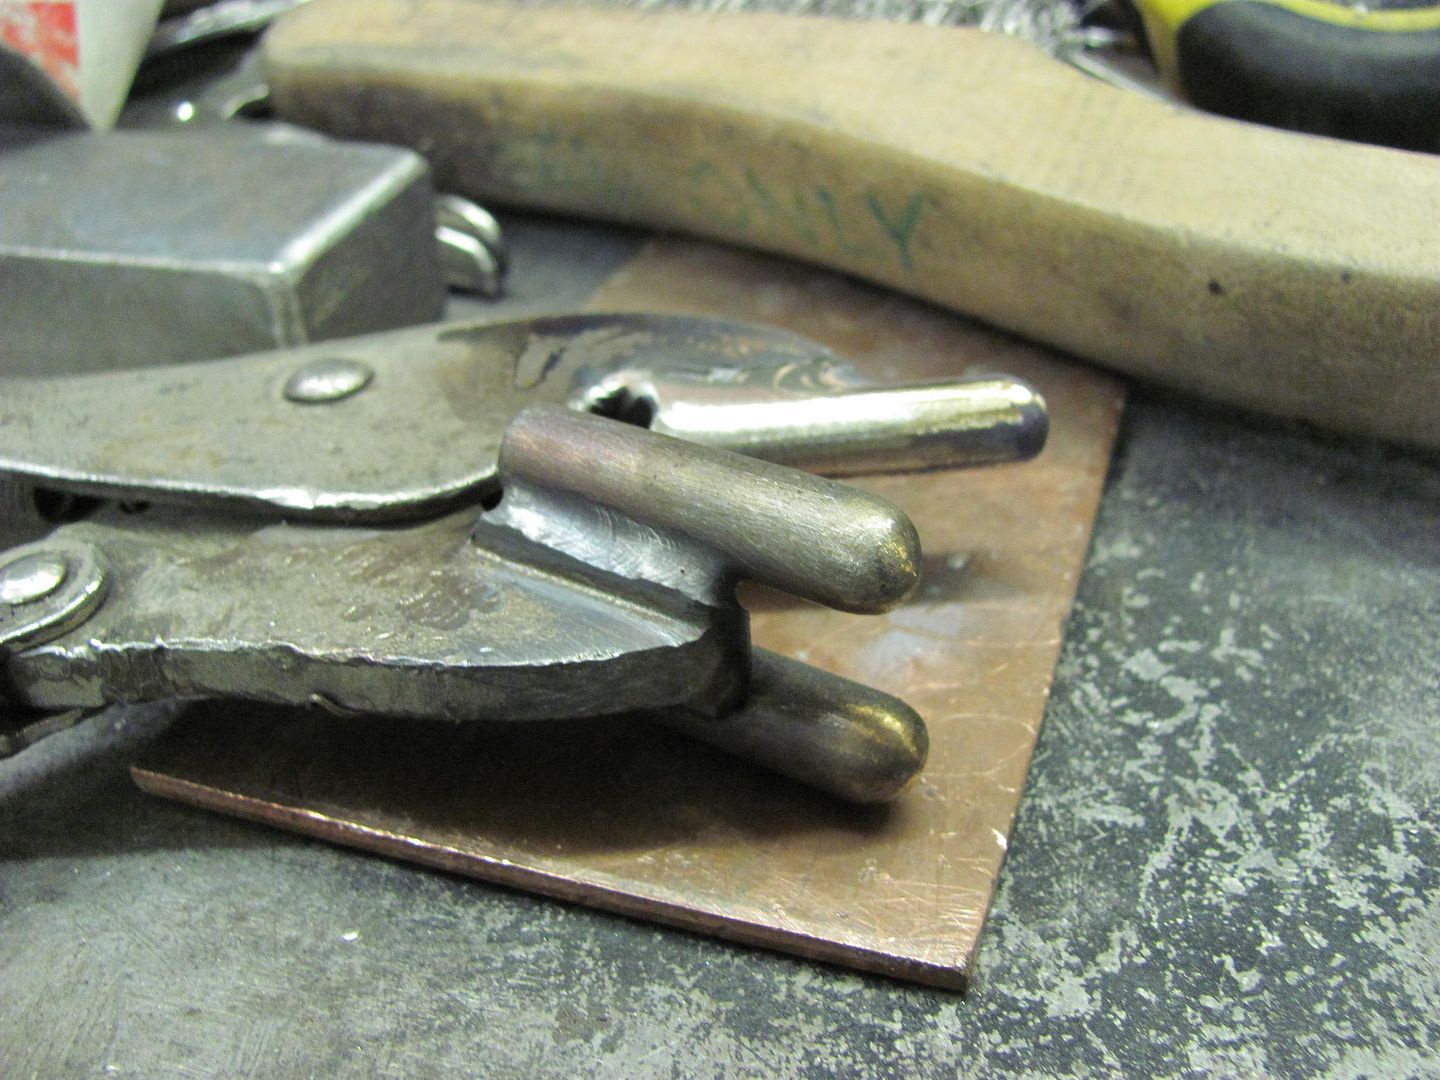
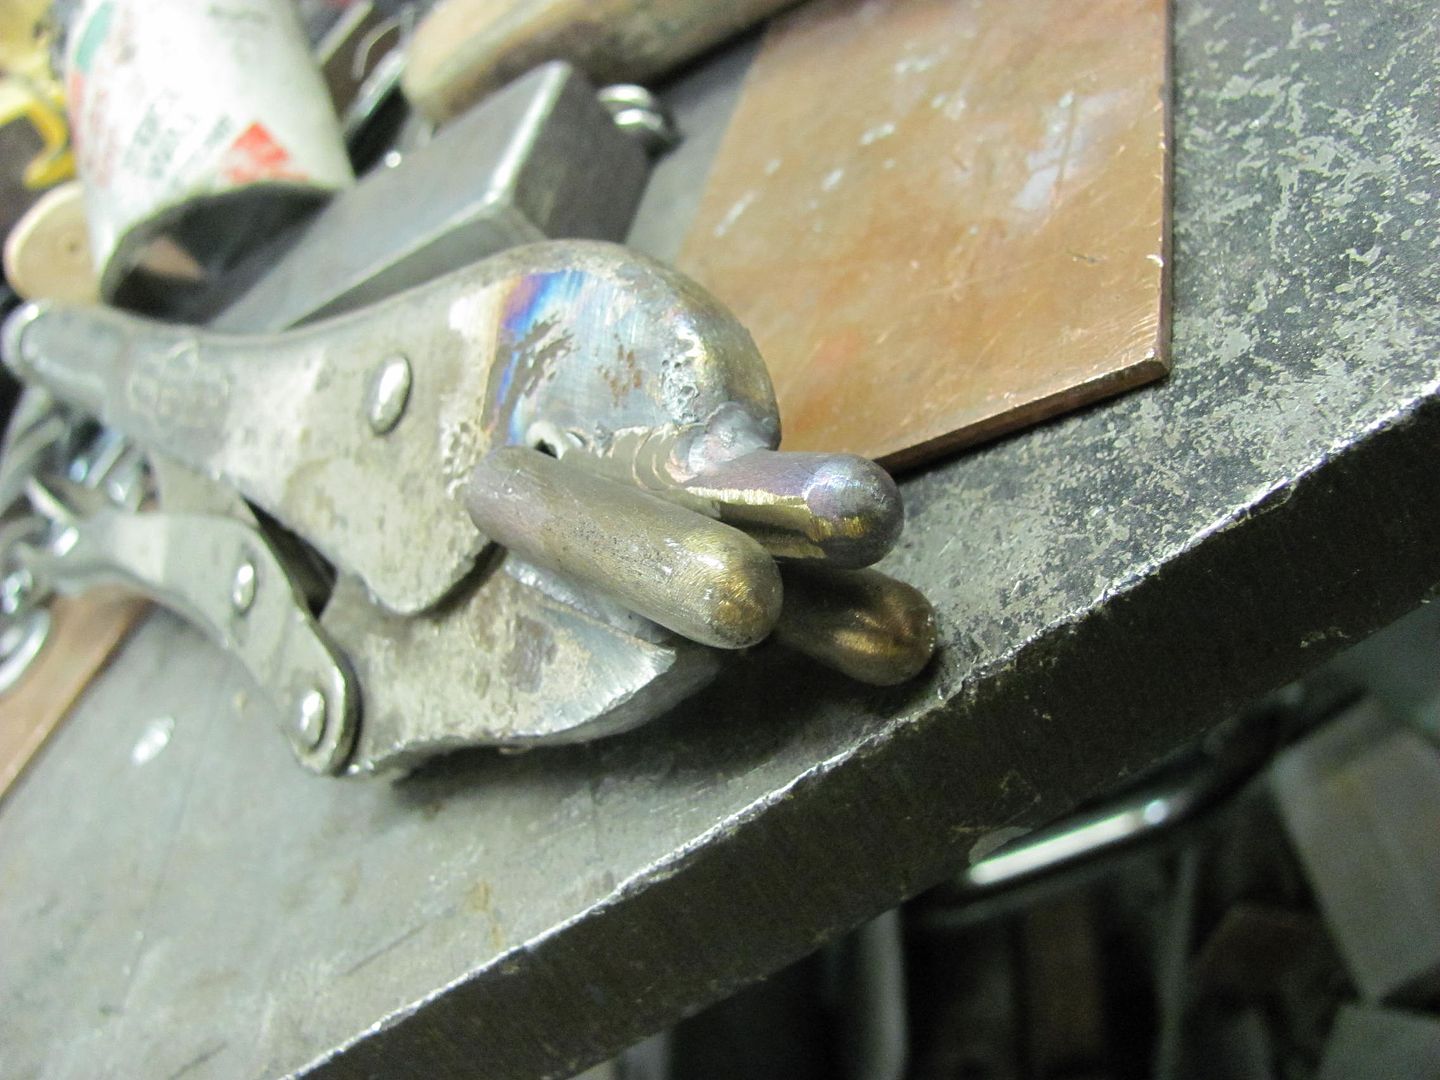
To set the spacing for the "fingers" the first is clamped in the vise grip jaw, centered.
The outer is placed next to it and then welded down the outside, center finger removed, and then welded down inside.
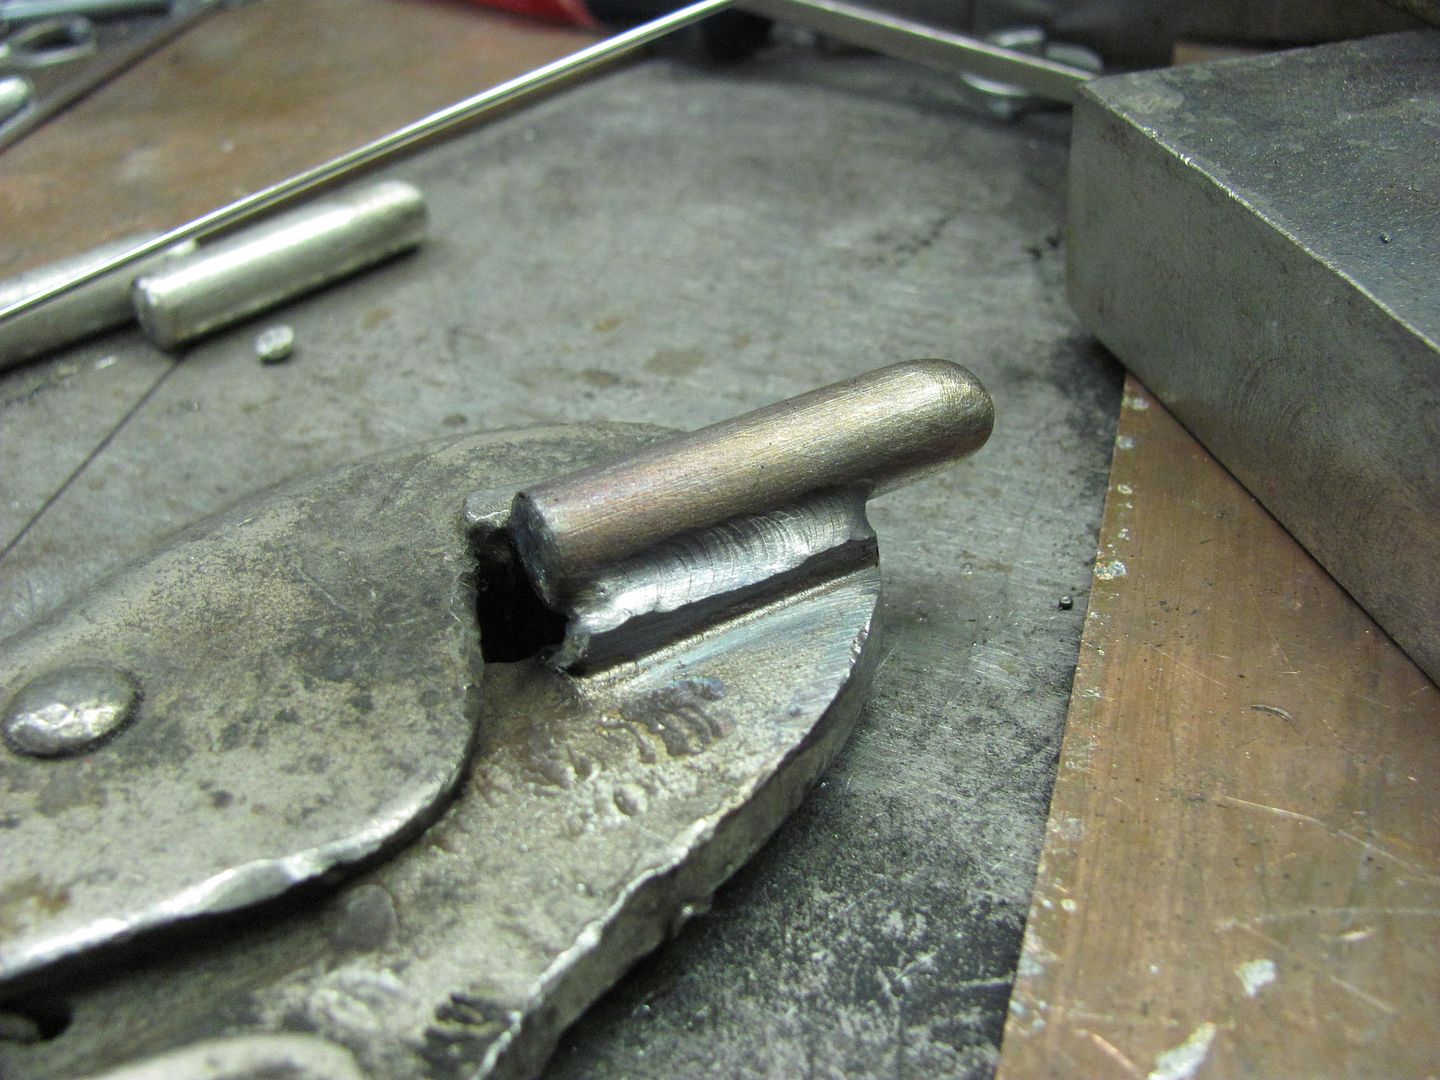
Repeat for opposite side, then weld center finger.
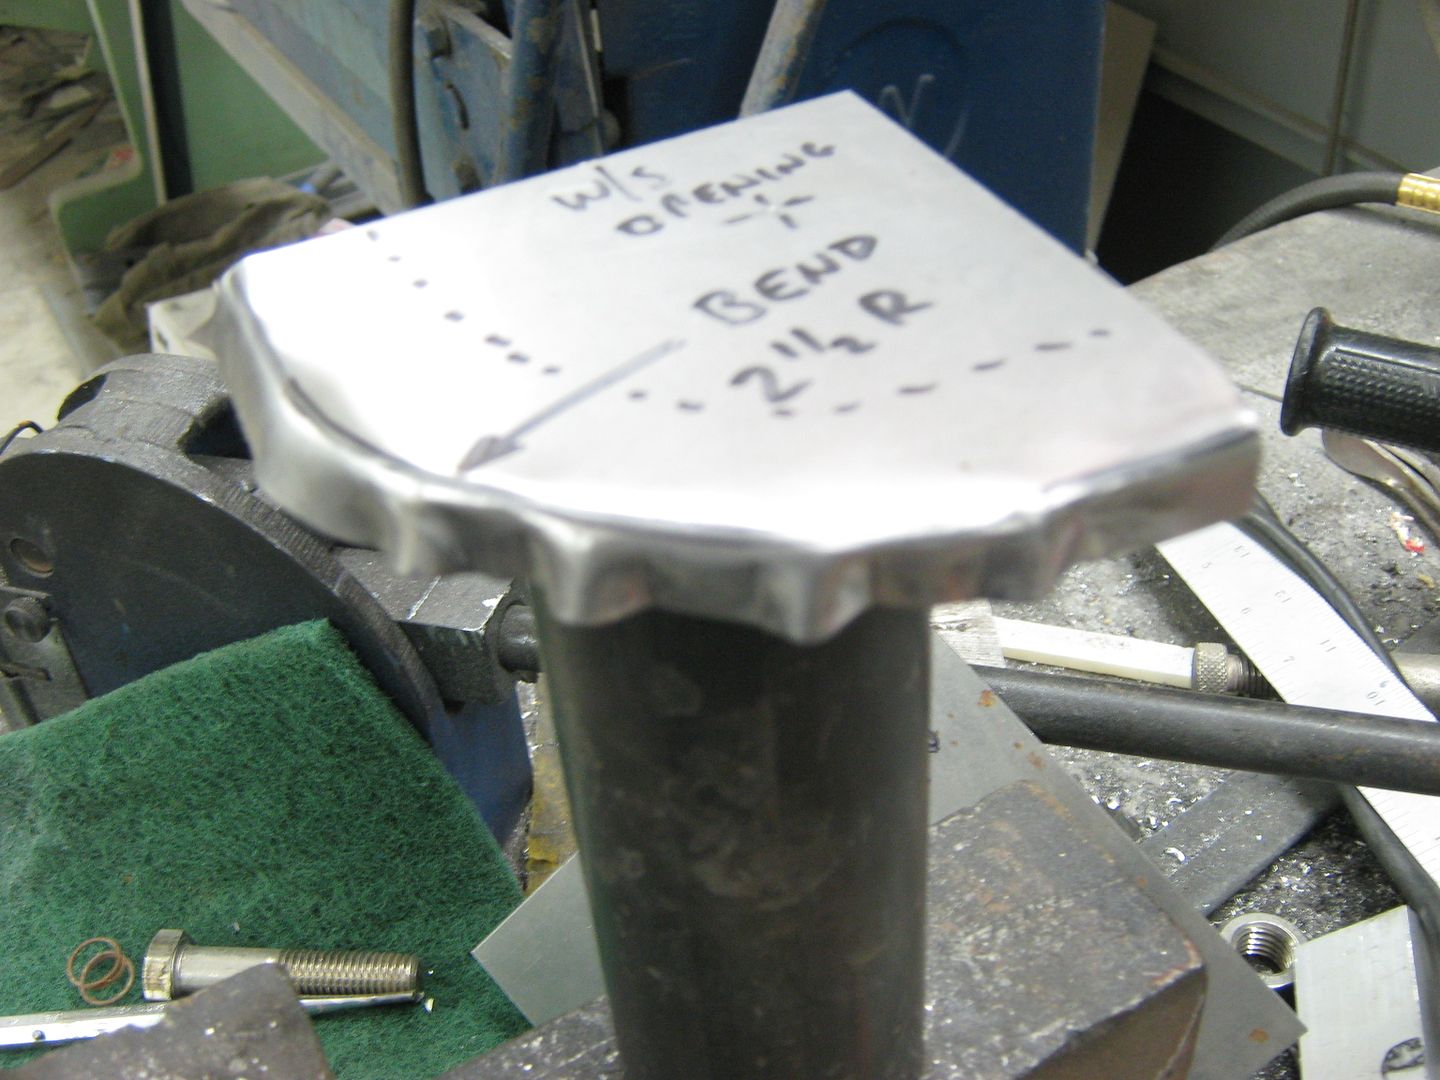
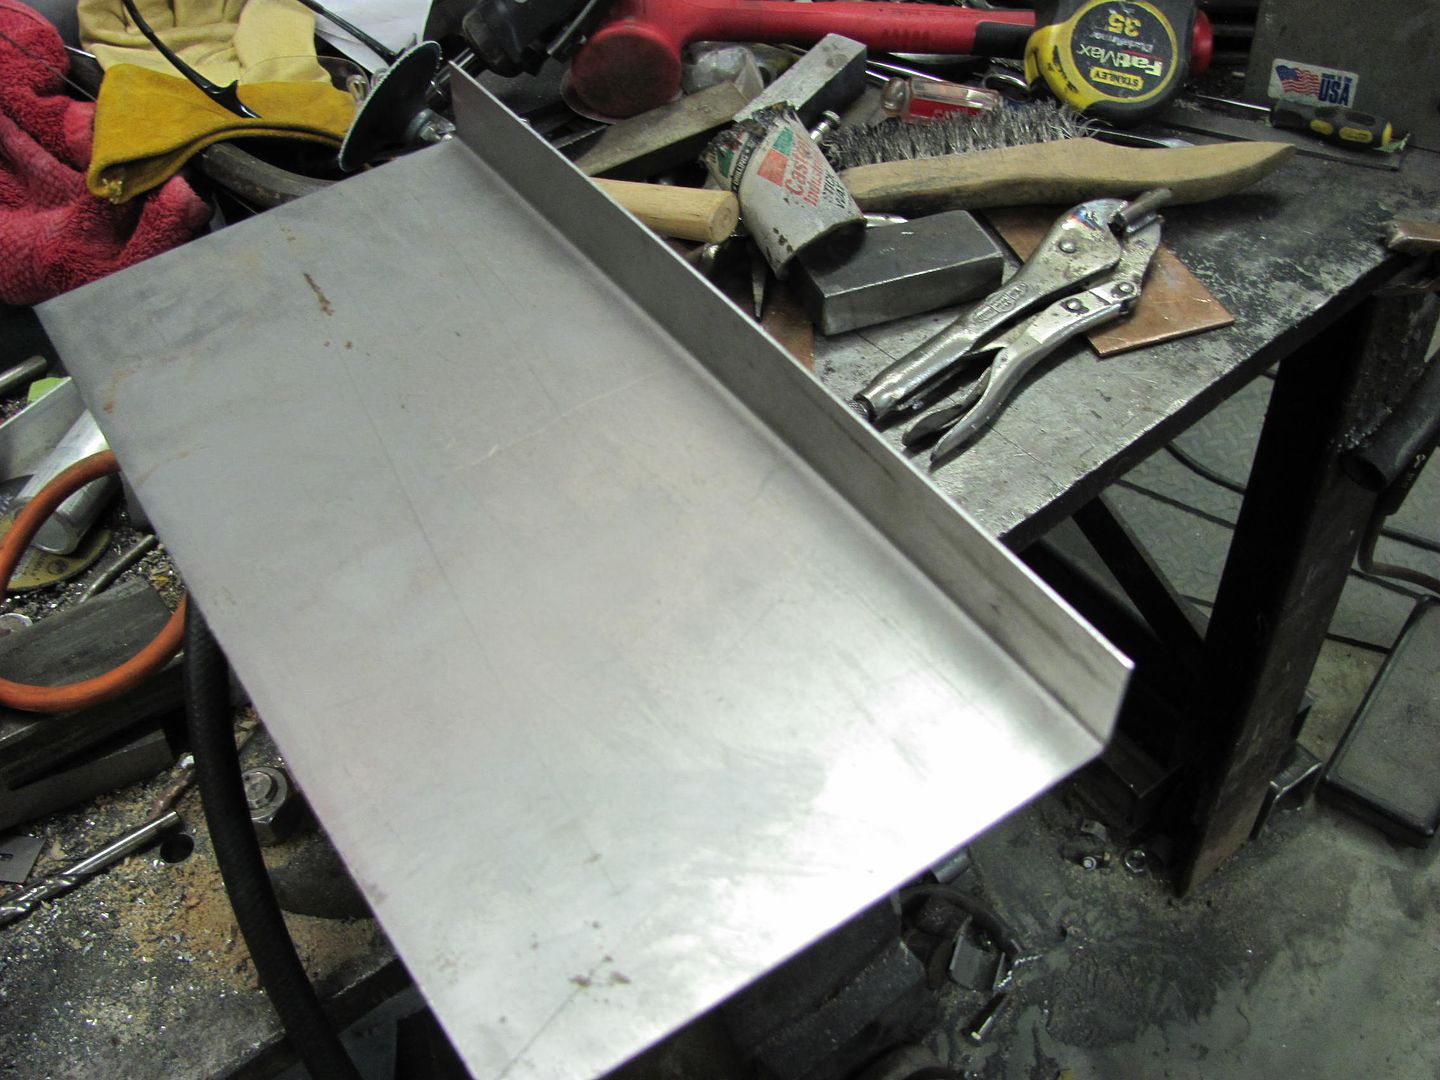
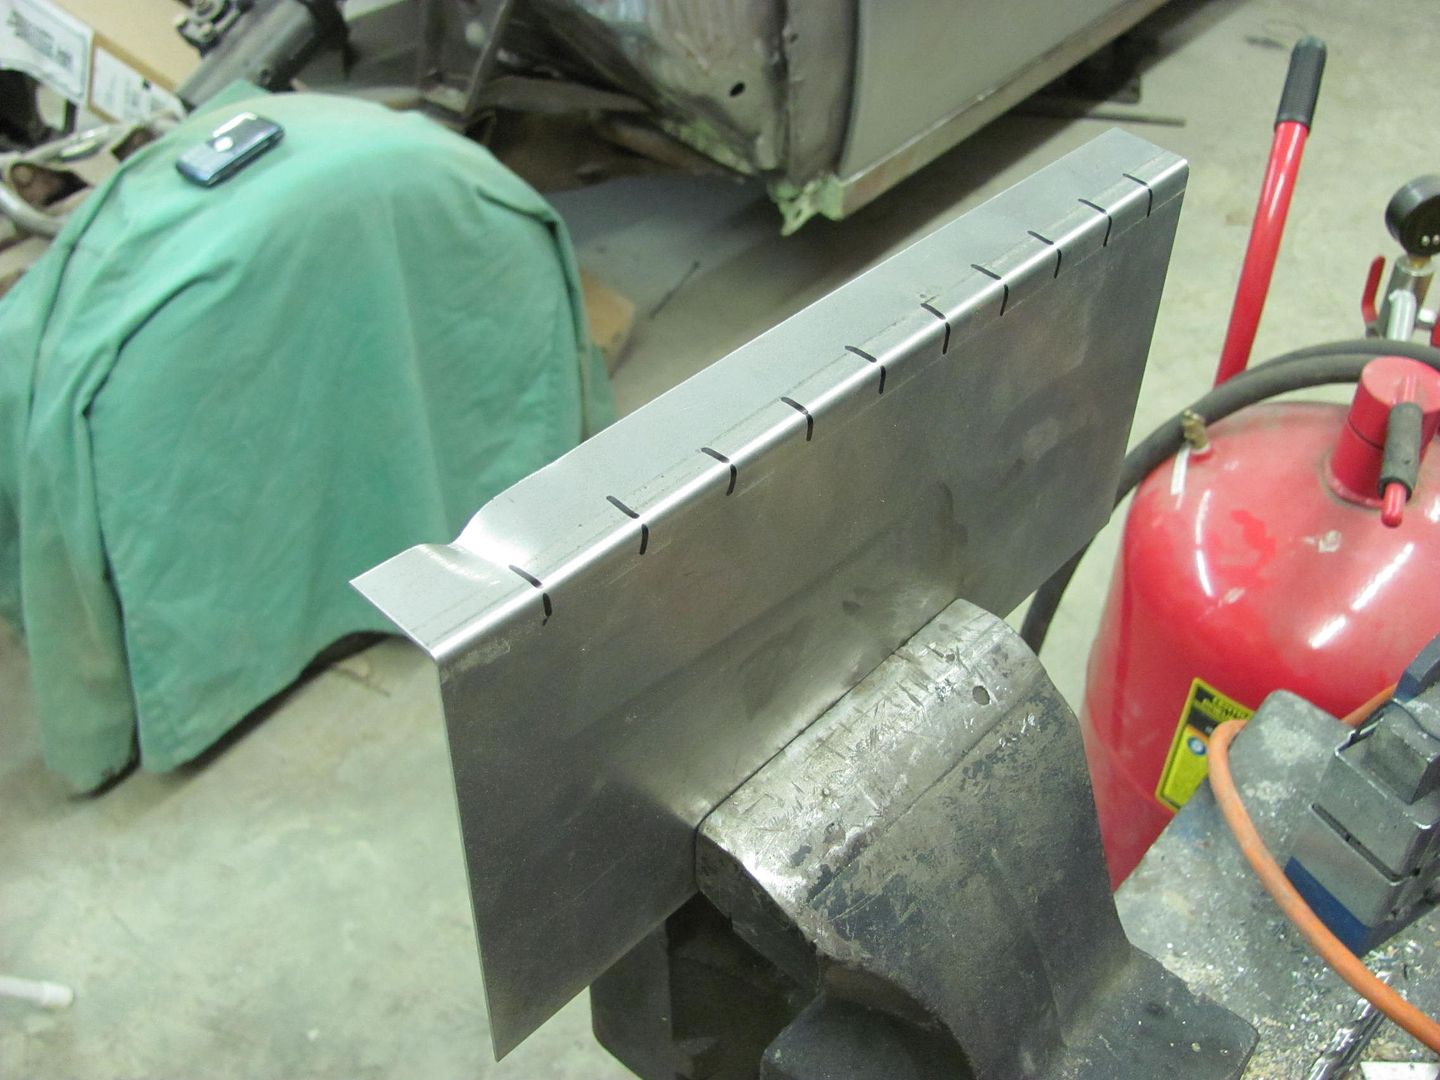
Our new patch panel is bent up with about a 1" flange. Reference marks are placed one inch apart...
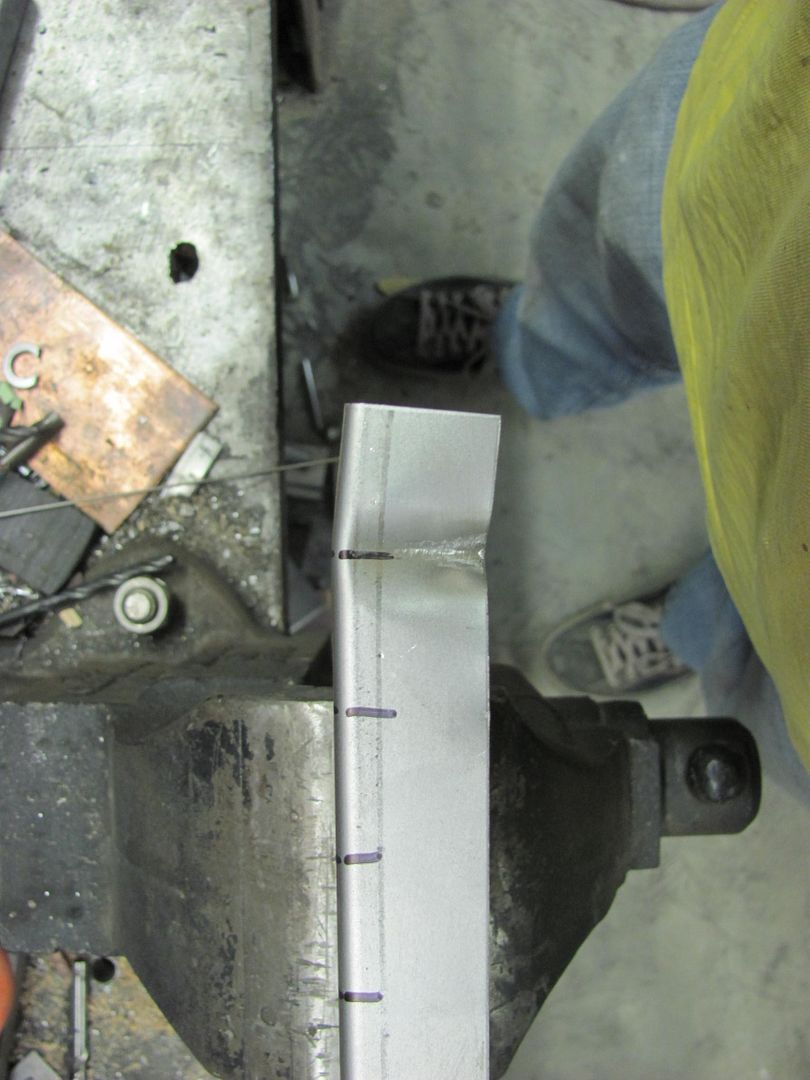
The first tuck shows how the radius starts to form. Slide the parallel fingers all the way against the bent panel and then squeeze the jaw closed. This will help to get the same depth of tuck each time.

Where I used an O/A torch, you should also be able to accomplish similar results with a hand held propane torch. (use what you have that works)

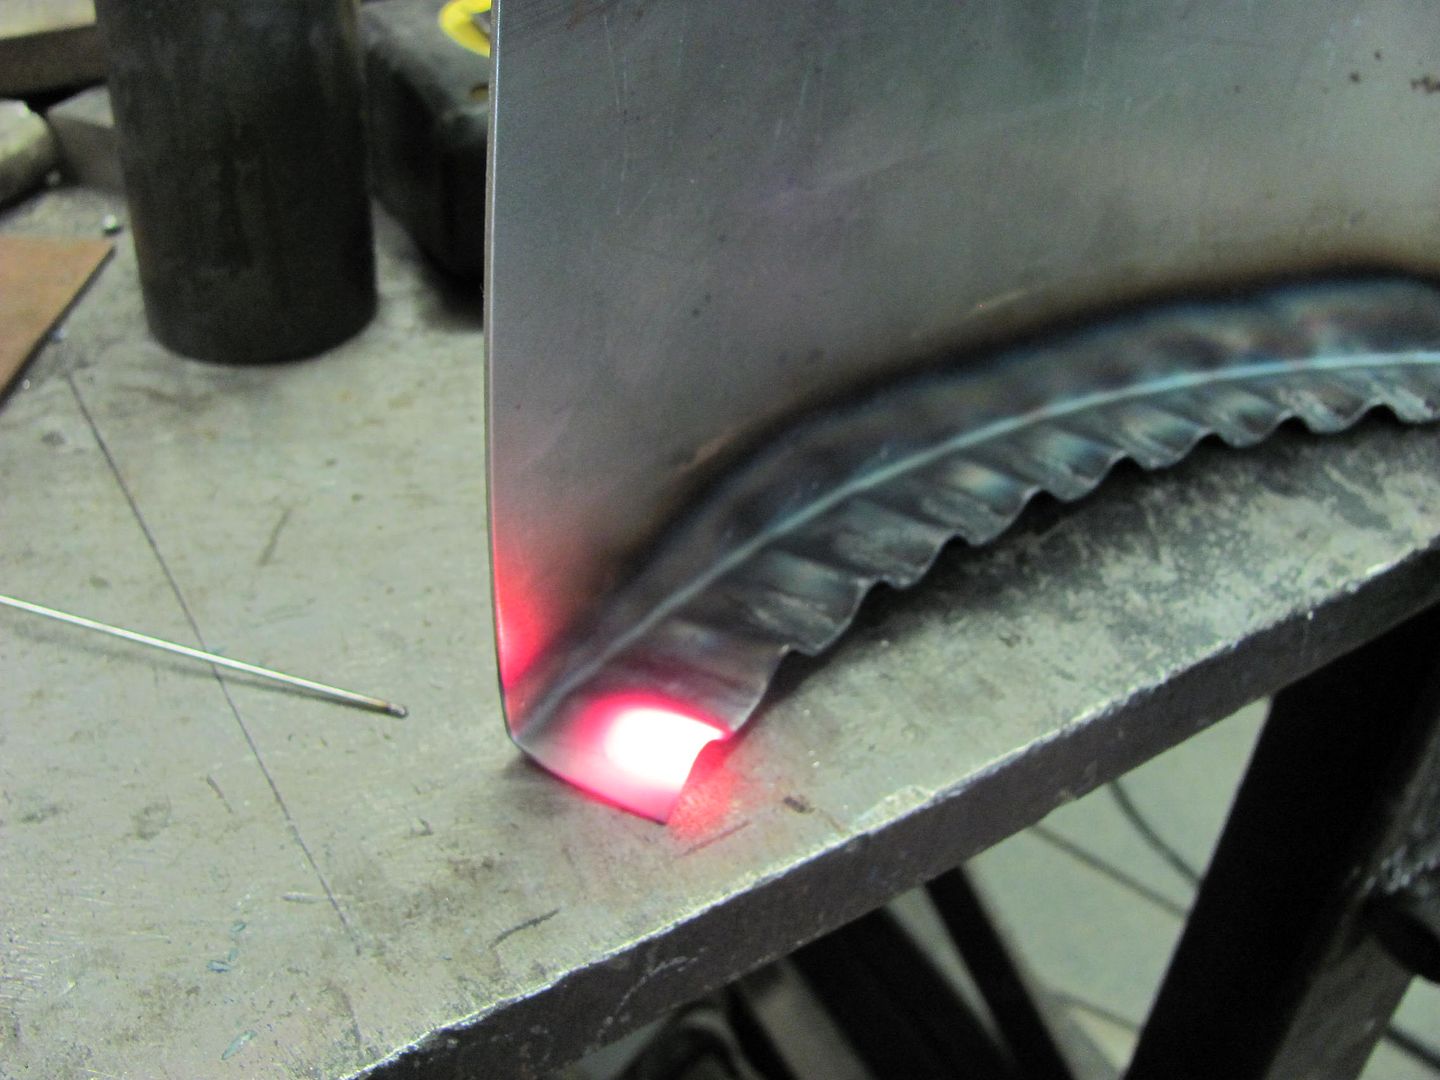
Heat up the raised portion of the first tuck until it glows nicely, then use a low crown body hammer (or suitable substitute) to flatten the tuck back into the flange. Repeat for the remaining tucks...
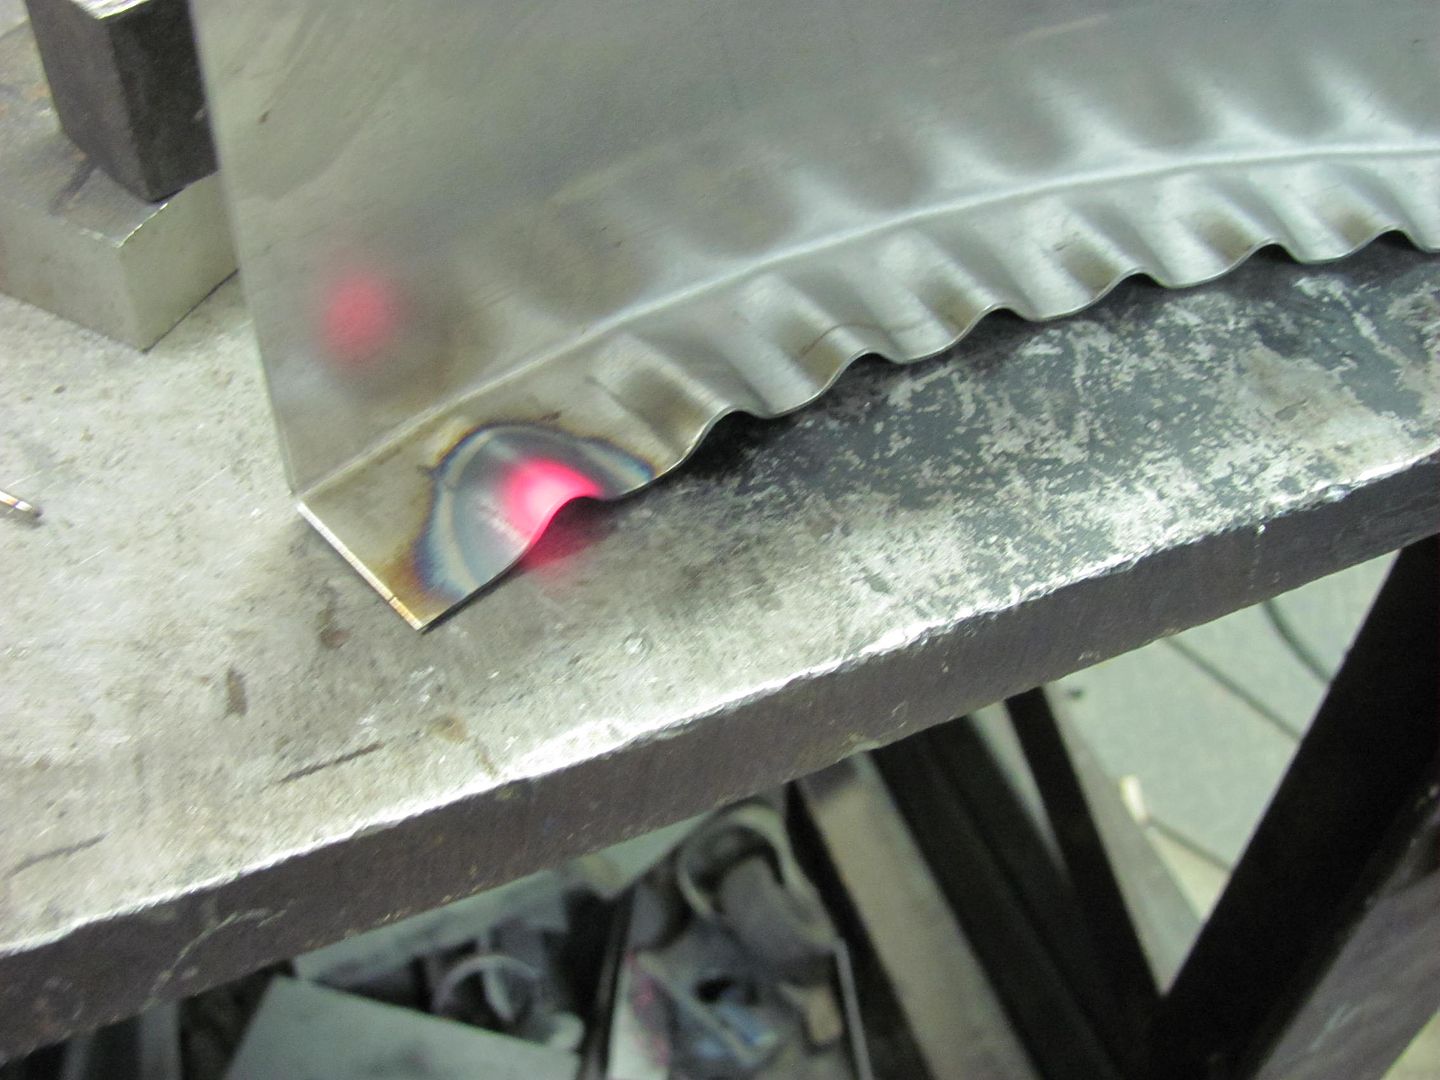
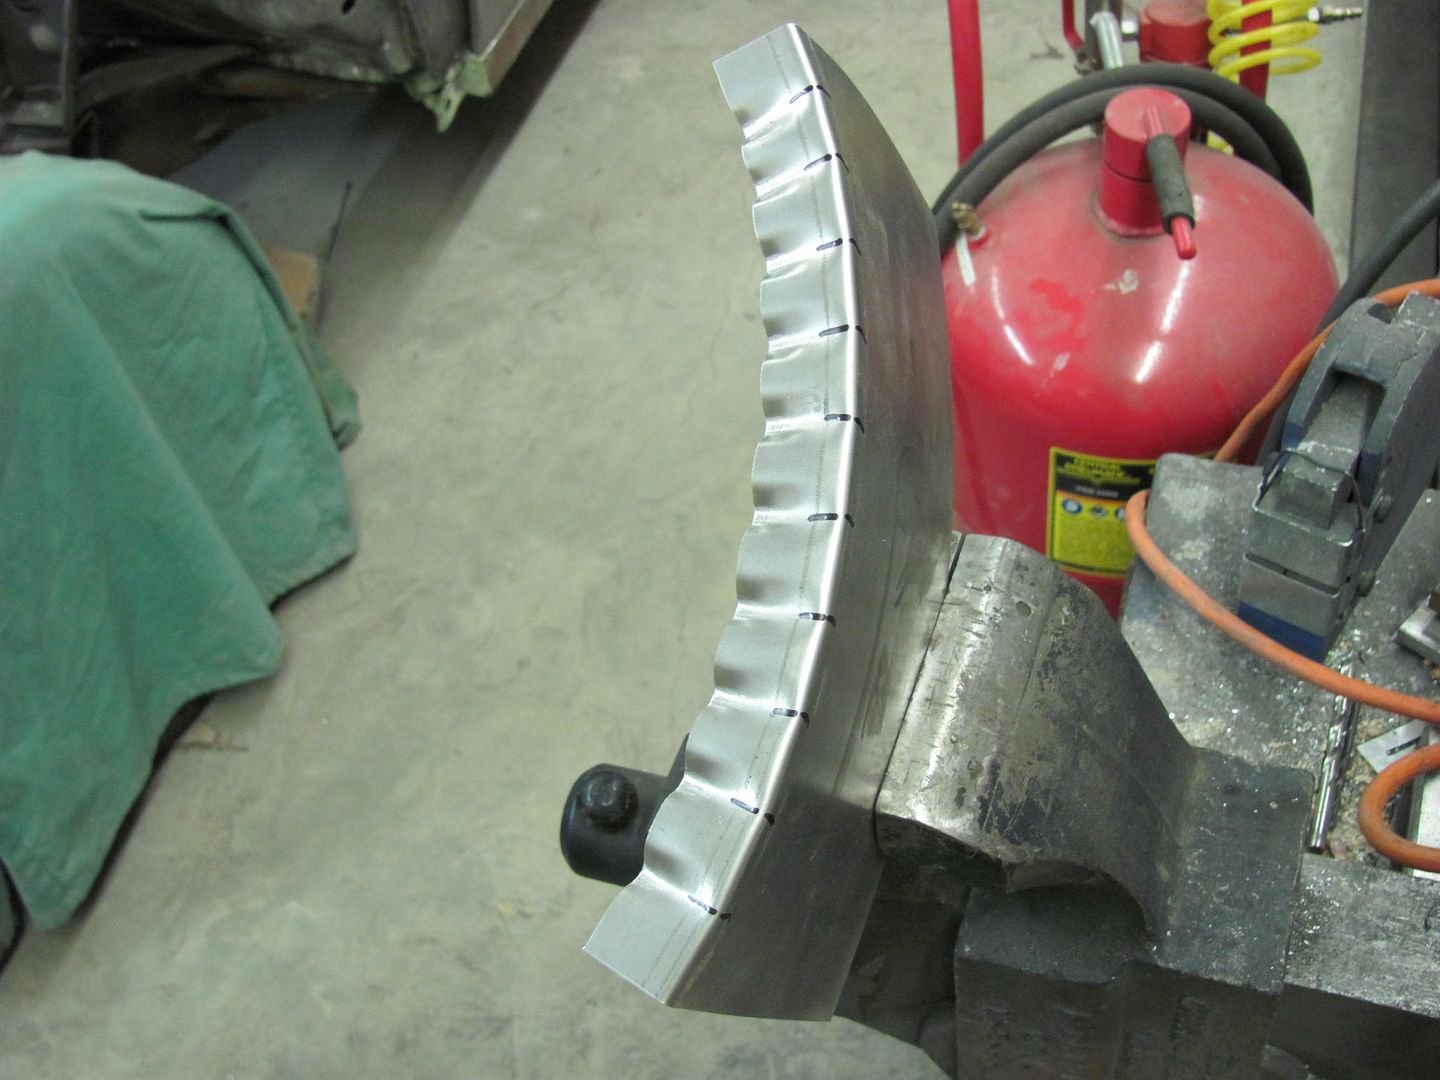
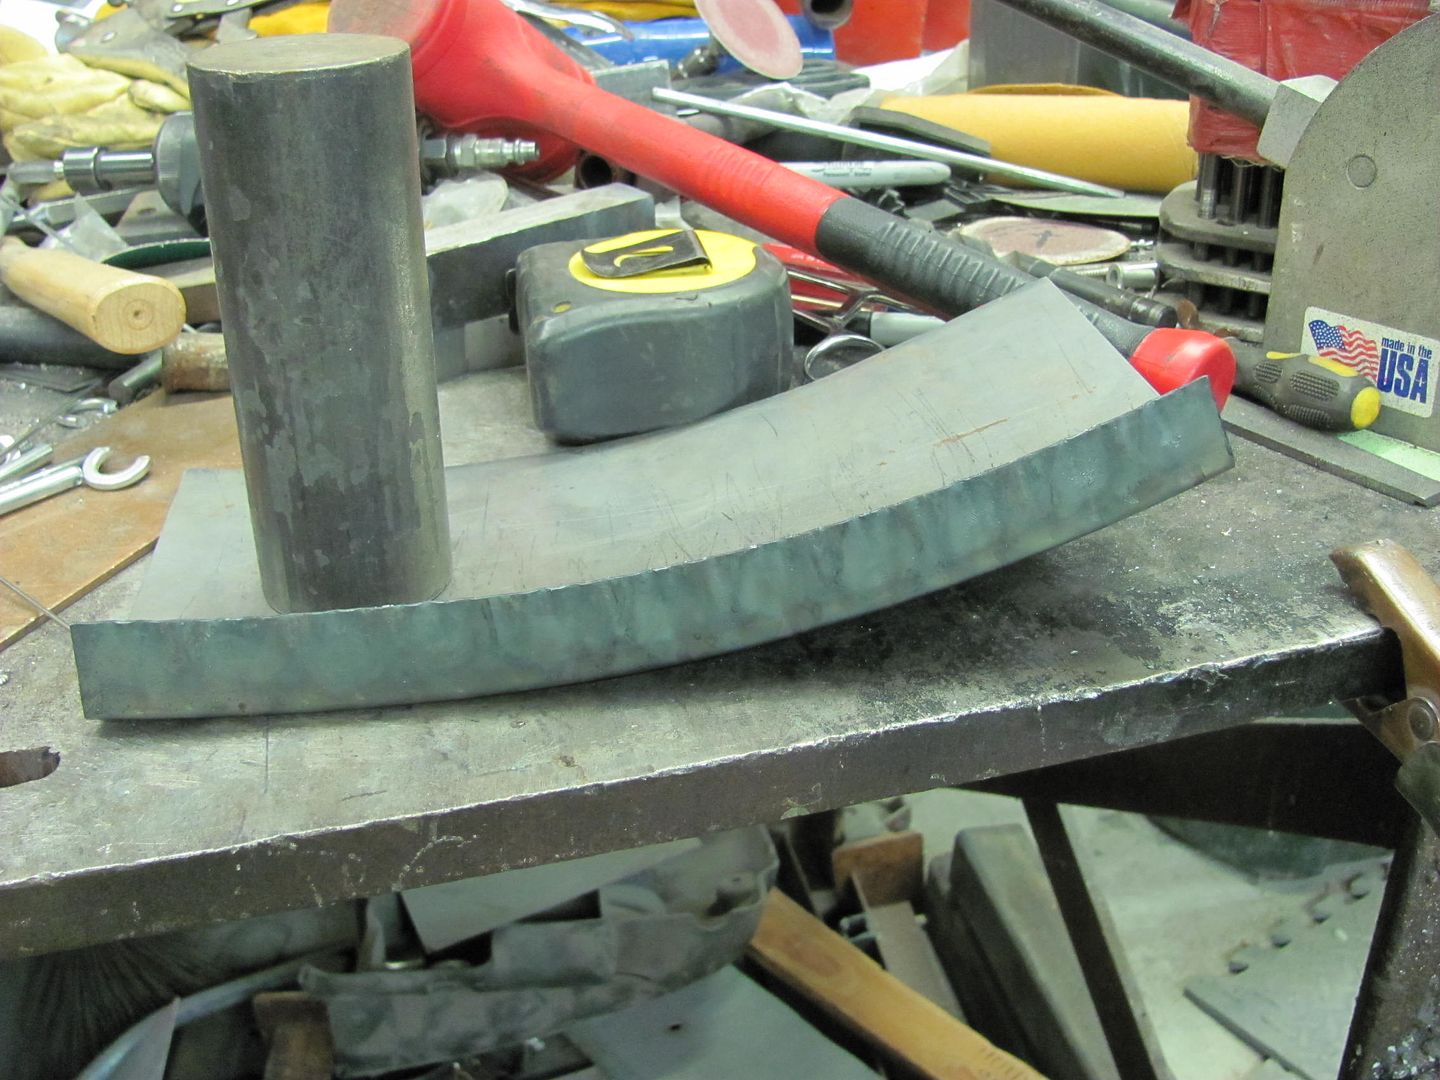
You can see we have a nice consistent radius, but likely it is not enough. Mark the next set of reference marks in between the first ones, just to stagger the shrink area to a new portion of the flange that has not been shrunk yet..

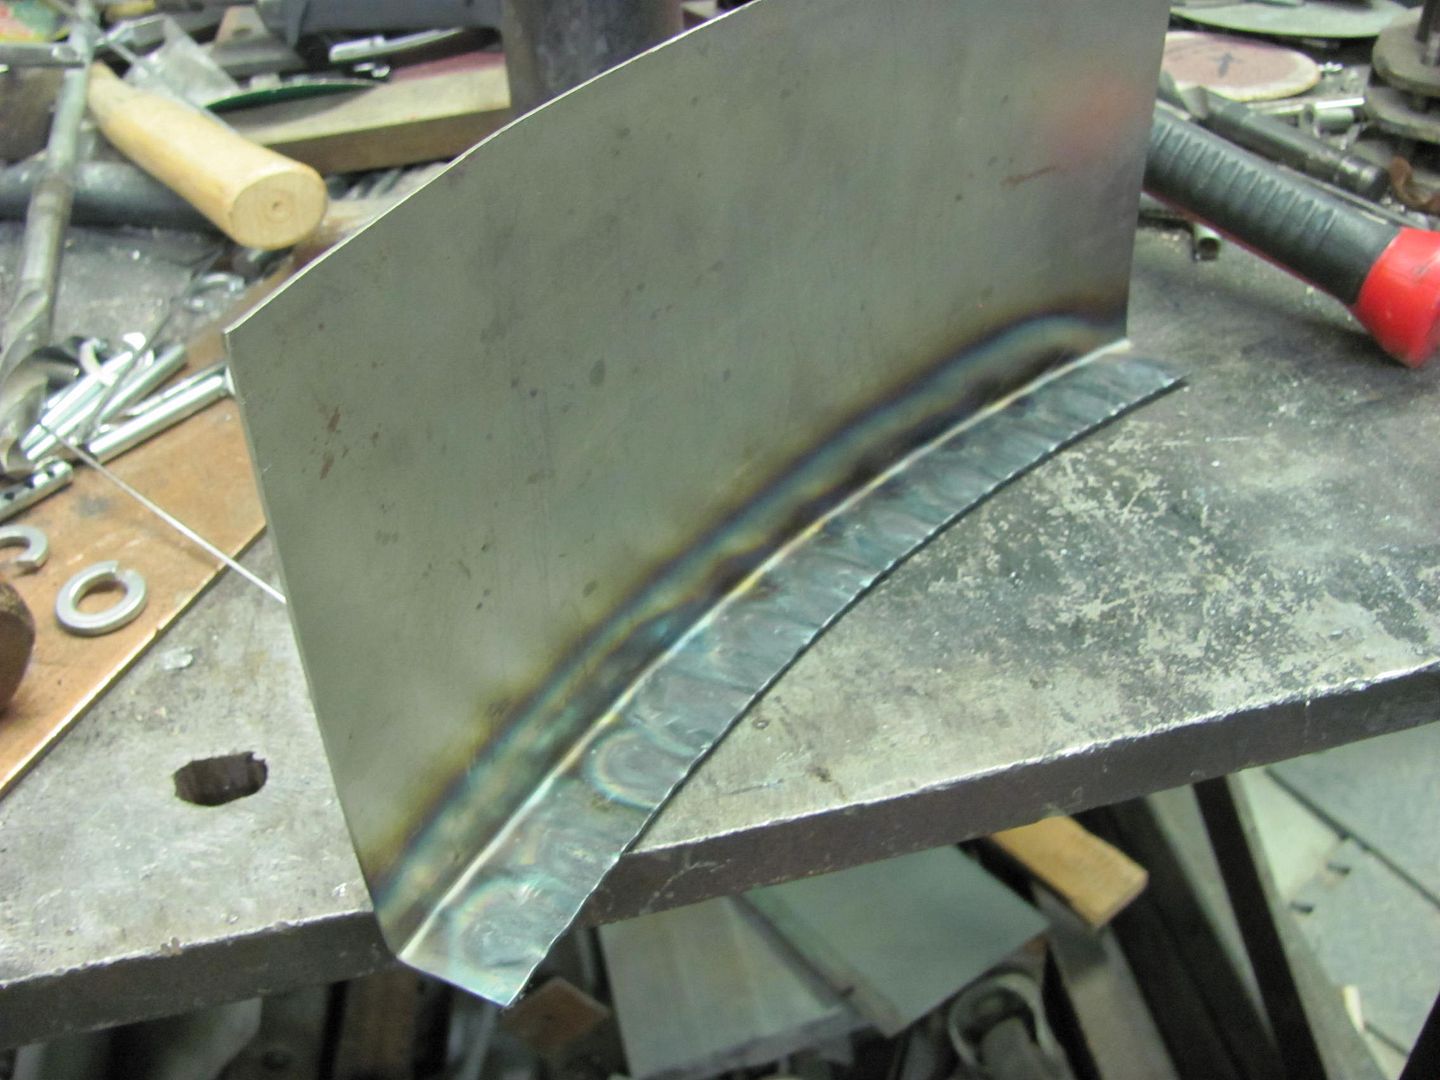
Where our flange is starting to form a radius, the outer edge has a tendency to remain flat. Rolling across a nice round piece of pipe while holding down gently on the edges will help (or whatever is handy....I will not be held liable for repurcussions from using stuff from your wife's kitchen..)
Repeat the process of heating and hammering the tucks....
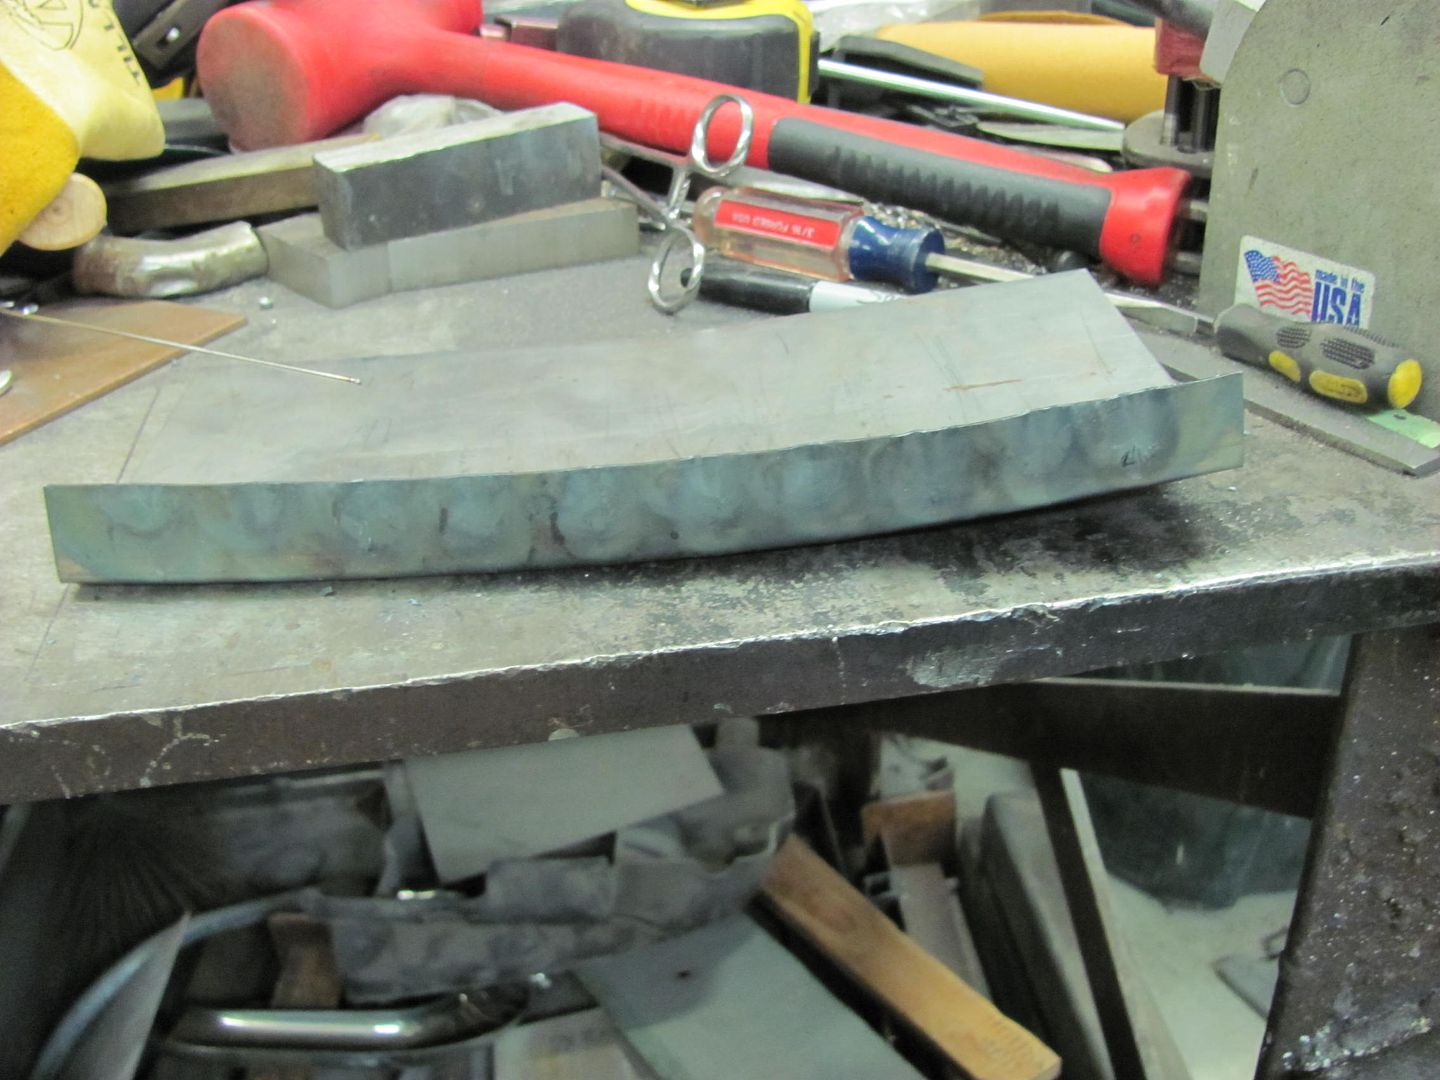
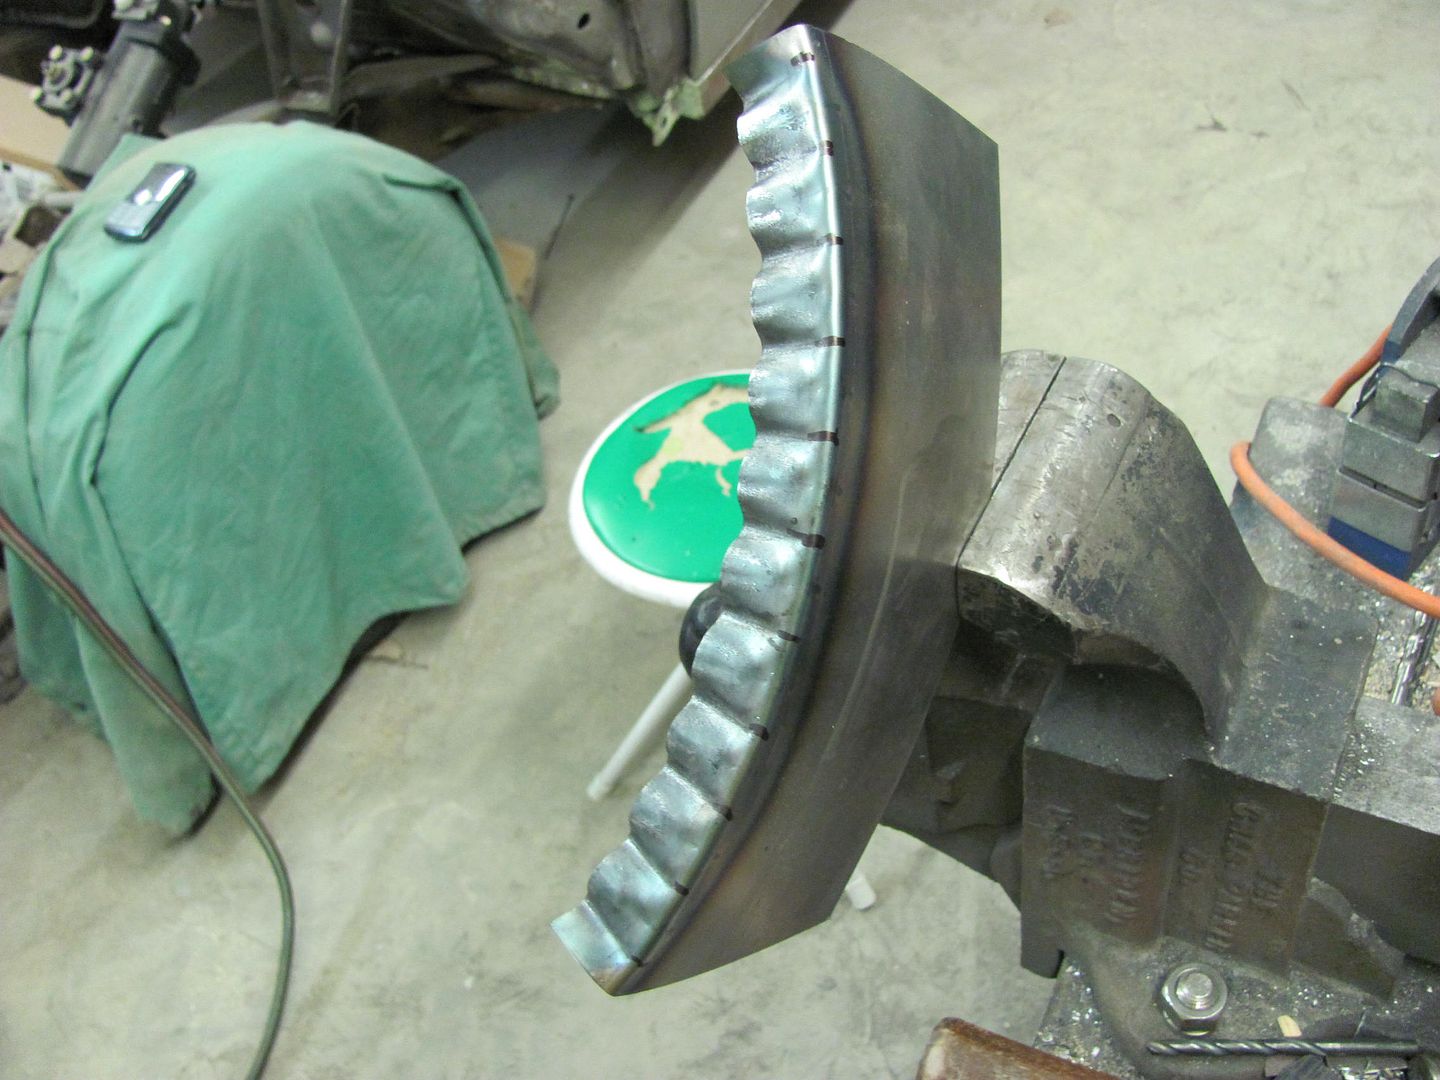
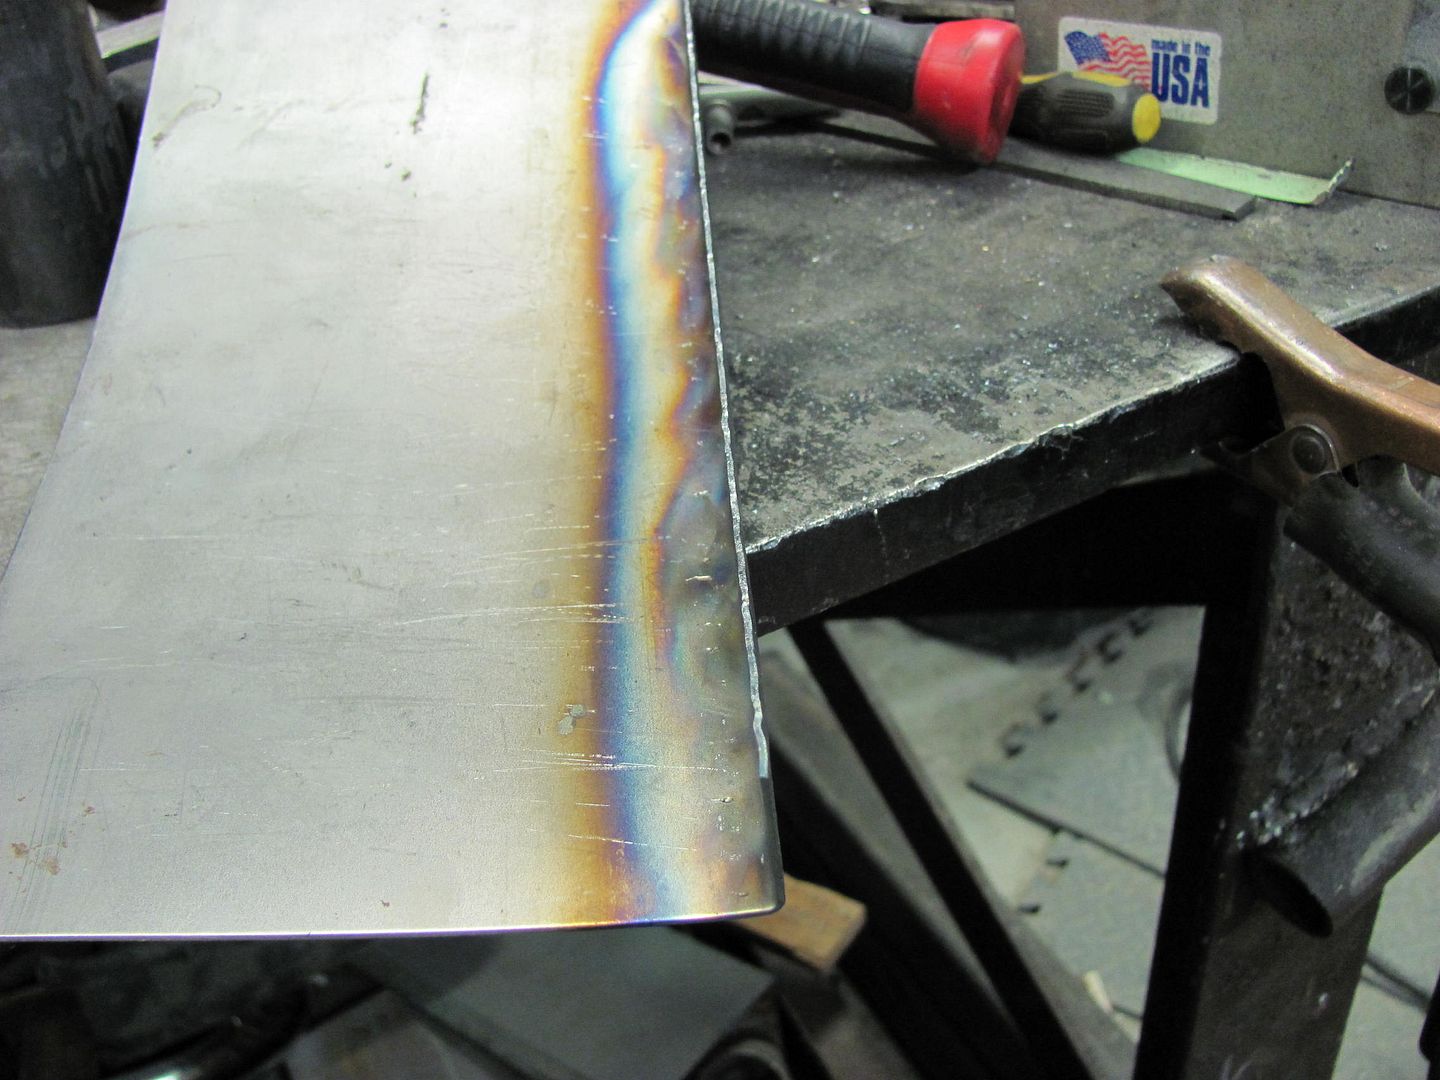
Depending on how wavy the flange gets, you may have to go past the radius you are looking for to allow for flattening the flange
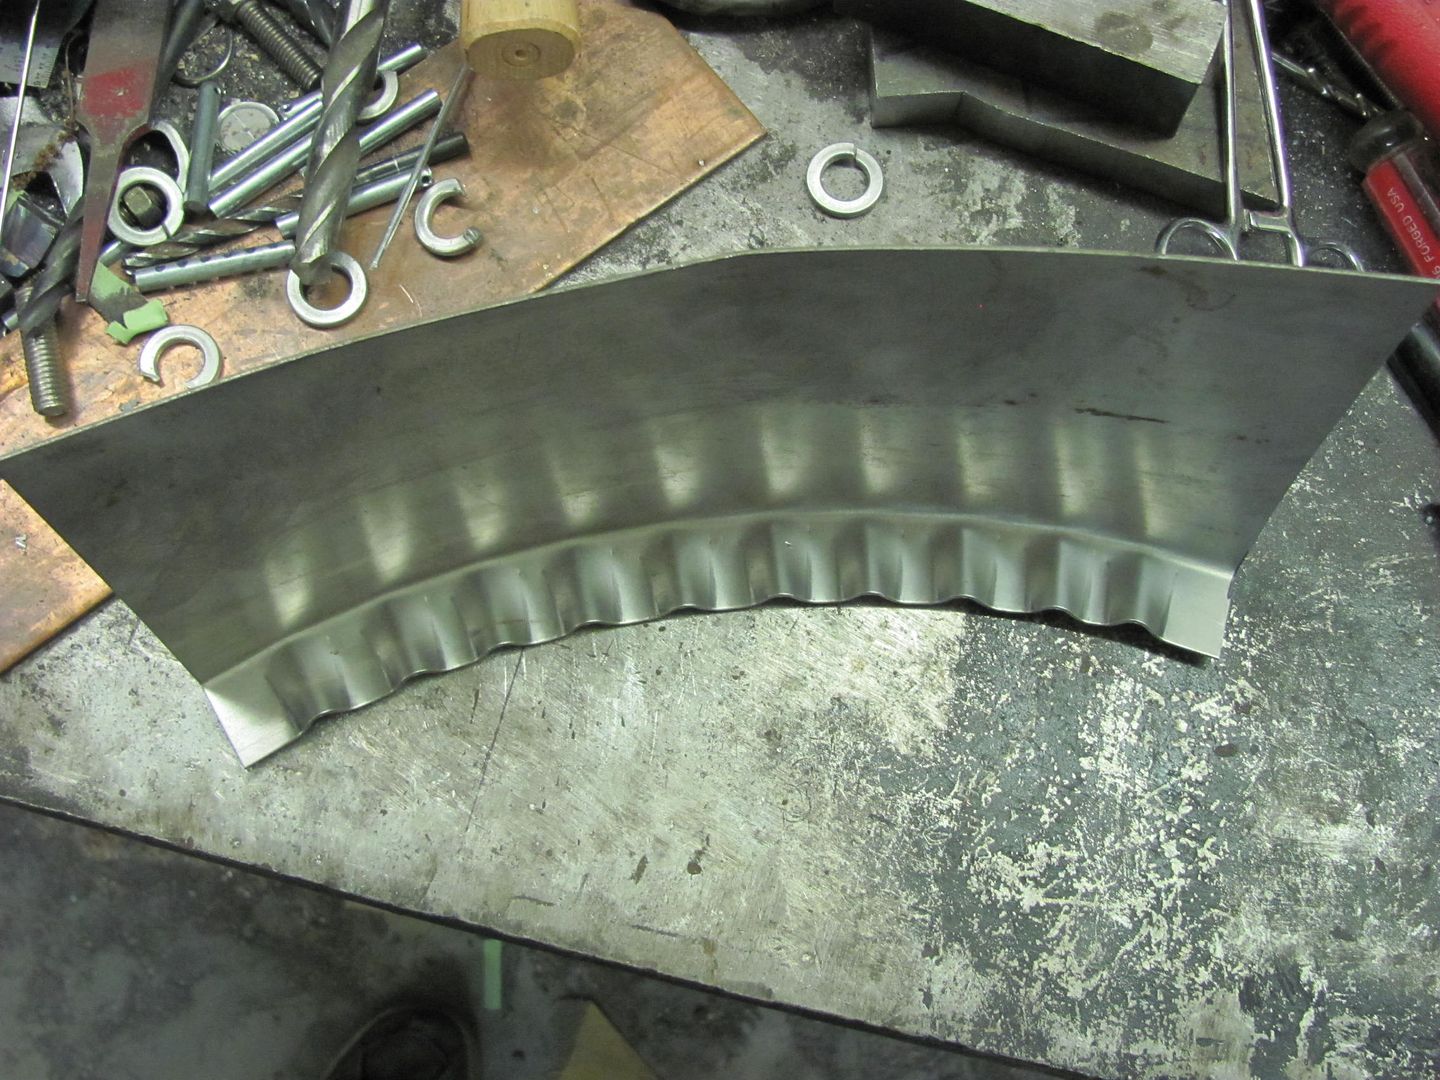
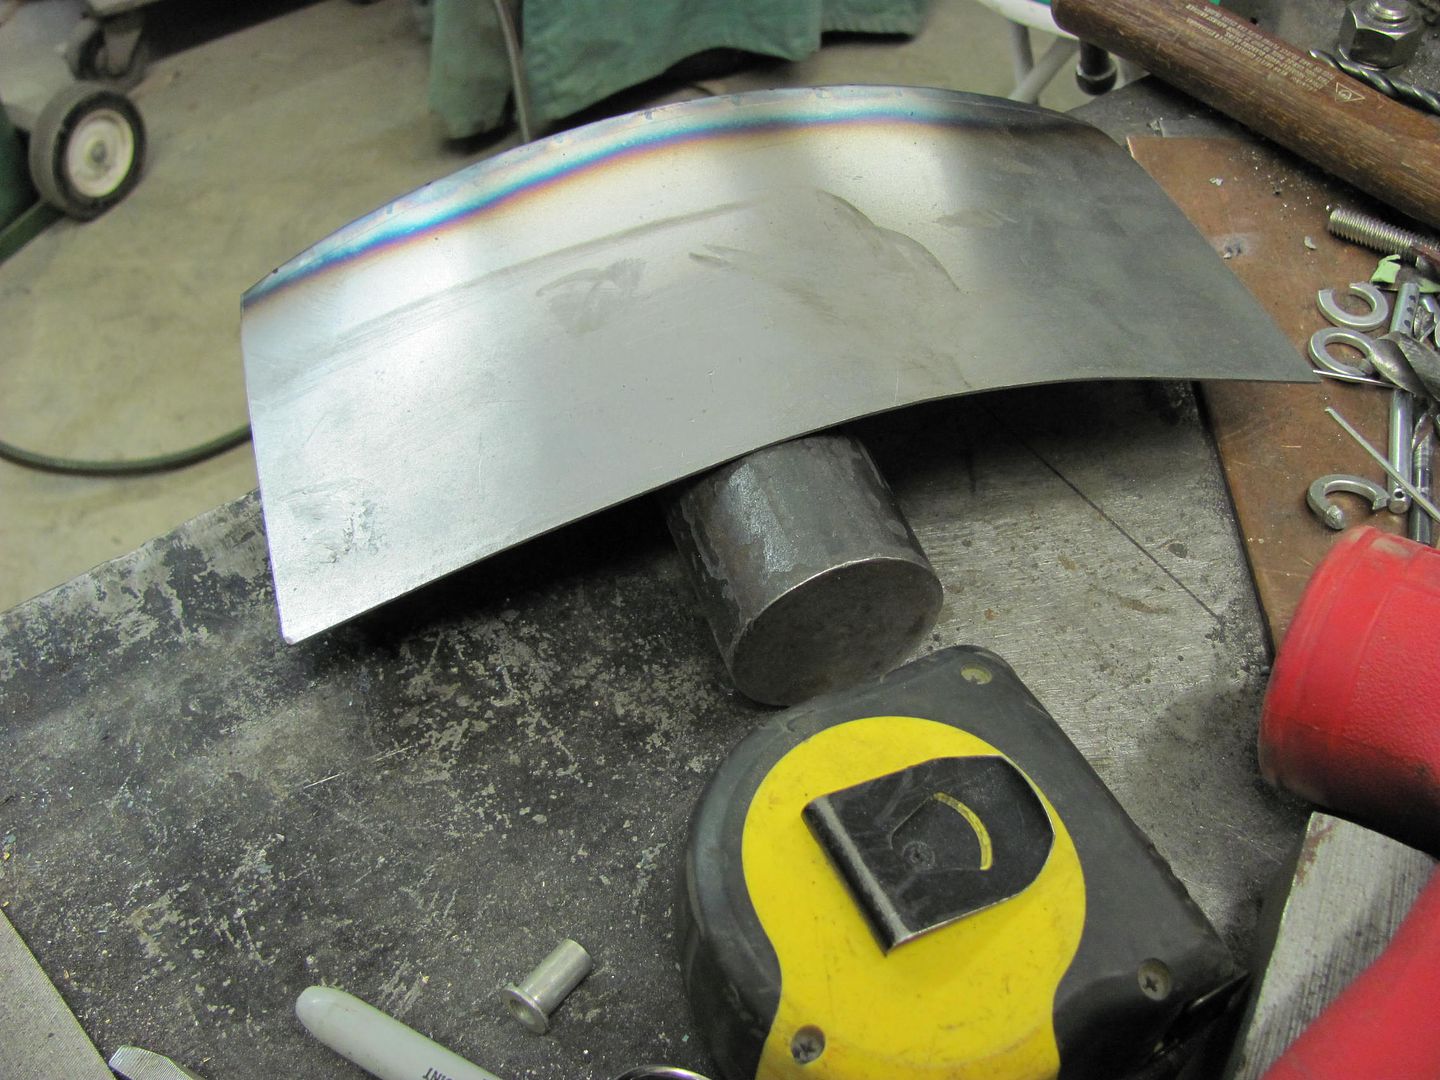
....and a comparison of the first and second, repeat as neccessary until you reach the radius you need.
Here are some "tucking" pliers I made out of neccessity when forming up a replacement piece for rust repair, and I'll have to admit, their biggest flaw is not providing accurate, consistent tucks. Of course, the operator could also be flawed.....
The more consistent the tucks, the more consistent the distance between them, in the end, the more consistent our radius will be. To improve on the tucks I'll start out by making a tool that will more accurately duplicate consistent tucks. We'll start off by finding a pair of vise grips suitable for the job, which in this case means the jaw serrations are starting to wear and round off. Finish what has started by removing the serrations to produce a nice flat jaw on the bottom, and cut the top one off at about 30 degrees from its original position.
I had some extra long shouldered 3/8 bolts, perfect round stock for the job. Three of them were cut off to 1-1/2" length.
Now because we don't have a fancy shrinker-stretcher machine likely means we don't have a lathe either. No sweat, use this economy model made by Dewalt...
To set the spacing for the "fingers" the first is clamped in the vise grip jaw, centered.
The outer is placed next to it and then welded down the outside, center finger removed, and then welded down inside.
Repeat for opposite side, then weld center finger.
Our new patch panel is bent up with about a 1" flange. Reference marks are placed one inch apart...
The first tuck shows how the radius starts to form. Slide the parallel fingers all the way against the bent panel and then squeeze the jaw closed. This will help to get the same depth of tuck each time.
Where I used an O/A torch, you should also be able to accomplish similar results with a hand held propane torch. (use what you have that works)
Heat up the raised portion of the first tuck until it glows nicely, then use a low crown body hammer (or suitable substitute) to flatten the tuck back into the flange. Repeat for the remaining tucks...
You can see we have a nice consistent radius, but likely it is not enough. Mark the next set of reference marks in between the first ones, just to stagger the shrink area to a new portion of the flange that has not been shrunk yet..
Where our flange is starting to form a radius, the outer edge has a tendency to remain flat. Rolling across a nice round piece of pipe while holding down gently on the edges will help (or whatever is handy....I will not be held liable for repurcussions from using stuff from your wife's kitchen..)
Repeat the process of heating and hammering the tucks....
Depending on how wavy the flange gets, you may have to go past the radius you are looking for to allow for flattening the flange
....and a comparison of the first and second, repeat as neccessary until you reach the radius you need.
More Turbo
Joined: Jan 2007
Posts: 593
Likes: 15
From: Wichita, KS
Nice tutorial! I've seen others made from old vise grips too. You can also make different sized ones for deeper sections, though it gets tough if you have to go real deep into the panel. The tucking I've done was with a couple of 3/8" Allen wrenches ground round and pointed, then welded together. We clamped these in the bench vise or in a special stand that holds dollies, tucking forks, and other stuff.
I've never seen used a torch to soften the metal and allow it to shrink faster. If I was going to, I would heat it just til it starts to blue so that there is no mill scale to deal with later. Another thing I'd like to mention is that by heating the panel, the entire lower edge may shrink, so if you want a consistent radius all the way to the edge, the sides, not just the flange, may have to be restretched. Without a wheel, that can be tough to do smoothly, especially for a beginner.
I just made a tucking tool that works much like the stretcher/shrinkers, but cost a fortune less than even the HF models.
Oh, and it you heat it, you can't put it on a UHMW slab or use a UHMW hammer to flatten the tucks.
Nice tool though!
Dave
More Turbo
Joined: Jan 2007
Posts: 593
Likes: 15
From: Wichita, KS
I'll add, for the benefit of others, that the tucking doesn't have to be done on a flange like that. You can do the same to a flat piece of sheet and put a crown in it. It doesn't take long to see the effect, but it does take a "little bit" of trial and error to get it right sometimes.
The first thing that I learned to tuck-shrink on was a motorcycle fender. Started with a flat piece of 20 ga. and ended up with something that looked kind of Indian-ish.
Dave
The first thing that I learned to tuck-shrink on was a motorcycle fender. Started with a flat piece of 20 ga. and ended up with something that looked kind of Indian-ish.
Dave
Thread Starter
|
Tuned
Joined: Aug 2007
Posts: 458
Likes: 123
From: Maryland
Thanks for the comments guys.
Each time you heat the metal (tuck) you should eliminate any work hardening that may, if at all, exist. I would think the possibilities should be endless as far as how tight a radius you could do. When the radius starts to get real tight, or if we were using a wider flange, you may see where it would be beneficial to alternate the depth of the tuck, one full depth of the flange, the next half the depth, etc. This would help as the inner radius (edge of the flange in this case) needs to be shorter in length than where the bend is, so by alternating the depth of tucks, you would have more shrinking there on the edge where it's needed, half as much ( or so) in by the bend.
Each time you heat the metal (tuck) you should eliminate any work hardening that may, if at all, exist. I would think the possibilities should be endless as far as how tight a radius you could do. When the radius starts to get real tight, or if we were using a wider flange, you may see where it would be beneficial to alternate the depth of the tuck, one full depth of the flange, the next half the depth, etc. This would help as the inner radius (edge of the flange in this case) needs to be shorter in length than where the bend is, so by alternating the depth of tucks, you would have more shrinking there on the edge where it's needed, half as much ( or so) in by the bend.
Trending Topics
Fleet Owner


Joined: Jul 2004
Posts: 27,294
Likes: 1,055
From: NM
FTE Stories
Ford Trucks for Ford Truck Enthusiasts

10 Things Every Truck Owner NEEDS (2026 Edition)
Michael S. Palmer
Rezvani's Latest Post-Apocalyptic Monster Is a Ford F-150 Raptor Underneath
Verdad Gallardo
Top 10 Most Expensive Ford Trucks Ever Sold on Bring a Trailer
Joe Kucinski
2027 Ford Super Duty Buyer's Guide (Every Model, Engine, & Package)
Brett Foote
Top 10 Ford Truck Tragedies
Joe Kucinski
AEV FXL Super Duty - the Super Duty Raptor Ford Doesn't Make
Brett Foote
Lobo Vs Lobo: Proof the F-150 Lobo Should Be Even Lower!
Michael S. Palmer
Ford's 2001 Explorer Sportsman Concept Looks For a New Home
Verdad Gallardo
10 Best Ford Truck Engines We Miss the Most!
Joe KucinskiHotshot


Joined: Nov 2000
Posts: 11,591
Likes: 14
From: Pflugerville, tx

how do you do that?
Sam

Thread
Thread Starter
Forum
Replies
Last Post
MP&C
1948 - 1956 F1, F100 & Larger F-Series Trucks
3
Jan 5, 2009 12:56 PM