
What did you do to the X today?
 07-05-2013, 09:28 PM


Cargo Master
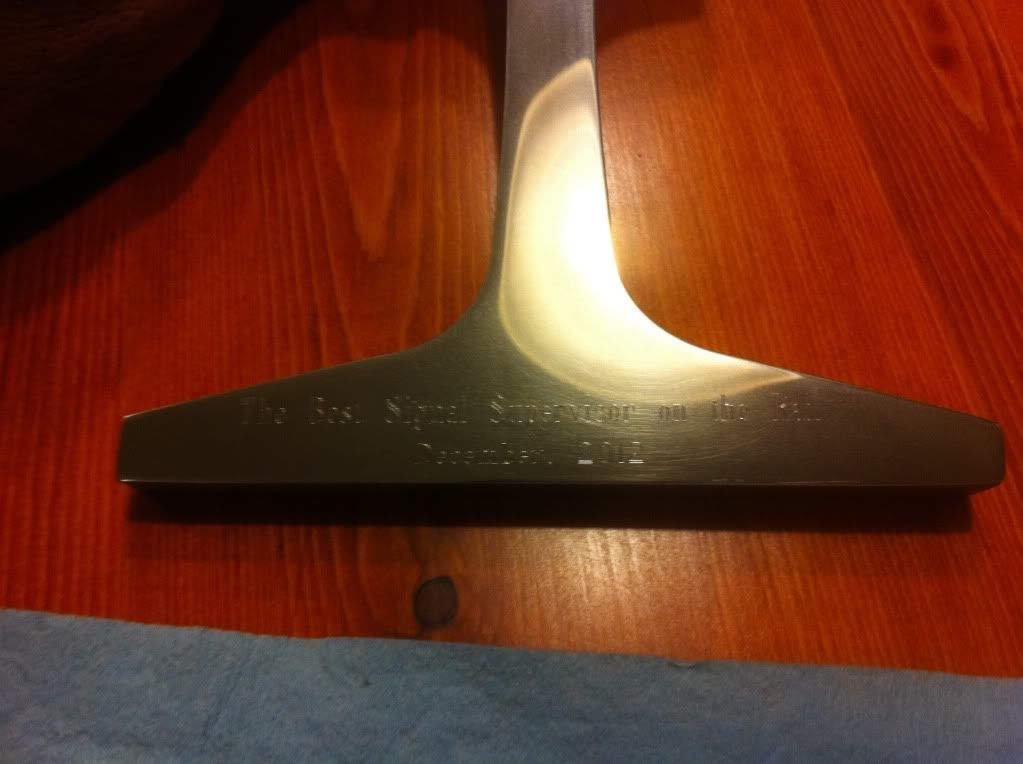
These pictures don't do it justice. It looks like a mirror instead of a piece of metal.
07-05-2013, 09:59 PM

Now hit it with a buffer and polishing compound then add a clear coat so it won't rust.


 07-05-2013, 10:06 PM
Postmaster
Yes just polished alumina with a clear coat. Getting the clear coat off = no biggie. Sanding all that corrosion off the aluminum is one of those tasks that you can cannot rush. Took me about 6 hours, blasted the back side and edges with an angle grinder, stripped the coat off the front with aircraft remover, then started sanding, and sanding, and sanding. The 220 I went dry, then 320, 400 and 600 I used wet....will make 800 and 1200 the polishing passes. I'm pondering what then (since it's going to take me a month or so to find the time to get the other three done I have some time) but I'm thinking some self etching clear primer followed by a couple coats of clear coat. Couple more pictures - haha excuse the socks the garage floor was cold. 
07-05-2013, 10:08 PM
Postmaster
07-05-2013, 10:09 PM
Postmaster
Hard work, my fingers are bleeding but man that metal gets shinny if you give it enough love....

 07-05-2013, 11:13 PM
Reminds me of my hot rod days when I used to port and polish heads by hand. You might want to take those wheels to a polishing/chrome shop and let them do it. They have high speed wheels with polishing compounds that will have those looking like new wheels in about 1/2 hour, then you can apply a clear coat or keep them up with Mothers polish. Otherwise you will spend a week on them when you could be doing something else.
07-06-2013, 01:12 AM
I rode in the back seat of the X today, we went up to Fish Lake Utah, we went the back way up there, from where we turned off the highway it was 37 miles, only 7 of them were paved. I let my Father in Law drive since he knew the way, and had driven my X before. Since I did all the work to the X last week, it had quite a bit more power and the rear wanted to walk on the washboard, I was quite happy when he slowed down and we took the rest of the road around 20 mph. It was beautiful, We crossed the divide just above 11,000 feet, I was in the back and could not get a picture of the sign. We ate at the lodge up at Fish Lake and then I hopped in the drivers seat and drove home, on the paved road. It was not all that bad in the back, but with 2 car seats and a booster with 3 kids and 5 Adults it was full. I have never watched a movie in there from the back before. I don't care if I ever do again. Yes all 6 feet and 250lbs fits back there, but after an hour, I was ready to get out!
07-06-2013, 02:18 PM
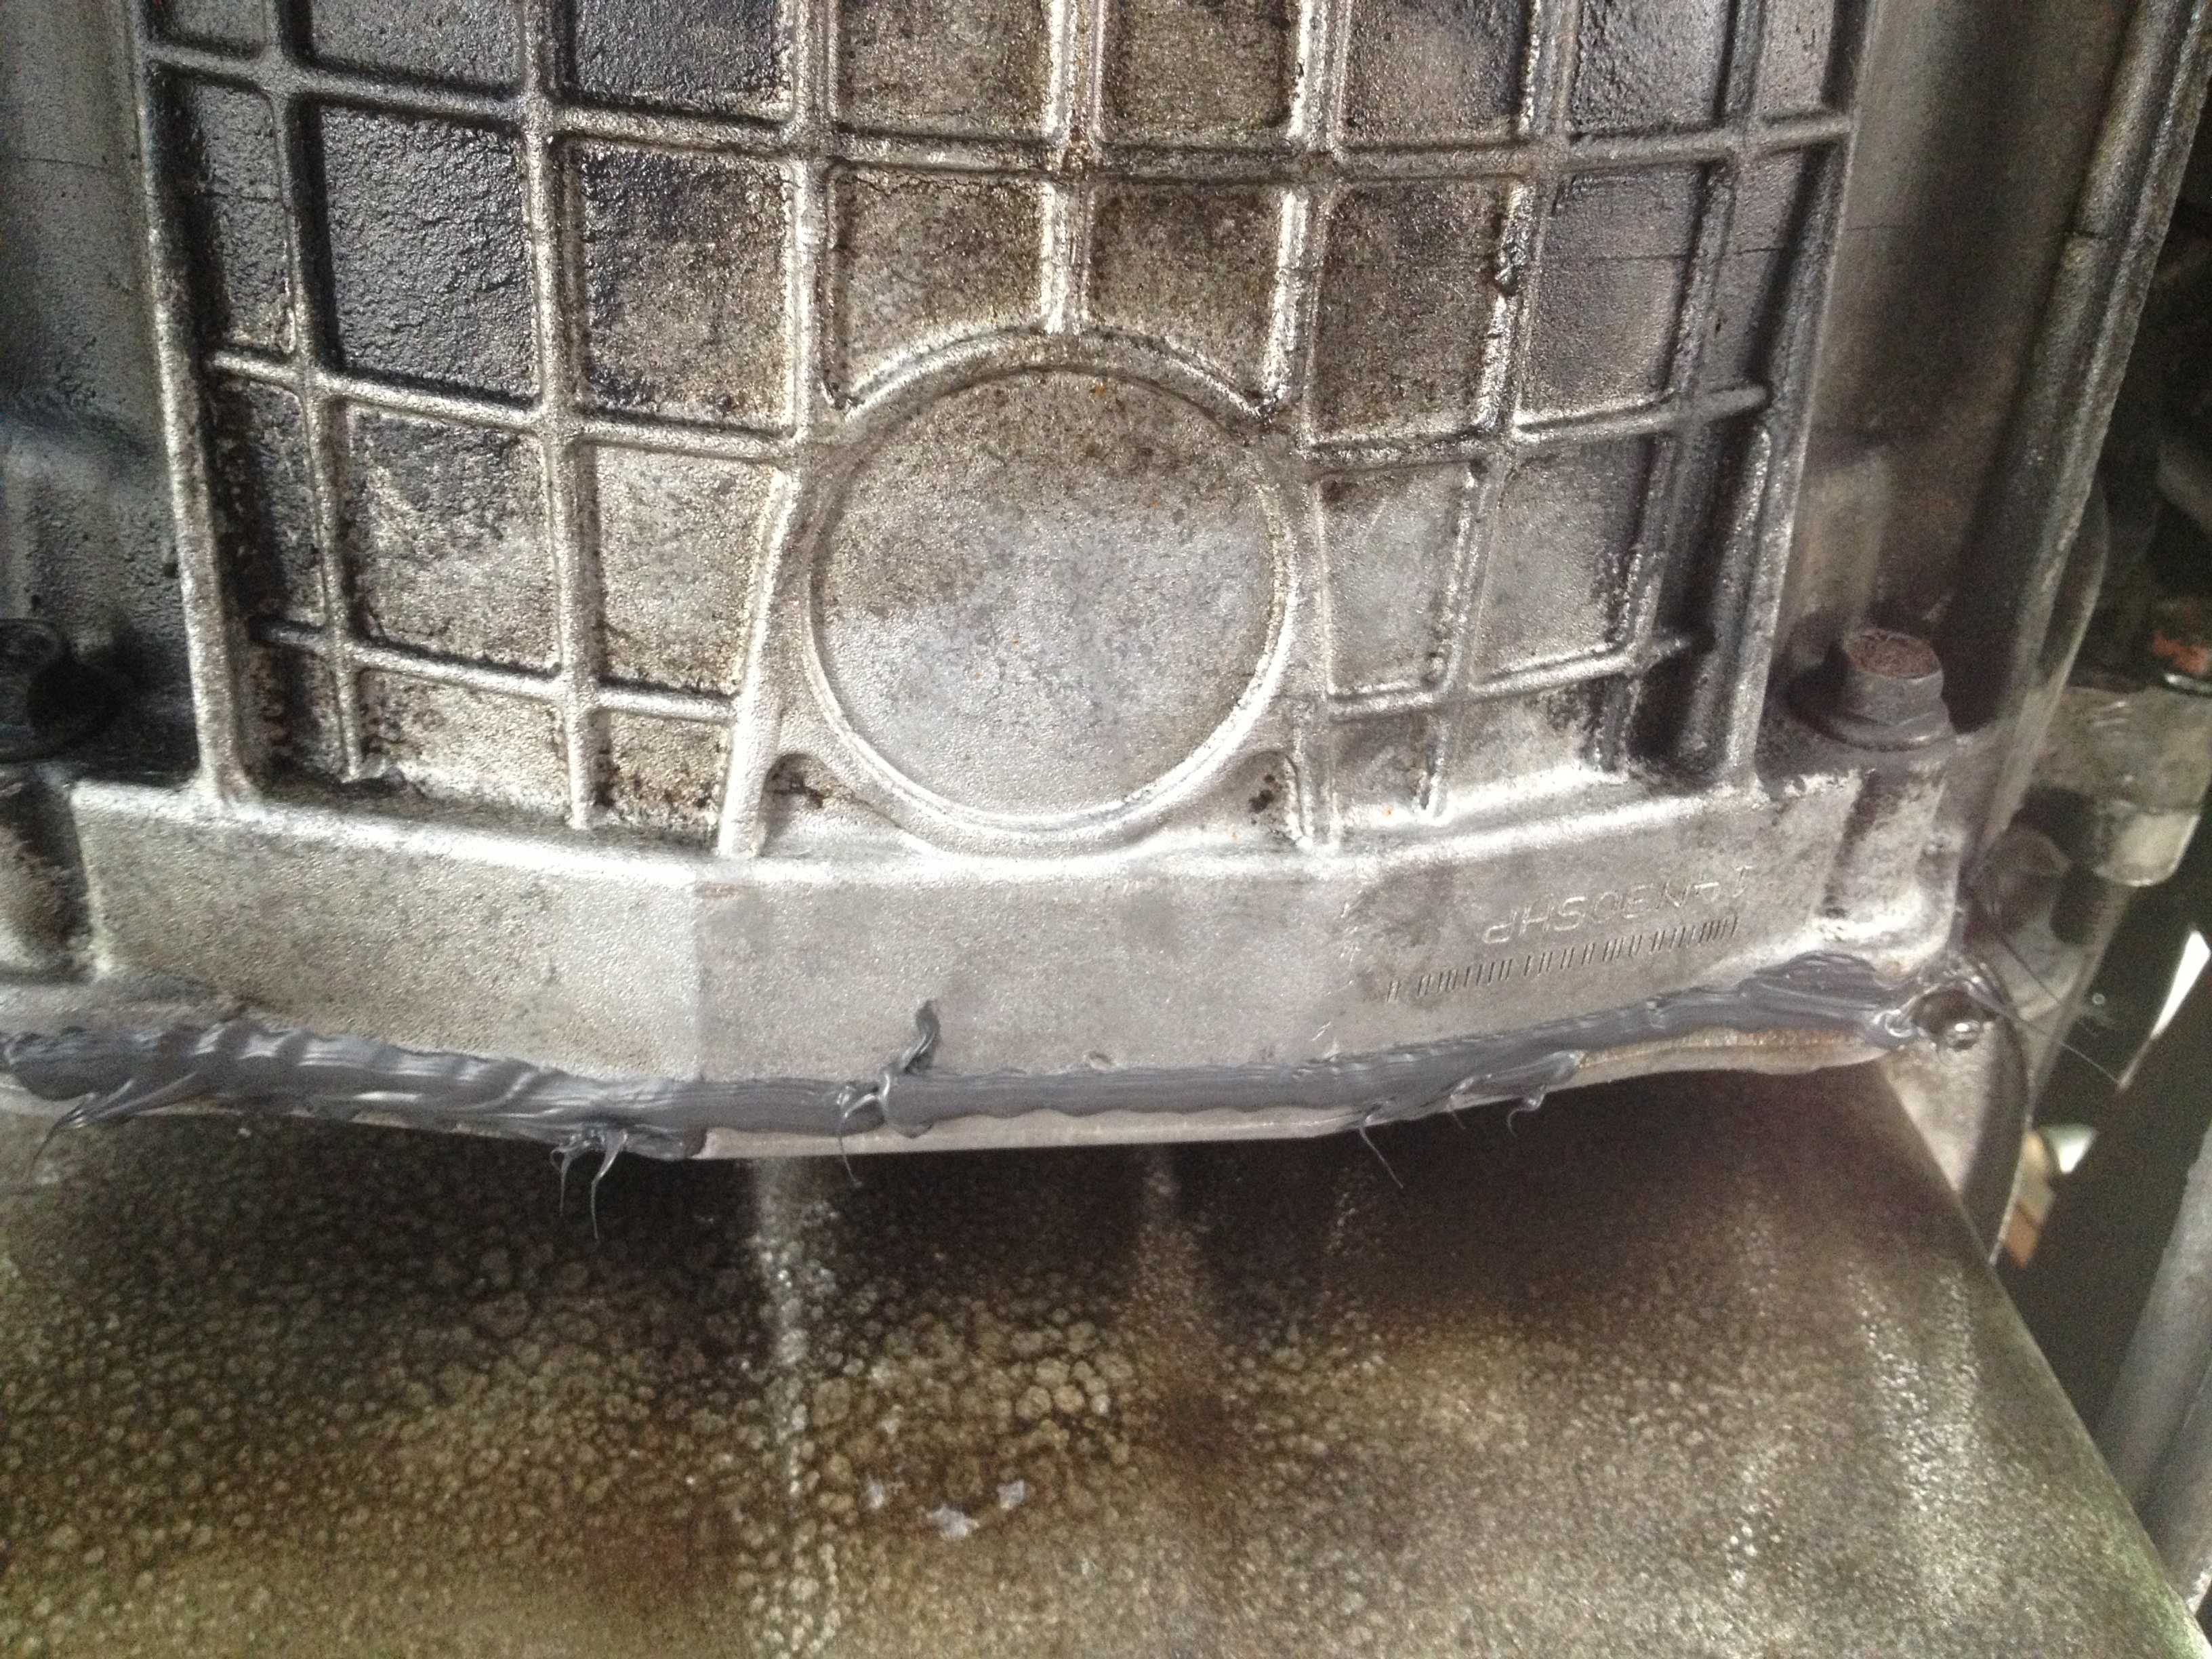
My buddy with an 06 did this about a month ago, put a bead of the black RTV where the trans meets the engine, and his is still completely oil free. As you can see mine is covered in oil except where i cleaned it, and always had a drip ready to fall. Driven 20 miles and so far so good lol. Got a little messy though
Also fixed my overhead display
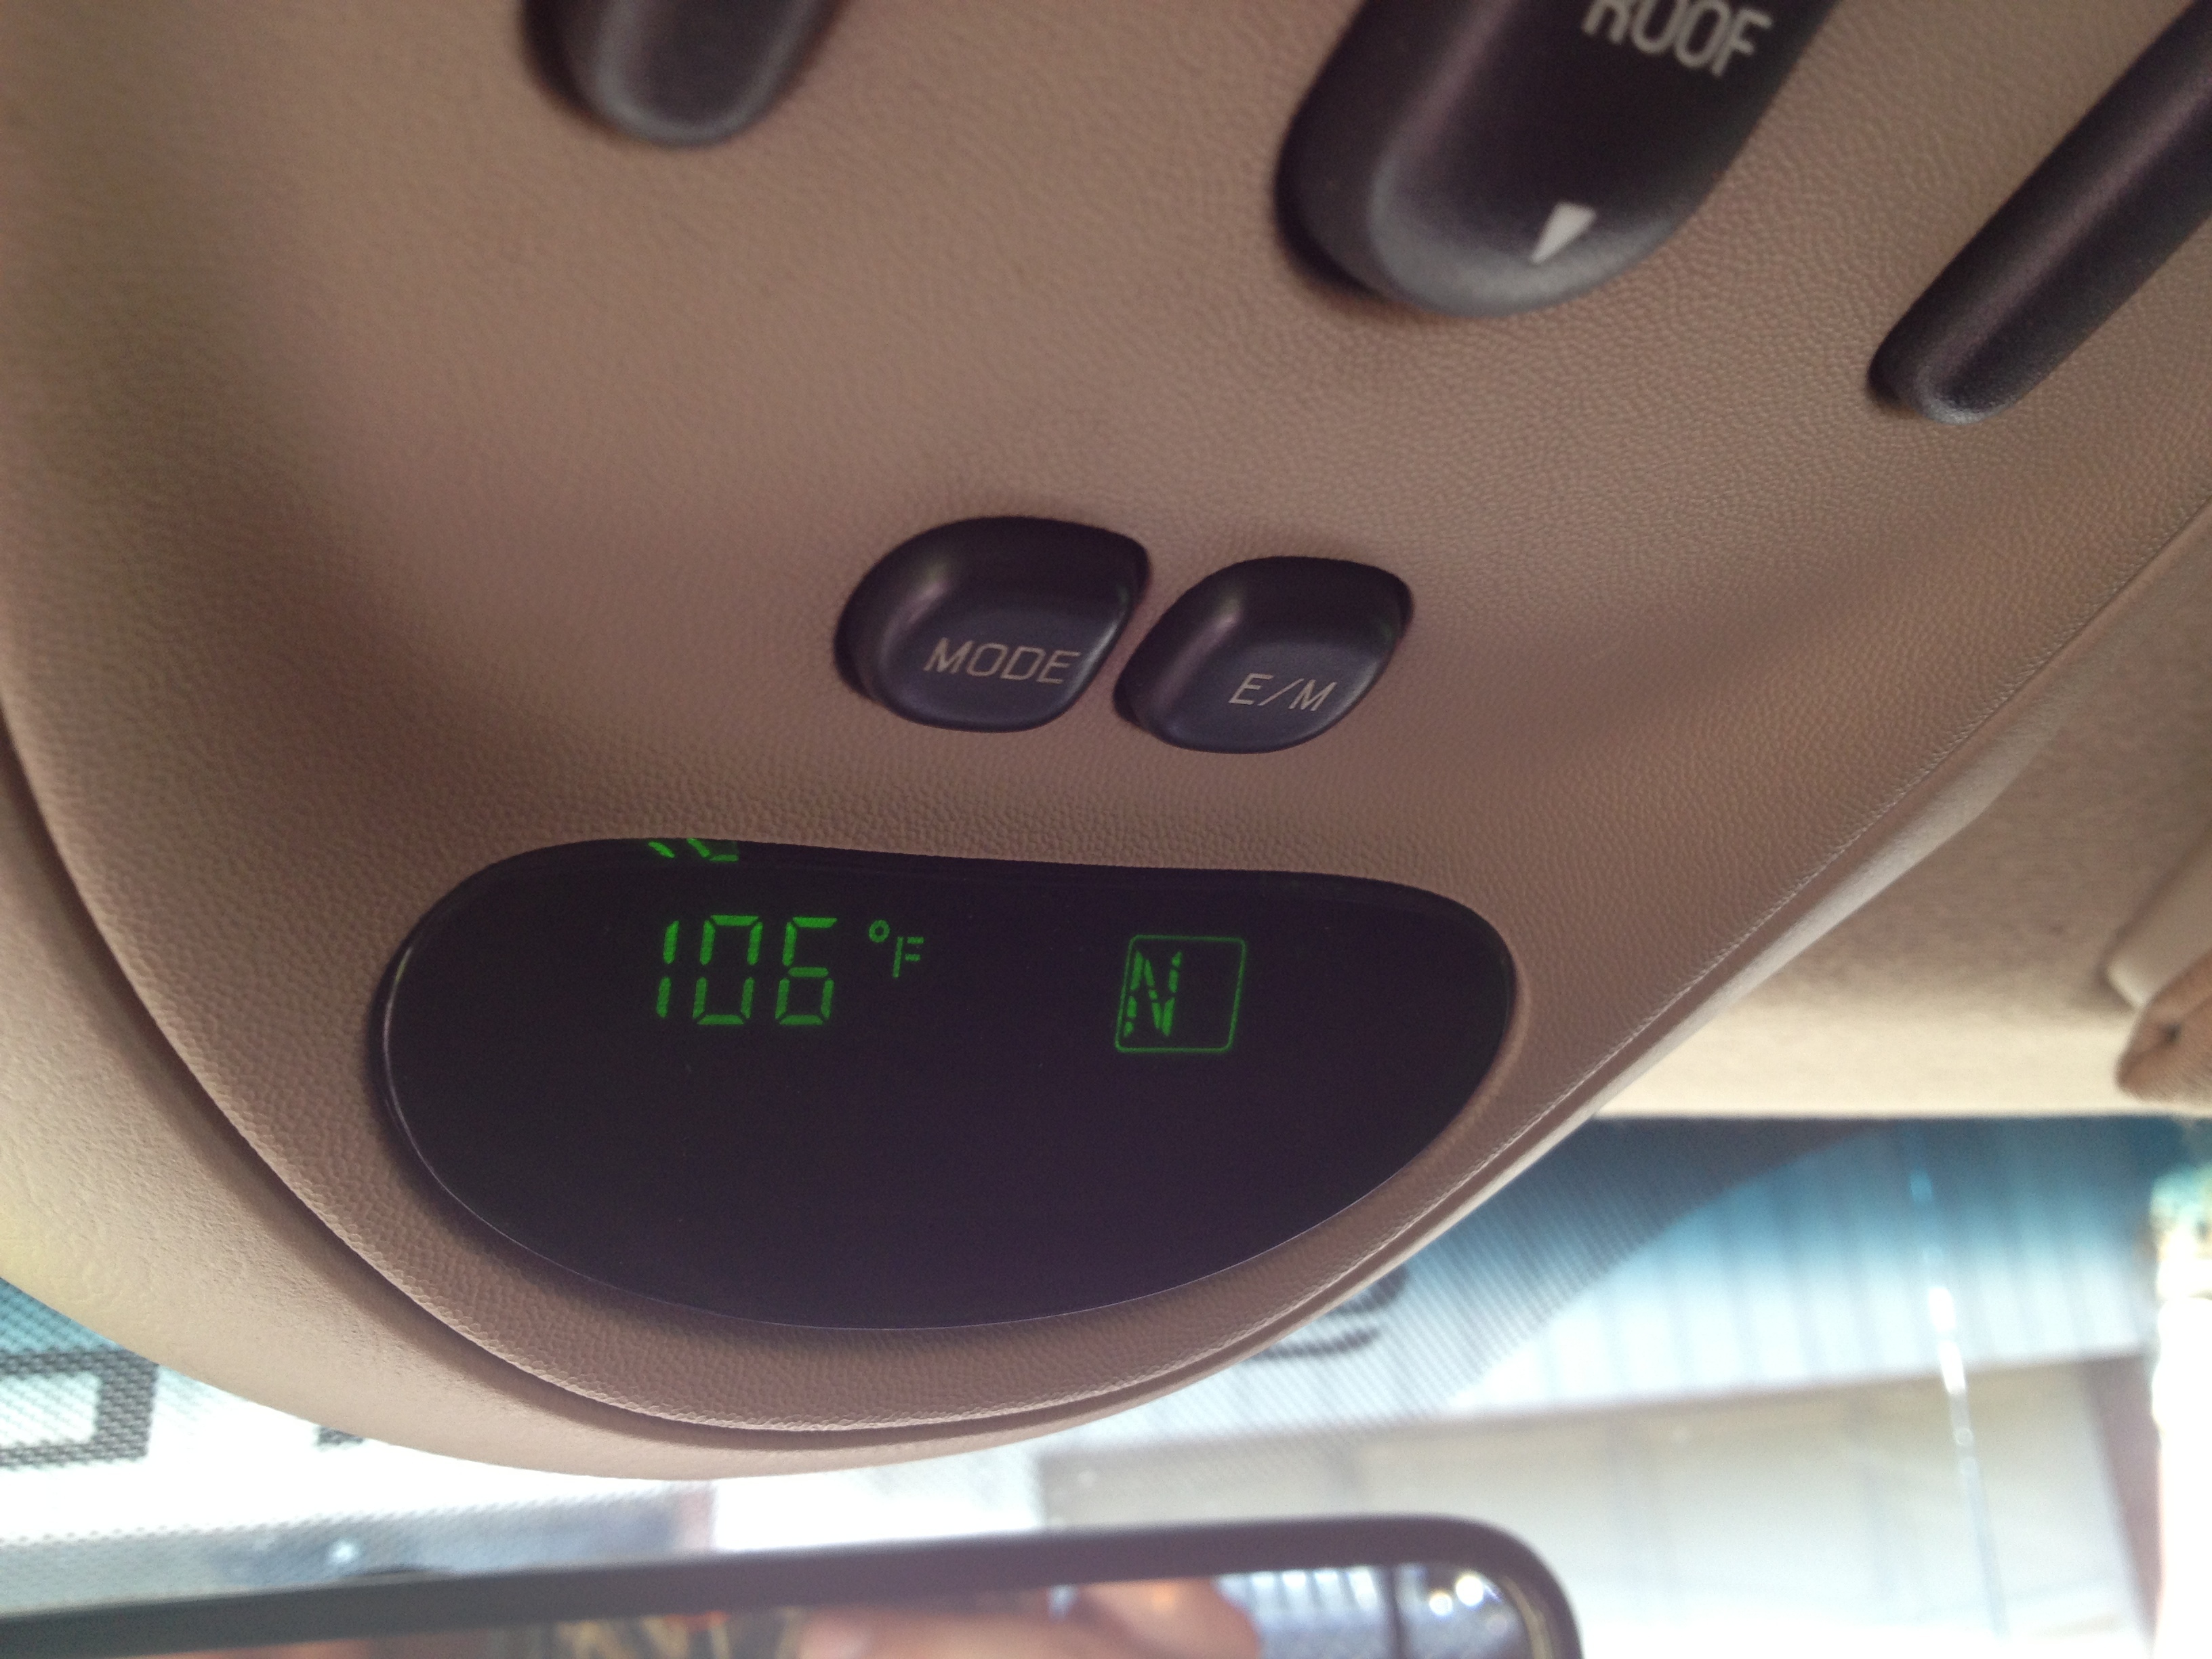

Also fixed my overhead display
 07-06-2013, 02:48 PM
filled my X up last night. ouch! but you gotta pay to play
going to wash/wax tonight once it cools off
for some reason, the 6.0 just loves to do that. my 2006 with only 9,800 miles at purchase did the exact same thing. the entire 2 yrs I owned her, she had 1 drop of oil "just waiting" to fall. and a slight surrounding stain.
alot of guys in the 6.0 forum say thier motors are exactly the same.
going to wash/wax tonight once it cools off
My buddy with an 06 did this about a month ago, put a bead of the black RTV where the trans meets the engine, and his is still completely oil free. As you can see mine is covered in oil except where i cleaned it, and always had a drip ready to fall. Driven 20 miles and so far so good lol. Got a little messy though

alot of guys in the 6.0 forum say thier motors are exactly the same.


 07-06-2013, 06:33 PM
Elder User
Join Date: Jan 2013
Location: Reno, NV
Posts: 916
Likes: 0
Received 0 Likes
on
0 Posts
Started the rear washer fix but alas, the coupler that holds the two pieces if hose together snapped. Not only that but a nice big chunk of said coupler was stuck inside the rubber sleeve that connects them.
http://www.flickr.com/photos/jeruhme/9224409697/ by technologiq, on Flickr
Realized that this is 1/4" and thought - hey, I have a bunch of this and couplers for my drip system! I could have made this really simple by using a irrigation coupler and it would have been permanent but I a) didn't like the idea of making the line permanent and b) didn't want to cut any of the factory line.
First I pulled the existing tubing out of the top of the window, I then used a irrigation coupler to connect a new longer piece of 1/4" tubing - this way I'd have much more play to hook it back up (pretty sure it broke because of my pulling)
http://www.flickr.com/photos/jeruhme/9227190128/ by technologiq, on Flickr
Decided to use the factory rubber coupler again, had to drill out the plastic that was in there, worked better than I thought. Tightened it with some zipties.
http://www.flickr.com/photos/jeruhme/9224411999/ by technologiq, on Flickr
Put it all back together with more zipties. Works great with no leaks, plus I can still disconnect easily if needed if there is any clogging.
http://www.flickr.com/photos/jeruhme/9224412489/ by technologiq, on Flickr
07-06-2013, 07:45 PM
I hooked up a back-up camera. Everything works, I just have to clean up the install a bit and buy some more RCA cable--I could use another 5 feet or so. I removed the mirror from the visor and put the monitor on the there using the vanity mirror power connector for juice.
Anyone know a good way to go to route the wire from the outside behind the license plate to inside and up to the front drivers side?
Anyone know a good way to go to route the wire from the outside behind the license plate to inside and up to the front drivers side?