My '85 F150 4x2 project/build log.
#91
 12-13-2011, 07:19 AM

I made a mistake, they were the CC820's. I edited the change. Thanks for catching it.
#92
12-13-2011, 07:33 AM
Yep, they are progressive rate. Dave your original springs looked pretty "newish" for some reason, unless you had painted them.
Did you get 2 or 3 degree camber bushings to go along with the springs?
P.S. now might be a good time to change the oxygen sensor if it's old, you can reach it through the wheel well pretty easily. It would have been really easy a few months ago when you had the passenger side fender off the truck .
.
Did you get 2 or 3 degree camber bushings to go along with the springs?
P.S. now might be a good time to change the oxygen sensor if it's old, you can reach it through the wheel well pretty easily. It would have been really easy a few months ago when you had the passenger side fender off the truck
.No, I did not get any camber bushings. I am thinking about letting the shop that does the alignment do them.
I replaced the oxygen sensor with a new one several years back. So far it is still working good. And as I recall, it was not that difficult to replace.
The new springs look like progressive units since the coils are closer together at the top than at the middle.
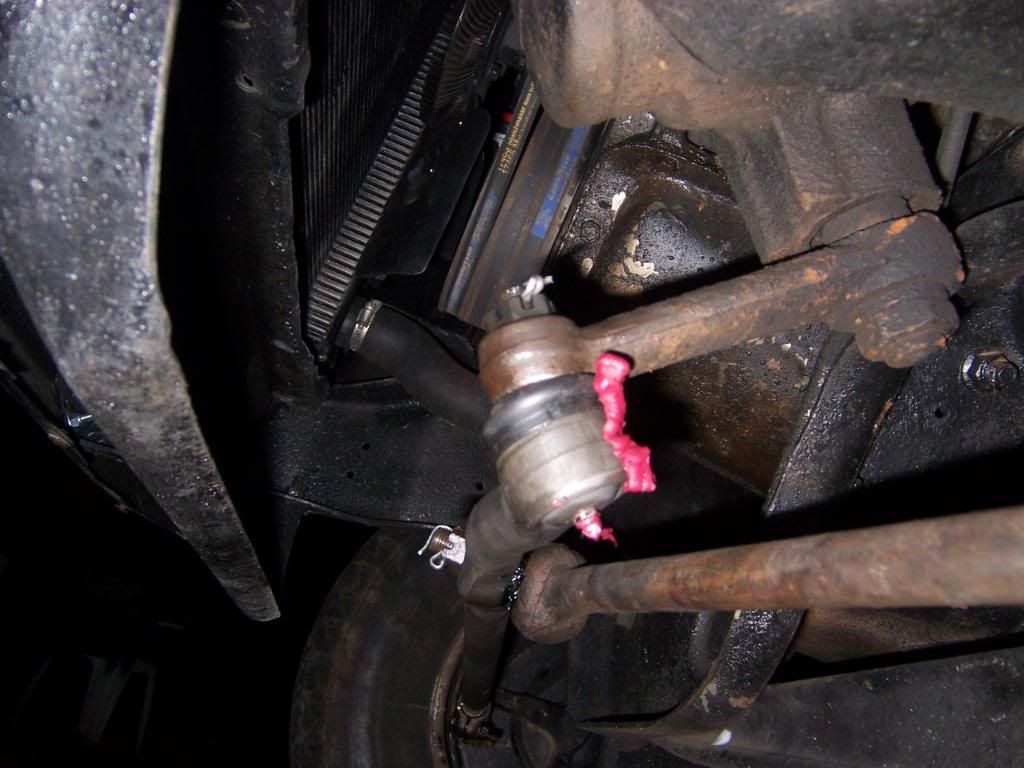
As for the end that won't come off, I had to use my gear puller to get drag link off the pitman arm the other day as my puller that looks just like yours wouldn't budge it. And even with the gear puller it took everything it/I had. I tightened it, hit the end with a hammer, tightened, hit, etc. In fact, I was looking for a bigger hammer when it went POP and came off.
As for the end that won't come off, I had to use my gear puller to get drag link off the pitman arm the other day as my puller that looks just like yours wouldn't budge it. And even with the gear puller it took everything it/I had. I tightened it, hit the end with a hammer, tightened, hit, etc. In fact, I was looking for a bigger hammer when it went POP and came off.
Gear puller, huh? I have a new tie rod end puller on order at Napa and will have the wife pick it up today. This one has a smaller opening. If this one does not work I will get a gear puller as a loaner, or maybe just get it at the same time. As far as a bigger hammer, I have some bigger hammers. Will a sledge do? Already tried it, no room to swing the big one, only the small one. Also tried the pickle fork and the sledge. Thanks for the advise on the gear puller, I may just try that.
#93
12-13-2011, 08:08 AM
Posting Legend
#94
12-14-2011, 08:15 AM
I used my new Tie Rod & Pitman Arm Puller on the last stubborn drag link end (drag link to pitman arm) last night. It finally came off after an hour or so of really working at it. Gary, that C-clamp trick came in really handy (if you have the right size C-clamps). I installed the new one, but haven't torqued it in yet. I will do that tonight, and put some new grease in everywhere too (I had to buy more this morning on my way to work, as I'm out). It will probably be too dark for me to take any pictures when I am finished tonight. So, I guess pictures will come as soon as I get a chance. I can't wait to see what kind of lift I will get out of those new springs. On a side note, I am packaging the broken tool up today and sending it back to the manufacturer in hopes of a warranty replacement.
#95
12-14-2011, 08:28 AM
Posting Legend
#96
12-14-2011, 07:46 PM
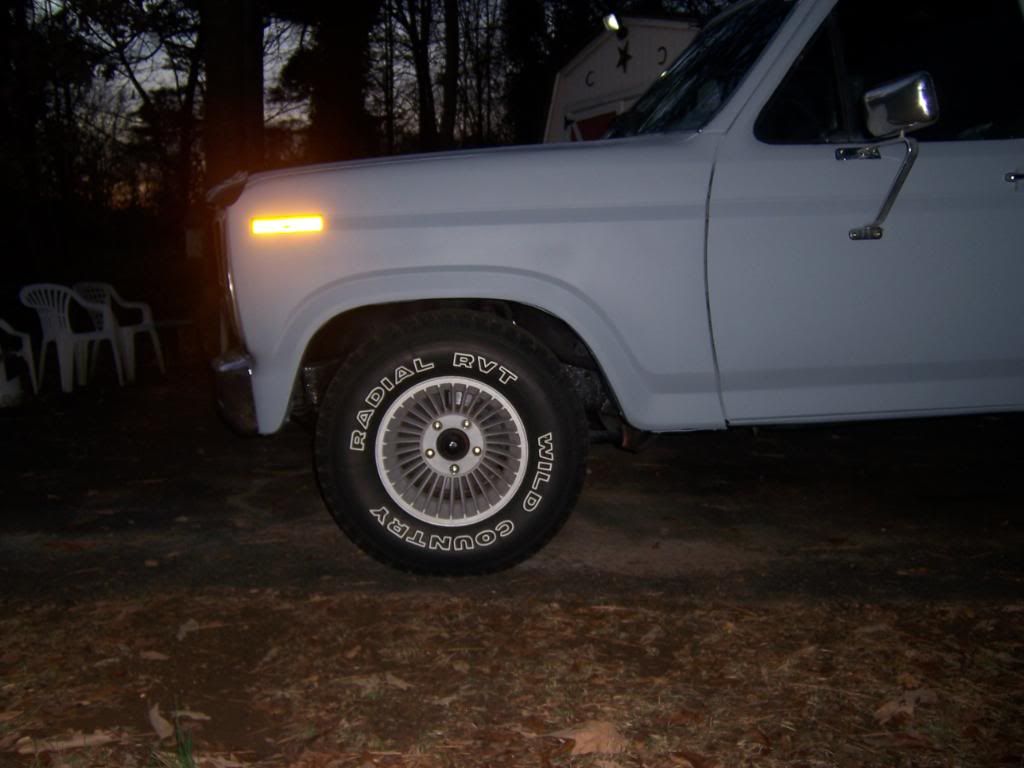
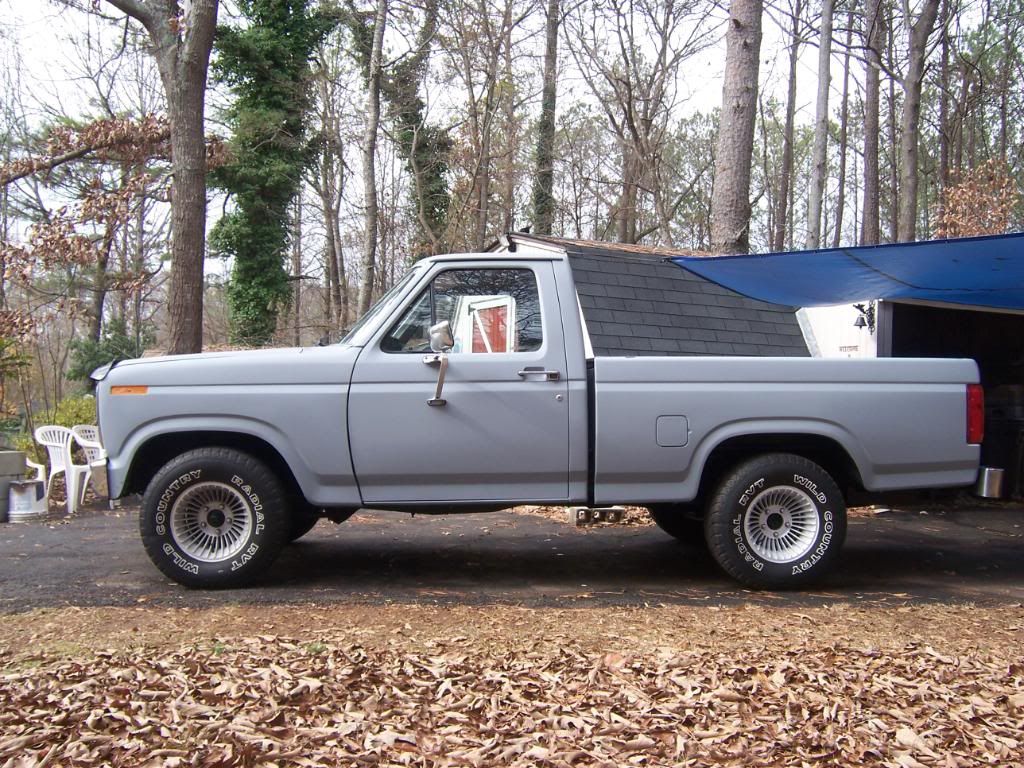
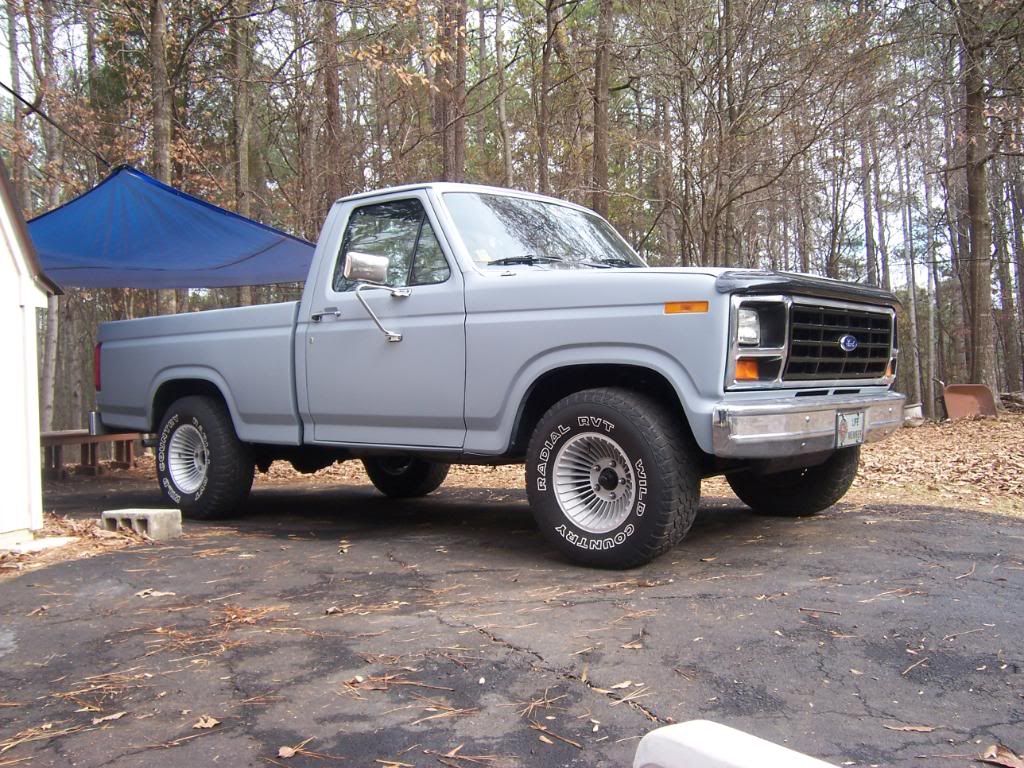
Ok, here are some before and after shots of the lift in the front, along with a few of the other stuff;
passenger side, old springs;
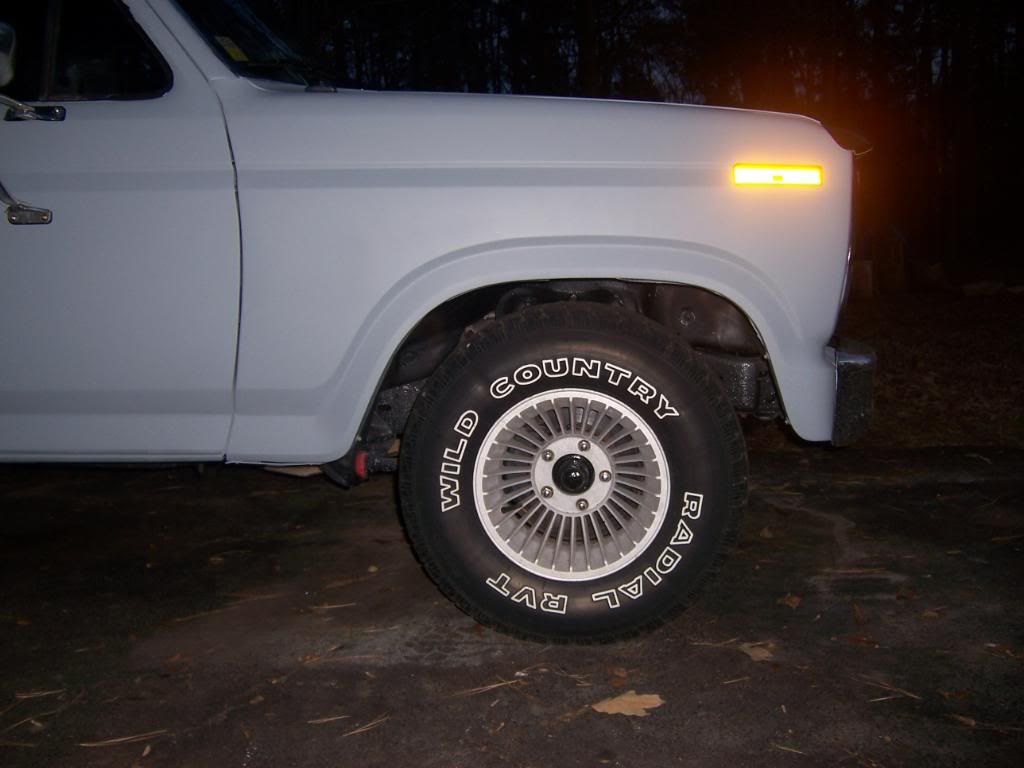
passenger side, new springs;
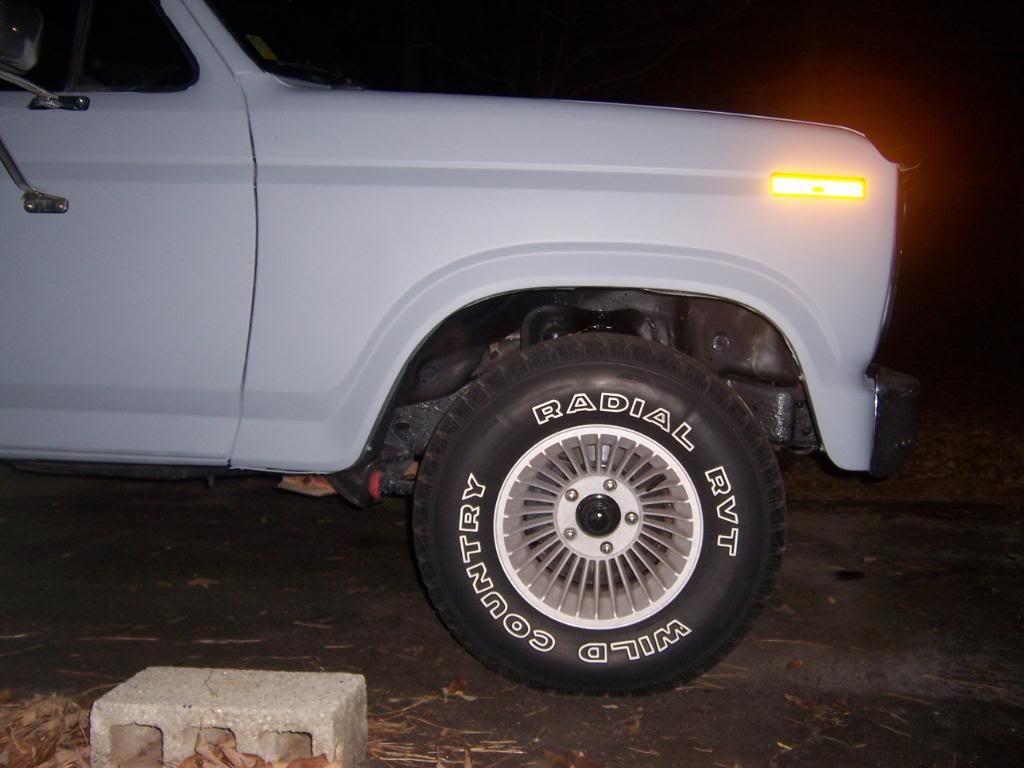
drivers side, old springs;
drivers side, new springs;

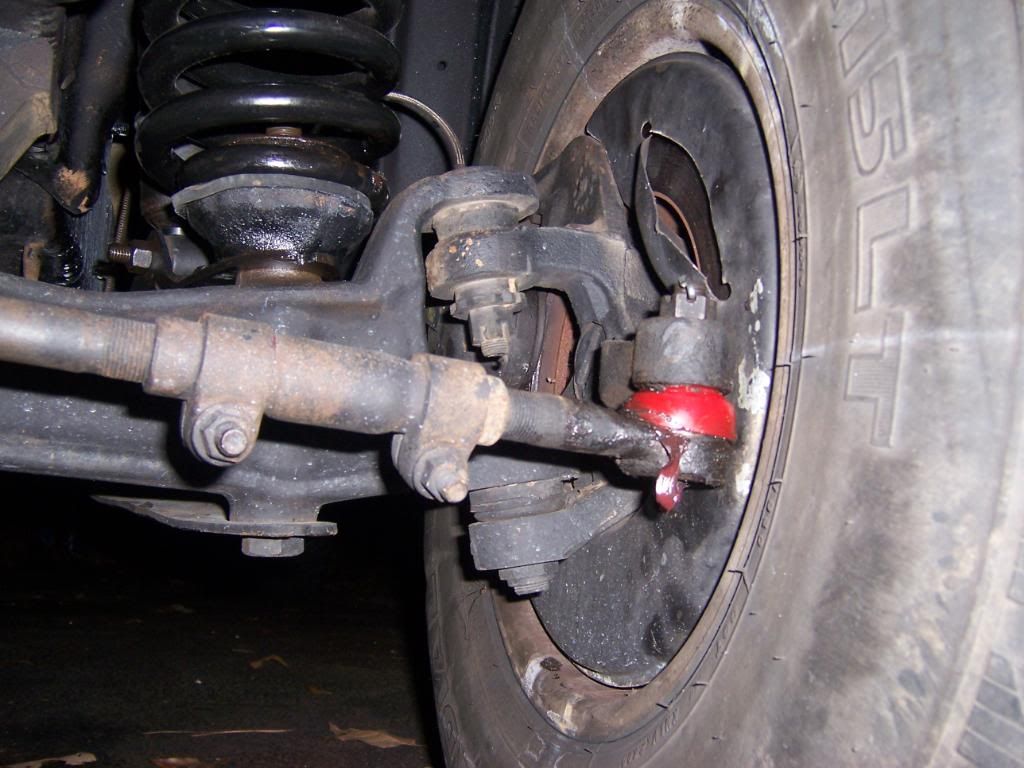
A shot of the new drag link installed;
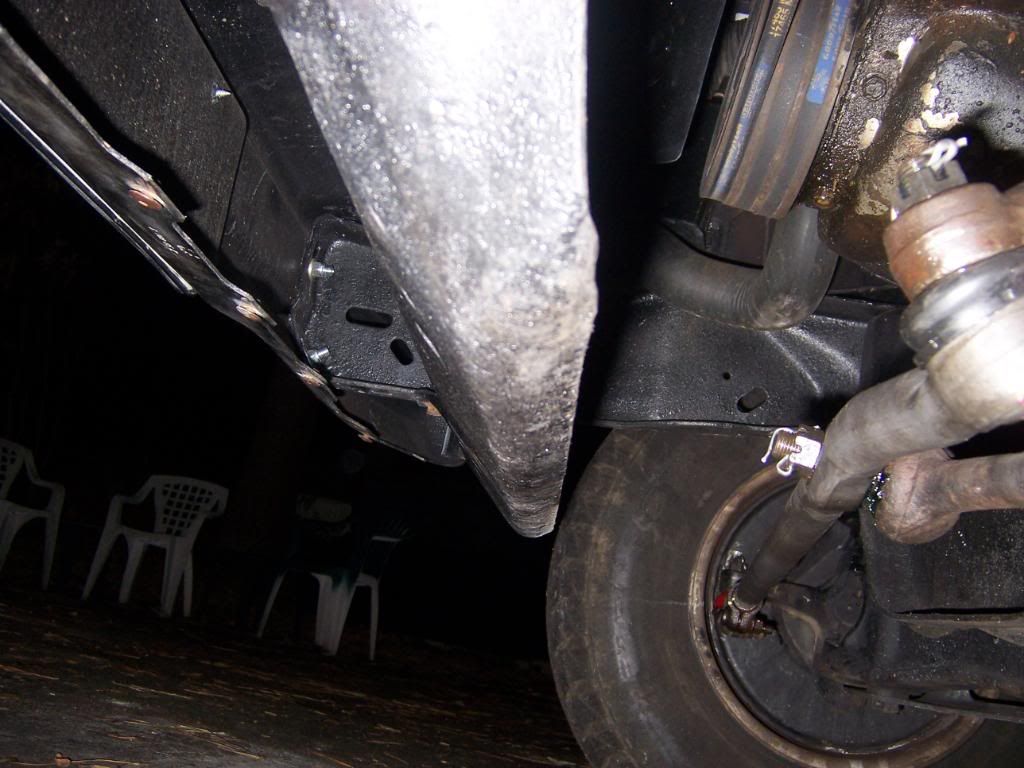
and the new tie rod end covers;

I took these pictures after I finished, in the dark. I will get some better shots when the sun is out and I get a chance. I drove down the street and back, to settles things in a little. While driving slowly I heard a slight metal rubbing sound, like it was only rubbing at one spot when the wheel went around and hit that spot. I will have to take a closer look this weekend, when it is daylight.
passenger side, old springs;
passenger side, new springs;
drivers side, old springs;
drivers side, new springs;
A shot of the new drag link installed;
and the new tie rod end covers;
I took these pictures after I finished, in the dark. I will get some better shots when the sun is out and I get a chance. I drove down the street and back, to settles things in a little. While driving slowly I heard a slight metal rubbing sound, like it was only rubbing at one spot when the wheel went around and hit that spot. I will have to take a closer look this weekend, when it is daylight.
#97
12-14-2011, 09:05 PM
Posting Legend
#98
12-15-2011, 07:23 AM
Yes, I prefer to use the better quality synthetic grease. I was taught to always pump it in till it squeezes out. I did wipe it off, but then I took it for a spin up the street and back. I guess more of it oozed out while it was being used. I took the pictures as an after thought. I really took about 20 pictures or so, but only a few turned out. I just couldn't see what I was taking pictures of in the dark.

#100
12-15-2011, 07:51 AM
Posting Legend
#101
12-15-2011, 08:07 AM
No, but it is close. I think it will do fine like this. I prefer to have the rear slightly higher than the front. When the rear is loaded it should be level. If not, I will be in search of something to stiffen the rear springs, to keep the rear from dropping down too much under load. I will take some pictures of the truck in the daylight this weekend. I will also do the measurements again and post the before and afters.
#102
12-15-2011, 08:41 PM
No, but it is close. I think it will do fine like this. I prefer to have the rear slightly higher than the front. When the rear is loaded it should be level. If not, I will be in search of something to stiffen the rear springs, to keep the rear from dropping down too much under load. I will take some pictures of the truck in the daylight this weekend. I will also do the measurements again and post the before and afters.
The trick is you have to bolt them on with the truck jacked up in the rear from the frame, such that the rear wheels/suspension are "free-hanging" when you install the helper springs. Then when you lower the truck back down, the helpers get tensioned a little just from the weight of the truck.
#103
12-18-2011, 05:35 PM
People seem to often poo-poo on those "helper springs" you can buy that bolt onto the bottom of the leaf springs. But I put a set on the rear leafs of my first F150 years ago, and they jacked the rear up an inch or so and also really stiffened it up (way less sag under load).
The trick is you have to bolt them on with the truck jacked up in the rear from the frame, such that the rear wheels/suspension are "free-hanging" when you install the helper springs. Then when you lower the truck back down, the helpers get tensioned a little just from the weight of the truck.
The trick is you have to bolt them on with the truck jacked up in the rear from the frame, such that the rear wheels/suspension are "free-hanging" when you install the helper springs. Then when you lower the truck back down, the helpers get tensioned a little just from the weight of the truck.
I would have to do some more research on those, but I do believe those would be exactly what I am looking for. I like the way the truck sits and handles right now with the new springs. I really don't want to go any higher in the rear than I am now. I am happy with the size of the tires and I like the rake of the truck now. I am afraid that if the rear went higher I would want the front higher too. Then there would be the bigger tires to fill the void. Oh well, can't have everything. I also achieved the main purpose of the new front springs, they stopped the tire rubbing. I probably won't do anything with the rear springs until later next year, because I will want to see how it handles a few camping loads anyway.
#105
12-19-2011, 09:14 AM