


Going to do some touch up

Hotshot


Joined: Oct 2004
Posts: 15,882
Likes: 88
From: Durham NC
Where you go now depends on a few different factors: Type of paint used, condition/type of the surrounding paint, how much effort you want to put into it (blend in locally vs renew entire truck) equipment available (high quality power buffer with foam and wool pads vs hand buff).
I will assume locally/by hand. There are paint type products out there for leveling/blending, or you could spray a couple more coats of the color double diluted with thinner, finishing with a coat of 10% paint/90% thinner. The idea is to extend the covered area slightly past the overspray of the previous coat to blend off the texture and gloss. This works well for single part colors. Give the paint plenty of time to cure, a couple weeks for single part. Use a machine grade (not hand grade it's too course if you don't know what you are doing) rubbing compound by hand on a wet but not drippy clean soft cotton cloth (old towel or T shirt) folded neatly into a palm sized pad. Keep the work area damp with a spray bottle of water. Work primarily from the newly painted area out concentrating on the over sprayed section. Wipe dry with clan cloths regularly to check progress. You should be able to feel the difference as you rub and the area gets smoother. Stop when there is no longer an appearance difference across the blended area.
At this point you can give the area a waxing with a good wax (NOT a polish or anything that's an opaque liquid product with compound in it) following the directions on the container. If you want a higher gloss use 3M Hand Glaze according to the directions on the bottle before waxing. If you use the hand glaze, you'll probably want to do the whole truck with it.
I will assume locally/by hand. There are paint type products out there for leveling/blending, or you could spray a couple more coats of the color double diluted with thinner, finishing with a coat of 10% paint/90% thinner. The idea is to extend the covered area slightly past the overspray of the previous coat to blend off the texture and gloss. This works well for single part colors. Give the paint plenty of time to cure, a couple weeks for single part. Use a machine grade (not hand grade it's too course if you don't know what you are doing) rubbing compound by hand on a wet but not drippy clean soft cotton cloth (old towel or T shirt) folded neatly into a palm sized pad. Keep the work area damp with a spray bottle of water. Work primarily from the newly painted area out concentrating on the over sprayed section. Wipe dry with clan cloths regularly to check progress. You should be able to feel the difference as you rub and the area gets smoother. Stop when there is no longer an appearance difference across the blended area.
At this point you can give the area a waxing with a good wax (NOT a polish or anything that's an opaque liquid product with compound in it) following the directions on the container. If you want a higher gloss use 3M Hand Glaze according to the directions on the bottle before waxing. If you use the hand glaze, you'll probably want to do the whole truck with it.

Thread Starter
|
Senior User
Joined: May 2009
Posts: 382
Likes: 0
From: Chicago
Ok sounds great, just for giggles lets say I am looking for a good time on a sat. night what would be the renew entire truck steps? Wouldnt mind the truck looking good for the summer.
Thanks a ton.
Cbass
Thanks a ton.
Cbass
Hotshot
Joined: Oct 2004
Posts: 15,882
Likes: 88
From: Durham NC
Id give it a real good washing, claybar the whole thing then go over it with the Hand Glaze followed by a good paste wax (I always liked Simonize in the yellow oversized tuna fish can). Best set aside a weekend in a shady location tho.
Thread Starter
|
Senior User
Joined: May 2009
Posts: 382
Likes: 0
From: Chicago
one last question, what is the best inexpensive power buffer I could use for this. I would rather not dump a ton of cash but is there a buffer that doesnt cost a boat load but does a good job?
Thread Starter
|
Senior User
Joined: May 2009
Posts: 382
Likes: 0
From: Chicago
Also, I read someplace that after letting the paint dry instead of doing the deluted spray that I could use like 2000 grit wet paper and sand it all smooth and this would get it supper smooth and help with the blending, is this true?
Hotshot
Joined: Oct 2004
Posts: 15,882
Likes: 88
From: Durham NC
The diluted paint makes rubbing out easier and faster. Even with 2000 grit paper you can sand thru pretty quickly. the rubbing compound is ~ 2400 grit IIRC.
When it comes to tools, you usually get what you pay for. It's expensive to gear down an electric motor to a slow enough speed without sacrificing the power needed for a large enough disk. Even the pads are relatively expensive.
When it comes to tools, you usually get what you pay for. It's expensive to gear down an electric motor to a slow enough speed without sacrificing the power needed for a large enough disk. Even the pads are relatively expensive.
Thread Starter
|
Senior User
Joined: May 2009
Posts: 382
Likes: 0
From: Chicago
Ok, I have been working on the paint now that it has had time to dry well and that I am waiting for my starter to get here. So I have parts that are awesome as can be seen in the photos but I also have parts that you can still see little scratches from wet sanding (not visible in the pictures). What can I do to get rid of these? I have gone over it like 4 times with the rubbing compound, which worked on the other spots but it just wont work on these.
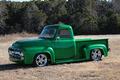
Here are the before and after of the good spots


Here are the before and after of the good spots
FTE Stories
Ford Trucks for Ford Truck Enthusiasts

2027 Ford Super Duty Buyer's Guide (Every Model, Engine, & Package)
Brett Foote
Top 10 Ford Truck Tragedies
Joe Kucinski
AEV FXL Super Duty - the Super Duty Raptor Ford Doesn't Make
Brett Foote
Lobo Vs Lobo: Proof the F-150 Lobo Should Be Even Lower!
Michael S. Palmer
Ford's 2001 Explorer Sportsman Concept Looks For a New Home
Verdad Gallardo
10 Best Ford Truck Engines We Miss the Most!
Joe Kucinski
2026 Shelby F-150 Off-Road: Better Than a Raptor R?
Brett Foote
2027 Super Duty Carhartt Package First Look: 12 Things You NEED to Know!
Michael S. Palmer
10 Most Surprising 2026 Ford Truck Features!
Joe Kucinski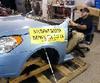
Hotshot


Joined: Nov 2000
Posts: 11,591
Likes: 14
From: Pflugerville, tx

Ok, I have been working on the paint now that it has had time to dry well and that I am waiting for my starter to get here. So I have parts that are awesome as can be seen in the photos but I also have parts that you can still see little scratches from wet sanding (not visible in the pictures). What can I do to get rid of these? I have gone over it like 4 times with the rubbing compound, which worked on the other spots but it just wont work on these.
Here are the before and after of the good spots
Here are the before and after of the good spots
He came over last weekend and we worked a little on the green truck. Him showing me areas that needed work, and he brought his tools to work with.
1200, 2000, and 2500 wet/dry papers, and a set of griots garage grits and buffing pads from http://www.griotsgarage.com
we worked a couple sections using grits from 1 to 4, and spent about an hour on the left cab corner behind the drivers door. there was still some orangepeel as well as some good prior scratch and swirl marks. the buffing pad was amazing, and he was confident that you can do multicurve shapes without much difficulty.. the air orbital polisher was great.. light and easy to use with the 6 in pads. the pad was at best about 1/4 as fast as sand paper, so you DON'T go over the edge (thur) very easily..
the difference is quite incredible to me. pics don't show it yet however.
he was also clear that this wasn't the only equipment or material to use, but HE was happy with the amount of effort and results.
Sam
Hotshot
Joined: Nov 2000
Posts: 11,591
Likes: 14
From: Pflugerville, tx
Sam

Thread
Thread Starter
Forum
Replies
Last Post
tasboj
1967 - 1972 F-100 & Larger F-Series Trucks
19
Jan 21, 2013 07:28 PM
ReBilld
1994.5 - 1997 7.3L Power Stroke Diesel
51
Jul 14, 2012 06:39 PM
dclack
1948 - 1956 F1, F100 & Larger F-Series Trucks
9
Aug 2, 2011 01:07 PM
Greywolf
General Automotive Discussion
78
Feb 28, 2010 09:00 PM
