
IH Up-Pipe Install - EBPV o-rings question
#1
 05-15-2009, 10:23 PM


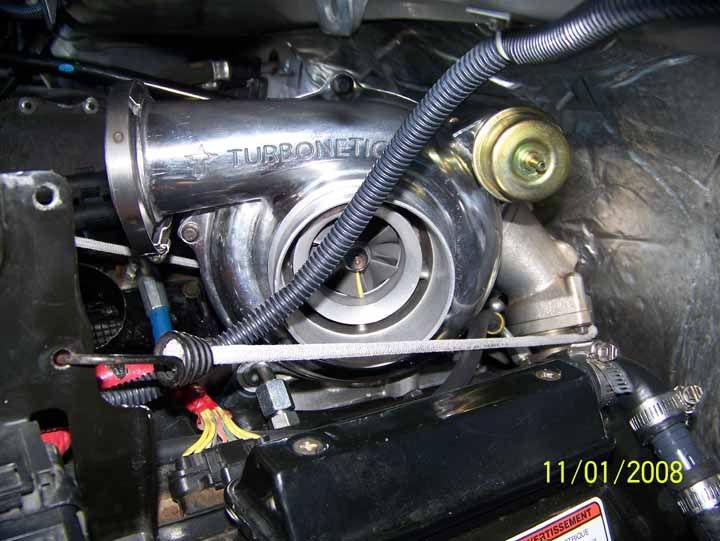
I am installing the IH bellowed up-pipes on my truck and managed to re-install the turbo pedestal before darkness overtook me.
As I was putting away my tools and reviewing my progress I noticed a pack of 2 o-rings that I did not come across during dis-assembly. This is from the 11-piece kit from Clay (thanks Clay!).
The package says:
Turbo Re-install
EBPV o-rings
EBPV Backplate
& solinoid
I am guessing that the solenoid is the one that is a part of my turbo pedestal? If not, where is it? Since I did not dis-assemble anything that requires these o-rings, can I just keep going with my re-assembly or should I find out where these o-rings go and change them out while I have things apart?
As soon as daylight comes I want to finish this up so any help that you folks could give me would be greatly appreciated.
TIA
Chris
#2
05-15-2009, 10:38 PM

PREMIUM SPONSOR
I am installing the IH bellowed up-pipes on my truck and managed to re-install the turbo pedestal before darkness overtook me.
As I was putting away my tools and reviewing my progress I noticed a pack of 2 o-rings that I did not come across during dis-assembly. This is from the 11-piece kit from Clay (thanks Clay!).
The package says:
Turbo Re-install
EBPV o-rings
EBPV Backplate
& solinoid
I am guessing that the solenoid is the one that is a part of my turbo pedestal? If not, where is it? Since I did not dis-assemble anything that requires these o-rings, can I just keep going with my re-assembly or should I find out where these o-rings go and change them out while I have things apart?
As soon as daylight comes I want to finish this up so any help that you folks could give me would be greatly appreciated.
TIA
Chris
As I was putting away my tools and reviewing my progress I noticed a pack of 2 o-rings that I did not come across during dis-assembly. This is from the 11-piece kit from Clay (thanks Clay!).
The package says:
Turbo Re-install
EBPV o-rings
EBPV Backplate
& solinoid
I am guessing that the solenoid is the one that is a part of my turbo pedestal? If not, where is it? Since I did not dis-assemble anything that requires these o-rings, can I just keep going with my re-assembly or should I find out where these o-rings go and change them out while I have things apart?
As soon as daylight comes I want to finish this up so any help that you folks could give me would be greatly appreciated.
TIA
Chris


#6
05-16-2009, 07:35 AM
I will pull the pedestal back off and have a look inside. I figure that if I unscrew the piece that clips to the turbo I can then undo the snap ring on the other end and get the ... actuator? piston? ... out from that end. Once I get that far I should be able to see where the o-rings go.
Thanks again!

#7
05-16-2009, 08:34 AM
Trending Topics
#9
05-16-2009, 08:41 AM
#10
05-16-2009, 08:51 AM
#11
05-16-2009, 10:57 AM
Thanks for the confirmations fellas.
After reading Roland's post I went and pulled my pedestal off and changed out those o-rings.
There were actually 3 in the package. Once I pulled the temperature sensor out and saw those 2 o-rings I opened my package and found the 2 smaller ones had ended up looking like one seal. The other one was for the solenoid backing plate (the one that is held in place by a snap ring).
I just got done wrestling with the back clamp on the turbo. What I ended up doing was tying a length of 5mm cord to the up-pipe, running it alongside the turbo, and my wife pulled on it once I had the turbo lined up with the y-flange. She held it together while I put the clamp in place and snugged it up.
After a late breakfast I will go back out and finish the job. I think the hard part is done now and the rest should just be basic reassembly.
Thanks a lot and I will rep all that I can for posting up.
Cheers
After reading Roland's post I went and pulled my pedestal off and changed out those o-rings.
There were actually 3 in the package. Once I pulled the temperature sensor out and saw those 2 o-rings I opened my package and found the 2 smaller ones had ended up looking like one seal.
The other one was for the solenoid backing plate (the one that is held in place by a snap ring).I just got done wrestling with the back clamp on the turbo. What I ended up doing was tying a length of 5mm cord to the up-pipe, running it alongside the turbo, and my wife pulled on it once I had the turbo lined up with the y-flange. She held it together while I put the clamp in place and snugged it up.
After a late breakfast I will go back out and finish the job. I think the hard part is done now and the rest should just be basic reassembly.
Thanks a lot and I will rep all that I can for posting up.
Cheers
#13
05-16-2009, 04:35 PM
Thanks to all for the help.
I just came back from a drive and, aside from finding no leaks, am really impressed by the way it sounds now that it is not leaking anymore.
Doing it myself was a good experience and I am a lot more familiar with what is back there now. Glad I went with the IH bellowed up-pipes as I wouldn't want to do it on a regular basis.
I just came back from a drive and, aside from finding no leaks, am really impressed by the way it sounds now that it is not leaking anymore.
Doing it myself was a good experience and I am a lot more familiar with what is back there now.
Glad I went with the IH bellowed up-pipes as I wouldn't want to do it on a regular basis.
#14
05-16-2009, 04:45 PM
Thanks to all for the help.
I just came back from a drive and, aside from finding no leaks, am really impressed by the way it sounds now that it is not leaking anymore.
Doing it myself was a good experience and I am a lot more familiar with what is back there now. Glad I went with the IH bellowed up-pipes as I wouldn't want to do it on a regular basis.
I just came back from a drive and, aside from finding no leaks, am really impressed by the way it sounds now that it is not leaking anymore.
Doing it myself was a good experience and I am a lot more familiar with what is back there now.
Glad I went with the IH bellowed up-pipes as I wouldn't want to do it on a regular basis. Back at ya.
#15
05-16-2009, 05:22 PM
Post Fiend
Join Date: Jun 2006
Location: White Mnt's,New Hampshire
Posts: 9,714
Likes: 0
Received 2 Likes
on
2 Posts
glad you got her Chris...job well done..