
Hard top to soft top 56K beware, many pics
#1
 09-28-2008, 04:47 PM


Hard top to soft top 56K beware, many pics
I decided to cut and fab my own mount from an old hard top for my soft top. I like the way it looks finished a lot better than the aluminum frame work that comes with a soft top.
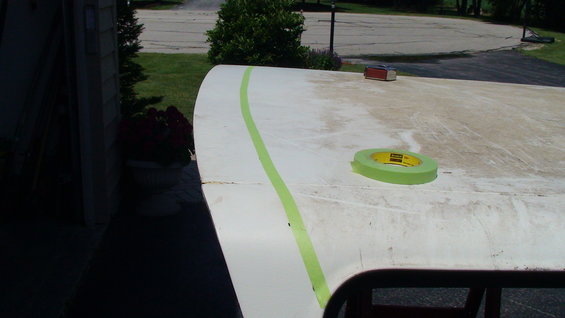
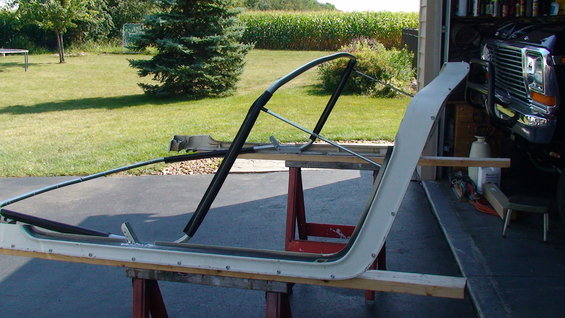
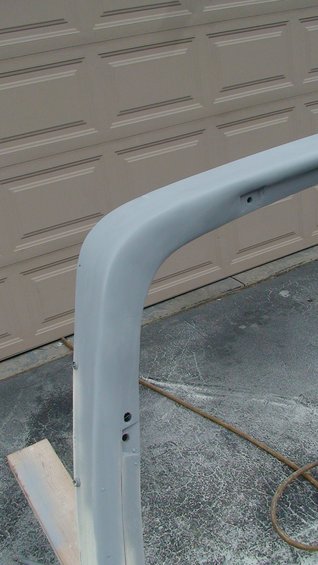
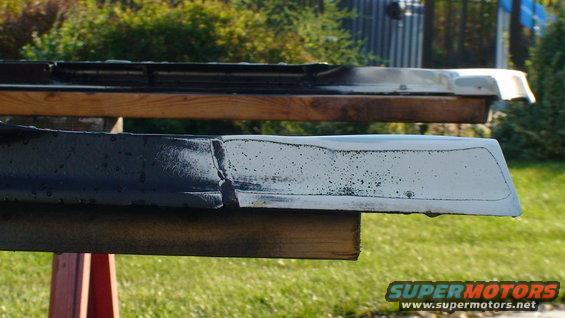
1st thing to do was figure out the cut line. I wanted to keep enough of the old top to keep the rigidity of the top.
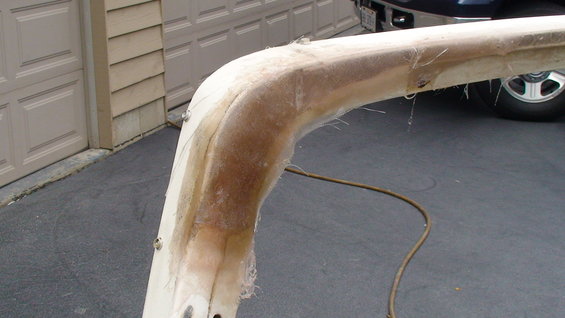
When I cut the top off the sides had broken the bonding. I'll get this fixed later with some fiberglass mat.
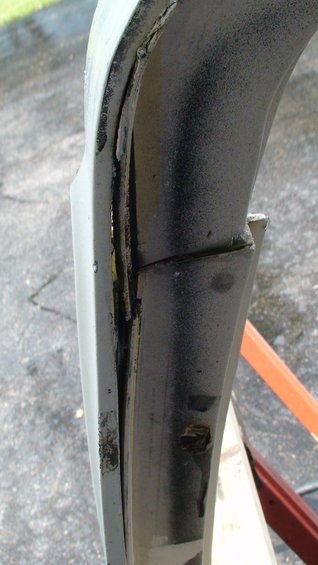
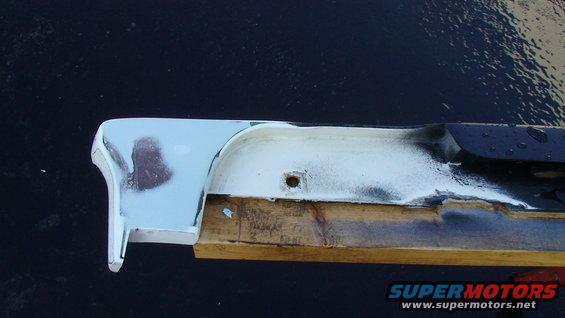
What I ended up with after cutting. You can see in the center it dips down. The center bolt hole was cracked around it. I'll add some fiberglass to strengthen that up.
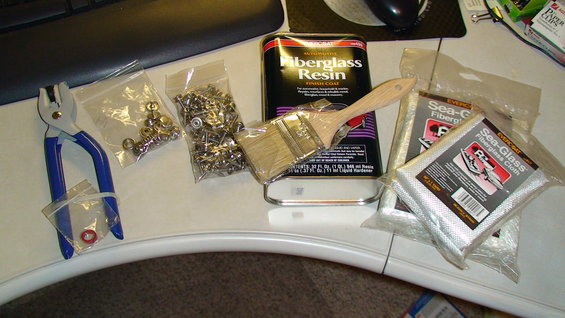
I found a guy on ebay that sells the snaps that I need and also some snaps to go in the top. I ended up buying the installation tool from him as well. I also went to the parts store and got the fiberglass needed to close this top back up.
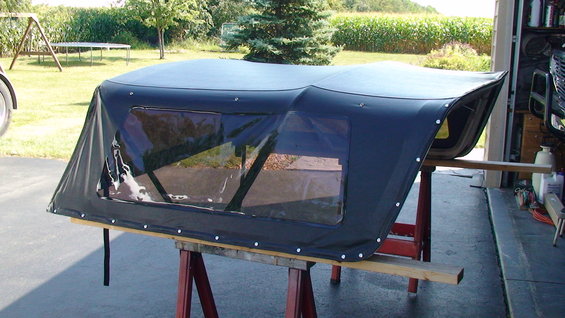
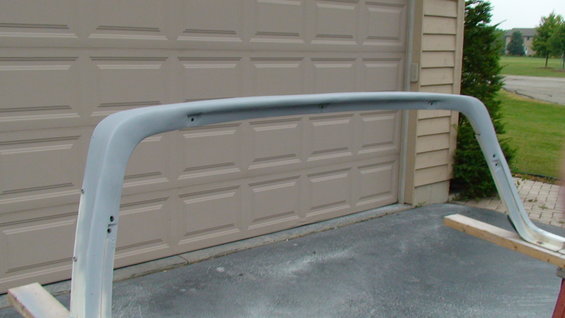
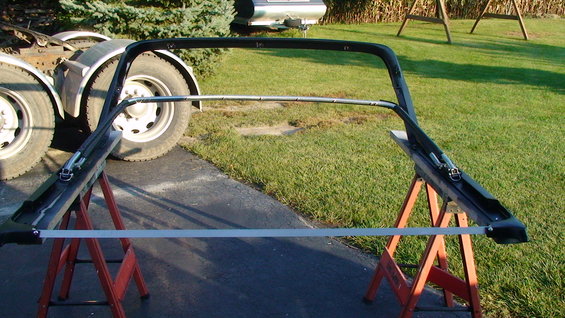
So after test fitting the top and getting some snaps in place this is how it is going to look.
For the back I am going to use a piece of aluminum angle iron to mount the snaps to.
Now comes the fun, fiberglass. I'd suggest wearing long sleeves when sanding this stuff as it is pretty itchy.
I wanted to add some fiberglass mat on the inside where the weak joint was after cutting.
After that I was able to build up in layers the inside.
In the very center of the top it was cracked. I clamped it back together and added some more mat to the inside area.
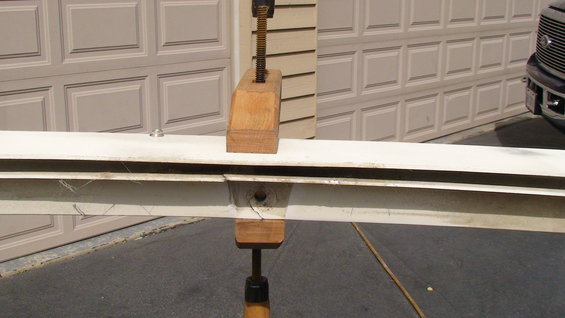
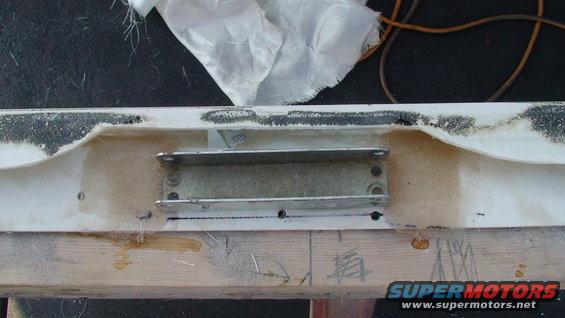
For the center bracket rod supports I am going to fiberglass those to the top so there are no unnecessary screws going into the body. I've also eliminated the window gasket lip on each side with a grinder.
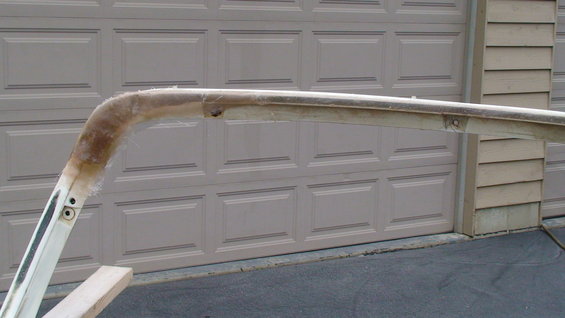
And this is where it is at now. Some more sanding and it will be ready for a final coat of bondo to finish it up.
After some more sanding and some bondo spread it is starting to be finished. Now I have to figure out how I am going to finish off the back with some fiberglass to make it look finished.

So now we have gone from this:
To this:
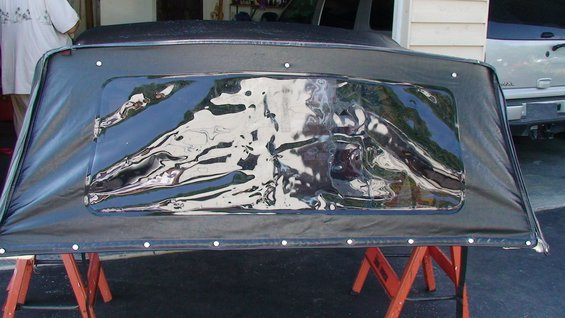
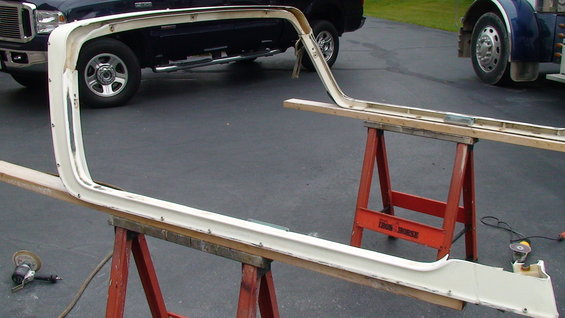
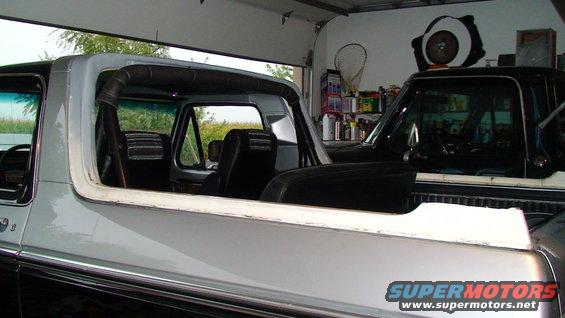
Here is a test fit to see how it looks.
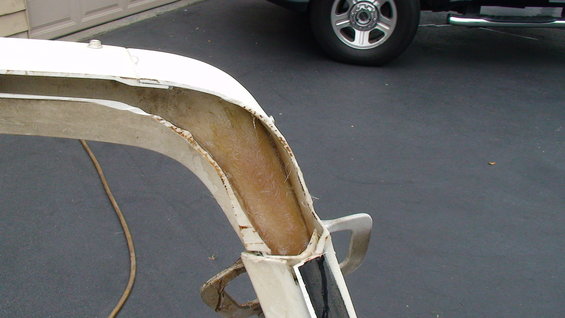
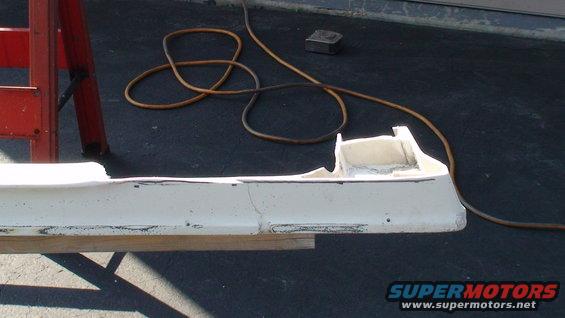
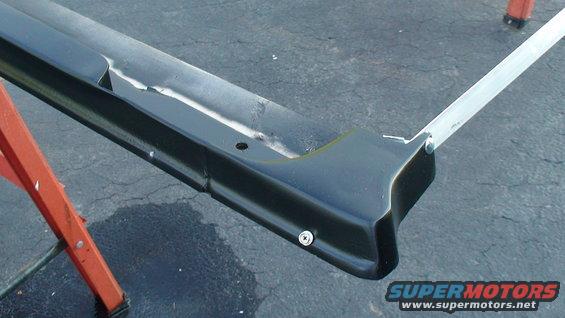
At the back I am not liking the big excessive hump there. I am going to cut it at the black line and fiberglass the end closed to give it a neat finished look.

I decided to fiberglass the metal brackets to the top so there would be no screws attached to the Bronco and this would be a totally self contained assembly.
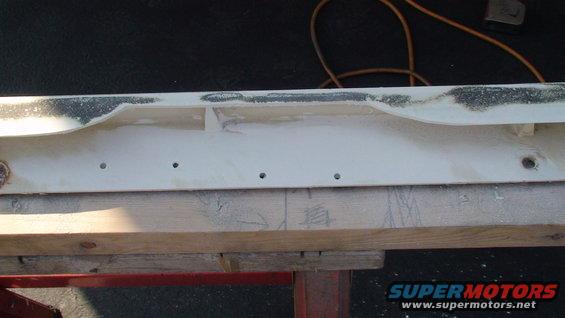
1st thing to do is mark off where it goes and cut away some of the top for the pins I will be using for the bars:


I decided to round the corners off so it wouldn't catch on something later:
Next was to precut some fiberglass mat to lay into place:

Setting up:
I then applied a final coat of fiberglass web to give it a nicer finish coat. This will probably be the final on it as trying to put a coat of bondo and sanding is going to be to much of a hassle.

Some final sanding and it should look pretty good and be nice and stable:

At the rear I got the cut line down. This will get finished off with some fiberglass as well.

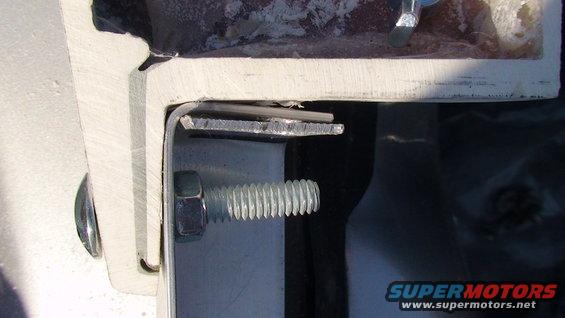
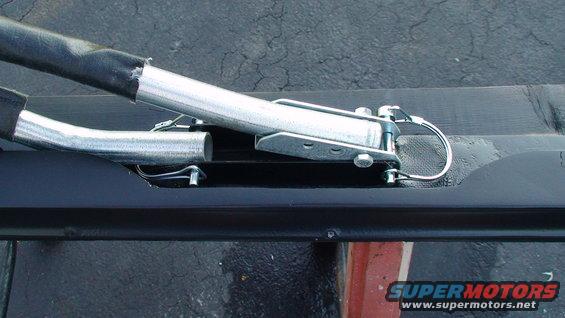
For the back I picked up some aluminum angle iron. I cut the ends and folded them over for a little structural support at the end where it meets the topper. I had planned on bolting it thru the ends but with the expected fiberglass finish there I would not be able to get the bolt into the angle iron. I changed that around and ran a single bolt thru the end of the top so at any time the aluimnum angle iron can be removed to gain acces into the back of the Bronco. I am going to use some foam insultion tape on the lower part of the angle iron to keep the rain/water out.

1st thing to do was figure out the cut line. I wanted to keep enough of the old top to keep the rigidity of the top.
When I cut the top off the sides had broken the bonding. I'll get this fixed later with some fiberglass mat.
What I ended up with after cutting. You can see in the center it dips down. The center bolt hole was cracked around it. I'll add some fiberglass to strengthen that up.
I found a guy on ebay that sells the snaps that I need and also some snaps to go in the top. I ended up buying the installation tool from him as well. I also went to the parts store and got the fiberglass needed to close this top back up.
So after test fitting the top and getting some snaps in place this is how it is going to look.
For the back I am going to use a piece of aluminum angle iron to mount the snaps to.
Now comes the fun, fiberglass. I'd suggest wearing long sleeves when sanding this stuff as it is pretty itchy.
I wanted to add some fiberglass mat on the inside where the weak joint was after cutting.
After that I was able to build up in layers the inside.
In the very center of the top it was cracked. I clamped it back together and added some more mat to the inside area.
For the center bracket rod supports I am going to fiberglass those to the top so there are no unnecessary screws going into the body. I've also eliminated the window gasket lip on each side with a grinder.
And this is where it is at now. Some more sanding and it will be ready for a final coat of bondo to finish it up.
After some more sanding and some bondo spread it is starting to be finished. Now I have to figure out how I am going to finish off the back with some fiberglass to make it look finished.
So now we have gone from this:
To this:
Here is a test fit to see how it looks.
At the back I am not liking the big excessive hump there. I am going to cut it at the black line and fiberglass the end closed to give it a neat finished look.
I decided to fiberglass the metal brackets to the top so there would be no screws attached to the Bronco and this would be a totally self contained assembly.
1st thing to do is mark off where it goes and cut away some of the top for the pins I will be using for the bars:
I decided to round the corners off so it wouldn't catch on something later:
Next was to precut some fiberglass mat to lay into place:
Setting up:
I then applied a final coat of fiberglass web to give it a nicer finish coat. This will probably be the final on it as trying to put a coat of bondo and sanding is going to be to much of a hassle.
Some final sanding and it should look pretty good and be nice and stable:
At the rear I got the cut line down. This will get finished off with some fiberglass as well.
For the back I picked up some aluminum angle iron. I cut the ends and folded them over for a little structural support at the end where it meets the topper. I had planned on bolting it thru the ends but with the expected fiberglass finish there I would not be able to get the bolt into the angle iron. I changed that around and ran a single bolt thru the end of the top so at any time the aluimnum angle iron can be removed to gain acces into the back of the Bronco. I am going to use some foam insultion tape on the lower part of the angle iron to keep the rain/water out.
#2
09-28-2008, 04:48 PM
I got the fiberglass laid in the back section. I also put a fine layer of bondo over it to finish it off.
After some black paint this is the final outcome for now. I'll probably pull it off next spring and redo some sanding on it as there are some sand scrathes showing thru. I wanted to finish it up now so I could get the soft top back on.
Here is what the finished product is starting to look like. I still have more snaps to get in but I should be able to finish it tommorow.:chili:
Other than a couple more snaps on the bottom edge and the rear angle piece needing snaps it is finished. I am very pleased with the final outcome. It gives the Bronco a nice clean appearance with the sides rolled up.
Total cost for this project:
Topper - free
Fiberglass mat, resin, bondo and sandpaper - 100.00
Finshed results - priceless
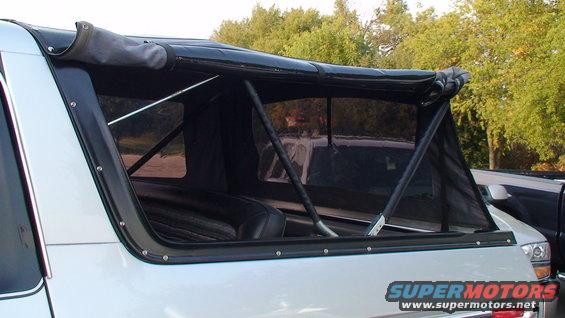
Rear side pic, still need to install snaps on aluminum angle iron

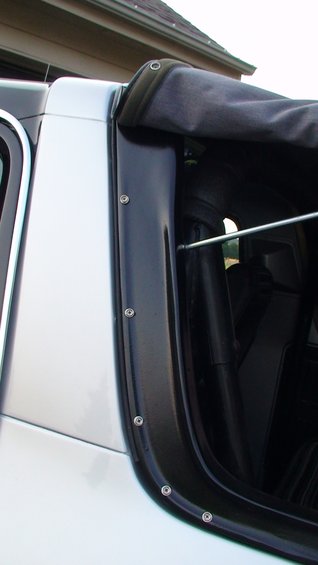
Driver side front

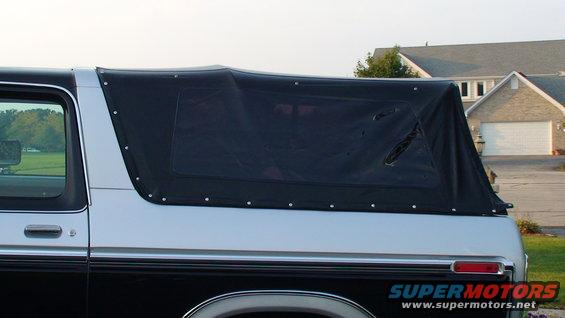
Rolled up with a clean appearance

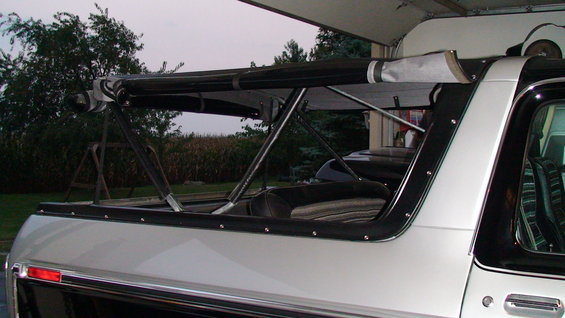
A few more snaps to put in here
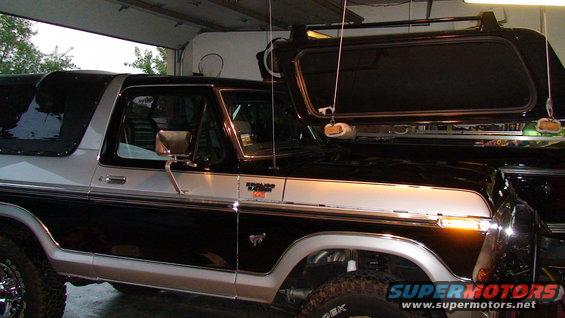
And the only downfall now is parking. Having the top hanging in the garage and the soft top on I am putting a lot of faith in my hoist hangar.
After some black paint this is the final outcome for now. I'll probably pull it off next spring and redo some sanding on it as there are some sand scrathes showing thru. I wanted to finish it up now so I could get the soft top back on.
Here is what the finished product is starting to look like. I still have more snaps to get in but I should be able to finish it tommorow.:chili:
Other than a couple more snaps on the bottom edge and the rear angle piece needing snaps it is finished. I am very pleased with the final outcome. It gives the Bronco a nice clean appearance with the sides rolled up.
Total cost for this project:
Topper - free
Fiberglass mat, resin, bondo and sandpaper - 100.00
Finshed results - priceless
Rear side pic, still need to install snaps on aluminum angle iron
Driver side front
Rolled up with a clean appearance
A few more snaps to put in here
And the only downfall now is parking. Having the top hanging in the garage and the soft top on I am putting a lot of faith in my hoist hangar.
#3
09-28-2008, 06:29 PM

#4
09-28-2008, 07:01 PM

Postmaster
Join Date: Oct 2005
Location: NJ
Posts: 3,034
Likes: 0
Received 0 Likes
on
0 Posts
#7
09-29-2008, 01:09 PM
Elder User
Join Date: Jun 2004
Location: Tucson (Cortaro & I10)
Posts: 629
Likes: 0
Received 0 Likes
on
0 Posts