


D60 Lock Right Install (write-up)
Thread Starter
|
Senior User
Joined: Jul 2007
Posts: 342
Likes: 0
SO you got thos big beefy tires on your truck and you think you are pretty cool. 
So you get out to the mud to show them off, and you start getting stuck, and only one of your front tires is spinning
What good are those big tires if you cant spin em both??
Here is one answer to your problem:

The lock right locker by powertrax is what people call a "lunchbox locker"
It is the cheaper easier to install option to your full locker (ie Detroit, ARB, OX, etc...) There are also similar lockers made by detroit, aussie, and a few others. But the design is almost identical.
The lockright runs around $300 and can be installed (for the most part) without having to pull the carrier out of the housing. This means almost anyone can do it in their driveway with a few standard tools in a reasonable amount of time. Sounds like my kinda thing!
This particular installation is on a 2003 F250 front D60 axle...
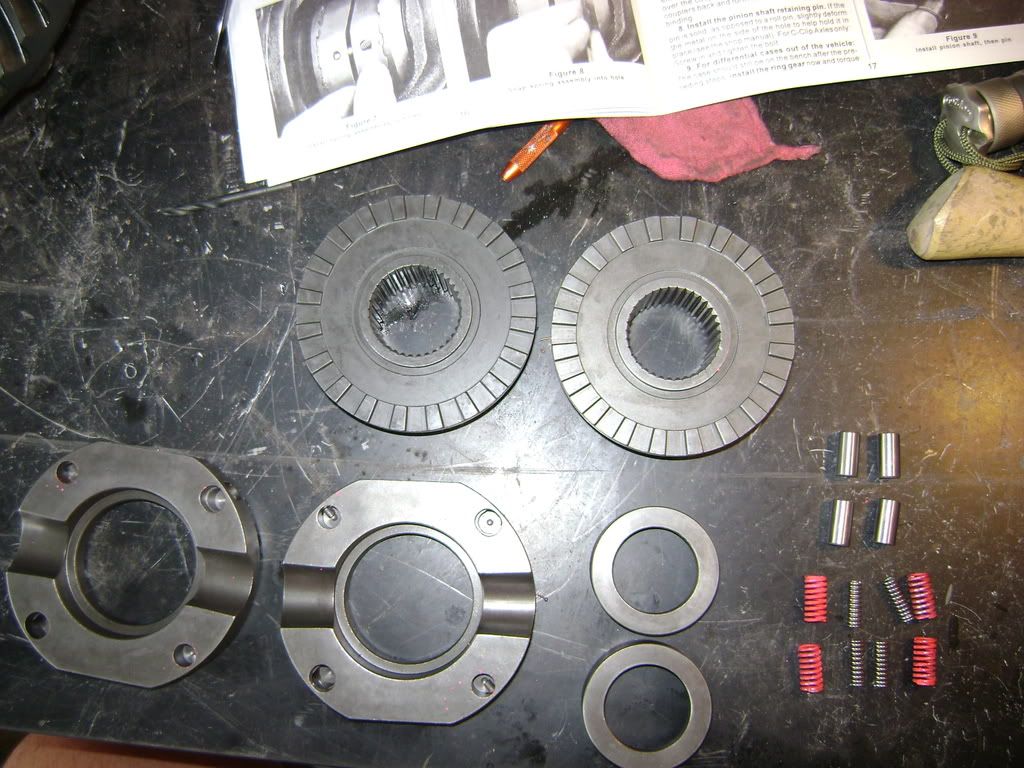
Here is the breakdown of what makes up the Lock Right locker
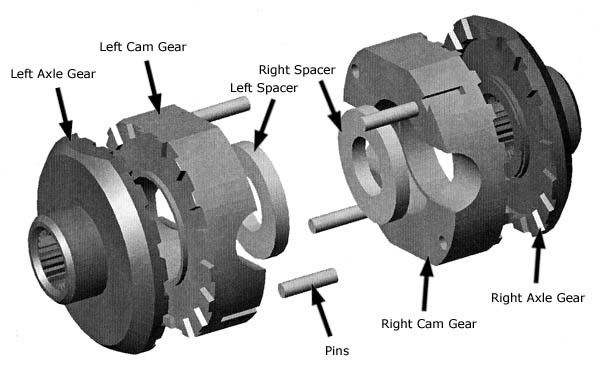
This set up will allow your axles to lock up and spin both tires when you apply the skinny pedal. However, it will also allow the tires to spin at different speeds on turns, which is critical, especially if you are planning on using it on the pavement.
Lets begin on the install:
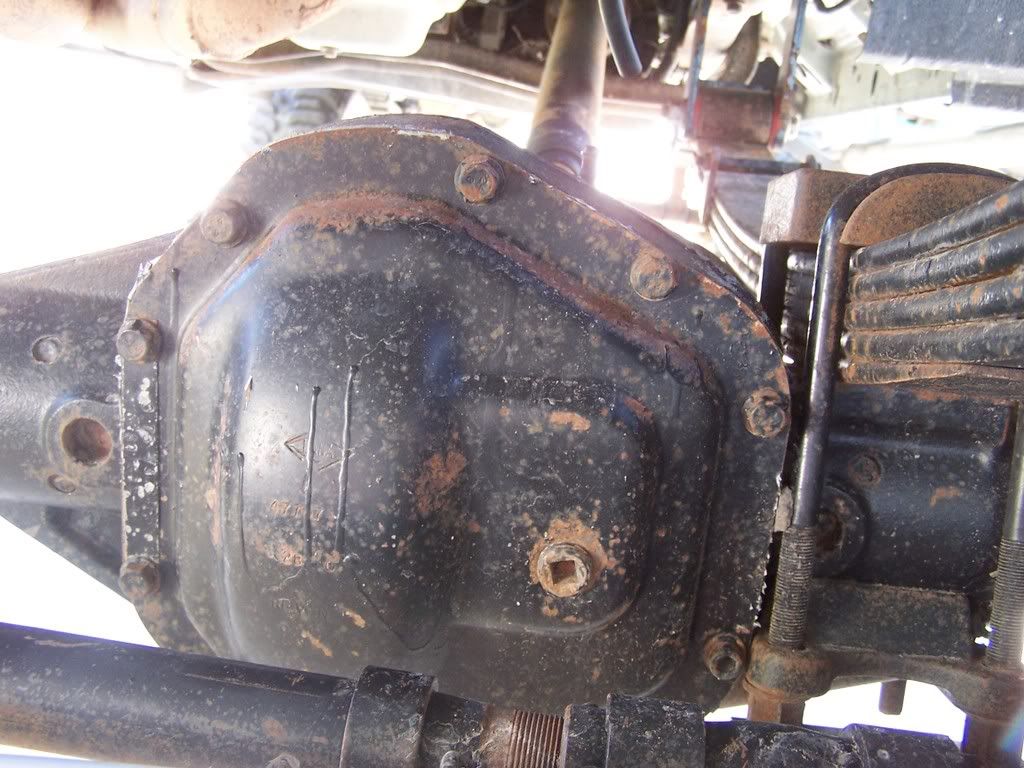
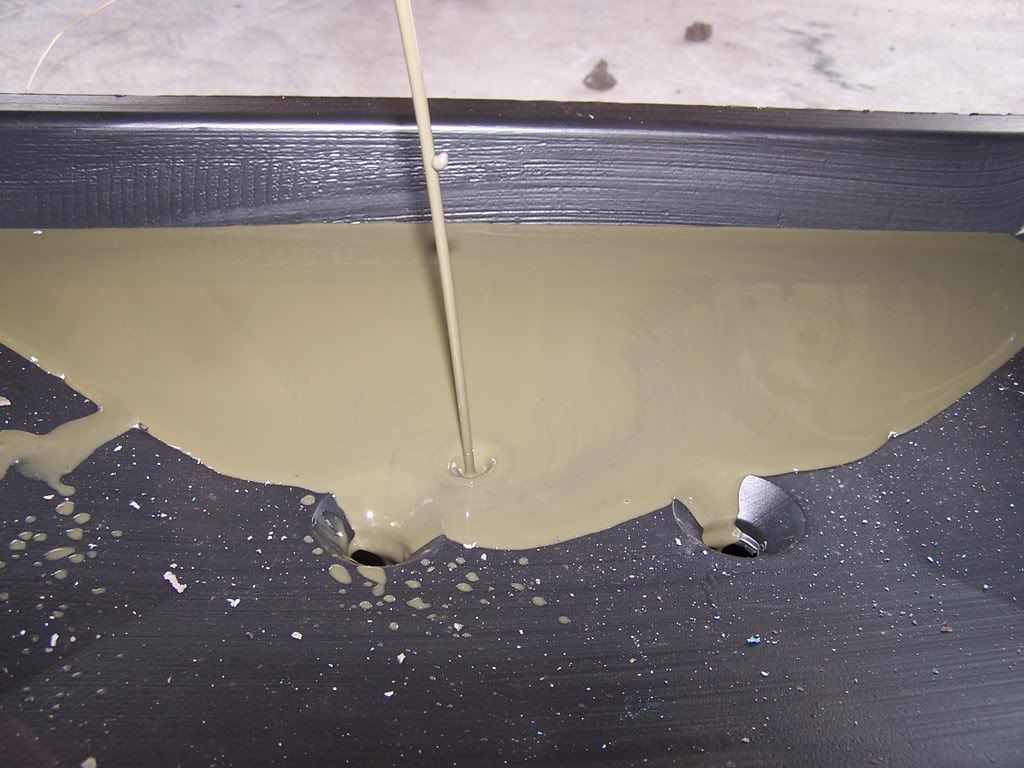
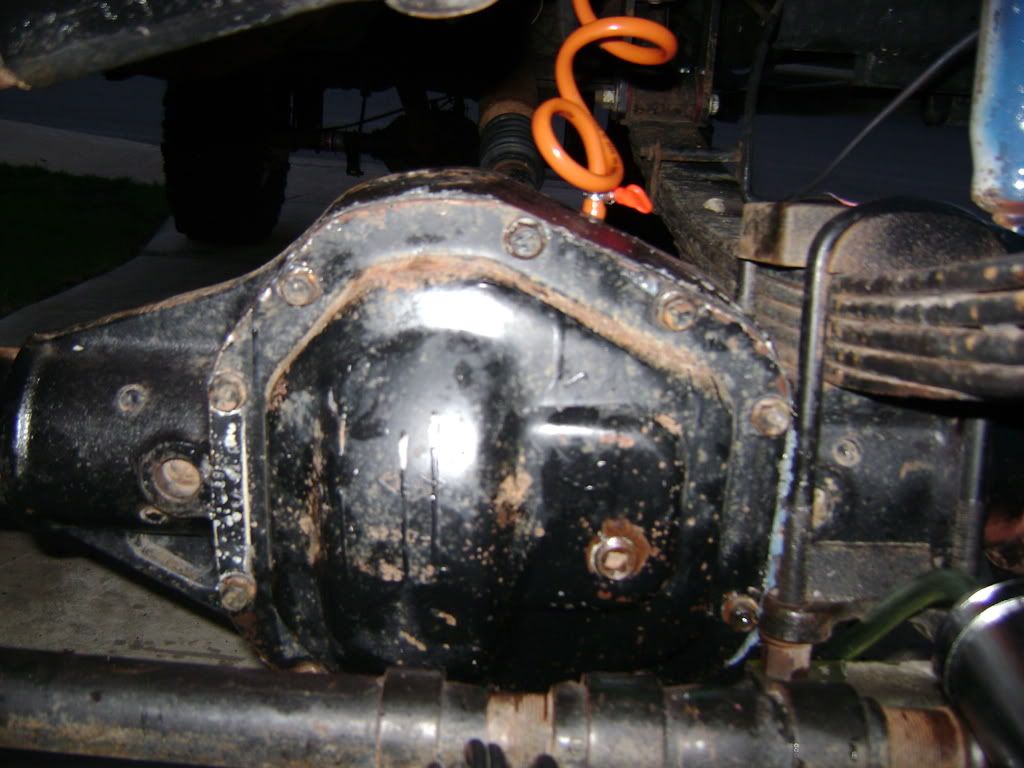
You will have to start by unbolting your differential cover and draining your gear oil. A good way to approach it is to remove all the bolts except for the very top one. Loosen it, and this will allow the majority of the oil to drain through the bottom:
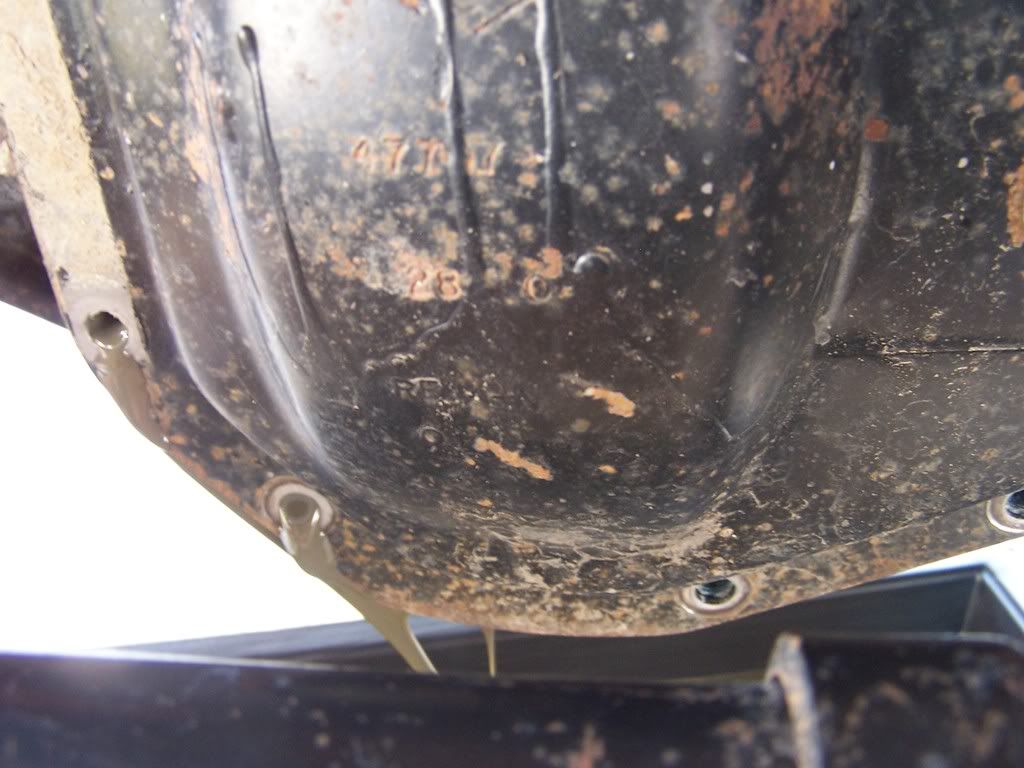
This will give you a chance to inspect your gears and make sure there is nothing of concern. Since my truck is only 5 years old, everything still looks good, and should last a few more years. There was however some muddy gear oil that came out
I expected this since my axle breather tube kept popping off, and I have been going into some pretty deep stuff. Luckily there was no damage to be seen
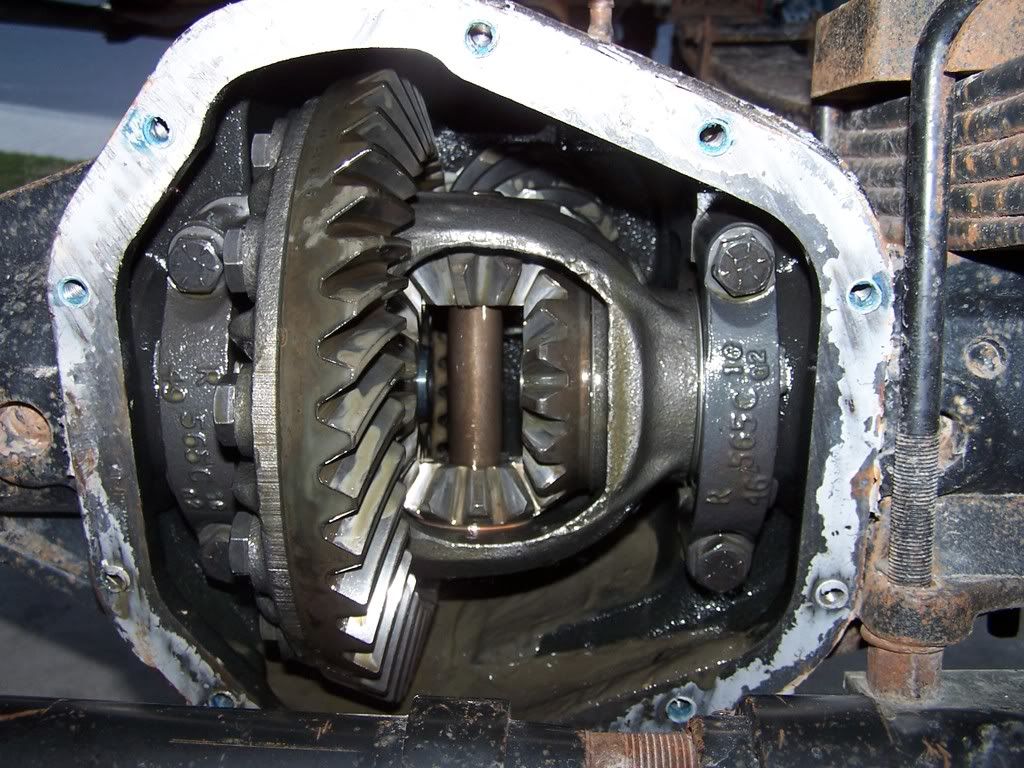
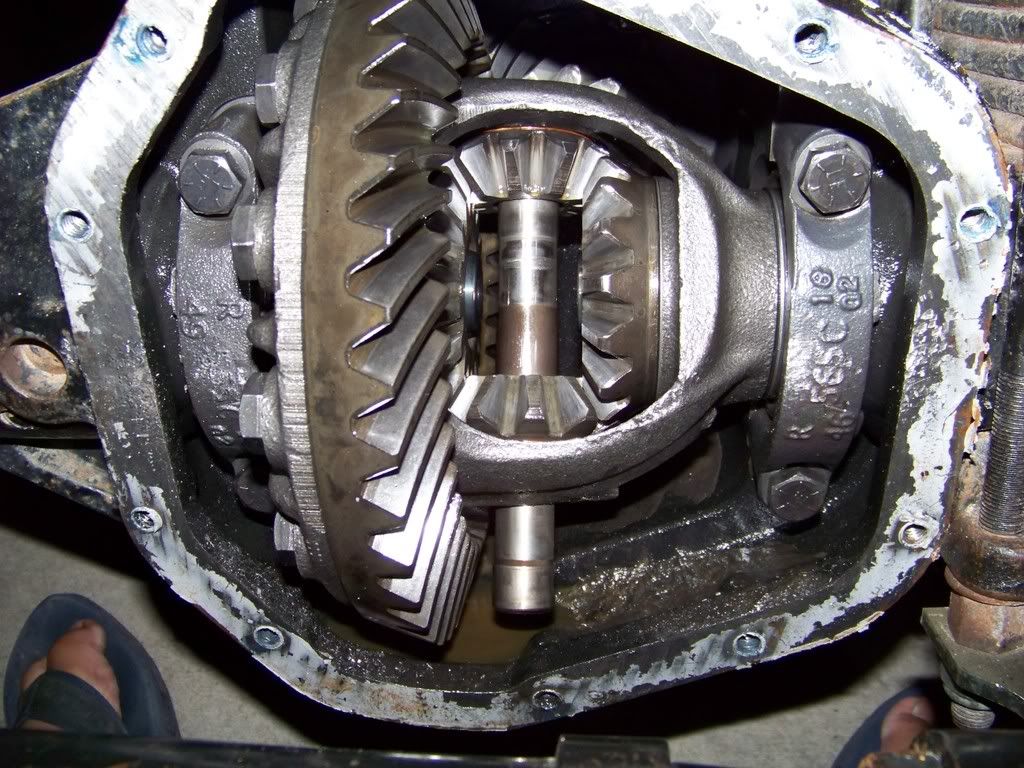
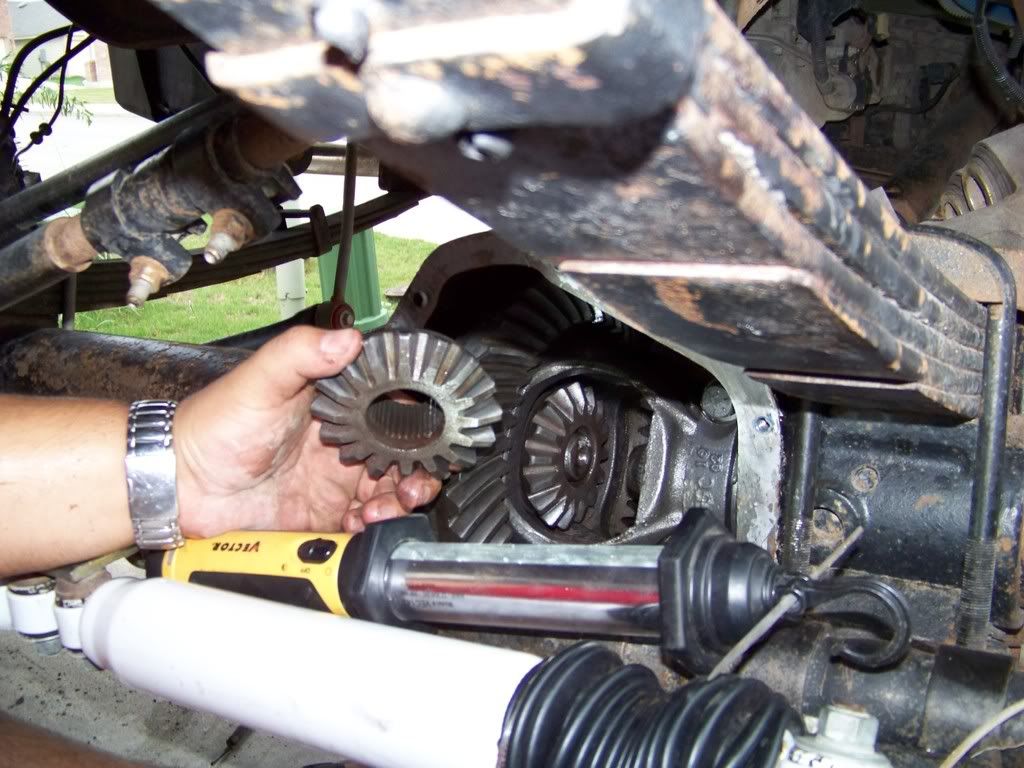
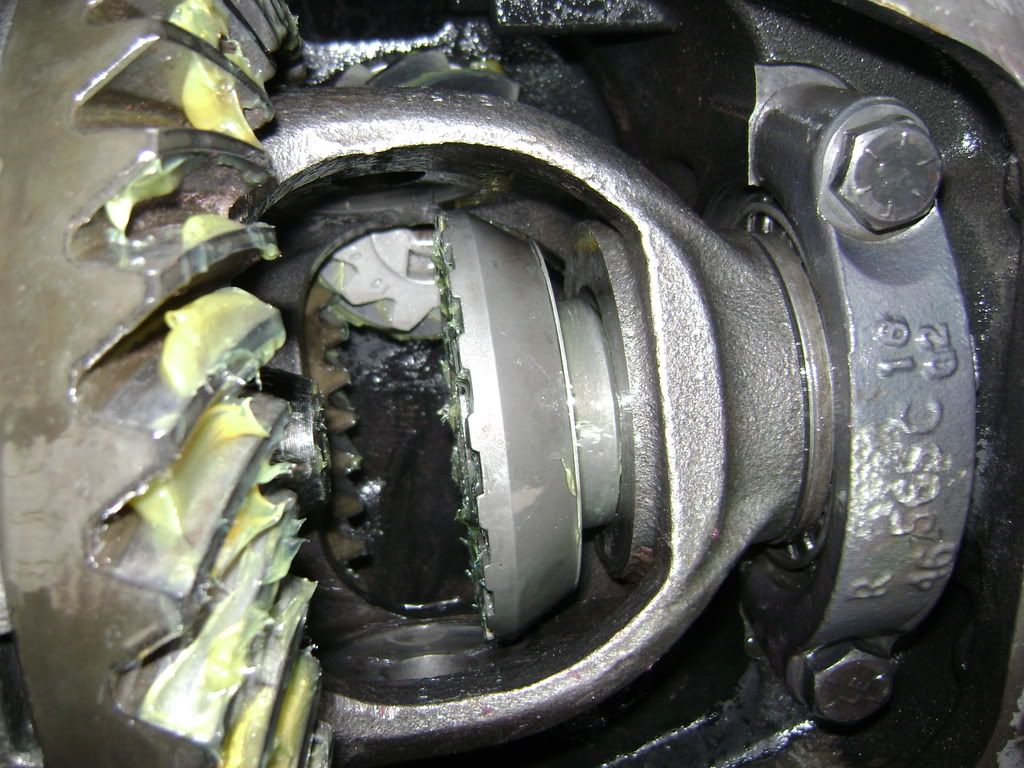
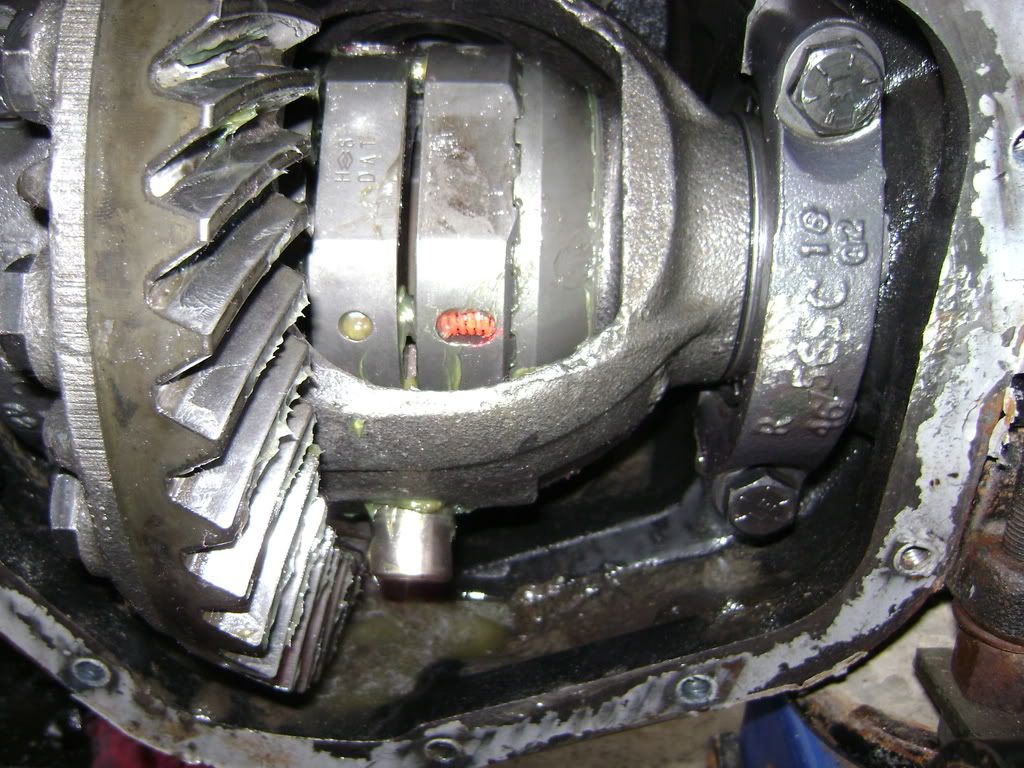
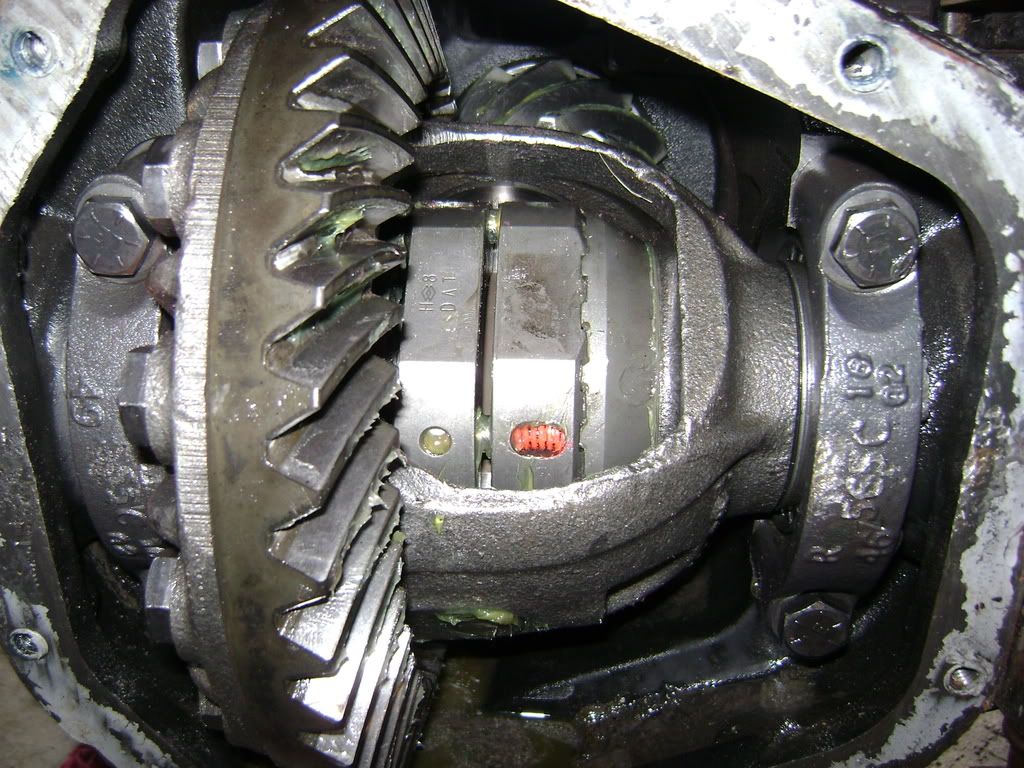
Here is what you should see when you open it up
Time to dig in...
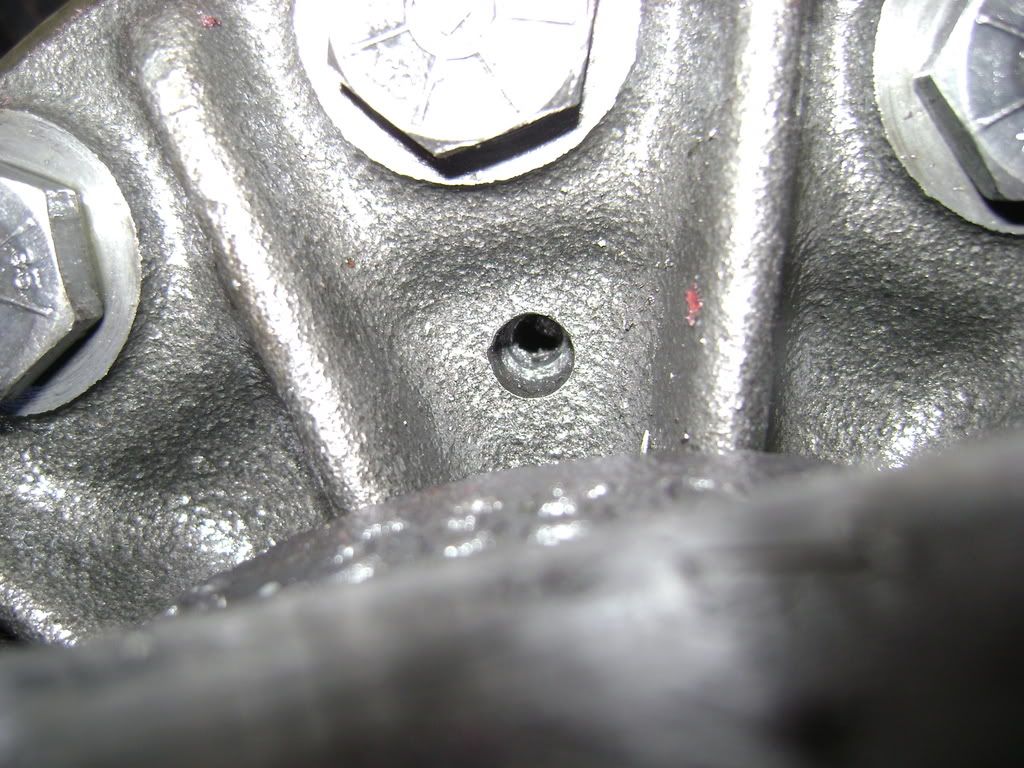
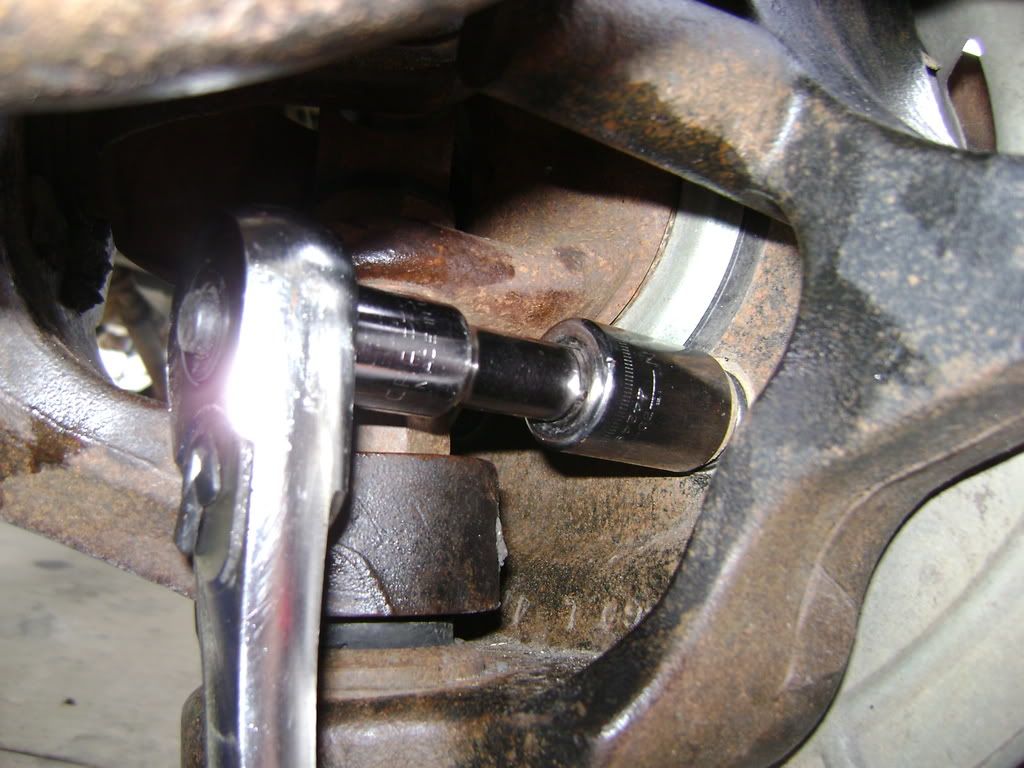
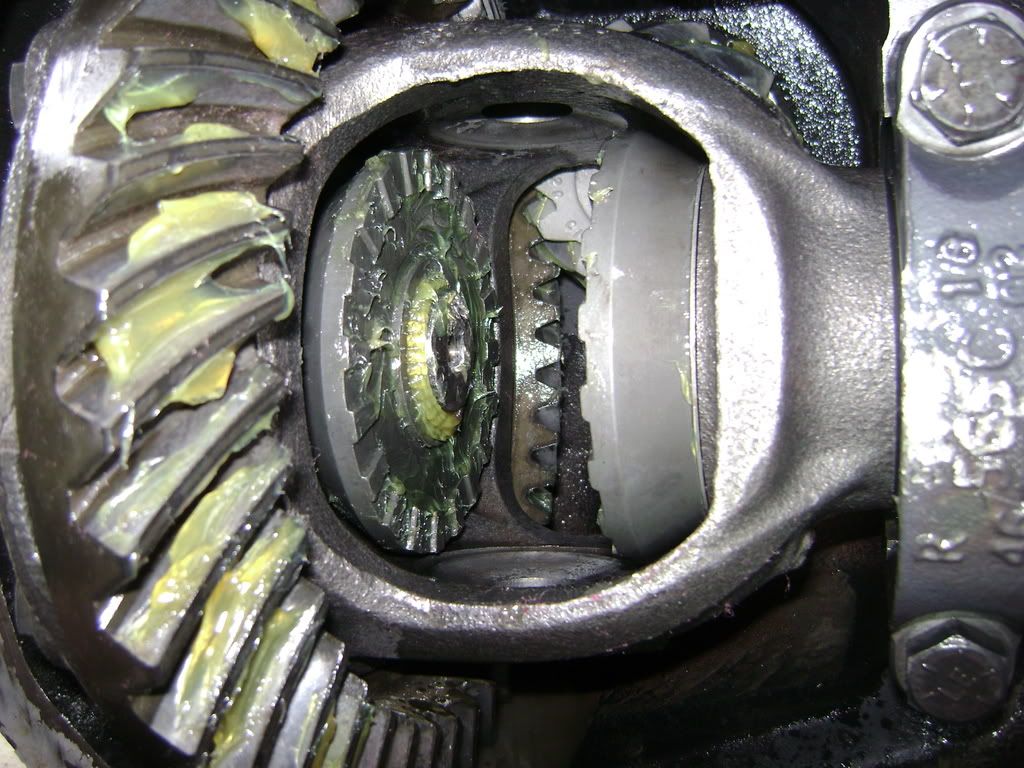
The first step is to remove the roll pin that holds the cross pin in place
To do this you will need a long punch that will fit into the opening to punch the roll pin out.
The roll pin only comes out one way in this case. In the picture above you will tap it out from left to right. In my case I used a smaller roll pin tap it out. Be sure not to use anything with a tapered end, since this will most likely wedge into the roll pin and open it up, making it harder to remove it.
Tap from this side
For reference, this is a roll pin, the one on the left side in the picture is used

Here is the way the roll pin should come out:
NOTE that the roll pin will be re-used unless it is damaged, in which case it should be replaced!
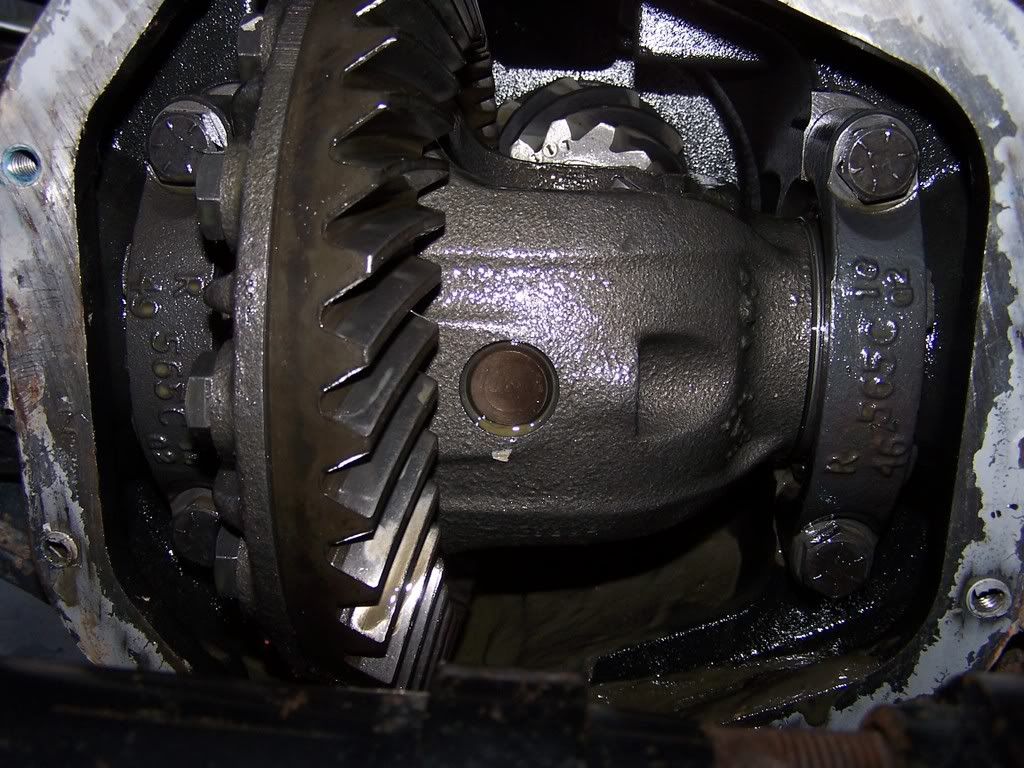
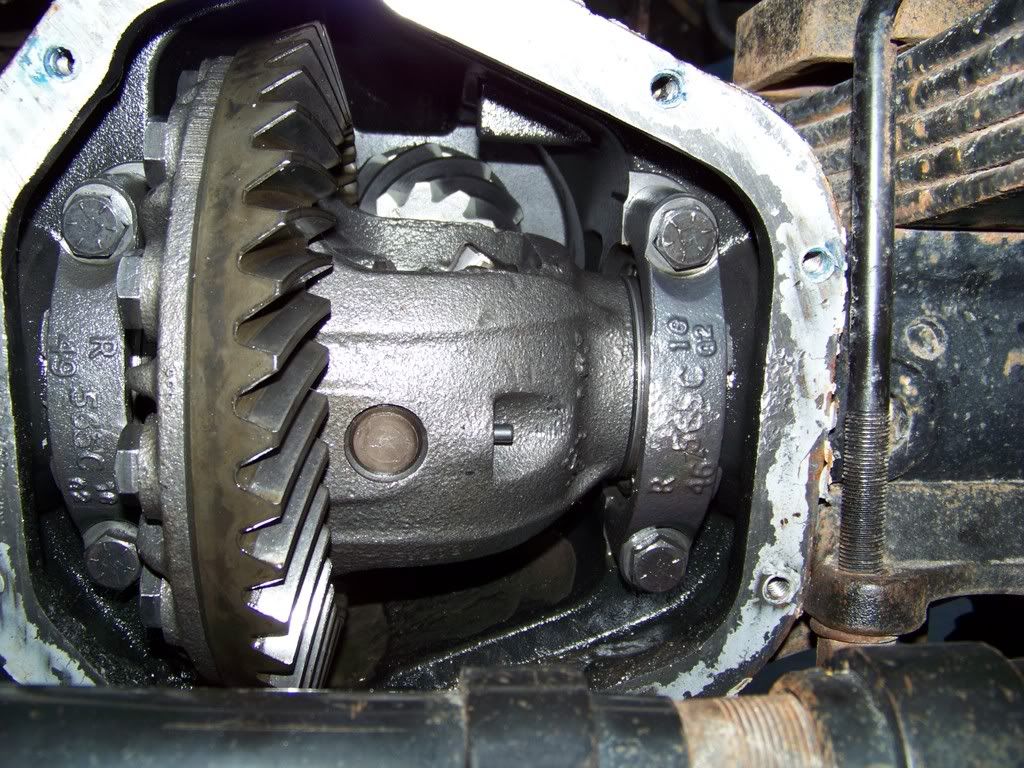
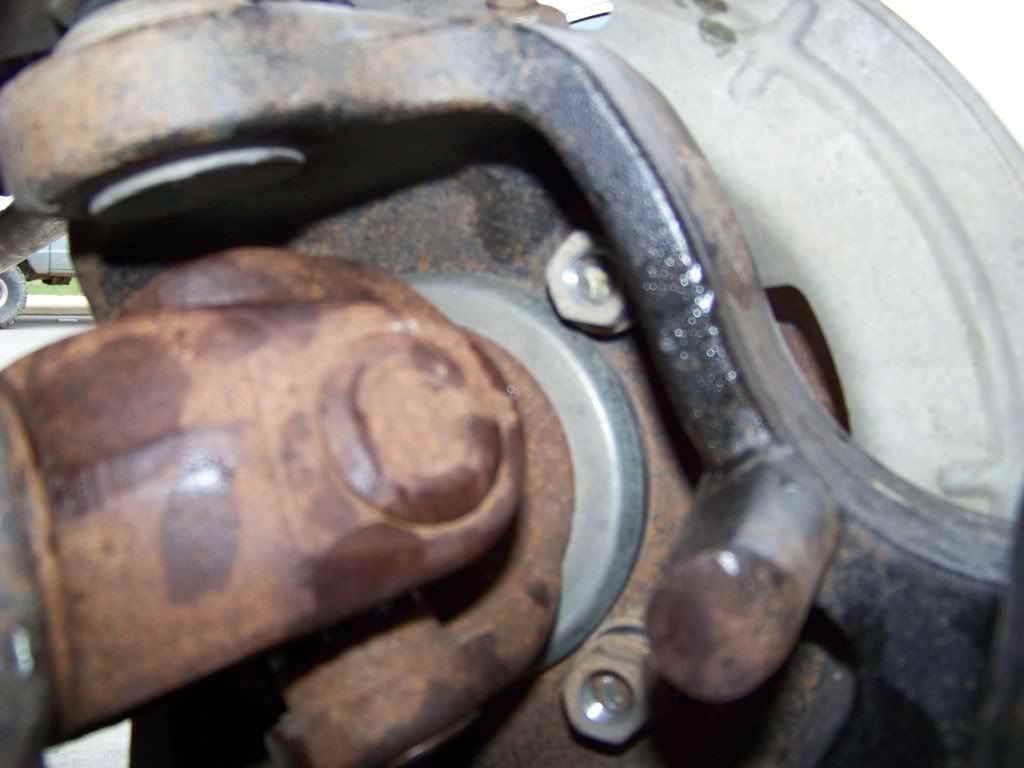
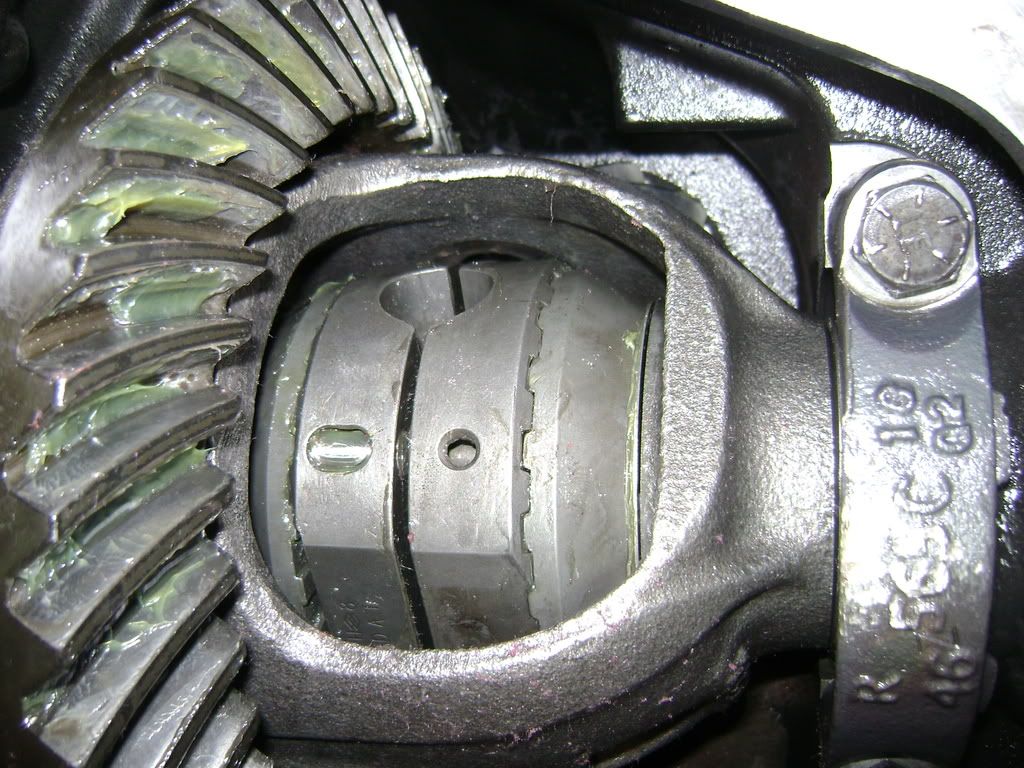
With the roll pin out, the cross pin should now drop out:
NOTE again, the roll pin will be re-used in the locker, so dont lose it
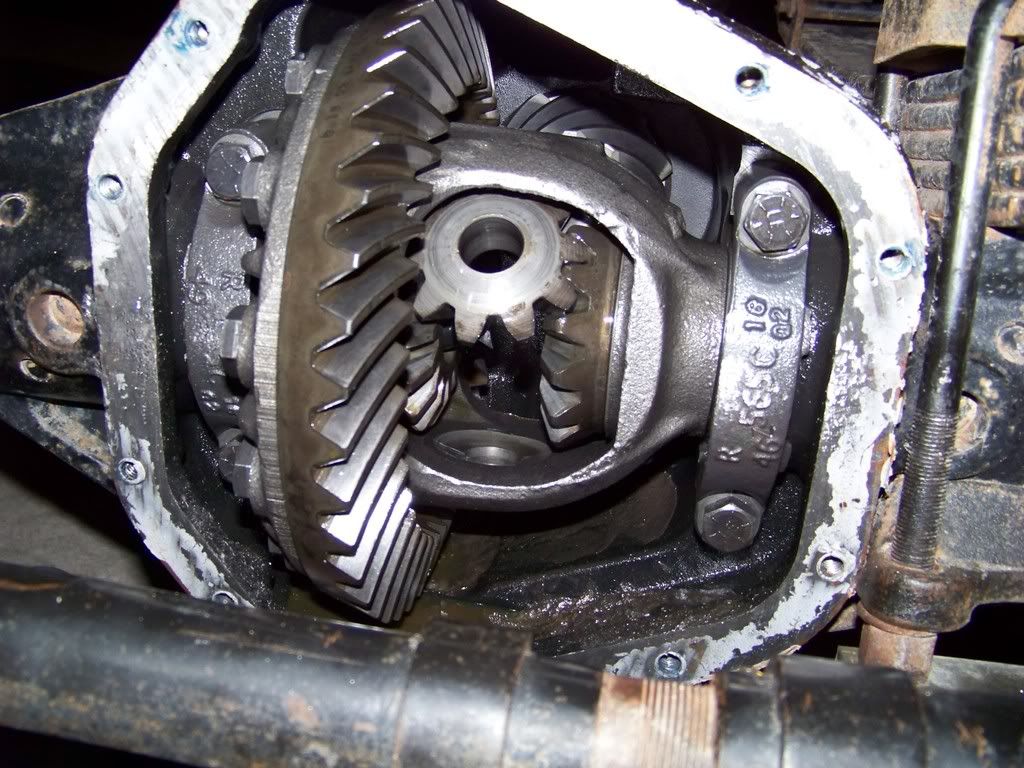
With the cross pin the spider gears that were attached to it should come out. Simply rotate the side gears until the top and bottom spiders clear the carrier opening
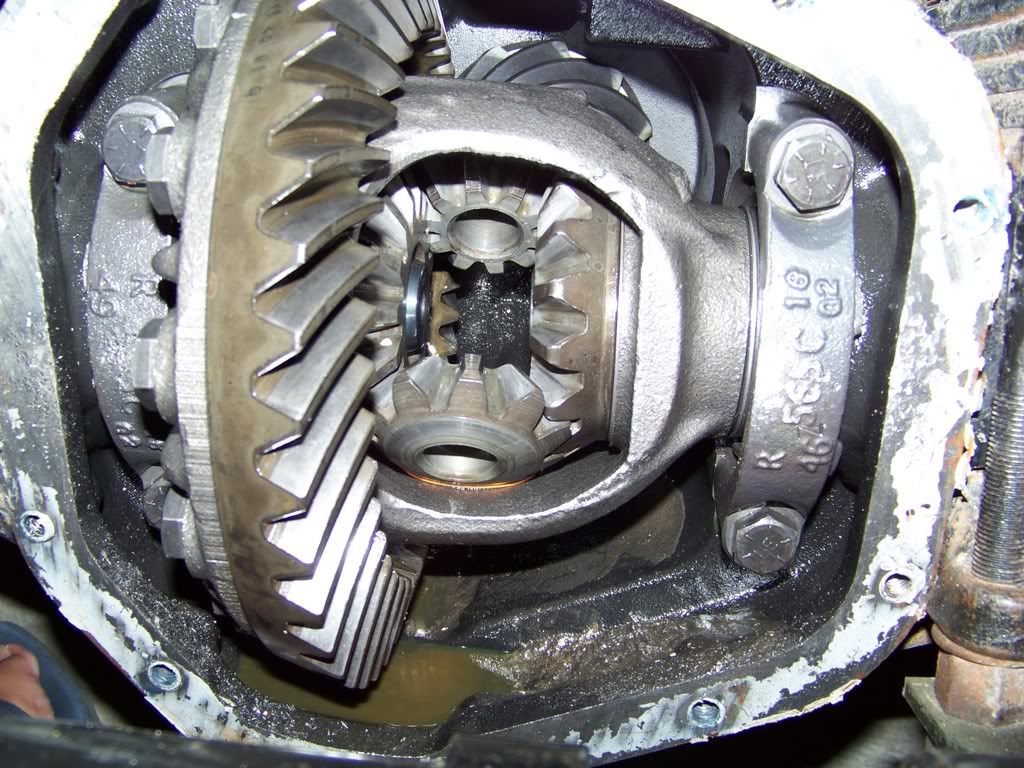
Note that there are washers behind the cross pin spider gears that will NOT be re-used. So you can lose thos if you want
Now you can remove the gears attached to the axles. These should slide right off and out of the carrier. In my case the axle stubs were too close, and did not allow enough clearance to remove them. If this happens to you, first try and remove some of the slack from the axle shafts by pulling them out at the U-joints. If you are lucky you have enough play to allow you to remove the gears. In my case I had to remove the brakes and unbolt my hub assy to pull it out some to give enough clearance inside the carrier
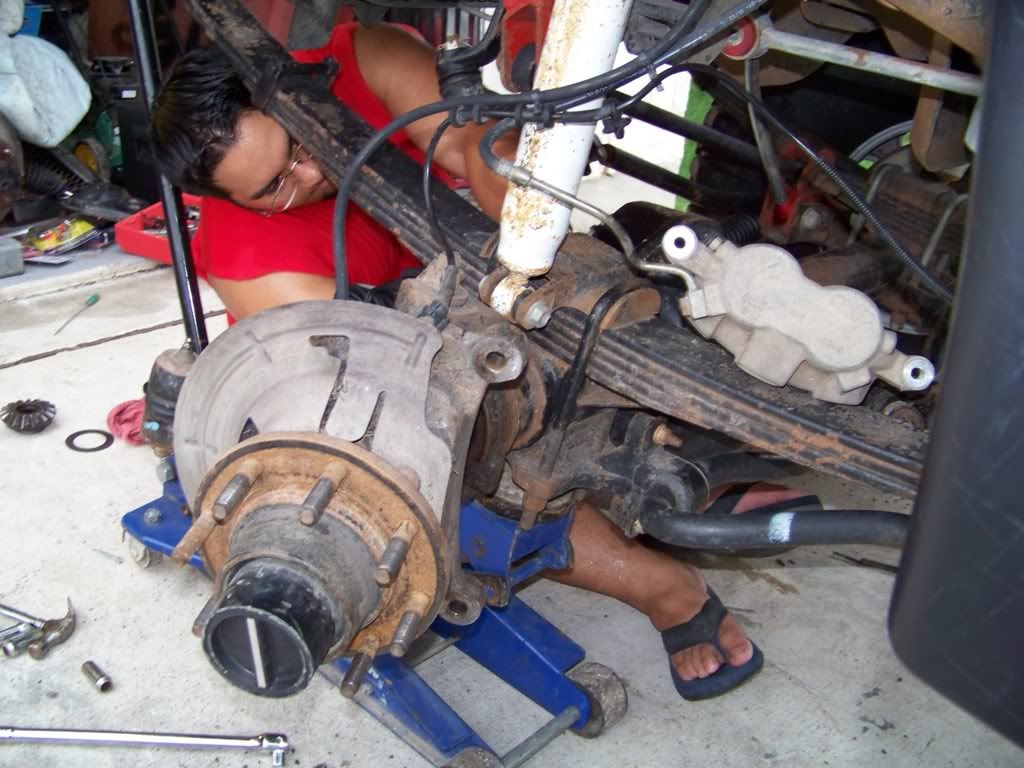
Luckily I didnt have to take the hub assy apart, I simply unbolted it from the knuckle to push it out some
Here you can see the nuts I loosened
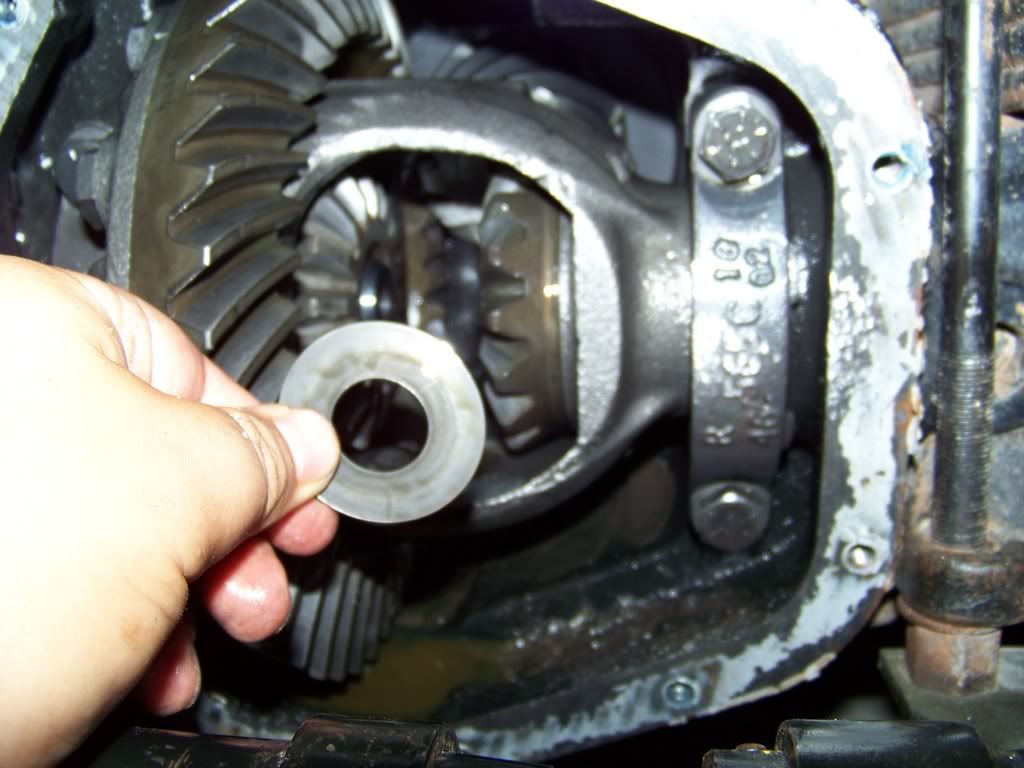
This worked, and the last two gears slid off and out
IMPORTANT! there are thin thrust washers behind each of the gears that you will need to keep and re-use on the locker Dont lose em!
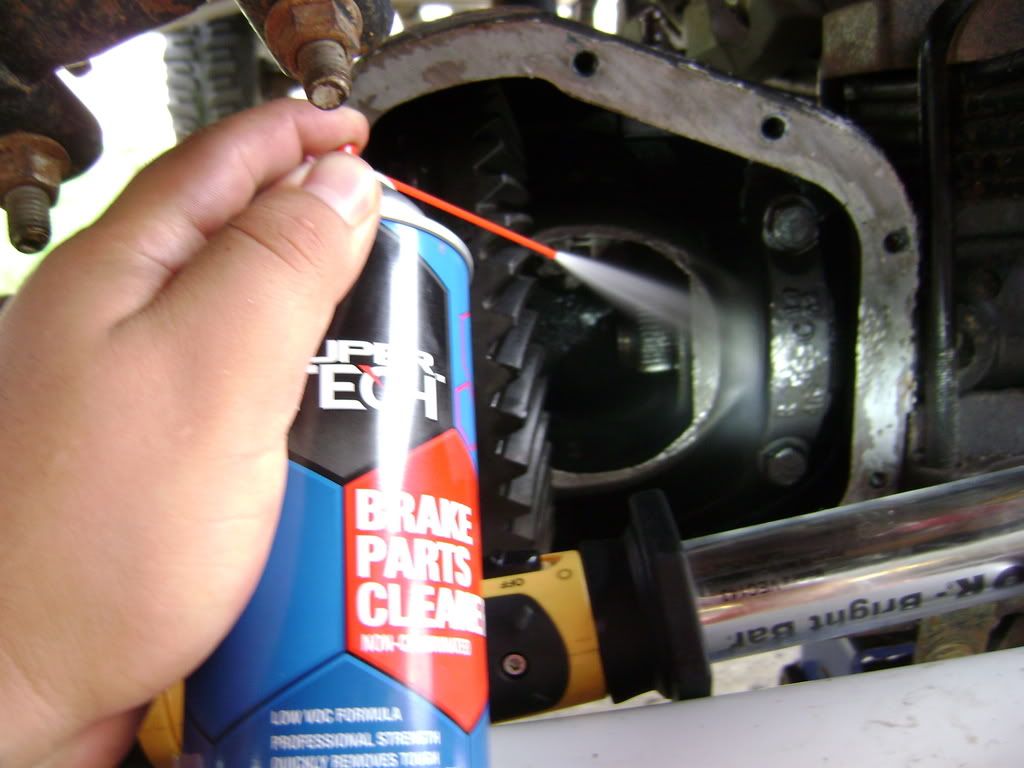
With everything out, its a good time to clean everything
Grab a few cans of brake cleaner and go crazy!
So you get out to the mud to show them off, and you start getting stuck, and only one of your front tires is spinning
What good are those big tires if you cant spin em both??
Here is one answer to your problem:
The lock right locker by powertrax is what people call a "lunchbox locker"
It is the cheaper easier to install option to your full locker (ie Detroit, ARB, OX, etc...) There are also similar lockers made by detroit, aussie, and a few others. But the design is almost identical.
The lockright runs around $300 and can be installed (for the most part) without having to pull the carrier out of the housing. This means almost anyone can do it in their driveway with a few standard tools in a reasonable amount of time. Sounds like my kinda thing!
This particular installation is on a 2003 F250 front D60 axle...
Here is the breakdown of what makes up the Lock Right locker
This set up will allow your axles to lock up and spin both tires when you apply the skinny pedal. However, it will also allow the tires to spin at different speeds on turns, which is critical, especially if you are planning on using it on the pavement.
Lets begin on the install:
You will have to start by unbolting your differential cover and draining your gear oil. A good way to approach it is to remove all the bolts except for the very top one. Loosen it, and this will allow the majority of the oil to drain through the bottom:
This will give you a chance to inspect your gears and make sure there is nothing of concern. Since my truck is only 5 years old, everything still looks good, and should last a few more years. There was however some muddy gear oil that came out
I expected this since my axle breather tube kept popping off, and I have been going into some pretty deep stuff. Luckily there was no damage to be seen
Here is what you should see when you open it up
Time to dig in...
The first step is to remove the roll pin that holds the cross pin in place
To do this you will need a long punch that will fit into the opening to punch the roll pin out.
The roll pin only comes out one way in this case. In the picture above you will tap it out from left to right. In my case I used a smaller roll pin tap it out. Be sure not to use anything with a tapered end, since this will most likely wedge into the roll pin and open it up, making it harder to remove it.
Tap from this side
For reference, this is a roll pin, the one on the left side in the picture is used
Here is the way the roll pin should come out:
NOTE that the roll pin will be re-used unless it is damaged, in which case it should be replaced!
With the roll pin out, the cross pin should now drop out:
NOTE again, the roll pin will be re-used in the locker, so dont lose it
With the cross pin the spider gears that were attached to it should come out. Simply rotate the side gears until the top and bottom spiders clear the carrier opening
Note that there are washers behind the cross pin spider gears that will NOT be re-used. So you can lose thos if you want
Now you can remove the gears attached to the axles. These should slide right off and out of the carrier. In my case the axle stubs were too close, and did not allow enough clearance to remove them. If this happens to you, first try and remove some of the slack from the axle shafts by pulling them out at the U-joints. If you are lucky you have enough play to allow you to remove the gears. In my case I had to remove the brakes and unbolt my hub assy to pull it out some to give enough clearance inside the carrier
Luckily I didnt have to take the hub assy apart, I simply unbolted it from the knuckle to push it out some
Here you can see the nuts I loosened
This worked, and the last two gears slid off and out
IMPORTANT! there are thin thrust washers behind each of the gears that you will need to keep and re-use on the locker Dont lose em!
With everything out, its a good time to clean everything
Grab a few cans of brake cleaner and go crazy!
Thread Starter
|
Senior User
Joined: Jul 2007
Posts: 342
Likes: 0
Now grab all the pieces to your locker and lay em out
This should be everything that comes in the box plus instructions (but you dont need those
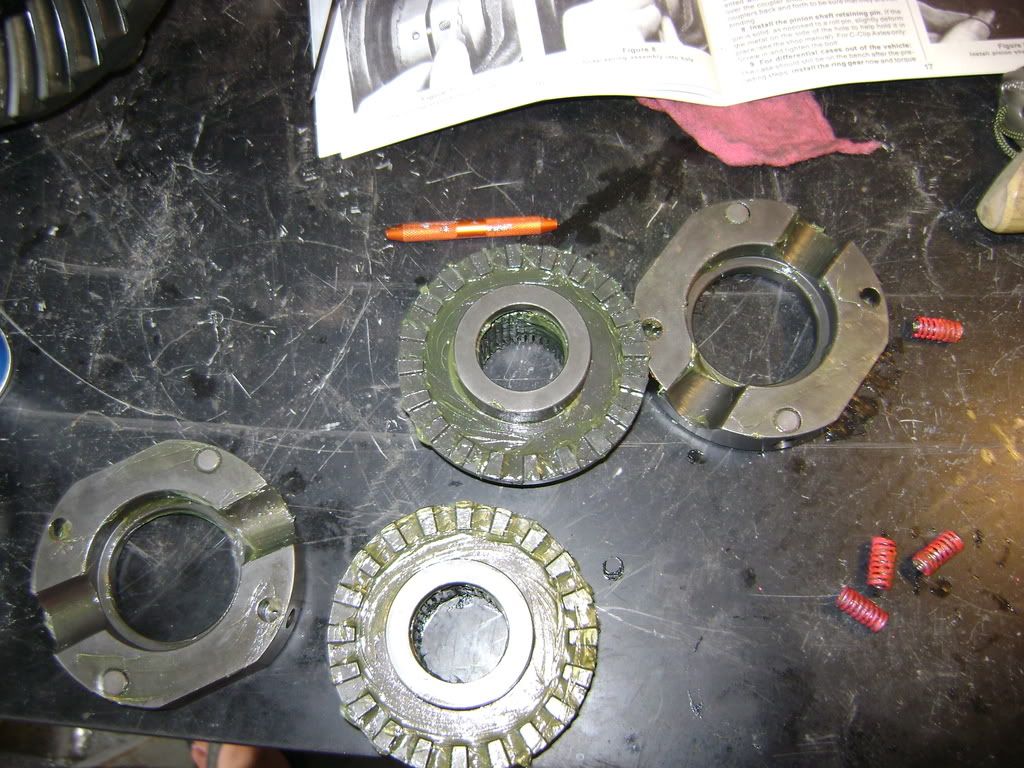
Assy for reference
With everything out, you probably want to test fit everything together and make sure you know how it is going to go in the carrier
You can apply a coat of grease to everything to make sure it has some lube before the gear oil has a chance to get to it.
It also helps the parts stick together while you are installing them
Note, I installed the smaller springs into the larger (pink ones)
as well as the small pins into the oval shaped holes
now get back over to the truck!
first you will slide the axle gear on, making sure you install the thrust washer you saved from first part!
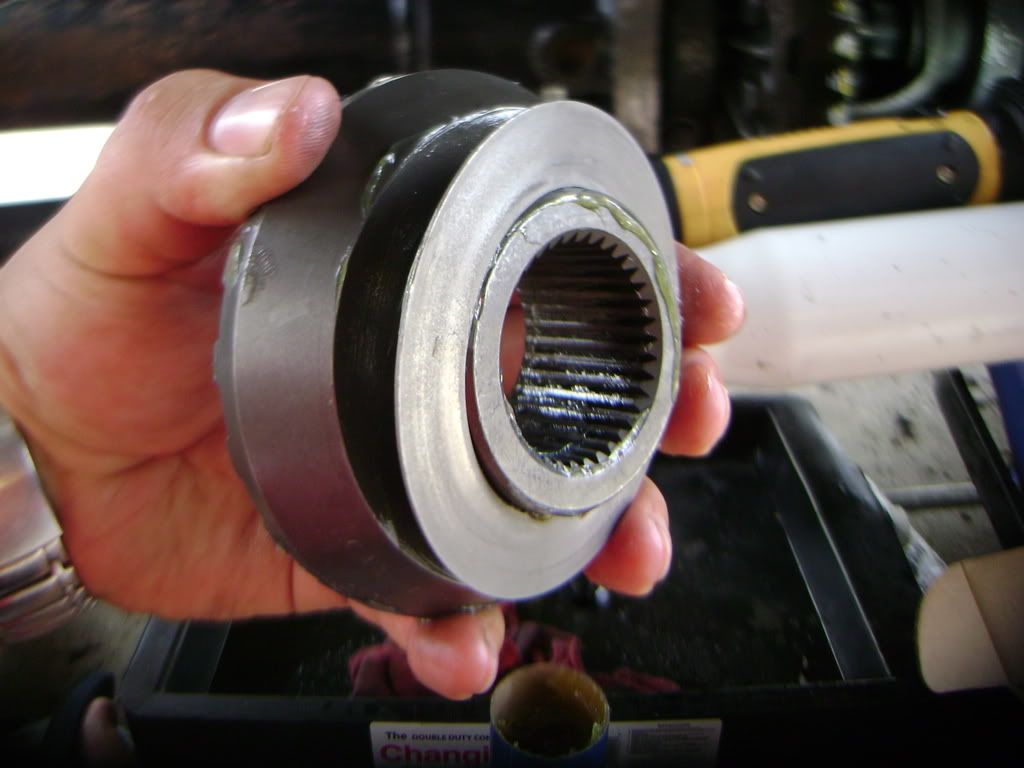
You will have to wiggle it to get it to seat all the way on the axle
Now repeat on the opposite side
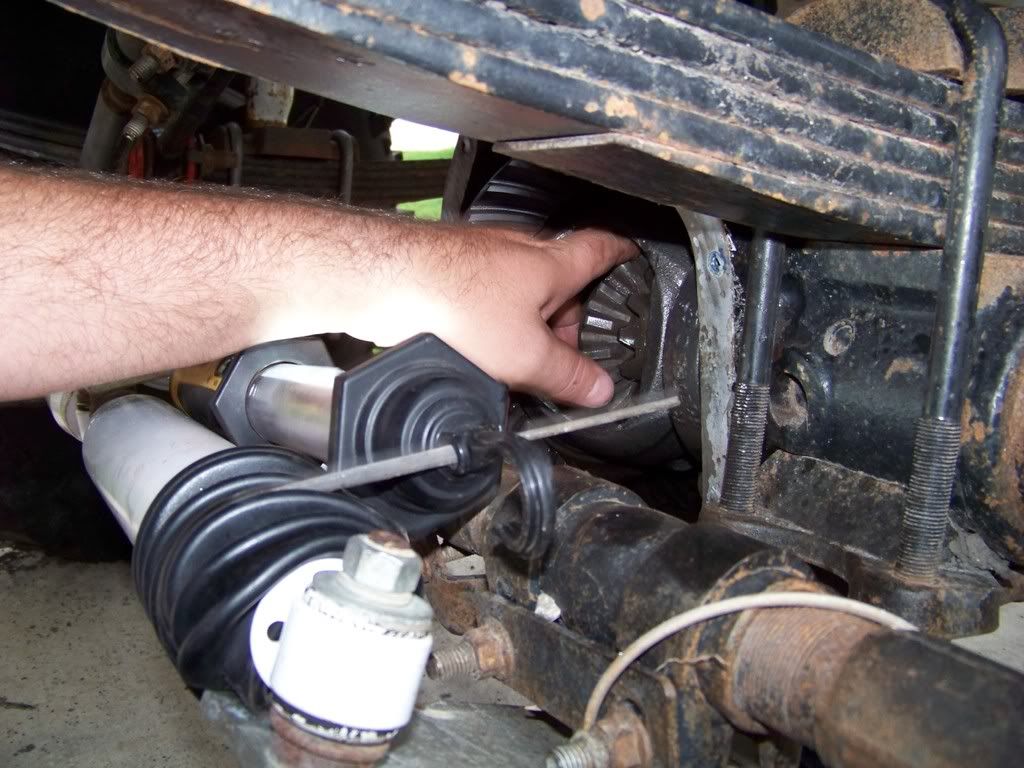
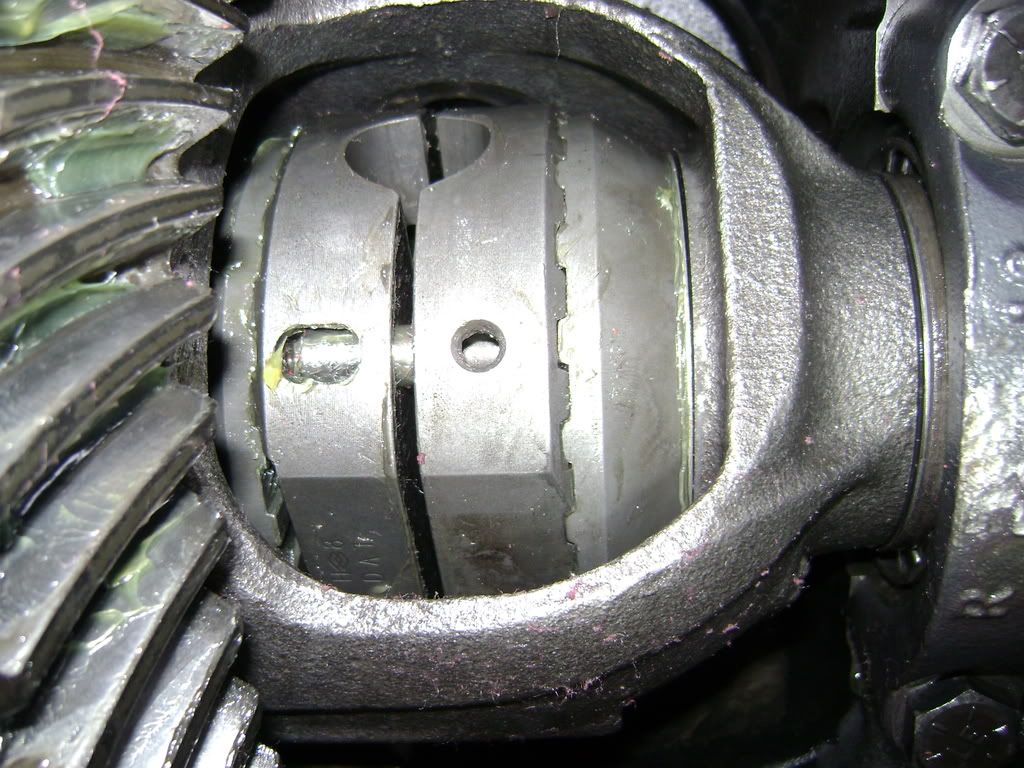
Now grab the right and left cam assy and slide them onto the axle gears
Once on, you will line them up so the pins can slide into eachother
Now grab a skinny screw driver and push the pin into the opposite side
Once the pin seats, you will install the springs behind it
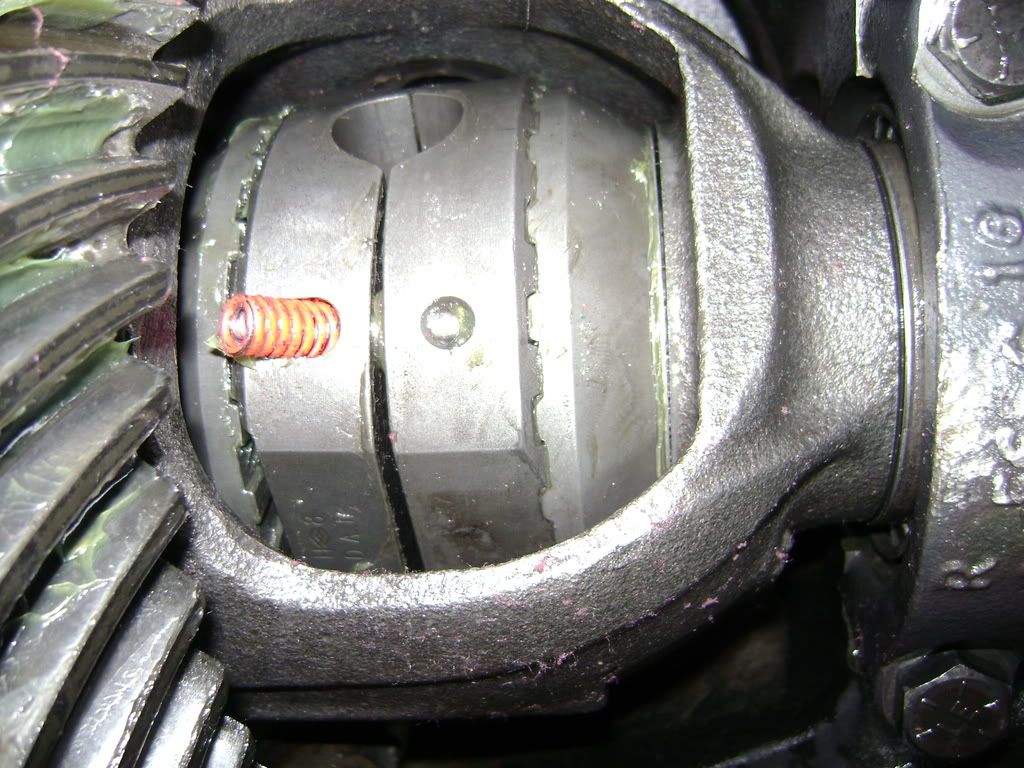
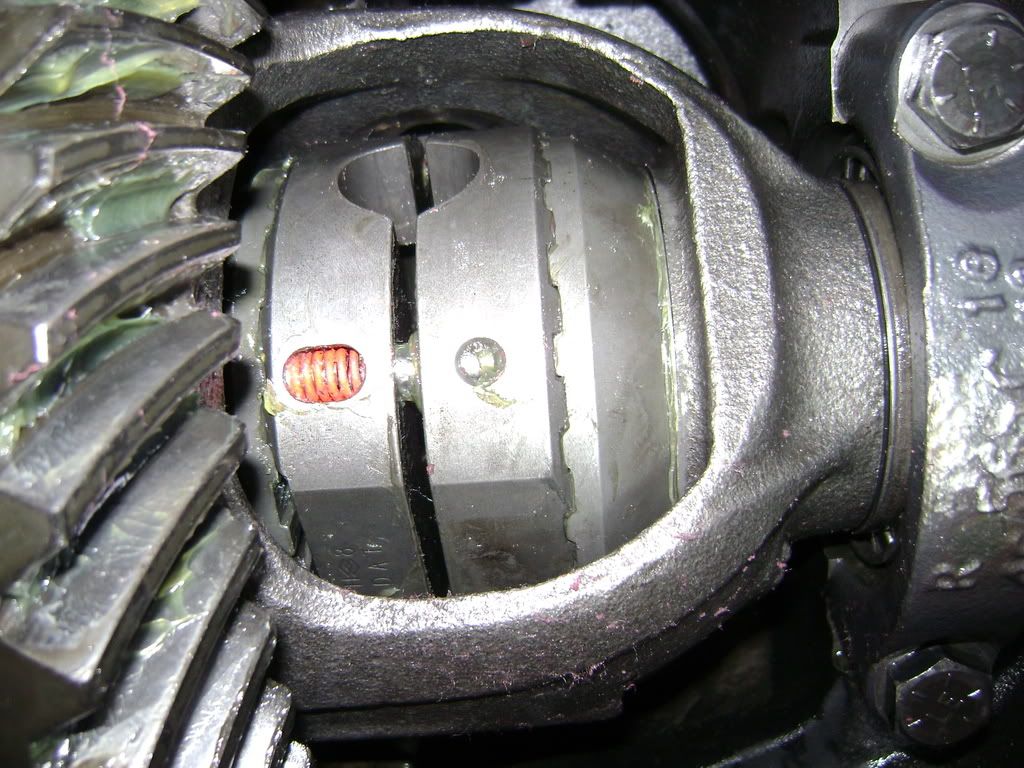
repeat on all four pins
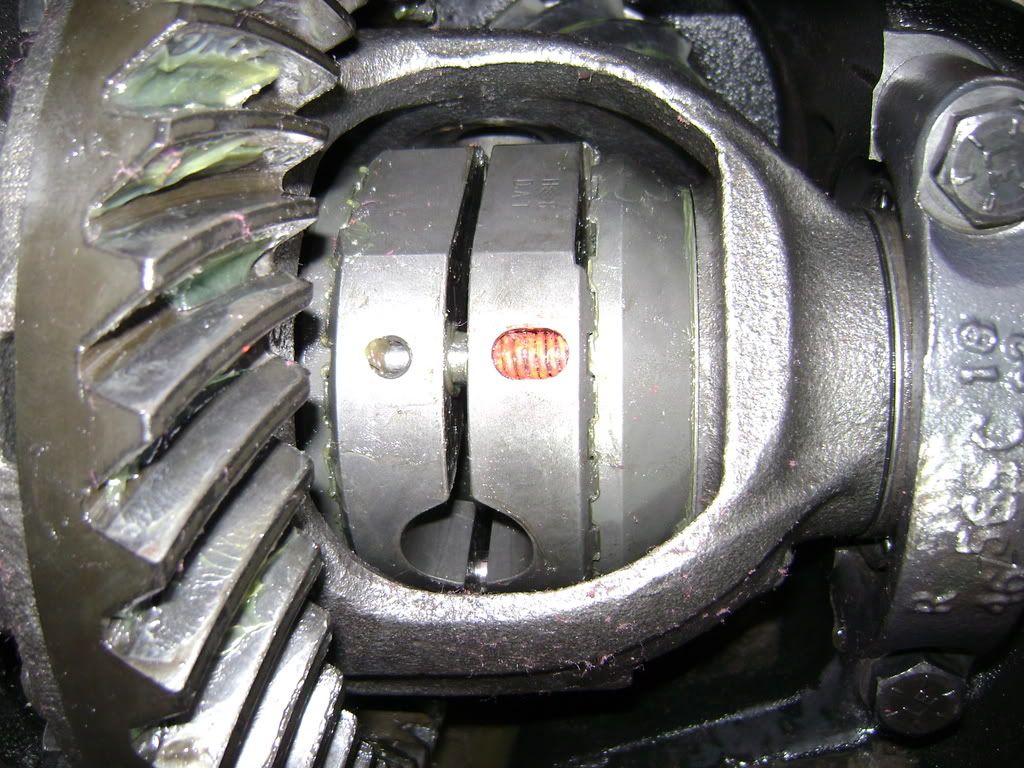
Now, line the locker up with the cross pin opening and install the cross pin
Now tap the roll pin back in, and make sure it is holding the cross pin
Take a step back and look at your new locker
Now get some RTV and bolt your diff cover back on
Dont forget to refill your diff with gear oil!!(amount dependent on vehicle)
Note, new breather tube installed to keep mud out
Now go test it out in some mud!!
This should be everything that comes in the box plus instructions (but you dont need those
Assy for reference
With everything out, you probably want to test fit everything together and make sure you know how it is going to go in the carrier
You can apply a coat of grease to everything to make sure it has some lube before the gear oil has a chance to get to it.
It also helps the parts stick together while you are installing them
Note, I installed the smaller springs into the larger (pink ones)
as well as the small pins into the oval shaped holes
now get back over to the truck!
first you will slide the axle gear on, making sure you install the thrust washer you saved from first part!
You will have to wiggle it to get it to seat all the way on the axle
Now repeat on the opposite side
Now grab the right and left cam assy and slide them onto the axle gears
Once on, you will line them up so the pins can slide into eachother
Now grab a skinny screw driver and push the pin into the opposite side
Once the pin seats, you will install the springs behind it
repeat on all four pins
Now, line the locker up with the cross pin opening and install the cross pin
Now tap the roll pin back in, and make sure it is holding the cross pin
Take a step back and look at your new locker
Now get some RTV and bolt your diff cover back on
Dont forget to refill your diff with gear oil!!(amount dependent on vehicle)
Note, new breather tube installed to keep mud out
Now go test it out in some mud!!
Posting Guru
Joined: Feb 2008
Posts: 1,795
Likes: 1
From: Lubbock, Texas
I might have just missed it but how do you engage the locker? Is it an air actuation system? cable?
Also I love your truck... I have seen her cruising around on youtube
ps: reps sent for the writeup
Also I love your truck... I have seen her cruising around on youtube
ps: reps sent for the writeup
Thread Starter
|
Senior User
Joined: Jul 2007
Posts: 342
Likes: 0
thanks for the rep!
its an "automatic" locker
it is always locked, but unlocks when you turn, allowing the outside tire to spin faster
The gears overrun eachother to allow the difference in speed
Its probably not the best if you drive in 4wd on the road alot
its an "automatic" locker
it is always locked, but unlocks when you turn, allowing the outside tire to spin faster
The gears overrun eachother to allow the difference in speed
Its probably not the best if you drive in 4wd on the road alot
Post Fiend
Joined: Jun 2004
Posts: 8,147
Likes: 1
From: Joppa, Maryland
Trending Topics
Senior User
Joined: Jan 2008
Posts: 439
Likes: 0
From: Yuma, AZ
FTE Stories
Ford Trucks for Ford Truck Enthusiasts

3 Best / 3 Worst Parts of Modern Ford Ownership
Brett Foote
10 Amazing Upgrades That Solve Common Ford Truck Owner Headaches
Pouria Savadkouei
Every 2026 Ford Engine Explained
Brett Foote
10 Ugly Ford Trucks That We Still Kinda Love
Joe Kucinski
10 Things Every Truck Owner NEEDS (2026 Edition)
Michael S. Palmer
Rezvani's Latest Post-Apocalyptic Monster Is a Ford F-150 Raptor Underneath
Verdad Gallardo
Top 10 Most Expensive Ford Trucks Ever Sold on Bring a Trailer
Joe Kucinski
2027 Ford Super Duty Buyer's Guide (Every Model, Engine, & Package)
Brett Foote
Top 10 Ford Truck Tragedies
Joe Kucinski


Lead Driver

Joined: May 2000
Posts: 9,236
Likes: 12
From: Senoia, GA
awesome tech and killer pics man! its refreshing to see some good actual tech in here. hopefully i can play soon too!
i have two of those portable halogen work lights and they are awesome! the magnetic base comes in handy a lot and i like the fact i dont get burned when i touch the lens! lol
i repped ya
-cutts-
i have two of those portable halogen work lights and they are awesome! the magnetic base comes in handy a lot and i like the fact i dont get burned when i touch the lens! lol
i repped ya
-cutts-

Junior User
Joined: May 2008
Posts: 99
Likes: 0
Nice write up, but you will hate it in the winter if your trying to drive down the hwy in 4wd. The first time i drove mine in the snow on road in 4wd. I nearly took out 3 other cars, because the truck wanted to go strait instead of turning. Down right scary

Posting Guru
Joined: Aug 2005
Posts: 1,473
Likes: 0
From: Coal Country, ND
But for a trail rig (or one that doesn't see ice/snow) this is a very viable option.