
Cutting Cab Corners

Thread Starter
|
Senior User

Joined: Sep 2003
Posts: 113
Likes: 2
From: Grant Park Il.
Cutting Cab Corners
I am getting ready to replace cab corners on my 56 F100 unfortunatley I am do not have experience with body work. I have purchased new cab corners but im not quite sure of the proper way to measure and mark to make the cut. I do not need to replace the whole corner therefore I'am planning to trim the new corners to what is needed to fix the rust. I have settled on a but weld to join the new corners to the truck. Any advice will be greatly appreciated. thank you......... 
Posting Guru
Joined: Mar 2006
Posts: 1,118
Likes: 0
From: Williamson, NY
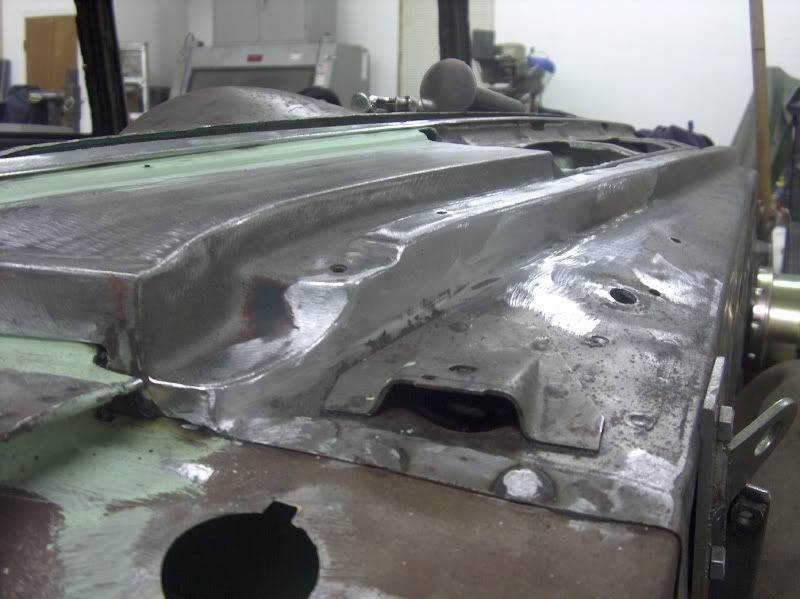
I am currently replacing the cab corners on my 77 F150 and here's what I have done to fit the new corners. You're doing the right thing by only using as much of the new cab-corner as you need to replace the rusted sections of your old cab-corner. It is hard to get accurate cut lines when you lay your new cab-corner directly over your old one, so I like to first cut down my new one down to size I want to use as my patch. I then lay the cut patch over the old panel to be cut and trace a line around it. I then remove the patch panel and make a new cut line 1/2" inside of the line you traced. Now cut out the old metal on this new cut line and then drill out the spot welds and remove the old rusted metal. I like to use a die grinder with a 1/16" cut-off wheel to cut the metal and I use my Dremel tool w/ a small cut-off wheel in the tight areas. Now you can better fit the new patch over the cut out area and make sure it is properly aligned with the surrounding body lines and then clamp it in place. Now mark your final cut line on the old metal, remove the patch, and cut out the last bit of old metal. For butt welding you need to leave about a 1/16" inch gap to get a good butt weld. I hope your patch panels for your 56 F100 are better than the one's I got for my 77 F150. I had to cut and weld my new patches where they met at the door to make them fit properly. I plan to use 3M Panel adhesive to attach my cab-corners for many reasons I have already stated in another thread on this forum. I am just waiting for the adhesive I ordered to come in so I can finish up this repair. Here's a link to some pictures of my repair:


Junior User
Joined: May 2004
Posts: 67
Likes: 0
From: Covington, La
I replaced mine,Here's what I learned.. Besides the aftermarket parts don't fit exactly, I was told your have to " Massage" them somewhat, so don't think it's you.
1-Get a flange tool, harbor freight, it's well worth the Bucks.
http://www.harborfreight.com/cpi/cta...emnumber=41696
2-Cut and Replace only what you have to.
3-Flange and cut spot holes in the replacement metal
3-Use Mig Gas and spot in the new corners, Welding from the Back side.
these tips would have saved me a lot of trouble.
Thread Starter
|
Senior User
Joined: Sep 2003
Posts: 113
Likes: 2
From: Grant Park Il.
Thanks for the advice. The patch panels seem to be very nice, but im sure you have to fit them a little. They seem to be of the same thickness as the original metal which i noticed some of the other replacement panels were not. I prefer to but weld the panels but I am going punch spot weld holes both in the old and new metal and weld in a backing piece of metal to both the new and old metal. I saw this method on another web site and really liked it so I thought i would try it. Any negatives to this approach ? ---thanks
Tuned


Joined: Aug 2007
Posts: 459
Likes: 123
From: Maryland
I would recommend looking at what obstacles you have inside the cab, and make the patch large enough to allow easier access to dress the welds from the inside as well as outside. The butt weld method may be a bit harder to accomplish, however, any multiple layers, such as flanging or using a backer piece will just act as a moisture trap and promote the rust action all over again, and it will be more difficult to fix any low spots using hammer welding. If using a butt weld, cut out the old rusty stuff until you are in good metal, then fit your new piece. Scribe the new panel for trimming, but leave a bit extra, fit again, and scribe again. the tighter you can get your joint, the easier it will be to weld:
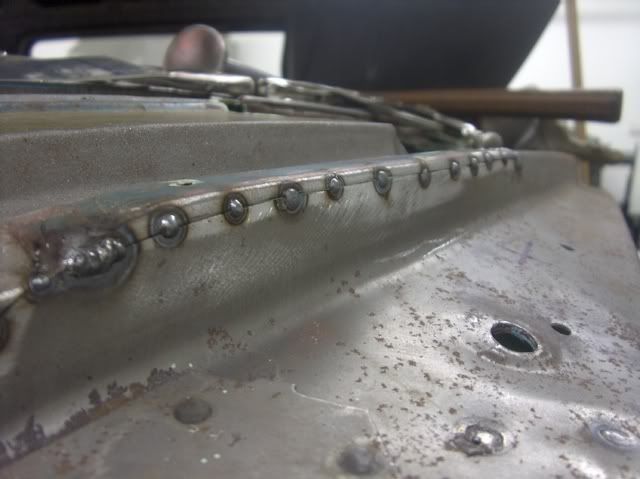
For cutting out the old panel, I will typically use a 4-1/2 grinder with a .045 thick cut off wheel for longer cuts, and a 3" cutoff wheel .035 thick for shorter cuts or those in tight areas. Tha plasma cutters are nice, but they do produce quite a bit of heat, and will likely warp your panels.
For cutting out the old panel, I will typically use a 4-1/2 grinder with a .045 thick cut off wheel for longer cuts, and a 3" cutoff wheel .035 thick for shorter cuts or those in tight areas. Tha plasma cutters are nice, but they do produce quite a bit of heat, and will likely warp your panels.


Thread
Thread Starter
Forum
Replies
Last Post
clintonvillian
1948 - 1956 F1, F100 & Larger F-Series Trucks
16
Apr 19, 2022 10:32 AM
Chevmn56
1973 - 1979 F-100 & Larger F-Series Trucks
2
Nov 17, 2015 05:56 PM


