



Making It Look New Again
Thread Starter
|
Cargo Master


Joined: Dec 2004
Posts: 2,232
Likes: 3
From: NE Texas
Making It Look New Again
I am beginning a new project that I will be asking some questions about, so I thought that I would describe the project for all that who might be interested.
I have a 78 F150, Ranger 4X4, short wide bed that I bought new in November of 1977. The truck has less than 90,000 miles but they are mostly offroad in the pasture and on hunting treks into the swampy lands of the Texas Red River, so they are hard miles. In spite of these hard miles the truck is in very good mechanical condition. About ten years ago I built a pretty nice 400 for it and have kept the truck in good shape mechanically.
The problem with the truck is 30 years of unaddressed cosmetic decay. The truck is actually very straight for its age and use, with no rust EXCEPT severe surface rust.
I am very familiar with most everything mechanical and electrical on these trucks, but have very little experience in dissembling the trim, removing the glass and interior pieces. I am not planning a frame off restoration, but I plan on removing all trim, glass and interior pieces so that I can completely paint the exterior and interior of the truck. I will not restore the underhood area, at least I am not planning so at this time.
I replaced this truck 2 1/2 years ago and it has sat hid out behind some bushes since shortly after that point. I had to move it behind the bushes because so many people were stopping to ask if the truck is for sale. Upon replacing the truck I wanted to sell it, but my wife wouldn't hear of it. It was the first new vehicle that we ever bought together.
My wife took a few pictures of the truck before I moved it out last Saturday. It was covered with English Ivy. I put a battery in and started it right up, although, after running it a little, I found pools of gas on the intake manifold, and discovered the primary needle and seat was leaking. I then tried to start it later only to find that the needle and seat was stuck closed. I've had this problem before with neoprene needle and seats in vehicles that sat for extended periods. It has a Holley with center pivot float bowls, so I will fix this easily by replacing the needle and seats without dissassembling the carb.
The only other mechanical issue to address is charging the a/c which I think leaked some of the refrigerant past the seal during the set up time. I will also renew all fluids as I put it back on the road.
Now to my trim questions:
o How do I remove the long pieces of side trim and the band of trim below the rear window that separates the two tone as well as the two horizontal trim pieces on the tailgate? I have a factory manual set and see what the clips look like. They are sort of key hole shaped with wire, but the manual gives no information on removing them.
o If I take out the front and rear glass with a "beer opener" so to speak, will it be difficult roping them back in or should I just plan on getting a glass man to do it? Also, this is a Ranger with the very narrow chrome trim that fits into the rubber seal. Is this trim hard to put in place? Does it just press into a groove in the seal?
o Has anyone ever removed a LARGE amount of surface rust? I am thinking that my best bet is to just use my DA and just sand it off. What grit would be best?
I realize that some of these questions might be best for the paint forum, but I expect that the trim questions are probably better put here. I'm sure I will have plenty of paint and paint prep questions for the paint forum as the project moves along.
I am looking forward to seeing my truck look new again. I am even putting the original wheels and hub caps on during this project. I know all the details of exactly what the truck looked like new in the way of trim, upholstery colors and the like and I plan on putting it back as accurately as possible. Once finished, I will probably come up with some nice wheels and tires since these can be easily changed without effecting originality.
Thanks for your help and any encouragement you might offer. If there is interest, I will post progress and maybe even try to post a few pictures. Now that I have finally decided to take on this project I am very excited about it, especially since the truck is like a member of the family.
Thanks for your help,
I have a 78 F150, Ranger 4X4, short wide bed that I bought new in November of 1977. The truck has less than 90,000 miles but they are mostly offroad in the pasture and on hunting treks into the swampy lands of the Texas Red River, so they are hard miles. In spite of these hard miles the truck is in very good mechanical condition. About ten years ago I built a pretty nice 400 for it and have kept the truck in good shape mechanically.
The problem with the truck is 30 years of unaddressed cosmetic decay. The truck is actually very straight for its age and use, with no rust EXCEPT severe surface rust.
I am very familiar with most everything mechanical and electrical on these trucks, but have very little experience in dissembling the trim, removing the glass and interior pieces. I am not planning a frame off restoration, but I plan on removing all trim, glass and interior pieces so that I can completely paint the exterior and interior of the truck. I will not restore the underhood area, at least I am not planning so at this time.
I replaced this truck 2 1/2 years ago and it has sat hid out behind some bushes since shortly after that point. I had to move it behind the bushes because so many people were stopping to ask if the truck is for sale. Upon replacing the truck I wanted to sell it, but my wife wouldn't hear of it. It was the first new vehicle that we ever bought together.
My wife took a few pictures of the truck before I moved it out last Saturday. It was covered with English Ivy. I put a battery in and started it right up, although, after running it a little, I found pools of gas on the intake manifold, and discovered the primary needle and seat was leaking. I then tried to start it later only to find that the needle and seat was stuck closed. I've had this problem before with neoprene needle and seats in vehicles that sat for extended periods. It has a Holley with center pivot float bowls, so I will fix this easily by replacing the needle and seats without dissassembling the carb.
The only other mechanical issue to address is charging the a/c which I think leaked some of the refrigerant past the seal during the set up time. I will also renew all fluids as I put it back on the road.
Now to my trim questions:
o How do I remove the long pieces of side trim and the band of trim below the rear window that separates the two tone as well as the two horizontal trim pieces on the tailgate? I have a factory manual set and see what the clips look like. They are sort of key hole shaped with wire, but the manual gives no information on removing them.
o If I take out the front and rear glass with a "beer opener" so to speak, will it be difficult roping them back in or should I just plan on getting a glass man to do it? Also, this is a Ranger with the very narrow chrome trim that fits into the rubber seal. Is this trim hard to put in place? Does it just press into a groove in the seal?
o Has anyone ever removed a LARGE amount of surface rust? I am thinking that my best bet is to just use my DA and just sand it off. What grit would be best?
I realize that some of these questions might be best for the paint forum, but I expect that the trim questions are probably better put here. I'm sure I will have plenty of paint and paint prep questions for the paint forum as the project moves along.
I am looking forward to seeing my truck look new again. I am even putting the original wheels and hub caps on during this project. I know all the details of exactly what the truck looked like new in the way of trim, upholstery colors and the like and I plan on putting it back as accurately as possible. Once finished, I will probably come up with some nice wheels and tires since these can be easily changed without effecting originality.
Thanks for your help and any encouragement you might offer. If there is interest, I will post progress and maybe even try to post a few pictures. Now that I have finally decided to take on this project I am very excited about it, especially since the truck is like a member of the family.
Thanks for your help,

Posting Guru
Joined: Mar 2006
Posts: 1,118
Likes: 0
From: Williamson, NY
Doc, Sounds like a fun project and a labor of love. Definately take lots of pictures, not only to show us your project, but also to remember how it all goes back together. Don't forget to carefully bag and label things as you take them off the truck and keep notes on some of the more complicated assemblies. I know you said you were not going to do a frame-off restoration, but that was what I said and I ended up doing one anyway. For me it was hard once I rebuilt the engine and had it looking so good to just put into that nasty looking engine compartment....and one thing led to another and the frame-off was under way. I have the total rolling chassis complete now and I am just getting started with the body work. As for how to deal with all the surface rust, I would sand it down to bare metal, clean the metal with laquer thinner, treat the metal with a rust converter, then lightly sand and clean the surface again, and then prime the surface with a good 2K epoxy primer. Using the epoxy primer will keep the metal from rusting again and you can also bondo on top of the epoxy primer after you first rough it up with some sand paper.
Here is a link to the rust converter product that Eastwood sells:
http://www.eastwoodco.com/jump.jsp?i...rID=347&KICKER
Here's a link to pictures of my project:

Jim
Here is a link to the rust converter product that Eastwood sells:
http://www.eastwoodco.com/jump.jsp?i...rID=347&KICKER
Here's a link to pictures of my project:
Jim

New User
Joined: Jan 2008
Posts: 0
Likes: 24
Any attempt removing the glass other than the is usually done will usually result in damage /Breakage of the glass.
The rear glass should be okay..but not the windshield.
The Chrome Channel lock strip requires a tool for installation.
Harbour Freight sells them
The rear glass should be okay..but not the windshield.
The Chrome Channel lock strip requires a tool for installation.
Harbour Freight sells them

Senior User
Joined: Feb 2007
Posts: 267
Likes: 0
From: Colorful Colorado
what up.
Taking out your windows should be pretty easy. You'll want to cut away the old rubber for the windshield to not break it. You can get weatherstripping kits from our sponsors. The rear window is pretty easy to remove.
As far as the race track moulding goes, there are pins sticking out the side of the vehicle. On these pin is a plastic mounting bracket, the moulding than clips itself on to the brackets. More than likely you will need new brackets so you can pull the trim off and not cause any damage to the moulding, but will probably break the plastic brackets.
As far as rust goes, hit it with a DA, 150 grit to see how far down the rust goes. You will be tempted to use an 80 grit, but don't. If you don't have to go to bare metal, this is better for cohesive purposes of the new primer/paint. It's a LOT OF WORK.
It's hard to tell what you are getting into until you are there.
Good luck!
-grizz
Taking out your windows should be pretty easy. You'll want to cut away the old rubber for the windshield to not break it. You can get weatherstripping kits from our sponsors. The rear window is pretty easy to remove.
As far as the race track moulding goes, there are pins sticking out the side of the vehicle. On these pin is a plastic mounting bracket, the moulding than clips itself on to the brackets. More than likely you will need new brackets so you can pull the trim off and not cause any damage to the moulding, but will probably break the plastic brackets.
As far as rust goes, hit it with a DA, 150 grit to see how far down the rust goes. You will be tempted to use an 80 grit, but don't. If you don't have to go to bare metal, this is better for cohesive purposes of the new primer/paint. It's a LOT OF WORK.
It's hard to tell what you are getting into until you are there.
Good luck!
-grizz
Thread Starter
|
Cargo Master
Joined: Dec 2004
Posts: 2,232
Likes: 3
From: NE Texas
Thanks for the responses and encouragement.
I am not worried about breaking the windshield since it will be replaced anyway. A funny (or sad) story about the windshield. It is the original windshield and never had any flaws whatsoever until one day a few years ago. I was on a secondary road going about 35 miles away. On the way to my destination an oncoming truck and utility trailer threw up a large rock putting a pock mark in the windshield. On the way home ANOTHER oncoming vehicle threw up another rock and another pock mark. By the time I got home two cracks had spread. So much for reusing the original windshield.
I have removed these type windshields before without breaking them. I hope to do so with my back glass which is original and in, of course, good shape.
This truck is a Ranger, not a Ranger XLT or Lariat, so it doesn't have what I think is called the Race Track moulding. It has simple, one piece moulding. Will the clips be the same as the Race Track moulding?
Since the truck is mechanically near excellent I will not be pulling the engine or any other mechanical components, so I don't think the frame off project portion will present itself. The only thing that might drive it to that is that I may consider pulling some components from the firewall so that I can paint it. I expect to pull the hood for painting so that I can paint it underneath as original. This truck originally had no insulation pad on the underside of the hood.
The color of this truck is evidently very unusual since I can't find interior parts of the proper color. The truck is dark brown metallic with a tan roof. The interior is dark brown, with a dark brown dash pad and two tone tan and dark brown door panels and original seat. The original seat is woven vinyl. I have not seen any reproductions of this seat. I am hoping to find the woven vinyl material with which an upholstery shop can make an accurate reproduction seat cover.
The truck originally had off white wheels with small hub caps. These wheels and hub caps are currently on the truck. I plan to sand blast the wheels and paint them with the same off white that I will use for the F O R D letters on the tail gate. Again, no fancy tailgate panel since this was a lower trim level truck.
The surface rust is VERY bad and there is very little original brown or tan paint on the exterior. I will pursue the rust conversion process suggested and see if that will be the ticket for my project. Thanks very much for that info.
I am not worried about breaking the windshield since it will be replaced anyway. A funny (or sad) story about the windshield. It is the original windshield and never had any flaws whatsoever until one day a few years ago. I was on a secondary road going about 35 miles away. On the way to my destination an oncoming truck and utility trailer threw up a large rock putting a pock mark in the windshield. On the way home ANOTHER oncoming vehicle threw up another rock and another pock mark. By the time I got home two cracks had spread. So much for reusing the original windshield.
I have removed these type windshields before without breaking them. I hope to do so with my back glass which is original and in, of course, good shape.
This truck is a Ranger, not a Ranger XLT or Lariat, so it doesn't have what I think is called the Race Track moulding. It has simple, one piece moulding. Will the clips be the same as the Race Track moulding?
Since the truck is mechanically near excellent I will not be pulling the engine or any other mechanical components, so I don't think the frame off project portion will present itself. The only thing that might drive it to that is that I may consider pulling some components from the firewall so that I can paint it. I expect to pull the hood for painting so that I can paint it underneath as original. This truck originally had no insulation pad on the underside of the hood.
The color of this truck is evidently very unusual since I can't find interior parts of the proper color. The truck is dark brown metallic with a tan roof. The interior is dark brown, with a dark brown dash pad and two tone tan and dark brown door panels and original seat. The original seat is woven vinyl. I have not seen any reproductions of this seat. I am hoping to find the woven vinyl material with which an upholstery shop can make an accurate reproduction seat cover.
The truck originally had off white wheels with small hub caps. These wheels and hub caps are currently on the truck. I plan to sand blast the wheels and paint them with the same off white that I will use for the F O R D letters on the tail gate. Again, no fancy tailgate panel since this was a lower trim level truck.
The surface rust is VERY bad and there is very little original brown or tan paint on the exterior. I will pursue the rust conversion process suggested and see if that will be the ticket for my project. Thanks very much for that info.

Fleet Mechanic


Joined: Aug 2007
Posts: 1,815
Likes: 248
From: Piney Woods of East Texas
Good luck on your new adventure. I'm currently in the same process on my 68. I was able to remove my glass without breaking the front or rear (did not cut the weather stripping). Mine also has the chrome trim locking it in place. It's a lot easier going back if you have 2-3 person. Trying to hold all of the chrome in place can be a troublesome job. You can get the weather stripping without chrome, but I think they look better with it. In my area NO ONE will touch one with chrome. So I ended up doing it my self. Not to bad once you've done it once.
As for rust. Use the converters, if you have large sections that are rusted out, look at replacement panels, may save you a lot of time.
AC reg leaks. All do but at different rates. As long as we continue to hoses they will have a leak rate. The most common areas to look is schrader valves. Being a 77 it's R-12 unless you had a conversion to R134A. Then if they did not drain all of the oil and flush the lines, cond, and evap. The R134A (POA oil, syn) + R12 ref oil (mineral based) turns the oil to acid, attacks AL. Like Evap...... If they by chanced added a special filter, only will handle 5% dilution. I've kow many person that went this way, worked yes, long enough to get it out of warranty, ~ 1yr on many. Then it was some one else problem. Don't fool with dye leak detection, messy and in most cases its where you can't see. Use Nitrogen gas with a trace ref, and a good sniffer to locate the leak. If it has not been converted to R134A Good for you. I'm keeping mine R12.
But you will not need it for any time soon if your starting your body work. If your painting the inside you will have the evap out, it would be a good time to leak check then. Use compressed air and soap should work for you, since you will be replacing the dryer anyway.
Use the newer HVLP guns and you will save over 50% in paint. And the clouds you use to see are not there.
Good Luck
As for rust. Use the converters, if you have large sections that are rusted out, look at replacement panels, may save you a lot of time.
AC reg leaks. All do but at different rates. As long as we continue to hoses they will have a leak rate. The most common areas to look is schrader valves. Being a 77 it's R-12 unless you had a conversion to R134A. Then if they did not drain all of the oil and flush the lines, cond, and evap. The R134A (POA oil, syn) + R12 ref oil (mineral based) turns the oil to acid, attacks AL. Like Evap...... If they by chanced added a special filter, only will handle 5% dilution. I've kow many person that went this way, worked yes, long enough to get it out of warranty, ~ 1yr on many. Then it was some one else problem. Don't fool with dye leak detection, messy and in most cases its where you can't see. Use Nitrogen gas with a trace ref, and a good sniffer to locate the leak. If it has not been converted to R134A Good for you. I'm keeping mine R12.
But you will not need it for any time soon if your starting your body work. If your painting the inside you will have the evap out, it would be a good time to leak check then. Use compressed air and soap should work for you, since you will be replacing the dryer anyway.
Use the newer HVLP guns and you will save over 50% in paint. And the clouds you use to see are not there.
Good Luck

Senior User
Joined: Mar 2007
Posts: 134
Likes: 0
Cujo8
very nice project, I saw all the pics they look cool. I have a 76 ford ranger xlt 2wd, and planning on having the frame painted, I do not have room on my home, so I will take it to some else to do it. I notice on on your frame you took out the plastic clips that hold the fuel and brake line to the frame, were you able to find new plastics clips and if you did where did you get them from, thanks for your help.
very nice project, I saw all the pics they look cool. I have a 76 ford ranger xlt 2wd, and planning on having the frame painted, I do not have room on my home, so I will take it to some else to do it. I notice on on your frame you took out the plastic clips that hold the fuel and brake line to the frame, were you able to find new plastics clips and if you did where did you get them from, thanks for your help.
Trending Topics
Thread Starter
|
Cargo Master
Joined: Dec 2004
Posts: 2,232
Likes: 3
From: NE Texas
BigGriz,
Are you saying that I can pry off the moulding without doing any damage to the moulding? From your description, it sounds like you are saying to pry it off, and the clips will just break. As long as I can pry it off without hurting the moulding, I'm good with that. I don't mind buying clips.
Blue68,
I am only dealing with surface rust, there is nowhere on the truck that has rusted through. I live in a pretty rust free climate. The surface rust is bad in that it probably covers 40 or 50 percent of the surface of the vehicle as opposed to paint.
The air conditioning is not a problem, I was only mentioning it so that folks might get a feel for the overall vehicle condition. I have done a good bit of automotive a/c work and find the UV dye to be quite useful. I don't have a nitrogen setup or sniffer, so the dye was serving as a first look for leaks. I replaced the compressor about five years ago and put in the dye at that time after having a small leak. The system has service valves, rather than shraeder valves. I converted it to 134a about ten years ago which resulted in compressor failure. The Yorks and Tecumsehs are NOT good candidates for conversion. When I replaced the compressor the last time, I thoroughly flushed the system, replaced the filter/drier and went back to R12. I am quite certain that I can top off the charge and it will "make icicles."
I will be painting inside the cab, but I will not go so far as removing the evaporator. I am not doing a frame off. I am doing a repaint of the exterior and interior and refreshing trim, upholstery, etc. as necessary.
Thanks for everyones comments. Please keep them coming. Corresponding with others who are doing the same thing, or even interested in the project, will prove helpful in keeping me charging ahead at a steady rate.
Are you saying that I can pry off the moulding without doing any damage to the moulding? From your description, it sounds like you are saying to pry it off, and the clips will just break. As long as I can pry it off without hurting the moulding, I'm good with that. I don't mind buying clips.
Blue68,
I am only dealing with surface rust, there is nowhere on the truck that has rusted through. I live in a pretty rust free climate. The surface rust is bad in that it probably covers 40 or 50 percent of the surface of the vehicle as opposed to paint.
The air conditioning is not a problem, I was only mentioning it so that folks might get a feel for the overall vehicle condition. I have done a good bit of automotive a/c work and find the UV dye to be quite useful. I don't have a nitrogen setup or sniffer, so the dye was serving as a first look for leaks. I replaced the compressor about five years ago and put in the dye at that time after having a small leak. The system has service valves, rather than shraeder valves. I converted it to 134a about ten years ago which resulted in compressor failure. The Yorks and Tecumsehs are NOT good candidates for conversion. When I replaced the compressor the last time, I thoroughly flushed the system, replaced the filter/drier and went back to R12. I am quite certain that I can top off the charge and it will "make icicles."
I will be painting inside the cab, but I will not go so far as removing the evaporator. I am not doing a frame off. I am doing a repaint of the exterior and interior and refreshing trim, upholstery, etc. as necessary.
Thanks for everyones comments. Please keep them coming. Corresponding with others who are doing the same thing, or even interested in the project, will prove helpful in keeping me charging ahead at a steady rate.
FTE Stories
Ford Trucks for Ford Truck Enthusiasts

2027 Ford Super Duty Buyer's Guide (Every Model, Engine, & Package)
Brett Foote
Top 10 Ford Truck Tragedies
Joe Kucinski
AEV FXL Super Duty - the Super Duty Raptor Ford Doesn't Make
Brett Foote
Lobo Vs Lobo: Proof the F-150 Lobo Should Be Even Lower!
Michael S. Palmer
Ford's 2001 Explorer Sportsman Concept Looks For a New Home
Verdad Gallardo
10 Best Ford Truck Engines We Miss the Most!
Joe Kucinski
2026 Shelby F-150 Off-Road: Better Than a Raptor R?
Brett Foote
2027 Super Duty Carhartt Package First Look: 12 Things You NEED to Know!
Michael S. Palmer
10 Most Surprising 2026 Ford Truck Features!
Joe Kucinski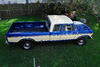
More Turbo
Joined: Apr 2007
Posts: 615
Likes: 93
The trim dosnt just pry off!! You need a picture out of the service manual to show where there's nuts on the back side. For instance: take out the tail light and theres a 3/8" speed nut in there holding the trim.
Once you remove all the nuts in various places the trim can then be snapped off the remaining plastic clips, by pushing down and then prying out the bottom. Once the trim is off the plastic clips slide off the metal studs.
If I had a scanner i'd send a picture --sorry--maybe some one else does?
Mark
Once you remove all the nuts in various places the trim can then be snapped off the remaining plastic clips, by pushing down and then prying out the bottom. Once the trim is off the plastic clips slide off the metal studs.
If I had a scanner i'd send a picture --sorry--maybe some one else does?
Mark
Posting Guru
Joined: Mar 2006
Posts: 1,118
Likes: 0
From: Williamson, NY
Originally Posted by mlevario99
Cujo8
very nice project, I saw all the pics they look cool. I have a 76 ford ranger xlt 2wd, and planning on having the frame painted, I do not have room on my home, so I will take it to some else to do it. I notice on on your frame you took out the plastic clips that hold the fuel and brake line to the frame, were you able to find new plastics clips and if you did where did you get them from, thanks for your help.
very nice project, I saw all the pics they look cool. I have a 76 ford ranger xlt 2wd, and planning on having the frame painted, I do not have room on my home, so I will take it to some else to do it. I notice on on your frame you took out the plastic clips that hold the fuel and brake line to the frame, were you able to find new plastics clips and if you did where did you get them from, thanks for your help.
http://cgi.ebay.com/ebaymotors/NEW-F...temZ8074350710
http://cgi.ebay.com/ebaymotors/NEW-F...temZ8008704405

Hotshot
Joined: Aug 2006
Posts: 10,764
Likes: 39
Originally Posted by Mil1ion
Any attempt removing the glass other than the is usually done will usually result in damage /Breakage of the glass.
The rear glass should be okay..but not the windshield.
The Chrome Channel lock strip requires a tool for installation.
Harbour Freight sells them
The rear glass should be okay..but not the windshield.
The Chrome Channel lock strip requires a tool for installation.
Harbour Freight sells them
Senior User
Joined: Feb 2007
Posts: 267
Likes: 0
From: Colorful Colorado
I pried mine off, did no damage to the mouldings. There are only bolts on the front and rear....start in the middle and work your way out.
If you do some damage, I will send you mine. I am only talking of the mouldings in the dent side..."race track"
If you do some damage, I will send you mine. I am only talking of the mouldings in the dent side..."race track"
Thread Starter
|
Cargo Master
Joined: Dec 2004
Posts: 2,232
Likes: 3
From: NE Texas
Thanks for the quick replies. Since posting last night, I did some more investigation and found the nuts on the ends of the strips. Telling me to pry UP from the bottom after that is invaluable information.
Also thanks for the info regarding the "lock strip" on the windshield. When you say "lock strip" are you talking about the narrow "chrome" in the middle of the rubber strip, or are you talking about the plastic/rubber strip along the top of the windshield inside the cab?
Now, is there a trick to removing the drip rail trim without destroying it?
I appreciate everyones ongoing help. This project will take a LONG time, so I will be asking lots of questions before I am finished. Like I said from the get/go I have no trouble with the functional portions of these trucks. I have done a little paint and body work over the years, but I want to strip this truck thoroughly to do a better job on the paint job. It will take lots of extra time in order to remove and replace trim and such without destroying it.
Thanks again.
Also thanks for the info regarding the "lock strip" on the windshield. When you say "lock strip" are you talking about the narrow "chrome" in the middle of the rubber strip, or are you talking about the plastic/rubber strip along the top of the windshield inside the cab?
Now, is there a trick to removing the drip rail trim without destroying it?
I appreciate everyones ongoing help. This project will take a LONG time, so I will be asking lots of questions before I am finished. Like I said from the get/go I have no trouble with the functional portions of these trucks. I have done a little paint and body work over the years, but I want to strip this truck thoroughly to do a better job on the paint job. It will take lots of extra time in order to remove and replace trim and such without destroying it.
Thanks again.

Posting Guru
Joined: Mar 2006
Posts: 1,118
Likes: 0
From: Williamson, NY
Originally Posted by MBDiagMan
T
Also thanks for the info regarding the "lock strip" on the windshield. When you say "lock strip" are you talking about the narrow "chrome" in the middle of the rubber strip, or are you talking about the plastic/rubber strip along the top of the windshield inside the cab?
Thanks again.
Also thanks for the info regarding the "lock strip" on the windshield. When you say "lock strip" are you talking about the narrow "chrome" in the middle of the rubber strip, or are you talking about the plastic/rubber strip along the top of the windshield inside the cab?
Thanks again.