Interior Project -Path Rust/Herculiner

Thread Starter
|
New User
Joined: Sep 2006
Posts: 14
Likes: 0
Interior Project -Path Rust/Herculiner
Hi all, I called around the area trying to get quotes on Rhino lining the entire floor of my Bronco. The closest guy to where I live quoted me $750 for the full floor Rhino lined, and 1.5-2 days of work. Since That's about $600 more than I'm willing to pay at the moment, I looked into some of the DIY liners and found many folks here on the forums that used the Herculiner. For the cost and positive feedback, I think it's the way I want to go. Of course, feel free to share your opinions on this!
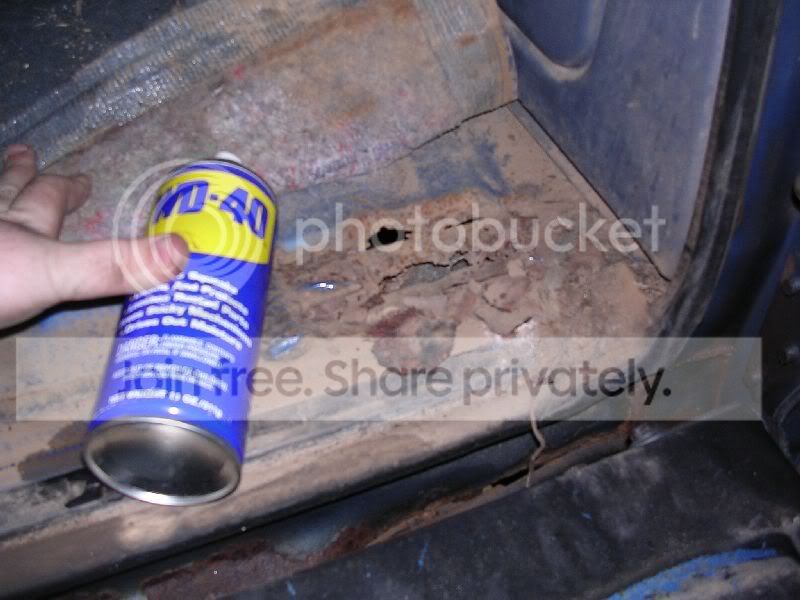
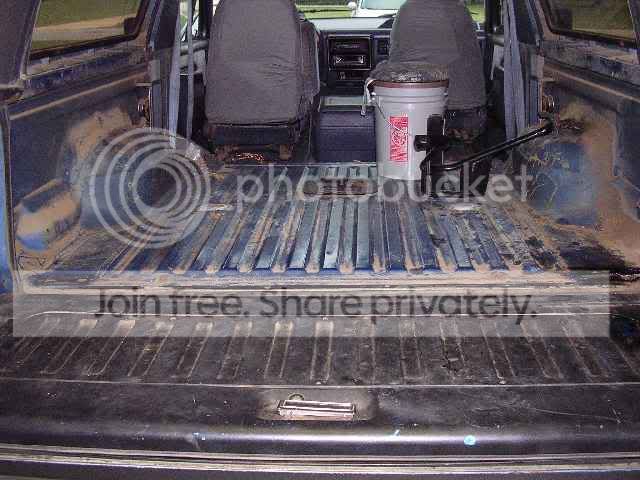
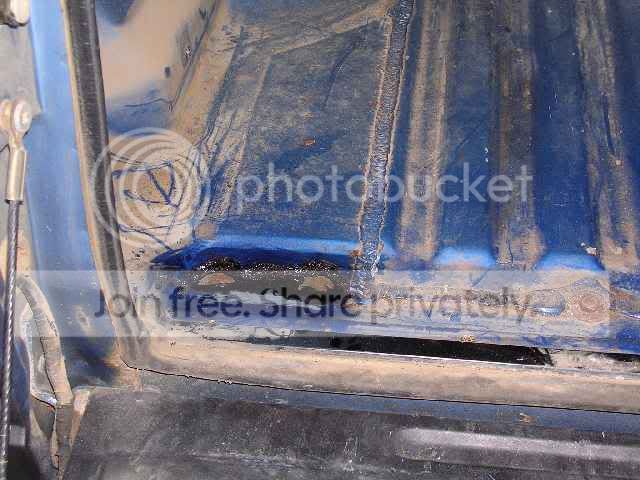
So I began the process tonight of pulling the carpet in the back, pulled the rear seat out, tried to get the brackets up that the rear seat bolts on to but broke my pipe that I was using for leverage so I'll have to wait on that. I did run into one slight problem when I was pulling the carpet. I found a rust spot on the rear opassenger side, right in front of where the spare holder bolts onto the floor. Here is a pic, with a can of WD40 as size reference:
What's the best way to patch something like this? I do have access to a machine/welding shop at work, though I would have to make sure doing something like this would be ok with our machine shop manager (I work in the engineering dept. and I haven't ever screwed him TOO much on projects.... )
)
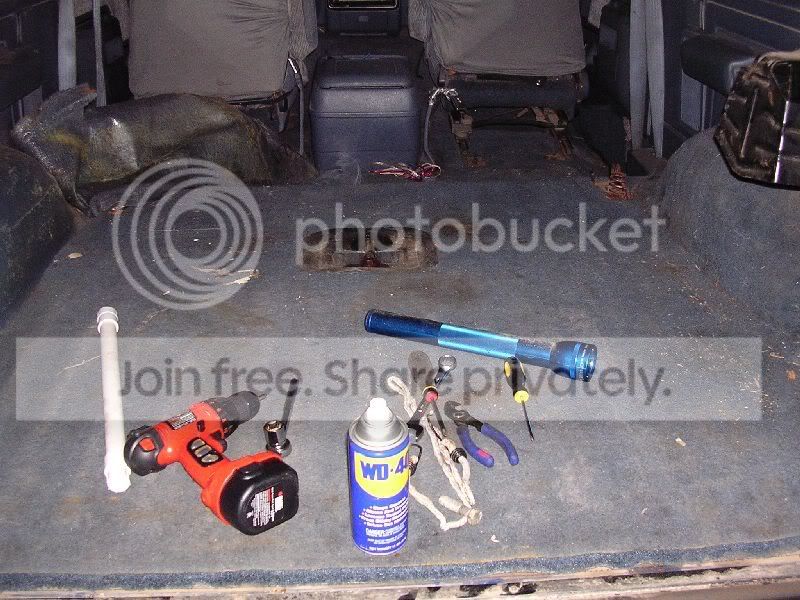
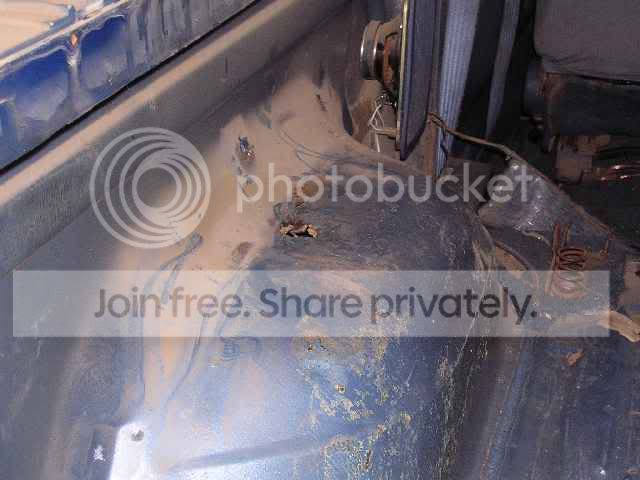
Would cutting and welding to patch this be better, or is there another type of method to patch this, such as putty, fiberglass, etc? Once I get it patched I plan on putting the liner on top, just need to know which would be best and quickest so I can move on with the bedliner. Also here's another pic of my dirty truck after removing the back seat:
Thanks for your help!!
So I began the process tonight of pulling the carpet in the back, pulled the rear seat out, tried to get the brackets up that the rear seat bolts on to but broke my pipe that I was using for leverage so I'll have to wait on that. I did run into one slight problem when I was pulling the carpet. I found a rust spot on the rear opassenger side, right in front of where the spare holder bolts onto the floor. Here is a pic, with a can of WD40 as size reference:
What's the best way to patch something like this? I do have access to a machine/welding shop at work, though I would have to make sure doing something like this would be ok with our machine shop manager (I work in the engineering dept. and I haven't ever screwed him TOO much on projects....
)Would cutting and welding to patch this be better, or is there another type of method to patch this, such as putty, fiberglass, etc? Once I get it patched I plan on putting the liner on top, just need to know which would be best and quickest so I can move on with the bedliner. Also here's another pic of my dirty truck after removing the back seat:
Thanks for your help!!

Senior User

Joined: Dec 2000
Posts: 220
Likes: 0
Well, if I could weld and had access to fab equipment that would be the route I would take.
I have had excellent luck using heavy fiberglass after cutting back to solid metal, rust-converting any rust and then 3 layers of carefully laid fiberglass. I did some repairs on my floor over 5 years ago that are still holding and my truck is outsisde 24/7--no room in the garage to pamper the old girl.
I have had excellent luck using heavy fiberglass after cutting back to solid metal, rust-converting any rust and then 3 layers of carefully laid fiberglass. I did some repairs on my floor over 5 years ago that are still holding and my truck is outsisde 24/7--no room in the garage to pamper the old girl.
Thread Starter
|
New User
Joined: Sep 2006
Posts: 14
Likes: 0
Yeah, I have no welding skills at all, but our machine shop mgr. knows how to do it and is a pretty good friend of mine at work. However, since I plan on covering with the liner, if I could get away with patching with a fiberglass kit on that small spot I'd rather do that before going and trying to use company property for personal use!! But, if there is a big difference or reason why I would want to go that route, I'll test the waters and see if I can schedule an after hours project with him. I have plenty of access to scrap metal as well, just need someone that can weld for me. I'll even grind it myself! 
Senior User
Joined: Dec 2000
Posts: 220
Likes: 0
Metal repair would be the best. If I had access to welding equipment, I would have definitely gone this route.
Best of luck.
By the way, I used an electric impact wrench to remove those stubborn bolts holding the rear seat mounts. I was killing myself with a breaker bar until I got tired of it and hauled out the impact wrench.
Best of luck.
By the way, I used an electric impact wrench to remove those stubborn bolts holding the rear seat mounts. I was killing myself with a breaker bar until I got tired of it and hauled out the impact wrench.
Elder User
Joined: May 2003
Posts: 575
Likes: 0
From: Orlando, FL
That back seat latch is a pain. I ended up busting the heads off of both of them after soaking them in PB Blaster for a few days. Drilled out the center of the bolt the best I could and was able to unscrew them. I don't recomend that aproach though, it sure is tough work.
Senior User
Joined: Dec 2000
Posts: 220
Likes: 0
Attemting ot remove the torx bolt holding the shoulder harness on the driver's side, I stripped out the "star" recess even though I was using a T-50 Torx. Of course, this happened when it was only 1/3 the way out.
I dont' know if I can even get down there with a drill and drill out the center and use an Easy-Out, which, for those who have never had the pleasure, are anything BUT easy.
I dont' know if I can even get down there with a drill and drill out the center and use an Easy-Out, which, for those who have never had the pleasure, are anything BUT easy.

Posting Guru
Joined: Jan 2003
Posts: 1,388
Likes: 0
From: SE Texas
I Herculined my 84 Bronco this Summer, and it's doing great!!! You certainly want to patch any rusted areas, and not simply cover them up. I had some cracks in the front floorpan, wheere the stock seats were bolted in. I can tell you that welding the floor metal is a real PITA. IT's paper thin, and very, very easy to burn through, leaving a bigger hole than you started with. Since that area in your pic doesn't appear to be in an area with major traffic like the front floor, you might get by with cutting out the rusted area as best you can. Then make a slightly larger patch panel to cover it, and either spot weld, rivet or screw the panel on top of the floor. Seal it really good with some silicone, and then apply the liner. Should keep the exhaust from getting into the cab, too. JSM84
Trending Topics
Post Fiend
Joined: Mar 2005
Posts: 8,542
Likes: 5
From: Louisiana
I have a gallery showing exactally what your wanting to do.
https://www.ford-trucks.com/user_gal...&albumid=16736
I did it on my 79 Bronco, and I want to say the guy at a Rhino lining dealer told me 500 if I stripped everything down first, and that wasn't going to happen.
I didn't have alot of rust, so I patched it with some epoxy puddy from por 15 and used there rust stopping/preventative paint also, and put the herculiner on top. Turned out great, and including the cost of the por 15 and bedliner, I want to say it was $110ish.
Put if you think the rust is to bad for puddy to solve, then cutting and welding would be the best thing to do.
FTE Stories
Ford Trucks for Ford Truck Enthusiasts

Top 10 Fords at 2026 Carlisle Ford Nationals
Joe Kucinski
3 Best / 3 Worst Parts of Modern Ford Ownership
Brett Foote
10 Amazing Upgrades That Solve Common Ford Truck Owner Headaches
Pouria Savadkouei
Every 2026 Ford Engine Explained
Brett Foote
10 Ugly Ford Trucks That We Still Kinda Love
Joe Kucinski
10 Things Every Truck Owner NEEDS (2026 Edition)
Michael S. Palmer
Rezvani's Latest Post-Apocalyptic Monster Is a Ford F-150 Raptor Underneath
Verdad Gallardo
Top 10 Most Expensive Ford Trucks Ever Sold on Bring a Trailer
Joe Kucinski
2027 Ford Super Duty Buyer's Guide (Every Model, Engine, & Package)
Brett Foote
Thread Starter
|
New User
Joined: Sep 2006
Posts: 14
Likes: 0
Yeah it's the extreme rear passenger area, right behind the spare tire holder, so it would be low/no traffic. I might go with the bolt on patch idea, or fiberglass based on the location, since it will hardly ever see any action. I also showed my buddy at work in the machine shop, he said it was going to be a little tougher to weld to that than just throwing a sheet metal patch on there and welding away, which shows how much i know about body work. Of course I say it's a low traffic area, then I will drop something heavy on it and break my patch! I need to finish pulling the carpet to see if there are any other areas that may need patching. So far, it looks clean underneath, but I haven't gotten all the way through yet so we'll see. I do want to get the liner on quickly as gun season starts this weekend and I'm going hunting Sunday morning. Would be nice to just throw a deer in the back, and rinse out when I get home!
Elder User
Joined: Feb 2002
Posts: 703
Likes: 1
From: Rochester
Patch jobs and bedliner
It's amazing what these companies charge! Just for the interior of the truck? Wow $500-$700 WOOOOW. I am in the process of doing this to my entire truck. All new doors front/rear fenders, rockers, rock guard, and tailgate. Durabak (black smooth) a majority of the truck with Durabak (Sandstone rough) in the cap and the lower 6 inches of the truck. the interior of the truck will be done with rough black Durabak. Total material cost was $450 (ENTIRE TRUCK)!! I am doing it myself like I said (Roller and siphon-fed paint gun. Let me know if you wnat to see pics...I plan on a write up at some point.
I think I may have to go into business myself!
I also have the same issue with the rear section (as mentioned) and front section (foot section). I plan on POR-15, new panels and duramix (3M adhesive - 10x stronger than a spot weld)...This stuff is usually used for the rear quarters...I got a little extra for this reason.
Get some more picks of your floor resto project!
Thread Starter
|
New User
Joined: Sep 2006
Posts: 14
Likes: 0
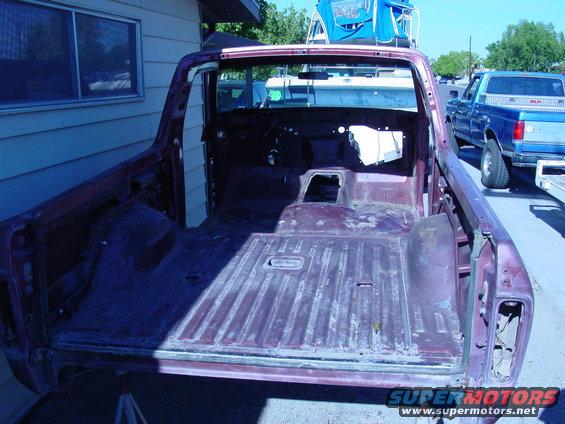
Update! Got the carpet pulled, had to drill out one of the bolts for the spare holder as we couldn't get it out, even with an impact wrench. There are four rust spots that are going to definitely need patching with sheet metal, and two other suspect spots. I've just cleared out the back for now, will worry about the front later. I did however pull the carpet back behind the front seats, and down on the floorboards up front to look, didn't see anything. I'll have to wait on that section I guess. I've got some pics to show the spots I found. I do have access now to welding equipment and a buddy from work to help me. Also, he told me that his next door neighbor that also works at the plant has his own shop with a lift and everything and that I would be able to use it for this, and other future projects. Sweet!! Anyway, here are the pics, I wasn't too happy with what I found, but honestly I thought it might be worse:
First pic, entire back without carpet. I also removed side panels and what appeared to be some really thin braces along the sides. Are those for structural support, or more for holding in side panel insulation?
In addition to the spot in my first post, there is another spot in the same place on the drivers side, but not quite as bad:
Next is the driver side wheel well. There was a small bubble which turned into a bigger hole once I hit it with the rubber mallet a few times!
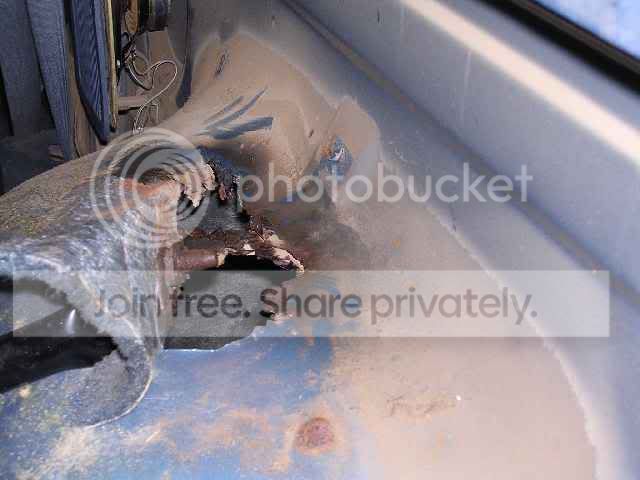
Alright, this is the monster hole I discovered when trying to pull the spare tire mount off. I drilled the bolt out down close to the tailgate, then tried to rotate the mount to get the other bolt started. Instead I got a big freaking hole!
It sucks, but I did get this truck as a hunting truck/weekend toy, so I enjoy having projects to work on with it. Plus I do have some resources to help me out. I'll let you guys know as I move forward. Getting closer to the liner baby!
Also, I plan on lining the entire exposed rear now, but I haven't decided if I might put the side panels back on afterward or not, and paint them to match the liner. The speakers look funny mounted by themselves, is there something I could do to move these elsewhere? I appreciate any ideas!
First pic, entire back without carpet. I also removed side panels and what appeared to be some really thin braces along the sides. Are those for structural support, or more for holding in side panel insulation?
In addition to the spot in my first post, there is another spot in the same place on the drivers side, but not quite as bad:
Next is the driver side wheel well. There was a small bubble which turned into a bigger hole once I hit it with the rubber mallet a few times!
Alright, this is the monster hole I discovered when trying to pull the spare tire mount off. I drilled the bolt out down close to the tailgate, then tried to rotate the mount to get the other bolt started. Instead I got a big freaking hole!
It sucks, but I did get this truck as a hunting truck/weekend toy, so I enjoy having projects to work on with it. Plus I do have some resources to help me out. I'll let you guys know as I move forward. Getting closer to the liner baby!
Also, I plan on lining the entire exposed rear now, but I haven't decided if I might put the side panels back on afterward or not, and paint them to match the liner. The speakers look funny mounted by themselves, is there something I could do to move these elsewhere? I appreciate any ideas!

Junior User
Joined: Jan 2005
Posts: 76
Likes: 2
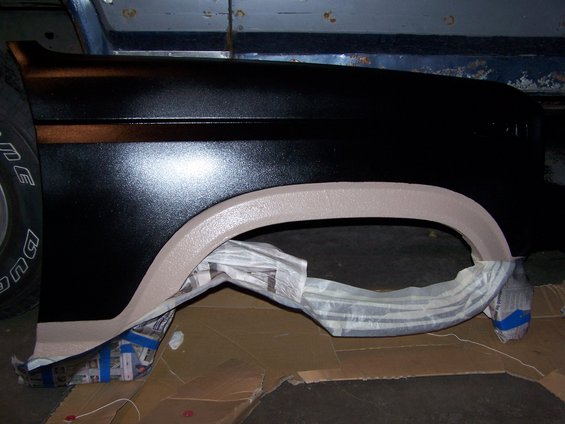
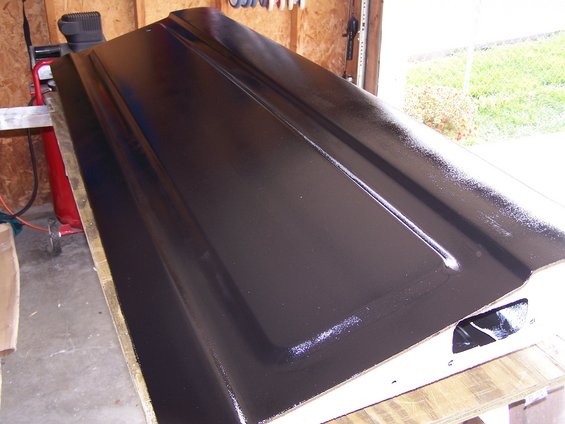
I have seen several people that did the herculiner and weren't happy with it. I am sure it all comes down to the preparation. I personally did Linex, because I know that it will last forever and I think it was worth the price.
Before:
After:

Before:
After:
Junior User
Joined: Jan 2005
Posts: 76
Likes: 2
I paid $2k for the whole interior (floor, sides, roof, dash, doors and tailgate) in gray and the underside up to the hood line in black.
They charge by the surface area and it is a little extra for colors other than black. All colors other than black are top coated with a urethane paint to protect from discoloration.
He quoted me something like $700 for just the floor and sides in the back in black.
The reason I chose Linex over Rino is that I think it looks nicer on the sides. I have seen some truck beds where the Rino lining runs on the sides and since I wanted the whole interior done I didn't want to risk it turning out bad.
I know it is expensive, but when I had the body stripped down, I figured I would go all the way with it. It will probably be a couple of years before I actually get it finished and can drive it, but I am hoping that it won't be any louder inside than it was with the carpet.
Elder User
Joined: Feb 2002
Posts: 703
Likes: 1
From: Rochester
Quick Pics of entire truck...so far
Just thought I would show a few pics of an entire truck being done. I went with Durabak. this is not ment to steal the thread just to give ya'll an idea of what can be done with many of the bedliners. Can't wait to see the complete interior of your truck.