
How to replace your Super Duty Ball Joints
#121
 10-19-2008, 05:08 PM


#122
11-06-2008, 11:45 PM

7th Gear
Join Date: Sep 2007
Location: West Coast
Posts: 7
Likes: 0
Received 0 Likes
on
0 Posts
I ordered the kit from powerstrokeshop.... Powerstrokeshop.com $291usd plus s&h. I bought an oil filter and fuel filter at the same time.
Local parts store (Lordco Auto Parts Ltd. - British Columbia's Source for Auto Parts) wants $300cdn a side for the parts. Ya right. Jokers.
Originally had a clunk sound in front end a second after hitting the brakes. Ended up finding a leaking tie rod boot in the driver's side, replaced that. Still had a clunk sound (not as bad). Then I pulled the front driver's side tire, was able to wiggle the whole knuckle/hub up and down 1/8" and looked behind to see lots of play in lower ball joint.
Bad timing.... should be a month or so till my new workshop is framed up but I don't think those lower ball joints will last. Thinking maybe replacing the lower BJ without opening the hub up. Can you replace the lower without disturbing anything else? Using the c-clamp press?
#123
11-07-2008, 05:18 AM
I ordered the kit from powerstrokeshop.... Powerstrokeshop.com $291usd plus s&h. I bought an oil filter and fuel filter at the same time.
Local parts store (Lordco Auto Parts Ltd. - British Columbia's Source for Auto Parts) wants $300cdn a side for the parts. Ya right. Jokers.
Originally had a clunk sound in front end a second after hitting the brakes. Ended up finding a leaking tie rod boot in the driver's side, replaced that. Still had a clunk sound (not as bad). Then I pulled the front driver's side tire, was able to wiggle the whole knuckle/hub up and down 1/8" and looked behind to see lots of play in lower ball joint.
Bad timing.... should be a month or so till my new workshop is framed up but I don't think those lower ball joints will last. Thinking maybe replacing the lower BJ without opening the hub up. Can you replace the lower without disturbing anything else? Using the c-clamp press?
Local parts store (Lordco Auto Parts Ltd. - British Columbia's Source for Auto Parts) wants $300cdn a side for the parts. Ya right. Jokers.
Originally had a clunk sound in front end a second after hitting the brakes. Ended up finding a leaking tie rod boot in the driver's side, replaced that. Still had a clunk sound (not as bad). Then I pulled the front driver's side tire, was able to wiggle the whole knuckle/hub up and down 1/8" and looked behind to see lots of play in lower ball joint.
Bad timing.... should be a month or so till my new workshop is framed up but I don't think those lower ball joints will last. Thinking maybe replacing the lower BJ without opening the hub up. Can you replace the lower without disturbing anything else? Using the c-clamp press?
kenny
#124
12-14-2008, 08:32 PM

Seal Driver Not Needed, How To Install Vacuum Seal Without Seal Driver Super Duty
Hey Guys,
I used the original posters how to for a couple of Superduty (Mine were 01 & 04 models) ball joint jobs. It work well for me but I figured out a way to install the axle vacuum seal without using a seal driver. I have used this method several times with great success.
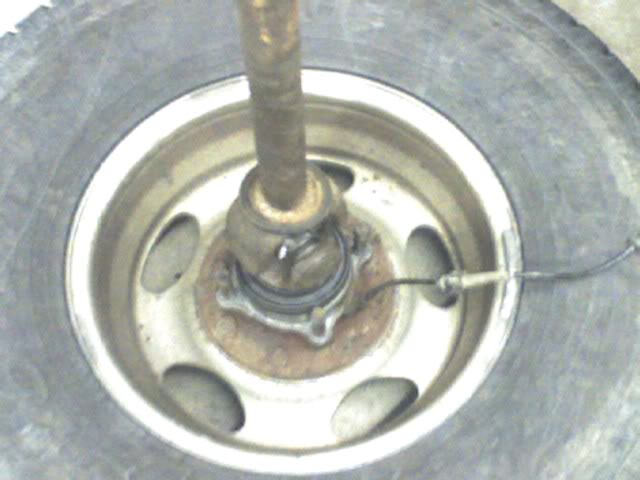
1.Put a wheel upside down on the floor,
2.Set the hub assembly on top of the wheel,
3.Set your new vacuum seal correct side up on top of the hub assembly, (i not the fist time, ruined the seal )
)
4.Put the axle shaft through the hub Assembly,(make sure the shaft is clean)
5.Use the axle as a slide hammer, make sure it gets started evenly, pull the axle up some (not out of the hole) and slam it down, feel free to use a soft hammer to tap on the axle
Putting the Axle back on the truck:
I did the same thing as the original poster to put the axle back on the truck,
I wiped it clean and installed it in as far as I could myself.
Install the flat well greased washer with the groves towards the inside
Put some grease on the axle shaft where the needle bearing from the hub assembly will be riding
Install the hub assembly and start the studs and nuts,
Tighten the nuts evenly to push the axle back in correctly.
PICTURE OF METHOD SETUP:
http://i24.photobucket.com/albums/c4...ety/img093.jpg
I used the original posters how to for a couple of Superduty (Mine were 01 & 04 models) ball joint jobs. It work well for me but I figured out a way to install the axle vacuum seal without using a seal driver. I have used this method several times with great success.
1.Put a wheel upside down on the floor,
2.Set the hub assembly on top of the wheel,
3.Set your new vacuum seal correct side up on top of the hub assembly, (i not the fist time, ruined the seal
)4.Put the axle shaft through the hub Assembly,(make sure the shaft is clean)
5.Use the axle as a slide hammer, make sure it gets started evenly, pull the axle up some (not out of the hole) and slam it down, feel free to use a soft hammer to tap on the axle
Putting the Axle back on the truck:
I did the same thing as the original poster to put the axle back on the truck,
I wiped it clean and installed it in as far as I could myself.
Install the flat well greased washer with the groves towards the inside
Put some grease on the axle shaft where the needle bearing from the hub assembly will be riding
Install the hub assembly and start the studs and nuts,
Tighten the nuts evenly to push the axle back in correctly.
PICTURE OF METHOD SETUP:
http://i24.photobucket.com/albums/c4...ety/img093.jpg
#125
12-14-2008, 10:09 PM
Hey Guys,
I used the original posters how to for a couple of Superduty (Mine were 01 & 04 models) ball joint jobs. It work well for me but I figured out a way to install the axle vacuum seal without using a seal driver. I have used this method several times with great success.
1.Put a wheel upside down on the floor,
2.Set the hub assembly on top of the wheel,
3.Set your new vacuum seal correct side up on top of the hub assembly, (i did not the fist time, ruined the seal)
4.Put the axle shaft through the hub Assembly,(make sure the shaft is
5.Use the axle as a slide hammer, make sure it gets started evenly, pull the axle up some (not out of the hole) and slam it down, feel free to use a soft hammer to tap on the axle
Putting the Axle back on the truck:
I did the same thing as the original poster to put the axle back on the truck,I wiped it clean and installed it in as far as I could myself.
Install the flat well greased washer with the groves towards the inside
Put some grease on the axle shaft where the needle bearing from the hub assembly will be riding
Install the hub assembly and start the studs and nuts,
Tighten the nuts evenly to push the axle back in correctly.
PICTURE OF METHOD SETUP:
http://i24.photobucket.com/albums/c4...ety/img093.jpg

I used the original posters how to for a couple of Superduty (Mine were 01 & 04 models) ball joint jobs. It work well for me but I figured out a way to install the axle vacuum seal without using a seal driver. I have used this method several times with great success.
1.Put a wheel upside down on the floor,
2.Set the hub assembly on top of the wheel,
3.Set your new vacuum seal correct side up on top of the hub assembly, (i did not the fist time, ruined the seal
)4.Put the axle shaft through the hub Assembly,(make sure the shaft is
5.Use the axle as a slide hammer, make sure it gets started evenly, pull the axle up some (not out of the hole) and slam it down, feel free to use a soft hammer to tap on the axle
Putting the Axle back on the truck:
I did the same thing as the original poster to put the axle back on the truck,I wiped it clean and installed it in as far as I could myself.
Install the flat well greased washer with the groves towards the inside
Put some grease on the axle shaft where the needle bearing from the hub assembly will be riding
Install the hub assembly and start the studs and nuts,
Tighten the nuts evenly to push the axle back in correctly.
PICTURE OF METHOD SETUP:
http://i24.photobucket.com/albums/c4...ety/img093.jpg
#126
12-25-2008, 03:01 PM
Senior User
Join Date: Aug 2006
Location: ABQ, NM
Posts: 129
Likes: 0
Received 0 Likes
on
0 Posts
I am 50/50 of doing this myself. I took apart and found stub axle flange was rubbing back face of bearing assy. (Worn/dry axle support needle bearings.) So I purchased all parts to do swap. But I wonder If I should replace stubaxle to, or is there a thrust washer between the two that was actually rubbing? It was hard to tell with all the old dustseal particles. The axle race seemed smooth.
If I do this myself,
What is the chance of the camber (little sleeve like inserts?)getting out of wack when changing the ball joints?
How can I tell If I need a new axle other than to compare it to a new one?
thanks for all the great write ups and pictures and tooling Ideas,
Ryan
If I do this myself,
What is the chance of the camber (little sleeve like inserts?)getting out of wack when changing the ball joints?
How can I tell If I need a new axle other than to compare it to a new one?
thanks for all the great write ups and pictures and tooling Ideas,
Ryan
#127
12-28-2008, 11:55 AM
But I wonder If I should replace stubaxle to, or is there a thrust washer between the two that was actually rubbing? It was hard to tell with all the old dustseal particles. The axle race seemed smooth.
If I do this myself,
What is the chance of the camber (little sleeve like inserts?)getting out of wack when changing the ball joints?
How can I tell If I need a new axle other than to compare it to a new one?
thanks for all the great write ups and pictures and tooling Ideas,
Ryan
If I do this myself,
What is the chance of the camber (little sleeve like inserts?)getting out of wack when changing the ball joints?
How can I tell If I need a new axle other than to compare it to a new one?
thanks for all the great write ups and pictures and tooling Ideas,
Ryan
The camber sleeves are mounted loosesly when the balljoints are out. There is a great chance they will be out of adjustment when you put it back together. Even your new ball joints could be a little different than the old ones. The to avoid the tire wear the alignment is worth it.
#128
12-30-2008, 07:14 PM
Senior User
Join Date: Aug 2006
Location: ABQ, NM
Posts: 129
Likes: 0
Received 0 Likes
on
0 Posts
Hey Brodiedehass, thanks for the info. Turns out axle was worn (I compared the drivers side.) the bearing race is larger o.d. than the rest of the shaft.
I was reluctantly dropping truck off at the dealer and they said it wouldent be ready for a few days, So I grabbed my keys and left....
I DID IT! all ball joints, new hub assy, warn hubs, seals and new axle. I just went ahead and ordered a hole new passenger axle. Axle was pricey but it came with all the seals.
The galvanized pipe seal-tool worked great. I did turn the face flat on a lathe. but not necessary just spin it around as you hit it.
So, why does the dealer charges over 3hrs $$$ per side when I just did one side (tire off to tire on) in exactly one hour taking my time? (new hub,bearing assy, and axle)
I dont want to RANT about labor charges and the rising cost of parts, but I AM.!! Dang it!
Sorry for all the wind, I'm just amped that I did it and did it right(i think).
THANKS TO EVERY SINGLE PERSON THAT MADE THIS THREAD!! THIS SITE ROCKS.
#129
01-24-2009, 08:33 AM

I just finished the ball joint replacement on my 2000 4x4 Ex. WOW. It took me quite a while, prob about 10 hours, but a lot of time was wasted by not having the right tools the first time. This note is to help anyone doing ball joints on an Excursion, F-250 SD or F-350 SD.
1. the autozone pickle fork (loaner part no. 27020) is too small. It works for the tie rod ends, but is not wide enough for the ball joints. Get (2) of their 27021 Pitman Arm pickle forks, they are wide enough for the massive ball joints on an excursion/super duty.
2. Print out the directions that Racerguy put together on here. I spent plenty of time going back in the house to check torque values, etc.
3. The " oil seal" aka Axle/Knuckle seal installation tool is a must, but make sure the flange is square to the pipe. I have a lathe so I trued mine up, but they are just crappy chinese pipe fittings so mine were WAY out of square. I dont know what the consequenes would have been if I tried to drive them on with an out-of-square driver. See item 4.
4. The axle-knuckle "oil seal" seals are a 0.010 inch interference fit at ~2.5 inch diameter(!!!) A typical interference (press fit, shrink fit) is along the lines of 0.001-0.002 inch per inch of diameter. Basically this is a humongous interference fit. This also means unless you have a 5 lb hammer and can swing it like Paul Bunyan, you need a bigger hammer. I never saw this mentioned in any of the write ups. I tried for a LONG time to fit these on using a regular hammer, tried grinding the lip to lead it in, and only after I measured it (I thought I might have the wrong part?) I realized I needed a REALLY BFH. I whaled on it about 8-10 times with a 5 pound sledge to get them seated. That was WAY more than I was expecting. I felt like I was driving railroad spikes.
5. The typical ball joint press they have as a loner at autozone or advanced auto is damn near too small. Expect to make up some spacers and etc to get the job done. If you can beg/borrow a kit made for a heavy truck, that would work 100x better. I was extremely worried I was about to destroy the loaner press I got from advanced auto... and I was probably close.
6. After breaking a 33mm socket (thanks autozone chinese crap tools) I realized that a pipe wrench works great for removing stubborn ball joint locknuts (upper and lower). Pipe wrench highly reccomended. Stick a 6 foot lever pipe on the handle and those stubborn nuts crack like glass. Then use the crappy socket for installing the new ones, apparently they can handle 150 ft-lb. Barely.
All said and done, I would do it again since I saved about $800 in labor and it only cost me a weekend. I could probably do it in half the time next time. Here's to another 95k!
After the new ball joints and an alignment, my party bus drives like new. It is amazing how much difference it makes. My old ball joints had .050 play on the driver lower and 0.125 play on the passenger lower. The uppers were fine.
I hope this helps some people.
#130
01-24-2009, 04:20 PM
Elder User
Join Date: Sep 2007
Location: S CAL
Posts: 803
Likes: 0
Received 0 Likes
on
0 Posts
I took out the old nipple and compared to the selection that they had at the Napa auto parts. They had a big selection of brass nipples there for vacume lines.
#131
01-31-2009, 09:50 PM

#132
02-05-2009, 08:34 AM

Join Date: Jan 2006
Location: Gulf Coast of Florida
Posts: 5,406
Likes: 0
Received 0 Likes
on
0 Posts
I bought that as a "quick-fix" but before next winter I'll be getting the braided stainless lines from DieselSite to replace them for a more permanent fix.
#133
02-05-2009, 08:43 AM
Join Date: Jan 2006
Location: Gulf Coast of Florida
Posts: 5,406
Likes: 0
Received 0 Likes
on
0 Posts
Including by large snap-ring pliers, a LARGE pickle fork, the galvanized pipe to make my own seal installer, Bel Ray Waterproof grease, and all the balljoints & seals, I'm still at less than $400.
A friend of mine just booked a week long vacation in Puerto Vallarta at the Dreams Resort, airfare, drinks... ALL inclusive (from Denver) for $970.
So I look at is "Sacrifice a day to get a 'free' week in Puerto Vallarta" - not a bad day's work!!
#134
03-02-2009, 12:36 AM

Just completed this job ........
I think the intentions to let people know how to do this job are good but this job can be a real nasty one. 2003 Ford Excursion with 162K miles on it. Live in Northern Indiana where there is not much salt. Still the parts on the left side were virtually welded together with rust. I have a lot of tools, Oxy Acetylene cutting torch setup, Hydraulic press, Impacts etc.
I ordered most of the parts from Rock Auto - trying to figure out what I needed took quite a while. The yellow rings only Ford had - $13.00 for two O-rings. Now I know why they don't need a bailout.
The parts from Rock Auto were about $300.00 using the best Dana joints that they had.
The left side just didn't want to come apart. I ended up heating up just about everything to get things loose. The bearing housing was was stuck hard in the knuckle. I used a puller on the hub to pull on bearing which drives the axle into the axle tube and pushed the big vacuum seal out the backside. The bearing still would not come out with several tons of force on it. It started to move and then stopped. Get out the torch and I heated up the sides of the knuckle where the bearing housing enters the knuckle and it started to pop. A lot of pulling and tapping and heating and finally it came out. Then what to do about the axle with the seal stuck behind the knuckle. After thinking about it for quite a while I fired up the torch and cut the ball joints off. The wheel U joints where shot on the left side and welded into the sockets. Fire up torch and cut out U joint cross, then knock out U joint cups. Clean it all up and put it back together. Total time for left side with U joint - was a tough 12 hours. No joke.
The right side literally fell apart compared to the left side - I have no idea as to why. The coolest trick I read really worked well on the right side. Back the knuckle nuts off all but 3 or 4 threads. And use a impact driver - aka air chisel,muffler cutter etc with a straight driver in it. It drove the bearing right out of the knuckle. But for some reason the corrosion on the right side was much less than the left? Someone napping at the spray gun at Dana that day??? I dunno. Still the wheel U joint was corroded (welded) together rust so out came the torch and I cut out the cross in that one also. Autozone had the wheel U joints for $30 each.
Right side total hours 7 1/2.
Besides using my 1/2" and my 3/4" impact wrench, and my 3/4" ratchet set for the lower ball joint nut, I made good use of my hydraulic press. I have a ball joint install/remove tool and it wouldn't budge the big ball joints - those things are huge and they were welded in with rust. Also used the impact driver. Had a hard time finding a snap ring plier that didn't bend with that large axle snap ring. Also the Oxy-Acetylene torch set was necessary on this truck. Without it I'm not sure how I would have gotten the left side apart.
I've done a fair amount of heavy mechanical work and on a zero to ten scale I'd rate this as a 8 as far as difficulty. It was much worse than I expected. I could have pulled the engine and trans in the time it took me to rework this front axle.
Cost wise:
$300 for seals and U joints from Rock Auto
$12 for Yellow rings from Ford
$60 for wheel U joints from Autozone
$50 misc tools - two sets of snap ring pliers until I got one that worked, pipe pieces to make the driver tool.
$422 total and that was with discount part prices from Rock Auto.
Probably 4 hours driving around finding the wheel U joints and Yellow rings. Napa did not have the wheel U joints in stock and if I ordered them from Napa they were $69 each!!!
Would I do it again - yes but only if I had a cutting torch setup on hand with a number 2 or 3 tip. If you don't know how to handle one don't attempt this job on anything but a one year old truck or unless you live in the southwest where things just don't rust. I was thinking that after I had the left side torn down that if I didn't have the torch to cutoff the ball joints I would not be able to even reassemble the truck so it could be towed to a shop. I would have been totally screwed.
I can see why Ford would charge $1500 or more for a ball joint job. It's simply a tough job. Add in the wheel joints and that is probably another couple hundred - probably approaching $2000.
But the truck drives great now - no problems. Why some idiot at Ford didn't think that a superduty truck needs $1.00 worth of grease fittings I have no idea. The wheel U joint crosses I cut out where hollow. All they needed was a grease fitting to lube them.
So shade tree mechanics be warned. This one might be show stopper for you.
#135
03-02-2009, 08:19 AM

Senior User
Join Date: Oct 2005
Location: NW NJ
Posts: 462
Likes: 0
Received 0 Likes
on
0 Posts
I think the intentions to let people know how to do this job are good but this job can be a real nasty one.
I took a short cut and used a torch to cut a balljoint off because the shaft was spinning in the body. I cut the shaft high up ... a few minutes later, the balljoint shaft/ball exploded out of the housing. Could have killed someone. That was new to me.
BTW, the Advance Auto's near me, now lend the new expanded Balljoint Press Kit, with the correct spacers/cups for the SD balljoints. (I buy fluids and filters and such from them to thank them for the free tool rentals)