When you click on links to various merchants on this site and make a purchase, this can result in this site earning a commission. Affiliate programs and affiliations include, but are not limited to, the eBay Partner Network.
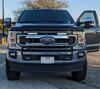
Finally got everything and installed the bumper on the truck yesterday... So here we go...
1) Trail Ready Full Guard Bumper with 4" and 6" light cutouts, winch plate and extra horizontal bar across the headlights
2) 577803 - Baja Designs XL-R Sport Pair - Driving Combo - Clear
3) 587815 - Baja Designs Squadron-R Sport Pair - Wide Cornering - Baja Amber
4) Warn M12000K Contactor winch (used, bought from a dude for $450)
5) Factor 55 Flat Link Expert
6) 125' of 3/8" Synthetic Rope from Custom Splice
The lights were a nightmare to get. One was backordered, then the it was found, then it was never shipped (3rd party distributor) then the order was re-submitted to Baja Designs direct, then they sent the wrong one... Finally got all that cleared up and got what I needed. I ordered them through another board I'm on that offered really amazing discounts. I had time so I'm not angry... It actually became a bit funny.
I didn't take a picture of it, but despite what they say, the angle brackets for the 6" lights have to be shimmed to get the light centered in the bucket. The lights and winch were all put into the bumper before install. You must install the winch first. No way in hell will you get that thing in there afterwards. The instructions were straight forward, but there is one thing that isn't mentioned. The 450's do not have Prius Catchers and instead use that area around the factory tow hooks for the Aux Cooler. The way that is mounted, there are tabs that wrap around the frame. That prohibits the install of the bumper brackets...
The picture above with my finger is the bend in the bracket you have to trim off. The second picture is after it has been cut off. Dremel is perfect for this. The instructions also call for 3 bolts through the frame horizontally and 3 carriage bolts through the old tow hook slots. This is incorrect and they sent hardware to use all 4 holes both in the horizontal and vertical so 8 total 1/2" bolts hold the bracket.
When you work alone, you have to get creative. This worked really well. Couple lift slings and two ratchet straps to get it level. The top carriage bolt through the mount into the bumper itself goes in through the back side. Only way you're ever going to do it by yourself. The other 2 bolts each side feed in through the front. All bolt holes are slotted to trap the carriage bolts to make it a bit easier.
I have previously drilled a stud hole on the hot side of the battery mount and hooked the winch up to test it and spool in the line. Here is the final with the wires runs to the Driver Side battery. I made new wires for this. 8', 2 AWG.
The Amber Lights are wired to the factory fog switch. I had to undo all that to get the OE bumper off and I had thought that I used Diode Dynamics adapter harnesses, but I didn't. The SS3's I had plugged right in. So I took the OE fog harness, cut the ends off and wired on new Weatherpack connectors to match the Baja Designs lights. The inner 6" lights I made my own wire harness for and tied it to the #1 on the upfitter switch. No picture of that. It's a bit of a mess of zip ties and nonsense underneath. There is a dearth of good places to route wires and there are no good grounds in that area. So, I ran the ground up with the hot lead to the engine bay and used a ground on the Passenger fender.
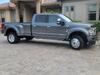
Final product. Have to drive it around and let it settle a bit and see where we're at. Right now, I don't think I"m going to install the spacers/shocks/caster shims. My prelim measurement said the front end dropped 1/8" - 1/4". I have to adjust the lights yet which I'll do today.
Time to install just the bumper from walking in the garage, 4 hours. Wiring the damn thing took another 5.5-6 hours, but that included about an hour break in there to give my buddy a lift to go get his truck. All told, one person, 8 hours is a reasonable install time.
dang thats a solid day. looks great! those BD lights should last your lifetime. I have a pair of the squadron sports from almost 10 years ago. and 3 xlpro's that are doing on 5 years. I wish BD would send them with better connectors. Deutsch are way better than the dinky 2 pin connectors.
Looks good. Now take it all apart again and send that bumper out to get coated and then put it back together. Trust me, you will thank me later unless you don't plan on keeping it for several years.
Excellent work! Mine is a 2016 F-350, and was searching re. TR front bumpers when I found your post. (I also run the DD SS3 OEM Fog pods.) Where are TR's manufactured?
Looks good. Now take it all apart again and send that bumper out to get coated and then put it back together. Trust me, you will thank me later unless you don't plan on keeping it for several years.
What is the issue that you have discovered re. this?
I wonder if TR would make it in raw steel/LineX ready.
That I doubt. LineX 'installers' are really good at prepping stuff, and you'd not want anything like a bumper to not be coated from the factory, as rust would set in immediately.
There is no issue with coating a painted surface with LineX; you don't have to go back to bare metal. (The post #6 I linked to before was a slightly different scenario, as their bumper was already rusted when they bought it 2nd hand, so it needed sand-blasting)
The powder coating or just plain paint (depending upon manufacturer) does not hold up well. Especially if the truck operates in areas that experience wide temperature swings and experience actual winter weather conditions. In my area, I could get by for several years but eventually, it’s going to start rusting. Best to get it sprayed from the start and it should last the life of the truck without issue. While it adds a considerable expense to the initial bumper purchase (600 or more), it’s worth it.
Good tip. I will include that in my plans. I wonder if TR would make it in raw steel/LineX ready.
I ordered raw steel bumpers from Trail Ready for my 2013 F350 and had them color matched powder coated locally. Turned out great & still looked great when I sold the truck in 2022.
This Hennessey Takes the Expedition Tremor's Off-Roading Capability to the Next Level
Slideshow: The VelociRaptor Expedition gains a lift, upgraded suspension, Brembo brakes, and trail-ready equipment while retaining the stock 440-horsepower EcoBoost V6.
Rezvani's Latest Post-Apocalyptic Monster Is a Ford F-150 Raptor Underneath
Slideshow: Called the Fortress, the 850-horsepower pickup combines Raptor underpinnings with military-inspired features, survival equipment, and a starting price of $285,000.