When you click on links to various merchants on this site and make a purchase, this can result in this site earning a commission. Affiliate programs and affiliations include, but are not limited to, the eBay Partner Network.
Yeah, I looked up the 351W firing order, as I'm unfamiliar with it. I've always had FE engines; 352, 390, etc.
Anyways, I was very careful to index everything before pulling the old distributor. But then again, it wasn't running that great beforehand, and had a pretty good miss. So maybe it was out of time before, and I just made it worse.
I guess tomorrow I will work on it again, starting from square one.
Thanks again for the info on the starter installation. 👍
I'm not a Perttronix fan. But that aside, I think your Mallory coil was not designed to run on 12V. Since you need to remove the ballast resister (or resistor wire on later model Fords) and run the Petronix distributor with 12V, you should get a new ignition coil that runs on 12V (does not need a ballast resistor). You might overheat that Mallory ignition coil. It might be worth double checking before ruining a coil and being stranded somewhere.
351W and 1985 and newer 302: 1-3-7-2-6-5-4-8
Older 302 and 289: 1-5-4-2-6-3-7-8
My understanding (could be wrong) is Ford did the firing order change to 1-3-7-. . . to reduce the loads on the front main bearing.
The only other thing to consider is having the correct type of gear on the distributor, steel or cast iron depending on the type of cam in the motor. Well, gear location on the dist. shaft is very critical as well on small block Fords.
Great information above here!
I also am wondering a little bit about the coil. Do you have a voltmeter that you could measure the "key on" voltage between the + terminal on the coil and a good ground? You should see around 12 volts there (that is if you don't have resistance wire powering it) Anyway I would look at that first because it is quick and easy to check.
@1956_F100- thanks for the insight. I will check the coil voltage today. I just ordered a Flamethrower II coil to go with the distributor, so it will be a moot point either way, but I'd still like to know for my own education. I just assumed that the Mallory would be 12V. Was the ballast resistor I removed the giveaway that it's 6V? I swear I've got a learning disability when it comes to electrical, be it home or automotive🤤
@hooler1- when you are bringing #1 up to TDC, do you pull the valve cover to see the rocker arms, or do you just go by feel at the plug hole? I've always had the covers off to narrow down when I'm getting close (unless of course it's actually the exhaust stroke!)
@hooler1- when you are bringing #1 up to TDC, do you pull the valve cover to see the rocker arms, or do you just go by feel at the plug hole? I've always had the covers off to narrow down when I'm getting close (unless of course it's actually the exhaust stroke!)
That's one way to do it. But I always just pull the #1 plug , put my thumb over the hole and bump the engine over until I feel the gush of air trying to blow out of the spark plug hole during the compression stroke. At this same time you should also see the timing mark coming up on TDC. Once I get to that point I usually take the good old 15/16 socket and manually turn the damper over until the TDC mark is aligned with the pointer attached to the block. Then I drop in the distributor. The hard part for me is now getting the rotor aligned to your #1 wire connector on your distributor cap. Sometimes it's a lot of drop in, check rotor position, pull it back out and try to adjust it a few degrees here or there and drop it in again all while also adjusting the oil pump shaft with a long screwdriver to get the rotor position to end up at least close under 1 while its being dropped in. As you know as you drop it in the rotor will rotate some. Also I always put some oil on the distributor gear for some pre lube before the engine gets running. I hope this helps! Maybe others have a better way of doing it so I can learn too!
Forgot to mention that after you get distributor dropped in and hopefully the motor fires and runs as it should then set your initial timing using you timing light. Not sure what that should be but it will probably be 6 to 8 degrees before TDC. You might want more if it has a big cam shaft in it. Timing is almost a whole separate thread. But we can talk about that too once you get your engine running.
Good refresher advice hooler, thank you. As I said, I've been out of the hotrod business for 15 years or so. Its scary how much you forget. Well, not forgotten, just kinda gets buried under a bunch of life's other junk.
My coil should be here Thursday afternoon. I'll give it a go & post results.
Thanks again! 🍻
Last edited by Smokdu1973; 06-10-2020 at 10:25 AM.
Reason: Autocorrect mistakes
That's one way to do it. But I always just pull the #1 plug , put my thumb over the hole and bump the engine over until I feel the gush of air trying to blow out of the spark plug hole during the compression stroke. At this same time you should also see the timing mark coming up on TDC. Once I get to that point I usually take the good old 15/16 socket and manually turn the damper over until the TDC mark is aligned with the pointer attached to the block. Then I drop in the distributor. The hard part for me is now getting the rotor aligned to your #1 wire connector on your distributor cap. Sometimes it's a lot of drop in, check rotor position, pull it back out and try to adjust it a few degrees here or there and drop it in again all while also adjusting the oil pump shaft with a long screwdriver to get the rotor position to end up at least close under 1 while its being dropped in. As you know as you drop it in the rotor will rotate some. Also I always put some oil on the distributor gear for some pre lube before the engine gets running. I hope this helps! Maybe others have a better way of doing it so I can learn too!
When aligning the damper to the timing pointer before installing the distributor, instead of aligning to TDC, try setting it 10 to 12 degrees before top dead center. Then install the distributor aligning the rotor tip to the number 1 terminal on the cap. It's seems better to be a little too advanced than too retarded for initial startup. After it's running, most start with a base timing of 10 degrees before top dead center on a small block Ford. After that, the cam and compression ratio will determine the best initial timing, advance curve and total advance. For performance, it seems better to get as much advance as possible from a combination of initial and mechanical advance. Then if there is any advance needed remaining include the vacuum advance.
When aligning the damper to the timing pointer before installing the distributor, instead of aligning to TDC, try setting it 10 to 12 degrees before top dead center. Then install the distributor aligning the rotor tip to the number 1 terminal on the cap. It's seems better to be a little too advanced than too retarded for initial startup. After it's running, most start with a base timing of 10 degrees before top dead center on a small block Ford. After that, the cam and compression ratio will determine the best initial timing, advance curve and total advance. For performance, it seems better to get as much advance as possible from a combination of initial and mechanical advance. Then if there is any advance needed remaining include the vacuum advance.
You are right ! That's really the best way to do it.
I have done it both ways and got engines running. When writing it up I was trying to think the best way to describe the process and I thought I might cause a little confusion if I talked about using an advance static timing. Most times someone has painted the TDC line on the damper (we hope it's true TDC)and it's an easy reference mark especially if you have a dial back timing light. But there is no doubt adding the initial timing right off the bat is a helpful thing when first firing the engine.
Good news! I spun the engine around to TDC, pulled the dist cap, and the rotor was pointed at #7. So, obviously I didn't mark things as well as I thought. That's good news though. It explains why it wouldn't fire. I'd been REALLY worried if it had been on #1 & hadn't started😳
Still waiting on my coil to get here so I can fire this sucker up!
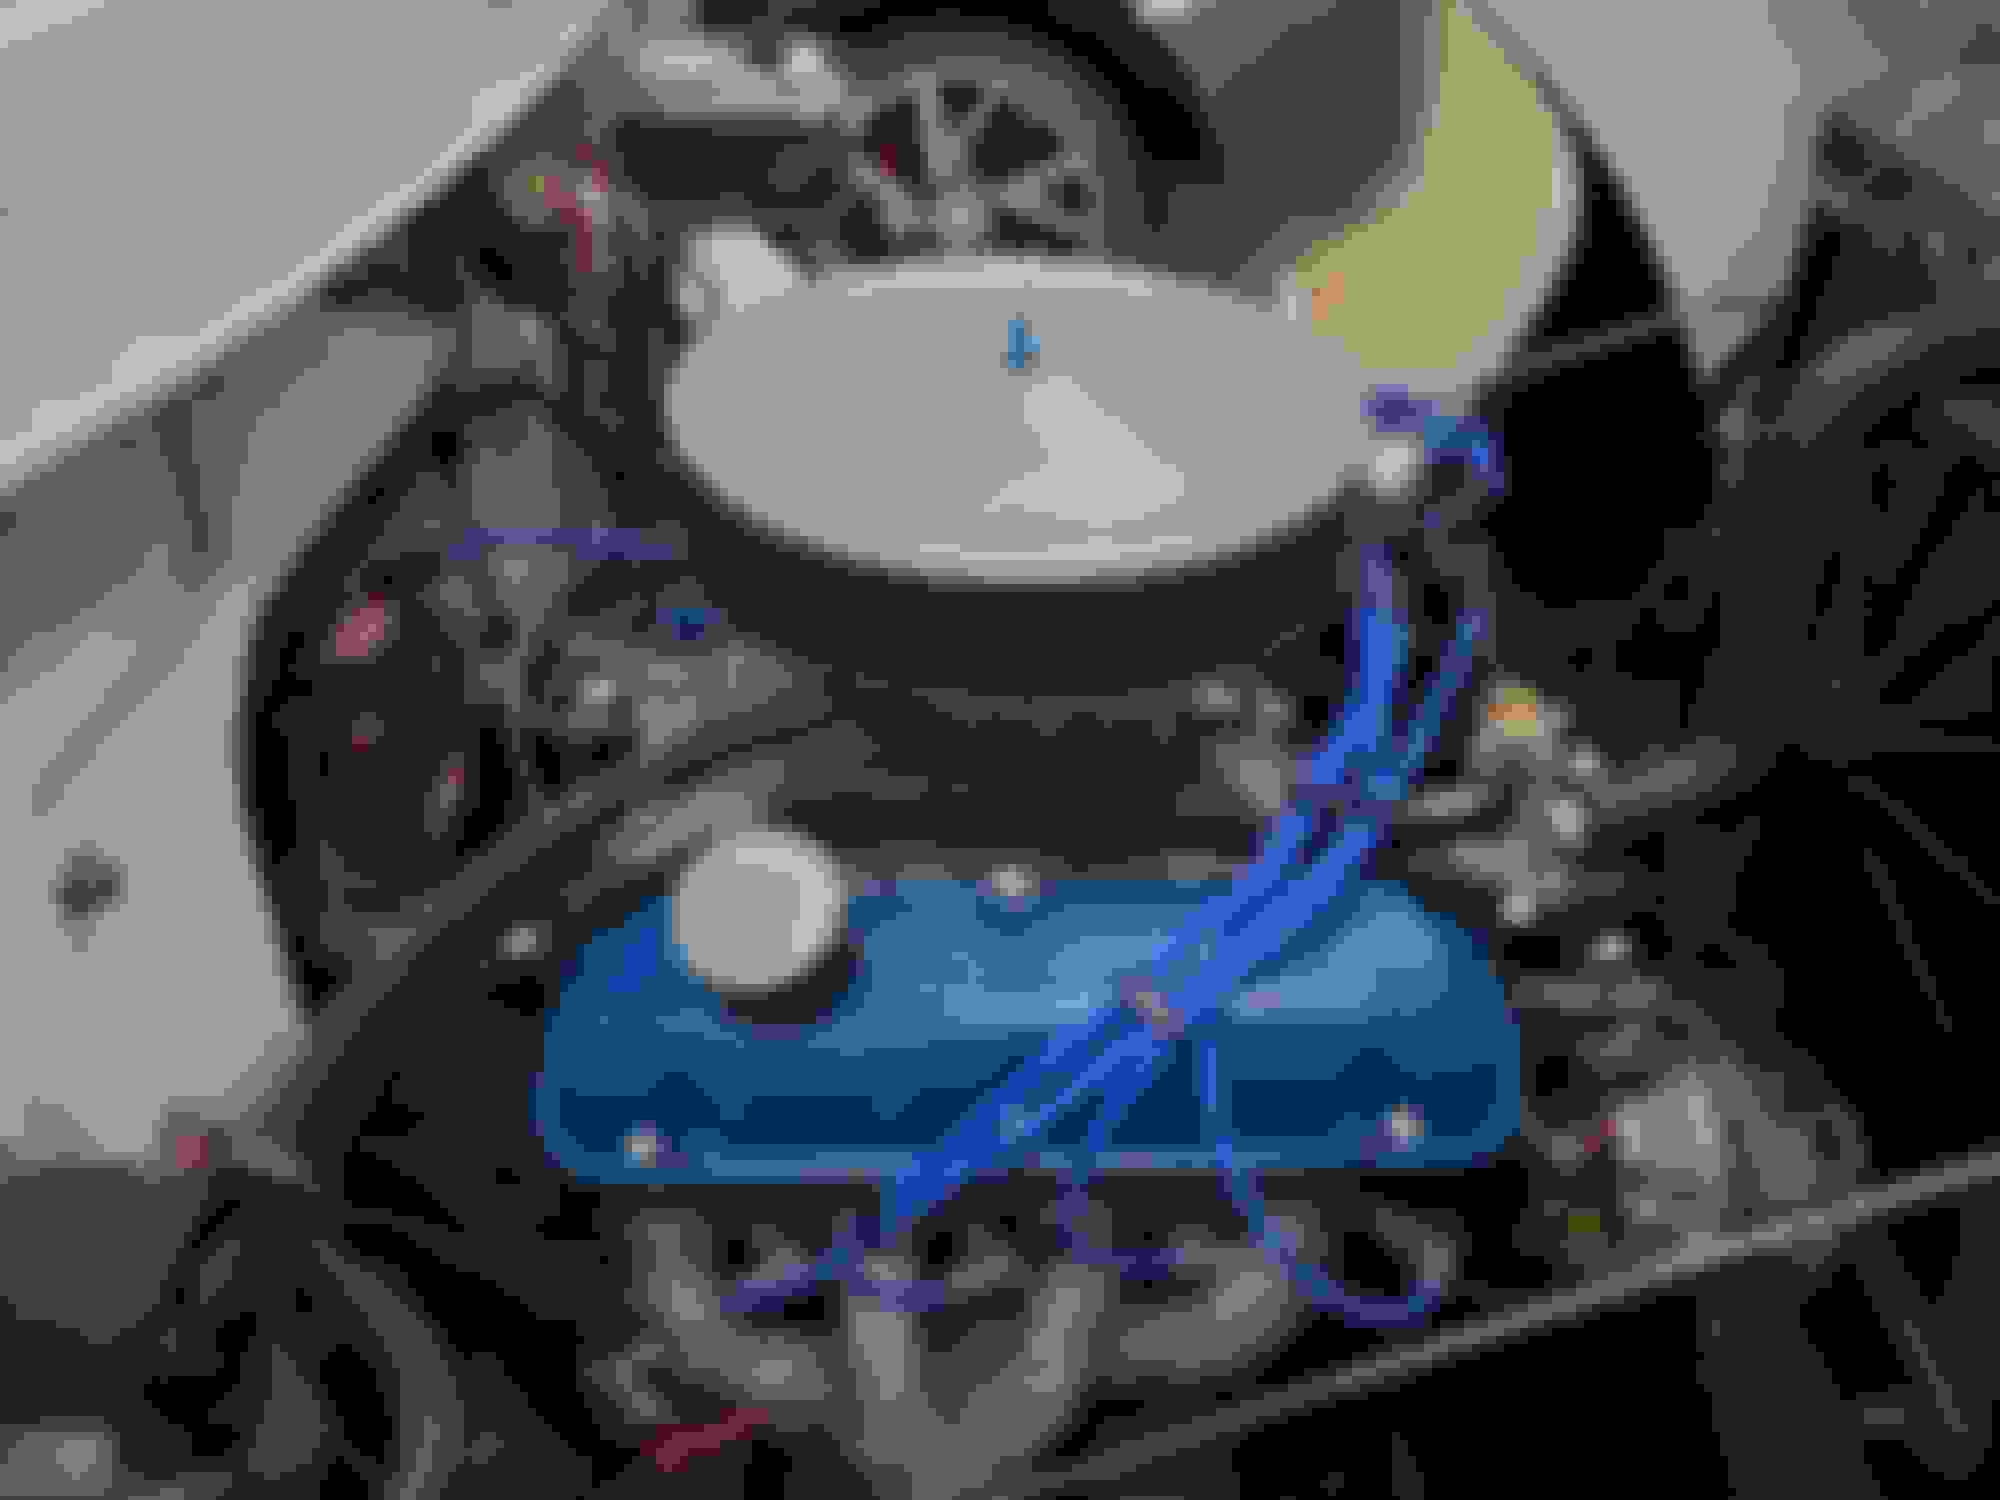
Thought you guys might like a before/after, so far...
Looks better after some clean-up! Don't forget to plug any open vacuum ports on the carb. I'm fairly certain there is a thermostat housing for small block Fords that points straight up, if that will make upper radiator hose fitment a little easier. Try for a mid to late 1980's Mustang with a 5.0L motor.
Ok, so coil is in. Distributor is dropped in @ 10� before TDC. Poured some gas in carb, and it fored right up. Ran a little rough, but it ran. Before I could get out to adjust distributor, it died. Tried to restart, no dice. A little more gas, no dice. Finally fired, ran rough for a second, then POOF, fireball shot up from carb, and died.
All the separate systems are working. See-thru fuel filter is full, electric fuel pump is working. Obviously I have spark. TDC on balancer seems to be in the right spot. (When both valves were closed, piston was up top.)
What am I missing guys? I'm starting to get frustrated, not to mention the looks I'm getting from the wife, who now thinks I know less about engines than she does...HELP!
 06-09-2020, 12:18 AM