When you click on links to various merchants on this site and make a purchase, this can result in this site earning a commission. Affiliate programs and affiliations include, but are not limited to, the eBay Partner Network.
Thinking of removing the cab on a 53 Ford F500. About how heavy is the cab minus the hood and doors?
How hard is it to remove the cab? How do I go about removing it? What holds it on to the frame. I�ve seen some videos of a beam stuck through the door opening jumper the roof.
With the bed and front clip removed, it's actually not very difficult. As for weight? I would guess 400 or so pounds. 4 men can lift it off, but it's easier to use a lift.
You have to disconnect all of the wiring, heater hoses, speedometer cable, and in your case remove the shifter and levers that are through the floor.
The steering column has to go, as does the throttle linkage and choke cable. The pedals have to be disconnected so they drop below the floor pan.
The cab is held on by two bolts at the front door columns, and by two "dog bone" cab mounts in the rear. You only need to remove the bottom through-bolts on the rear. The cab needs to be supported before the rear bolts are removed.
Then lift it off.
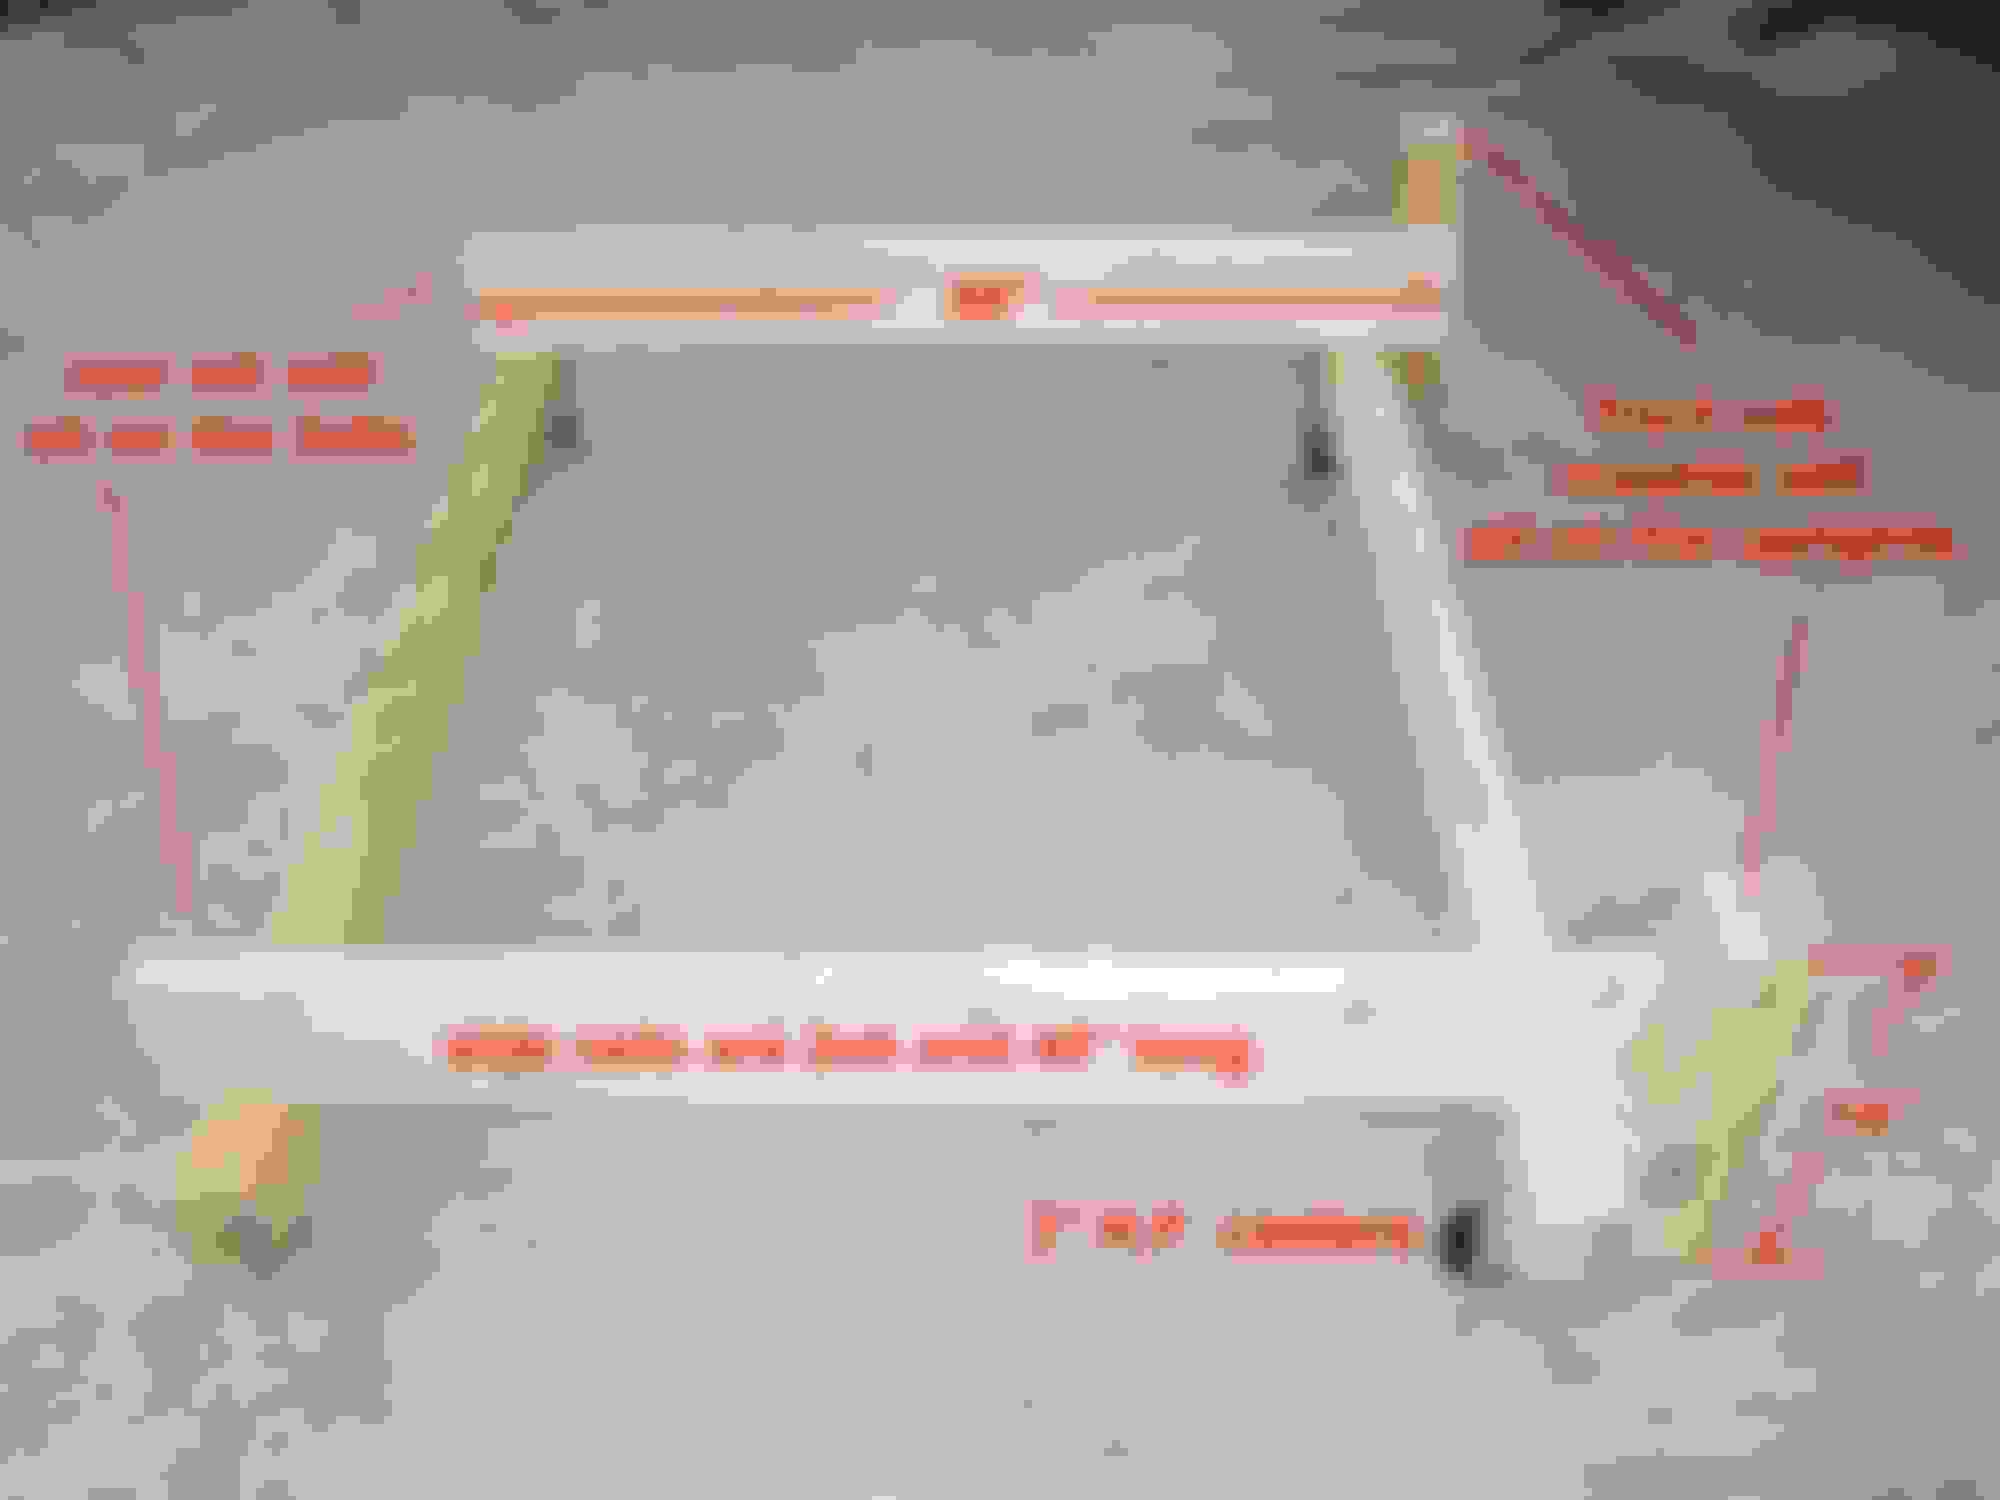
I built the beam, as you called it, to go through the cab and support it by the door frames. I also built a dolly from scrap lumber and some wheels from Lowes.
The 2x4 "A" sits in the pockets in the back of the cab where the "dog bone" mounts go. The front of the cab sits on "B" at the front cab mounts.
I used a chainsaw "scrench" as an alignment pin. This is where the front cab mount bolt is located.
Sorry, it's kind of dark, but the new bolt in the lower right is the lower cab mount bolt. There is one on each side of the cab that needs to come out.
If you are going to do it yourself post #4 and #5 show probably the easiest way to do it.
I used chains, but the tie down straps would be much easier to level the cab as you lift.
If you have help, 3 people can do it pretty easy. That's how I got mine back on. The hardest part was lining up the dang rear cab mounts. https://www.ford-trucks.com/forums/1...-best-way.html
Here is the tie down strap picture. Use the rear seat bolt holds and front cab mount holes to secure your straps.
Harrier/Joe's method has always been my choice of cab snatching. I've done a few now.
The cab tends to be nose heavy - rather nose heavy if the windshield is in.
If you lose balance of your center of gravity without solid attachments to the cab, it can get away from you real quick.
JML
This may sound redundant, but take lots of pictures first. Then as you start to dismantle, put the bolts to a certain piece in a plastic baggie and label it. I also put what size it is and also how many. Example- Radiator shroud 6 bolts 3/8 by 16 or whatever.
Try not to mix different groupings together, even if they are the same size. When you go to reinstall, it is a good guide to help you out. If you think you can remember where everything goes with out pictures or bolt count and sizes, you might be mistaken and disappointed.
To spread the lifting force, I made a rectangle out of 2 x 4 that stretched beyond the cab. The 4 point harness was attached to it and lifted via chain block. worked very well for me
One word of caution, if you use the chains or straps inside the cab, be sure they are long enough to keep the boom of the engine hoist at least as high as the top of the dash, or higher. This will keep the center of gravity low, and the cab stable when lifting.
Also, no matter how stable or solid everything seems, never trust it. Never get under it unless it is supported by more than hydraulics.
Rezvani's Latest Post-Apocalyptic Monster Is a Ford F-150 Raptor Underneath
Slideshow: Called the Fortress, the 850-horsepower pickup combines Raptor underpinnings with military-inspired features, survival equipment, and a starting price of $285,000.