6.0L Power Stroke Diesel 2003 - 2007 F250, F350 pickup and F350+ Cab Chassis, 2003 - 2005 Excursion and 2003 - 2009 van

Removing the Engine

Thread Tools
 
Search this Thread
 
  #226  
Old 02-15-2019, 06:20 PM
Justin Jones's Avatar
Justin Jones
Justin Jones is offline
Laughing Gas
Join Date: Apr 2014
Location: Shreveport, LA
Posts: 880
Received 4 Likes on 3 Posts
That's what I was going to say as well! Your attention to detail on the paint looks really good.
 
  #227  
Old 02-15-2019, 06:52 PM
HTM101's Avatar
HTM101
HTM101 is offline
Tuned
Thread Starter
Join Date: Apr 2017
Location: Maryland
Posts: 275
Likes: 0
Received 1 Like on 1 Post
Originally Posted by Justin Jones
That's what I was going to say as well! Your attention to detail on the paint looks really good.
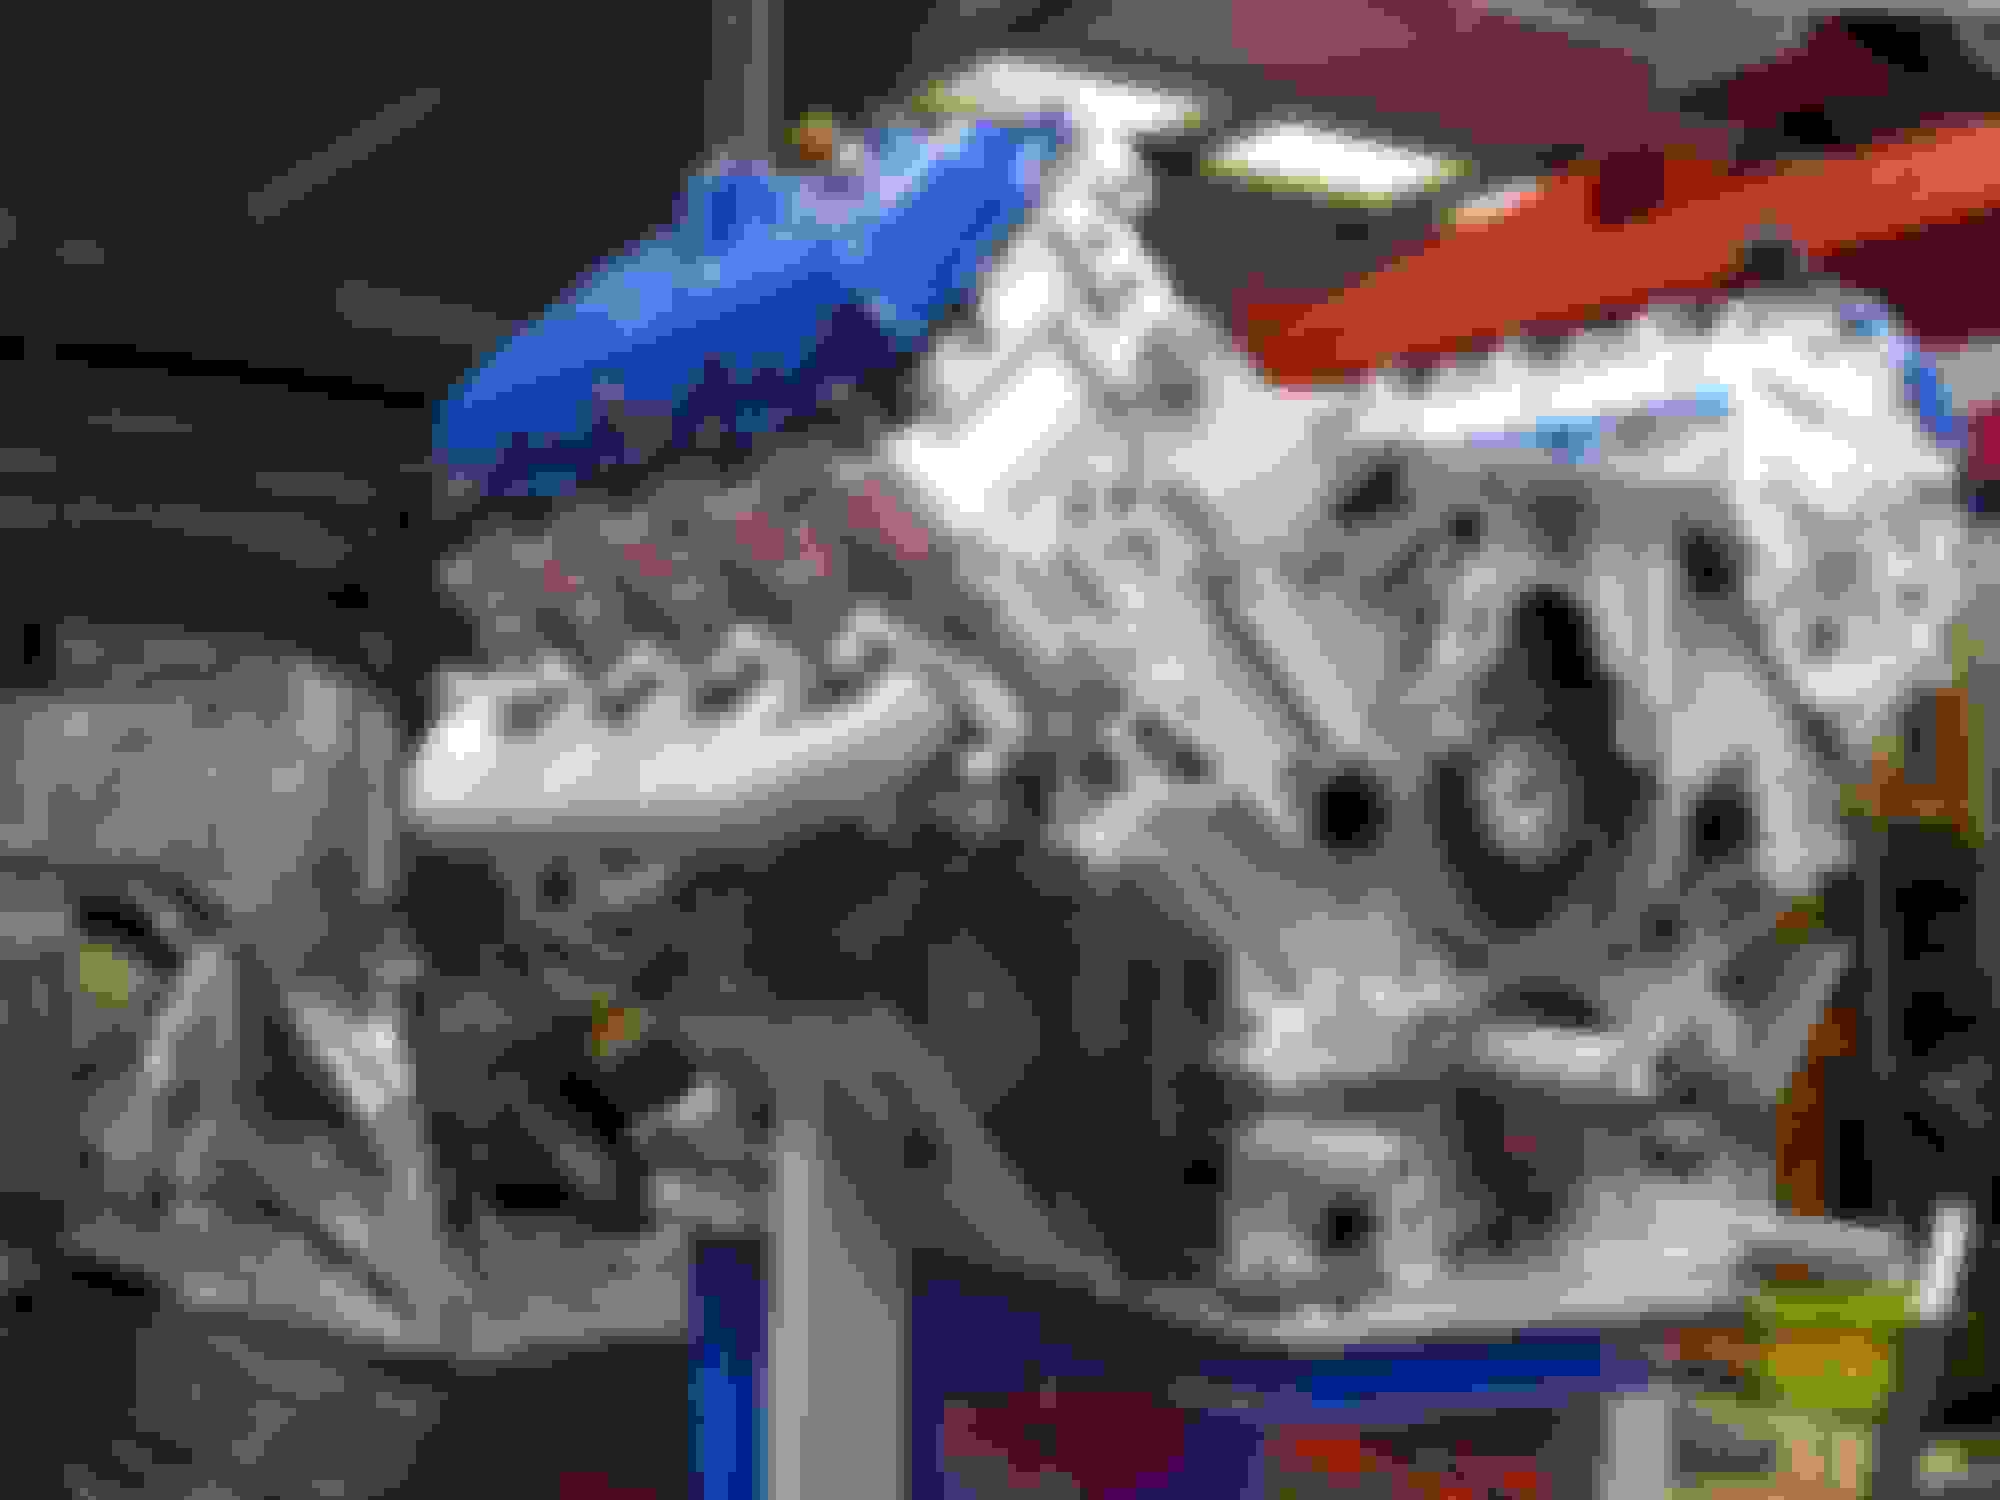
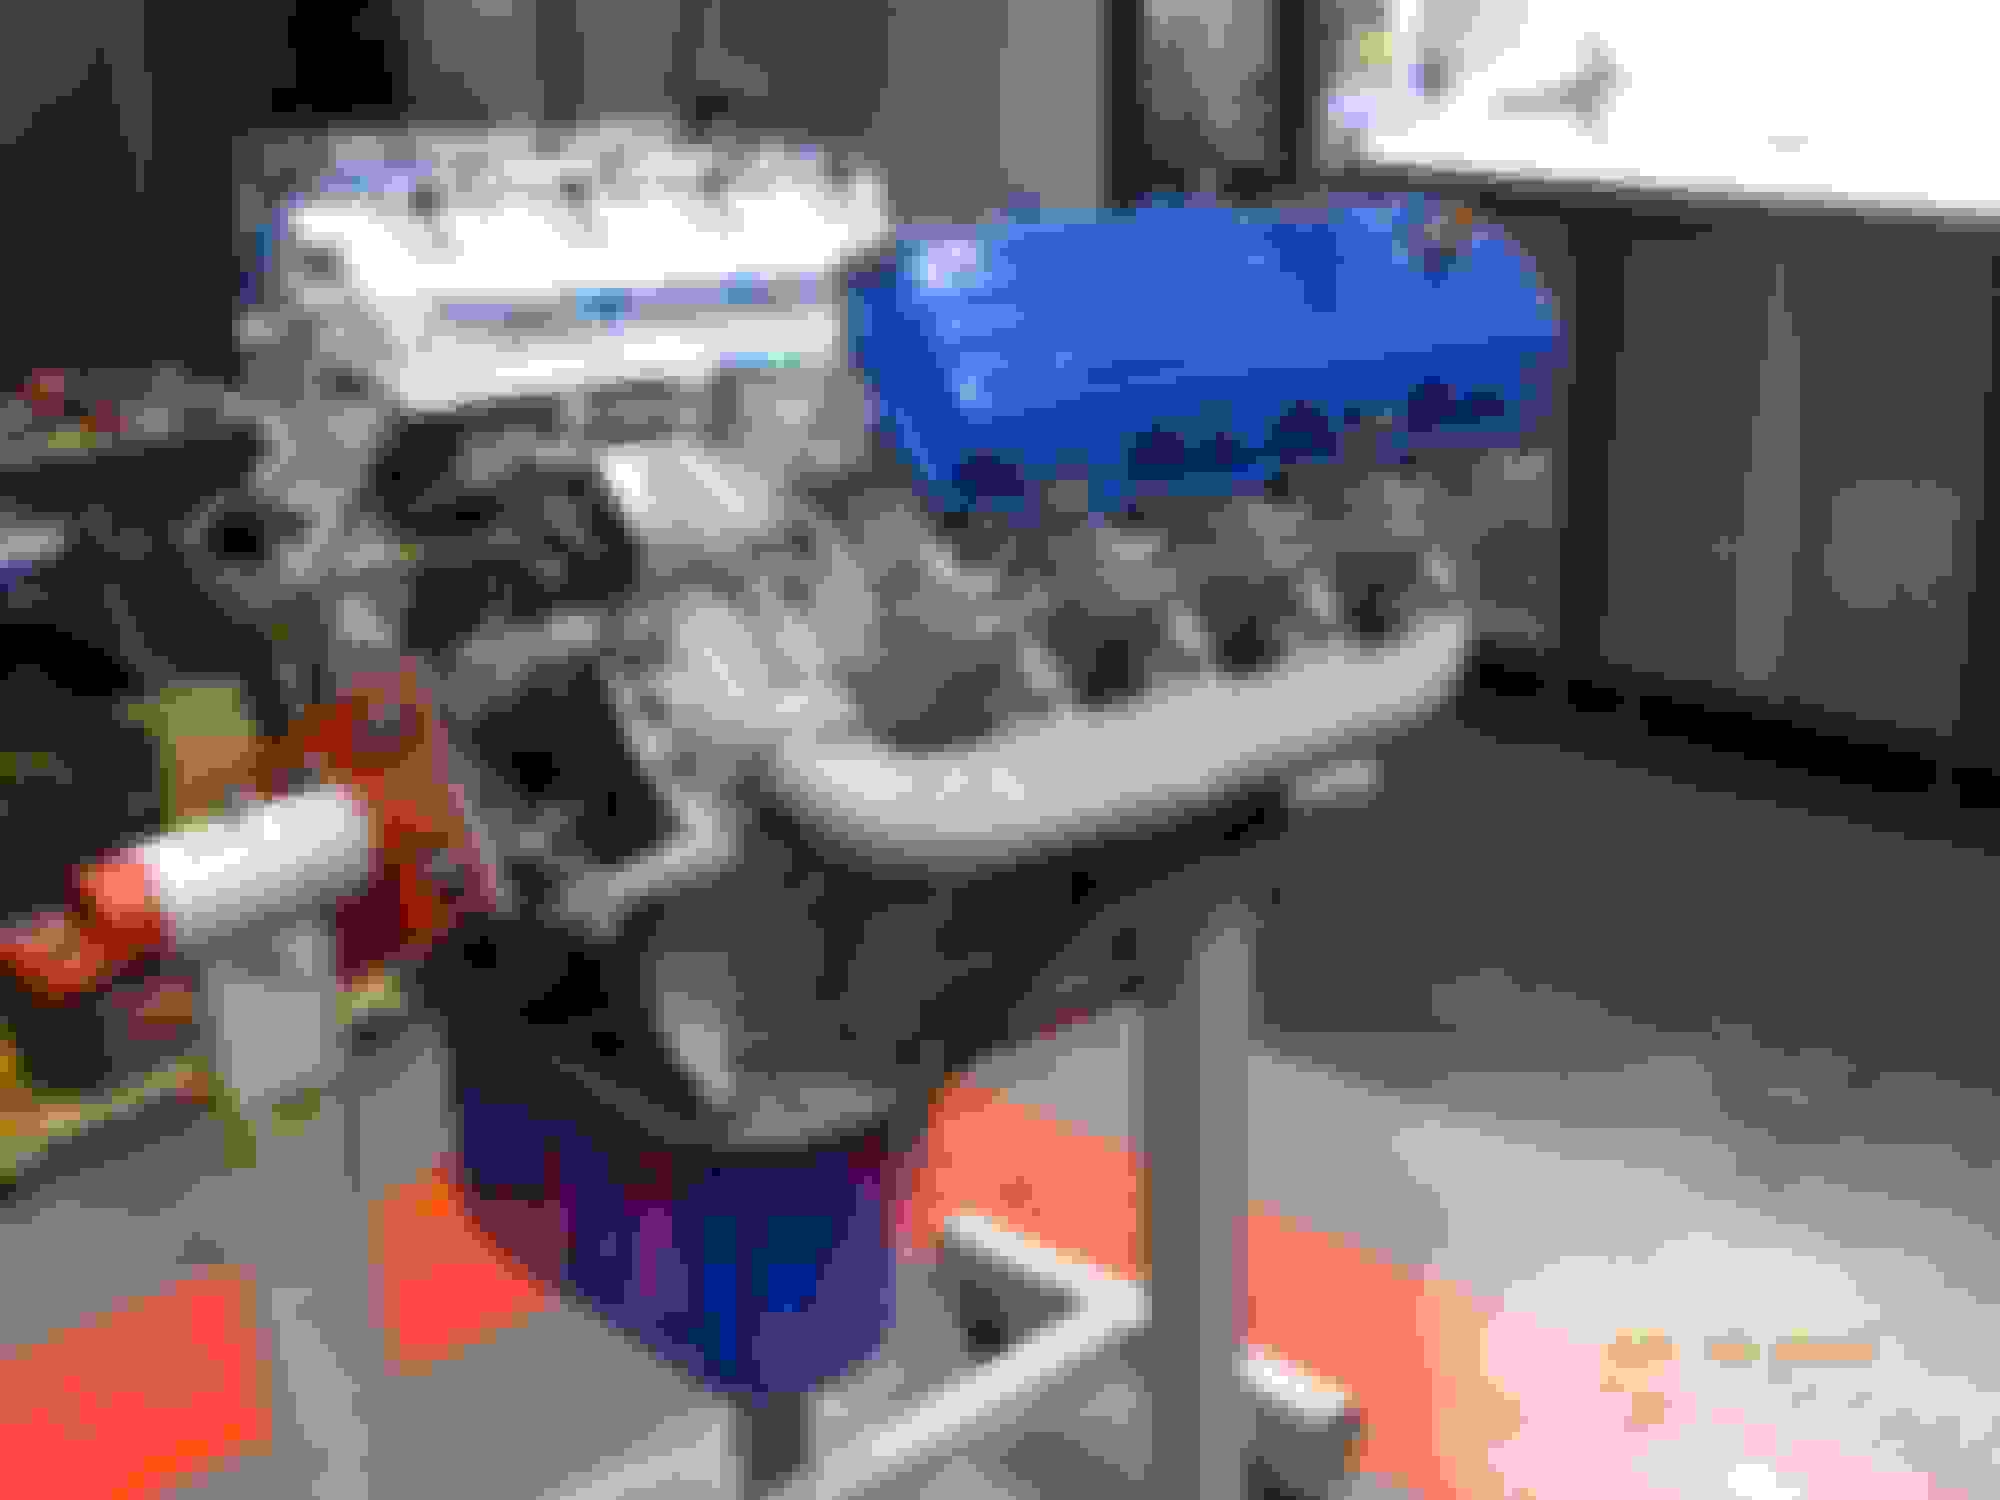
I appreciate your comment. The original black block and heads made inspections difficult. This light gray should make identifying future leaks a bit easier.
 
  #228  
Old 02-15-2019, 07:33 PM
Justin Jones's Avatar
Justin Jones
Justin Jones is offline
Laughing Gas
Join Date: Apr 2014
Location: Shreveport, LA
Posts: 880
Received 4 Likes on 3 Posts
Oh I didn't think about the practicality of the paint choice color. I just thought it was a color preference.
 
  #229  
Old 02-16-2019, 05:02 PM
HTM101's Avatar
HTM101
HTM101 is offline
Tuned
Thread Starter
Join Date: Apr 2017
Location: Maryland
Posts: 275
Likes: 0
Received 1 Like on 1 Post
Rockers, Studs, Injectors, Glow Plugs, Exhaust

Installed the valve stem bridges.


Dismantled all the rocker assemblies, cleaned them, changed out the old white plastic retaining clips for new black ones.


Ran all 20 studs in.


Torqued the heads down in 3 steps; 110 pounds, 170 then 210.


8 fuel injectors back in the holes.


Wavy rails, standpipes and dummy plugs next.


A piece of 3/8" i.d. rubber hose is a nice aid for re-inserting glow plugs.


Attached the valve covers and exhaust manifolds. Starting to look more like an engine.


  #230  
Old 02-16-2019, 06:20 PM
SmackDaddy's Avatar
SmackDaddy
SmackDaddy is offline
Postmaster
Join Date: Sep 2016
Location: Texas
Posts: 3,941
Received 234 Likes on 161 Posts
Top notch work! I can’t wait to get mine looking that way. I will be using this thread as my guide.
 
  #231  
Old 02-16-2019, 06:38 PM
BBslider001's Avatar
BBslider001
BBslider001 is offline
Hotshot
Join Date: Mar 2012
Location: Texas
Posts: 10,628
Received 376 Likes on 268 Posts
Wow you aren't wasting any time! This is great to see! It looks fantastic and nice attention to detail.
 
  #232  
Old 02-16-2019, 06:55 PM
HTM101's Avatar
HTM101
HTM101 is offline
Tuned
Thread Starter
Join Date: Apr 2017
Location: Maryland
Posts: 275
Likes: 0
Received 1 Like on 1 Post
Smackdaddy and BBslider001,
I'm enjoying this stage of the rebuild compared to the first few weeks of scrubbing, grinding, rust removal, wire brushing, yada, yada, that took a lot of elbow grease. Heck I spent an hour and a half working on the 14 year old ARP studs. The nut on 10 of the 20 studs is always exposed, as they aren't covered by the valve covers. So there was a certain amount of rust removal to contend with. On a few of them the nut and stud had slightly rusted together.

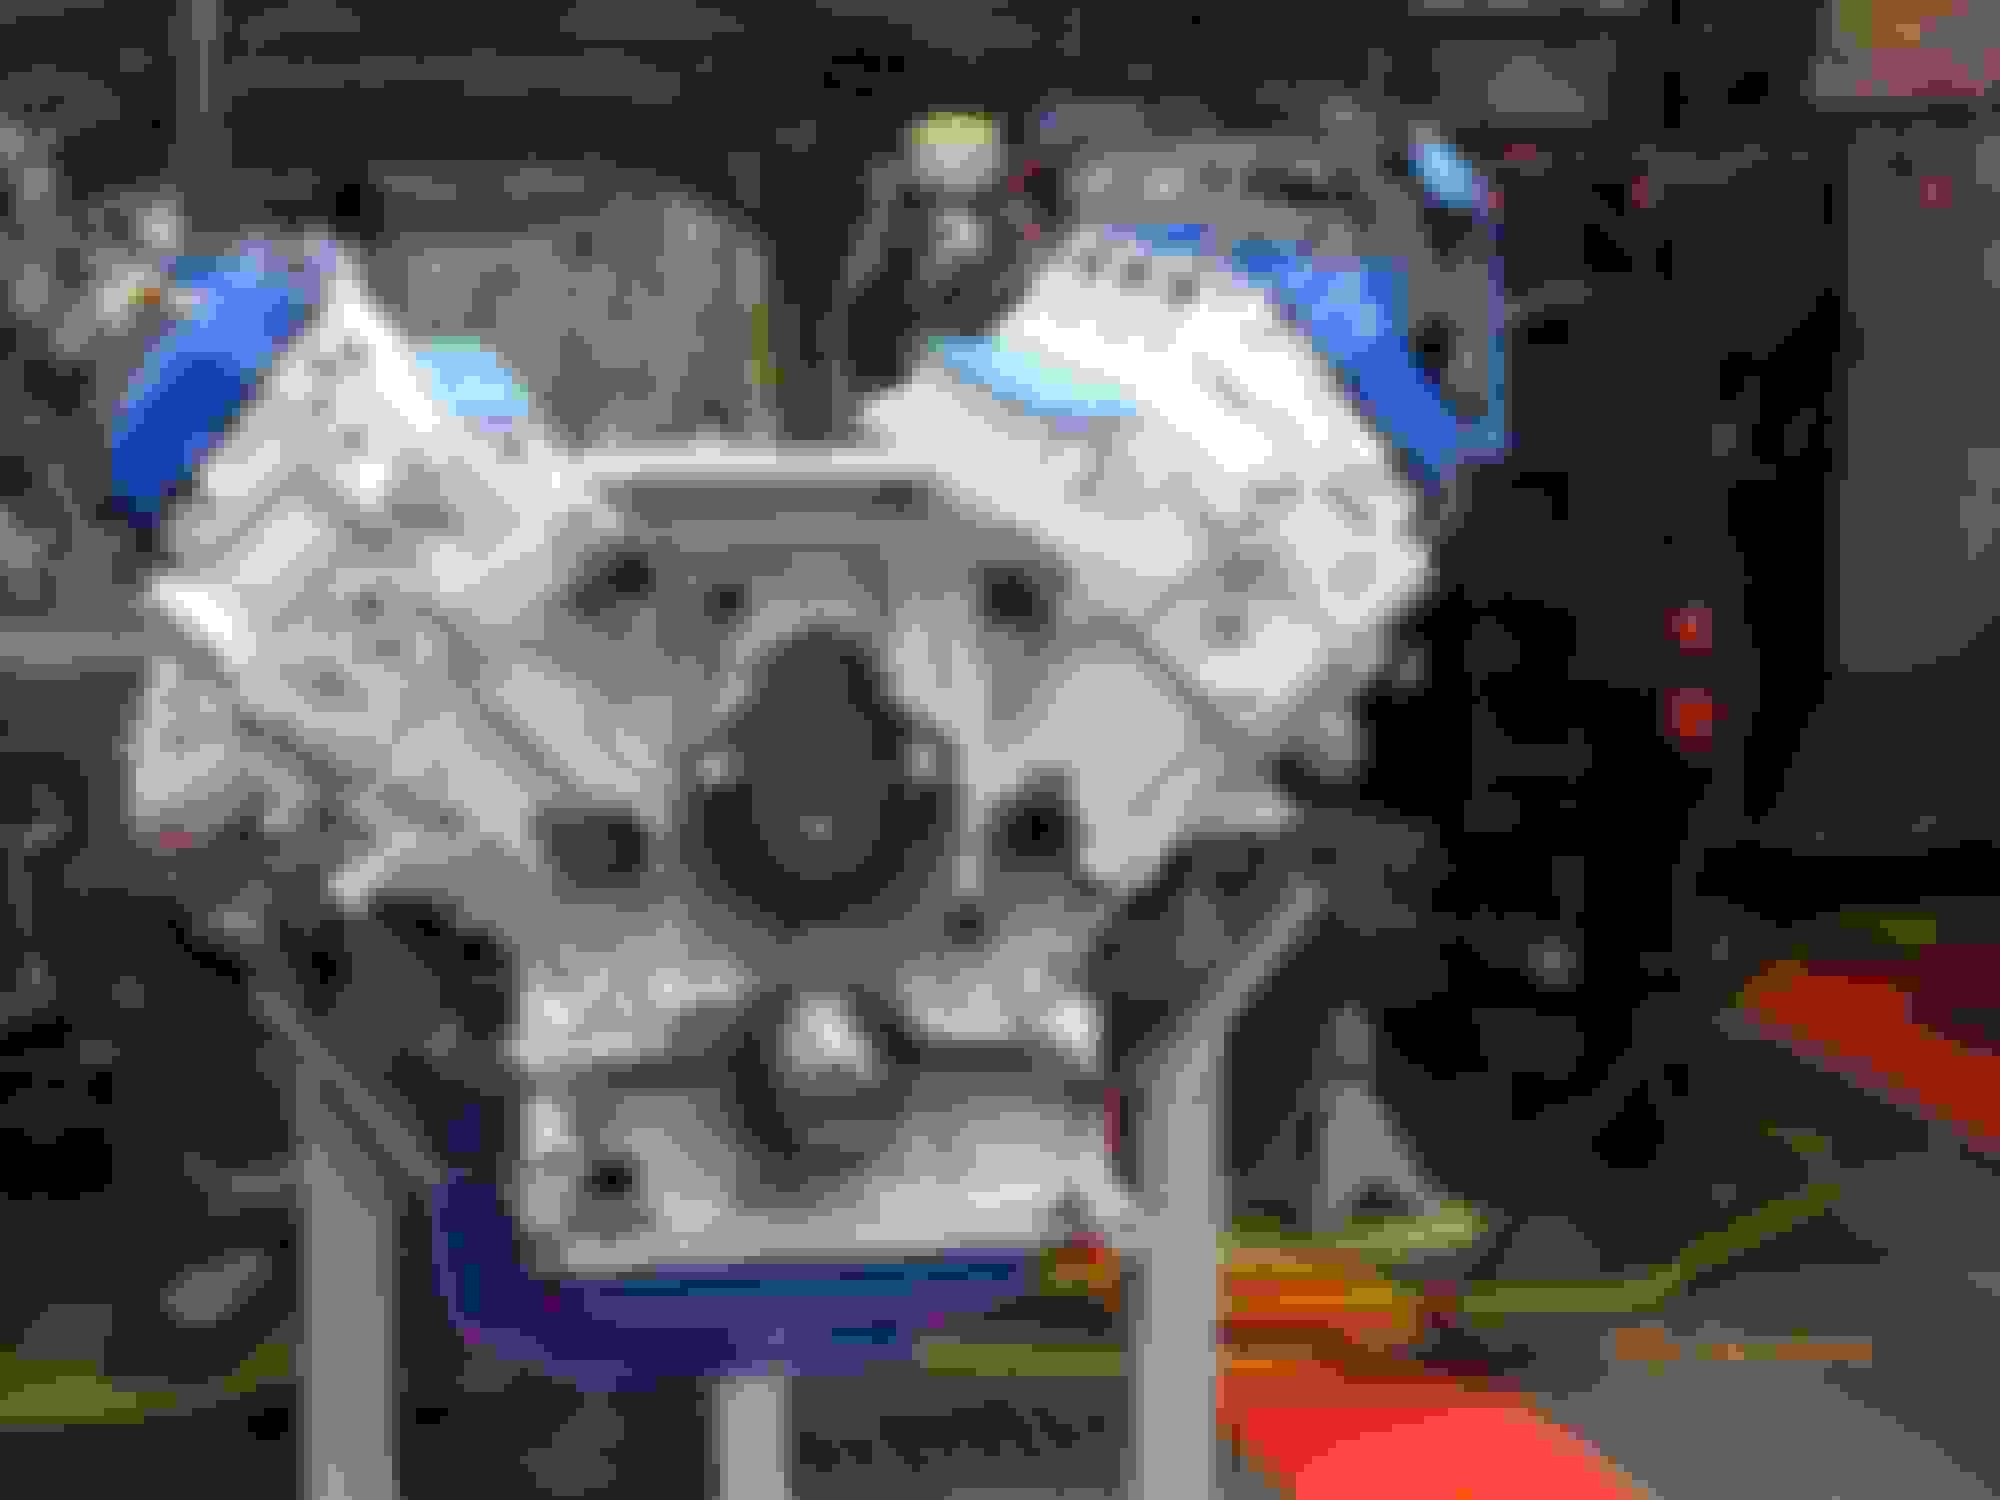
The engine may be ready for installation in about 3 days, but I'll set it aside for a while. I need to spend a few days on the rust in the engine bay, down in the frame, suspension and steering area. I'll knock off the worst of the scaling rust and then paint over it with rust inhibiting paint.

I'm liking the appearance of the engine so much I may put it in the family room as a conversation piece.
 
  #233  
Old 02-16-2019, 07:47 PM
87crewdually's Avatar
87crewdually
87crewdually is offline
Lead Driver
Join Date: Dec 2006
Location: So. Jersey
Posts: 6,493
Received 90 Likes on 65 Posts
Yeah, you're at the stage now that at the end of the day your lab coat is still white. Almost too enjoyable.
 
  #234  
Old 02-16-2019, 08:32 PM
HTM101's Avatar
HTM101
HTM101 is offline
Tuned
Thread Starter
Join Date: Apr 2017
Location: Maryland
Posts: 275
Likes: 0
Received 1 Like on 1 Post
Originally Posted by 87crewdually
Yeah, you're at the stage now that at the end of the day your lab coat is still white. Almost too enjoyable.
That’s fairly accurate. Today I didn’t put coveralls on. First day dressed like that!
 
  #235  
Old 02-17-2019, 08:18 AM
HTM101's Avatar
HTM101
HTM101 is offline
Tuned
Thread Starter
Join Date: Apr 2017
Location: Maryland
Posts: 275
Likes: 0
Received 1 Like on 1 Post
Metal Junk

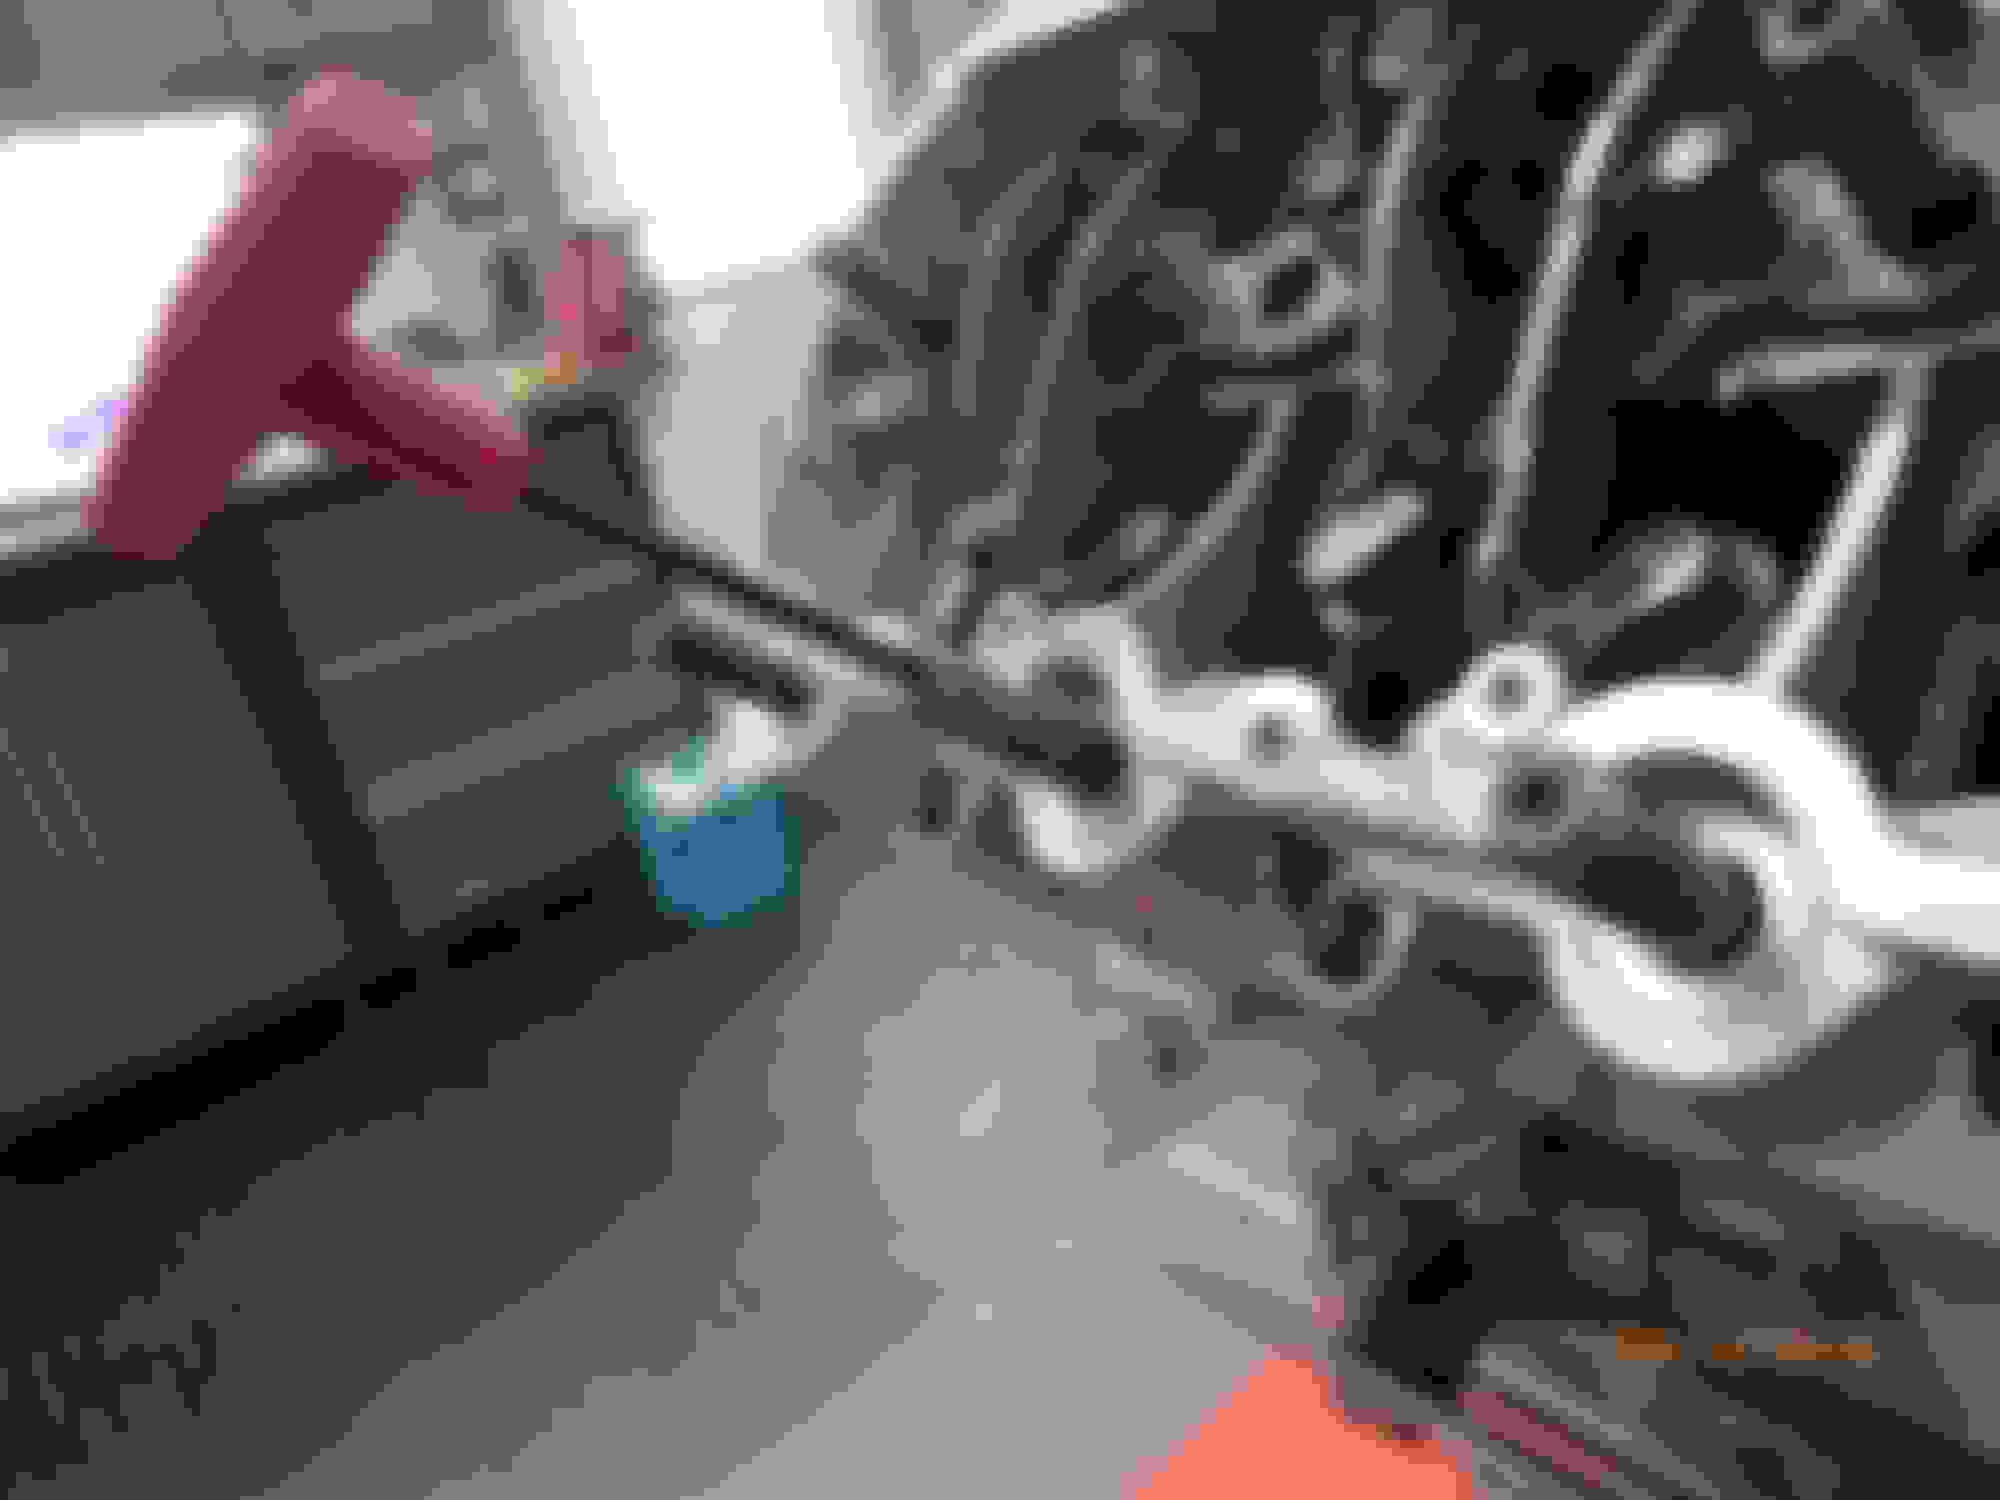
Friday I was washing the oil pickup tube, the one that hangs down deep in the oil pan. As I was shaking the excess water out of it, a piece something fell out. I shook it some more and 2 more pieces dropped out of the screened end. They jumped to my magnet. I guess they may have been riding in the screen since somewhere back at the beginning of the engine's life.


  #236  
Old 02-17-2019, 08:51 AM
BBslider001's Avatar
BBslider001
BBslider001 is offline
Hotshot
Join Date: Mar 2012
Location: Texas
Posts: 10,628
Received 376 Likes on 268 Posts
What the??!! I wonder if that is old casting that molded together? Hard to say.....jeeez that's crazy.
 
  #237  
Old 02-17-2019, 09:10 AM
HTM101's Avatar
HTM101
HTM101 is offline
Tuned
Thread Starter
Join Date: Apr 2017
Location: Maryland
Posts: 275
Likes: 0
Received 1 Like on 1 Post
Jack should have an educated opinion on those pieces.
 
  #238  
Old 02-17-2019, 09:28 AM
TooManyToys.'s Avatar
TooManyToys.
TooManyToys. is offline
Hotshot

Join Date: Dec 2014
Location: Jersey Shore
Posts: 16,428
Received 2,075 Likes on 1,405 Posts
Geeze, and I'm trying to stay out of your thread. Engine looks great BTW. Must be a Shelby love trait to do this kind of stuff no matter what.

I wish I could say the first piece was an attempt by the motor for some Valentine's Day love, but that sure looks like some casting flash in flat view. If I'm reading this right, those were in the post screen side of the pickup. I'm guessing you've already looked to the oil pump gears for indentations. That kind of debris would eat the gearing madly. During disassembly, transport, and washing if there a possibility that those items came from elsewhere and got transported into the pickup rather then initially residing in there?
 
  #239  
Old 02-17-2019, 10:05 AM
HTM101's Avatar
HTM101
HTM101 is offline
Tuned
Thread Starter
Join Date: Apr 2017
Location: Maryland
Posts: 275
Likes: 0
Received 1 Like on 1 Post
Jack,
Your advice and opinions are valued. Please step into the thread anytime. Thanks for the compliment re: the engine.

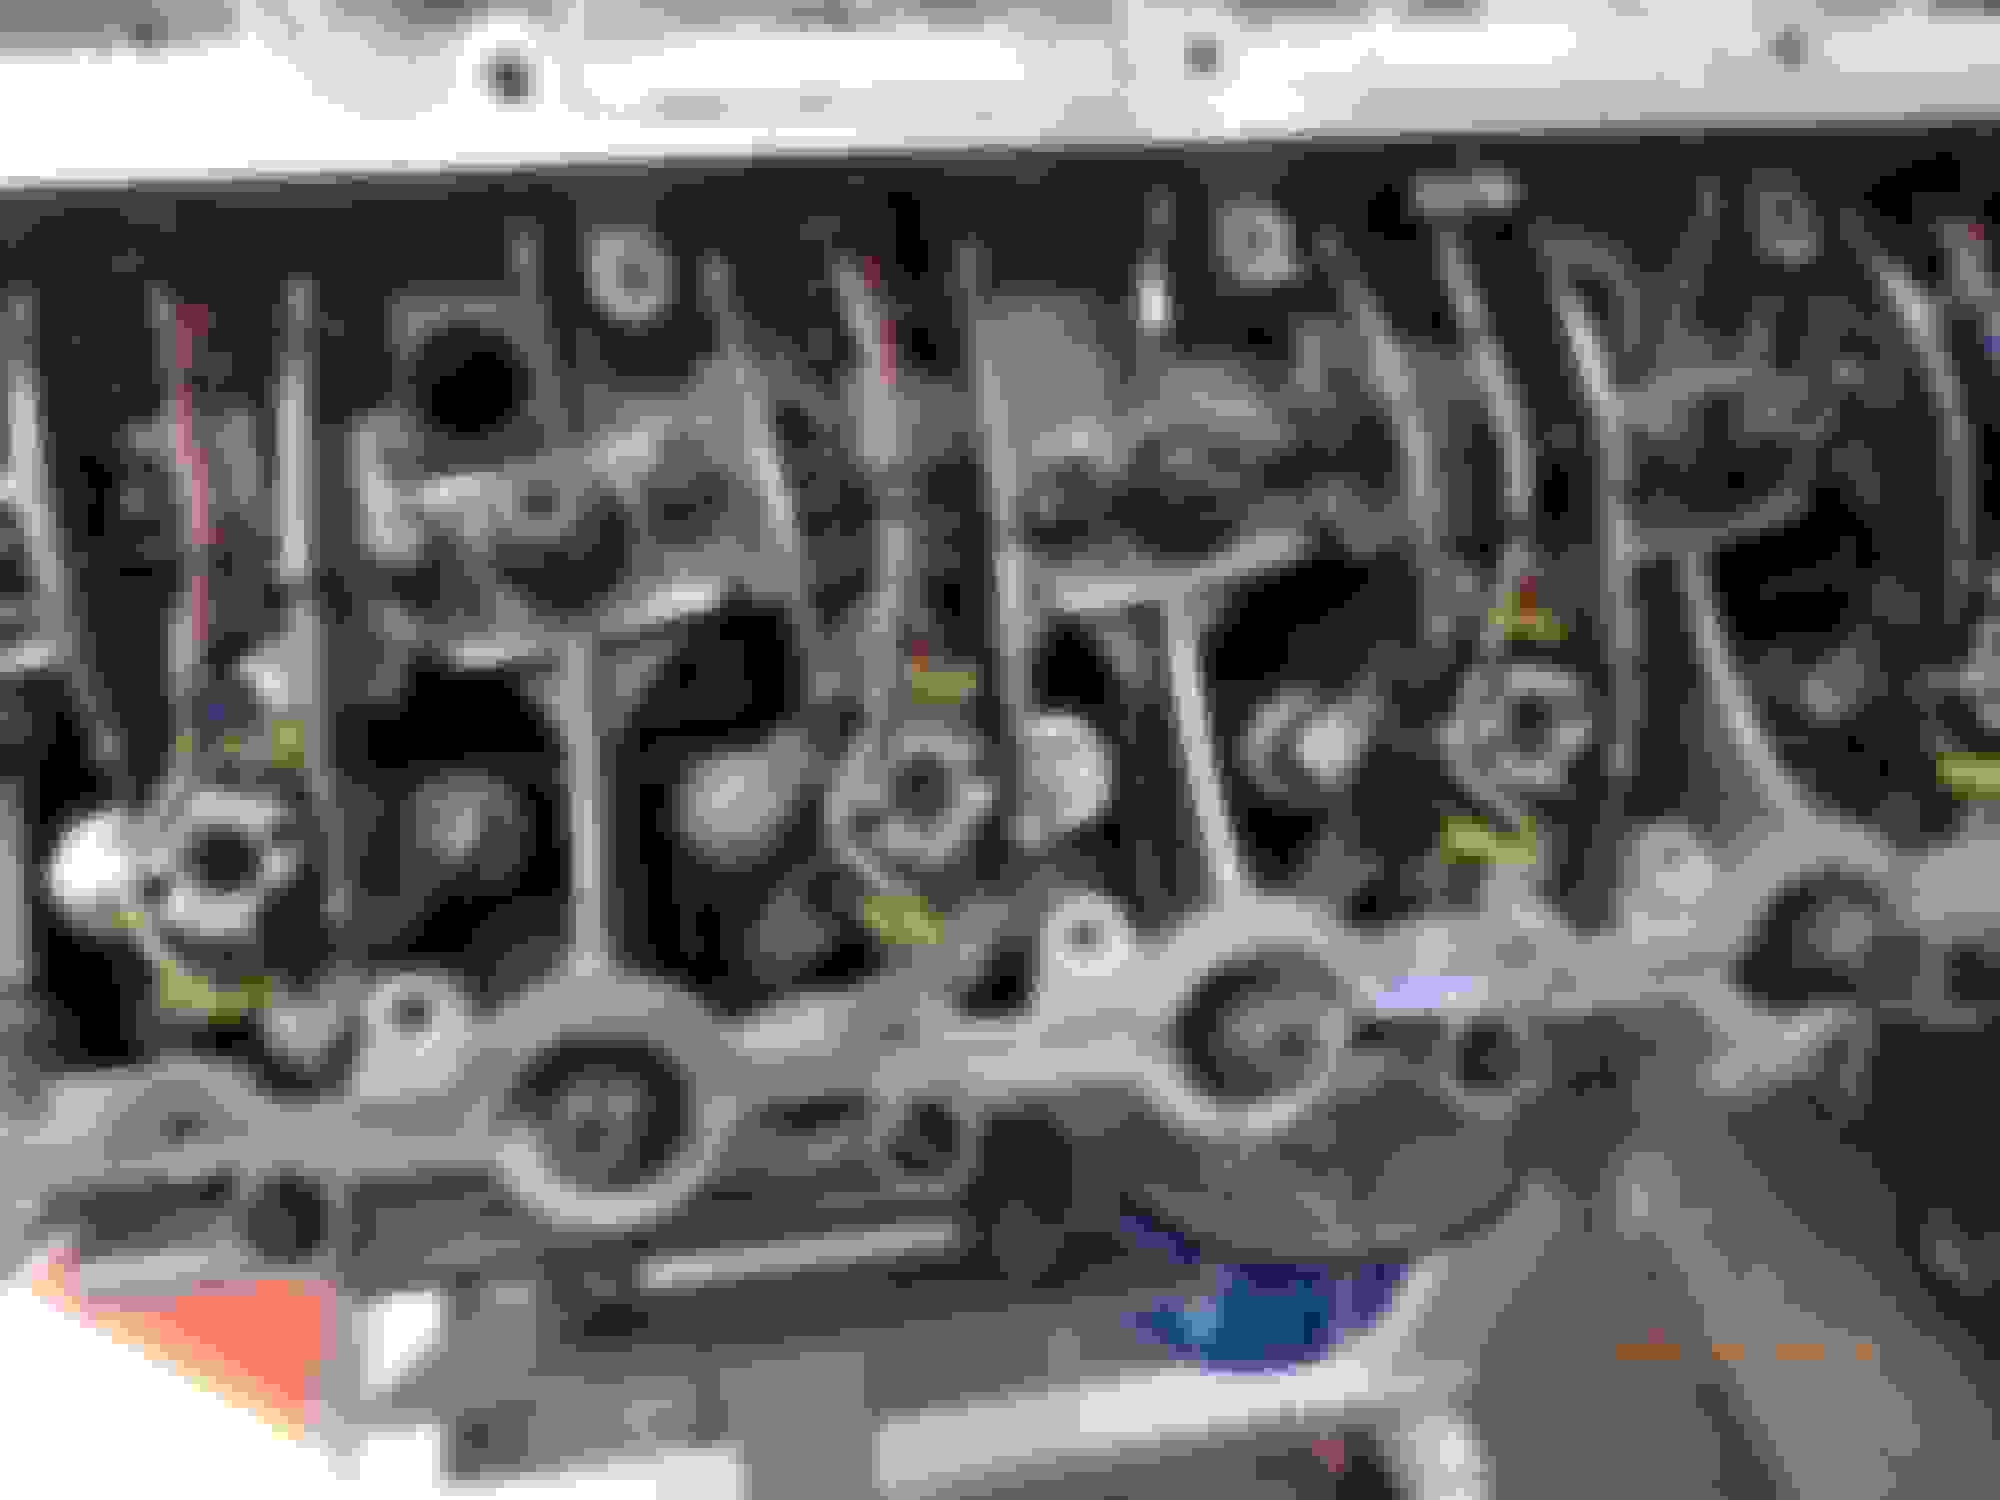
I just now pulled the pump gears apart. The outer gear shows debris contact on 4 teeth. The inner gear has evidence on each tooth. Do they seem minor in your opinion?

Outer gear.


Inner gear.

 
  #240  
Old 02-17-2019, 10:44 AM
TooManyToys.'s Avatar
TooManyToys.
TooManyToys. is offline
Hotshot

Join Date: Dec 2014
Location: Jersey Shore
Posts: 16,428
Received 2,075 Likes on 1,405 Posts
Remember, I have the 6.0L experience of 1, only one.

I didn't show the oil pump gears in the video as they are not that bad and could use the footage in another video. I had enough material in the Rocky Horror Picture Show. Mine does show distress of bearing material or debris going through, more than the front cover housing and oil pump cover lead do. More then yours does.

Yours looks like a bit of debris, easily caught in the filter or HPOP screen, so possibly a one and done. The pump gnawed on it generating a few minor cavities, I wouldn't expect that amount of deviation on the surfaces to alter oil flow volume or pressure.

I'm doing maintenance at the hair salon and heading to the farm, but when I get back home I'll show images of my pump gears.


Quick Reply: Removing the Engine


All times are GMT -5. The time now is 11:22 AM.