When you click on links to various merchants on this site and make a purchase, this can result in this site earning a commission. Affiliate programs and affiliations include, but are not limited to, the eBay Partner Network.
I'll be performing a headlight and fog light LED conversion on my X, and I'll be using the 2007 housings and the 2007 headlight support I just bought from Ford. I'm looking at the Morimoto M LED projector kit from the Retrofit Source.
Has anyone here already done this up-fit using the Morimoto kit? If so what is your opinion of it's effectiveness, did you like it, Etc.
Nice. I've done a couple on motorcycles, and I have a set that I'm hoping to install on the Excursion one of these days... I'll be watching your progress with interest - please share your tips!
just did the hid kit from them. Was'nt to bad there kit for 05 and up had every thing in it. I up dated my front before so I had they adapters for the newer bulbs of 05 and up already. And everything plugged right in. You'll only need the one adapter for the passenger side. If you don't have the adapters maybe you will want to get the kit for the 04 and older? Not sure.
I'd post pictures but out of town till next week. Awesome kit.
I should also say don't reseal the lens cover back on till you mount them and make sure cut off lines are level both sides. Also you might want to put a small notch in the light housing for the shutter wires so not crushed by the washer and lock nut. Been there done that.
I should also say don't reseal the lens cover back on till you mount them and make sure cut off lines are level both sides. Also you might want to put a small notch in the light housing for the shutter wires so not crushed by the washer and lock nut. Been there done that.
Please elaborate a little. I'm a little blind on this project, both links I posted don't give detailed instructions for the install, so I'm going to find these little nuances out as I go, which is ok, not a daily driver, so unexpected down time won't be so bad. I wonder if the HID and LED kits are the same where the housing is concerned.
The previous owner replaced the headlights with an 05-07 aftermarket euro style, I still have to look at what he did for harness plugs etc, the lights were forced into the original 2001 support and secured with drywall screws at the tops. I don't think he even cut out the support for a proper fit.
What cut off lines are you referring to, the line of the beam?
The intended install did not account for the shutter wire to comfortably pass through?
The proper process to open the housings is an oven heated to 270, and housings in for 8 min?
Please post any pics you have when you are able to.
From the motorcycle installs I did, it was difficult to tell where the beam was going to point as there is no way to reference it while holding a projector lens in a housing on a bench. You can easily wind up with one pointed too high and one pointed too low. So yes, aligning the cutoff is important as there is only so much adjustment in the housing before it starts to look wonky re: the alignment with grille and body. I'm not sure if there is a good way to do this other than with the housing mounted on the vehicle, and then energizing an unsecured HID has a boatload of potential issues.
The shutter needs two small wires to pass through the rear of the lens housing, and the existing bulb hole will not usually accomodate it. You will need to make a small notch for the wires, and best practice is to seal it up so the housing doesn't get dust or water inside.
As for releasing the glue on the housings, I've found a huge variance in melt temperatures of glue in the housings from different manufacturers. It's going to be a "try it and see" experience - have patience, work at getting a pry tool under an edge carefully, don't try to rip the whole thing off in one go if it isn't cooperating. I think I had to go to 325* on one set, couldn't believe the glue was holding and the housing wasn't distorting. A pair of silicon oven mitts is very helpful for this stage.
Just as mentioned above I did have to mount the light housing with the lens and projector shroud off in my Ex to check the light beam cut off for the Hids. The first time I only put in the 2 top screws and not the bottom. It turned out off, to my liking so I redid it. Next time i put the corner bottom screw in to.There is a keyed washer in the kit that mounts on the treaded shaft of the projector that I believe helps you clock the projector ,Itraced it's outline with a pencil on the housing when I got the cut off line were I wanted it. I did that BECAUSE I had to disasimble again, to trim the light shroud so that it fit more snug inside the head light housing. You might not have to do that. I also trimmed the backside of the light housing were the original bulb goes to allow for more of the treaded shaft on the projector to protrude through to tighten the anchor nut to. I just used a Dremel with I believe 1inch cut of wheel to cut off inserted into housing were the bulb went and cutter from the inside out. That way I didn't have to completely remove he original reflector housing. To cut straight, mine
wouldn't come all the way apart. As far as the kit from retro source when I purchased my kit the headlight were hid projector and the for were led.? Cool if there both led now. I spent more time stressing about the install then actually doing it,it all came together when installing on Ex. Good luck there awesome lighting for my old eyes.
When removing the chrome piece out of the headlights be careful. The piece that it pivots on will break very easily. I did the mini H1 retro fit. They came out pretty good, but I am going to redo them. I have another set of after market headlights and a set of OE headlights. Shave as little as you need to get the nut to fit, and make sure you stay aligned when you are doing that. The piece that covers the bulb on the OE bulb punches out and you can run the wires thru there.
When removing the chrome piece out of the headlights be careful. The piece that it pivots on will break very easily. I did the mini H1 retro fit. They came out pretty good, but I am going to redo them. I have another set of after market headlights and a set of OE headlights. Shave as little as you need to get the nut to fit, and make sure you stay aligned when you are doing that. The piece that covers the bulb on the OE bulb punches out and you can run the wires thru there.
I wondered about the OE bulb metal shield inside having to be removed. These are supposed to be full LED only projector lights. I'm not adding the halo's or choice of bezels either.
I looked at the new OE housing/reflectors today, the full one piece appears to just fasten to the new fiberglass support with no adjustment, and it appears that you are supposed to only use the reflector adjustment screw once the projectors are installed.
I'm sure this will all make complete sense once I have the kit in person.
From the motorcycle installs I did, it was difficult to tell where the beam was going to point as there is no way to reference it while holding a projector lens in a housing on a bench. You can easily wind up with one pointed too high and one pointed too low. So yes, aligning the cutoff is important as there is only so much adjustment in the housing before it starts to look wonky re: the alignment with grille and body. I'm not sure if there is a good way to do this other than with the housing mounted on the vehicle, and then energizing an unsecured HID has a boatload of potential issues.
The shutter needs two small wires to pass through the rear of the lens housing, and the existing bulb hole will not usually accomodate it. You will need to make a small notch for the wires, and best practice is to seal it up so the housing doesn't get dust or water inside.
As for releasing the glue on the housings, I've found a huge variance in melt temperatures of glue in the housings from different manufacturers. It's going to be a "try it and see" experience - have patience, work at getting a pry tool under an edge carefully, don't try to rip the whole thing off in one go if it isn't cooperating. I think I had to go to 325* on one set, couldn't believe the glue was holding and the housing wasn't distorting. A pair of silicon oven mitts is very helpful for this stage.
At 325 did you feel that the poly carbonate lens or housing was getting soft?
I am able to pick at some of the excess factory sealant on the new OE housings that had pressed out a little during assembly, at room temp, it's tough but pretty pliable.
At 325 did you feel that the poly carbonate lens or housing was getting soft?
I am able to pick at some of the excess factory sealant on the new OE housings that had pressed out a little during assembly, at room temp, it's tough but pretty pliable.
When using a screwdriver to begin prying at an edge of the lens, yes - it gouged easily when twisting the screwdriver. But it didn't go very deep, and it wasn't visible once sealed. The housing seemed fine, but it was HOT to work with. And it cools quickly, tough to get a lens off in one go. Then again, these were fairly large motorcycle headlamps.
My advice would be to start at the lowest recommended temp, and move up in 10 degree increments if you don't have luck at the lower temp.
I was thinking of incrementing the temps too, also looked like a good putty knife would work well on these housings to release the tabs, and start the case opening.
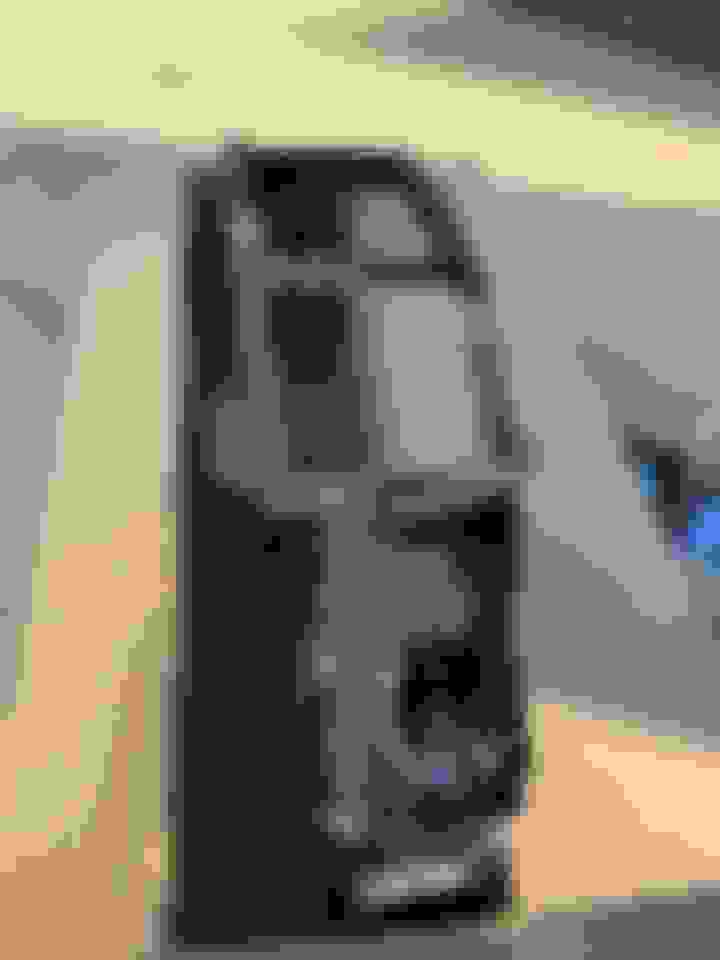
All ready to go back on the truck.. One other thing are you in a big rush? There are some pretty good black Friday deal that are coming up...I think they usually run a 20/25% off sale. I know I am going to pick up a set for my Audi at that time. I buy mine from lightwerx...when you sign up they also send you a coupon.
Last edited by agsmv1; Oct 21, 2018 at 09:46 AM.
Reason: added infor
Looks good, are those HID, or LED? I think I'll be fine with the standard bezel too.
No rush here, not doing anything with it till after this Wednesday, company will be in town and the pontoon boat is setting sail. I'm expecting a few unexpected s after I start, possibly grounding the vehicle till whenever. I hadn't planned on ordering the projectors till I take my current setup apart, paint the header support to match the truck, and see how the new headlights/header fit, also need to get my new style plugs sorted out too.
This Hennessey Takes the Expedition Tremor's Off-Roading Capability to the Next Level
Slideshow: The VelociRaptor Expedition gains a lift, upgraded suspension, Brembo brakes, and trail-ready equipment while retaining the stock 440-horsepower EcoBoost V6.
Rezvani's Latest Post-Apocalyptic Monster Is a Ford F-150 Raptor Underneath
Slideshow: Called the Fortress, the 850-horsepower pickup combines Raptor underpinnings with military-inspired features, survival equipment, and a starting price of $285,000.