
C6 to a ZF5--All the small stuff.
#91
 01-24-2019, 09:06 PM


Yeah, I think I will. It should go quickly. I hope to do it while the shafts are standing vertically in/on the rear section of the case housing. I also have to recheck the preload clearance. The book says between .00079 and .00434 on the main shaft freeplay. Talk about splitting hairs. Geez Louise. I remember being a teenager in a pinch and setting the points gap with a match book cover. I guess this is not like that, ha ha. Now I have to round up a dial indicator.
I need to finish reading, only half way thru and the suspense has got me.
I'll be converting a 2WD ZF5 into a 4WD and stuffing it into a 78 Bronco between a 460 and a NP203. originally had a C6. (note: may take "awhile")
#92
01-24-2019, 09:14 PM
that calculates to .02mm and .11mm respectively. the hairs just look worse because of the math conversion. anything between .001" and .004" should work fine.
I need to finish reading, only half way thru and the suspense has got me.
I'll be converting a 2WD ZF5 into a 4WD and stuffing it into a 78 Bronco between a 460 and a NP203. originally had a C6. (note: may take "awhile")
I need to finish reading, only half way thru and the suspense has got me.
I'll be converting a 2WD ZF5 into a 4WD and stuffing it into a 78 Bronco between a 460 and a NP203. originally had a C6. (note: may take "awhile")
#93
01-29-2019, 11:48 PM
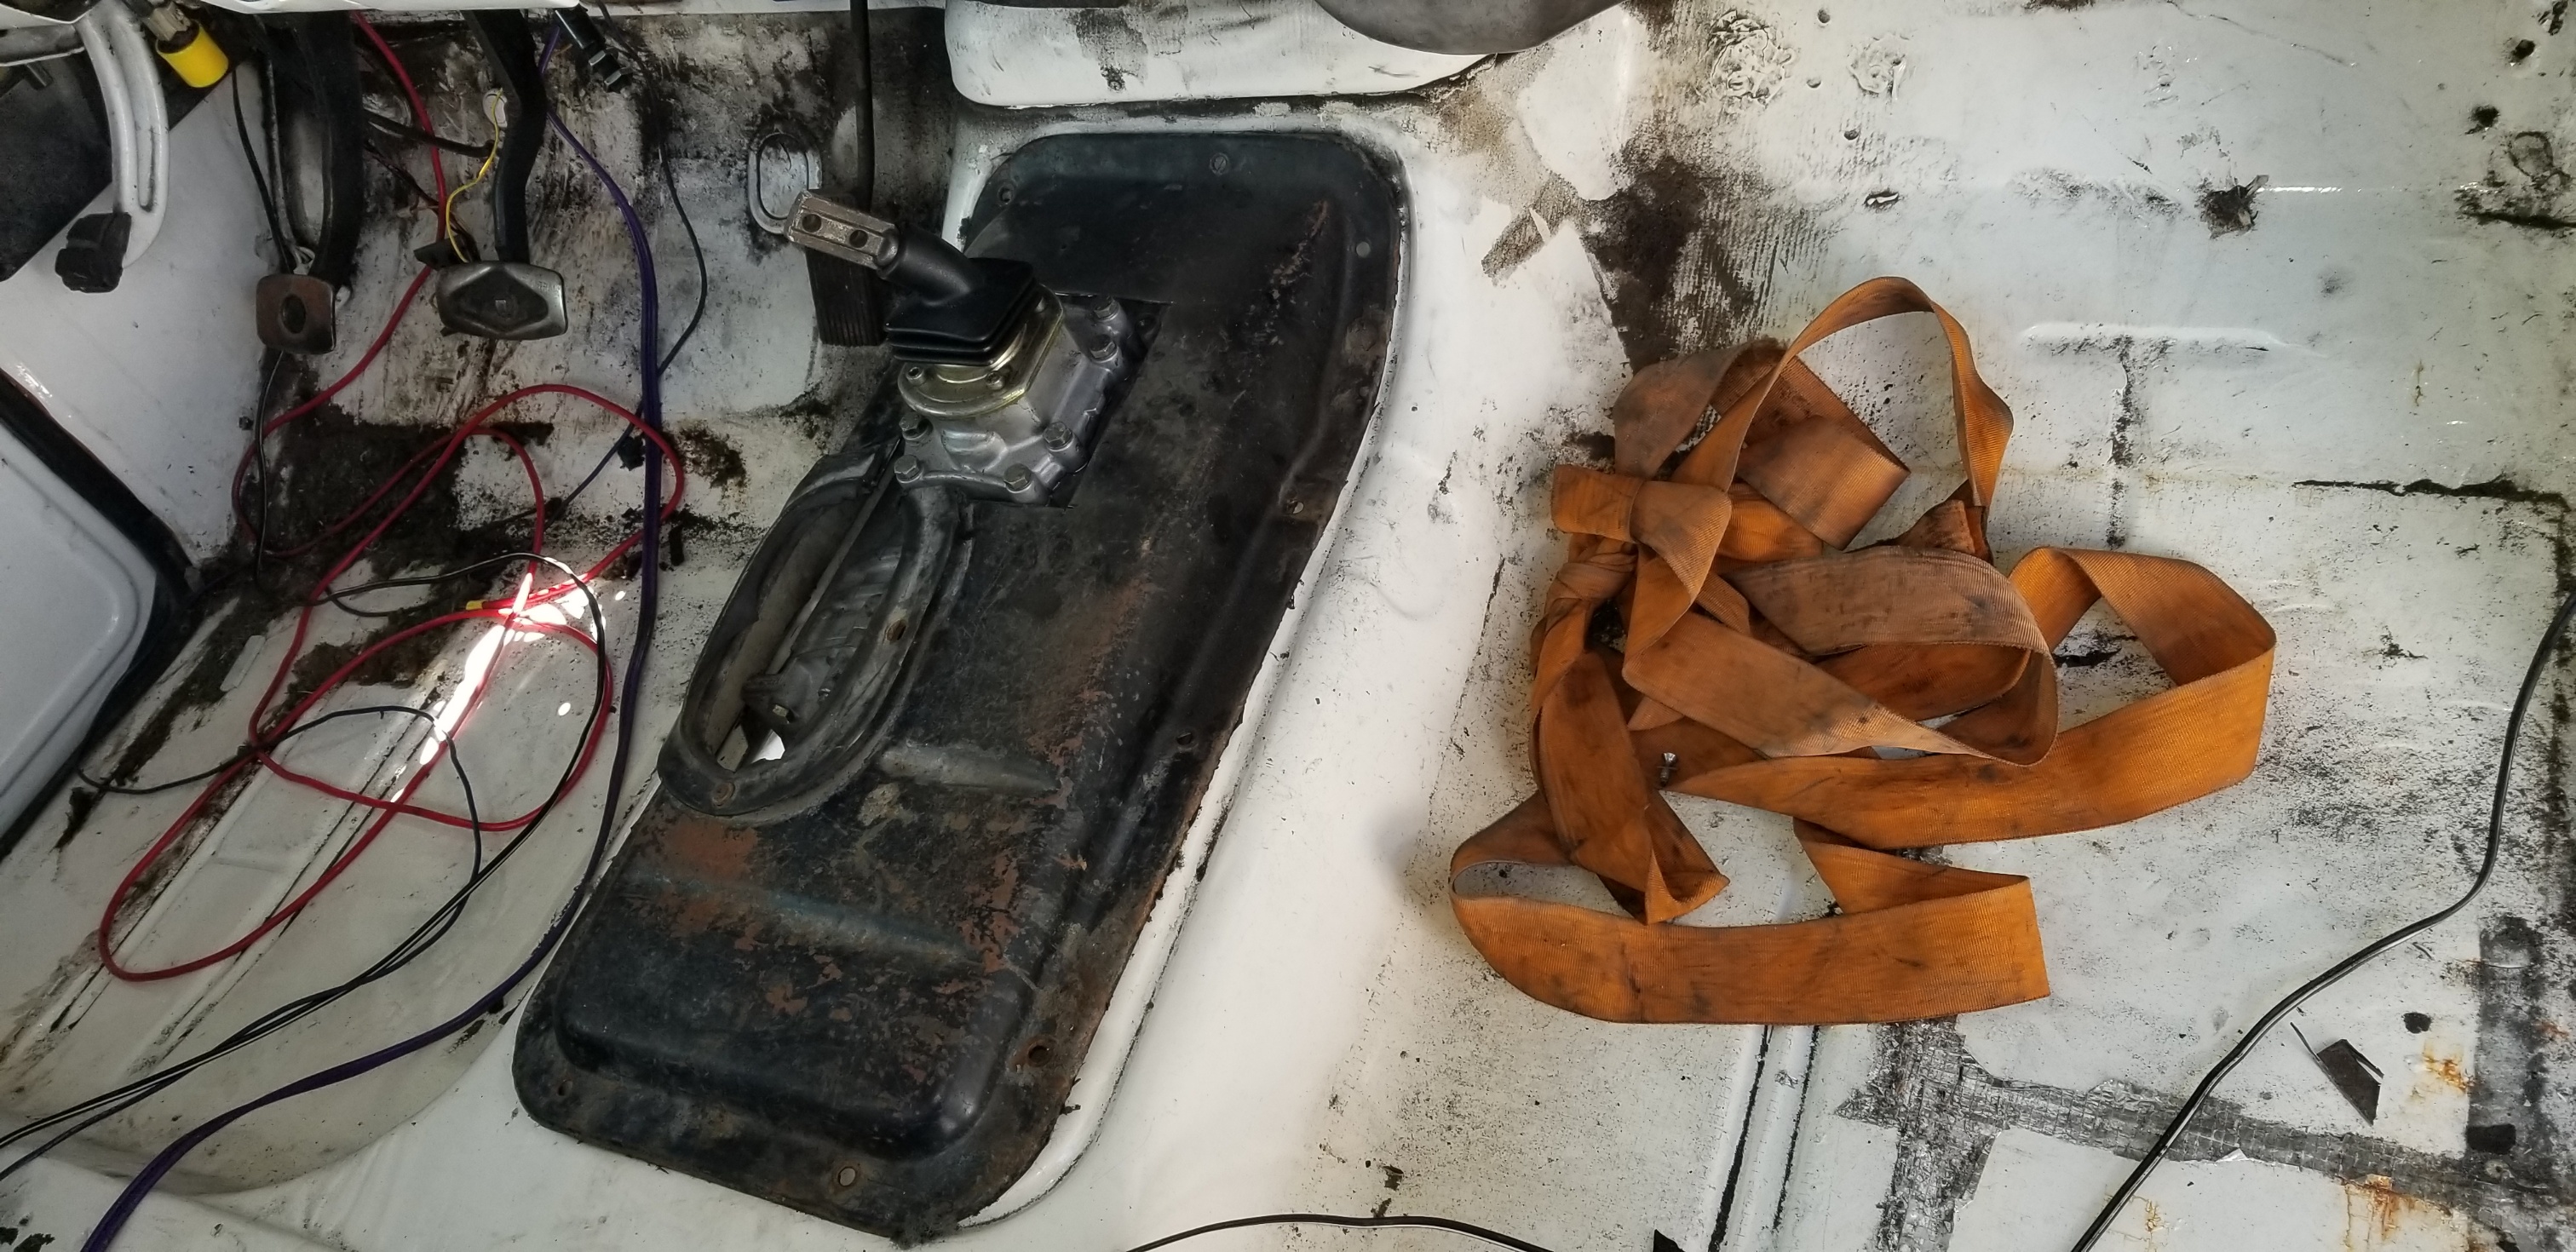
I'm upgrading my p/s pump to a 'canned ham' or Saginaw pump to supply good power to the steering and braking with the hydroboost unit. This unit came oe on a 1976 Ford LTD wagon with a 460. Notice it has dual return line inlets for a Hydroboost. I just have to cut off the hose clamp flair in those lines so I slip on Aeroquip compression fittings.
Attachment 280176
The easiest way to find a bracket for the Saginaw pump is to take one off an Econoline van with your engine in it. Note: see that bolt on the back of and p/s pump? Be sure to take it from the j/y pump. They are near impossible to come by, and needed for the bracket to mount on.
Attachment 280176
The easiest way to find a bracket for the Saginaw pump is to take one off an Econoline van with your engine in it. Note: see that bolt on the back of and p/s pump? Be sure to take it from the j/y pump. They are near impossible to come by, and needed for the bracket to mount on.

#95
01-30-2019, 11:22 PM
I put together the front of the engine and began trying out different Saginaw brackets that came off Econoline vans. One is so darn long that it looks like a wing hanging off the engine. Keep in mind that the engine is a 300 inline, and that it is sitting 90* to how it will sit in the engine compartment, but you get the idea with the different brackets. The one positive with the long one is that it mounts to the block with 4 bolts, and the other bracket mounts with 3. Huh.
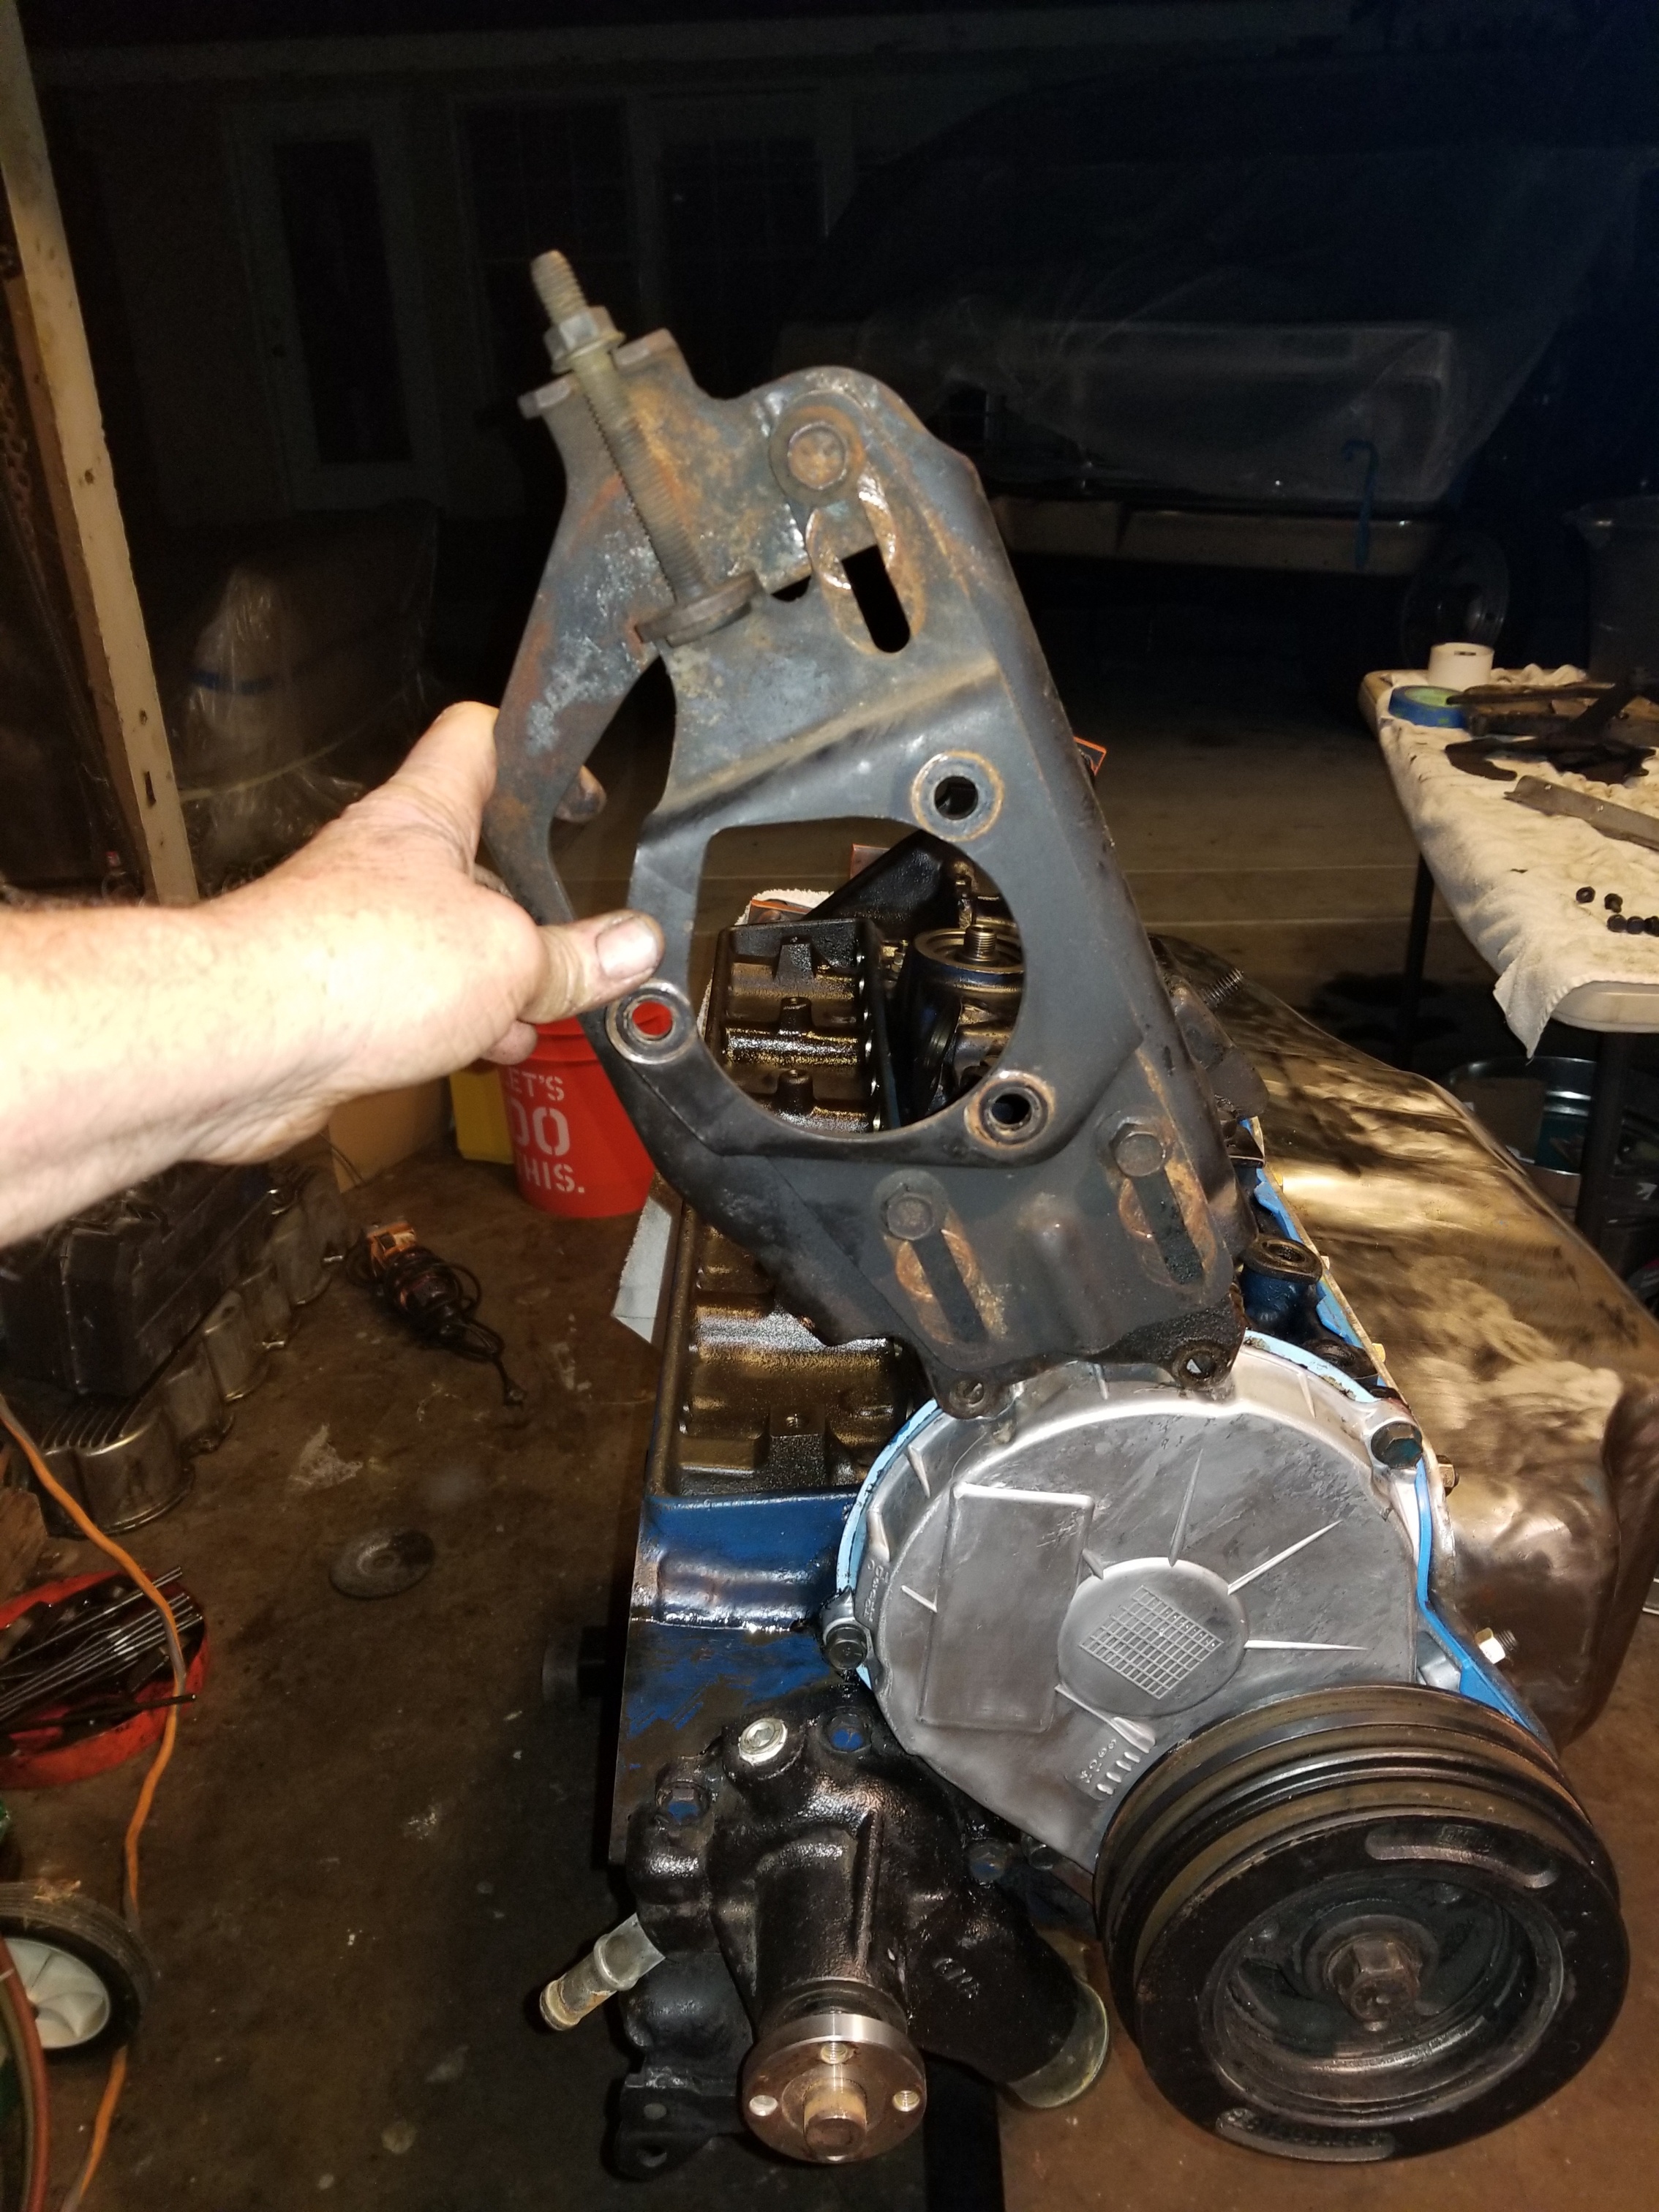
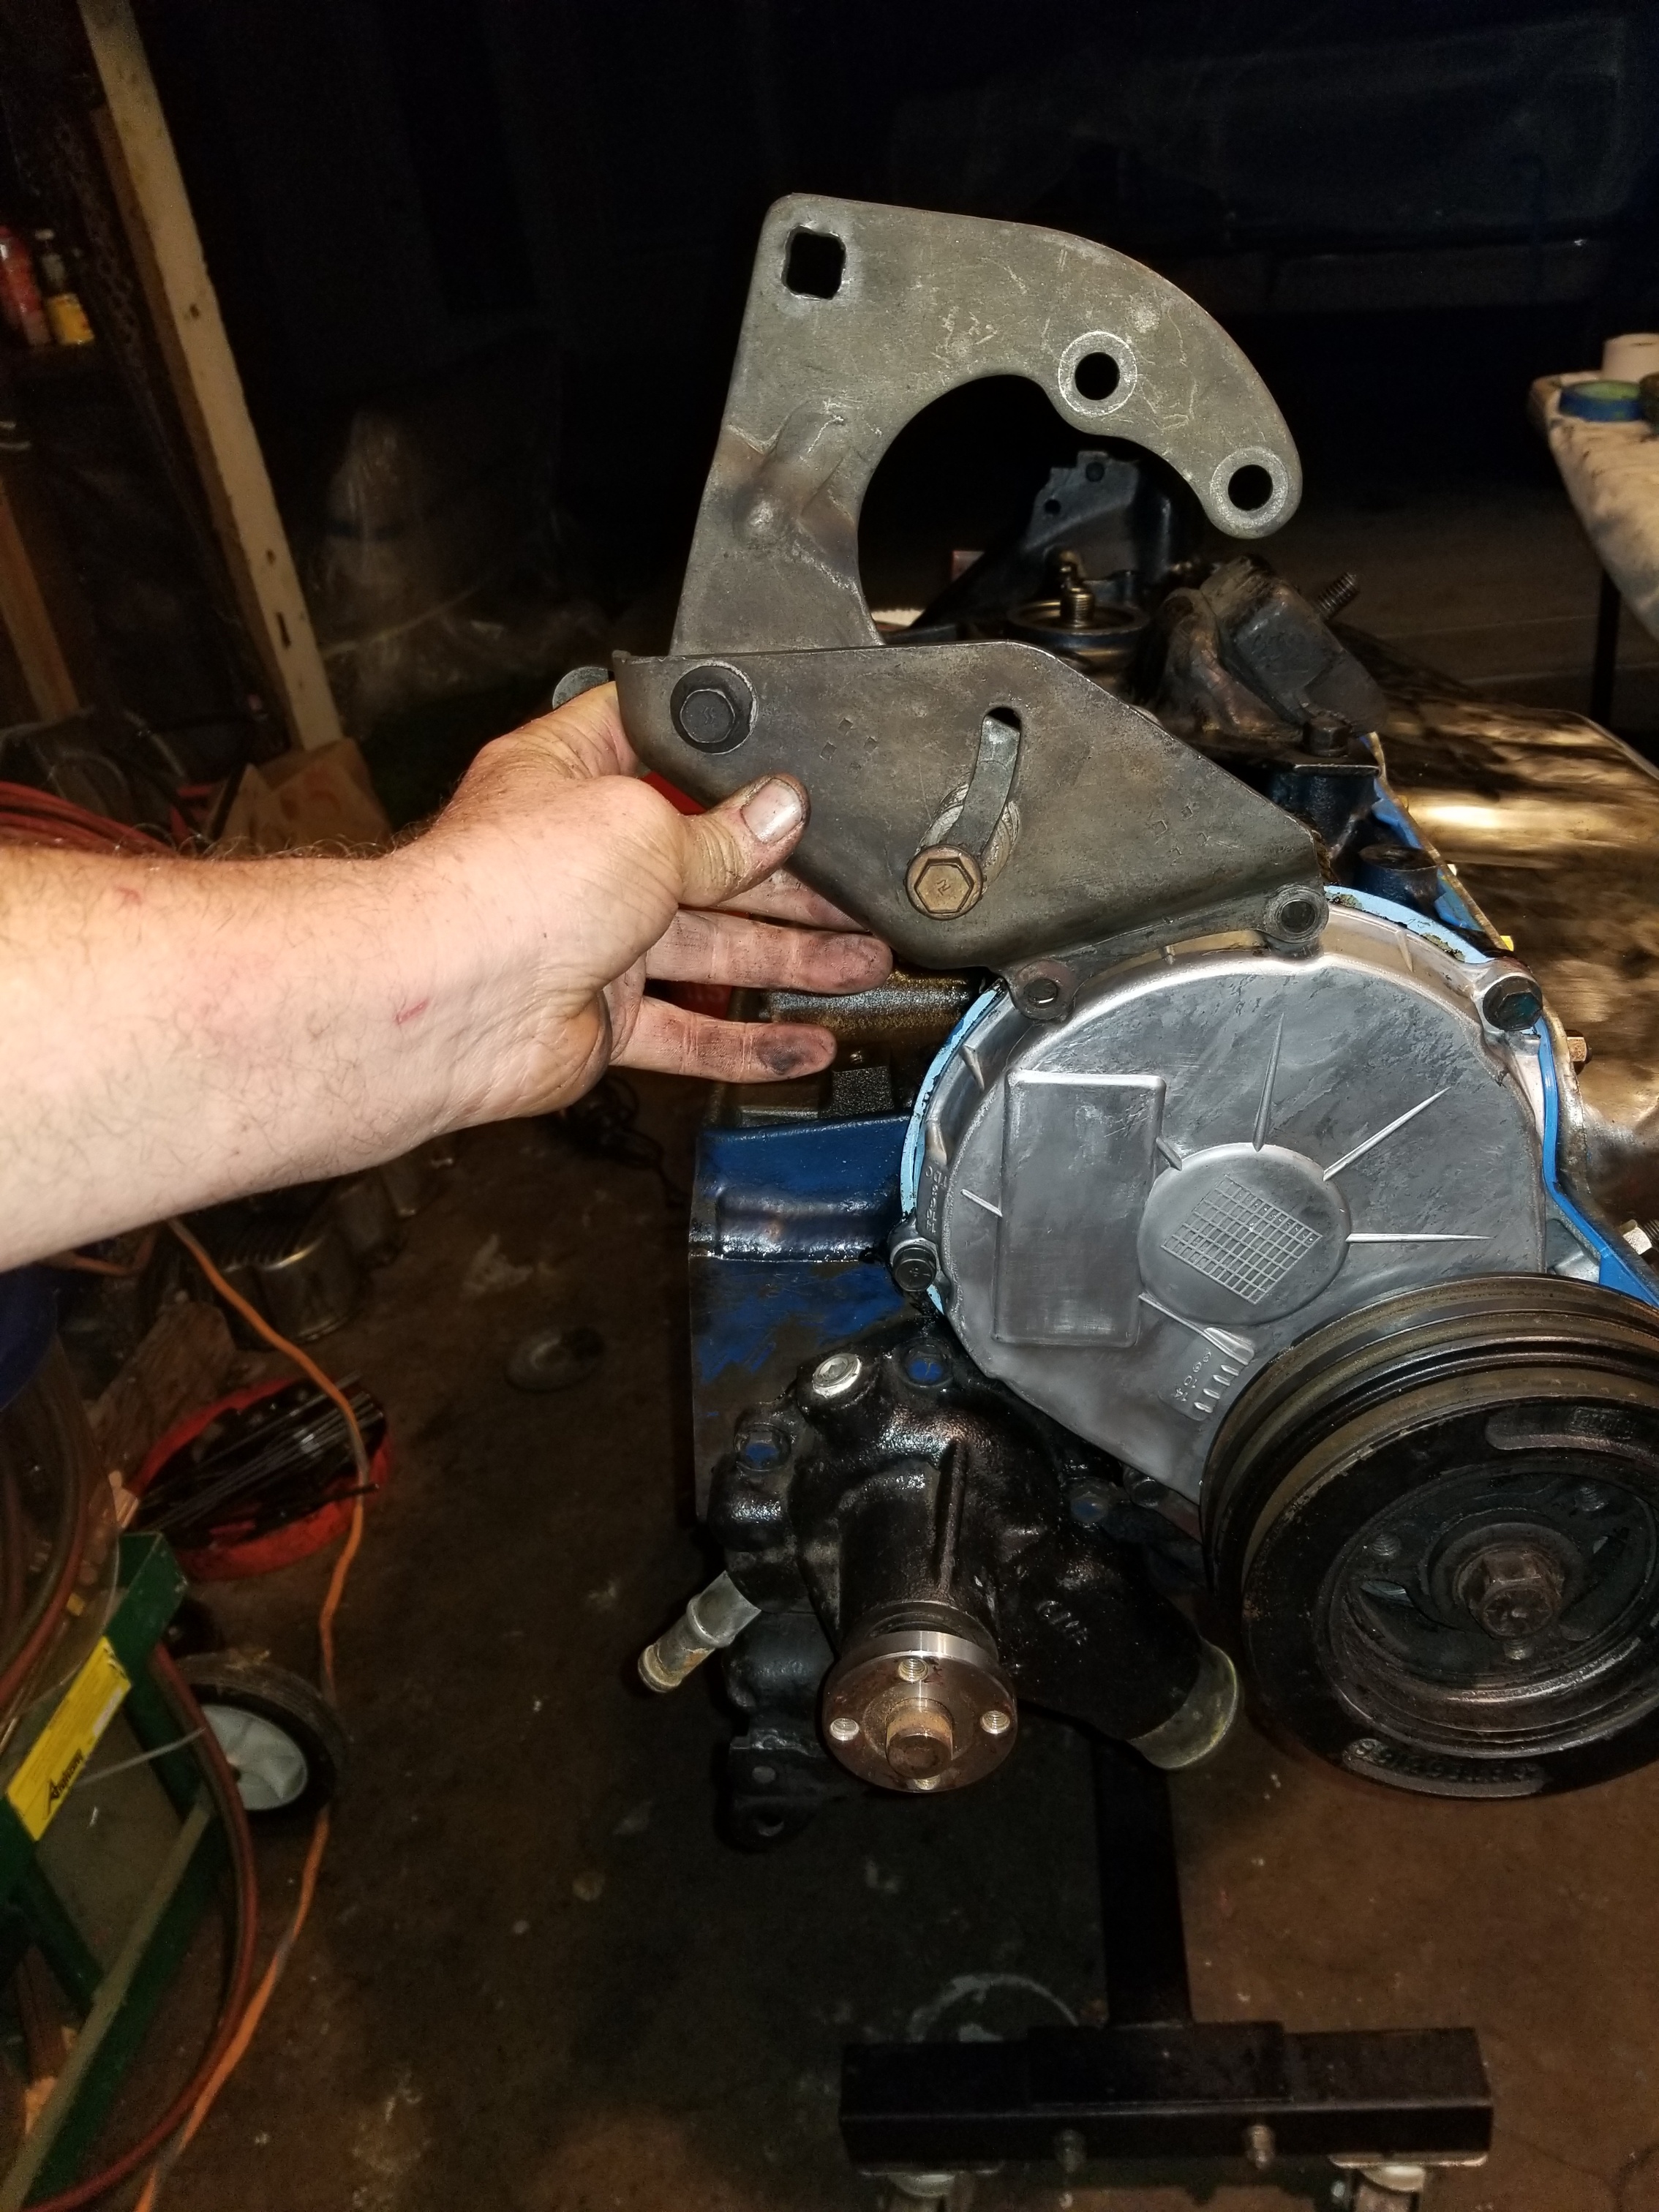
I have to wait and see which one will line up the Saginaw with the belt groove on the harmonic balancer.
I have to wait and see which one will line up the Saginaw with the belt groove on the harmonic balancer.
#96
02-01-2019, 09:51 AM
#97
02-06-2019, 09:36 AM
Finally able to get back to the project. Yesterday I finished welding in the braces for the Clutch master plate. There will be zero flex of the firewall since the braces are welded to the pedal assembly.
Attachment 280535
I also welded in a vertical support from the pedal stop to the bottom of the plate. You can see a mock up of that brace here.
Attachment 284012
With the hydroboost the other other aspect of the system is the p/s pump. I ran the oem ford style for a few years, but got tired of it having lazy steering in parking situations. It felt almost like manual when I was trying to quickly manuever if I was on the brakes too. So I read that a good Saginaw pump with dual return lines would remedy the issue. Ford used one on their 1976 LTD wagon with a 460 and hydroboost.
Attachment 280176
The next aspect was cutting the trans tunnel. Once the carpet is out, you'll see there are several divets in the sheet metal around the top of the tunnel. You need to cut an opening at the edge of those divets, leaving them there. The reason you leave them is because it is in those recessed areas (divets) where you will install the body clips that will hold your new tunnel cover in place. Set your used tunnel cover in place and mark the holes with a sharpie. If you look closely at the photo below, you'll see the divets and where I maked the holes to be drilled. You'll have to find a trans cover for a manual trans to replace the cut out area. *Note: one item I've never read mention of is that your carpet, made for an automatic floor board with auto type tunnel, which is lower than on a manual, won't fit once you install the manual. More carpet is required to fit up and across the tunnel, so your sides at the doors will be short. Oops. When I was at the J/Y I found the manual cover for my era truck. I also took a cover from an efi era, in case I needed extra sheet metal, and I can see that I will. The tunnel I took had the opening for the shifter cut in the driver side of the tunnel. The zf has the shifter almost in the middle. So I will need to patch that oem hole.
Attachment 284013
#98
02-06-2019, 09:31 PM
Attachment 282322
I got the trans under the truck, pushed it under since it would not fit once atop the jack. I started installed my new Ram clutch when I hit a snag. Two of the pressure plate bolts could not be tightened with a socket nor a wrench. The design/machine work was so poor that neither tool would go on!!! Then I noticed that three or four of the small 'arms' in the center of the pressure plate that the slave cylinder pushes against were sticking out further than the others. That would destroy my slave cylinder fast. This is frustrating. I bought Ram because I thought I was getting quality. Stamped on the p. plate is: Made in Korea. I guess that's Ram tough. Try getting a torque wrench on this bolt below.
Attachment 281160
#99
02-08-2019, 09:05 AM
I spent five hours trying to install the zf using this cheap Harbor Freight trans jack. USE CAUTION. What I found was that the perch of the jack is slippery. The trans slides around at the worst moments, and can roll right off the jack. If you're working alone, that can be dangerous.
I had to cut a piece of 3/4" plywood and bolt it to the top of the jack. Although the jack comes with an attached tie down, I used an extra one to keep the zf, which is tall with a thin base, from rolling.
It won't fit beneath the vehicle with the trans on the jack. You have to slide each one beneath the vehicle and then muscle the trans (200lbs) onto the jack. I used my hoist, the arm through the cab. I highly recommend having a second set of hands.
Attachment 284008
Attachment 282322
BTW, get special bolts to attach your pressure plate to the flywheel. I tried standard grade 8 bolts (3/8 x 1") with a 9/16 hex head, and two of the bolts I could not get a socket or wrench on to tighten past a certain point. I converted to grade 8 bolts with a 3/8" hex head.
Attachment 281160
*Note: I first ordered a clutch from RockAuto, a LUK clutch set. It looked/felt so rinky dink that I returned it. Then I ordered (from Summit) a Ram clutch set for $225+. It was much better, but still I was not impressed with the quality. The friction material is only a band two inches wide.
#101
02-09-2019, 09:10 PM
I HATE the Harbor Freight Cheapo trans jack. It is crap. After fighting it for 6+ hours, I gave up. I put the engine hoist in through the door, wrapped some chain around the trans, stuck a crow bar in the end of the hoist for reach, and hoisted the trans that way. I also took some old head bolts and cut the head off them, then screwed them into the block. They worked as a guide. The ends of the bolts slipped right through the trans bolt holes and helped align the trans.
Attachment 284004
I also used a small jack and some 2x4's to jack up the rear of the engine and align engine and trans that way. I can see that I'll have to cut a piece of sheet metal to fill the void on the bottom of the spacer between block and trans. Since I used the c6 spacer, it had an inspection opening to take off the p.plate bolts. That now has to be covered. The trans is sitting close to the side gas tank, but I'll see how that goes as the project progresses. It might change once I get the cross member in. That is the gas tank close to the yoke that you see there!
Attachment 284002
Attachment 282214
I should mention that the zf has 4 thick triangular tabs that stick out, two on the top of either side, two in the front, two in the rear. I cut off the driver's side front tab to give myself room.
#102
02-10-2019, 07:51 PM

Laughing Gas
Thanks for taking the time to document all of the details on this conversion. While I won't go with the ZF5, I can still take some stuff away from this. Some of the highlights for me; the Mustang Steve bearing conversion, the details on the hydroboost conversion, the clutch master setup and of course the pedal box upgrades.
#103
02-10-2019, 09:23 PM
Thanks for taking the time to document all of the details on this conversion. While I won't go with the ZF5, I can still take some stuff away from this. Some of the highlights for me; the Mustang Steve bearing conversion, the details on the hydroboost conversion, the clutch master setup and of course the pedal box upgrades.
#104
02-11-2019, 10:58 PM
Today I got the cross member in. I had to trim 1/4" off the driver's side to line up the holes on the trans mount.
Attachment 283987
I had purchased a zf tail mount, but found my old C6 tail mount worked fine.
Attachment 283937
Although once that rear of the trans was raised to get the mount bolted up, I found I had to trim the tunnel cover. I also had to trim a tab off the trans body.
That tab you see below is what I had trim. If I left it the inspection cover would not have fit.
Attachment 283500
I also had to grind off another bit of the trans case. Zf's have 4 small wing like tabs on the case. All four are on the sides near the top of the trans, two up front, and two in the rear. In the photo below you can see, near the yellow writing, one of the tabs that I cut is still very close to the trans tunnel and needs to be ground down further.
Attachment 283988
Below is the cover in place. I'll have to patch the cover.
I had to set the v.cover on the new engine.
Attachment 283990
** The support bearing on the Driveshaft: I found that with the zf front driveshaft attached, I can still use my support bearing perch. I only have to drill a couple of holes in it to hold the bearing, and it will be good.
#105
02-12-2019, 08:28 AM
