When you click on links to various merchants on this site and make a purchase, this can result in this site earning a commission. Affiliate programs and affiliations include, but are not limited to, the eBay Partner Network.
It fits... IT FITS.... picked up this 98 chevy Silverado seat. Fit perfectly and slides up and back with no issues... painted the frame. Removed the head rests as well. I left the contours in (the upholstery shop suggested i have the foam shaved) and I am glad i did. They feel great and look better than a plain bench IMO.
Now just waiting on the seat belts... estimated time to make was 3 weeks, checked on my oct 3rd order today just to see how far along they were... to my disappointment apparently the retractors the place uses are out of stock ... and they don�t see them coming in until end of next week at the earliest (place in Florida that makes seatbelts)... so then its at least a week from there... bummer.
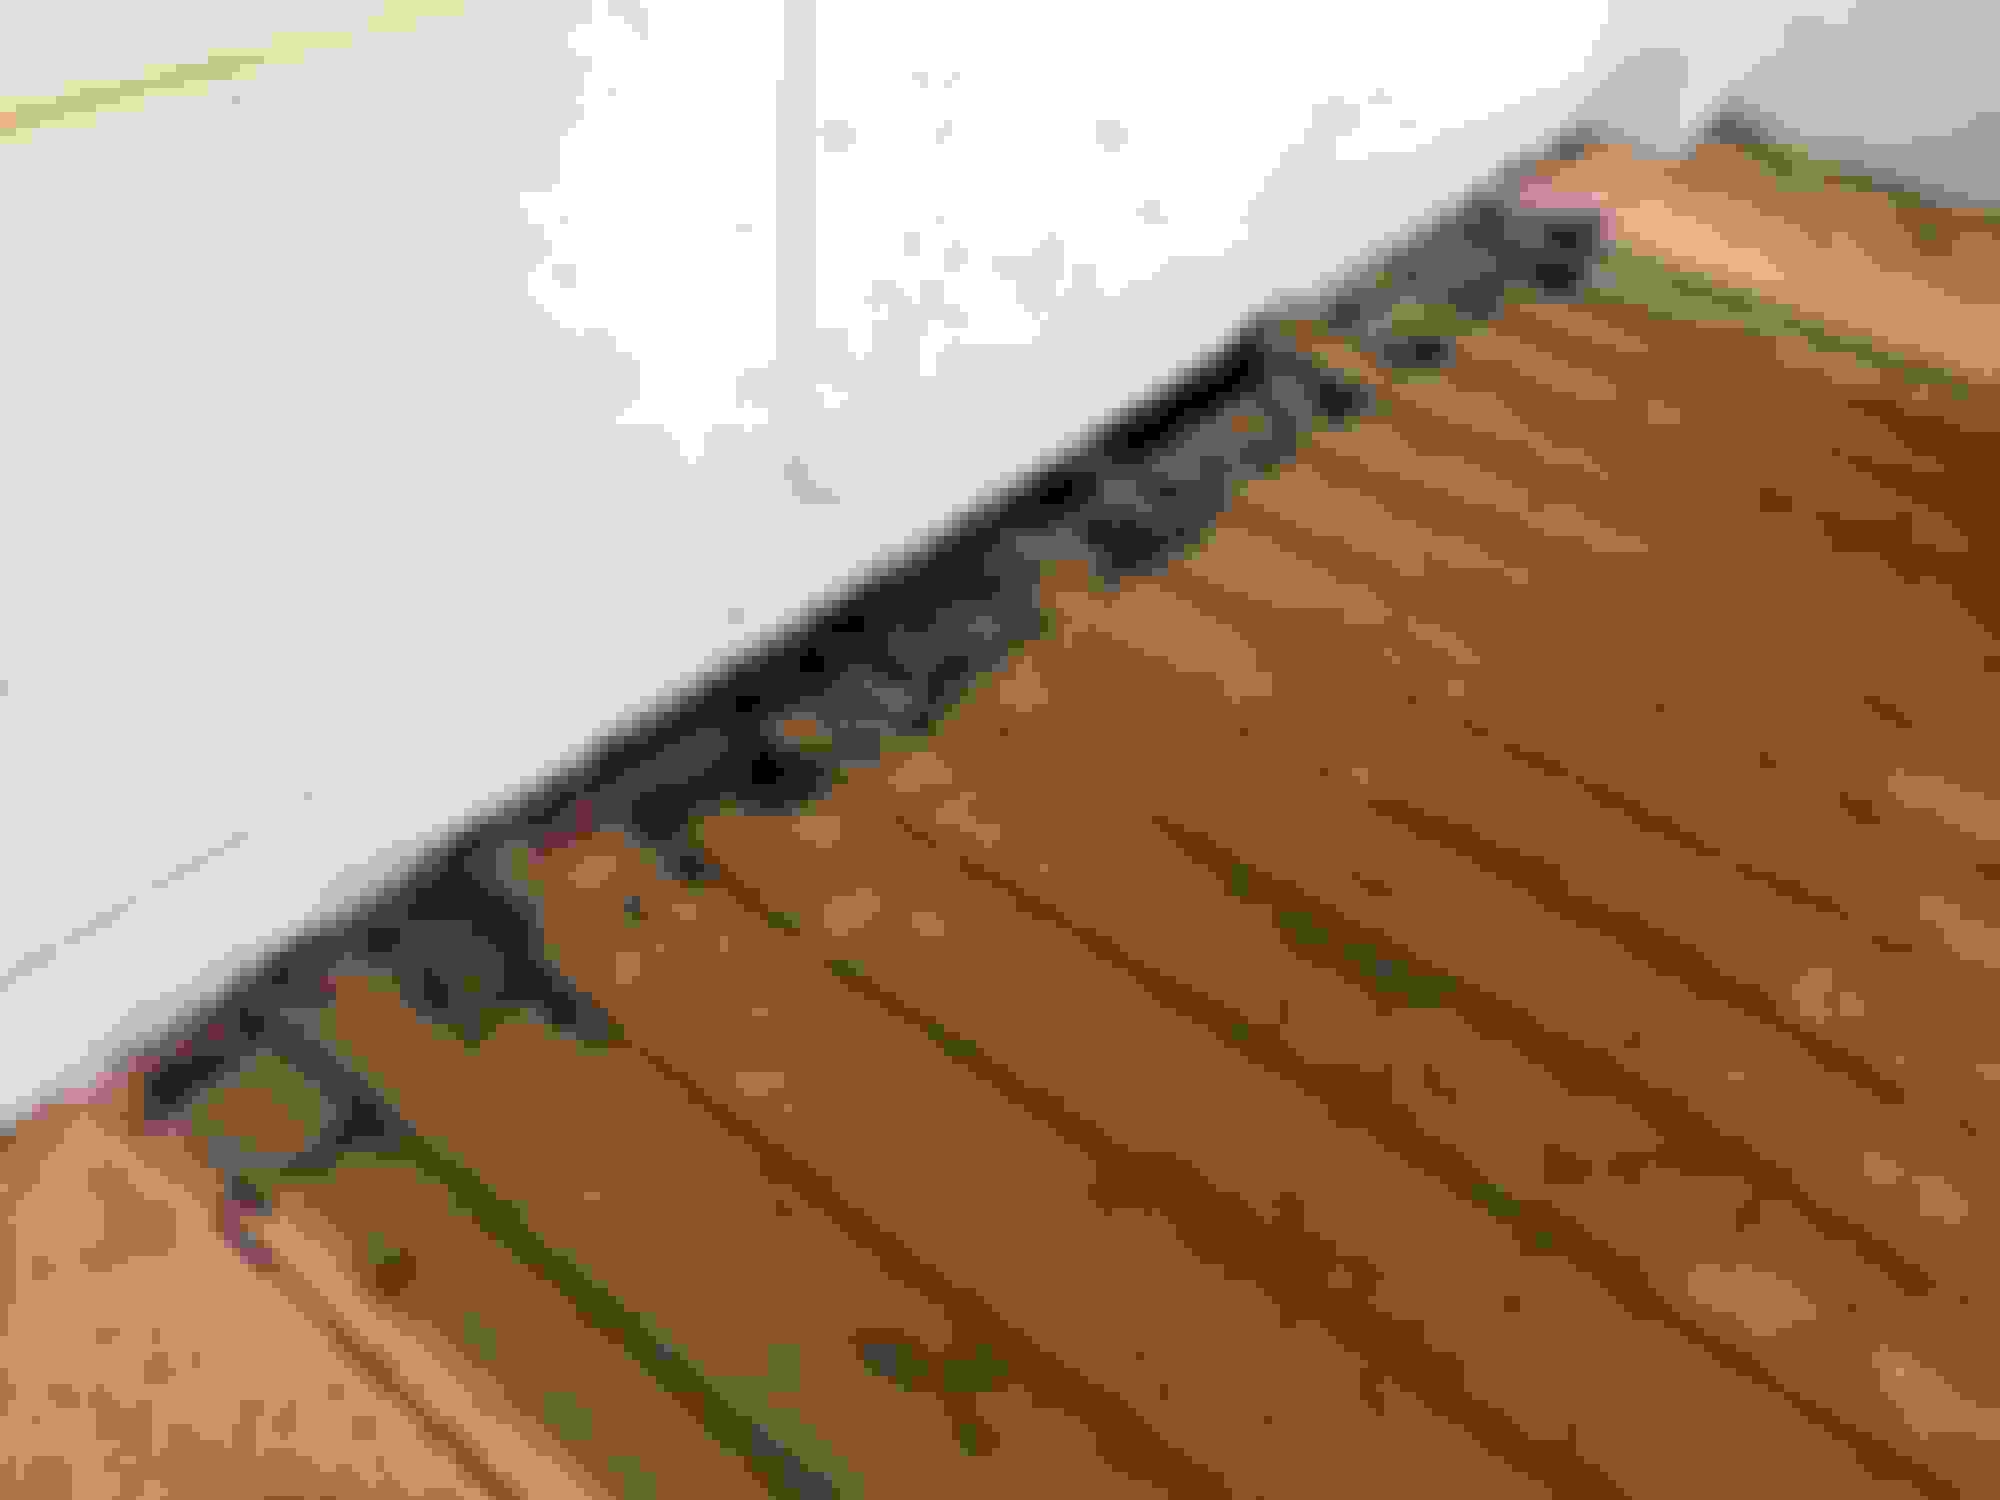
In the meantime, we removed what seemed to be a sheet metal sign that was sheet-metal screwed down onto the bed.... now after the big reveal, we know why... holy hell... ya think the P.O. was trying to hide somthin?
The sheet metal sign covered up what i would have expected...well almost Didn’t expect THIS! But we have an unconventional fix in mind... stay tuned.
The seat fit's great now I know what to get for mine!
That bed looks like a real cover up I thought mine was bad. I have removed the centre section and I will be installing a bed floor from a 99ish superduty. I am in the process of removing the front panel and trying to fit the super duty bed panel t the 57 box, then I will get the crossmember sorted out.
that most forward rotted bed support is shot directly under the corrugated bed steel... but is solid under both ends... the rest of the bed is surface rusted but nothing going through... will D/A the bed and use some alchemy to turn the rust back into paintable metal. As for the rot... we're gonna cut out the bed that is rotten as close to cab as we can... we'll also cut the support out as well to where it is solid on both ends... then it appears we can install a 2x2 square tubing (with drain holes on bottom) in the original brackets channels on both sides adjust for height and weld in place (not having to remove bed)... as it is now, it is gone and yet the bed is structurally sound.. therefore removing bed and replacing entire bracket serves no real purpose for this daily driver... once all that is done, I will have a piece of steel cut and a lip bent upward towards the cab and this will be welded to that that front piece to provide rigidity... it will lay flat on top of the corrugated bed and will be spot welded on each "rise"... entire bed will be shot with Rhino bed liner (red to match) and yes, there will be gaps under where the flat steel lays on top of the corrugated bed ... but that is intentional as this will provide much needed draining never to "pool" water thereby eliminating any chance of this to rot out behind the cab in the future... the idea will of course when its all said and done, to not be noticeable... and to look as though it was designed by intention... we'll see.... that is the beauty and challenge of doing these projects... being creative yet remaining ascetically correct
Bed Repair...
So after removing the sheetmetal sign the P.O. screwed down over the missing rotten part of the bed near the cab... we did some figuring... came up with a permanant fix that is not intended to be a complete restoration solution... but a good daily driver price conscience repair. As you can see from the pics, the front most bed support was rotted out as was the bed where it attached to the front panel... to rectify this w/o having to remove the bed (the rest was in tact with just surface rust) we cut out the rot and removed what was left of the bed support. I had a piece of 16 ga hot rolled steel cut and bent with a 1” lip that will now go over the missing bed metal ($70.00). This will be spot welded on each rise in the bed floor as well as the front bed panel. Underneath to replace the cross member/support, i had 1/8” (overkill) 2.5” square tubing cut 71.5” wide ($25). We did have to notch on side of the bed to get it to fit w/o having to remove the bed and cut down the pinch weld to get it to slide into proper place... fits perfectly. The sheet metal patch fits and will be spot welded in place.. the entire bed will be hit with red Rhino bed coating after we treat the surface rust with Oxy-Gone (acid that changes iron oxide into iron phosphate). The best thing is that the bed now has natural drainage toward the cab and will NEVER rust out like that again... will likely put a flush mount tool box there in the future for lockable storage... less than 200 with bed liner... not a bad fix.
Next is the treatment with Oxy-Gone (turns iron oxide into iron phosphate), prime then RED RHINO bed liner....


 10-17-2018, 07:47 PM


 I thought mine was bad. I have removed the centre section and I will be installing a bed floor from a 99ish superduty. I am in the process of removing the front panel and trying to fit the super duty bed panel t the 57 box, then I will get the crossmember sorted out.