Notices
1973 - 1979 F-100 & Larger F-Series Trucks Discuss the Dentsides Ford Truck
Sponsored by:
Sponsored by: Moser

Seized Drum...

Thread Tools
 
Search this Thread
 
Old May 27, 2017 | 07:58 AM
  #16  
78 PEB's Avatar
78 PEB
Cargo Master
Joined: Oct 2010
Posts: 2,674
Likes: 16
From: Ideeho
Do yourself a favor........make sure the star wheel adjusters turn freely ........take them apart and coat the threads with antiseize..........they wont freeze up again....been using this trick for years.......
 
Reply
Old May 27, 2017 | 12:18 PM
  #17  
jakeharp's Avatar
jakeharp
Thread Starter
|
Fleet Mechanic
20 Year Member
Photogenic
Photoriffic
Shutterbug
Joined: Aug 2004
Posts: 1,311
Likes: 31
From: Nevada
Thanks fellas

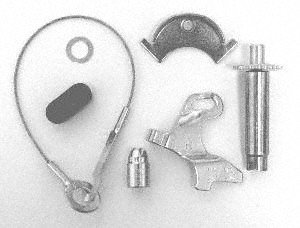
Pics are worth a million words, thanks FB, I planned on taking lots of pics of mine before I disassembled, but half the springs were missing and it fell apart before I could really get a good look Im back at it today !
 
Reply
Old May 27, 2017 | 12:37 PM
  #18  
KULTULZ's Avatar
KULTULZ
Cargo Master
20 Year Member
Liked
Loved
Community Favorite
Joined: Mar 2002
Posts: 3,132
Likes: 219
From: W (BY GOD) V
Post

On the end of the star wheel shaft where the end cap comes off will be a stamping, R or L.

 
Reply
Old May 27, 2017 | 05:36 PM
  #19  
jakeharp's Avatar
jakeharp
Thread Starter
|
Fleet Mechanic
20 Year Member
Photogenic
Photoriffic
Shutterbug
Joined: Aug 2004
Posts: 1,311
Likes: 31
From: Nevada
Get some where

Ok I think I got the shoes licked here's some pics, for a first timer, the tie down strap trick worked like a champ along with some of those spring pliers, im at a pause right now, cuz the E-Brake needs some attention, its all out of whack..... So one more little project inside of a project....


First shoe on with the assistance of the boy child..


Getting both shoes on with tie down strap and cheesy spring pliers ....


Everything buttoned up, yet the E-Brake is not adjusted correctly... so im now looking at those adjustment cables under the truck.....

Let me know if ya'all see anything that looks jacked up, I can leave as is and start working on getting the studs out of the drums and preping for the bearings and seals..................
 
Reply
Old May 27, 2017 | 05:40 PM
  #20  
jakeharp's Avatar
jakeharp
Thread Starter
|
Fleet Mechanic
20 Year Member
Photogenic
Photoriffic
Shutterbug
Joined: Aug 2004
Posts: 1,311
Likes: 31
From: Nevada
Star wheel


Star Wheel and adjuster pic, works like it should, i think

Thanks for the directional heads up Kult and the anti seize trick, although my adjusters are new, I put some on the threads anyhow.....
 
Reply
Old May 27, 2017 | 06:10 PM
  #21  
jakeharp's Avatar
jakeharp
Thread Starter
|
Fleet Mechanic
20 Year Member
Photogenic
Photoriffic
Shutterbug
Joined: Aug 2004
Posts: 1,311
Likes: 31
From: Nevada
B4 and After


B4... Where did the springs go ?

After..... with some added springs.....

Welp im starting a new thread for my 1st bearing race install here, thanks for all of your help, I musta looked at FB's pics 50 times today.....
https://www.ford-trucks.com/forums/1...e-install.html
 
Reply
Old May 28, 2017 | 03:09 AM
  #22  
Michael McIntyre's Avatar
Michael McIntyre
Cross-Country
Joined: Mar 2014
Posts: 73
Likes: 2
From: New River Valley
If it makes you feel any better, I hadn't done back brakes in a loooong time, and I had to get out the book. I put it all back together like the picture in the book, and....... the picture was of the opposite side, and I got everything backwards.

Another time, while I had the shoes off, I got the brilliant idea for some unimaginable reason to go press the brake pedal.

POOOOOOOOOOOOT!

Feel better now?
 
Reply
Old May 28, 2017 | 04:30 AM
  #23  
FMJ.'s Avatar
FMJ.
Elder User
Joined: Aug 2016
Posts: 723
Likes: 3
From: Cape Town, South Africa
Nice job so far !

With regard to the adjusters being fitted correctly, looking at the picture in post 20.

That is the right side, and as you face it, turning the adjuster towards the backing plate (upwards) should open the shoes.

Or, looking from the diff side, the adjuster would turn downwards to open the shoes.

Same applies to the left side.

With regard to setting up the e brake, look at the pic below, at the two parts that sit on the pin.

Move the big lever by hand and you'll see play develop between the two parts. Basically you want zero play there as you take the slack out of the cable.

Notice that the two parts line up at an angle sloping down from right to left.

Hope that makes sense.

Silly question for you. How do you upload a pic, type something, upload another pic, and type something else ?
 
Attached Images  
Reply
FTE Stories

Ford Trucks for Ford Truck Enthusiasts

story-0

Top 10 Fords at 2026 Carlisle Ford Nationals

 Joe Kucinski
story-1

3 Best / 3 Worst Parts of Modern Ford Ownership

 Brett Foote
story-2

10 Amazing Upgrades That Solve Common Ford Truck Owner Headaches

 Pouria Savadkouei
story-3

Every 2026 Ford Engine Explained

 Brett Foote
story-4

10 Ugly Ford Trucks That We Still Kinda Love

 Joe Kucinski
story-5

10 Things Every Truck Owner NEEDS (2026 Edition)

 Michael S. Palmer
story-6

Rezvani's Latest Post-Apocalyptic Monster Is a Ford F-150 Raptor Underneath

 Verdad Gallardo
story-7

Top 10 Most Expensive Ford Trucks Ever Sold on Bring a Trailer

 Joe Kucinski
story-8

2027 Ford Super Duty Buyer's Guide (Every Model, Engine, & Package)

 Brett Foote
story-9

Top 10 Ford Truck Tragedies

 Joe Kucinski
Old May 28, 2017 | 04:38 AM
  #24  
FMJ.'s Avatar
FMJ.
Elder User
Joined: Aug 2016
Posts: 723
Likes: 3
From: Cape Town, South Africa
In the middle picture in post 19, where the spring pliers are resting, this is where the oil seal will rest.

Run your finger nail across that section and feel for a groove.

If there is a groove, this will allow oil to leak.
Fit a ''speedi sleeve'' over that section.

Mine is a Dana 70, which might fit the Dana 60 (?).

If so, the part number is SKF 99287.

One picture shows the correct way to fit one, and the other shows how I f$$ked it up !
 
Attached Images   
Reply
Old May 28, 2017 | 04:47 AM
  #25  
FMJ.'s Avatar
FMJ.
Elder User
Joined: Aug 2016
Posts: 723
Likes: 3
From: Cape Town, South Africa
Why do you want to remove the studs from the drums ?
 
Reply
Old May 29, 2017 | 01:08 AM
  #26  
jakeharp's Avatar
jakeharp
Thread Starter
|
Fleet Mechanic
20 Year Member
Photogenic
Photoriffic
Shutterbug
Joined: Aug 2004
Posts: 1,311
Likes: 31
From: Nevada
Studs

Oh, got new drums, the old one had a groove nearly a 1/4" deep from one of the shoe rivets ... of which I didn't actually know until it was off the truck, but ordered anyhow, cuz everything I touch seems to need replacing.... So transferring studs to new drum... Fresh start ! And thanks for the heads up on the seal contact surface I will give a good look at tomorrow... Oh and for the pic text question, when you hit the 'add image' icon and it brings up the 'upload' screen and it loads it in, after it gets to 99% and finishes, it lets you type in a description underneath the pic before you hit the 'insert' button, then when you do insert it and your normal 'new post' box is back up you can scroll to the bottom of the pic and click the mouse button below the pic and your flashing 'prompted' line will be there and you can add more text ... hope that makes sense, goofy stuff to explain....

Thank u for all your help above, I appreciate the details, I hope to never have to take this axle apart in the near future....
 
Reply
Old May 29, 2017 | 09:55 AM
  #27  
FMJ.'s Avatar
FMJ.
Elder User
Joined: Aug 2016
Posts: 723
Likes: 3
From: Cape Town, South Africa
Hi Jake,

Removing the studs now makes sense !!

Before I forget, you don't want to reinstall everything onmly to find that a wheel cylinder is faulty.

May I suggest that you bleed the brakes without the hub on, use the tie down like you did in the middle picture in post 19, and see that no leaks occur at the cylinders.

Many thanks for the upload/type instructions.

Let's see if I get it right :

Ok, like in the pic below, pull the big ebrake lever backwards and forwards gently, and you'll see the gap that I mentioned before, opening and closing between the two parts on the pin.
 
Attached Images  

Last edited by FMJ.; May 29, 2017 at 09:55 AM. Reason: Coz I'm stupid and can't follow Jake's instructions. LOL
Reply
Old May 29, 2017 | 10:02 AM
  #28  
FMJ.'s Avatar
FMJ.
Elder User
Joined: Aug 2016
Posts: 723
Likes: 3
From: Cape Town, South Africa
Next, move the ebrake lever forwards gently and observe two things.

1
The primary (front) shoe will lift up and away from the pin.

(You don't want this when the ebrake cable is tensioned !!)

2
You should see the adjuster start to work.

The next pic is purely me trying to follow your instructions !! LOL

I see 'preview post' and submit reply' only.
 
Attached Images  
Reply
Old May 29, 2017 | 12:01 PM
  #29  
jakeharp's Avatar
jakeharp
Thread Starter
|
Fleet Mechanic
20 Year Member
Photogenic
Photoriffic
Shutterbug
Joined: Aug 2004
Posts: 1,311
Likes: 31
From: Nevada
Image text


Then it shows up here

The after it inserts in your post before you hit 'Submit Reply' you can click down here and add more text Thanks for the breakdown on testing the cylinders, after some chores im going to get back at the brakes !
 
Reply
Old May 29, 2017 | 12:18 PM
  #30  
FMJ.'s Avatar
FMJ.
Elder User
Joined: Aug 2016
Posts: 723
Likes: 3
From: Cape Town, South Africa
Haha, thank you for that.

Nothing like that shows up, but I'll play around.

Let me not hijack your thread with my crap any further !! LOL
 
Reply
Related Topics
Thread
Thread Starter
Forum
Replies
Last Post
mytoolman
1948 - 1956 F1, F100 & Larger F-Series Trucks
10
Aug 1, 2019 02:40 PM
Rustlin'
1987 - 1996 F150 & Larger F-Series Trucks
6
Apr 27, 2016 02:21 PM
Rustlin'
1987 - 1996 F150 & Larger F-Series Trucks
8
Apr 26, 2016 02:58 PM
broncoderek
1987 - 1996 F150 & Larger F-Series Trucks
4
Oct 25, 2013 06:02 PM
alchemist1
1973 - 1979 F-100 & Larger F-Series Trucks
2
Aug 25, 2012 09:40 PM


All times are GMT -5. The time now is 01:14 PM.

story-0
Top 10 Fords at 2026 Carlisle Ford Nationals

Slideshow: Top 10 Fords at 2026 Ford Nationals

By Joe Kucinski | 2026-06-09 11:10:08


VIEW MORE
story-1
3 Best / 3 Worst Parts of Modern Ford Ownership

Based on years of owning multiple modern Ford products.

By Brett Foote | 2026-06-09 10:53:36


VIEW MORE
story-2
10 Amazing Upgrades That Solve Common Ford Truck Owner Headaches

SPONSORED: From muddy boots to rain-soaked cargo, these upgrades address some of the most common frustrations Ford truck owners face every day.

By Pouria Savadkouei | 2026-06-08 18:50:34


VIEW MORE
story-3
Every 2026 Ford Engine Explained

Here's everything you need to know about every Ford engine available for the 2026 model year.

By Brett Foote | 2026-06-05 12:58:01


VIEW MORE
story-4
10 Ugly Ford Trucks That We Still Kinda Love

Slideshow: 10 ugly Ford trucks that we still kinda love.

By Joe Kucinski | 2026-06-03 09:51:16


VIEW MORE
story-5
10 Things Every Truck Owner NEEDS (2026 Edition)

Slideshow: the best gifts for dads & grads

By Michael S. Palmer | 2026-06-03 15:43:58


VIEW MORE
story-6
Rezvani's Latest Post-Apocalyptic Monster Is a Ford F-150 Raptor Underneath

Slideshow: Called the Fortress, the 850-horsepower pickup combines Raptor underpinnings with military-inspired features, survival equipment, and a starting price of $285,000.

By Verdad Gallardo | 2026-06-03 11:38:36


VIEW MORE
story-7
Top 10 Most Expensive Ford Trucks Ever Sold on Bring a Trailer

Slideshow: 10 most expensive Ford trucks ever sold on Bring a Trailer.

By Joe Kucinski | 2026-05-27 16:24:34


VIEW MORE
story-8
2027 Ford Super Duty Buyer's Guide (Every Model, Engine, & Package)

Here's everything that has changed for the latest model year.

By Brett Foote | 2026-05-27 16:17:28


VIEW MORE
story-9
Top 10 Ford Truck Tragedies

Slideshow: Top 10 Ford truck tragedies.

By Joe Kucinski | 2026-05-18 19:34:33


VIEW MORE