how to restore single stage metllic paint?
#1
 04-02-2017, 12:09 AM

how to restore single stage metllic paint?
I need some help figuring out how to restore the paint on my 1988 E150 conversion van.
Best I can tell is that the original main van color was ford 9M, or White.
I don’t know what type of paint this is or if it has a clear coat over it.
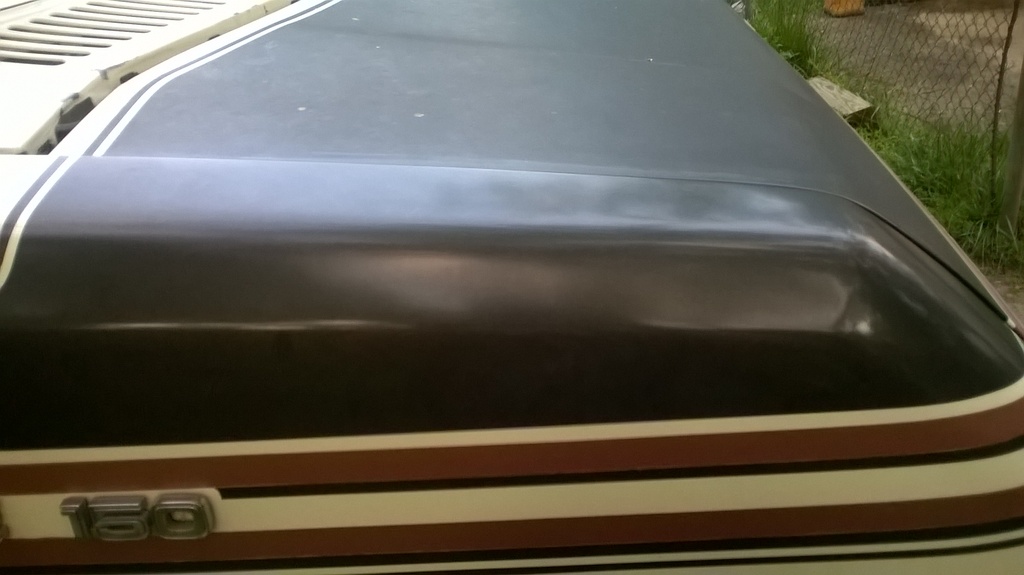
The black paint is actually a “Metallic Dark Pewter".
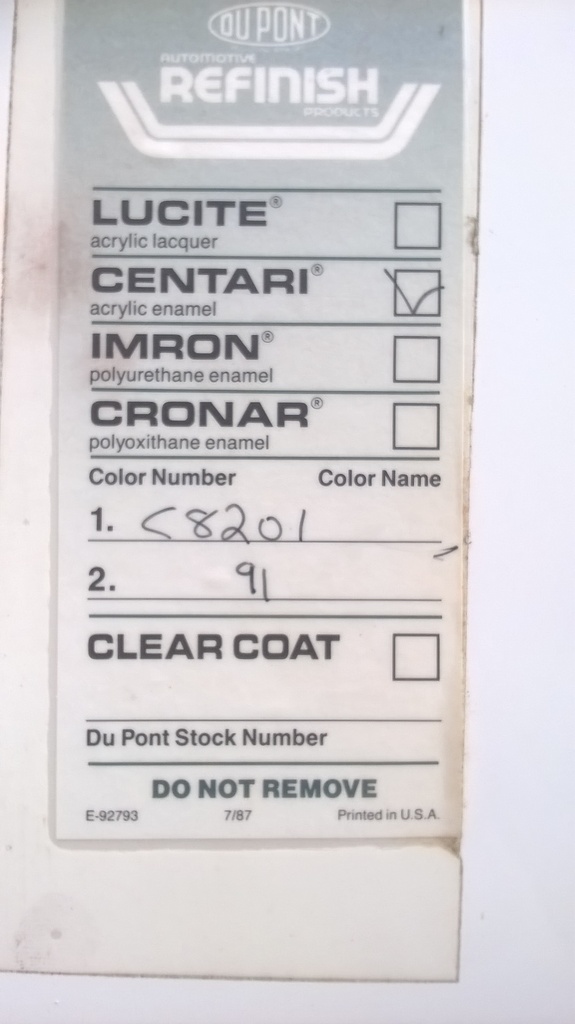
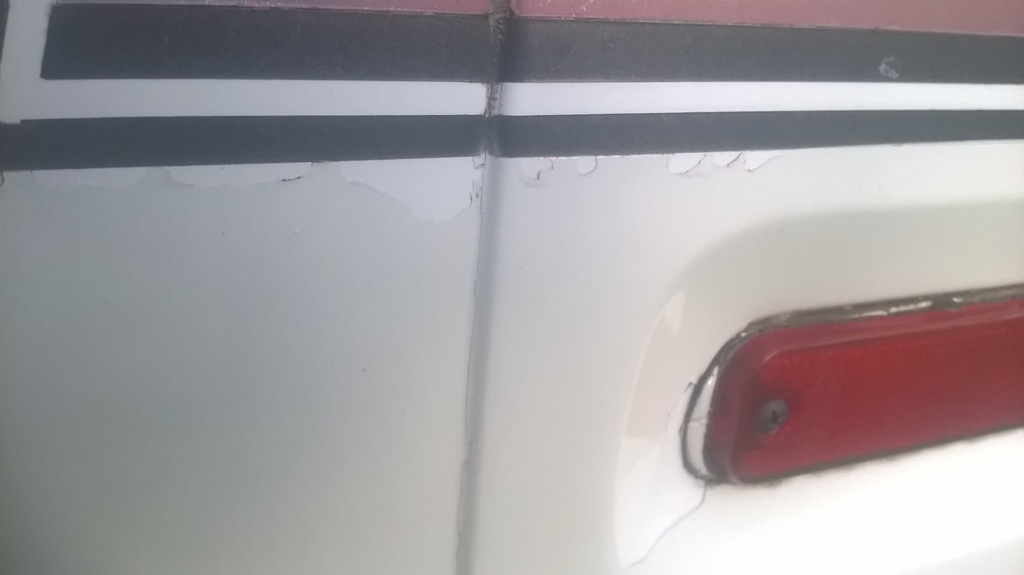
As to paint type or brand. There is a sticker on the drivers door. The van must have been in an accident on the passenger side rear quarter panel. i can see a place where the clear coat has pealed just a little around the rear, red, side marker light. I don’t know how much of the van has clear coat on it. If it is the whole van or just the rear quarter panel area. I did wash the RT front fender and try some Meguiar’s cleaner wax by hand. The white looked great but it did very little for the Dark Pewter. It is much smoother and does shine a bit more but is still dull sorta of.
When i did the front fender by hand, there was no residue left on the hand buffing aplicator or rag I used to wipe it off with.
Perhaps the whole van has a clear coat on it? Perhaps it is just that one side?
I have been reading that if it is single stage metallic paint, that one should not use a buffer unless you really know what you are doing. I have never bluffed a car.
What should I do from here?
i don’t know if this is from the repair or the conversion company.
The 3rd color chip down is the dark Pewter.
http://www.uniquecarsandparts.com.au..._ford_usa_1982
this label on the door says Dupont Centari Acrylic Enamel. I don't know what the 91 is unless it was the year of the repair or perhaps total paint job.
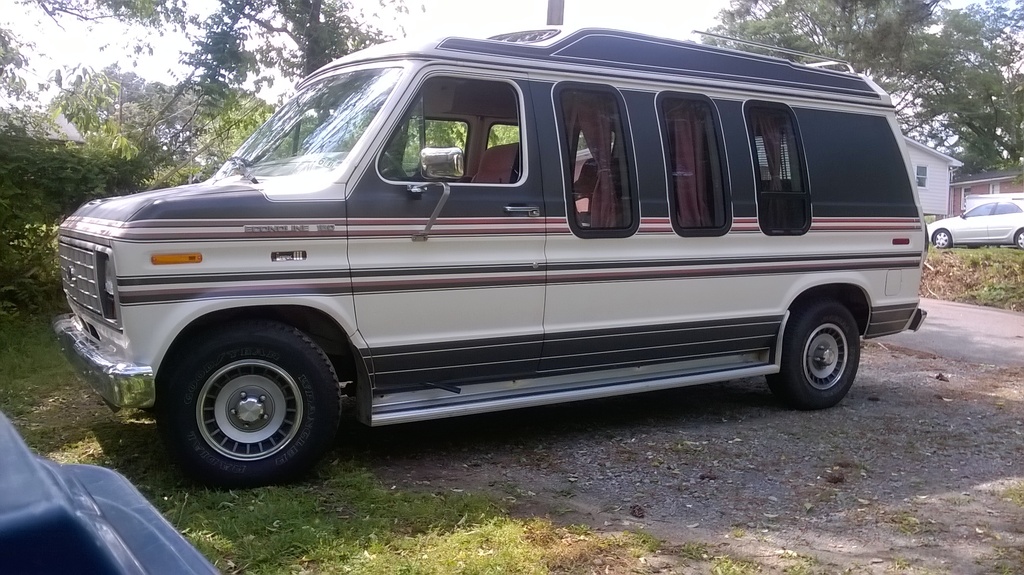
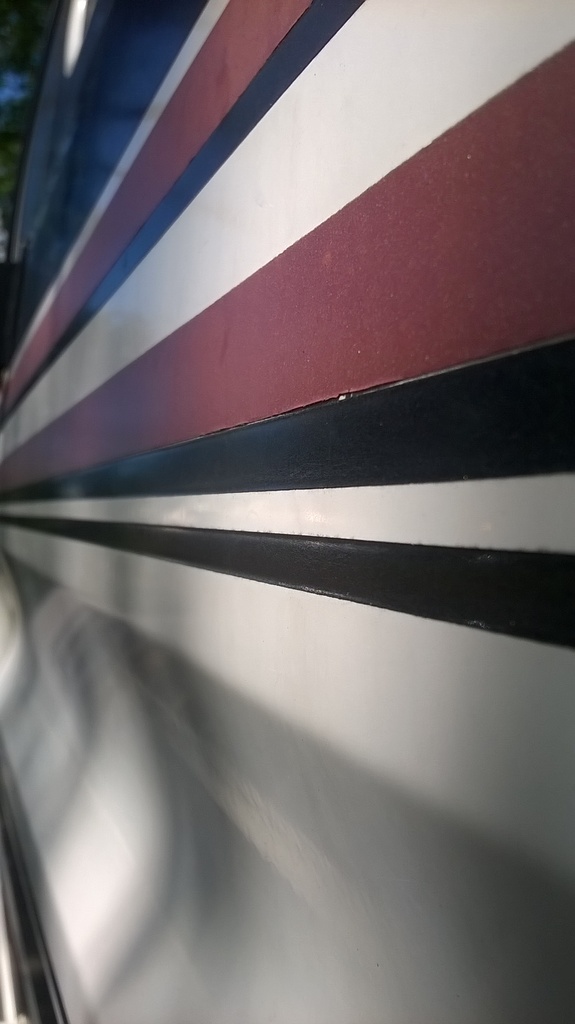
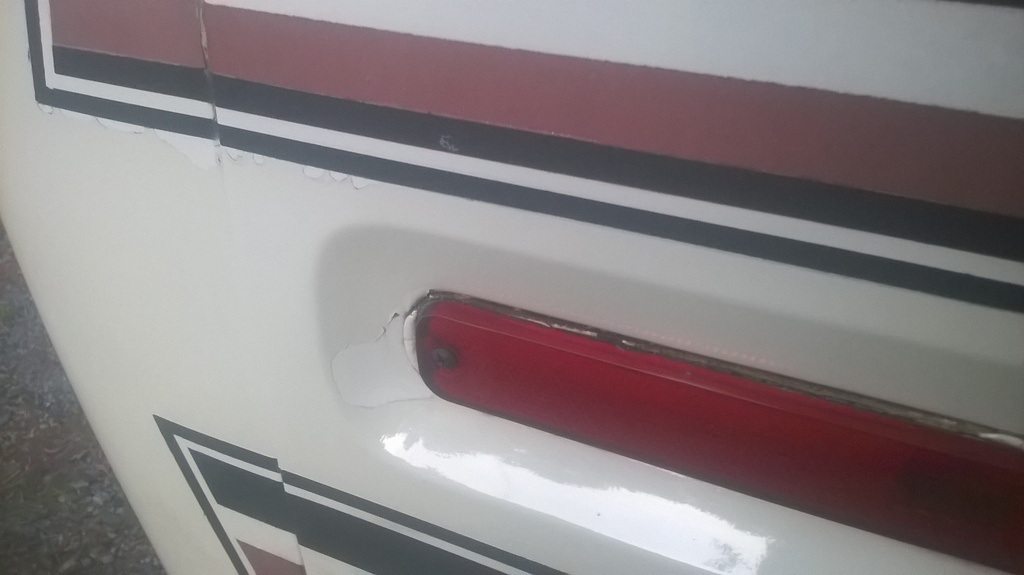
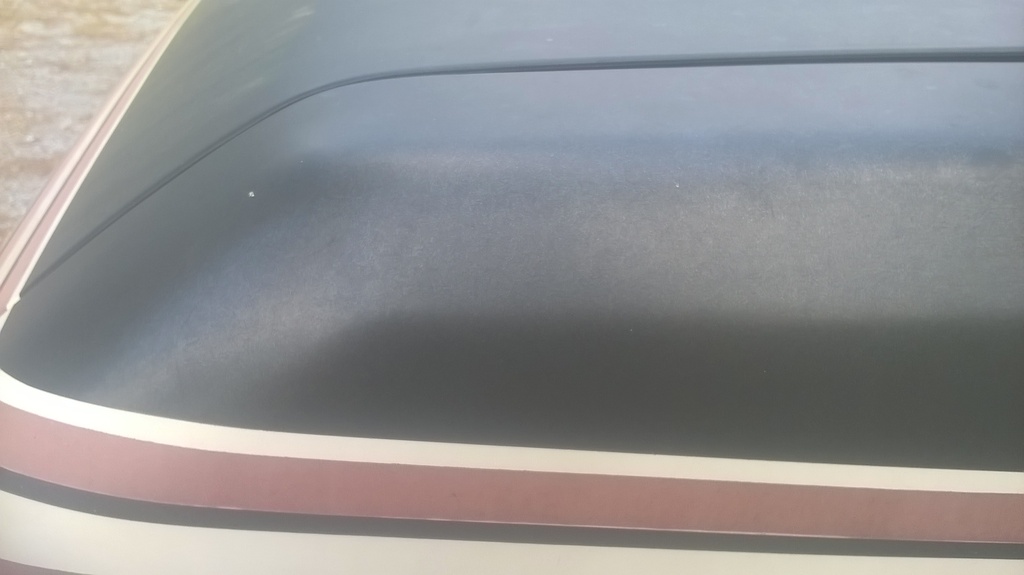
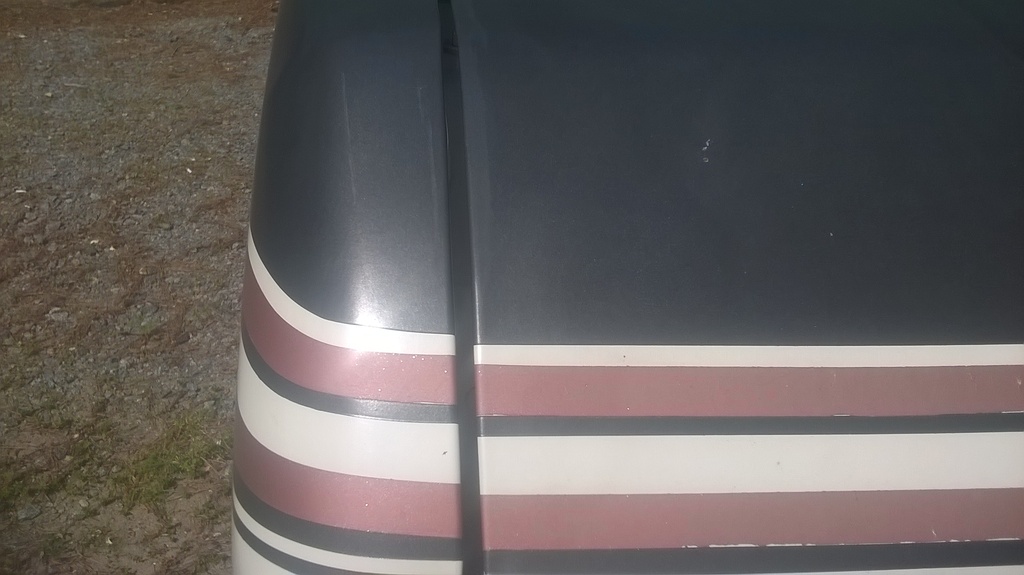
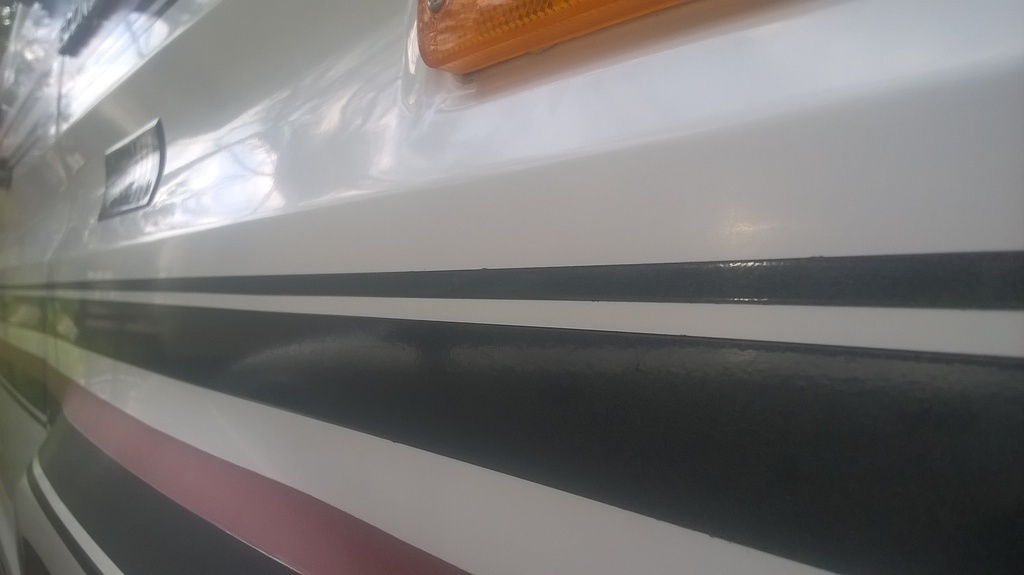
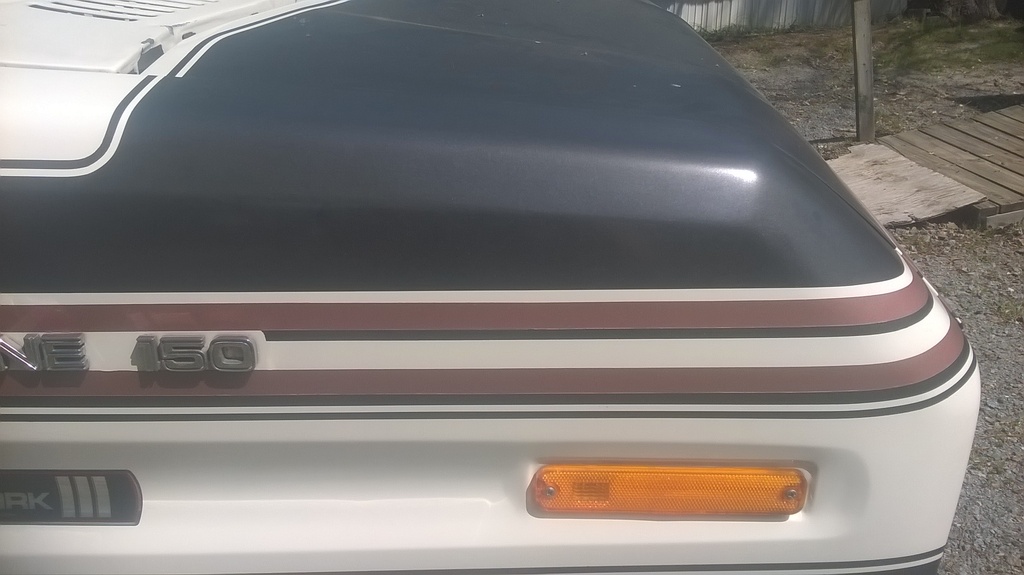
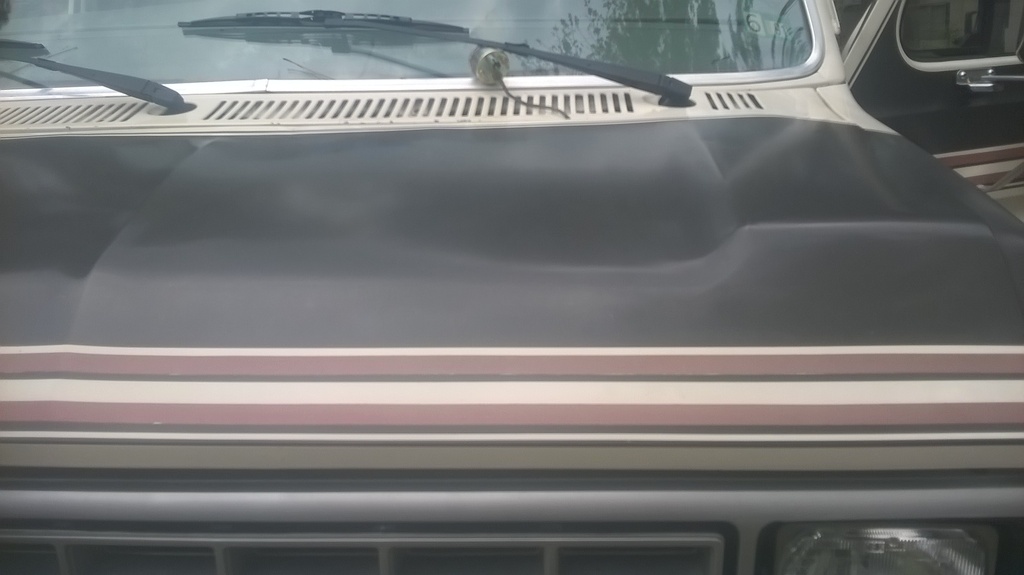
The striping. The reddish color is striping but the black stripe is the dark pewter paint. You can see the way the paint fades out as it wraps around the door jam
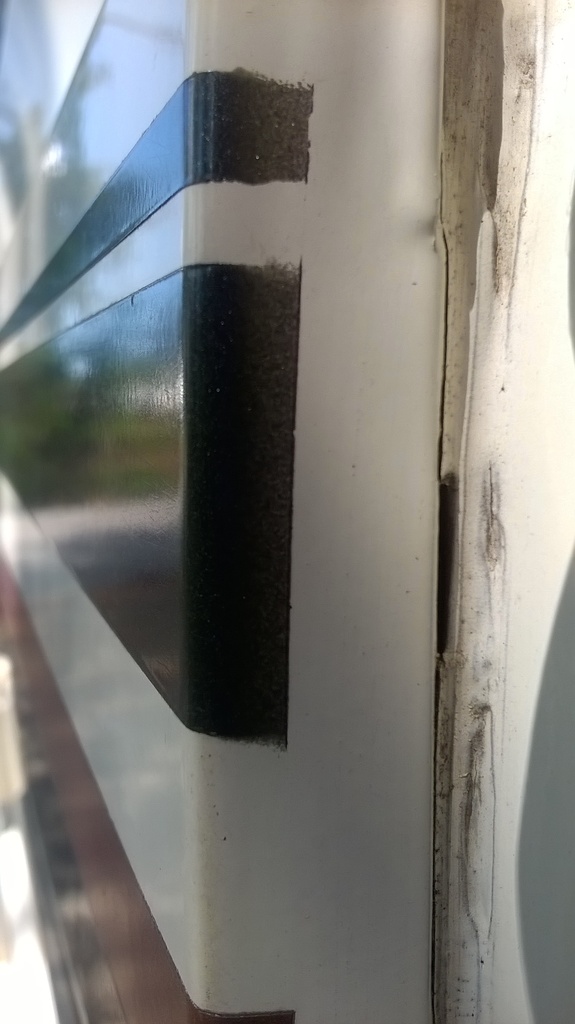
here you can see the strip tape is pealed just a little at the bottom. this is the worst area. I woud keep a buffer off of that area or tape over it.
Thanks
Anna
Best I can tell is that the original main van color was ford 9M, or White.
I don’t know what type of paint this is or if it has a clear coat over it.
The black paint is actually a “Metallic Dark Pewter".
As to paint type or brand. There is a sticker on the drivers door. The van must have been in an accident on the passenger side rear quarter panel. i can see a place where the clear coat has pealed just a little around the rear, red, side marker light. I don’t know how much of the van has clear coat on it. If it is the whole van or just the rear quarter panel area. I did wash the RT front fender and try some Meguiar’s cleaner wax by hand. The white looked great but it did very little for the Dark Pewter. It is much smoother and does shine a bit more but is still dull sorta of.
When i did the front fender by hand, there was no residue left on the hand buffing aplicator or rag I used to wipe it off with.
Perhaps the whole van has a clear coat on it? Perhaps it is just that one side?
I have been reading that if it is single stage metallic paint, that one should not use a buffer unless you really know what you are doing. I have never bluffed a car.
What should I do from here?
i don’t know if this is from the repair or the conversion company.
The 3rd color chip down is the dark Pewter.
http://www.uniquecarsandparts.com.au..._ford_usa_1982
this label on the door says Dupont Centari Acrylic Enamel. I don't know what the 91 is unless it was the year of the repair or perhaps total paint job.


The striping. The reddish color is striping but the black stripe is the dark pewter paint. You can see the way the paint fades out as it wraps around the door jam

here you can see the strip tape is pealed just a little at the bottom. this is the worst area. I woud keep a buffer off of that area or tape over it.

Thanks
Anna
#2
04-07-2017, 02:33 PM


Ok, Centari is an excellent paint made by Dupont......as you can see it is acrylic enamel....most likely the entire truck was repainted with it and although the oem was a single stage paint job.....if you say the clear coat is peeling, then it would be a BC/CC paint job....and the whole vehicle would be done the same way but the door sticker is not marked so................you could really only tell in person, but it sound slike you have a BC/CC or 2-stage paint job.
As far as restoration goes, it looks like the paint is in good shape...I would use an obital buffer/polisher.....and use a foam pad (not cotton- they can be purchased separately and are inexpensive) to apply the polish, etc....they do not develop heat (which is what burns paint) and really allow you to work with the product in a gentle manner.
They can be purchased at a variety of places (Slep Boys, etc.) but here is a link to what they look like....
10 in. Random Orbital Polisher
6" Compact Palm Polisher
I would recommend two things.......1) purchase denatured alcohol at your local hardware store...it is oilless....and use this with a sponge to wipe down the paint...it will remove 99% of the contamination and really clean the paint....avoid any stickers....it will lift the glue but it will not hurt the paint.
I would use a good commercial grade polish...visit a local auto paint supplier, they can look specifically at your paint and make a really good recommendation.
To should be looking real good!
#3
04-07-2017, 07:46 PM
This is going to be long because of the pics...
Thanks for the reply and helpful advice.
When choosing a polishing machine, what is the difference in the one you posted a link to and this one?
6 in. 5.7 Amp Heavy Duty Dual Action Variable Speed Polisher
There are some light scratch marks or swirls in the surface of the paint.. Mostly the dark pewter. it almost seems like a different paint from the white. The white cleans and shines great. The metallic dark pewter was definitely sprayed on top of the white and you can feel a noticeable ridge so it is fairly thick.
As to single stage or CC, I went out and took a closer look at the area where there is some pealing. It might very well be just the new paint where the repair was made to the rear quarter panel. If you look you can see a slight difference in the color. It also looks like they might have painted just up to the black paint stripe. Maybe the reason it is pealing there is because they didn't sand too well at the edge of the stripe. So perhaps it is single stage paint.. What are your thoughts?
Since you are here, I will ask your advice about a couple of other issues I need to take care of before they become a real problem.
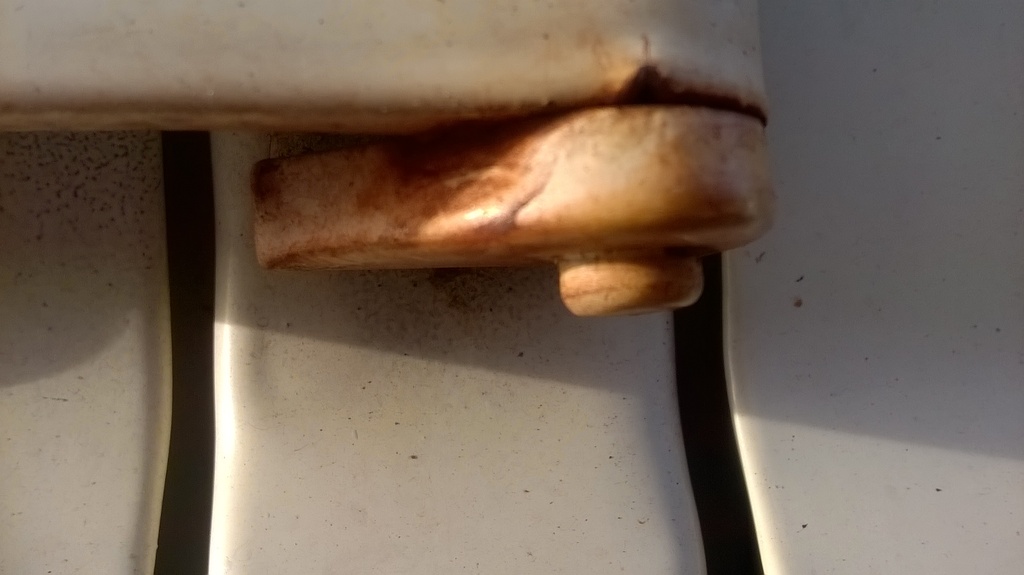
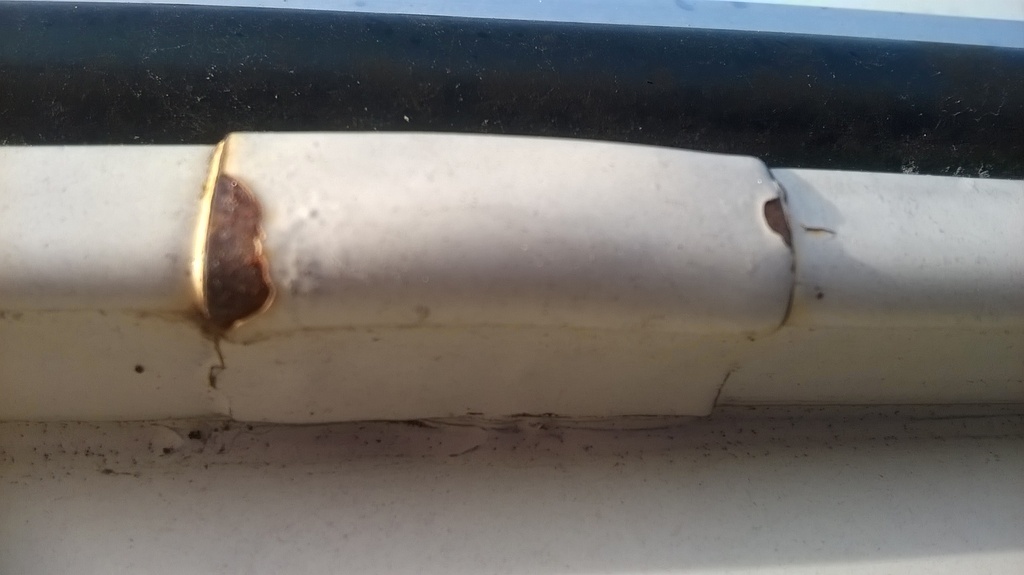
The front passenger door. I was looking at the door seal and at the bottom I noticed a place where the factory sealant.calking was cracked and pulled the small piece off and here is what I found.
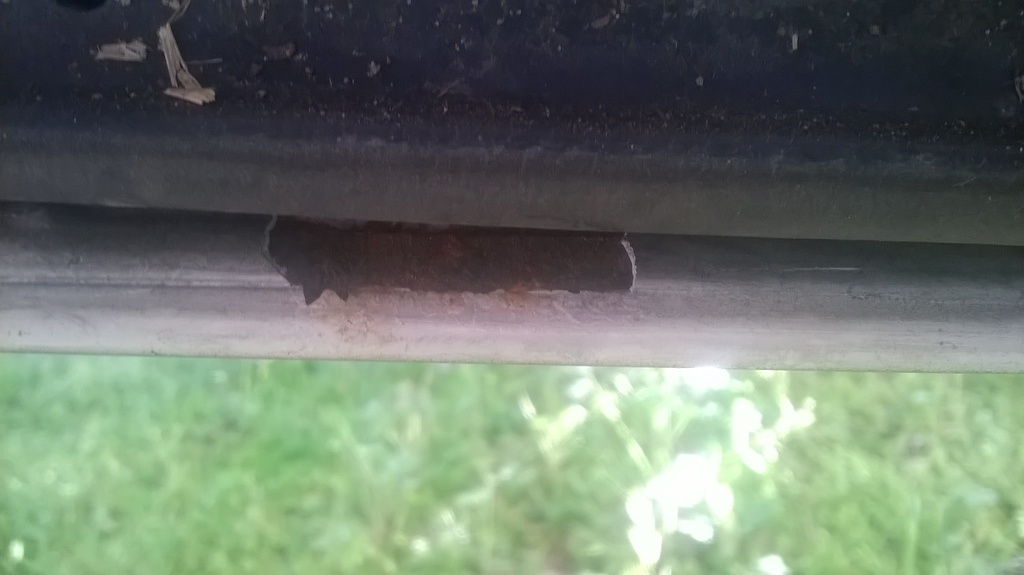
I pulled the door seal back a little and used my finger nail to pick off a little more of the calking and it looks like this:
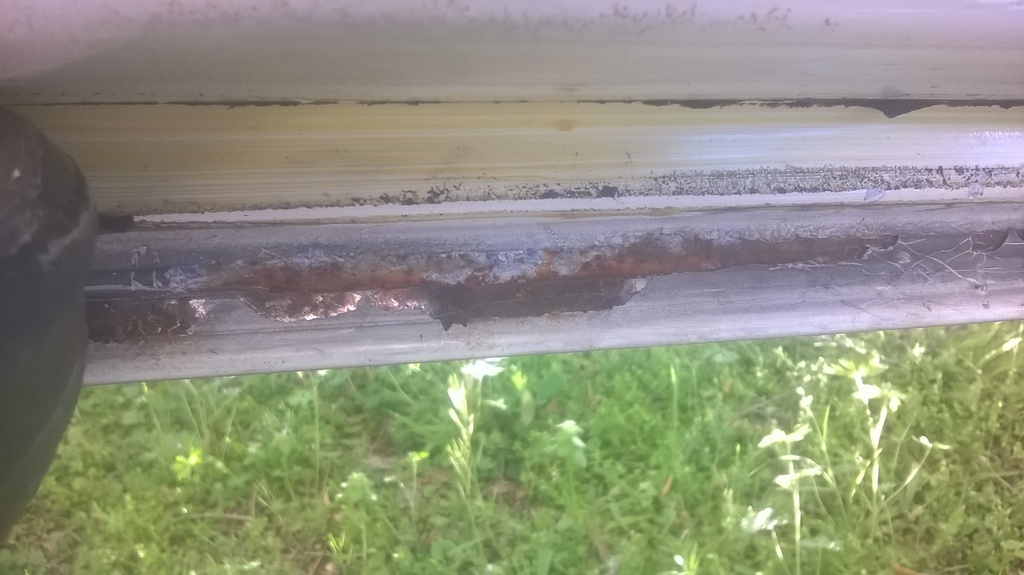
here is a closer view. Some of the metal under the caulking is shiny and not rusted but the lighting was not so good.
I have a bottle of Ospho I bought for another project. Do you think I should clean the area and apply some ospho then primer and paint? The bottom of the outer door skin is bent up over the inner and then the caulking put on then painted is what it looks like to me, so that is the seam where the panels join.. I will also be taking the door panel off to look inside. hopefully the rust is only on the outside.
For the last 2 problems.. What would you do about these problems?
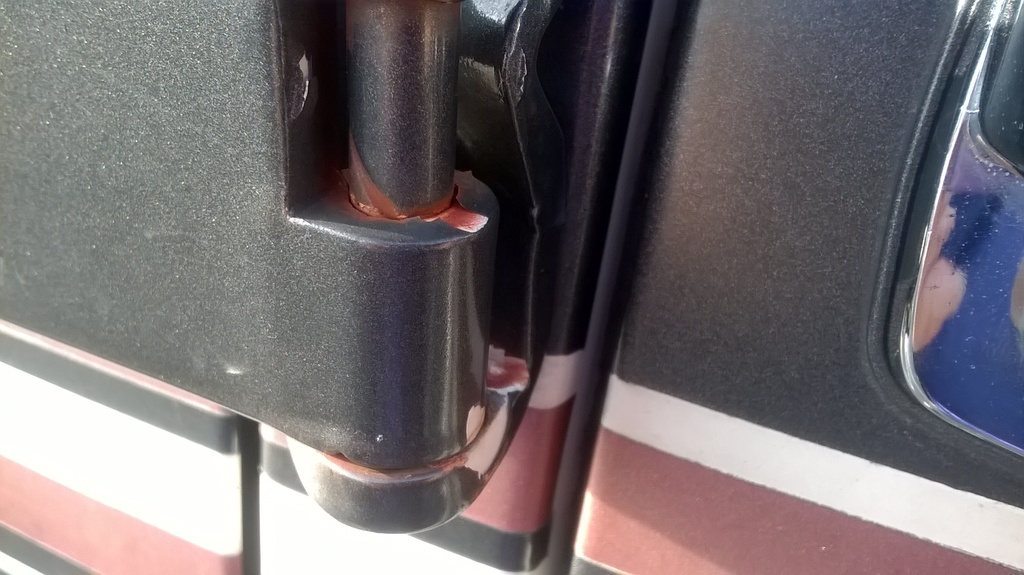
The rust on the door hinges will clean off when I wash the van but it comes back.i am guessing it comes from the pins?
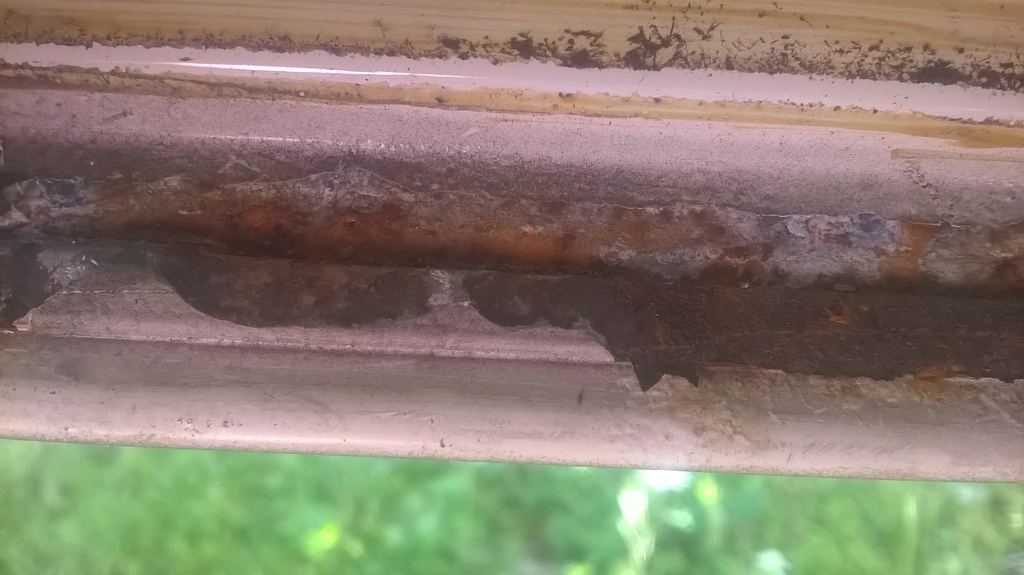
I have no idea what to do about the hinges or the rin gutter seam joint.
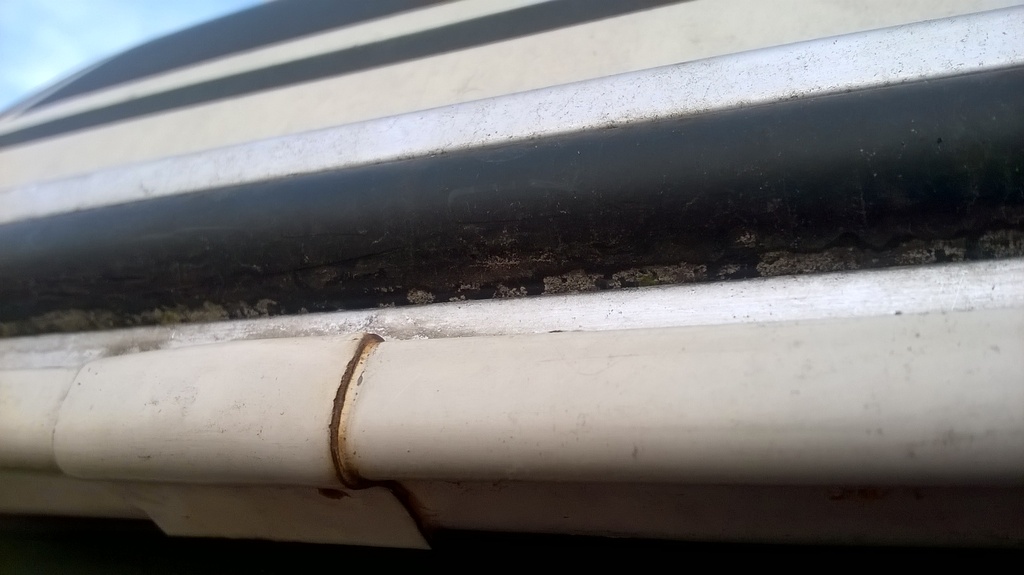
notice the high top aluminum mounding sits right on top of the rain gutter and would have to be removed which is a project
I think I am going to do later in the fall so I can re-caulk the rain gutters. I thought about just filling them up with caulking since they seem to do little good with that trim so low.
Ok well again thanks for taking the time to help me with this!
Anna
Thanks for the reply and helpful advice.
When choosing a polishing machine, what is the difference in the one you posted a link to and this one?
6 in. 5.7 Amp Heavy Duty Dual Action Variable Speed Polisher
There are some light scratch marks or swirls in the surface of the paint.. Mostly the dark pewter. it almost seems like a different paint from the white. The white cleans and shines great. The metallic dark pewter was definitely sprayed on top of the white and you can feel a noticeable ridge so it is fairly thick.
As to single stage or CC, I went out and took a closer look at the area where there is some pealing. It might very well be just the new paint where the repair was made to the rear quarter panel. If you look you can see a slight difference in the color. It also looks like they might have painted just up to the black paint stripe. Maybe the reason it is pealing there is because they didn't sand too well at the edge of the stripe. So perhaps it is single stage paint.. What are your thoughts?


Since you are here, I will ask your advice about a couple of other issues I need to take care of before they become a real problem.
The front passenger door. I was looking at the door seal and at the bottom I noticed a place where the factory sealant.calking was cracked and pulled the small piece off and here is what I found.

I pulled the door seal back a little and used my finger nail to pick off a little more of the calking and it looks like this:

here is a closer view. Some of the metal under the caulking is shiny and not rusted but the lighting was not so good.

I have a bottle of Ospho I bought for another project. Do you think I should clean the area and apply some ospho then primer and paint? The bottom of the outer door skin is bent up over the inner and then the caulking put on then painted is what it looks like to me, so that is the seam where the panels join.. I will also be taking the door panel off to look inside. hopefully the rust is only on the outside.
For the last 2 problems.. What would you do about these problems?
The rust on the door hinges will clean off when I wash the van but it comes back.i am guessing it comes from the pins?
I have no idea what to do about the hinges or the rin gutter seam joint.


notice the high top aluminum mounding sits right on top of the rain gutter and would have to be removed which is a project
I think I am going to do later in the fall so I can re-caulk the rain gutters. I thought about just filling them up with caulking since they seem to do little good with that trim so low.
Ok well again thanks for taking the time to help me with this!
Anna
#4
04-08-2017, 03:12 PM
Thanks for the reply and helpful advice.
When choosing a polishing machine, what is the difference in the one you posted a link to and this one?
6 in. 5.7 Amp Heavy Duty Dual Action Variable Speed Polisher
Avoid like the plague......they are a terrible design and build, they are more of a typical buffer...high speed, where as the orbital I suggested is more of a vibrator......just like you were applying the product by hand...much more difficult to do an ooops with the paint
So perhaps it is single stage paint.. What are your thoughts?
Definitely single stage
I was looking at the door seal and at the bottom I noticed a place where the factory sealant.calking was cracked and pulled the small piece off and here is what I found?
That is bondo or plastic filler.........
Do you think I should clean the area and apply some ospho then primer and paint?
Yes....and it appears to be more surface rust but I would remove all the plastic filler , repair as necessary and osho, primer, paint.
The rust on the door hinges will clean off when I wash the van but it comes back.i am guessing it comes from the pins?
It appears the surface was not properly prepped when it was repainted......clean, ospho, prime, paint and grease the hinge with white lithium dry grease or equivalent
rain gutter seam joint.......
Same as above...just no grease.
#5
04-11-2017, 07:27 AM
Thanks again for taking the time to help and sharing your experience.
Let me ask you if any of the polishes I have on hand will be of any use.
I have a can of Meguiars cleaner wax.
A bottle of Meguiar's mirror glaze professionsl swirl remover M09
A bottle of Meguiar's mirror glaze #7 show car glaze.
I was at walmart and bought a 6" random orbital that came with a yellow foam pad and a blue microfiber pad.
I started a couple of weeks ago on the RT fender (thats my test area), mainly on the black at the top to see what would happen. I washed it and then used the cleaner wax. That did a little but not much. I tried the #7 and that seemed to help a little more but still no shine. I do have a little reflection in the paint now.
I bought the 6" because of needing to work around the striping and hard lines.. Do you think I need the 10 machine also? IS there more to it then the fact that it covers a large area faster?
I was thinking top work on the dark paint areas first. The white shines up easy.
Thanks
Anna
#6
04-11-2017, 10:29 AM
Thanks again for taking the time to help and sharing your experience.
Let me ask you if any of the polishes I have on hand will be of any use.
I have a can of Meguiars cleaner wax.
A bottle of Meguiar's mirror glaze professionsl swirl remover M09
A bottle of Meguiar's mirror glaze #7 show car glaze.
I was at walmart and bought a 6" random orbital that came with a yellow foam pad and a blue microfiber pad.
I started a couple of weeks ago on the RT fender (thats my test area), mainly on the black at the top to see what would happen. I washed it and then used the cleaner wax. That did a little but not much. I tried the #7 and that seemed to help a little more but still no shine. I do have a little reflection in the paint now.
I bought the 6" because of needing to work around the striping and hard lines.. Do you think I need the 10 machine also? IS there more to it then the fact that it covers a large area faster?
I was thinking top work on the dark paint areas first. The white shines up easy.
Thanks
Anna
Let me ask you if any of the polishes I have on hand will be of any use.
I have a can of Meguiars cleaner wax.
A bottle of Meguiar's mirror glaze professionsl swirl remover M09
A bottle of Meguiar's mirror glaze #7 show car glaze.
I was at walmart and bought a 6" random orbital that came with a yellow foam pad and a blue microfiber pad.
I started a couple of weeks ago on the RT fender (thats my test area), mainly on the black at the top to see what would happen. I washed it and then used the cleaner wax. That did a little but not much. I tried the #7 and that seemed to help a little more but still no shine. I do have a little reflection in the paint now.
I bought the 6" because of needing to work around the striping and hard lines.. Do you think I need the 10 machine also? IS there more to it then the fact that it covers a large area faster?
I was thinking top work on the dark paint areas first. The white shines up easy.
Thanks
Anna
With regards to the "I bought the 6" because of needing to work around the striping and hard lines.. Do you think I need the 10 machine also?"
IMHO, it would be more of a convenience thing than anything else in regards to the 10"..........you can also take masking tape or painters tape and mask off the lines so you don't touch them accidentially...it works well.
With regards to........
I have a can of Meguiars cleaner wax.
A bottle of Meguiar's mirror glaze professionsl swirl remover M09
These are retail grade products.....not really the best IMHO either. If I may suggest, take a visit to your local autobody paint supplier...everybody has one the local shops buy their supplies from, let them look at the truck and they will recommend a "real" polish that has the right amount of "strength"......you may find that the megs swirl mark removers is more than adequate after you use a good polish on the paint.
#7
04-11-2017, 06:37 PM
Thank you Beachkid again for the help!
I will probably be doing the work in sections but taping off the stripes, the 10“ buffer would make it much faster on the roof and lower half...
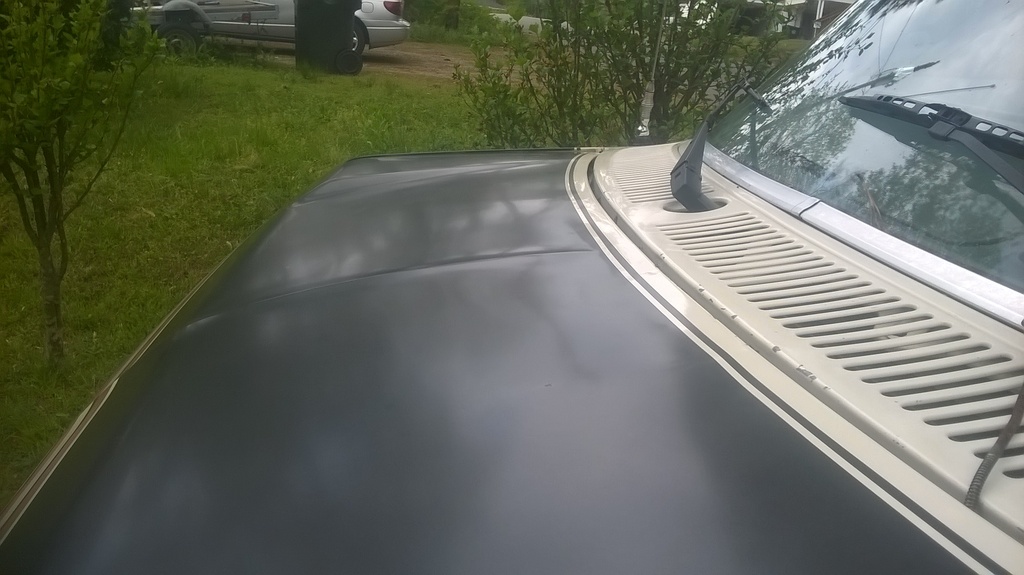
Roof, that brings up a question as it is fiberglass.. I believe it is single stage paint on top of gelcoat? I know the dark pewter on the sides of the hightop is the same metallic paint as on the bottom.
Should I claybar or is that the idea of using the denatured alcohol?
I’ll follow your advice and seek out a supplier.. Probably much cheaper then buying those little bottles at 8 to 10 dollars a pop. I am sure that van is going to take a good bit..
I should have used my digital cam instead of my phone as the pics would have been better and as I move along on this project i will...
The only area I have worked on is the RT fender and the top half of that.. I did wash it with Dawn before I started..
So I washed the fender.
I used the cleaner wax only on the pewter and top of the fender.
I put 2 coats of the #7 on top of that. Again just the top half of the fender. I let each coat sit a couple of hours before removing it.
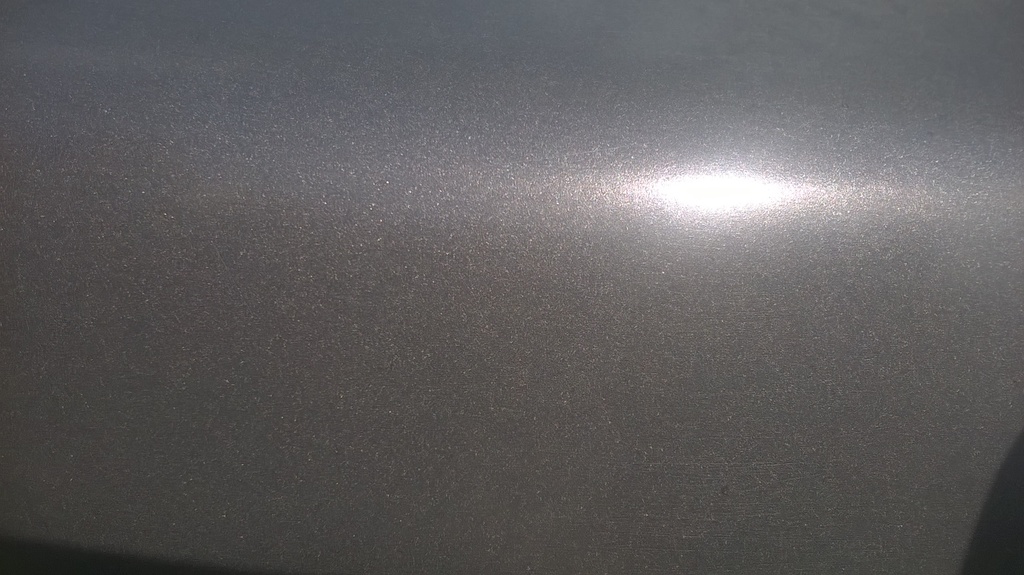
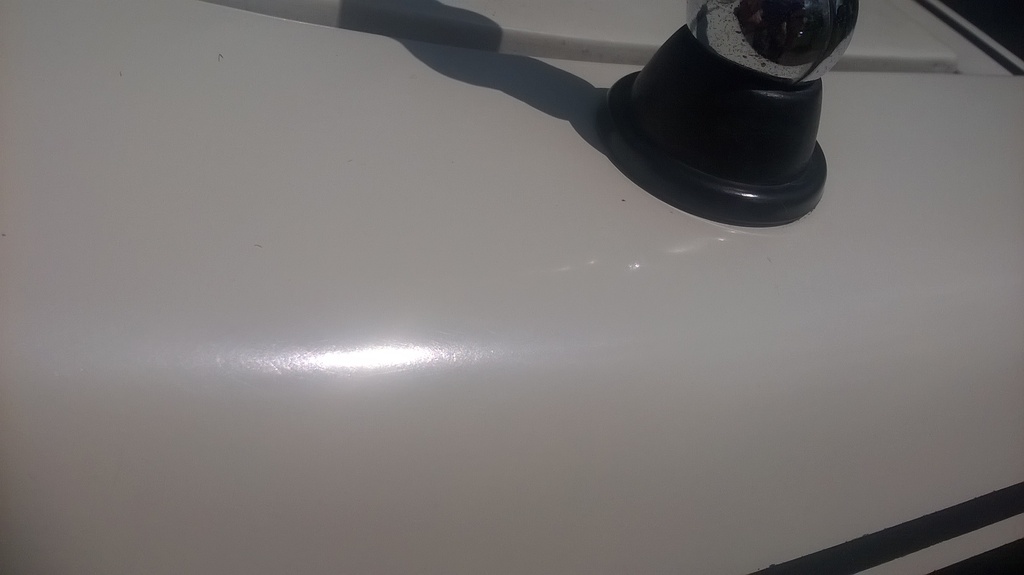
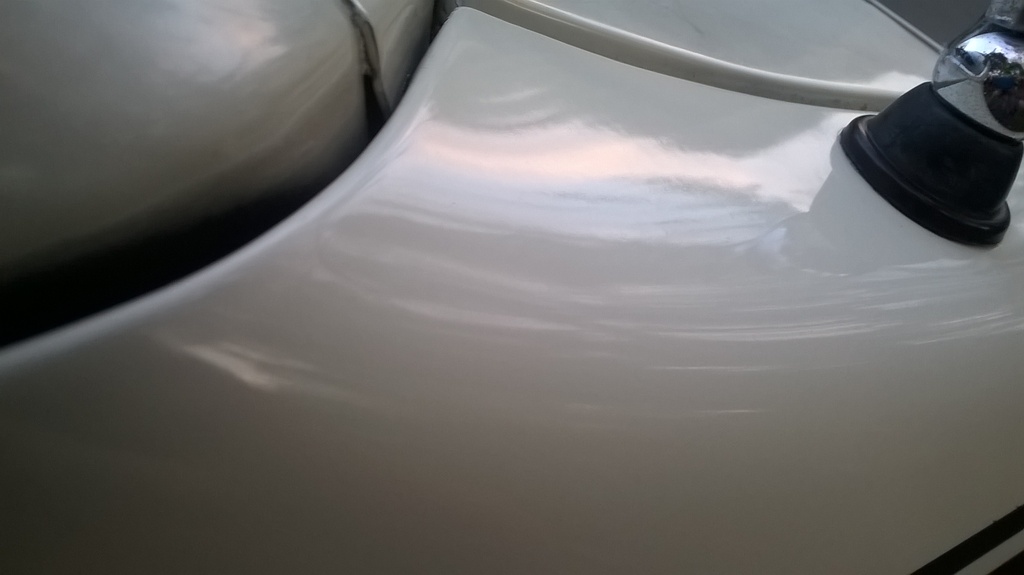
Now you can see better what the paint looks like on the test area..
Left side not touched.
Right side test area. You can almost seem my other car reflection

Here is the fender compared to the untouched hood
That white is in really good shape and should turn out like new!

This is as far down as i went, the pewter stripe. I am going to have to take a closer look, i thinkthose stripes are just black paint and not metallic
I think it will look great after following your instructions and getting the right materials.

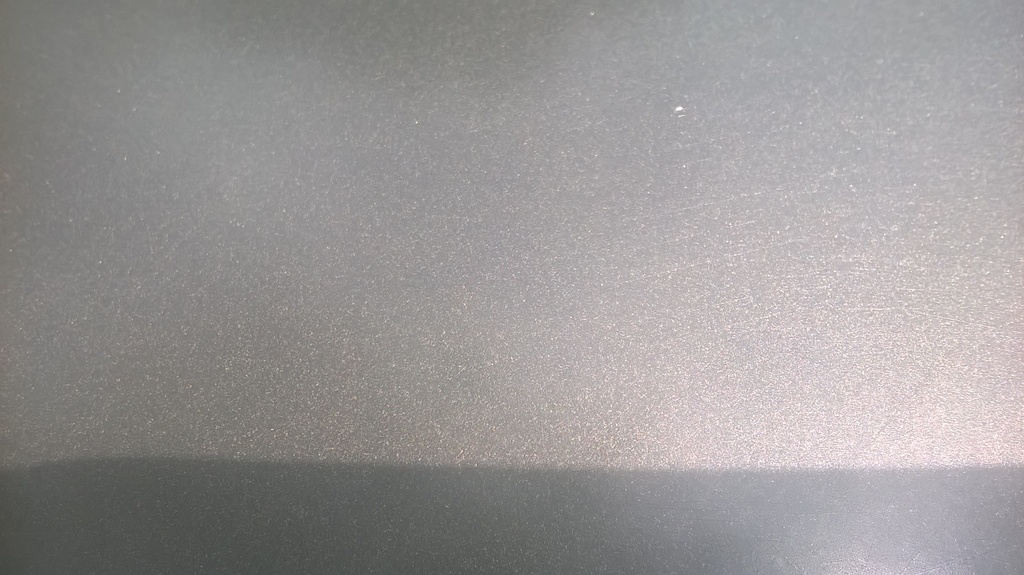
And here is a close up of the paint on the test area.
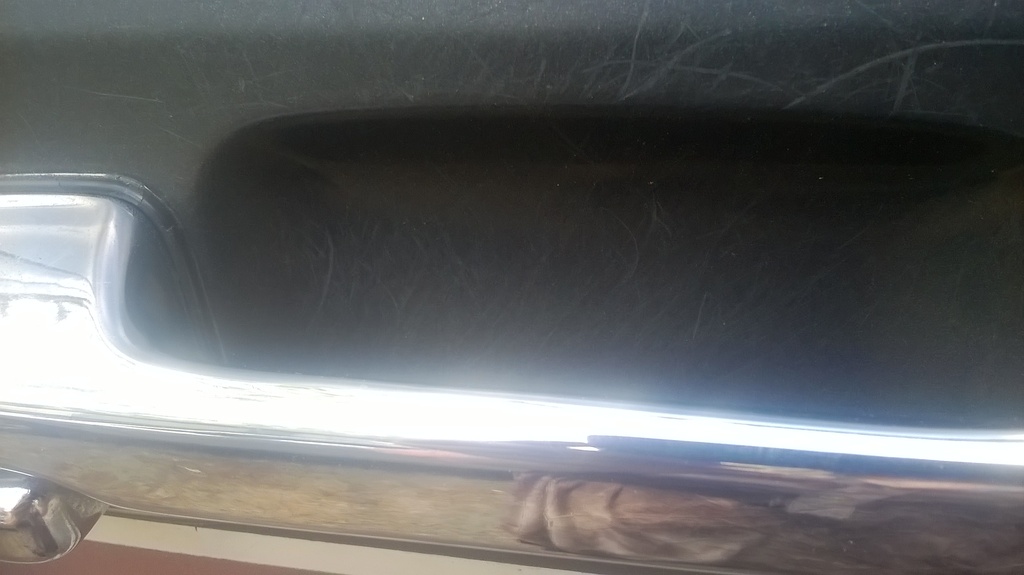
And last is a problem area,, fingernail scratches at the door handles... Maybe they make a round type pad that will fit in a battery drill?
Oh my,, this will be a job.. I just thought about the white painted trim on the inside and door jams.. Not counting the aluminum running boards...
Have a great day..
Anna
I will probably be doing the work in sections but taping off the stripes, the 10“ buffer would make it much faster on the roof and lower half...
Roof, that brings up a question as it is fiberglass.. I believe it is single stage paint on top of gelcoat? I know the dark pewter on the sides of the hightop is the same metallic paint as on the bottom.
Should I claybar or is that the idea of using the denatured alcohol?
I’ll follow your advice and seek out a supplier.. Probably much cheaper then buying those little bottles at 8 to 10 dollars a pop. I am sure that van is going to take a good bit..
I should have used my digital cam instead of my phone as the pics would have been better and as I move along on this project i will...
The only area I have worked on is the RT fender and the top half of that.. I did wash it with Dawn before I started..
So I washed the fender.
I used the cleaner wax only on the pewter and top of the fender.
I put 2 coats of the #7 on top of that. Again just the top half of the fender. I let each coat sit a couple of hours before removing it.
Now you can see better what the paint looks like on the test area..
Left side not touched.

Right side test area. You can almost seem my other car reflection

Here is the fender compared to the untouched hood

That white is in really good shape and should turn out like new!


This is as far down as i went, the pewter stripe. I am going to have to take a closer look, i thinkthose stripes are just black paint and not metallic

I think it will look great after following your instructions and getting the right materials.

And here is a close up of the paint on the test area.

And last is a problem area,, fingernail scratches at the door handles... Maybe they make a round type pad that will fit in a battery drill?

Oh my,, this will be a job.. I just thought about the white painted trim on the inside and door jams.. Not counting the aluminum running boards...
Have a great day..
Anna
Trending Topics
#8
04-12-2017, 12:08 PM
Yes, you are doing a good job and I agree, it looks like the paint will come back nicely!!!!!
IMHO- I'm betting that when you get you hands on the "real" polish, you will be able to fairly easily polish those fingernail scratches out at the door handles.
With regards to claybar......I'm really not a big fan as you are essentially "wet-sanding" the paint......Mequire's clay bar (medium) is rated at 3500 grit. There much better clay bar products out there rated at much finer grits (up to 6000 IIRR)- so if you are comfortable and believe your paint needs to be wet-sanded, then do so. Between the Dawn and the alcohol, that should remove most any surface contamination in the paint and should put you in real good shape for polishing the paint back.
As an FYI- sometimes because of the amount of depth of a mark on paint, it's best to polish out what you can but also leaving as much paint (thickness) as possible for longevity.....which is where the swirl mark remover and wax comes into play....it essentially hides the blemish and over time, the sun will fade much of those away as well.
#10
04-12-2017, 07:40 PM
Yes, I am using photo bucket to upload them. I should learn to upload them to the forum in a photo album so if something happened to the photo bucket album, they wouldn't be lost.
Beechkid.... Big thanks again!
So I went to a paint store like you said to and the guy recommended I use his 3M 05973 Rubbing Compound. He also said it is SS paint. He also said that it may not stay shinny long. We will see how that goes.
The fender I worked on yesterday had no wax on it and this morning when i went out and looked at the paint, it had a whitish haze on it.
Today I used used the 3M by hand on a towel and then used the cleaner wax I have on hand to protect it, we will see what it looks like in the morning..
Your advice is 120% correct (real polish)! I bet the orbital buffer I bought will do a much better job then by hand..
Just a thought here... 1- I washed the fender with Dawn.. 2- I used the cleaner wax. 3- i put 2 coats of #7 and let it sit 2 hrs in between coats and when I wiped it off. 4- I used the 3M. 5- I applied the cleaner wax. Am I going to have to do all those same steps to get the same shine on the whole van or will, wash, alcohol wipe down, 3M, and wax be the same?
So here is before and after from today..
Before with store bought..
After with 3M
The white paint will almost look like new..
Before with store brand
After with 3M
Beechkid.... Big thanks again!
So I went to a paint store like you said to and the guy recommended I use his 3M 05973 Rubbing Compound. He also said it is SS paint. He also said that it may not stay shinny long. We will see how that goes.
The fender I worked on yesterday had no wax on it and this morning when i went out and looked at the paint, it had a whitish haze on it.
Today I used used the 3M by hand on a towel and then used the cleaner wax I have on hand to protect it, we will see what it looks like in the morning..
Your advice is 120% correct (real polish)! I bet the orbital buffer I bought will do a much better job then by hand..
Just a thought here... 1- I washed the fender with Dawn.. 2- I used the cleaner wax. 3- i put 2 coats of #7 and let it sit 2 hrs in between coats and when I wiped it off. 4- I used the 3M. 5- I applied the cleaner wax. Am I going to have to do all those same steps to get the same shine on the whole van or will, wash, alcohol wipe down, 3M, and wax be the same?
So here is before and after from today..
Before with store bought..
After with 3M

The white paint will almost look like new..
Before with store brand

After with 3M

#11
04-13-2017, 10:40 AM
Yes, I am using photo bucket to upload them. I should learn to upload them to the forum in a photo album so if something happened to the photo bucket album, they wouldn't be lost.
Beechkid.... Big thanks again!
So I went to a paint store like you said to and the guy recommended I use his 3M 05973 Rubbing Compound. He also said it is SS paint. He also said that it may not stay shinny long. We will see how that goes.
The fender I worked on yesterday had no wax on it and this morning when i went out and looked at the paint, it had a whitish haze on it.
Today I used used the 3M by hand on a towel and then used the cleaner wax I have on hand to protect it, we will see what it looks like in the morning..
Your advice is 120% correct (real polish)! I bet the orbital buffer I bought will do a much better job then by hand..
Just a thought here... 1- I washed the fender with Dawn.. 2- I used the cleaner wax. 3- i put 2 coats of #7 and let it sit 2 hrs in between coats and when I wiped it off. 4- I used the 3M. 5- I applied the cleaner wax. Am I going to have to do all those same steps to get the same shine on the whole van or will, wash, alcohol wipe down, 3M, and wax be the same?
So here is before and after from today..
Before with store bought..

After with 3M

The white paint will almost look like new..
Before with store brand

After with 3M

Beechkid.... Big thanks again!
So I went to a paint store like you said to and the guy recommended I use his 3M 05973 Rubbing Compound. He also said it is SS paint. He also said that it may not stay shinny long. We will see how that goes.
The fender I worked on yesterday had no wax on it and this morning when i went out and looked at the paint, it had a whitish haze on it.
Today I used used the 3M by hand on a towel and then used the cleaner wax I have on hand to protect it, we will see what it looks like in the morning..
Your advice is 120% correct (real polish)! I bet the orbital buffer I bought will do a much better job then by hand..
Just a thought here... 1- I washed the fender with Dawn.. 2- I used the cleaner wax. 3- i put 2 coats of #7 and let it sit 2 hrs in between coats and when I wiped it off. 4- I used the 3M. 5- I applied the cleaner wax. Am I going to have to do all those same steps to get the same shine on the whole van or will, wash, alcohol wipe down, 3M, and wax be the same?
So here is before and after from today..
Before with store bought..
After with 3M
The white paint will almost look like new..
Before with store brand
After with 3M
With regards to the white haze, the stronger polishing/rubbing compounds can leave this haze and you can either wipe it off or even just a quick wash if necessary.......what can also cause this (if it is not residue) is if the paint is thin, exceptionally tired (environmental/sun issues) and/or has been buffed too much, the pigmentation of the paint is damagedand it can develop a white haze to it....there is really not much in reality that can be done but keeping a good coat of wax on it (monthly if needed) will hide most of it.....and as a guy who has purchased vehicles that the previous owners over-buffed the paint, I can tell you, the 15 minute spray on waxes work GREAT for this!!!!!
From the recent pics, I think you are in very, very good shape and I am very anxious to see the end result....I think you will be very proud of your work and I know how much effort it takes to do this......I will be very, very proud of you as well!!!!!!!!!!!!!!!!!!!

With regards to....
will, wash, alcohol wipe down, 3M, and wax be the same?
Answer- Yes!!!!
#12
04-14-2017, 10:46 PM
Thanks for the reply!!
Ok I think I have an environmental/sun issue!
I washed the van really good last night at the high pressure spray wand type wash. Some of the stains on the white did not want to come off of the white paint, so I tried a little of the engine tire cleaner soap but that didn't do much more. What I did learn is that the 3M compound did remove it.. The only white paint ?I worked on today was the little strip on the front of the hood.
Ok so now to the environmental issue.
This is the first time I have really looked the paint over this close. I believe the van must have been parked facing the south, possibly a little of the left side. I will know more about the left side as I move along.. The dark pewter looks almost new and is shiny after washing it "on the lower half" of the van where the sun would not hit it. .
But this morning before the sun came out good I worked on the hood.
I lightly wiped it of with denatured alcohol. I did not soak the rag. I did use enough to where I could see where I was wiping and it quickly dissipated.
Next I used the yellow foam pad with the orbital buffer. I did the up and down and then across pattern about 5 of 6 times then wiped it off. It left a little to be desired so I repeated the same process and it looked much better.
Next I used the cleaner wax by hand and then you could see allot of splotchy areas. I thought oh no,, maybe I buffed it too much. I read on ss metallic paint that you have to be careful because the aluminum metallic flakes will dull the paint if buffed too much,, I dont know.
Next I thought, let me try some of the Meguiars #7 mirror glaze. That made it show up worse.
Next I thought I would try using the cleaner wax with the buffer and terry cloth pad. It turned out a little better so I did it twice then buffed it by hand.
Today i read where someone said to use the #7 before you wax, again I don't know!
Maybe i need to get the wax off and do something different?
Anyway here are the pictures. In person depending on the angle and light it looks good but other times you see the splotches. They look like dry areas under the wax.
Also in the close ups of the paint you can see the old scratches so I didn't buff that much. Most re old straight line scratches.. You have to be at the right angle to see them but they are not from my work because i didn't do any thing in straight lines...
Ok here they are.. Oh and the fender looks great but it is a small area where the hood is a larger flat area. Also some of the lines in the hood are shadows.
Edit: BTW, I found a small dent in the hood that I could not see before getting it polished up.. And it does look much better and i am pretty sure i will be really impressed with the rest of the areas.

close up's of the paint


Ok I think I have an environmental/sun issue!
I washed the van really good last night at the high pressure spray wand type wash. Some of the stains on the white did not want to come off of the white paint, so I tried a little of the engine tire cleaner soap but that didn't do much more. What I did learn is that the 3M compound did remove it.. The only white paint ?I worked on today was the little strip on the front of the hood.
Ok so now to the environmental issue.
This is the first time I have really looked the paint over this close. I believe the van must have been parked facing the south, possibly a little of the left side. I will know more about the left side as I move along.. The dark pewter looks almost new and is shiny after washing it "on the lower half" of the van where the sun would not hit it. .
But this morning before the sun came out good I worked on the hood.
I lightly wiped it of with denatured alcohol. I did not soak the rag. I did use enough to where I could see where I was wiping and it quickly dissipated.
Next I used the yellow foam pad with the orbital buffer. I did the up and down and then across pattern about 5 of 6 times then wiped it off. It left a little to be desired so I repeated the same process and it looked much better.
Next I used the cleaner wax by hand and then you could see allot of splotchy areas. I thought oh no,, maybe I buffed it too much. I read on ss metallic paint that you have to be careful because the aluminum metallic flakes will dull the paint if buffed too much,, I dont know.
Next I thought, let me try some of the Meguiars #7 mirror glaze. That made it show up worse.
Next I thought I would try using the cleaner wax with the buffer and terry cloth pad. It turned out a little better so I did it twice then buffed it by hand.
Today i read where someone said to use the #7 before you wax, again I don't know!
Maybe i need to get the wax off and do something different?
Anyway here are the pictures. In person depending on the angle and light it looks good but other times you see the splotches. They look like dry areas under the wax.
Also in the close ups of the paint you can see the old scratches so I didn't buff that much. Most re old straight line scratches.. You have to be at the right angle to see them but they are not from my work because i didn't do any thing in straight lines...
Ok here they are.. Oh and the fender looks great but it is a small area where the hood is a larger flat area. Also some of the lines in the hood are shadows.
Edit: BTW, I found a small dent in the hood that I could not see before getting it polished up.. And it does look much better and i am pretty sure i will be really impressed with the rest of the areas.


close up's of the paint


#13
04-15-2017, 01:42 AM

#14
04-15-2017, 04:07 PM
The hood is actually looking much better today for some reason..
A couple of places that appear different, appear to have a little deeper scratches in them then the rest of the paint that shines better. Perhaps I didn't buff it enough. i was worried about buffing the paint too much. It is easier to buff it down then to build it back!
So am thinking the dry looking splotches may be where I didn't buff it good enough..
Interesting is the test spot the guy at the paint shop did on the hood. He used one of those blue paper shop towels and rubbed about a 2" circle and then wiped it off with the other side of the towel. That spot still shows and has a little better shine then the hood.
I didn't touch that spot till the next day and that was when I washed the van. It was the second day after he did the test spot that I buffed the hood.
#15
04-16-2017, 03:24 PM
The hood is actually looking much better today for some reason..
A couple of places that appear different, appear to have a little deeper scratches in them then the rest of the paint that shines better. Perhaps I didn't buff it enough. i was worried about buffing the paint too much. It is easier to buff it down then to build it back!
So am thinking the dry looking splotches may be where I didn't buff it good enough..
Interesting is the test spot the guy at the paint shop did on the hood. He used one of those blue paper shop towels and rubbed about a 2" circle and then wiped it off with the other side of the towel. That spot still shows and has a little better shine then the hood.
I didn't touch that spot till the next day and that was when I washed the van. It was the second day after he did the test spot that I buffed the hood.
A couple of places that appear different, appear to have a little deeper scratches in them then the rest of the paint that shines better. Perhaps I didn't buff it enough. i was worried about buffing the paint too much. It is easier to buff it down then to build it back!
So am thinking the dry looking splotches may be where I didn't buff it good enough..
Interesting is the test spot the guy at the paint shop did on the hood. He used one of those blue paper shop towels and rubbed about a 2" circle and then wiped it off with the other side of the towel. That spot still shows and has a little better shine then the hood.
I didn't touch that spot till the next day and that was when I washed the van. It was the second day after he did the test spot that I buffed the hood.
I agree with your analysis!!!!!!!! and yes, being more experienced with paint condition & products, he probably used a bit more pressure than you would
 which is ok.......and you are right, better to need to do a little more than to do too much!!!!
I think you will have a great looking vehicle when it is all done and yes, there is a bit of a trial and error test period that everyone (including the pros) do to figure out what will bring out the best outcome.