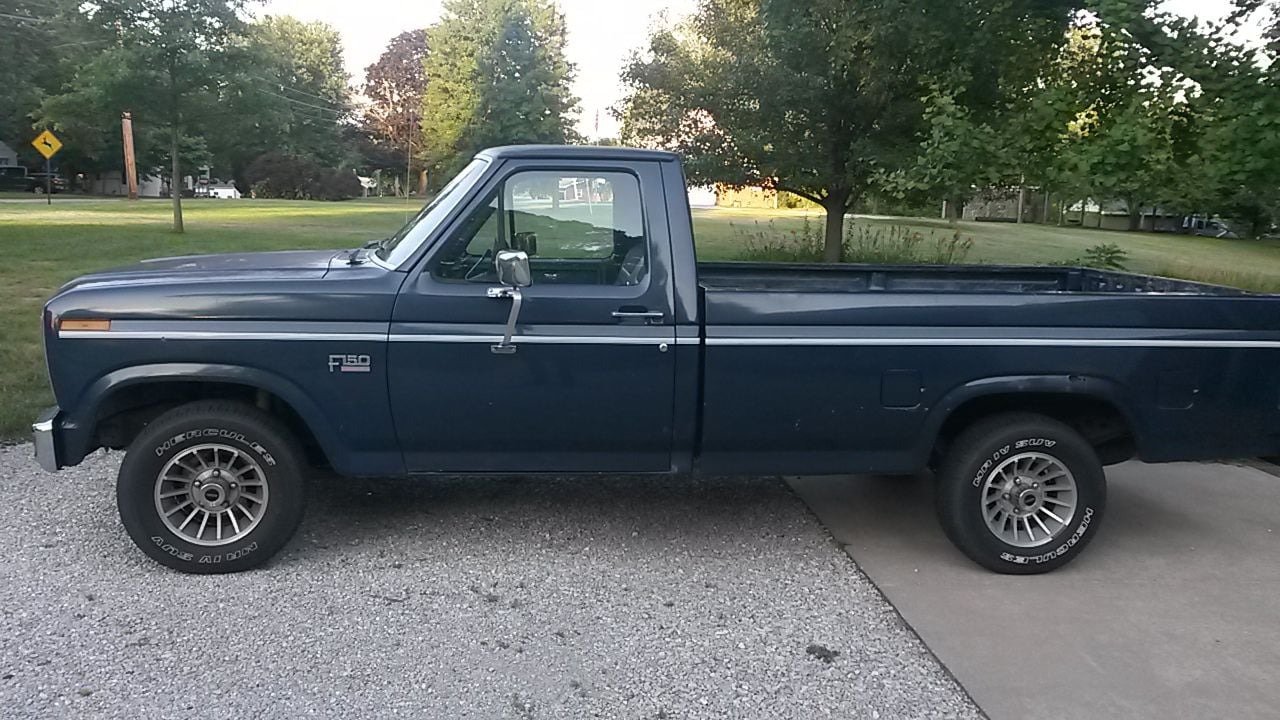
New owner 1980 F100 Flare Side
#662
"Period correct" is why I also like them it is also the only wheel in the 5 x 5.5 that I have. My son has a set of Alum. slots for his Jeep that may fit I could "use" but I like the ones on the truck better.
Who makes the wheels you have on the truck? Mine are more like yours, the fins blend into the wheel center hub where the ET's have a ring around the center hub.
I ask because my center caps are also painted and could be in better shape to start with so may get new ones?
Dave ----
#663
A few weeks ago I was in the truck when it was darkish and saw half the dash lights did not work. When I rebuilt the cluster I did not replace the bulbs, just cleaned them.
Also the colored covers were like new so I left them in at that time.
So I ordered LED bulbs, pulled the cluster last weekend and replaced all the bulbs.
Today was install time and to make sure worked. Some of the bulbs needed to be turned 180* before they would work.
I also replaced the warning lights across the top with LED's too.
I had to jump out the sensors to make sure they worked or needed to be turned also.
The only one I did not jump out was the brake light. I did not know what it was till I was going in the house. Then again I will know if the brakes don't work and don't need a light to tell me.
What bulb colors did I use you ask? Green for the gauges and white for the warning lights.
Garage lights off but still bright out at 5:45pm and facing the windows but you can see the gauges.

Then took a picture when it was a little more dark out.

I left the colored cover in as I did not want to take the cluster all apart to remove them.
After the cluster was back in and tested in day light I pulled the truck out of the garage and did a Bill Murray cleaning like in Caddy Shack, back pack blower and all!
There was a lot of body filler dust all over, even on top of the lights! It will take a lot more cleaning before I can paint in there.
It would be nice to get my sons boxes from moving out and the 1 car I have in there with 4 blown out tires for the next cleaning
I don't see that happening but I do see Bill Murray coming back out again LOL
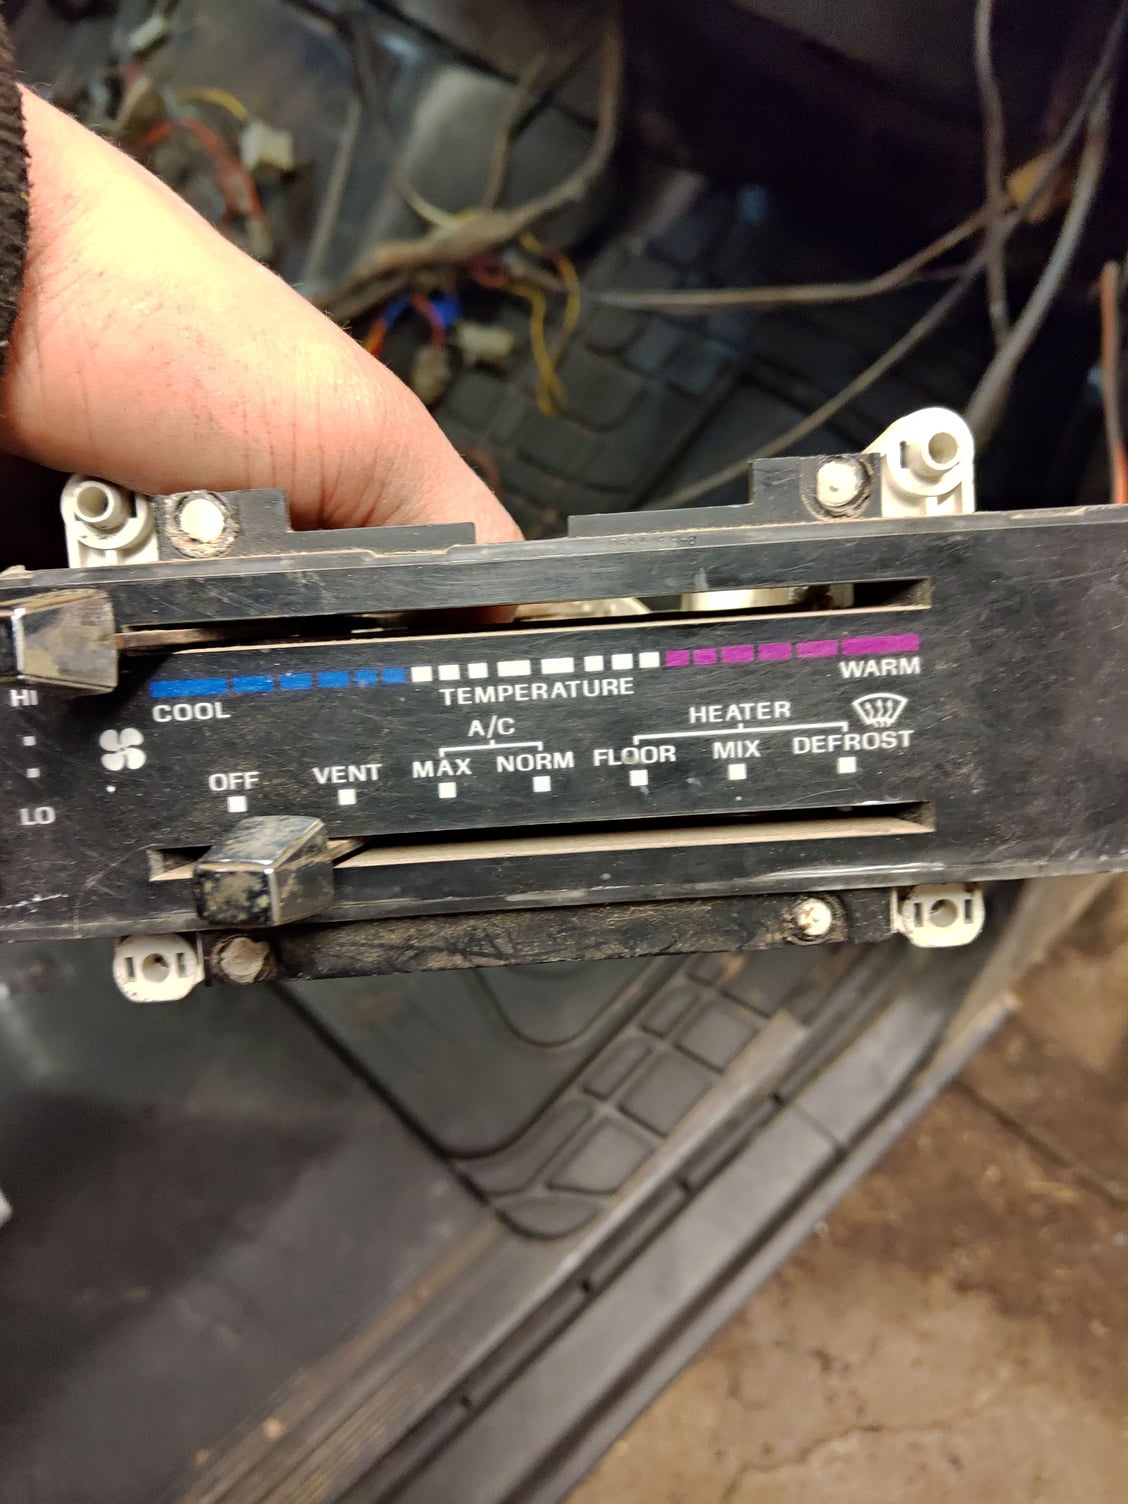
Before backing the truck back in I checked how the HVAC worked as I remembered something not right with it.
When on MAX AC the air comes out the defrost. If on Normal AC it comes out the dash vents. The rest work as should when in that position of vents / floor / mix / defrost.
This works off the vacuum system of the switch, the temp side works as should and that is cable.
I should have jumped the AC pressure switch and checked for power to the AC compressor, maybe next time?
Oh I also bolted the jack bracket to the right fender and the hood hinges on.
I need to go thru all the parts a have and start putting them together that I have 2 of, like wiper arms, wiper motors & linkage to name a few.
Dave ----
Also the colored covers were like new so I left them in at that time.
So I ordered LED bulbs, pulled the cluster last weekend and replaced all the bulbs.
Today was install time and to make sure worked. Some of the bulbs needed to be turned 180* before they would work.
I also replaced the warning lights across the top with LED's too.
I had to jump out the sensors to make sure they worked or needed to be turned also.
The only one I did not jump out was the brake light. I did not know what it was till I was going in the house. Then again I will know if the brakes don't work and don't need a light to tell me.
What bulb colors did I use you ask? Green for the gauges and white for the warning lights.
Garage lights off but still bright out at 5:45pm and facing the windows but you can see the gauges.

Then took a picture when it was a little more dark out.

I left the colored cover in as I did not want to take the cluster all apart to remove them.
After the cluster was back in and tested in day light I pulled the truck out of the garage and did a Bill Murray cleaning like in Caddy Shack, back pack blower and all!
There was a lot of body filler dust all over, even on top of the lights! It will take a lot more cleaning before I can paint in there.
It would be nice to get my sons boxes from moving out and the 1 car I have in there with 4 blown out tires for the next cleaning
I don't see that happening but I do see Bill Murray coming back out again LOL
Before backing the truck back in I checked how the HVAC worked as I remembered something not right with it.
When on MAX AC the air comes out the defrost. If on Normal AC it comes out the dash vents. The rest work as should when in that position of vents / floor / mix / defrost.
This works off the vacuum system of the switch, the temp side works as should and that is cable.
I should have jumped the AC pressure switch and checked for power to the AC compressor, maybe next time?
Oh I also bolted the jack bracket to the right fender and the hood hinges on.
I need to go thru all the parts a have and start putting them together that I have 2 of, like wiper arms, wiper motors & linkage to name a few.
Dave ----
#664
I just tore my ac apart, but cant remember exactly how the vac lines were hooked, I will look at it again to see how it was hooked. I remember three lines that run off separate and hook up with a triangular boot, if it were those maybe it was rotated partway before being connected? I get to tear the other one up tomorrow, I can try and map the system as I unhook it.
#665
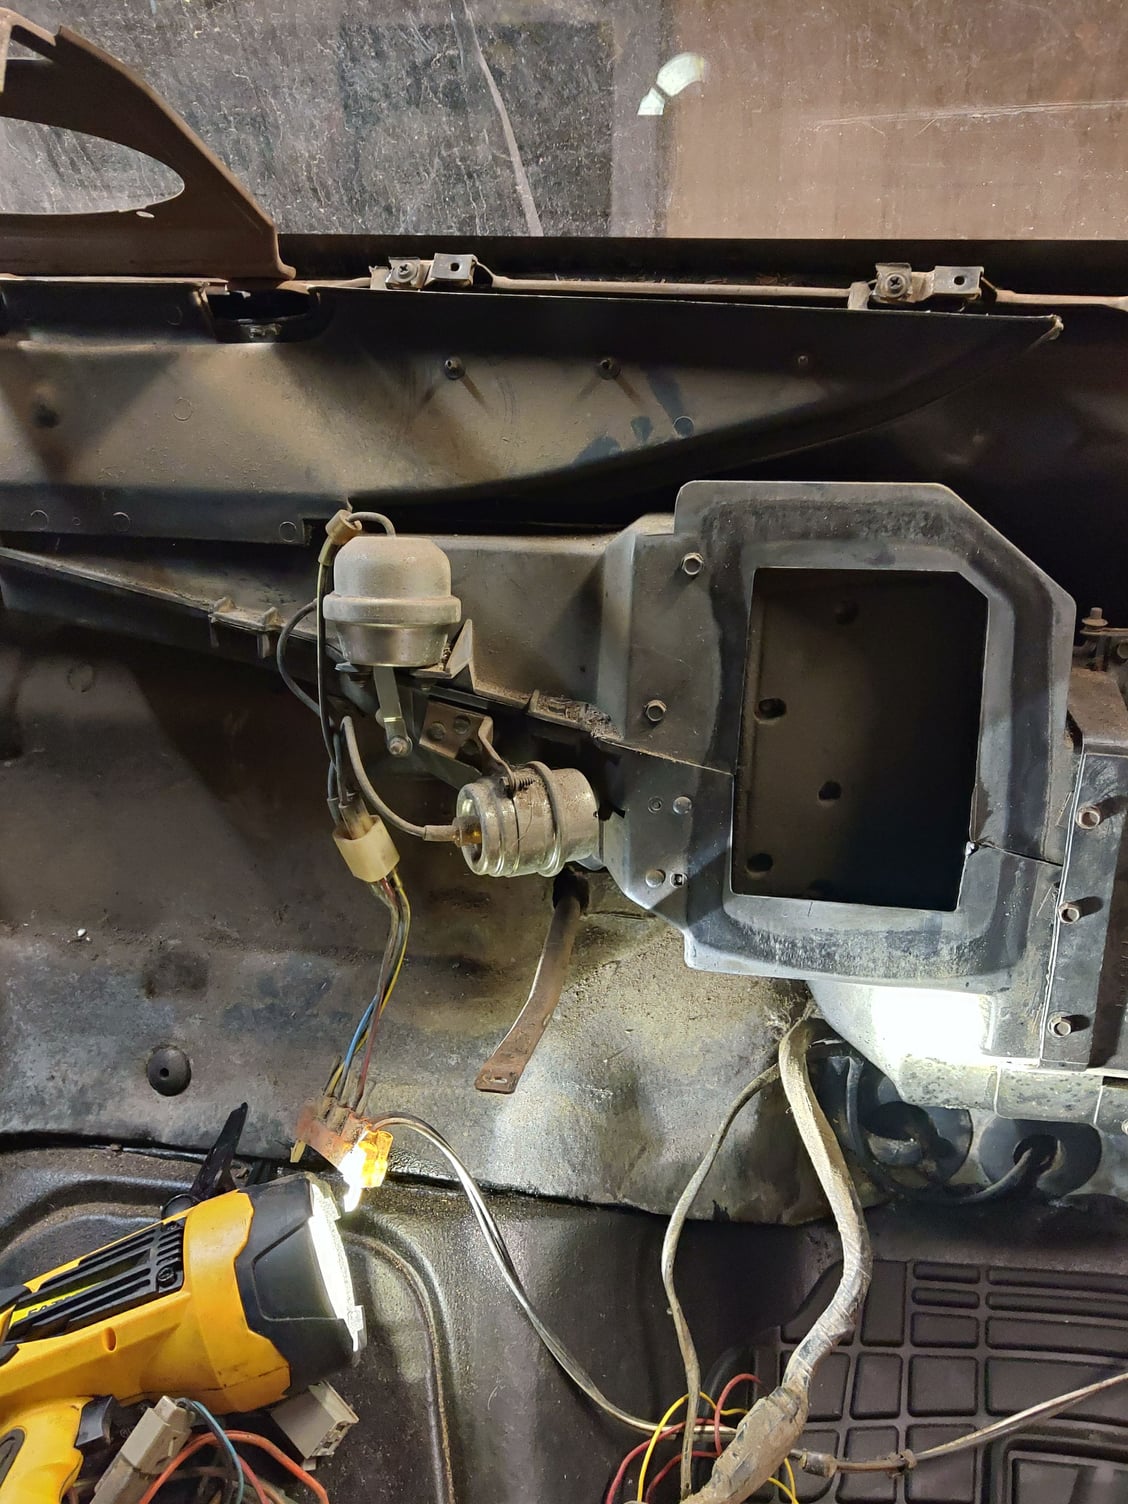
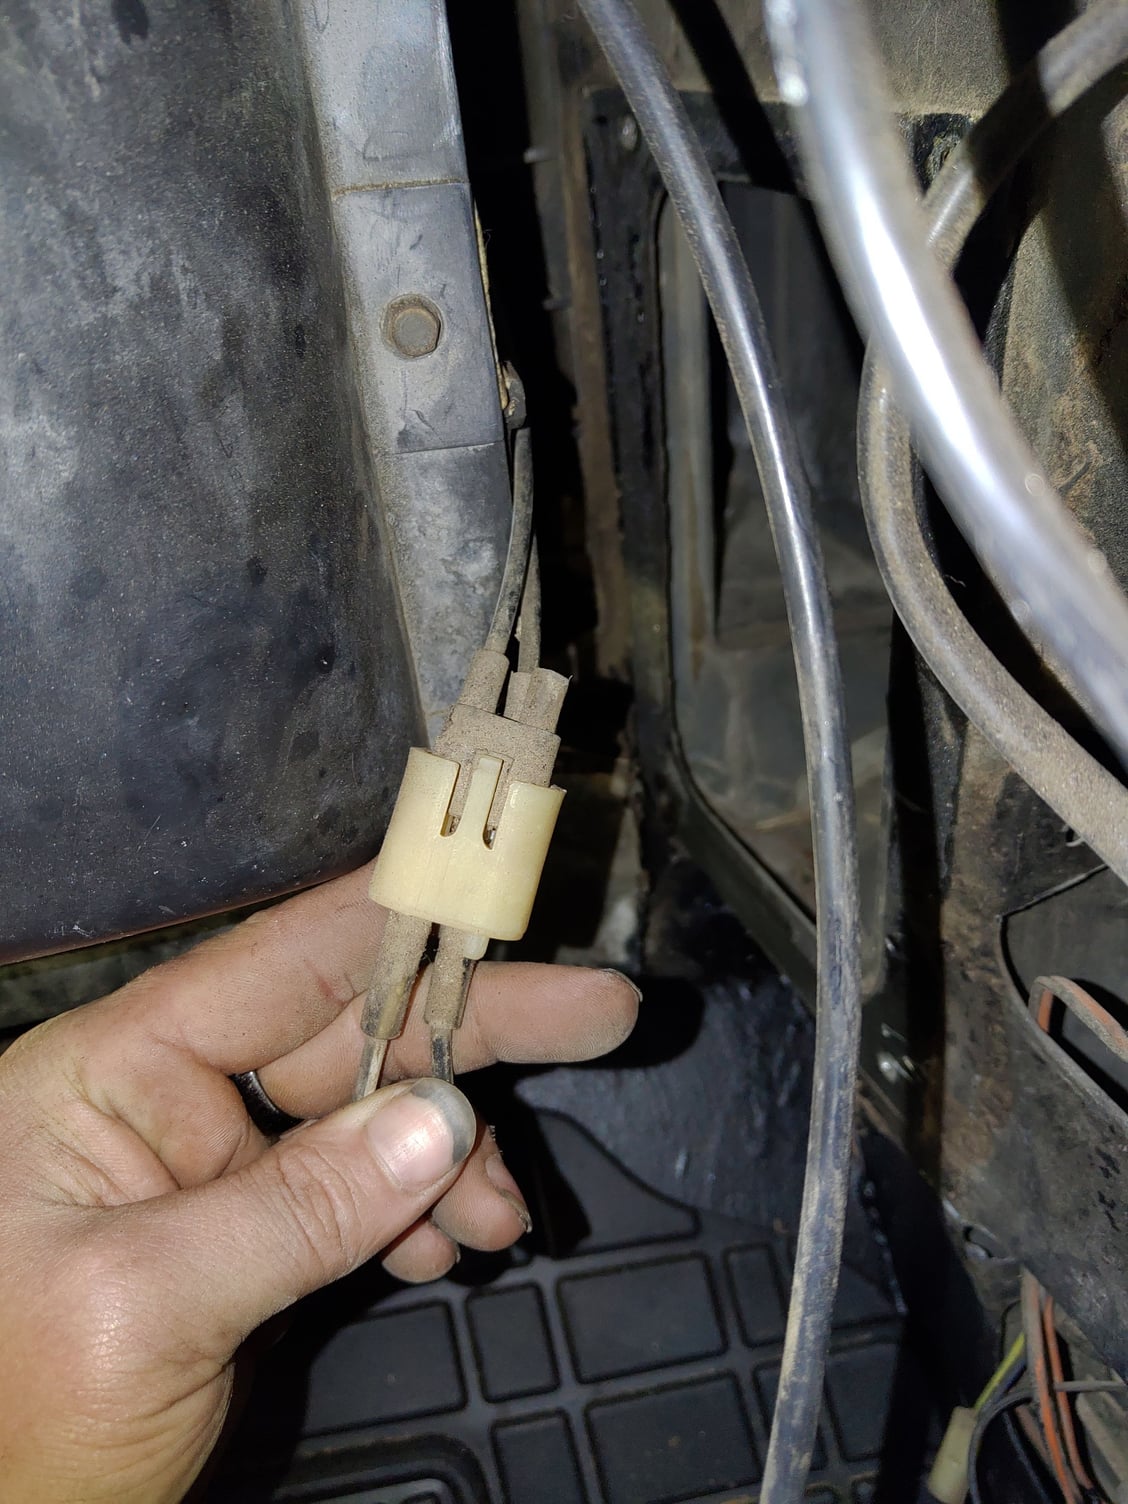
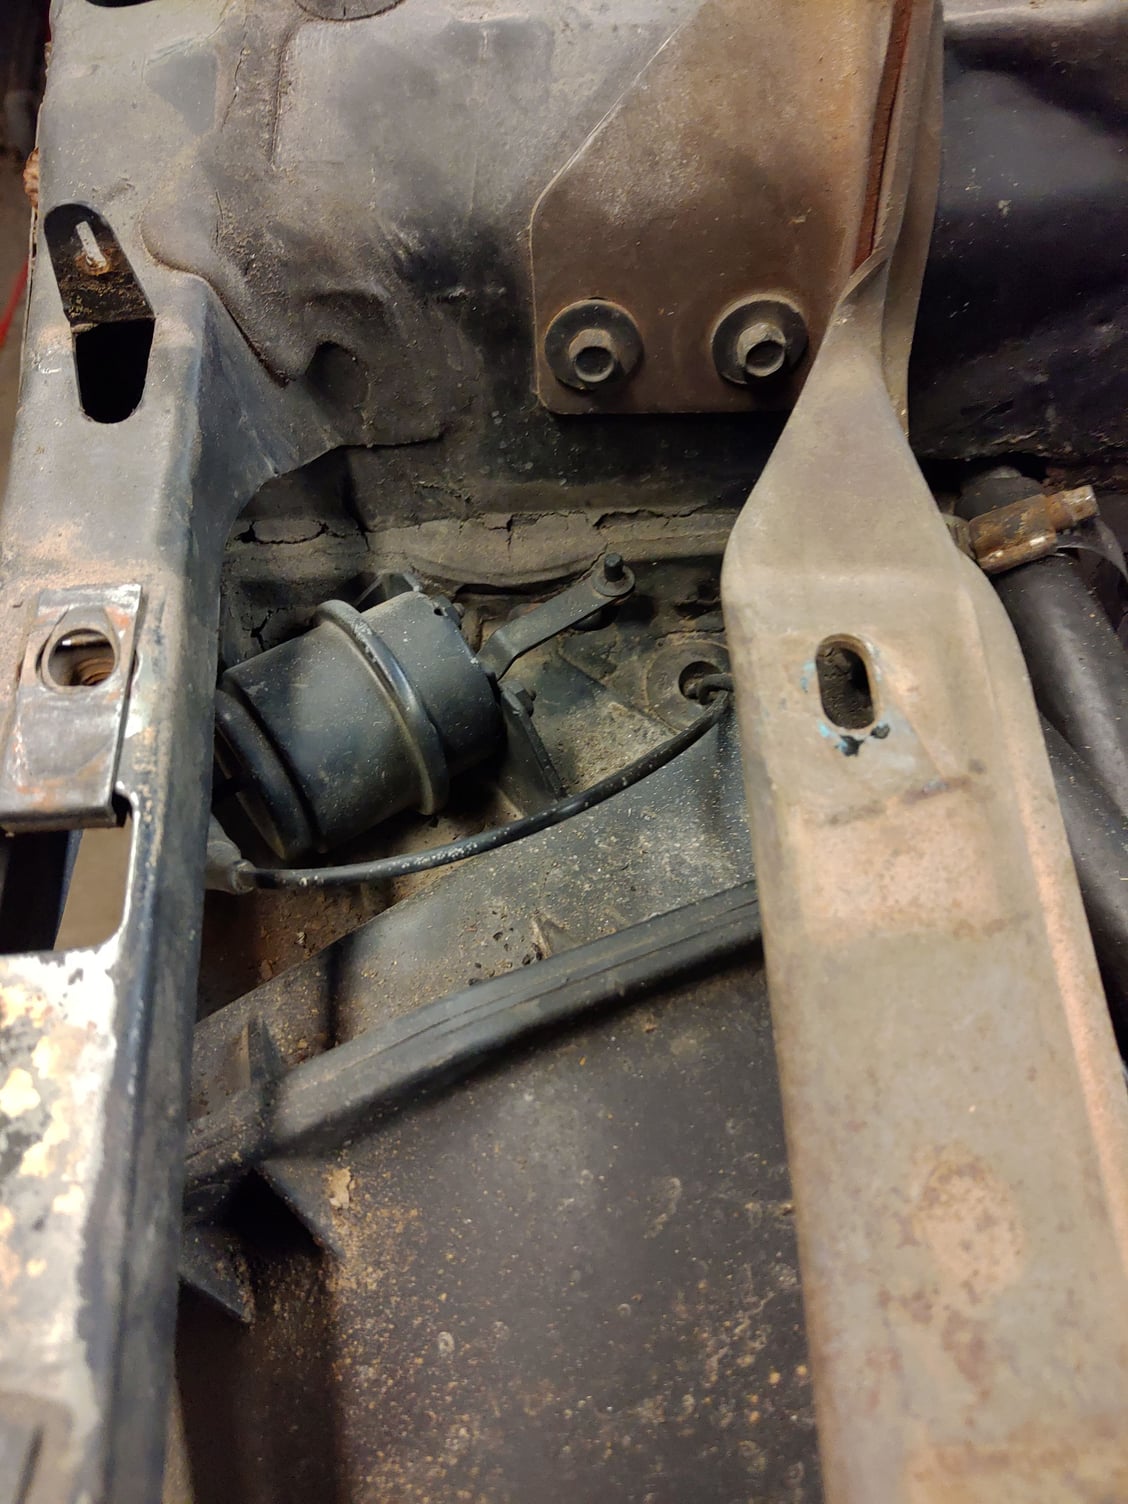
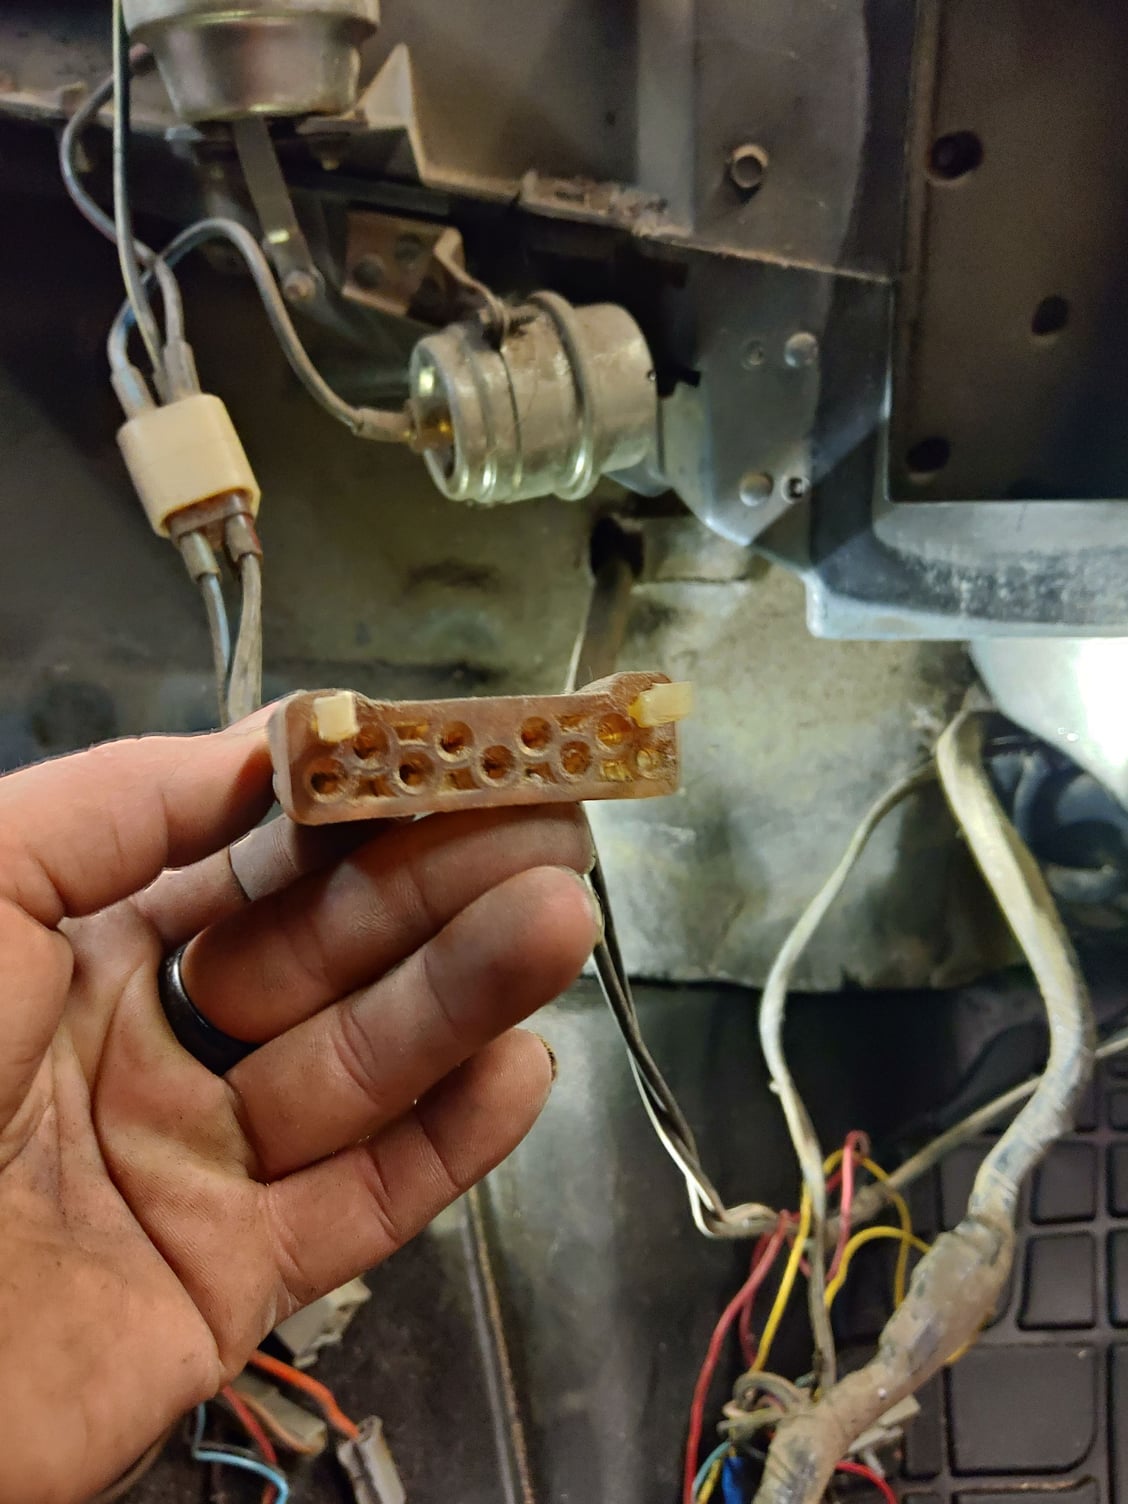
I'm going to number the ports from left to right. Top is T1 T2 T3 T4 Bottom is B1 B2 B3 B4 B5
On mine T1 Goes to the actuator on the left, looks like it controls defrost and floor vents. plugs into top of actuator and is yellow/black
T2 is plugged
T3 is plugged
T4 runs to the 3 way connector on the passenger side, min only has 2 vac lines, it connects to the actuator on the blower housing under the hood. Black/white
B1 is plugged
B2 goes the the lower actuator, looks like it controls main vents. blue/black
B3 plugs into side of the left actuator(floor/defrost). Red/Black
B4 runs into the tri connector on left with only 2 lines on mine. Connects to the check valve that T's off and goes to the Vacuum Resevoir.
B5 Open on mine
I'll see if it looks the same on the donor in the morning. The ones that are plugged look like they are factory. I assume maybe it's for rear vents or something. Not sure if yours is set up the same way as mine. Hope this helps.
#666
I'm going to number the ports from left to right. Top is T1 T2 T3 T4 Bottom is B1 B2 B3 B4 B5
On mine T1 Goes to the actuator on the left, looks like it controls defrost and floor vents. plugs into top of actuator and is yellow/black
T2 is plugged
T3 is plugged
T4 runs to the 3 way connector on the passenger side, min only has 2 vac lines, it connects to the actuator on the blower housing under the hood. Black/white
B1 is plugged
B2 goes the the lower actuator, looks like it controls main vents. blue/black
B3 plugs into side of the left actuator(floor/defrost). Red/Black
B4 runs into the tri connector on left with only 2 lines on mine. Connects to the check valve that T's off and goes to the Vacuum Resevoir.
B5 Open on mine
I'll see if it looks the same on the donor in the morning. The ones that are plugged look like they are factory. I assume maybe it's for rear vents or something. Not sure if yours is set up the same way as mine. Hope this helps.
What year is that and the other truck when you get to it?
I ask because when I was looking for this control, mine was missing along with the radio before I got the truck, and there was something about 3 different ones between 80 to 86.
I cant remember just what it was, maybe how the cables hooked up to the panel? So the vacuum switch part would be the same then?
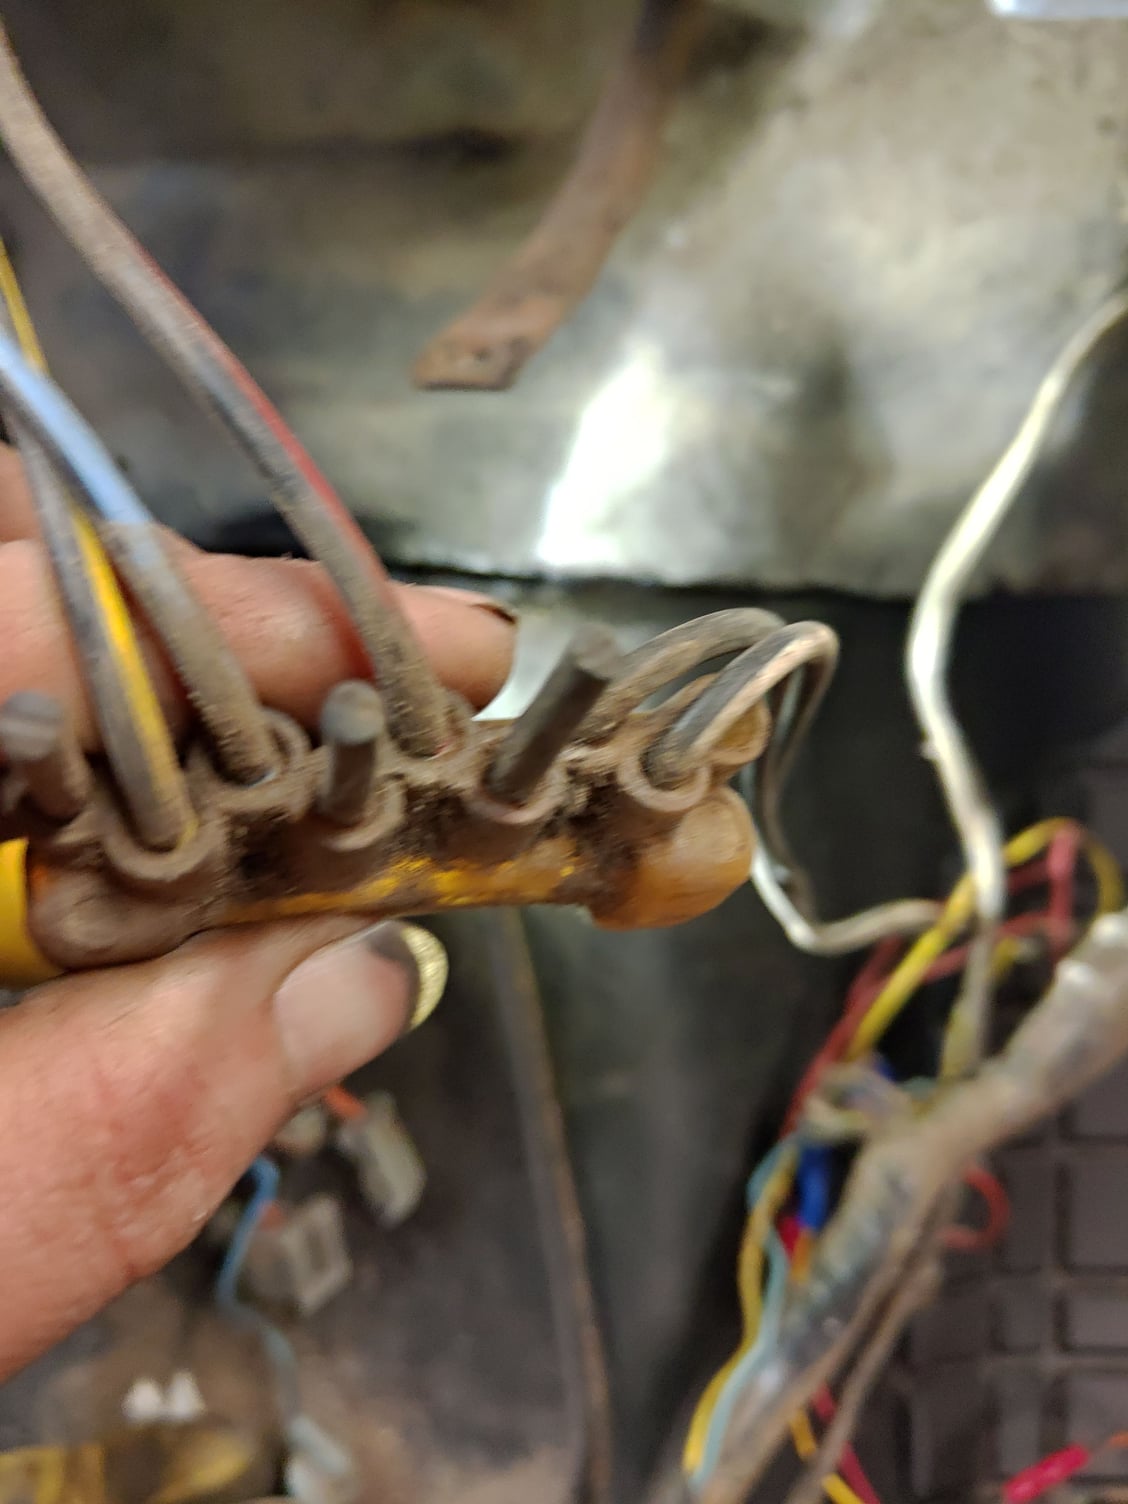
What I have found and others have told me is that vacuum control likes to break the studs that hold it to the vacuum plug or something like that.
Here you can see they are broken 1 to the left of the group of nipples and the other is below the 2 nipples on the right.

I think the issues with mine is the vacuum control. If I feel like I can see if the broken ones I have work as should and if so see if there it a way to hold the manifold to it.
Then again I think MAX AC closes off out side air to full recirc.
When Jonathan found a control panel with AC & duel tanks with all plugs he also sent it with the vacuum manifold so did not have to mess with studs that may break.
Dave ----
#667
Pics were from the system in my 82. But I dont know what's original on it. Tailgate thread was talking about stamped ford lettering up to '82 and after that were different. well my 82 had the stick on letters on it's tail gate. But at the same time the 85 has the stamped letters. So I'm not really sure. Going to put it together and call it an '82 like on the title haha.
#668
Pics were from the system in my 82. But I dont know what's original on it. Tailgate thread was talking about stamped ford lettering up to '82 and after that were different. well my 82 had the stick on letters on it's tail gate. But at the same time the 85 has the stamped letters. So I'm not really sure. Going to put it together and call it an '82 like on the title haha.
Yep as long as the papers match the numbers on the truck body & frame that is all that counts for DMV.
Dave ----
#669
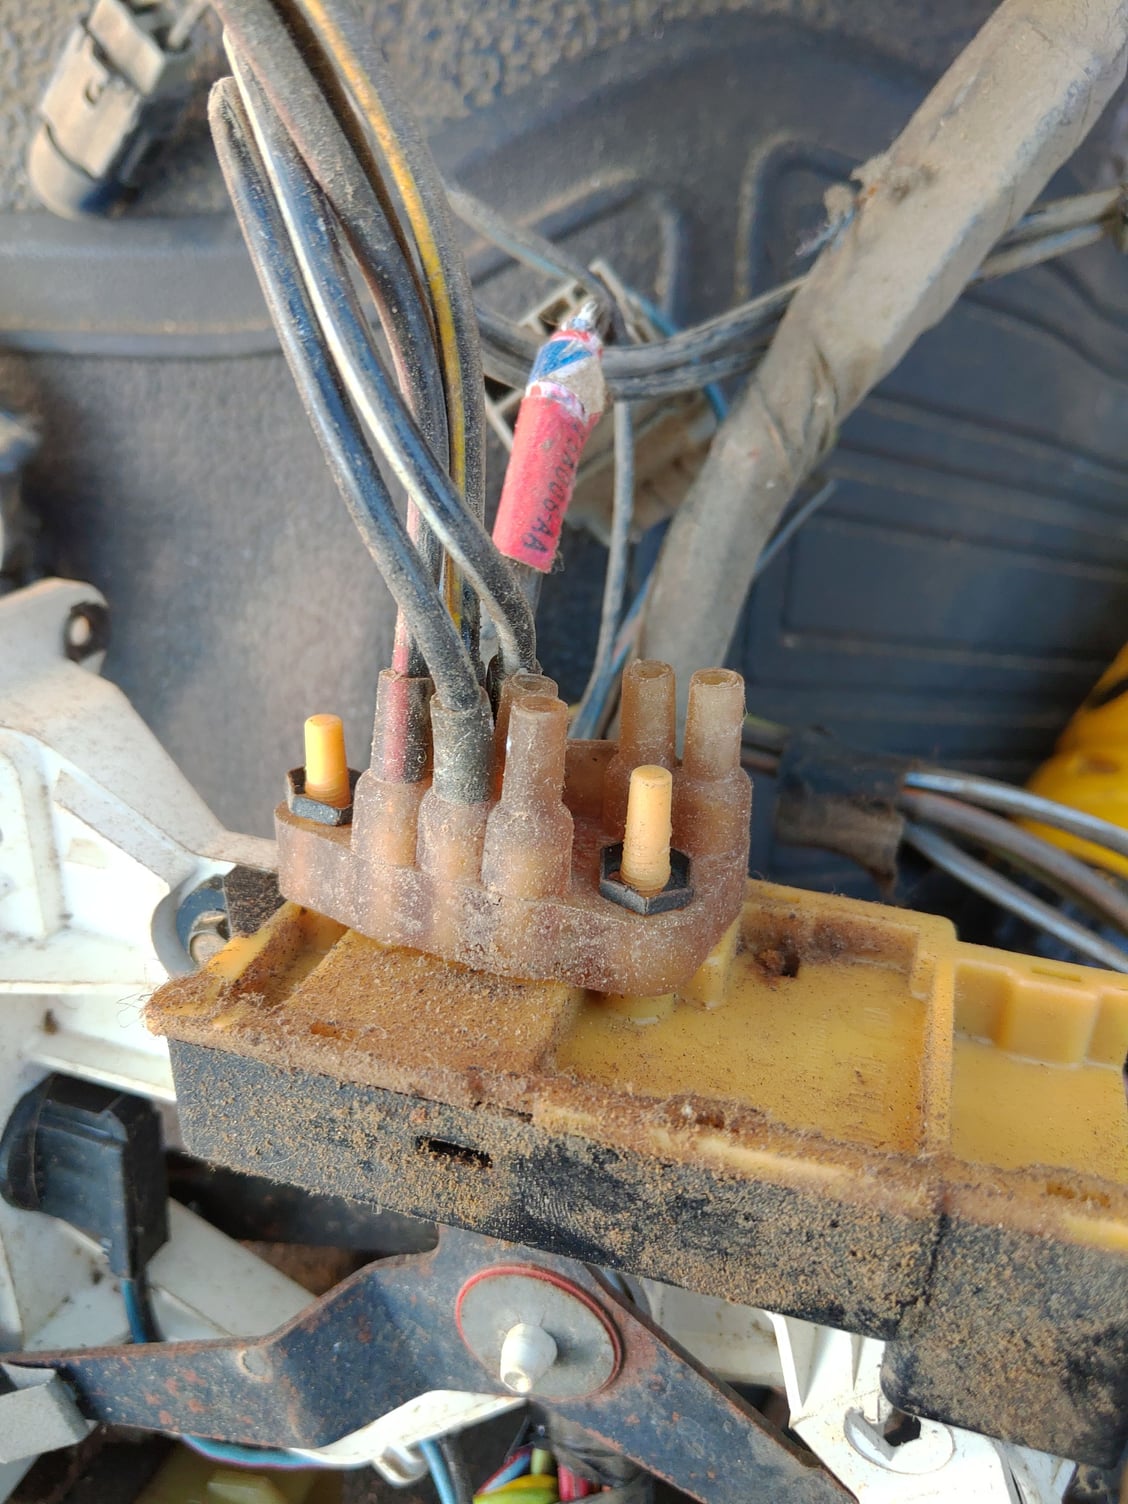
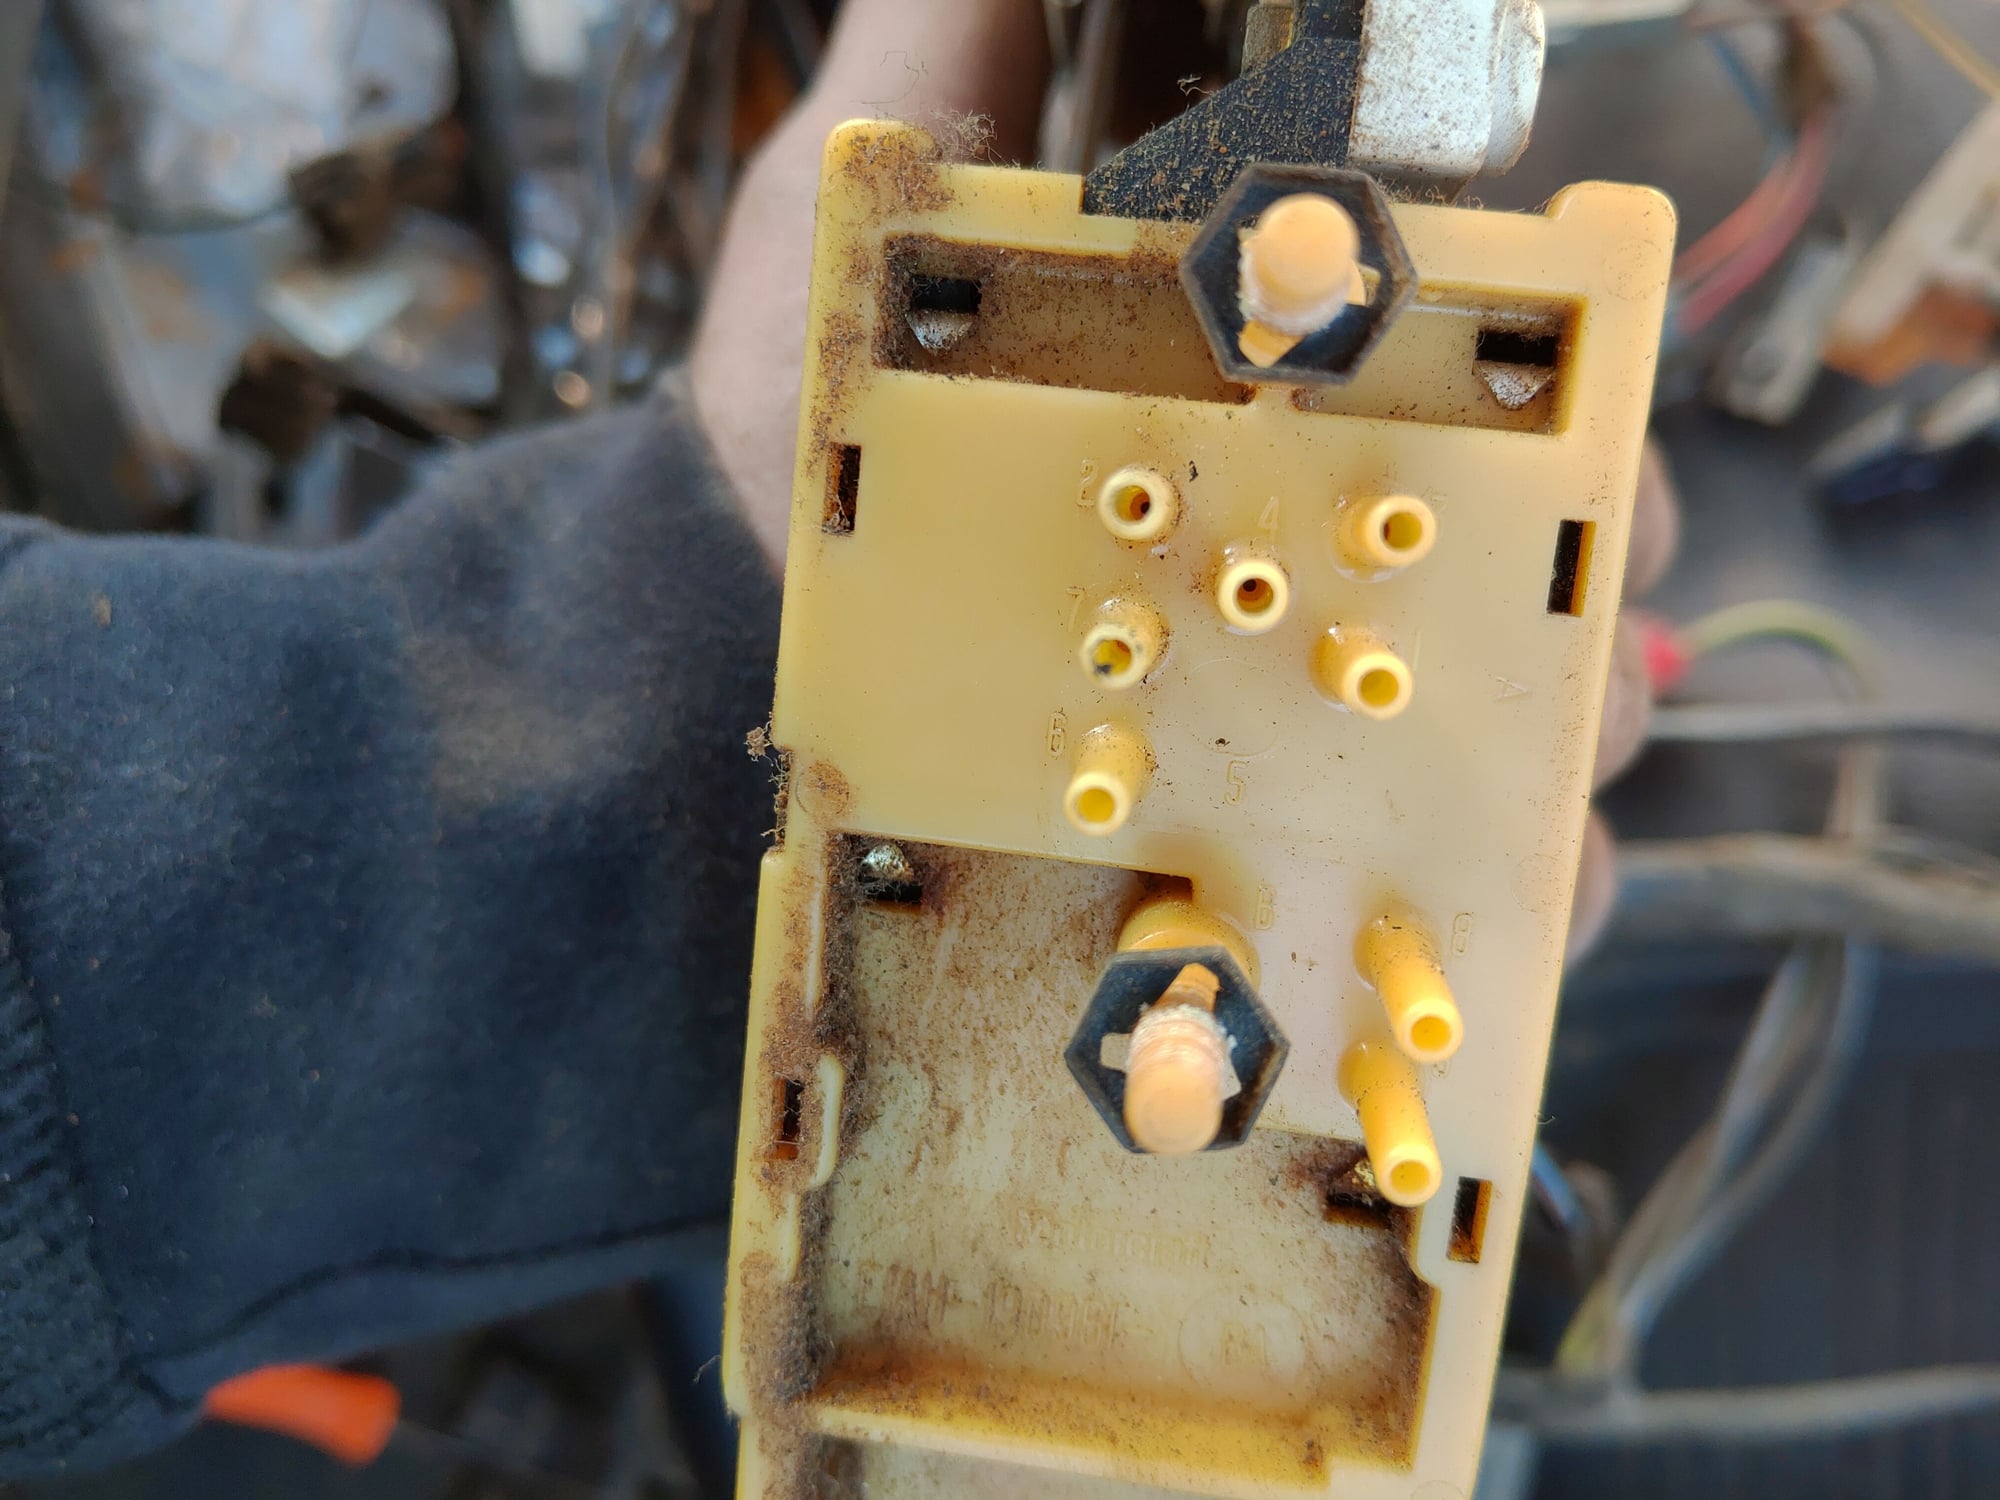
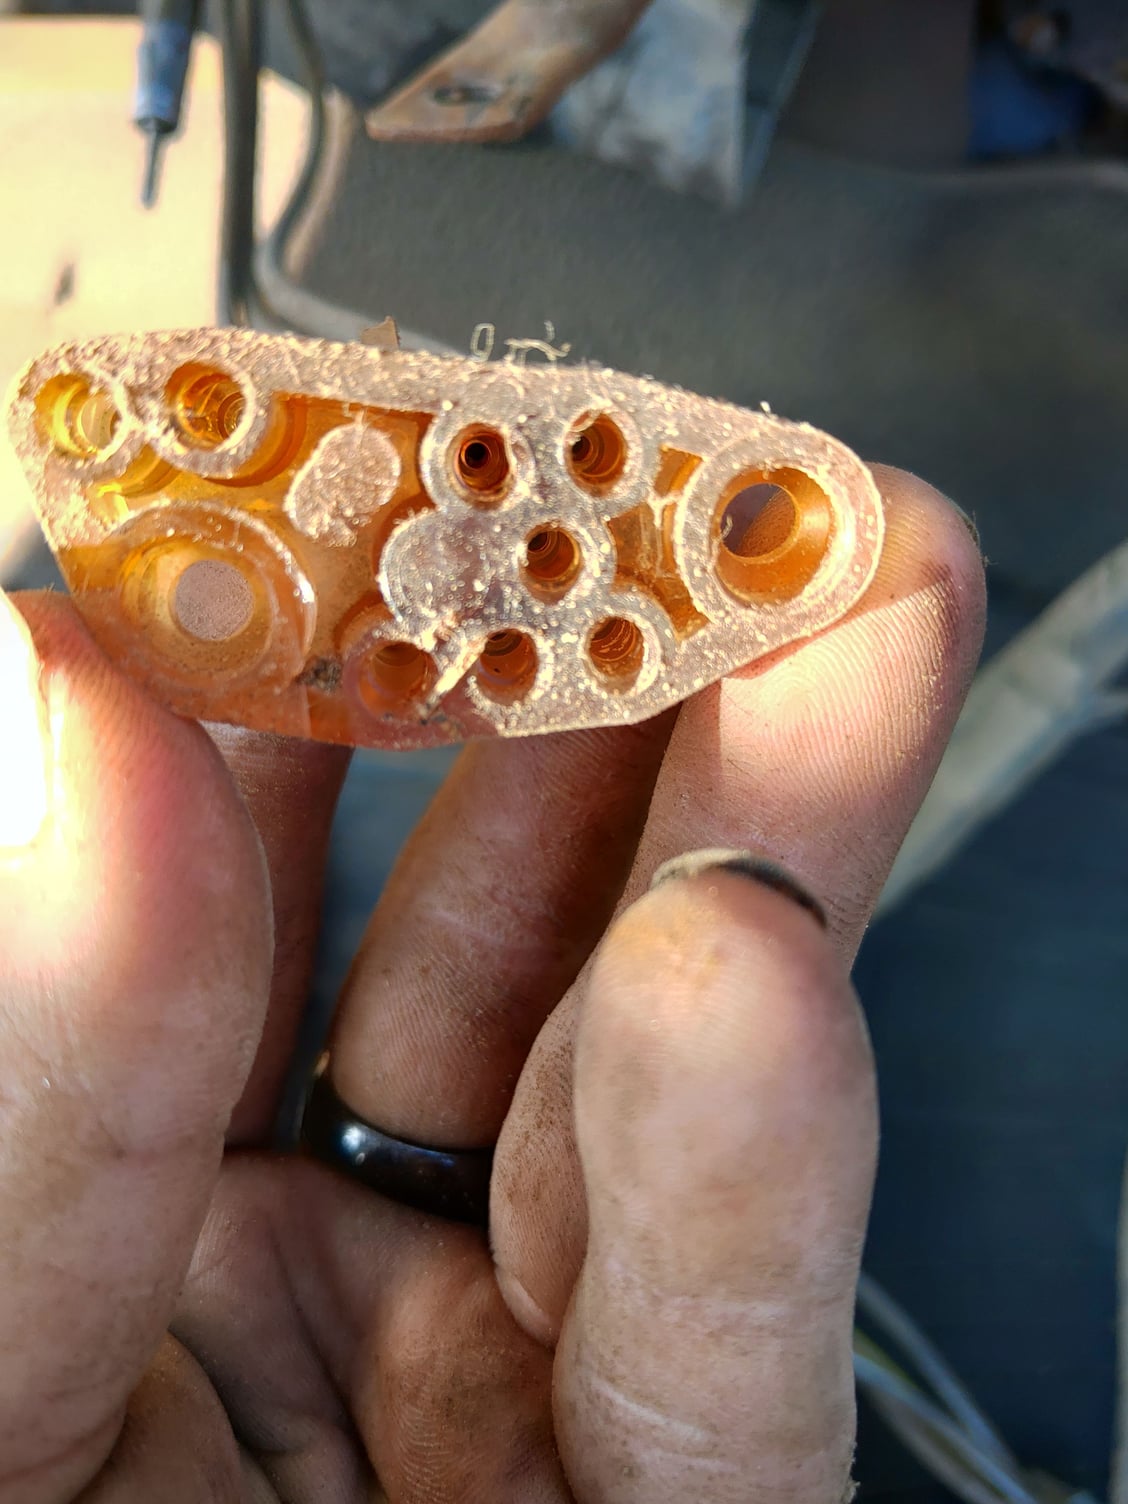
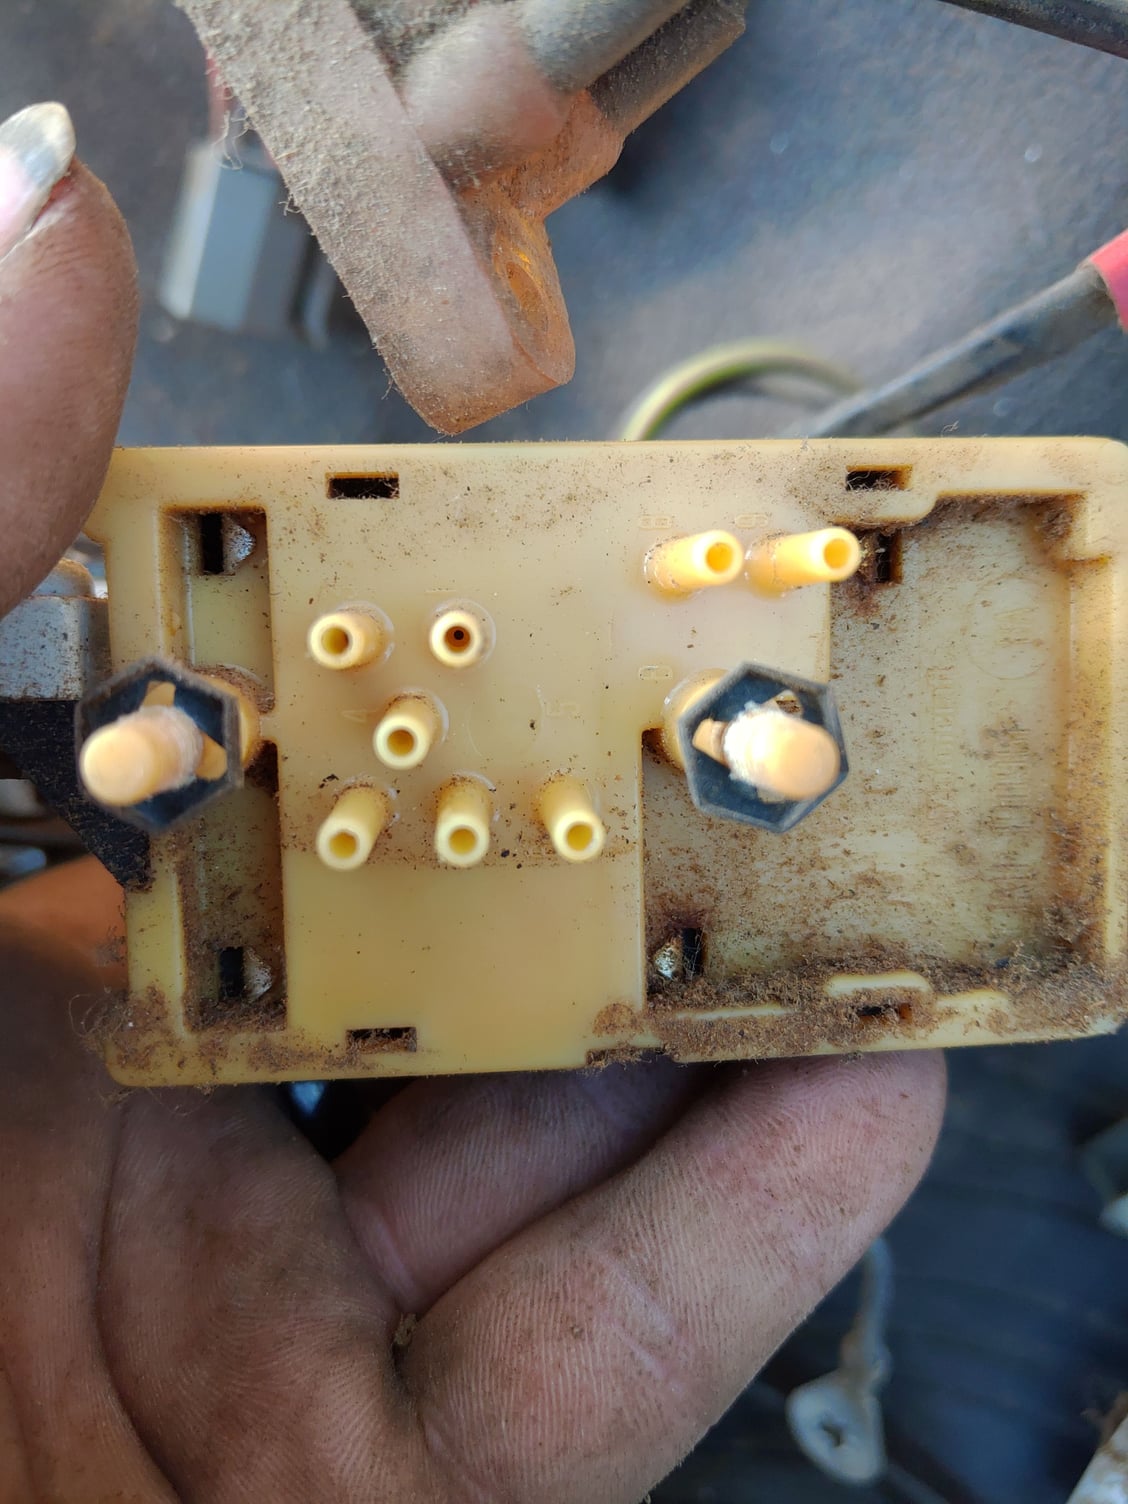
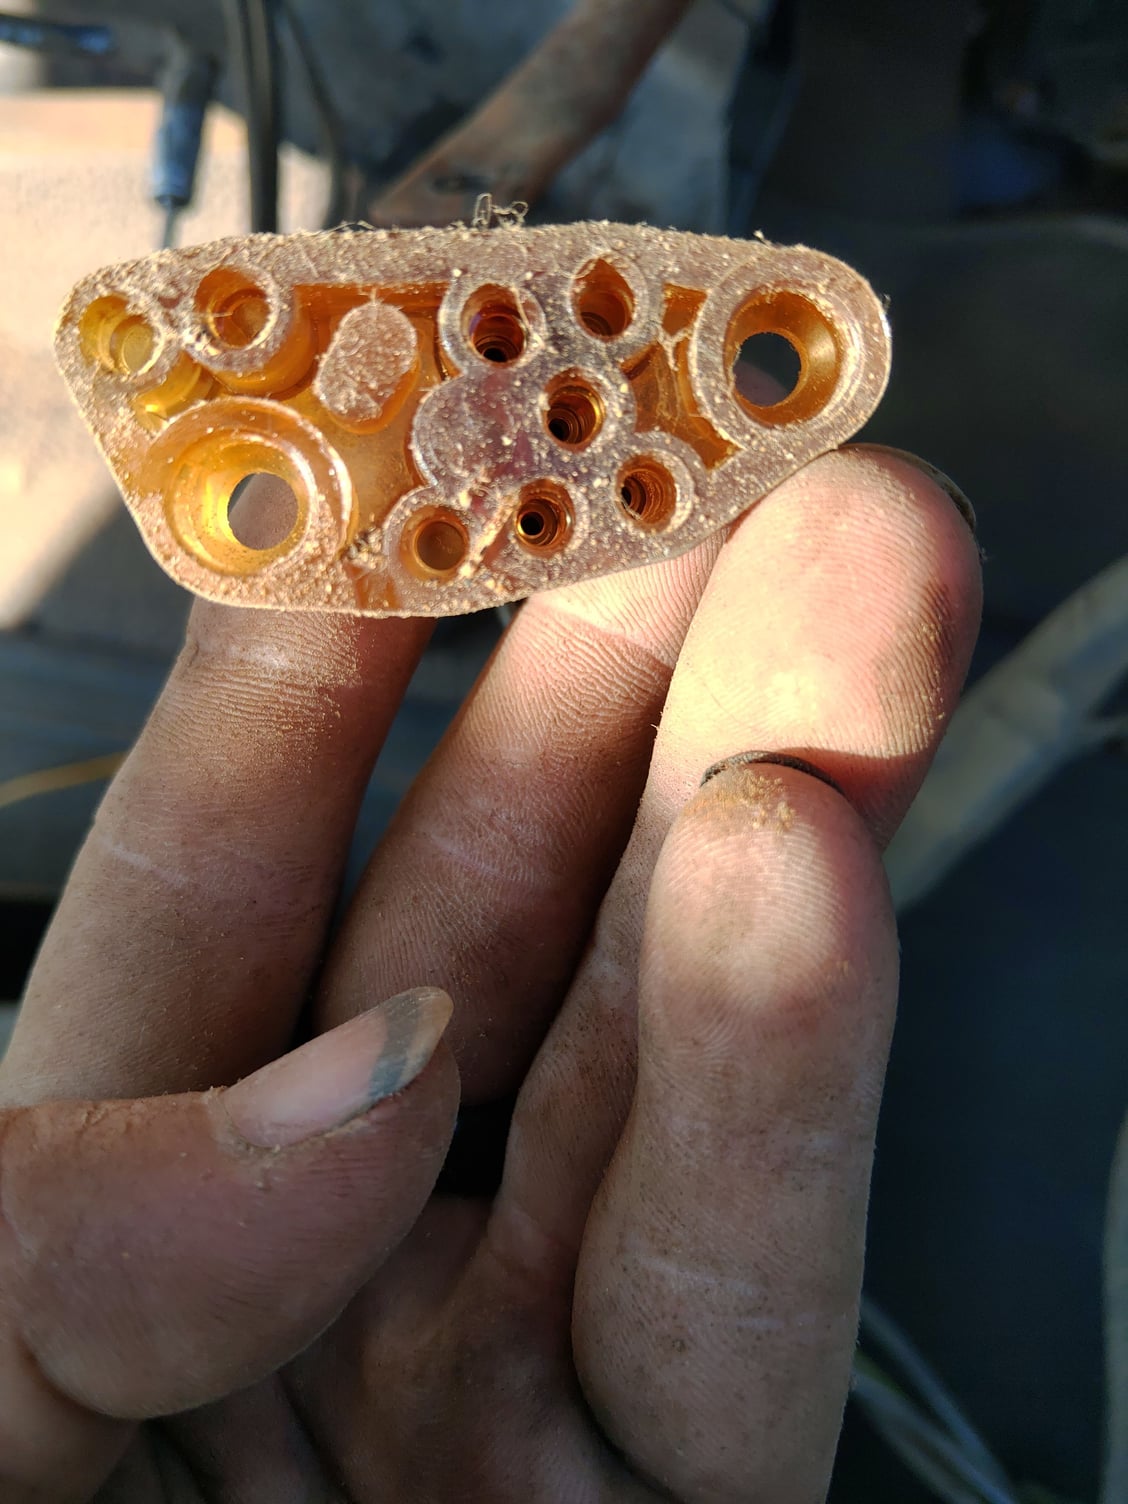
Numbered left to right. two on top left are 9,8 right side are 1,3 middle is 4 bottom three are 6,7,2 1 - white/black - under hood actuator over blower motor 2 - red/black plugs into side of actuator on the right floor/defrost 3 - black/blue actuatory on the right controls the big vent door 4 - yellow/black plugs into top of actuator for defrost/floor vent 6 - plugged from factory 7-black runs to vac resevoir 8 - open 9 - open
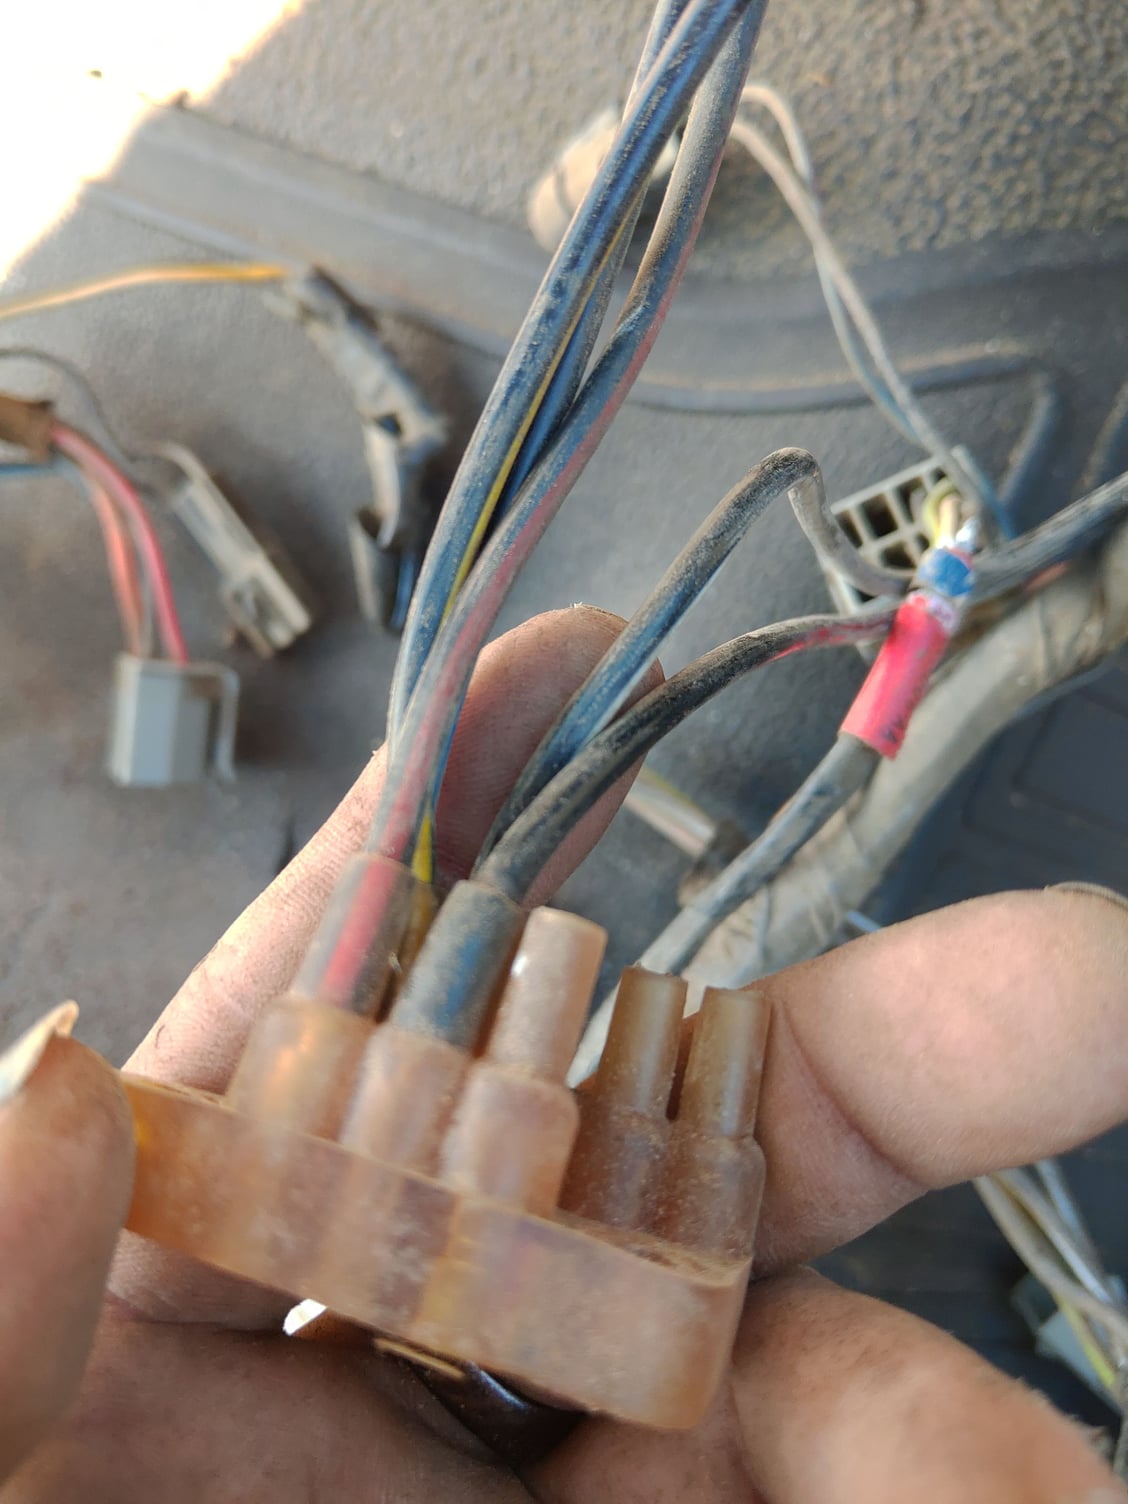
The color of the lines and where they are hooked are the same on both trucks, only difference is shape of the connector.
#670
I think my truck hates me 
I keep the gas cans in my garage, cooler in there than the tractor shed, and the 5 gal can is heavy so open the garage door and backed my DD up to it so did not need to carry the can far.
When walking in thru the garage door I see a puddle of anti freeze under the truck
Got out the drop light and creeper. Green on the new Y pipe and up above that on the starter?
Looking farther up I see a trail down the side of the block and what does it lead me to ........... one of them rubber repair casting plugs that use a nut that flares out the rubber to seal it to the block.
I remember seeing it when I had the manifolds off and was well it's not broken don't fix it!
So got out the tools and was able to tighten the nut a little more, dried the area and fingers crossed it will hold.
If it keeps dripping I will replace it with a steel or brass one with a little sealer.
I think if I peel back the inner fender well I think I can use a long extension & socket to drive the plug in.
The other day I saw some members under hood pictures and saw I had the hood release cable run the wrong way so fixed that.
Being up at 1am for work I called it quits for the day and plan to get some work done Saturday and/or Sunday.
Dave ----

I keep the gas cans in my garage, cooler in there than the tractor shed, and the 5 gal can is heavy so open the garage door and backed my DD up to it so did not need to carry the can far.
When walking in thru the garage door I see a puddle of anti freeze under the truck

Got out the drop light and creeper. Green on the new Y pipe and up above that on the starter?
Looking farther up I see a trail down the side of the block and what does it lead me to ........... one of them rubber repair casting plugs that use a nut that flares out the rubber to seal it to the block.
I remember seeing it when I had the manifolds off and was well it's not broken don't fix it!
So got out the tools and was able to tighten the nut a little more, dried the area and fingers crossed it will hold.
If it keeps dripping I will replace it with a steel or brass one with a little sealer.
I think if I peel back the inner fender well I think I can use a long extension & socket to drive the plug in.
The other day I saw some members under hood pictures and saw I had the hood release cable run the wrong way so fixed that.
Being up at 1am for work I called it quits for the day and plan to get some work done Saturday and/or Sunday.
Dave ----
#671
#672
No miles as the truck is not together, need to paint it.
It is together enough to move it in and out of the garage under it's own power.
I don't even put gas in the tanks, I run it off a 2 gal can sitting on the fender well.

I don't have any of the glass in the truck, the doors are still gutted latches and all, hood not on (need to paint the under side first) or cowl panel.
1 rear fender is off and need to prim it along with the 2 gas filler doors before painting. What it looked like 7/4/18 I have since pulled that rear finder off prepping for paint and the tail gate had been prepped and back on for safe keeping till I pull the bed all apart for painting.

After painting I need to buy all the weather stripping, door glass channels, put the doors back together, run the wiring to the rear, get & mount rear lights, mount both bumpers after I fix mine or get new ones, finish putting the dash together, etc. so you get the picture
A LOT MORE WORK!
Did I tell you this was a cab off frame rebuild started Dec of 2015 and I am doing all the work myself.
But it dose run, move and stops.
Dave ----
It is together enough to move it in and out of the garage under it's own power.
I don't even put gas in the tanks, I run it off a 2 gal can sitting on the fender well.

I don't have any of the glass in the truck, the doors are still gutted latches and all, hood not on (need to paint the under side first) or cowl panel.
1 rear fender is off and need to prim it along with the 2 gas filler doors before painting. What it looked like 7/4/18 I have since pulled that rear finder off prepping for paint and the tail gate had been prepped and back on for safe keeping till I pull the bed all apart for painting.

After painting I need to buy all the weather stripping, door glass channels, put the doors back together, run the wiring to the rear, get & mount rear lights, mount both bumpers after I fix mine or get new ones, finish putting the dash together, etc. so you get the picture
A LOT MORE WORK!
Did I tell you this was a cab off frame rebuild started Dec of 2015 and I am doing all the work myself.
But it dose run, move and stops.
Dave ----
#673
I had replaced the door weatherstrip on my truck a couple months ago, ordered it from lmc, and it didn't fit good at all. Doors wouldn't shut or latch all the way. I ended up putting air holes in it like the original had but that didn't do much. So I used an adjustable wrench to bend the lip in all the way around the door. I Got them to close, but never did finish juggling between them keeping water out, and not having to slam the door closed. Never did figure out why they didn't fit better than that.
#674
I have heard of others that had trouble closing the doors & truck lids on cars after weather strip install.
I think part of that is the old has been flatten out over the years and the new is all "plumped up".
I know I will have the same problem but thinking I will adjust the door latch pin out a little so the door closes and over time move it in a little at a time as the weather strip flattens till the door sits right.
Now are you saying the LMC did not fit right because you could not close the doors or it did not fit on the lip and around the opening?
If it fit the opening and it was the door closing then I say the strip is ok.
Dave ----


