When you click on links to various merchants on this site and make a purchase, this can result in this site earning a commission. Affiliate programs and affiliations include, but are not limited to, the eBay Partner Network.
Hello all,
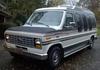
I recently became the proud owner of a 2002 Ford E-250 Super which I intend to convert into a camper. This conversion is a little special in that I intend to
use the van extensively right through the winter. I live in Maine. Insulation will be a focus as will heat and ventilation. I am by no means any kind of authority on any kind of subject, except for maybe hiking, so bear with me as I try to make a liveable space out of this beast!
I spent $2300 bucks and got myself a former wheelchair van with 162k miles. There is some rust on the rockers, floor, and around a few doors.
Typical for the salt state, but not too shabby for the price. I saw worse vans for more money in my search. Anyway let's get this thing started!
The previous owner had removed the wheelchair lift and installed some plywood to use the van to haul stuff for his business. (I have some plywood in the back in the picture) The first step was to rip all of this stuff out, including the rubber wheelchair floor (think schoolbus floor) and the subfloor below that. It was a complete gut job.
The shelf and plywood came out super easy, just a matter of removing a few screws. The rubber came up super easy as well, seems that the glue was damaged due to moisture or old age.
"School bus" style flooring. It left a lot of glue residue on the wood.
The subfloor was a PITA to get up. All of the screw heads were hidden beneath a layer of glue, and most of them were rusted out. Not to mention it was jammed underneath these buggers:
The wheelchair tie-downs are bolted on with hex bolts that are so soft that they strip out immediately. I had the most success with putting a slit in the head with a cutting wheel, starting it spinning with the air hammer, and finishing it off with a flathead screwdriver. Unfortunately two of them remain attached and will need to be hacked out with the cutting wheel.
Finally it all came out, including the fiberglass sides. There is definitely some rust under there, but nothing is really soft.
This back corner is the worst spot, I might cut some out and stiffen it up. I plan to grind all of this rust down best I can fill all the screw and bolt holes, spot spray some rust converter and primer, and call it good.
Ground down, cleaned up, and ready for some product. Next time I hope to get the cargo floor and rockers done, and maybe start on the driver's floor which looks like a mess dues to the felt-lined rubber mat that holds all moisture against the floor. Hopefully before too long I'll be done with bodywork and on to installing some camper parts!
Great deal.. Keep us posted on what you are doing.. I look forward to seeing your ideas.. You have a lot of room to work with there..
I plan to build a portable compact kitchenette to put in my van. Mine has a power ventilator in the back and for heat I was thinking about maybe the Mr. Heat Big Buddy.. 25 to 110 hrs on a 20lb tank of propane.
Wow...you got that entire van for what they want just for a fiberglass hi-top...
Score!
Oh yeah---he did get a great deal on the raised roof and a great heavy duty chassis as well along with relatively low mileage for its year.
But before the nay-sayers start in about "rusting away.........." and quotes what its worth as scrap with a bit of effort and good material selection you can wring another 10 years out of the body and chassis. After all we can't all live in super dry or hot arid parts of the country. By the time you get rid of this one your cost savings over "newer" will be monumental, the amount of work maintaining it as a usable steel tent with amenities very small.
if you have records of maintenance steps such as spark plug changes, if the transmission fluid has ever been flushed etc etc those would be areas I'd get out of the way soon----can't go camping if it ain't runnin'!
First step is as quickly as possible take care of the visible rust. The small bit at the left front door nearest the plastic footwell piece isn't of huge concern, the floor and rocker areas are. (FWIW I had a similar issue with my current 2003 E250 extended body cargo van, now a daily driver/work truck.)
Remove as much of the rust you can see---I used a 4 1/2" angle grinder and wire wheel over every area including the floor under front seats. (The OEM padded rubber mat is a huge rust incubator.) Using POR-15 in the silver color due its huge solids content along with their entire system of cleaner and metal preparation every area was thoroughly and properly covered.
Of high concern if only for the longevity of the body pay special attention to the lowest portions of the rocker area and lower rear quarter panels. They tend to be the most beat up since they're subject to rock chips and water being thrown against them constantly. Once the rust has been abated two choices to better protect them going forward would be a 3M Paint Protection Film or a bed liner type material such as Monstaliner (Monstaliner do-it-yourself roll-on truck bed liner outperforms Herculiner Bed Liner, Duplicolor and Rustoleum Road Warrior) Having once owned a body shop I can say using one of those methods is very helpful in taming your area's highways.
One other issue relating to the observed rust on your floor---most of that is a direct result of holes drilled through the factory floor and its protective envelope of electro-coated steel panels which were then painted by and at the factory. Because very few upfitters do anything except drill holes and run bolts rust is sure to form. Since its under the floor it goes undetected for years, often times until the damage is quite extensive. At this point as you've discovered its not too horrible.
Insulation will be a bit of a challenge since the single pane windows will be huge heat loss areas. Removing the rear area trim panels might allow a bit of unfaced fiberglass home insulation to be added, same with the raised roof---that would be a bit of an improvement to be certain. Side and rear doors could also be filled with the bat-type insulation---every little bit helps.
I'll PM you with a link to a site where the main function is building vans into mini RV's much like you're planning. There's a ton of great ideas already in everyday use so its worth a look.
Anyway welcome to FTE and we hope to read of your progress. Maybe one day you'll be as well known as WVVan---he's a legend on rehabbing a van!
Edit/Update: Elgorr you're a bit too new here for me to PM you with a link----I'll try another avenue OR you can try sending me an email through FTE's system----one of my email addresses is listed I'm sure. Post back if you're unsuccessful and I've got one more trick yet to use.
So I have been very busy lately, and unfortunately not with the van. Last weekend I worked so no major progress was made. This weekend I had to make a trip into town saturday morning and today I stacked about 6 cords of wood which took up most of the day. Progress is further slowed as it is too cold to paint (it never got above 40 today.) With all of the priming and painting I have left, I am beginning to think that I will need to take advantage of my work's unheated warehouse on the weekends. It stays pretty warm in there, and I could even run a little heater to warm up the area that I'm working in. Anyway, here's what I've done.
I sprayed all of the exposed/rusted metal with VHT rust converter. According to the amazon reviews it works wonders. (This was mid-week when it was warmer) I also cut out that bad spot in the corner. Apparently the van has a leak in the top corner, because the day after I did this it rained and there was a pool of water. I saw the drip coming from above. I'll investigate later. Each day after work I would mix up a batch of fiberglass bondo and plug some of the holes in the floor. You can see that in the upper right corner of the photo. This whole area will get primer before I put the floor down.
My mission Saturday was to take care of this little issue. Yuk. Years of snow and salt leaking under the rubber mat has done a number on the floor. Part of my run to town was to get the proper size star bit to remove the seats.
It turns out that T55 was not the right size, but I was careful and made it work.
Pounded out the soft spots, The damage isn't as bad as it could be. I cut out the bad, worked it with a flap wheel and hit it with the rust converter.
I did the passenger side too, which obviously wasn't as bad. I would have liked to primed both of these sections today, but the rust converter requires 24 hours before topcoat in normal conditions, and I was on the border of it being too cold. Besides it was too cold today anyway. I did however get started on making the new pan.
I am just using a piece of galvanized I had lying around. I'll be attaching it with rivets once the area is primed. I'll use bondo to seal up the bottom after it is installed, like I did on the back corner.
I used tape to hold the piece down while I was drilling. Being impatient, I didn't prime this area. It got a good coat of converter, and will be well protected by the bondo underneath. I probably should have primed it but I really wanted to try out my rivet gun.
It came out pretty good if I do say so myself.
Ready for some bondo.
Now I don't know how the professionals mix and apply this stuff, and maybe you guys can offer some insights, but this is what I've always done and it seems to do the job. I spoon the gunk out onto some wax paper with a piece of wood, and mix it on there almost like a painter's palette.
All done. I'll probably hit this with some paint too. Now, back to that door leak.
This isn't even the one that was leaky. But obviously the crappy weatherstripping job that the conversion company did leak, and rusted out the door extension supports. I ground it down best I could, but I think that this thing needs more than paint and bondo. I need to craft some kind of structural support. It doesn't look that bad from the pictures, but the panel is definitely weak compared to the others. I know that the best thing to do is cut the old supports out, beef up the door, and weld in new ones, but I have a crappy welder and limited time and motivation, so I'm leaving it open to suggestions. I don't have pictures of the other door, but it isn't rusty at all. The weatherstripping didn't fail on it, so I went above the door and found that the seal along the top of the door bump-out was toast. I scraped the caulking out and put some silicone in to see if that is indeed where the leak was coming from. I need some more rain haha.
I also wonder what to do about this seam (the same door with the bad supports.) It used to have a rubber piece in it that was painted over. It was very hard and brittle, and broke apart once I started wiggling the panel. I have some dicor self leveling sealant, but I am not sure if this is the proper place for it.
Well since I didn't have much to do, I pulled out the fiberglass top from inside. I thought I might get a better look at the leak, and it needed to go anyway. In the process of that beast crashing down, I broke my headliner. Not really that big of a deal, but It is just another piece of the puzzle that will have to be fixed at some point.
The top was insulated with these yellow fiberglass boards. I'm not sure how much value they really have, but I will find a use for them. It is interesting to get a look at the roof structure and get an idea for how my insulation and ceiling build will come together.
Sad headliner.
Well my new priority is to get the front floor in some kind of shape so I can reinstall my drivers seat. I need to get somewhere that I can paint. I still have the rockers to do, and I would love to knock those out next weekend but I am going to be out of state both days. Fortunately, bondo and herculiner both can be applied at any temp above freezing, so I don't have to worry about the cold as much. Maybe I'll pick away at them throughout the week. As long as it doesn't snow (which it tried to today,) I'll be all set. After the rockers, doors, and floor, the only other "body" work I will have is installing an exterior access door for my onboard propane tank. For safety purpose the tank will be sealed from the inside, and only accessible from an outside door with a vent for any leaks. Well, hope you all enjoyed! See you next week!
PS If any one is interested in an extremely shallow 5x11 tub, hit me up.
Just reading this quickly before heading off to work BUT please know or keep in mind the front seat Torx-headed bolts are a T55 PLUS, the PLUS being the important part there. (Capital letters are the typical designation, not my own added for emphasis. )
I bought one of those expressly for front seat removal as I do it anytime gaining that much more working space is an advantage.
Oh yeah---he did get a great deal on the raised roof and a great heavy duty chassis as well along with relatively low mileage for its year.
But before the nay-sayers start in about "rusting away.........." and quotes what its worth as scrap with a bit of effort and good material selection you can wring another 10 years out of the body and chassis. After all we can't all live in super dry or hot arid parts of the country. By the time you get rid of this one your cost savings over "newer" will be monumental, the amount of work maintaining it as a usable steel tent with amenities very small.
if you have records of maintenance steps such as spark plug changes, if the transmission fluid has ever been flushed etc etc those would be areas I'd get out of the way soon----can't go camping if it ain't runnin'!
First step is as quickly as possible take care of the visible rust. The small bit at the left front door nearest the plastic footwell piece isn't of huge concern, the floor and rocker areas are. (FWIW I had a similar issue with my current 2003 E250 extended body cargo van, now a daily driver/work truck.)
Remove as much of the rust you can see---I used a 4 1/2" angle grinder and wire wheel over every area including the floor under front seats. (The OEM padded rubber mat is a huge rust incubator.) Using POR-15 in the silver color due its huge solids content along with their entire system of cleaner and metal preparation every area was thoroughly and properly covered.
Of high concern if only for the longevity of the body pay special attention to the lowest portions of the rocker area and lower rear quarter panels. They tend to be the most beat up since they're subject to rock chips and water being thrown against them constantly. Once the rust has been abated two choices to better protect them going forward would be a 3M Paint Protection Film or a bed liner type material such as Monstaliner (Monstaliner do-it-yourself roll-on truck bed liner outperforms Herculiner Bed Liner, Duplicolor and Rustoleum Road Warrior) Having once owned a body shop I can say using one of those methods is very helpful in taming your area's highways.
One other issue relating to the observed rust on your floor---most of that is a direct result of holes drilled through the factory floor and its protective envelope of electro-coated steel panels which were then painted by and at the factory. Because very few upfitters do anything except drill holes and run bolts rust is sure to form. Since its under the floor it goes undetected for years, often times until the damage is quite extensive. At this point as you've discovered its not too horrible.
Insulation will be a bit of a challenge since the single pane windows will be huge heat loss areas. Removing the rear area trim panels might allow a bit of unfaced fiberglass home insulation to be added, same with the raised roof---that would be a bit of an improvement to be certain. Side and rear doors could also be filled with the bat-type insulation---every little bit helps.
I'll PM you with a link to a site where the main function is building vans into mini RV's much like you're planning. There's a ton of great ideas already in everyday use so its worth a look.
Anyway welcome to FTE and we hope to read of your progress. Maybe one day you'll be as well known as WVVan---he's a legend on rehabbing a van!
Edit/Update: Elgorr you're a bit too new here for me to PM you with a link----I'll try another avenue OR you can try sending me an email through FTE's system----one of my email addresses is listed I'm sure. Post back if you're unsuccessful and I've got one more trick yet to use.
Jwa please post the links.for building vans into motor homes.
Just my 2c...I wouldn't use BONDO for what you are using it for.It absorbs moisture if not sealed and has no strength. Fiberglas matt is much better.Treat the rusted sheet metal with some kind of rust converter/encapsulater or,better yet, POR 15.Clean the old screw holes down to bare metal and use the POR 15 with some light weight fiberglas cloth(the stuff POR 15 sells), otherwise you will be right back where you started in a year or two. Just my experience doing what you are doing.Good Luck.
Rick1025 you're 100% correct although I think Mr Elgorr used some sort of two part resin, that we once called "duraglas" but without the fibers mixed in.
Bondo seems to have become a generic name for body filler---it was once upon a time one of the bigger and better brand names in auto body repair---same with Duraglas.
For those looking in the rust seen is a direct result of the Ford OEM mats used---the backing absorbs moisture but never evaporates out again. Because this E250 is almost 16 years old the moisture has been in constant contact with the thinly painted metal floor leading to this much rust.
Along with holes drilled though the floor and never treated this looks like holy hell but can be prevented with a bit of knowledge and a few steps to keep the metal floor dry.
It has been a long time since I last update you guys, and I apologize for that. I've been right out straight at work and all of my other time is spent working on this pig. The last thing I want to do after a long day at work is fart around on the computer. Today is the first day I was able to convince myself to take a day off from the van to take care of all of the work piling up around the house.
To answer someone's question, the stuff I was calling bondo is actually a fiberglass resin, made by Bondo brand. Like many things that have taken the names of the brand instead of the technical name (Scotch tape, Band-aids, etc.) I was using just the common name. It is indeed fiberglass though and not traditional Bondo body filler.
So starting where I left off, the drivers floor got primer, and then sealed up with a galvanized sheet and fiberglass.
Second Coat. It took some work to get the plate to bend around the tricky corner on the left, but I did my best and the fiberglass filled the gaps. The underside of this was also sealed around the edges with fiberglass, but I don't have any pictures because it was hard enough to get in their once to work let alone and extra time for a photo.
The next step was to lay down some of this stuff. It does a really nice job a a sound deadener. I have used it with great success in the past on subwoofer installs, and think that it will really help with stiffening the thin sheet-metal and dampening vibration. It also seals the floor from water, which is pretty cool even if that isn't it's intended purpose.
It's chilly out, but no amount of cold is any match for Mumma's hair dryer! (shhh) The stuff becomes extremely sticky and flexible when warmed, and much easier to work.
All done for now, there will be more done on the cab area floor and the wheel wells in the back.
That rusted out rear door desperately needed some attention, so I had a buddy of mine who is a more experienced welder with better equipment come over and give me a hand. All of the pictures of door progress are pictures of his work. I didn't get as many progress pictures because I wasn't the one actually doing the work.
The bottom of this support had to be cut out, and the top of the door where it was attached was also gone.
New piece ready to go on. He welded on a temporary support rod so things wouldn't move around.
Popped the plate off for better access.
All finished up on this side.
This support was a little harder to get around. The door cable was in the way, and it would have been more of a pain to remove it. Thankfully the support on the far left was still good, so he just had to remove the box steel and reattach the whole thing.
Some big nasty welds that will be sure to hold this thing from flexing. The door wire survived, and the plate was also tacked into place.
This took a lot to clean up so the door wouldn't rub, but it's definitely solid now.
While he was working on that, I spent the day getting my tank hatch started. This van will have an on-board 20# propane tank that will supply my gas rv cooktop and Olympian Wave 3 Catalytic Safety Heater. Because propane regulators have an safety vent on them, it is unsafe to have a propane tank indoors. The vent could let out some gas and very quickly turn my van into a bomb. A traditional RV has a horizontal tank either under the rig or in the "basement," a separated compartment of the RV that houses water tanks, water heater, plumbing, etc. Some RV's have a dedicated compartment for the tank, which is what I am imitating here. It will be completely sealed from the inside of the vehicle, and because of that will only be accessible from the outside. The compartment will have a vent that will drain any vented gas out under the vehicle safely. I picked up an RV door on ebay, and started measuring out for the spot. The most convenient place was between the filler neck and the wheel well. That didn't give me much room to work with but it will position the tank between the stove and heater.
The door will go on something like this.
This is where I ultimately wanted the tank to be. My first obstacle were those black lines that are running to my rear heat/ac unit. I moved the lines up as high as they would possibly go, and there still wasn't enough room so I blocked the unit up on some 2x4s temporarily, and was able to just squeak the tank under there.
I threw some rough lines on there and started cutting.
I quickly realized that the inner wall of the van was not the only thing I was cutting into. There was a support column directly behind where I wanted my tank. This spot is really the only spot I can fit the tank, without radically changing the design I have in mind. I decided to proceed and cut the column out, but planned to reinforce the area by boxing it in with angle iron. As I found out later, that column was actually doing little to support vertically, as the base of it was rusted out and flopping around down in the rocker panels. It does still stiffen the wall tremendously for side impact though, and I hope my frame will do it justice.
Cutting into the side of a perfectly good van is a little nerve wracking, so I spent more time than I'd like to admit measuring and holding the door up and figuring it all out.
The fact that I was making these curved cuts with an angle grinder made it even more tedious and scary. But I took my time and left a lot of room for grinding to clean up the opening.
I spent a considerable amount of time grinding and cleaning up the cut so that the door slid in, but very tightly. Now it was time to beef up that area with some angle iron.
Before welding this guy into place, I wanted to clean up the inside of the rockers while they were accessible and weld up the bottom of that floppy support column.
I peeled back a piece of sheet metal that was riveted on from some previous body work, and thanks to the easy access was able to weld on a little support piece to stop this thing from moving. It was originally bolted to the body where the bolt is but when the body rusted out in that spot someone elected to just put some sheet metal over it.
Okay fast forward a little bit and I have angle iron welded in all the way around this opening. It is very sturdy, and I think it will do well to support the body in this area.
I set the frame back from the edge about 1/2" to allow for my plywood box. I didn't build the box or install the door right away, because I wanted to get the rocker panels done before it got too cold out
This was pretty much the worst spot, there were a few other soft spots, but this area recieved most of my attention. I put the flap wheel to it and then cut out all of the rusted metal.
Thankfully the rockers were fairly clean on the inside, I was worried that I was going to reach my hand in and find that the whole length of it was crumbling from the inside out. I continued to clean it up, and then tack welded in some old heater grate I had lying around to give it some structure. I'll fill the fiberglass over that after. I've found that this method is the easiest way to retain most of the shape of the original rocker. I have used it with great success in the past, and actually rebuilt the last foot of the rockers on my jeep with this same heater grate.
From this point on, all of my work has been done inside the unheated warehouse where I work. I just have the van parked up there and I pull it in every weekend. It isn't exactly warm inside, but it's a heck of a lot warmer than being outside.
One opening filled. I mix the fiberglass on wax paper, let it setup a bit, and then push the glass into the space while it is still on the wax paper. I can then smooth it up without touching it, and wait for it to mostly cure before peeling of the wax paper leaving a much smoother finish than there would have been otherwise. The first go is a little rough, like this one, but the second coat really smooths it out and I don't have to do nearly as much sanding.
I did end up putting a little traditional bondo filler to smooth the fiberglass out, as it is very porous. The passenger side of the vehicle was not nearly as bad, and I only had a few very small holes to fix. It then got primed, and coated with Herculiner.
The paint was chipping around wheel well, and as opposed to using color match, I decided that I would get fancy and run the bedliner up over the wheel. It was very hard to get a good even curved line with the bedliner, so it took two tapings. I didn't get many progress pictures because working with this stuff makes you filthy, and I didn't want to gum up my camera.
This is the rough line I was talking about. I taped this off a second time and smoothed it out considerably.
I don't actually have any pictures of the drivers side getting done, but it did.
There is a nice little montage of progress on making that door look pretty again, and it sure did come out good if I do say so myself. As usual the color match paint doesn't quite match the paint that has been weather beaten for 13 years, but it is close enough for me.
Okay, so now that all of that bodywork is all done let's shift gears into making this thing into a home! I did a lot more little body fixes here and there that I didn't show. At this point it was just more of the same methods and would not add much to the thread.
Back to the cab, while it is technically driveable once I bolt the driver's seat in, I will feel a lot more comfortable driving around with a proper floor.
I laid down some more of that "sound deadener" the same way I did before.
I chose to lay carpet down in the cab because 1. its comfy and 2. I have some. I work for an interior design/renovation company, and carpet remnants are a dime a dozen. I used some carpet pad for high moisture areas, which is what you see above. I traced out the rough outline of that old horrid piece of rubber that was in here before. The pad is not waterproof, but it as moisture repelling properties that keep it from staying wet long if water does sit on it and get through the membrane. It is typically used in basements and such. On top of that I laid down some high traffic industrial carpet in a lovely grey color.
I gained a lot of respect for our carpet guys during this job. It was quite difficult to get the rug into place to be cut to size without accidentally cutting it too small. I shorted myself on both sides of the doghouse up in the foot area. It isn't visible unless you crawl under though. I ordered some Husky Liners that have a raised edge, so any snow will hopefully stay in the floor mat and not even make it to my water resistant pad or floor. On a side note, when unhooking an hooking up the wires under the seat to remove them it is wise to unhook the battery. The wires go the airbags and those are nothing to be fooled around with.
Just from pulling the van in and out of the warehouse I have noticed a significant drop in cabin noise. Hopefully that transfers to a quite ride on the highway.
Shifting gears a bit here, The interior of the van will be mostly walled off. By this I mean the big windows that stretch the length of the van will be covered up. From the street I did not want people to be able to see my foil layer of insulation. seeing reflectix in the windows of a van just screams: "Hey everyone, I'm sleeping in here!" So to remedy that I decided to paint the inside of the windows. I used a rust-oleum product called Peel-coat. a removable glass and plastic paint. I don't really care about it being removeable, but I needed something that would stick to glass.
It still ran a lot, even though I was using very light coats. It looks like crap from the inside, but from the outside it looks exactly like window tint.
I did this to all of the windows except for the rear doors, cab windows, and side doors. I the insulated over them with reflectix. I used strips of reflectix against the glass to create an air gap, which is required for the insulation to work to its full potential. I actually still have one window left to do, (I left it clear just to let in some light while I worked) and I will take some pictures when I do it to show you what I mean.
I also began rolling some reflectix out on the fiberglass roof. It will be slightly less effective there, because I did not leave an air gap, but it will still act as a radiant barrier even if it doesn't achieve full r-value.
I didn't really know where to put this but just to give you guys an idea as to how my ceiling is going to work, here is a picture. There will be a layer of reflectix, and the the gap between the rafters will be filled with rockwool insulation with a vapor barrier (R-15 at 3.5 inches) and quarter inch paneling will go over that. I have already insulated the side and rear doors with rockwool and reflectix and they came out really good. I don't have any pictures but I will soon. The doors close so quietly it is unbelievable. The rockwool is a serious sound deadener.
Okay so to finish up this post we will finish up the propane door and box. I could not install the door until I built the box because the screws from the door mounting actually go into the edges of the plywood.
I did not have any 1/2 plywood, so I ended up using 5/8 and so had to cut the edge down to allow for the door. I actually like it better this way because my box is sturdier and the door fits more snugly.
The plywood is attached to the angle iron with sheet metal screws, and to itself with risers. This thing is pretty bomb proof.
The door is set in place and the tank is looking fine. Now to attach it I will use sheet metal roofing screws. The side of the van isn't exactly even, and to take up the gap at the bottom of the door I used a little shim. The door frame is pretty flexible, and the sheet metal of the van distorted a tiny bit when i screwed the door to it, so it all sealed up pretty well, but I did help it out on the bottom with a shim. I went around and put all of my screws in halfway, and then siliconed the crap out of the whole edge and put a dab of silicone on each screw-head before cranking her down. over the past few weeks the van has been parked next to the warehouse outside with the door just jammed in the hole and no sealant. It has rained several times and I got no water inside the van or even around the edge of the door. It seems like it sheds the water pretty good in that spot naturally, so I am pretty confident that the door won't leak.
Gap.
Shim.
Roofing screws with rubber washers and silicone shouldn't leak.
All done! Well, sorta. There will be a floor to the box, and a vent hose leading out the bottom. There will also be a hole to thread an extension cord through and a cord end leading to my electrical system that can be plugged into with the extension cord so I can run off shore power. But more about electronics later. (Don't mind the bad line on the bed liner over the fender. I haven't touched this side up yet.)
Well I have gotten a lot done, mostly body work, but starting to make some nice progress on the interior. I don't cover everything in this thread in as much detail as I would like because I simply don't have the time, but if anyone has any questions feel free to ask, because I am going to start checking this more often. My next post will probably be me outlining my plans for the interior design, because you all are in the dark about that and some of my choices may seem a little confusing. It will be easier to understand when you can see the big picture. Until next time!
This Hennessey Takes the Expedition Tremor's Off-Roading Capability to the Next Level
Slideshow: The VelociRaptor Expedition gains a lift, upgraded suspension, Brembo brakes, and trail-ready equipment while retaining the stock 440-horsepower EcoBoost V6.
Rezvani's Latest Post-Apocalyptic Monster Is a Ford F-150 Raptor Underneath
Slideshow: Called the Fortress, the 850-horsepower pickup combines Raptor underpinnings with military-inspired features, survival equipment, and a starting price of $285,000.



 buy the top, get the bottom for free!